ESKUTE Spark Y User manual
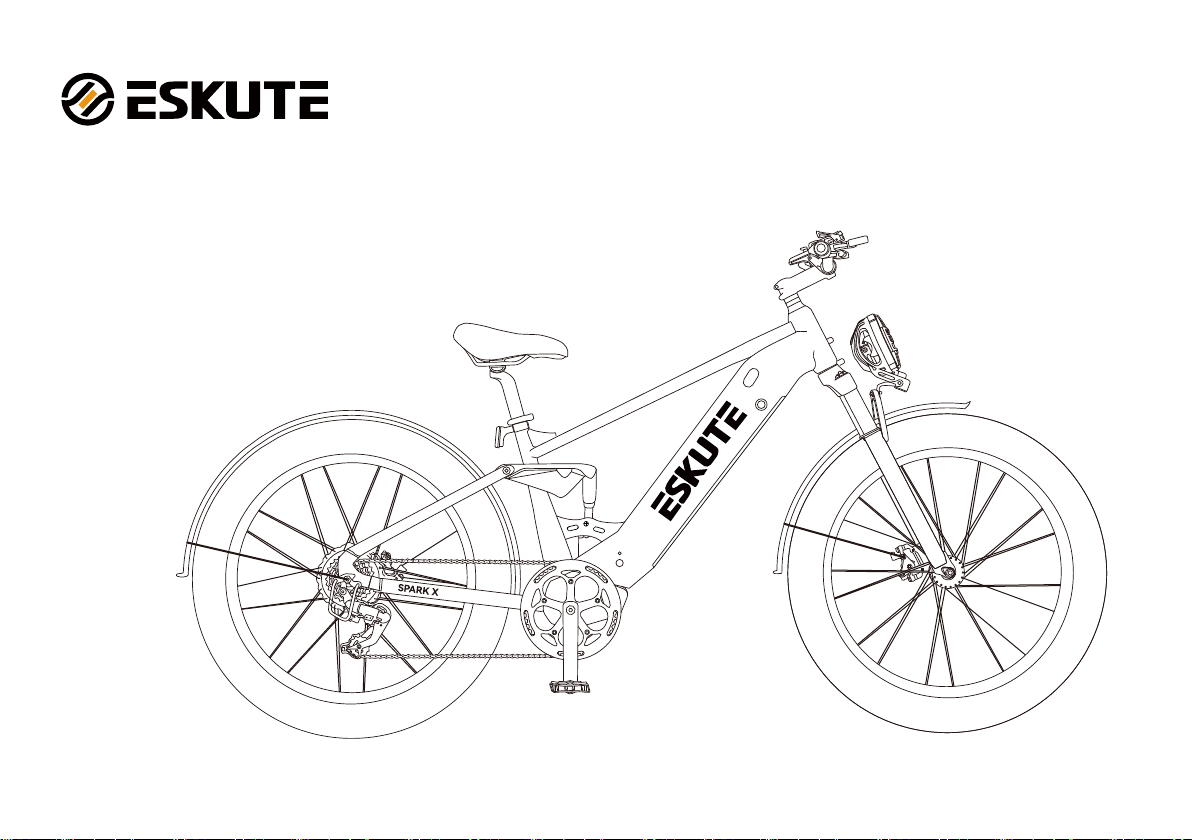
Fat Tire E-Bike
Model: Spark Y
www.eskute.com
User Manual
WELCOME!
Congratulations on the purchase of your new Spark Y and welcome to the
Eskute Team!
About this User Manual
It is impoant for you to understand your new electric bike. Even if you have
ridden an e-bike before, it is impoant for eve person to read this manual before
riding - you’ll know how to get better peormance, comfo, and enjoyment from
your new e-bike!
Before riding your e-bike, you will need
to charge your batte fully before
using. Failure to do so may damage the
batte life and peormance.
CAUTION WARNING
Don’t dismantle and repair pas by yourself,
please go to the local distributor or the
seicing station if necessa. For any
questions or concerns, please email to
suppo@eskute.com or visit
www.eskute.com.
TABLE OF CONTENTS
1. Geomet
2. Specication
3. Assembling Your Bike
4. Charging the Batte
5. Maintenance Instructions
6. More Tips
7. Warranty
Handlebars
Front Wheel
Seat / Saddle
Pedals
Tires
Brakes
Batte Care
08
11
01
02
03
18
19
SECTION

Geomet
Handlebar
On/O Switch
Display
Shifter
Brake
Throttle
0101
Batte
Front Fork
Front Brake
Frame
Fat Tire
Headlight
Saddle
Fender
Rear Brake
Rear Derailleur
Full Suspension
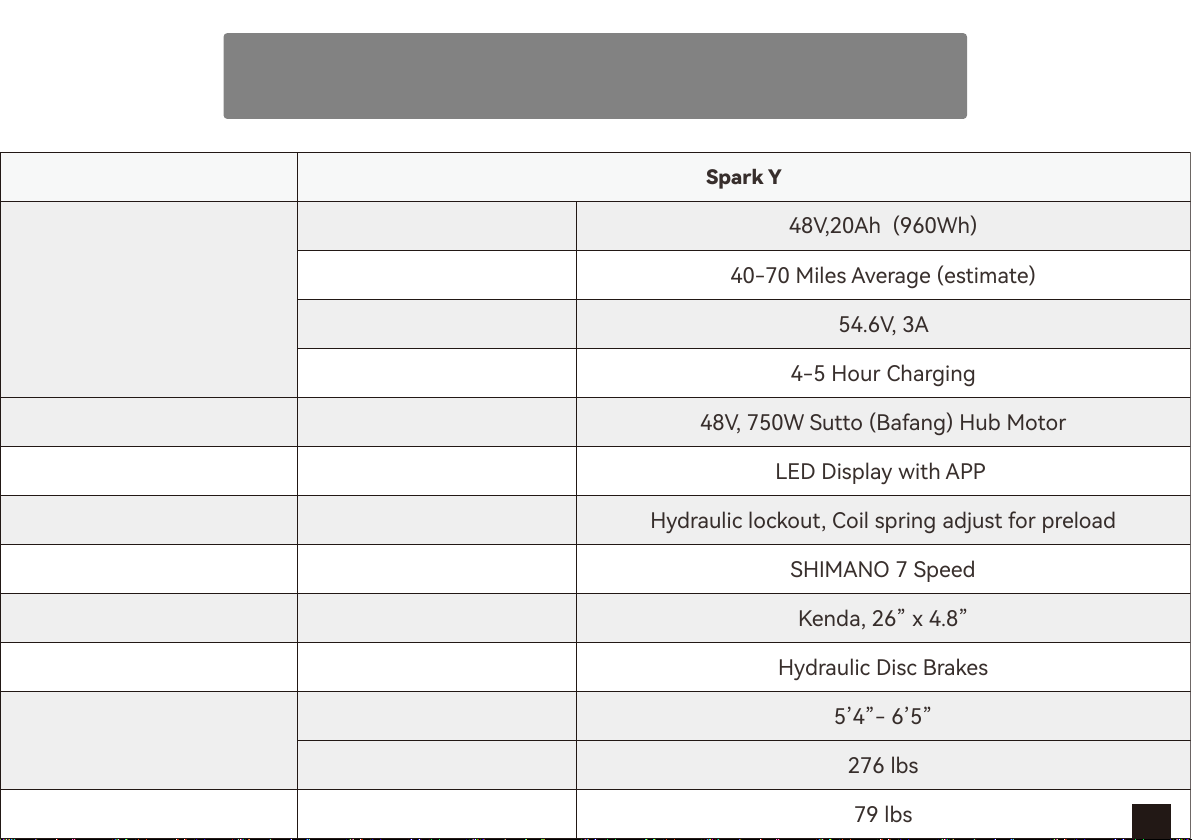
Specication
Riding Requirement
Range
Charger
Charging Time
Power
Display
Fork
Shifter
Front & Rear
Brakes
Suitable Height
Load Capacity
Weight Product
Capacity
Model
Batte
Motor
Display
Suspension
Derailleur
Tires
Brake
40-70 Miles Average (estimate)
54.6V, 3A
4-5 Hour Charging
LED Display with APP
Hydraulic lockout, Coil spring adjust for preload
SHIMANO 7 Speed
Kenda, 26” x 4.8”
Hydraulic Disc Brakes
5’4”- 6’5”
276 lbs
79 lbs
48V,20Ah (960Wh)
Spark Y
02
48V, 750W Sutto (Bafang) Hub Motor

Assembling Your Bike
Before assembling, check that all pas are complete and in good condition. If you have any
questions or cannot nd the information you need in the manual, please contact at
suppo@eskute.com.
NOTE:
03
STEP 1. Install the Handlebars
1.Using the Allen wrench, unscrew the 4 bolts and remove the stem plate.
2.Place your handlebars into the groove and replace the stem plate over the top. Tighten the bolts
about 3/4 this of the way.
3.Make the nal adjustments on your handlebars position, ensuring that they are centered and at
a comfoable angle before tightening the bolts the rest of the way.

04
Figure 1. Stem plate bolt removal.
Figure 2. Tightening stem plate bolts.
Note: DO NOT depress the brake levers before installing the front wheel.

05
1.Take o the plastic protective gaps on each side, throw these away.
2.Loosen up both bolts untill you are able to slide the wheel into place, making sure the brake
caliper slides onto the rotor and both of the forks are properly hooked onto the wheel, fasten
and screw the bolts.
STEP 2. Install the Front Wheel
Figure 3. Remove the protective gaps Figure 4. Fasten both screws

Tip: DO NOT raise the saddle higher than the safety line.
1.Loosen the seat post clamp and inse saddle post.
2.Adjust saddle to the preferred height then tighten clamp.
Figure 5. Dropping seat into bike.
Figure 6. Tighten the seat post clamp
STEP 3. Install the Seat Post
06
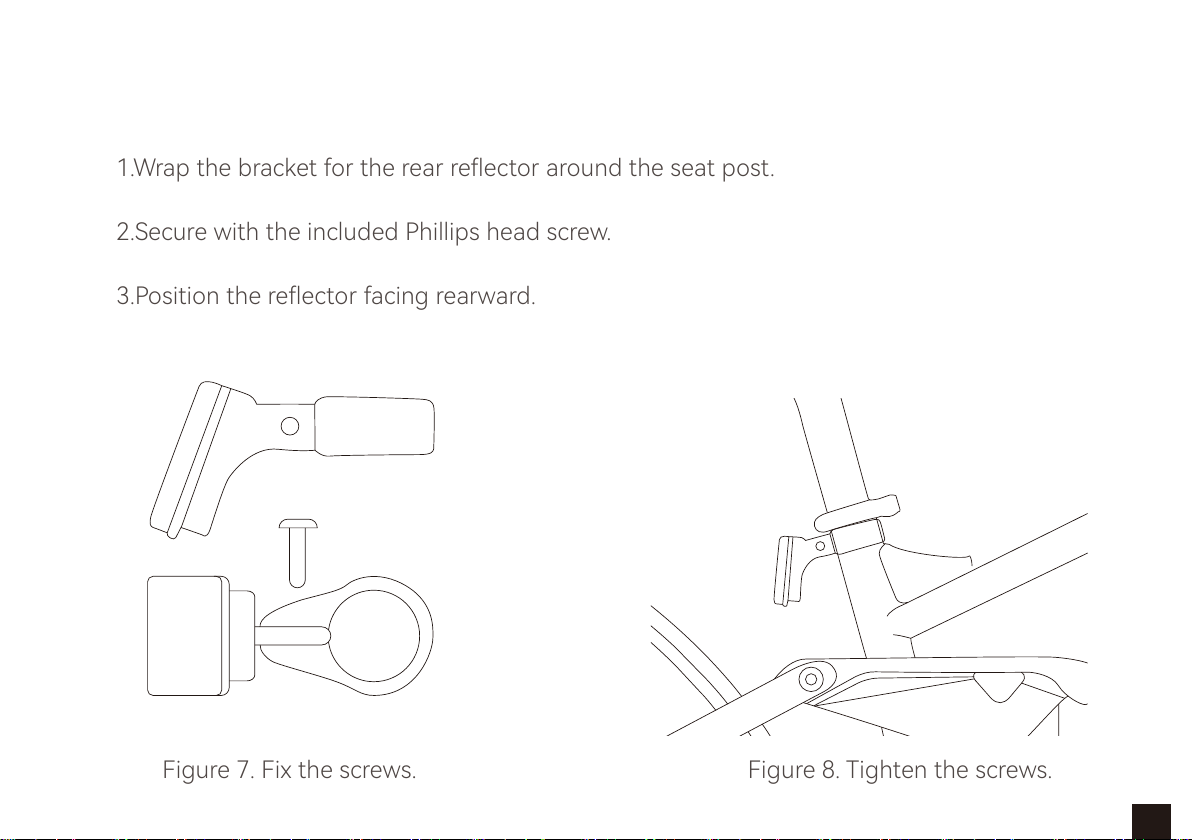
Figure 7. Fix the screws.
Figure 8. Tighten the screws.
07
1.Wrap the bracket for the rear reector around the seat post.
2.Secure with the included Phillips head screw.
3.Position the reector facing rearward.
STEP 4. Install the Rear Light / Reector
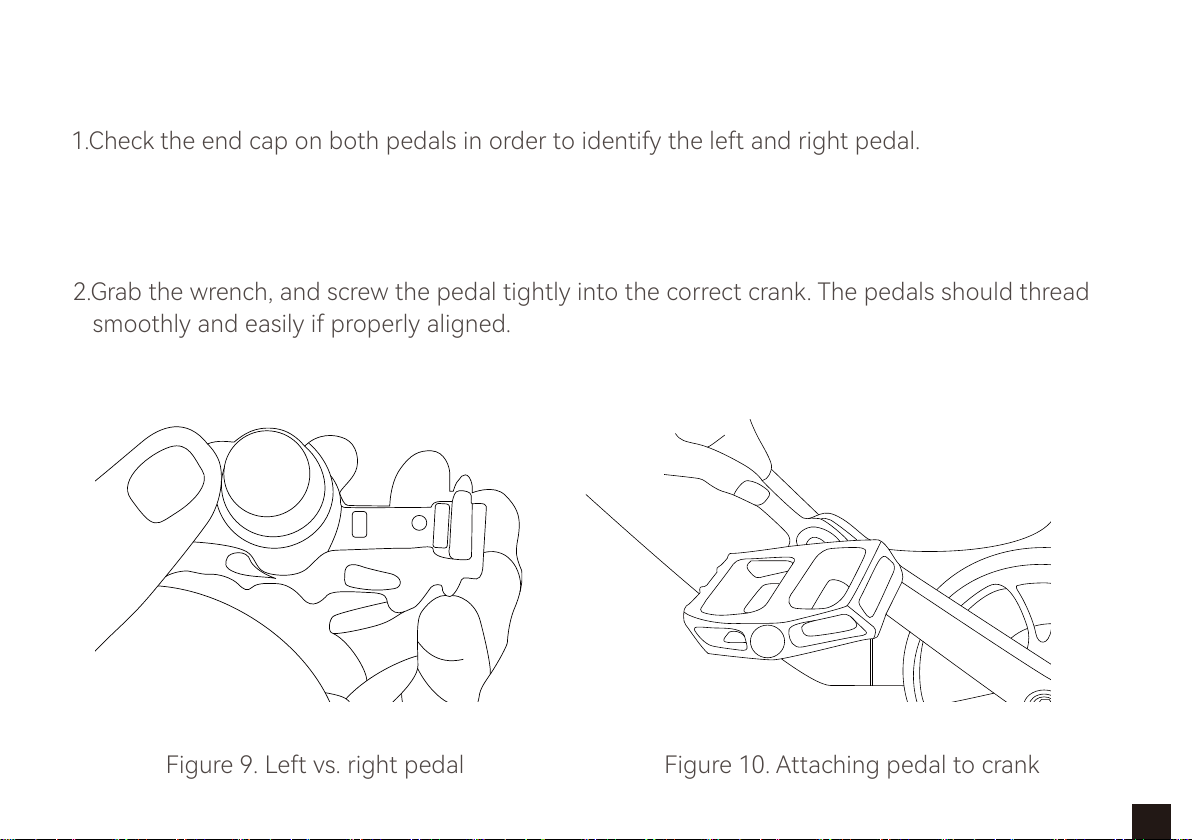
1.Check the end cap on both pedals in order to identify the left and right pedal.
2.Grab the wrench, and screw the pedal tightly into the correct crank. The pedals should thread
smoothly and easily if properly aligned.
Figure 9. Left vs. right pedal
Figure 10. Attaching pedal to crank
08
STEP 5. Attach the Pedals
Tip: Imagine that you are sitting on the bike to correctly determine left vs. right side.
R

Charging the Batte
Tip: The batte can be charged on/o your bike. Make sure that your motor system and batte is
turned completely o before beginning any charging procedures.
1.Use your key to unclock the batte pin, then pull the batte up from the bottom and slide it
downward to remove it from the frame.
2.Connect the charger to the po located on the batte rst, then plug the charger into the
AC power outlet to charge it.
Tip: To replace the batte, inse the top end in rst, slide it upward, then push in the bottom
end until it’s fully seated.
Tip: Allow the batte to fully charge for about 8-12 hours for the rst few cycles. After this, you
may charge it normally (4-6 hours).
09
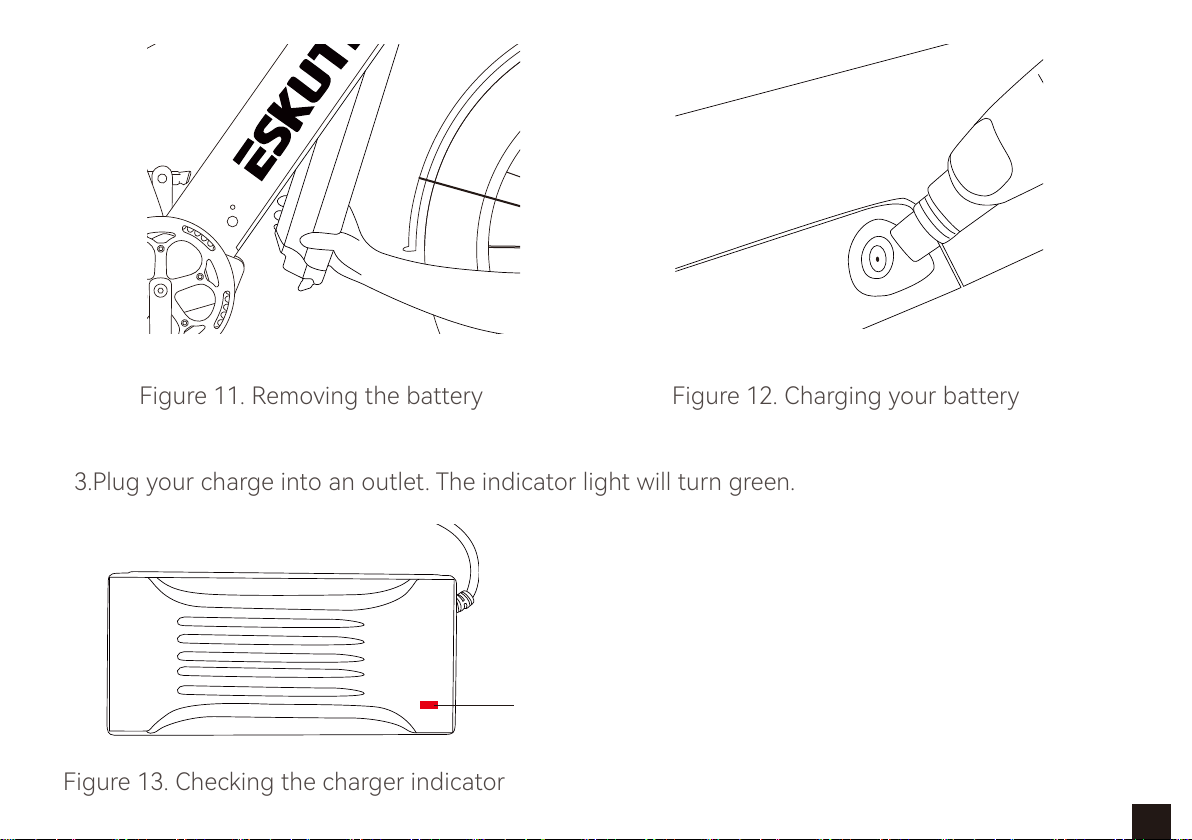
3.Plug your charge into an outlet. The indicator light will turn green.
Green Light:
Not charging / Fully charged
Red Light:
Charging / Not fully charged
10
Figure 11. Removing the batte
Figure 12. Charging your batte
Figure 13. Checking the charger indicator

4.You can also check the batte life by pressing on the button toward the bottom of the batte
pack. The light will indicate how much juice is left in your batte.
5.After allowing your bike to fully charge, test to make sure the LCD display is working. Locate
your handlebar controls, then press and hold the “MODE” button until the LCD screen turns on.
(Repeat this step to turn it o).
6.Familiarize yourself with your LCD screen, so that you can easily check your current speed,
distance traveled, batte life, and pedal assist levels while riding
Figure 14. Checking batte life
Signal
Fully charged
Red
Green
11
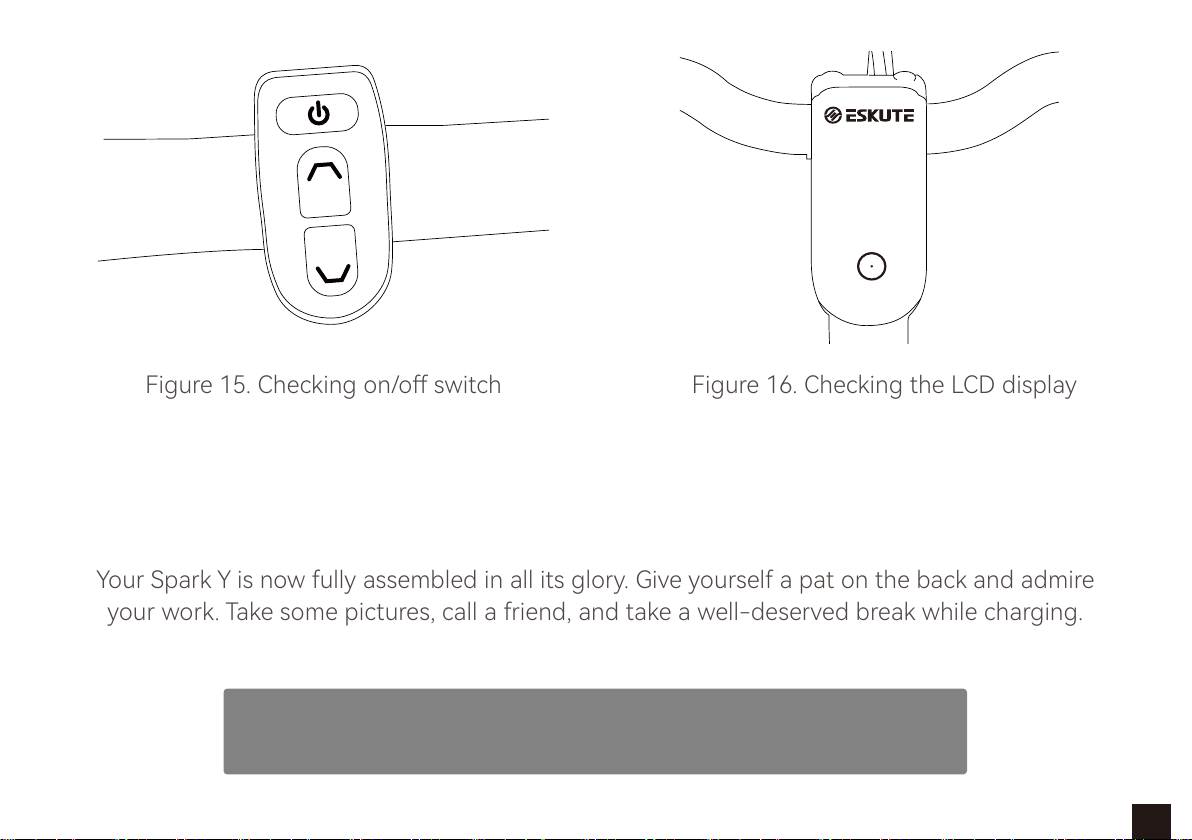
Figure 15. Checking on/o switch
Figure 16. Checking the LCD display
Cheers!
Your Spark Y is now fully assembled in all its glo. Give yourself a pat on the back and admire
your work. Take some pictures, call a friend, and take a well-deseed break while charging.
12
Maintenance Instructions

Traditionally, the right brake lever will control the rear brake, while the left brake lever will control
the front brake. However, this may va depending on what count you are in, and can always be
adjusted to suit your own preference.
To check which conguration your eBike is set up with, squeeze one brake lever and look to see
whether the front or rear brake engages. Now do the same with the other brake lever. Remember
this conguration.
While you are testing the brake conguration, make sure that your hands can comfoably reach
and squeeze the levers with no issues. If you experience any issues or discomfo operating the
brakes, please reach out to us before riding
It’s impoant that your learn, and remember, which brake lever controls each
brake (front/rear) in order to ensure your safety.
BRAKES
1.Test your brake tension by squeezing your brake levers.
If they feel too loose, adjust the tension by twisting the
barrel adjusters on either side.
Disc Brakes
13
Riding with worn brake pads, improperly installed brakes, or wheels where you can visibly see
the wear from the brake pads, is dangerous and can result in serious inju or death.
Applying the brakes suddenly or with too much pressure can result in your wheel locking up.
This can cause you to lose control and fall. Some brakes (like hydraulic disc brakes) are incredi�
bly poweul, so it’s impoant that you take extra care when becoming familiar with using these
brakes.
Disc rotors have sharp edges, exercise caution when handling them during maintenance.
Sudden or excessive application of the front brake may pitch the rider over the handlebars.
Tip: Twist clockwise to decrease tension, and counterclockwise to increase tension.
WARNING!
14
Inating a tire beyond the maximum pressure can blow the tire o the rim, resulting
in damage to the bike and potential inju to the rider.
Your Spark Y will come standard with 26” X 4.8” CST fat tires. It’s impoant that you understand
the
appropriate conditions and terrain these tires can handle, in order to ensure safe riding
Using a bike specic tire pump with a built-in pressure gauge is highly recommended. If
you do not have access to one, or do not feel comfoable inating them yourself, please seek
professional assistance from your local bike shop.
High tire pressures work best for smooth, d pavement rides, while low pressures give the best
peormance on smooth, slick terrain. However, increasing or decreasing tire pressure will have
no aect on the terrain that the tire is designed to handle. A road tire at low pressure still cannot
handle terrains such as clay or sand.
TIRES
Size, pressure rating and other information can often be found on the sidewall of the tire. Tire pres�
sure is the most key piece of information for you to remember
Tire Pressure
15

If the batte becomes physically damaged, non-functional, has been dropped, or
involved in a crash, or you notice it peorming abnormally, please discontinue use
and contact ESKUTE BIKE immediately.
It’s impoant to follow these instructions and safety tips in order to presee the longevity of your
batte’s life and ensure proper peormance.
Fully charge the batte before each ride to make sure it’s ready to go the full range. This will help
reduce the chance of over-discharging the batte.
If you are unsure, reach out to us or your local bike shop to determine the best tire pressure for
the kind of riding you will do most often.
BATTERY CARE
TThe charger is rated for 100-240V. Be sure to check the charger, charging cables, and batte for
damage before beginning each charge.
Charging time takes about 4-6 hours. On rare occasion, it may take longer to allow the batte to
fully charge, paicularly when the bike is new or has been stored for long period of time.
Charging Your Batte
16

Only charge the batte with the supplied ESKUTE charger, as others may cause
damage to the batte or increase the possibility of re or explosion.
When you rst receive your bike, it’s impoant that you follow these steps to ensure that your
batte cells are properly balanced in order to optimize batte longevity.
17
Balancing Your Batte
Do not cover the charger while in use.
Do not open the charger or alter the voltage input.
If there appears to be any issue with the charger or batte, stop riding and contact us
immediately.
While the charger is designed to automatically stop charging once the batte is full, do not leave it
plugged in for periods of time greater than 12 hours.
Make sure your charger avoids contact with liquids, di, and debris.
The charger may get hot while in use. However if it gets too hot to touch, or you notice anything
such as a strange smell or other indications that it may possibly be overheating, discontinue use
immediately and contact ESKUTE Bike.
Table of contents
Other ESKUTE Scooter manuals


