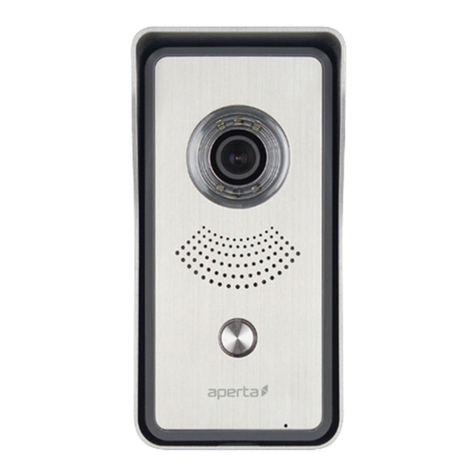
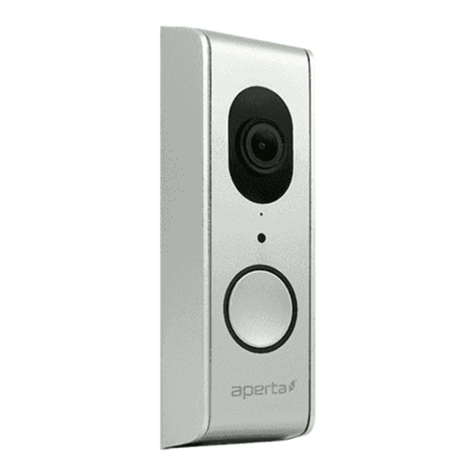
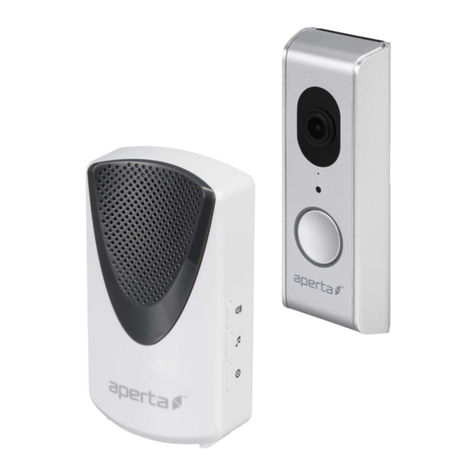
ESP APWIFIDSBP2 User manual

Wireless Battery Powered
Video DoorPhonew/ Wireless Hub
Installation and Operating Instructions
PLEASE READ THESE INSTRUCTIONS CAREFULLY BEFORE USING THIS PRODUCT
AND KEEP THIS MANUAL FOR FUTURE REFERENCE.

OVERVIEW
The state of art Video Doorphone is capable of deliver high quality Digital High Definition (HD)
video to your smart-mobile device(s), which would require higher internet bandwidth. Due to your
local internet environment condition, your mobile device(s) may display black-screen or temporary
disconnect tothe Video Doorphone.
* 2Mbps (upload/
download speed) is suggested.
* For best performance, the smart-mobile device(s) needto beon Wi-Fi or 4G mobile network
in order to receive maximum download speed.
*When the internet transmission islow, your Video Doorphone APP will automatically switch
to Relay Mode:
• By adjusting to “Video Resolution ” in the system setting section may improve
the Video Doorphoneperformance.
* Yourinternet bandwidth islimited. For best performance, try to avoid more than two users
connecting tothe Video Doorphone simultaneously.
* Make sure your smart-mobile device(s) is equipped with up-to-date technology, 1.5GHz dual
core processor or equivalent is suggested.
*If the signal strength of your Wi-Fi router isweak, there are several ways to improve
transmission:
•Change router/camera relative position to receive better signal.
• Use Wi-Fi repeater/extender to maximize the service range of your Wi-Fi route.
• Switch your router to 11b/g/n mode in order to improve router service range.
* Please use maximum 128GB of Micro SD card XC class 10 or Micro SD card XC class 10 UHS1.
16G Micro SD card had been pre-insert in the Wireless Hub

1
CONTENTS
INTRODUCTION .............................................................................................. 2
PLEASE READBEFORE YOUSTART .....................................................................2
WIRELESS DEVICES OPERATING RANGE ............................................................2
IMPORTANT SAFETYPRECAUTIONS.....................................................................2
KIT CONTENT ................................................................................................. 4
SAFETY AND INSTALLATIONTIPS ................................................................ 5
VIDEO DOORPHONE INSTALLATION ........................................................... 6
VIDEO DOORPHONE ..................................................................................... 7
APP DOWNLOAD AND INSTALL .................................................................... 8
APP SETUP ..................................................................................................... 9
Wired Setup..............................................................................................................9
Setup Steps ............................................................................................................10
HOME PAGE / DEVICE LIST ......................................................................... 15
PINLOCK ...................................................................................................... 16
LIVE VIEW ..................................................................................................... 17
EDIT SETTING............................................................................................... 18
EDIT SETTING_BASICSETTING .................................................................. 19
EDIT SETTING_EVENT ................................................................................. 20
Set Event Filter .......................................................................................................20
Play Back ...............................................................................................................21
PLAY BACK................................................................................................... 22
APP ADVANCED SETTINGS ......................................................................... 23
1. Wireless Hub Settings ......................................................................... 23
Admin Password ................................................................................................24
Device Security Code .........................................................................................24
Wi-Fi Setting ......................................................................................................25
Notify Setting......................................................................................................25
Doorbell Melody Enable/Disable.........................................................................26
Change Melody Type..........................................................................................26
Time Zone ..........................................................................................................27
Format SD Card .................................................................................................27
Overwrite SD Card .............................................................................................28
Device Information .............................................................................................28
2. Channel 2Settings(RVDP/ Video DoorPhone) .................................. 29
Device Name......................................................................................................30
Motion Detection ................................................................................................30
Melody Enable/Disable .......................................................................................31
Video Resolution ................................................................................................31
Environment Mode .............................................................................................32
Delete Device.....................................................................................................32
Device Information .............................................................................................33
PRODUCTIONSPECIFICATION.................................................................... 34
2
INTRODUCTION
IMPORTANT SAFETY PRECAUTIONS
Damages caused by non-compliance with this operating manual will void the warranty! We will
not assume any liability for damages to items or persons caused by improper handling or non-
compliance with the safety notices! Any warranty claim will be null and void in such cases.
1. Do not drop, puncture or disassemble the camera; otherwise the warranty will be voided.
2. Avoid all contact with water, and dry hands before using.
3. Never tug on the power cords. Use the plug to unplug it from the wall outlet.
4. Do not expose the camera to high temperature or leave it in direct sunlight. Doing so may
damage the camera or cause camera temporary malfunction.
5. Use the devices with care. Avoid pressing hard on the camera body.
is a storm or
lightning.
7. Remove the power adapter during long periods between usages.
8. Use only the accessories and power adapters supplied by the manufacturer.
9. To meet the regulations pertaining to parental responsibility, keep the devices out of the reach
of infants.
10. Check power cables, do not get crushed or damaged by sharp edges whenever the devices
are in operation.
KG
KG
KG

3
INTRODUCTION
PLEASE READ BEFORE YOUSTART
Always use discretion when installing CCTV equipment, especially when there is perceived
policy. Enquire relevant local regulations applicable tothe lawful installation of video recording/
surveillance. Third party consent may be required.
Installation Notice:
It is recommended to install the camera at the 1.3 M height above ground to have better
performance of the Human detection. Please see below illustration.
1.3M
1.7M
2M
B
A
2.4M
Walking
Direction
3M 4M
2M
SPECIAL NOTICE OF HUMAN DETECTIONFEATURES
It is recommended to install the camera at 1.3 Meters height to have the best detection
coverage. The detection effective range is 2~4 meters far from the camera.
Under certain scenario, environment, or application of the product would cause the human
detection not be able tofunction properly. Please see below for the conditions:
1. The PIR sensor sense the motion of the radiated heat from human body or animal body.
The sensor tell the camera when to start recording or alert user.
2. temperature of the environment is too high (greater than 35 degree), so keep away from any
heat source.
3. The detection accuracy maybe varied according to the walking direction. Best detection:
left to right or right to left (point A). less accurate: walking straight ahead. (point B)
4. The sensor cannot sense the motion behind the glass. Always place camera at the space
without obstacles.
WIRELESS DEVICES OPERATING RANGE
Ensure the signal reception viewed from the wireless camera(s) is the best possible reception
between the camera(s) and the Wi-Fi router. If necessary, reduce the distance between the
camera(s) and the Wi-Fi router to improve overall system performance.

4
FCC/CE WARNING
This equipment has been tested and found to comply with limits for a Class B digital device,
pursuant to Part 15 of the FCC rules and ETSI(EN) 300328. These limits are designed to provide
reasonable protection against harmful interference in residential installations. This equipment
generates, uses, and can radiate radio frequency energy, and if not installed and used in
accordance with the instructions, may cause harmful interference to radio communications.
However, there is no guarantee that interference will not occur in a particular installation. If this
equipment does interference to radio or television equipment reception, which can be determined
or more of the following measures:
• Reorient or relocate the receiving antenna.
• Move the equipment away from the receiver.
• Plug the equipment into an outlet on a circuit different from that to which the receiver is
connected.
• Consult the dealer or an experienced radio/television technician for additional suggestions.
the party responsible for compliance could void your authority to operate such equipment.
DISPOSAL
If the camera system no longer functions or can no longer be repaired, it must be disposed of
according to the valid statutory regulations.
Disposal of spent batteries/accumulators:
You are required by law (Battery Ordinance) to return all spent batteries and
accumulators. Disposing of spent batteries/accumulators with common household waste is
prohibited! Batteries/accumulators that contain hazardous substances are marked with the symbols
on the side. These symbols indicate that it is prohibited to dispose of these batteries/accumulators
in the household waste. The abbreviations for the respective heavy metals are: Cd=cadmium,
Hg=mercury, Pb=lead. You can return spent batteries and accumulators that can no longer be
charged to the designated collection points in your community, outlets or wherever batteries or
and contribute to the protection of our environment!
FCC Compliance Statement: This
device complies with Part 15 of the
FCC rules. Operation is subjected to
the following two conditions: (1) this
device may not cause harmful interference, and (2) this
device must accept any interference received, including
interference that may cause undesired operation.
Products with CE Marking comply
with EMC Directive (2004/108/EC);
Low Voltage Directive (2006/95/
EC) ; RED(2014/53/EU); ROHS
Directive (2011/65/EU) issued by the Commission
of the European Community. Compliance with
these directives implies conformity to the following
European Norms:
EMC: EN 301 489
LVD: EN 62368-1
Radio: EN 300 328

5
KIT CONTENT
Video
Door Phone
X1
Wireless Hub
X1
Bracket
X1
Screw Pack
X1
USB Charglng
Cable
X1
X1
Quick Start
Guide

6
VIDEO DOOR PHONE INSTALLATION
2
1
4
3
5
Use a phillips screwdriver to remove the set screw.
Confirm position and mount the bracket via the
screws supplied.
Placing video door phone at 150cm~160cm above
the ground is the ideal position.
Remove the device from the wall mount bracket.
Fully charge the video door phone before
installation.
Fasten the screw to secure video door phone to
the bracket.
Install the device from the bracket.

7
VIDEO DOOR PHONE
Pairing
Key
Power
ON/OFF
Pairing Butto
n
Power On/Off
Motion Sensor
Speaker
Doorbell Butto
n
LED Status
Indicator
Microphone
HD Camera
Micro USB Port
(For battery charging)

8
APP DOWNLOAD AND INSTALL
The Wireless APP camera is designed to deliver live video footage directly to your smart phone or
tablet device. Please follow these steps to download, setup and use the APP.
Download the App
Please download and install the " ESP Smart " APP to your device.
ESP Smart

9
(1) Download and install the "ESP Smart" APP to your device.
(2) Plug in the Wireless Hub to USB power adaptor which support 5V/1A power output.
voice prompt “Ready for Router Setup”.
(3) To connect wireless hub to your home Wi-Fi router by ESP Smart APP.
APP SETUP
1
32
ESP Smart

10
Setup Steps
1. Open the app, and the press ” ” button to add new system.
2. Select “Battery Camera Kit” and follow the wizard to complete setup.
ice list, please select “New Device”
to add the wireless hub. If you’ve set it up before, please select “Existing Device” to add it to
your list by entering DID and security code information.
4. Please turn up the volume at least 70% above of your mobile phone,then swipe left.
5. Ensure to setup the device at the less noisy environment and keep the phone to the Wireless
Hub /devices 30cm, then swipe left.
1
4 5
2 3

11
Setup Steps
6. Ensure the router you wish to connect is 2.4GHz. Wireless Hub/ Device do NOT support
5G network, then press “OK”.
7. Please scan the QR code label which be placed on the back of wireless hub.
8. If your mobile phone is not on the Wi-Fi, please follow the instruction in the pop-up window.
6 7
8

12
Setup Steps
9. Please check the Wi-Fi SSID is correct and enter the password, then press “OK”.
After pressing OK, your mobile phone will transfer the Wi-Fi setup information to your
wireless hub via ultrasonic. You will hear a voice prompt “Receive Router Setup
Information”.
10. It takes approximately 2 mins for wireless hub to connect to your home router. You will hear
a voice prompt “Router Connection Successful” once it’s connected.
9
10

13
Setup Steps
11. For you own security concern, please modify the sucurity code of your new added device.
Please press “OK” for processing.
12. Please modify your security code. Default password “123456” is NOT recommended.
11 12
Note:
You are not able to use switch function while threre is only one camera be purchased
and paired to your wireless router.

14
Home Page / Device List
1. ADD Device: To add the new devices in list.
2. Edit Setting: To access “Setting”, “Delete” & “Event”.
3. Reconnect: Refresh connection of all the devices in list.
4. Quad:Select the devices and click the icon to combine the devices liveview into
same image(It is available for more than 1 devices).
5. Info: Setup PIN Lock, APP version information.
1 2 3 4 5

15
PIN Lock
1. Enable/ Disable PIN Lock: You will be required for entering PIN when you launch APP.
2. Enter your PIN Code: 4 digits number for setup your PIN.
1
2
Note:
If you forget your PIN, please remove your APP and reinstall it.

16
Live View
1. Connection status of the Wireless HUB.
2. RSSI between Wireless HUB and end device. (Received Signal Strength Indication)
3. Remaining Battery Indication: It turns to Red, while battery is below 15% of power.
4. Talk: Tap to enable the audio transmmition from smart phone to end device.
5. Snapshot: Tap to take snapshot of the live video. The captured snapshots will store in your
mobile device.
6. Mute/Unmute: Mute or unmute the live audio.
7. Record: Record a short video clip. Your video is automatically saved to the camera's internal
SD card memory.
8. Switch: This function in only available when two devices be paired with wireless hub.
Tap to switch the live view of device.
4
5
4
6 7 8
1
2
3

17
Edit Setting
1. Setting: Tap to access Basic and Advance setting, Please refer to “Basic & Advance
Setting” Section.
2. Delete: Tap to delete the device.
3. Event: Tap to review recording clips, please refer to “Event” section.
4. Circle:
1 2 3
4
In case more than 1 pcs devices, select on the top left and click the
Quard icon. The devices liveview will be combined into one image.

18
Edit Setting_Basic Setting
1. Search: Auto search for available devices under your LAN (Local Area Network).
2. Cancel: Back to previous step.
4. System Name: Name your device.
6. Security Code: Password for remote access to device.
7. Advanced: Access to advance setting, Admin Password is required.
(Default Admin Password is “123456”)
1
4
5
6
7
2 3
Table of contents
Other ESP Intercom System manuals

ESP
ESP BDeye User manual

ESP
ESP Enterview 3 User manual

ESP
ESP Enterview VX User manual

ESP
ESP aperta EZTAG3 User manual

ESP
ESP Aperta APDSSWKP User manual

ESP
ESP APWIFIDS2 User manual

ESP
ESP Aperta APKITKPBLK User manual

ESP
ESP Aperta APDSMW User manual

ESP
ESP Aperta APWIFIDS-BLK User manual

ESP
ESP Enterview 3 User manual