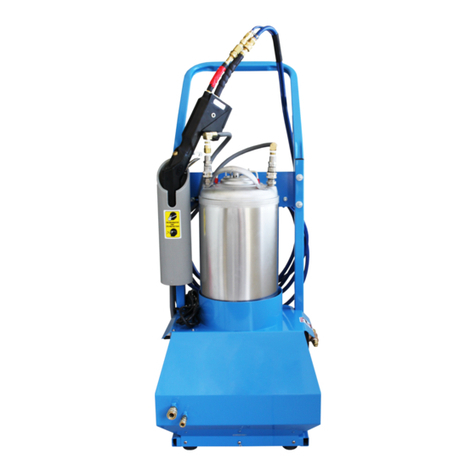
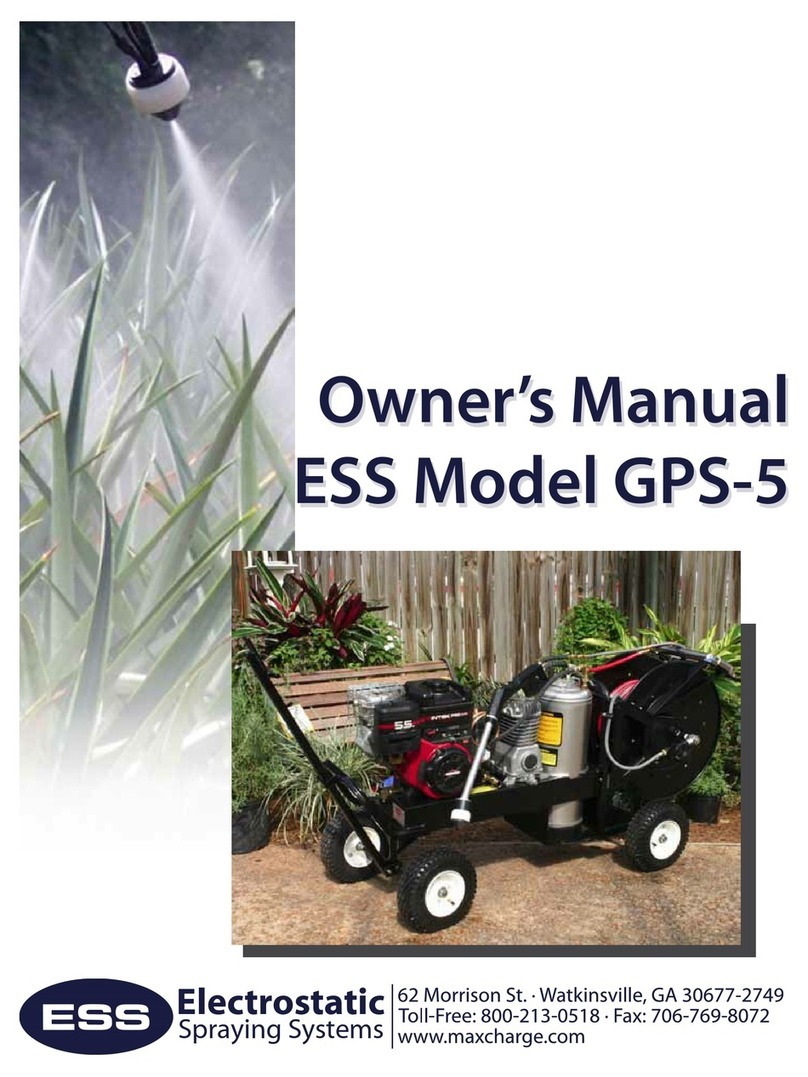
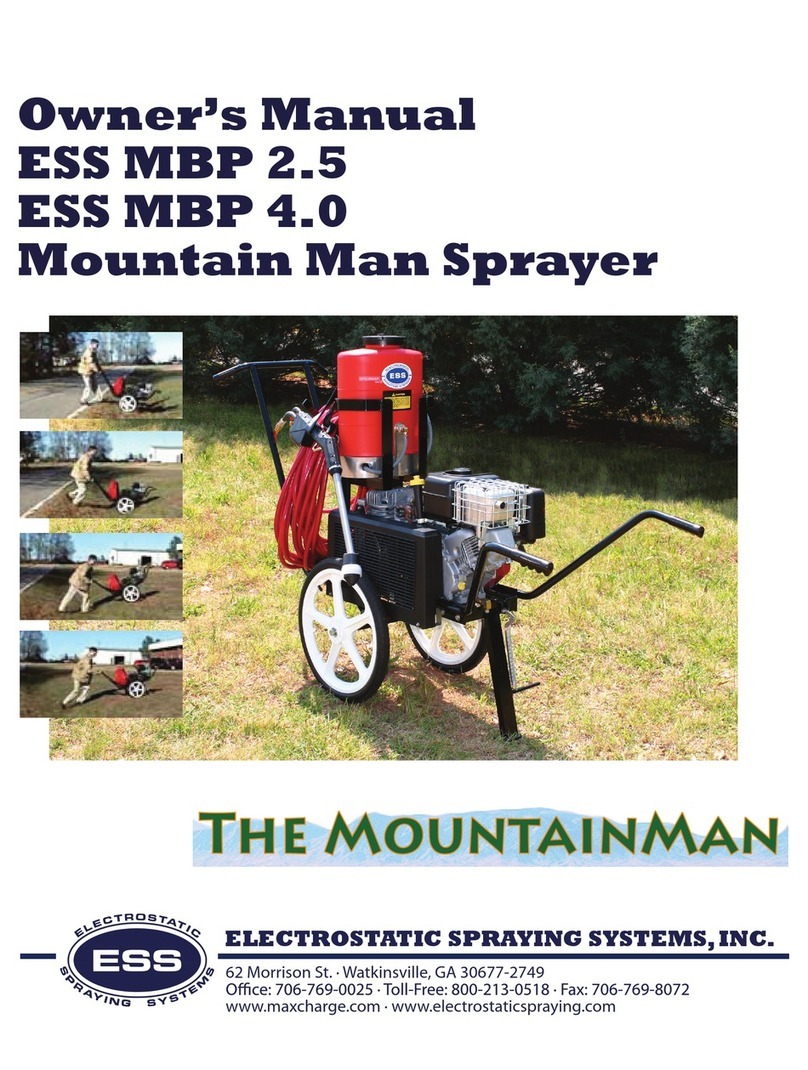
ESS TRG-5 User manual

Owner’s Manual
TRG-5
Owner’s Manual
TRG-5
Electrostatic
Spraying Systems

OWNER’S MANUAL
TRG5
Electrostatic Spraying Systems, Inc.
62 Morrison St. · Watkinsville, GA 30677-2749
CE certication applied for
Copyright © 2008, Electrostatic Spraying Systems, Inc. – All Rights Reserved
This manual last updated May 28, 2014

i
ESS TRG OWNER’S MANUAL
CONGRATULATIONS!
You have just purchased one of the most advanced spraying systems
on the market today. Electrostatic Spraying Systems, Inc.1(ESS) is
committed to providing you with powerful spraying systems that are
easy to operate and maintain.
The products of ESS are the result of the eorts and creativity of many
people. In addition to input from engineering, marketing and manufac-
turing personnel, suggestions from our customers have been imple-
mented into the design of our equipment. We would like to hear your
ideas also! If you have any suggestions or comments regarding the
products or service of ESS write or call us at:
Electrostatic Spraying Systems, Inc.
62 Morrison St.
Watkinsville, Georgia 30677-2749
Phone: 706-769-0025
1-800-213-0518
Fax: (760) 769-8072
support@maxcharge.com
Please take time to read this manual before operating your new ESS
TRG-5™ sprayer. The manual contains important instructions for the
safe operation of this equipment. It also includes helpful suggestions
to maximize productive use of the TRG-5 sprayer. Essential cleaning
instructions should be followed to maintain your sprayer at peak ef-
ciency. Please carefully read and follow all instructions for your own
safety and the safety of others around you.
Thank you!
We appreciate your business and are proud that you have selected an
ESS sprayer for your operation.
Your new sprayer has been thoroughly tested and calibrated at the
factory. If you have any problems with it, please get in touch with us
immediately. We will be glad to answer any questions you have con-
cerning our equipment or service. ESS intends to support its customers
with ecient, helpful and friendly service. We appreciate your business
and sincerely hope that Electrostatic Spraying Systems, Inc. can meet
your present and future spraying equipment needs.
1 ESS TRG-5 Sprayer™, TRG™, MaxCharge™, and the ESS logo are copyrights or registered
trademarks of Electrostatic Spraying Systems, Inc.
For your personal records
Please record the model
and serial numbers of your
new sprayer here.
TRG-5
______________________
Model #
______________________
Serial #
______________________
Spray gun serial number
______________________
Date of purchase.
We encourage you to make copies of the“Spray Gun Yearly Service”
form in the back of this manual. Use this form every year you
send your gun in for maintenance and when we service the gun,
your warranty will renew for another year. The service will replace
the nozzle base, replace air and liquid hoses inside gun housing,
replace lters, and recalibrate the gun and thoroughly cleaning the
entire spray gun.

ii
ESS TRG OWNER’S MANUAL
Notes

iii
ESS TRG OWNER’S MANUAL
TABLE OF CONTENTS
Overview of the ESS TRG-5 Air-assisted Electrostatic Sprayer ............ 1
Safe operation of the TRG-5 Sprayer ............................................................ 2
Operator’s responsibility........................................................................... 2
Safety precautions ...................................................................................... 2
Chemical safety precautions................................................................... 2
Safety decals ......................................................................................................... 3
About the low-voltage system of the MaxCharge™ spray gun .......... 4
Features of the TRG-5 sprayer......................................................................... 5
Technical specications ............................................................................ 5
Operating Instructions ...................................................................................... 6
Unpacking the sprayer .............................................................................. 6
Before use....................................................................................................... 7
Setting the air pressure for the incoming air ow........................... 7
Supply line drier........................................................................................... 8
Steps for operation ..................................................................................... 8
After spraying ............................................................................................... 8
TRG-5 maintenance schedule......................................................................... 9
REFERENCE SECTION
Quick connects...................................................................................................11
Hose reel and liquid inlet lter .....................................................................12
The ball valve (Airow On/O ).....................................................................12
Stainless-steel tank ...........................................................................................13
Incoming air pressure regulator...................................................................14
Tank pressure regulator ..................................................................................15
Spray gun connections ...................................................................................16
How to store the hose quick-connects when not in use ....................16
Spray gun .............................................................................................................17
Air lter..........................................................................................................17
Trigger ...........................................................................................................18
Liquid lter assembly...............................................................................19
Nozzle assembly ........................................................................................20
Pre-spray check..........................................................................................21
Post-spray check........................................................................................21
Batteries................................................................................................................22
Yearly spray gun service..................................................................................23
Spraying with your ESS sprayer....................................................................24
Preparing a tank mix ........................................................................................25
Chemical compatibility ...................................................................................26
A note about operating temperatures ......................................................26
Trouble-shooting Guide .................................................................................27
TRG-5 spray gun service parts (drawing)..................................................28
TRG-5 spray gun service parts (key) ...........................................................29
Flow disk chart ...................................................................................................29
TRG-5 Main unit assembly drawing............................................................30
TRG-5 Service parts...........................................................................................31
TRG-5 Tank assembly drawing......................................................................32
Warranty ...............................................................................................................33
Warranty card............................................................................................33a
Spray gun repair/Yearly service return form............................................35

iv
ESS TRG OWNER’S MANUAL
Notes

1
ESS TRG OWNER’S MANUAL
Overview of the ESS TRG-5
Air-assisted Electrostatic Sprayer
Air-assisted electrostatic sprayers produce electrically charged spray
drops that are carried to the plant canopy in a low pressure, gentle, air
stream. The heart of the TRG-5 is the patented MaxCharge™ nozzle.
Air and liquid enter separately at the rear of the nozzle. Just before
leaving the nozzle, the air hits the liquid stream to make many thou-
sands of tiny spray droplets that pass through the charging ring. An
electrical charge is applied to the spray droplets by the charging ring.
Then the charged spray droplets are blown out of the nozzle and
move into the plant canopy where they are attracted to plant material
by electrostatic forces. The electrostatic charge induced by the Max-
Charge™ nozzle is strong enough to allow the droplets to move in any
direction to cover all plant surfaces, even defying gravity to coat the
underside of leaves and the back side of fruits and vegetables. The re-
sult is uniform spray coverage on hidden areas deep inside of the plant
canopy where other sprayers miss.
The MaxCharge™ nozzle is easy to clean and corrosion-proof. The inte-
rior ceramic outlet resists wear three times better than stainless steel
outlets. These features combine to give the best spray coverage on the
market. This quality product is virtually maintenance-free, and assures
you of savings in the application of chemical.
The comparison of air-assisted electrostatic spraying versus conven-
tional spraying is dramatic. Electrostatically charged droplets are
attracted to plant surfaces.
Where Does the Spray Go?
The University of California completed a series of tests to investi-
gate what happens to spray liquid after it leaves the nozzle.
Conclusion: ESS technology places over 4 times the amount of
spray onto the plant surface using ½ the amount of chemicals.
Furthermore, they also reported that ESS sprayers send ⁄ less
chemicals to the ground and into the air. Less chemical used
overall, less waste and less drift than conventional equipment.
Imagine the environmental benet!
A picture worth a thousand words…
In this test, uorescent dye has been
sprayed on two round knobs. The left
knob was sprayed with the electrostatic
system ON; the right knob was sprayed
with the same sprayer, but with the elec-
trostatic system OFF. Note how even the
coverage is on the electrostatic knob.

2
ESS TRG OWNER’S MANUAL
OPERATOR’S RESPONSIBILITY
Read the Owner’s Manual.
It is the responsibility of the user to read the Owner’s Manual, to understand the
safe and correct operating procedures which pertain to the operation of the prod-
uct, and to maintain the product according to the Owner’s Manual. It is the owner’s
responsibility to ensure that all who are using this equipment read this manual.
The user is responsible for inspecting the equipment and for repairing and replacing
damaged or worn parts to prevent damage or excessive wear to other parts. It is the
user’s responsibility to deliver the machine for service or replacement of defective
parts which are covered by the standard warranty.
Lack of attention to safety can result in reduced eciency, accident, personal injury, or
death. Watch for safety hazards and correct deciencies promptly. Use the following safety
precautions as a guide when using this machine.
Safe operation of the TRG-5 Sprayer
Read the Owner's Manual. Failure to read the manual is considered a misuse of the equipment.
Use the TRG-5 sprayer ONLY for its intended use as described in this manual.
Before operating equipment, become familiar with all caution and warning decals axed to the sprayer.
Do not allow a child to operate the TRG-5 sprayer. Do not allow adults to operate the sprayer without
proper instruction.
Keep the area of operation clear of all persons and animals.
Do not apply chemicals when weather conditions favor drift from treated areas.
Turn o the sprayer when leaving it unattended.
Store sprayer in a dry place. Do not expose to freezing temperatures.
CHEMICAL SAFETY PRECAUTIONS
Read and follow all instructions on the chemical or pesticide manufacturer’s label.
Use protective clothing, eye protection and gloves when mixing chemicals and while spraying with
the TRG sprayer.
Always use a cartridge respirator, protective clothing and eye protection when spraying with the TRG.
Follow the chemical manufacturer’s recommendations in handling, mixing, applying, storing and
disposing of chemicals.
Be aware of decontamination methods in case a person, clothing, or equipment is accidentally
sprayed.
Be aware of poisoning symptoms and know the appropriate rst aid.
Know the length of time needed to pass before allowing people and pets to go back into the
sprayed area.
SAFETY PRECAUTIONS

3
ESS TRG OWNER’S MANUAL
About the low-voltage system of the MaxCharge™ spray gun
For operator safety, the MaxCharge spray gun is powered by a low-
voltage power supply. The rechargeable 9-volt batteries are in the
handle of the TRG-5 spray gun. The electrostatic charge imparted to
the spray is not strong enough to harm people. Some people report
feeling a“tingle” or a slight stinging sensation when the spray from the
nozzle falls on their bare skin.
Location of 9-volt rechargeable
battery pack in the handle of the
spray gun.
9v

4
ESS TRG OWNER’S MANUAL
Safety decals
Appropriate safety decals are placed on ESS equipment in order to
alert the operator to possible dangers. If decals are missing, please
contact ESS immediately for replacement decals.
¡PRECAUCIÓN!
WARNING!
AGRICULTURAL CHEMICALS CAN BE
DANGEROUS. IMPROPER SELECTION
OR USE CAN SERIOUSLY INJURE
PERSONS, ANIMALS, PLANTS, SOIL OR
OTHER PROPERTY.
BE SAFE:
·SELECT THE RIGHT CHEMICAL
FOR THE JOB.
·HANDLE IT WITH CARE.
·FOLLOW THE INSTRUCTIONS
ON THE CHEMICAL
MANUFACTURER’S LABEL.
LOS PRODUCTOS QUÍMICOS AGRÍCOLAS
PUEDEN SER PELIGROSOS. LA SELECCIÓN O EL
USO INAPROPIADOS PUEDEN LESIONAR
SERIAMENTE A LAS PERSONAS, LOS ANIMALES,
LAS PLANTAS, LA TIERRA U OTRA PROPIEDAD.
TENGA CUIDADO:
·
SELECCIONE EL PRODUCTO QUÍMICO
CORRECTO PARA EL TRABAJO.
· MANÉJELO CON CUIDADO.
· SIGA LAS INSTRUCCIONES DE LA ETIQUETA
DEL FABRIC ANTE DEL PRODUCTO
QUÍMICO.
READ AND FOLLOW THE CHEMICAL
MANUFACTURER’S INSTRUCTIONS
CAREFULLY.
It is extremely important for the owner/
operator’s safety as well as the safety
of other people in the vicinity that all
chemical safety precautions are fol-
lowed.
·DO NOT REMOVE TANK LID OR
RELEASE TANK PRESSURE WHILE
COMPRESSOR IS RUNNING.
·RELEASE TANK PRESSURE BEFORE
REMOVING LID OR TANK HOSE
CONNECTIONS.
·KEEP FACE AWAY WHEN RELEASING
PRESSURE AND WHILE REMOVING
TANK LID.
·DO NOT OVERFILL TANK.
·FILL TO 4 INCHES (10 CM) FROM TOP
OF TANK WHEN USING TANK
AGITATOR SYSTEM.
·NO RETIRE LA TAPA DEL TANQUE NI LIBERE LA
PRESIÓN DEL TANQUE MIENTRAS LA COMPRE
SORA ESTÉ FUNCIONANDO.
·LIBERE LA PRESIÓN DEL TANQUE ANTES DE
RETIRAR LA TAPA O LAS CONEXIONES DE LA
MANGUERA DEL TANQUE.
·MANTENGA EL ROSTRO ALEJADO CUANDO LIBERE
LA PRESIÓN Y MIENTRAS RETIRA LA TAPA DEL
TANQUE.
·NO SOBRELLENE EL TANQUE.
·LLÉNELO HASTA 10 CENTÍMETROS (4 PULGADAS)
DE LA PARTE SUPERIOR DEL TANQUE CUANDO
USE EL SISTEMA AGITADOR DEL TANQUE.
¡PRECAUCIÓN!
WARNING!
CAUTION:
The stainless steel tank
operates under pressure.
This decal describes important informa-
tion on correct use of the tank and its
agitator.
CLEAN
FILTER
REGULARLY
REMEMBER TO DISASSEMBLE AND CLEAN
THE FILTERS REGULARLY.
The performance of your TRG sprayer
can suer if the lters are not kept clean.
If you use a pacemaker, use our
electrostatic sprayer at your own risk.
Charger for
Electrostatic Spraying Systems
With the mains connected, the LED
will be orange the rst 5-7 seconds, and
be orange when the initialization and
analysis starts. If a battery is connected,
the actual charging will start a few
seconds later when the
LED changes to red/orange.
LED MODE
Battery initialization
& analysis
Fast charge
Top-o charge
Trickle charge
Error
This label is placed on the charger of all
sprayguns.

5
ESS TRG OWNER’S MANUAL
Features of the TRG-5 Sprayer
MaxCharge™ Spray gun
All-metal frame features durable welded
construction and powder-coated nish
About your TRG-5 sprayer
The TRG-5 is a sprayer that
depends on an external source
of pressurized air. The air
passes from the air inlet hose
through a lter and follows
two dierent routes from a
brass tee. One route goes to
the hose reel and through the
red air hose of the twinline
hose. The other route goes to
the tank pressure regulator
and then to the tank. When
external air supply is running
and tank pressure regulator
is set at 12-15 psi, the tank is
pressurized and continuously
agitated to prevent separation
and settling of the chemical(s).
From the tank, the pressurized
liquid line goes to the hose reel
and through the grey hose of
the twinline hose. The twinline
hose carries both pressurized
liquid and air to connect to the
spray gun. The liquid combines
with the pressurized air and
atomizes the chemical mix
into 40 micron VMD (Volume
Median Diameter) drops. The
droplets are then electrostati-
cally charged and sprayed from
the nozzle. Due to the electro-
static charge, the droplets are
attracted to all plant surfaces in
the direction that the handgun
points, including the back of
leaves and foliage deep within
the canopy.
47.5 meter (150 feet)
twin-line hose
18.9 liter (5-gallon)
Stainless-Steel tank
Oversized, semi-pneumatic tires
Nozzles 1
External air supply required Yes
Electricity required No
Standard hose length 150 ft. (45.7 m.)
Weight empty 80 lbs. (36.3 kg.)
Weight full 120 lbs. (54.4 kg.)
Shipping weight 275 lbs. (124.7 kg.)
Main tank capacity 5 gal. (18.9 l.)
Dimensions 31” H × 21”W × 36” L
(0.8m. × 0.5m. × 0.9m.)
Air volume required 12 CFM (0.34 m3/min.)
Air line pressure 65-90 PSI (4.6 - 6.3 kg./cm2)
Tank Pressure 10 PSI ( 0.7 kg./cm2)
Flow rate 4 gal./hr. (15.1 l./hr.)
Drop size 40 microns
Spray range 10-15 ft. (3 - 4.6 m.)
Available options 250 ft. (76.2 m.) hose
Aluminum trident
spraygun
Technical specications
For connection to an existing air supply
Tank agitator assures mixing of all chemicals
Compatible with all conventional chemicals and fungicides
Spray up to 40,000 sq. ft. per hour

6
ESS TRG OWNER’S MANUAL
Operating instructions
ALL OPERATORS must read this Owner’s Manual completely
and thoroughly before operating the TRG-5 sprayer. They
must be familiar with all operating instructions and safety
precautions.
Unpacking the sprayer
In the shipping box there should be:
one TRG-5 sprayer
one spray gun in a box,
one TRG-5 Parts Kit
Your new TRG-5 Sprayer is fully assembled. The sprayer is fastened to
the shipping crate with one 3-inch wood screw located on the tank
platform of the TRG-5 sprayer. Remove the screw with a Phillips head
screwdriver.
Carefully open the spray gun box, remove the spray gun, and unwrap
the bubble wrap from the spray gun. Store the box and bubble wrap
for future shipping. You will need this box to return the spray gun for
its Yearly Service.
The Parts Kit contains a collection of small parts commonly needed to
maintain and repair your TRG-5 sprayer as well as the battery charger
for the spray gun, a spray gun shoulder pad, and the TRG-5 Owner’s
Manual. Please store your Parts Kit in a safe place for future use.
Among the items in the Parts Kit you will nd one extra ow disk and
one extra strainer. We call your attention to these parts because they
are indeed very small and easy to overlook; however they are essential
for your sprayer to run correctly. (See the section about the air lter
for detailed instructions on cleaning and replacing the air lter. See
the section on the liquid lter to clean or replace the ow disk and the
strainer.)
A warranty registration card is bound into the manual after the
Warranty page. After unpacking the sprayer, please take time to ll this
card out and send it in to ESS. This will insure your warranty protection
in the event anything happens to your sprayer or handgun.
Before use
Connect the battery charger to the spray gun. Charge the battery for
6 to 8 hours before using the TRG-5 sprayer. After charging your spray
gun, store the battery charger in a secure location.
TRG-5 Parts kit

7
ESS TRG OWNER’S MANUAL
Setting the air pressure for the
incoming air flow
1. Start with an initial pressure setting of 60 PSI.
2. Count the number of nozzles on your spray gun. Add 5 PSI
for each nozzle over 1. For example:
- for a single nozzle add 0 to the initial setting
- add 5 PSI for a two nozzle spray gun
- add 10 PSI for a three nozzle spray gun
3. Determine the length of air hose furnished with your
sprayer. Add 10 PSI to the initial pressure setting for each
100 feet of air hose length. This is the desired air pressure
setting for the external air source.
Example:
Your TRG has the optional two-nozzle gun with 100 feet of air hose on
the reel.
60 PSI + 5 PSI + 10 PSI = 75 PSI
Example:
Your TRG has a single-headed nozzle and has 250 feet of hose.
60 PSI + 0 PSI + 25 PSI = 85 PSI
Note: The spray gun air ow requirement is 6 to 10 CFM of air ow
per nozzle.
The air pressure required at the nozzle is 55 to 75 PSIG.
(It’s greater because the design of the MaxCharge nozzle
increases the air pressure and air velocity.)
Air ow at the upper end of the range will require higher air
pressure from the source and will yield a longer spray plume
and ner liquid droplet size.
The charge level at the nozzle will increase or decrease as the
air ow changes due to the liquid/air ratio varying. By
regulating the air pressure and checking the charge level the
nozzle liquid charge level can be optimized.
To set the incoming air
pressure:
Turn on the air from the ex-
ternal air source. Locate the
air inlet regulator (liquid-lled
gauge with a range of 0 to 100
PSI). Pull the adjustment knob’s
black plastic cover to unlock it.
Turn left (counter-clockwise) to
decrease pressure; turn right
(clockwise) to increase pres-
sure. Set the pressure accord-
ing to the formulas described
at left. Push the black plastic
cover in to lock the new setting.
External
air
source
Air
inlet
lter
SS
tank
Incoming
air
pressure
0–60
0–100
Tank air
pressure
Reel assembly
In Out Liquid line
(Gray)
To
Spray gun
TRG-5 Air ow/Liquid ow
For precise measurement of the charge
level, contact ESS to purchase the op-
tional multi-meter kit with specialized
probe. ESS S/N AS2572

8
ESS TRG OWNER’S MANUAL
To set the tank pressure:
Turn on the air from the
pressurized air source. Set the
incoming air pressure accord-
ing to the instructions on the
previous page.
Locate the tank pressure gauge
(liquid-lled gauge marked
1 –30 PSI). Pull the adjustment
knob’s black plastic cover to
unlock it. Turn left (counter-
clockwise) to decrease pres-
sure; turn right (clockwise)
to increase pressure. Set the
pressure between 12 to 15 PSI.
Push the black plastic cover in
to lock the new setting.
Supply air line drier
ESS recommends that growers install dryers in their air lines to mini-
mize the amount of water condensation that is sprayed through the air
line of the TRG-5. Air compressors produce warm, moist air which con-
densates in air delivery lines during pumping. If allowed to travel into
a sprayer, this moisture can corrode or freeze its air lines or regulators.
A simple air dryer installed in the hose air lines can prolong the life of
spraying equipment. Typically, an air dryer is a separator or drain with
a plug or valve that is oset from the line to trap water build-up before
it leaves the air line through connectors. Air lines should be drained
monthly if they are used frequently.
Steps for operation
1. Connect external air supply to the air inlet hose
2. Disconnect tank quick connects and open tank.
3. Prepare tank mix.
4. Close tank and reconnect all quick connects.
5. Disconnect spray gun quick connect sockets from the
frame quick connect plugs; connect spray gun quick
connect sockets to handgun plugs.
6. Turn on air at external supply.
7. Set unit air pressure as described on the previous page.
8. Set tank pressure regulator to 12-15 PSI.
9. Aim spray gun at spray target and engage trigger;
lock trigger if desired. Note: It takes about 2 minutes for
liquid to spray regularly without air bubbles.
10. Apply spray.
After spraying:
1. Disengage trigger when spray application is complete.
2. Turn ball valve o.
3. Disconnect tank quick connects and open tank; clean tank
interior and exterior; ll tank with 2 gallons of clean, soapy
water; close tank and reconnect tank.
4. Unplug spray gun quick connect sockets from the spray
gun quick connect plugs.
5. Disassemble liquid lter assembly.
6. Plug spray gun quick connect plug (which is still threaded
in the 1/8” NPT body) into spray gun liquid quick connect
socket. 1.
7. Turn ball valve on.
8. Unplug spray gun liquid quick connect plug from spray gun
liquid quick connect socket to stop ow of liquid.
9. Clean liquid lter assembly.
10. Reassemble liquid lter assembly.
11. Reconnect spray gun quick connects.
Air line drier

9
ESS TRG OWNER’S MANUAL
Sil-Glyde is an excellent silicone-based
protective lubricant. You may purchase
it directly from ESS. S/N # 3174
TRG-5 maintenance schedule
Please observe the recommended maintenance schedule for your TRG-5 sprayer in order to preserve
spray quality and the working life of the unit. If you use heavy wettable powders to spray or if you operate
the TRG-5 in a dusty environment, you may need to clean liquid and air lters more often than these rec-
ommendations. Visually inspect the nozzle and trigger assembly often and clean as necessary.
Clean the liquid lter assembly After every spray application
Empty the bowl lter of water Weekly or when air pressure drops**
Clean the nozzle When the spray pattern is dierent than when
the TRG-5 was new
Clean the spray gun When unequal streams of water come out of the
nozzle
Clean the liquid lter at hose reel and spray gun After every spray application
Recharge batteries in spray gun When charging indicator does not light during
operation (about every 8 operational hours)
Replace batteries in spray gun When batteries no longer hold a sucient
charge to complete a ten-hour work session
or show other signs of battery deterioration
Clean air inlet lter As needed
Check and tighten bolts Every month
** Whichever comes rst
12. Engage the trigger and allow remaining quart of water to
run through to clean spray gun; allow air to ow for
30 seconds more to reduce possibility of corrosion.
13. Disconnect the spray gun quick connects and the tank
quick connects.
14. Disconnect air inlet hose from external air source.
15. Apply silicone spray or a similar lubricating oil to all quick
connect sockets.
16. Connect the spray gun quick connect sockets to frame
quick connect plugs; reconnect the tank quick connects.

10
ESS TRG OWNER’S MANUAL
Notes

11
ESS TRG OWNER’S MANUAL
REFERENCE SECTION
Quick connects
There are four sets of quick connects (plug and socket) on the sprayer:
tank inlet
tank (liquid) outlet,
spray gun air inlet
spray gun liquid inlet
To disconnect the quick connects:
1. Slide the sleeve on the quick connect socket up.
2. While holding the sleeve up, pull the socket o the quick
connect plug.
To connect the quick connects:
1. Slide the sleeve of the quick connect socket up.
2. While holding the sleeve up, push the socket onto the quick
connect plug.
3. Release the sleeve.
4. Pull on the socket body to ensure that it is properly seated
and cannot be pulled o the plug when the sleeve is down.
The Tank’s inlet and outlet plugs are
clearly marked,.
Quick connect plug for liquid (gray)
Quick connect plug for air (red)
Pull back on the socket sleeve to open the socket for connection or
disconnection. To latch, push the sleeve toward the plug..

12
ESS TRG OWNER’S MANUAL
The hose reel contains the twin line hose running from the main unit
to the handgun. Air (red hose) and liquid (gray hose) are plumbed into
the hose reel from the compressor and liquid tank. There is a lter
attached to the liquid inlet on the hose reel. The lter consists of a
strainer (pictured below), O-ring (installed on cap) , and bowl-shaped
cap. Periodically check and clean this lter to clear any debris that ac-
cumulates there. Replace the O-ring when it become worn.
The cap turns counter-clockwise (to the left) to open and clockwise (to
the right) to close.
Hose reel and liquid inlet filter
Liquid inlet lter
How to tell the cap end of the strainer
It’s important to replace the strainer in the correct direction. Carefully
examine the ends of the strainer. If you can see the terminus of the inte-
rior plastic ribs, that’s the “open” end. If there is a smooth plastic ring, that
is the “closed”end. Place the closed end into the lter cap (Remember:
CLOSED to CAP).
The ball valve (airflow On/Off)
The ball valve is a manually operated valve located at the end of the
red hose on the twin line hose. The ball valve allows or restricts airow
to the spray gun. Airow is stopped when the lever is perpendicular to
the hose. Airow is open when lever is parallel to the hose

13
ESS TRG OWNER’S MANUAL
Stainless-steel tank
The TRG-5 has a 5-gallon (18.9 liter) stainless steel tank. When the com-
pressor is operating and the tank pressure gauge is set between 12-15
PSI, the liquid in the tank is continuously agitated. This helps prevent
separation and settling of the chemical mixture.
There is a pressure release valve lever on the tank lid that allows the
operator to release pressure in the tank before opening. When the
lever is horizontal, the tank is pressurized; when the lever is vertical,
the tank is not pressurized and can be safely opened. When the TRG-5
is running, you will hear a small amount of air escaping from the tank
lid even when the lid is fastened and latched. This is due to agitation
and is normal.
ESS recommends the use of
NUTRA-SOL cleaner which
can be purchased from ESS.
Order S/N#1566.
To open the tank:
1. Slowly open the Pressure release valve by turning it
counter-clockwise (left). This depressurizes the tank.
2. Pull the tank lid’s latch up.
3. Holding on to the latch, rotate the tank lid 90° clockwise.
4. Pull out the tank lid. Notice the direction of the tank lid in
relationship to the tank opening.
To close the tank:
1. Slide the lid into the tank opening, using the same direction
as when it was removed.
2. Rotate the lid 90° counterclockwise.
3. While pulling the lid up to seal it against the tank opening,
push down on the lid latch until it is parallel with the
tank lid and seals tightly.
4. Close the Pressure release valve by turning it clockwise.
Note: Do not operate the sprayer when the tank lid is not securely
closed. Tank agitation is powerful and liquid may splash out if the lid is
not sealed.
The tank should be thoroughly cleaned immediately after each use
by triple-rinsing the tank; a commercially available tank cleaner like
Nutra-Sol may be used and is recommended when the TRG-5 is used to
spray wettable powders on a regular basis.
CAUTION:
TANK CONTENTS UNDER PRESSURE
Stand back when opening the
Pressure release valve.
Latched and pressurized Open (after being depressurized)
Pressure release valve
Note: Do not operate
the sprayer when the
tank lid is not securely
closed. Chemicals may
splash out onto the
operator if the tank is
open during operation

14
ESS TRG OWNER’S MANUAL
Incoming air pressure regulator
The air pressure regulator controls the amount of pressure sent to the
spray gun. Refer to page 6 instructions to determine the correct air
pressure settings.
Turn the external air source. on Locate the air inlet regulator (liquid-
lled gauge with a range of 0 to 100 PSI). Pull the adjustment knob’s
black plastic cover to unlock it.
Turn left (counter-clockwise) to decrease pressure.
Turn right (clockwise) to increase pressure.
Push the black plastic cover in to lock the new setting.
Note: For best results, set the pressure from a lower pressure to a high-
er pressure. If the pressure is set too high, adjust the regulator below
the desired pressure then adjust it up to the desired pressure.
To verify that the air pressure regulator functions properly:
1. Connect the air inlet hose to the air source.
2. Make sure that the air pressure regulator is set above 0 PSI
If the air pressure regulator is functioning, the gauge will register
above 0 PSI. If the gauge does not register above 0 PSI, contact ESS for
service.
Air pressure regulators
Incoming air pressure regulator
Tank pressure regulator
How do I tell the tank air pressure regulator from the
incoming air pressure regulator?
The tank pressure gauge/regulator
is mounted higher on the frame.
ranges from 0 to 30 PSI
output goes to tank
The incoming air pressure gauge/regulator
ranges from 0 to 100 PSI
output goes to the hose reel hub
Table of contents
Other ESS Paint Sprayer manuals
Popular Paint Sprayer manuals by other brands

Reliable
Reliable F1FR Series quick start guide

Vito Agro
Vito Agro VIPU12 instruction manual

Task Force Tips
Task Force Tips DECON/pak INSTRUCTIONS FOR SAFE OPERATION AND MAINTENANCE

Clarke
Clarke APK900 Operating & maintenance instructions

DeVilbiss
DeVilbiss COMPACT-X Service manual

Grouw!
Grouw! 12063 instruction manual