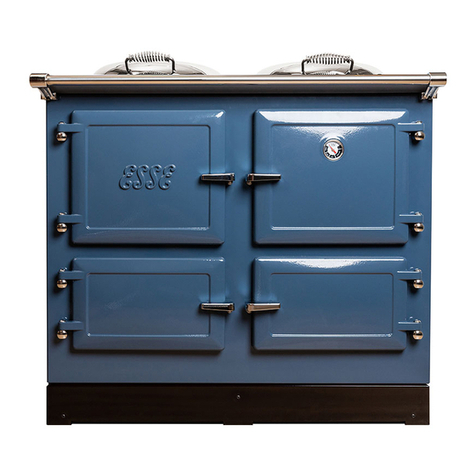
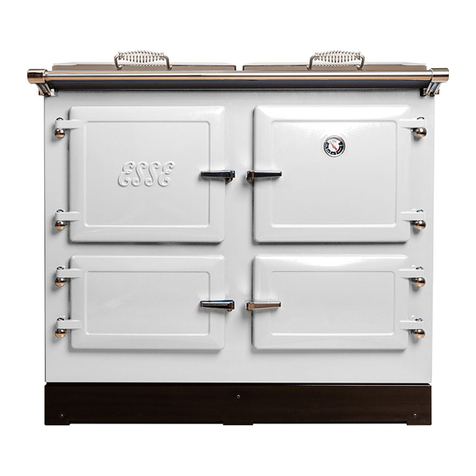
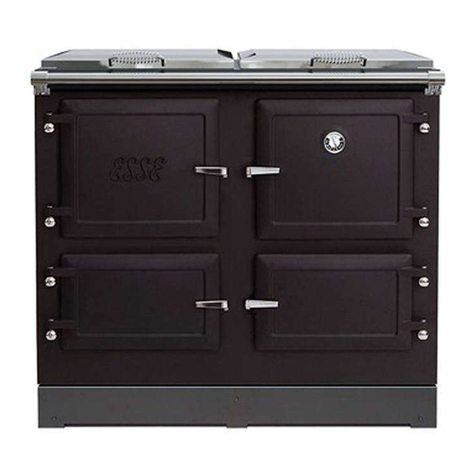
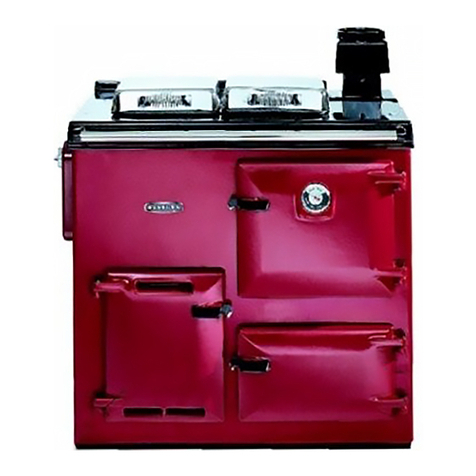
Esse 1000T User manual

1000T
Heat Storage Range Cooker
Instruction Manual
UK & I Version

2
CONTENTS
1. GENERAL HEALTH & SAFETY......................................................................................................3
2. WELCOME TO YOUR ESSE .........................................................................................................4
3. PRODUCT OVERVIEW................................................................................................................5
4. OPERATING INSTRUCTIONS ......................................................................................................6
THE DOORS.....................................................................................................................................6
SLUMBER ........................................................................................................................................7
THE CONTROLS ...............................................................................................................................7
THE CLOCK AND TIMER ..................................................................................................................8
THE OVENS ...................................................................................................................................12
THE STEAM VENTS........................................................................................................................13
THE GRILL......................................................................................................................................14
THE HOTPLATE..............................................................................................................................16
HEAT UP TIMES.............................................................................................................................16
THE INDUCTION HOB....................................................................................................................17
ESSE ACCESSORIES AND COOKWARE ...........................................................................................20
INSIDE DOOR LINERS ....................................................................................................................21
CLEANING & MAINTENANCE ........................................................................................................22
WARRANTY...................................................................................................................................23
TROUBLESHOOTING .....................................................................................................................24
PLANNING THE INSTALLATION .....................................................................................................25
5. INSTALLATION INSTRUCTIONS ................................................................................................25
REQUIRED SPACE..........................................................................................................................25
POWER SUPPLY.............................................................................................................................27
PRODUCT SPECIFICATION.............................................................................................................27
VENTILATION ................................................................................................................................27
UNPACKING THE APPLIANCE ........................................................................................................28
SWITCHING THE COOKER ON FOR THE FIRST TIME......................................................................28
3
All ESSE heat storage range cookers are designed and manufactured to be simple and efficient to
use, and we’ve taken great care to ensure that they meet the applicable safety requirements,
when appropriately installed and used. Before use, ensure you are familiar with the following:
The appliance can be used by children aged from 8 years and above and persons with
reduced physical, sensory or mental capabilities or lack of experience and knowledge if
they have been given supervision or instruction concerning use of the appliance in a safe
way and understand the hazards involved.
Children should not play with the appliance. Cleaning and user maintenance MUST not be
made by children without supervision.
WARNING: Accessible parts may become hot during use. Young children should be kept
away from the appliance.
The appliance must be installed on a level surface, capable of taking the weight of the
cooker. If installing on a base, the appliance must not be able to slip off the base.
WARNING: The appliance and its accessible parts become hot during use. Care should be
taken to avoid touching heating elements inside the ovens.
WARNING: Unattended cooking on a hob with fat or oil can be dangerous and may result
in a fire.
WARNING: Danger of fire. Do not store items on the cooking surfaces.
CAUTION: The cooking process has to be supervised. A short term cooking process has to
be supervised continuously.
Ensure that the kitchen is well ventilated. Natural ventilation holes within the room must
be left open, or install a mechanical ventilation device, such as an extractor hood.
WARNING: If the Induction hob glass is cracked, the cooker should be switched off and
isolated from the power supply, to avoid possibility of electric shock.
Metallic objects such as cutlery, cooking utensils and pan lids should not be placed on the
hob surface, as they may become hot.
WARNING: Any spillages on the bolster lids should be removed before they are opened.
WARNING: Do not use a steam cleaner to clean any part of this appliance.
The appliance must be installed in such a way that allows for disconnection from the
power supply after installation.
CAUTION: This appliance is not intended to be operated by means of an external timer or
separate remote-control.
If any of the supply cords are damaged, it must be replaced by the manufacturer, its
service agent or similarly qualified persons in order to avoid a hazard.
NEVER try to extinguish a fire with water, but switch off the appliance and then cover
flame e.g. with a lid or a fire blanket.
The appliance must not be placed behind a decorative door, so as to avoid overheating.
1. GENERAL HEALTH & SAFETY

4
Welcome to the ESSE family. All ESSE cookers are manufactured at our factory in Barnoldswick,
Lancashire, and we’re that if appropriately installed, maintained and cared for, your ESSE
Beforeyou switch onyour ESSE for the ensure that your installer has installed the cooker
inline with the of this manual, and that the has been
removed from the inside face of the four doors.
This appliance is designed for cooking only. Use for any other purpose could invalidate
the warranty.
These provide all the necessary to both install, then operate your ESSE, so
please retain them for reference. The key to your ESSE, including the serial
number, can be found on the data plate, located on the inside face of the top door. Please
quote the model and serial number, in any future with your retailer or the
manufacturer.
Data plate loca�on
2. WELCOME TO YOUR ESSE

5
Key features and parts
INCLUDED WITH YOUR ESSE
✔
Oven Shelves (X4)
✔
Oven Glove and Apron
✔
Grill Pan
✔
Wire Brush
✔
Roas�ng Dish
✔
Instruc�on Manual
3. PRODUCT OVERVIEW
Bolster lids
Steam vents
Inducon hob
Control panel
Slow cook oven
Hotplate
Top oven & grill
Boom oven

6
4. OPERATING INSTRUCTIONS
THE DOORS
The four cast iron doors are opened by lifting the chrome catch upwards, then swinging the door
forwards.Take care not to allow the door to swing open freely and clash with adjacent cabinets /
surfaces.
To close the doors, carefully but firmly push the door back into position, until the door catch
engages and holds the door shut.
Adjusting the door
catches
Over time, the door catches may need adjusting. This is typically a result of
the rope seals flattening, (and the doors becoming a little loose), or the cast
iron doors expanding naturally over time, (and becoming a little tight).
To adjust a door catch…
STEP 1
STEP 2
Open the door to be adjusted.
Using a 2mm Allen key, loosen the grub
screw on the underside of the handle, by
turning anti-clockwise.
STEP 3
STEP 4
Using a Philips head screwdriver, rotate the
screw head visible from the end of the
catch…
• Clockwise
Tighten the catch
• Anticlockwise
Loosen the catch
Re-tighten the 2mm grub screw, before
closing the door and reviewing whether it
now feels right. Repeat the process if
required.
4. OPERATING INSTRUCTIONS

7
4. OPERATING INSTRUCTIONS
SLUMBER
ESSE heat storage range cookers are designed to be permanently left on, ensuring the cooker is
ready to provide the unique surround heat for perfect cooking and baking.
However, when not in use, we recommend setting each cooking area to ‘slumber’, which will allow
the cooker to heat up to cooking temperature more quickly, whilst managing power consumption
and running costs. Keeping your ESSE in slumber will also allow you to enjoy all the benefits which
an ambient heat source brings.
THE CONTROLS
The top oven, bottom oven, grill, hotplate and induction hob are controlled by simply rotating the
appropriate dial. When the dial is rotated clockwise, the relevant indicator light will switch on, to
indicate that it is in use.
The controls are located behind the top left door.
Controls overview
1
Grill temperature dial
8
Top oven indicator light
2
Induction hob temperature dial
9
Bottom oven indicator light
3
Hotplate temperature dial
10
Suggested hotplate slumber setting
4
Top oven temperature dial
11
Suggested top oven slumber setting
5
Bottom oven temperature dial
12
Suggested bottom oven slumber setting
6
Grill indicator light
13
Induction setting display
7
Hotplate indicator light

8
4. OPERATING INSTRUCTIONS
THE CLOCK AND TIMER
The clock and timer allows for the temperatures of the top oven, bottom oven and cast iron
hotplateto either be adjusted manually, or to rise from slumber to any pre-selected temperature,
at a chosen time of day.
Timer controls
1
Clock Set Button
5
Control Dial
2
On Time Button
6
Countdown Timer LED
3
Off Time Button
7
Manual Operation LED
4
Countdown Timer Button
8
Light Sensor
Setting the clock
To set the clock…
1. Push and hold down the ‘Clock Set’ button (1), and rotate the
‘Control Dial’ (5) until the correct time is reached.
2. Release the ‘Clock Set’ button.
Your ESSE is factory set for the temperature of the hotplate and two main ovens to be controlled
manually, using the four temperature control dials hidden behind the top left door. When the
Manual Operation LED (7) glows orange, your ESSE is set to ‘Manual Control’.
However, using the timer, it is possible to programme the hotplate and two main ovens to heat up
from slumber, to any desired temperature and then back down to slumber, at a selected time of
day. For example, you could programme the top right oven to heat up from slumber to 180°C at
6.30pm, then back down to slumber at 8.30pm. This means that you do not have to remember to
manually raise the oven temperature, in advance of cooking in it.
NOTE: The timer incorporates a light sensor, (8), which reduces the brightness of the LCD time
display when there is low light, (ie, when the door is closed), so as to reduce power consumption
and prolong the lifetime of the timer.

9
4. OPERATING INSTRUCTIONS
Using the timer
By programing the timer, the hotplate and two main ovens are automatically
placed into slumber, (unless the individual temperature control dial is set to
0°C), which both provides a gentle background heat to the room, and
reduces the heat up time of the hotplate / oven(s). Your ESSE will then
automatically increase the temperature of the hotplate / oven(s), to the
desired temperature, at the desired time of day.
To programme the timer…
1. Set the hotplate / oven(s) to the desired temperature, using the
temperature control dials.
2. Set the hotplate / oven(s) desired ‘On’ time…
Push and hold down the ‘On Time’ button (2).
Rotate the ‘Control Dial’ (5) until the desired time is
reached*.
Release the ‘On Time’ button (2), to store the time.
3. Set the hotplate / oven(s) off time…
Push and hold down the ‘Off Time’ button (3).
Rotate the ‘Control Dial’ (5) until the desired time is reached.
Release the ‘Off Time’ button (3), to store the time.
4. Store the program…
Push and hold down both the ‘On Time’ (2) and ‘Off Time’ (3)
buttons simultaneously.
The screen will flash ‘OFF’, to show that manual operation
has been switched off, and that a timer program is active.
The four red LEDs will bounce on / off along the line of the
temperature control dials, and the ‘Manual Operation LED’
(7) will turn off, to indicate that the hotplate / oven(s) are in
slumber, within a heat up timer program.
When the selected ‘off’ time is reached, the orange ‘Manual Operation LED’
(7) will turn off and the hotplate / oven(s) will start cooling back down to
slumber.
* Remember to factor in at least 30 minutes to your ‘On Time’ for the hotplate / oven(s)
to heat up from slumber, before the time you want to start cooking.
You may want to temporarily override the heat up timer, either to manually move the hotplate /
oven(s) from slumber to a cooking temperature, (before the ‘On Time’ time is reached), or to cool
them from the set temperature, back down to slumber, (before the ‘Off Time’ time is reached).
Overriding the timer
to manually heat up
from slumber
To manually increase the temperature from slumber, whilst the timer is
programmed…
1. Set the hotplate / oven(s) to the desired temperature, using the
temperature control dials.

10
4. OPERATING INSTRUCTIONS
2. Push and hold down both the ‘On Time’ (2) and ‘Off Time’ (3)
buttons simultaneously.
3. The screen will flash ‘ON’, to show that manual operation has
been activated.
4. The hotplate / oven(s) respective LEDs will turn red and the
orange ‘Manual Operation LED’ (7) will turn on, to indicate that
they have started heating up to the set temperature.
The hotplate / oven(s) will remain at the set temperature until the pre-
programmed ‘Off Time’ time is reached, at which point they will start
cooling back down to slumber, as indicated by the four red LEDs bouncing on
/ off along the line of the temperature control dials, and the orange ‘Manual
Operation LED’ (7) turning off.
Overriding the timer
to manually cool
down to slumber
Tomanually return to slumber, whilst the timer is programmed and the
hotplate / oven(s) are on…
1. Push and hold down both the ‘On Time’ (2) and ‘Off Time’ (3)
buttons simultaneously.
2. The screen will flash ‘OFF’, to show that manual operation
remains off.
3. The hotplate / oven(s) will start cooling back down to slumber, as
indicated by the four red LEDs bouncing on / off along the line of
the temperature control dials.
The hotplate / oven(s) will remain in slumber until the pre-programmed ‘On
Time’ time is reached, at which point they will once again start heating up to
the temperature set on the temperature control dials.
Deactivating the
heat up timer
(returning to
manual operation)
To cancel the timer programming and return to manual operation, simply re-
programme the timer module, with the ‘On Time’ and ‘Off Time’ times set to
the same time, eg, 12.00 for both.
1. Set the hotplate / oven(s) on time to a notional time, eg, 12.00.
Push and hold down the ‘Time On’ button (2).
Rotate the ‘Control Dial’ (5) until 12.00 is reached.
Release the ‘Time On’ button, to store the time.
2. Set the hotplate / oven(s) off time to the same notional time, ie,
12.00.
Push and hold down the ‘Time Off’ button (3).
Rotate the ‘Control Dial’ (5) until 12.00 is reached.
Release the ‘Time Off’ button, to store the time.

11
4. OPERATING INSTRUCTIONS
3. Store the program.
Push and hold down both the ‘On Time’ (2) and ‘Off Time’ (3)
buttons simultaneously.
The screen will flash ‘ON’, to show that manual operation has
been activated, and that the heat up timer program has been
cancelled.
The orange ‘Manual Operation LED’ (7) will turn on, indicating
that your ESSE is once again set to manual operation.
Your ESSE is now in manual operation, so remember to adjust the
temperature control dials to 0°C, slumber or any other desired temperature.
The timer incorporates a countdown alarm, which can be set to count down any period of time.
Once the set time period has elapsed, the timer will beep until switched off.
Countdown alarm
To set the countdown timer…
1. Push and hold down the ‘Countdown Timer’ button (4).
2. Rotate the ‘Control Dial’ (5) until the desired time value is
reached (hours and minutes).
3. Release the ‘Countdown Timer’ button (4).
4. The orange ‘Countdown Timer LED’ (6) will turn on,
indicating that the countdown timer is active.
5. When the time period has elapsed, the timer module will
beep.
6. To cancel the beeping, press the ‘Countdown Timer’ button
(4) once.
7. The orange ‘Countdown Timer LED’ (6) will turn off.
To cancel the countdown timer, mid-programme, set the time value to
00:00.
PLEASE NOTE – The countdown timer does not affect the temperature
of the hotplate / ovens – it is purely an alarm.

12
4. OPERATING INSTRUCTIONS
THE OVENS
Your 1000T incorporates three cooking ovens, all of which incorporate ESSE’s patented wrap
around elements. The heating elements provide a unique even heat source from front to back and
top to bottom, so there’s no need to rotate oven trays, or adjust shelf heights. As a result, during
cooking the bottom of each oven can also be used to place oven trays on to.
Top oven
Variable temperature control up to 240°C.
Incorporates the grill, with a dedicated control.
Bottom oven
Variable temperature control up to 200°C.
Slow cook oven
Fixed temperature of around 85°C, ideal for slow cooking or plate
warming.*
Oven shelves
The oven shelves are designed to slide in and out of the ovens. They
incorporate a feature to prevent them from sliding forward and out of the
oven unintentionally.
To insert the shelves, offer the shelf up to the oven at a 45° angle, resting
the angled end of the wire shelf on the desired runner within the oven, and
gently push it forwards. Once the angled end has passed under the metal
pins on the side walls of the oven, swing the wire shelf down until it is
horizontal, then push it forward all the way into the oven.
To remove the shelf, repeat the process in reverse.
*To achieve and maintain the 85°C in the slow cook oven, the top and bottom ovens must be left
on at a minimum of slumber for several hours, allowing all of the cooker to fully heat up.
The oven shelves will be hot when the oven is in use, and for a time afterwards. Always
use an oven glove when adjusting their position.

13
4. OPERATING INSTRUCTIONS
Temperature gauge
Your ESSE incorporates a temperature gauge within the large oven door.
This can be used to provide an indication of the oven temperature, but due
to how the oven is heated, should not be relied upon to give an exact
temperature reading.
The Oven Gauge, with temperature guide
THE STEAM VENTS
All cookers produce steam when in use. Your ESSE incorporates two ‘steam vents’ located at the
rear of the top surface. The steam vents can be adjusted to either retain or release the steam,
depending upon what you are cooking in the ovens.
Opening and closing the steam vents

14
4. OPERATING INSTRUCTIONS
For example…
Steam vent closed
If you are cooking something which will benefit from retaining the moisture,
(such as baking a sponge cake), the steam vent can be left closed, to keep
the moisture within the oven.
Steam vent open
If you are cooking something which would benefit from the moisture
escaping, (such as roast potatoes), the steam vents can be swung open, to
allow the moisture to escape.
For certain items, (such as when roasting a joint or poultry), it may make sense to have the steam
vents closed throughout the majority of the cooking time, before opening it towards the end, to
crisp up the outside.
The Steam Vents are marked to indicate which oven they are linked to…
I
Top oven
II
Bottom oven
The steam vents can become hot during use, so always wear the supplied glove when
adjusting them, to open or close.
THE GRILL
The door must be left fully open when using the grill.
The grill is located within the top oven. When in use, the grill overrides the oven, so the top oven
elements will switch off when the grill is turned on. (The two bottom ovens and hotplate remain
unaffected by the grill being in use). If the top oven was in use when the grill was switched on, the
oven will switch back on automatically, once the grill is switched off.
The grill is switched on by rotating the control dial clockwise, and the power level set as
appropriate. The grill indicator light glows red when the grill is switched on, to indicate it is in use.
For best results, allow 4 – 5 minutes for the grill to heat up to temperature before starting to use it,
when it is heated up from cold.
As a safety feature, the grill is programmed to be active for a maximum of 30 minutes, and will
switch off automatically after this time period. If you wish to continue to use the grill, you must
manually turned the dial back to the ‘Off’ position, and then turn it back to the desired setting.

15
4. OPERATING INSTRUCTIONS
The supplied grill pan should be positioned on a wire shelf, which can be fitted on any of the four
heights of oven shelf runners. Typically the top shelf runner is used for grilling, but take care to
ensure that the food to be grilled does not touch the grill element.
We recommend positioning the wire shelf in the correct position, before switching on the grill.
Grill pan
The supplied grill pan comes in three parts – the pan, the wire rack and the
handle. The wire rack simply drops in place into the pan. To fit the handle,
first drop the wire hook over the inside of the pan, then slide it to the
centre, to lock in position.
We recommend removing the handle whilst grilling, so it does not get too
hot.
Assembling the grill pan
The towel rail may become hot when the grill has been used for a prolonged period. Do
not place towels or similar items on the towel rail during or immediately after grilling.

16
4. OPERATING INSTRUCTIONS
THE HOTPLATE
For your peace of mind, we fully test your ESSE cooker in our factory before it leaves us, so
as result, you may see some slight discolouration of the hotplate.
The hotplate can be used completely independently from the ovens, and the temperature can be
fully adjusted with the control dial. As with the ovens, we have suggested a position on the control
dial forslumber, but you can adjust this to suit your needs.
When set to maximum, the hotplate surface will reach temperatures of close to 350°C.
The bolster lid should be closed whilst the hotplate is heating up, to reduce the time taken to reach
the desired temperature. However, whilst the bolster lid is insulated, the top chrome face does still
get warm when the hotplate is in use, so care should be taken.
We strongly advise against placing any cookware, (including pans, casserole dishes, kettles, etc.),
directly onto the bolster lid surface, as this can cause irreparable scratches on the chrome finish.
You may want to invest in some round hob lid covers, which will protect the top surface of the
bolster lids. These are available through your retailer, or at www.esse.com.
Any spillages on the hotplate should be cleaned up immediately with a damp cloth.
HEAT UP TIMES
Your 1000Tis designed to be permanently left on, ensuring the cooker is ready to provide the
unique surround heat for perfect cooking and baking, provided by an ESSE. Keeping at least one of
the ovens on slumber will dramatically reduce the heat up times of the ovens and hotplate,
prevent a build-up of moisture, (which can lead to rusting), whilst also providing a gentle warmth
to your kitchen.
Power Share
Technology
ESSE heat storage range cookers incorporate unique technology which
shares power between the active elements on a cycle. This both reduces the
heat up time of the cooker, whilst also providing favourable power
consumption and running costs. The 3kW rating of the cooker is cycled
between the active elements, ensuring each element receives the full 3kW
of power. However, as a result, the more elements which are active, the
longer it will take to initially heat them up to temperature.
The heat up times for your ESSE vary, depending upon how many elements
are active, whether they are heating up from cold or slumber, the desired
cooking temperature, along with the ambient temperature of your kitchen.
However, as an approximate indication, from cold the hotplate takes in the
region of 25 – 30 minutes to heat up to cooking temperature, whilst the
ovens take in the region of 45 – 60 minutes.

17
4. OPERATING INSTRUCTIONS
THE INDUCTION HOB
The induction hob can be used completely independently from the ovens, and the temperature can
be fully adjusted with the control dial. The induction setting display indicates what setting the
induction hob is set to. Up to three pans can be used on the large induction hob, as indicated in the
pan placement section of this document.
Using pans on the induction hob
To get the best out of your induction hob, it’s crucial to only use the correct material, size and
shape of pans.
The correct
material
Due to the way induction hob technology works, it is critical that only pans of
the correct material are used. Typically, cookware made from cast iron,
stainless steel and composite (which incorporate a thick steel section within
the base), are appropriate for use on your induction hob. Appropriate pans
stick to magnets, so as a quick and simple check, offer a magnet up to the base
of the pan – if the magnet has a strong attraction, the pan is appropriate.
Pan sizes
Up to three pans can be used on the induction hob. However, the minimum
appropriate size of pan is 145mm diameter. Using a pan or cookware of a
smaller size may damage your induction hob.
Pan bases
To be most efficient, the base of the pan should be completely flat, and not be
curved upwards or downwards, or have ridges in it. In extreme cases, pan
surfaces that are not flat may not work at all on the induction hob.
When using cast iron pans, we recommend only using cookware with a base
that is treated, with a smooth enamel finish, or that has been ground flat.
Untreated cast iron, with a rough surface may scratch the glass top of your
induction hob.
When in use, the induction zone will generate a faint, repeating ticking noise. This is perfectly
normal and does not indicate that the pan is not appropriate to use.
We strongly recommend lifting pans off the induction zone and hob, rather than sliding
them, so as to not scratch or damage the glass induction top.

18
4. OPERATING INSTRUCTIONS
Using the induction hob
Pan detection
The induction hob has a built in pan detection system, which only supplies
power to the induction zone, if an appropriate pan has been detected.
If no appropriate pan has been detected, a flashing ‘U’ will be shown in the
induction zone control, indicating that no power is being supplied to the
induction zone.
This feature automatically cuts power to the induction zone when a pan is
temporally removed from the hob.
After use, switch off the induction zone by its control - do not rely upon the pan detector
to cut power.
Power boost
When cooking on an induction zone, typically one of the power settings
from 1 – 9 is appropriate to give the desired intensity of heat. However,
when bringing a pan to the boil, the power boost function can be use. This
function is indicated by a ‘P’ displayed within the zone display, and can be
found by gently rotating the induction hob dial clockwise, when set to 9.
This function will continue for a maximum of 5 minutes, after which the
setting will automatically drop down to ‘9’.
When using the power boost function, take care that the pan does not boil over,
particularly when covering the contents with a lid.

19
4. OPERATING INSTRUCTIONS
Automatic heat up
To quickly achieve cooking temperature, the automatic heat up feature
turns the induction to the power boost setting for a short period of time,
until the desired temperature is reached. At which point, the induction hob
automatically re-sets to the chosen power setting.
To activate the automatic heat up feature…
1. Place an appropriate pan on the induction hob.
2. Gently rotate the induction hob control dial anticlockwise,
holding it in position for 2 seconds, until you hear a beep, and the
induction hob display shows ‘A’ .
3. Then rotate the induction hob control dial clockwise, until you
reach the desired power setting. The induction hob display will
now alternate between showing ‘A’ and the chosen power
setting.
4. Once the pan has reached the chosen temperature, the induction
hob will re-set to the chosen power setting, which will be shown
in the induction hob display.
Residual Heat
Display
The technology used within your induction hob means the pan is heated
directly, and not the glass. However, the hot pan transfers heat back down
to the glass during use, leaving residual heat within the glass, even when the
pan has been removed.
To highlight this, the zone display will show ‘H’ for a short time after use, to
indicate that the glass remains hot.

20
4. OPERATING INSTRUCTIONS
Pan Placement
Up to three pans can be used on your induction hob. However, it is
important to ensure that the pans do not touch in two or more places, when
placed on the active induction hob. Doing so will create an extended
induction field, which may cause permanent damage to your pans.
Cooling fan
A cooling fan will switch on at times during use of the induction hob, to circulate air around the
electronics. This is to help maximise the life and efficiency of your induction hob. After switching
off the induction hob, the cooling fan should switch off within a few seconds.
ESSE ACCESSORIES AND COOKWARE
Your 1000T came supplied with an ESSE Roasting Dish, Grill Pan, Oven Glove and Apron. However,
additional ESSE cookware is available to purchase, through our cookware website at
www.esse.com/cookware
Our cookware range includes great items for use with your ESSE, including a Cast Iron Casserole
Dish, Cast Iron Griddle Pan, Stainless Steel Kettle and Bolster Lid Covers.
Table of contents
Other Esse Cooker manuals

Esse
Esse 990 ELX User manual

Esse
Esse 600X User manual

Esse
Esse INDUCTION EC4i Product guide

Esse
Esse INDUCTION EC2i Product guide

Esse
Esse 990 CH Installation and operation manual

Esse
Esse Plus2 User manual

Esse
Esse OC Installation and operation manual

Esse
Esse W35 User manual

Esse
Esse WN User manual

Esse
Esse 1000X User manual

Esse
Esse 600T User manual

Esse
Esse WN Installation and operation manual

Esse
Esse CAT Installation and operation manual

Esse
Esse EL13 AMP User manual

Esse
Esse Plus 1 User manual

Esse
Esse 990-EL User manual

Esse
Esse 1000 Series User manual

Esse
Esse CAT User manual

Esse
Esse GN User manual

Esse
Esse Plus2 User manual