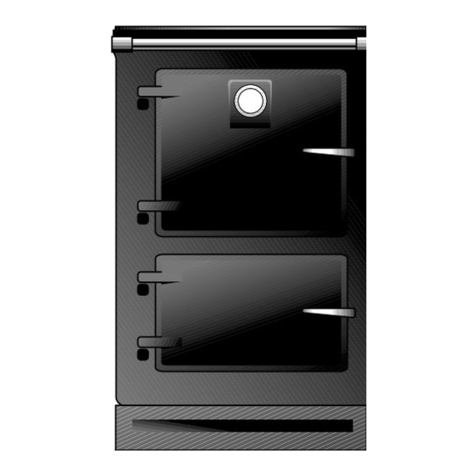
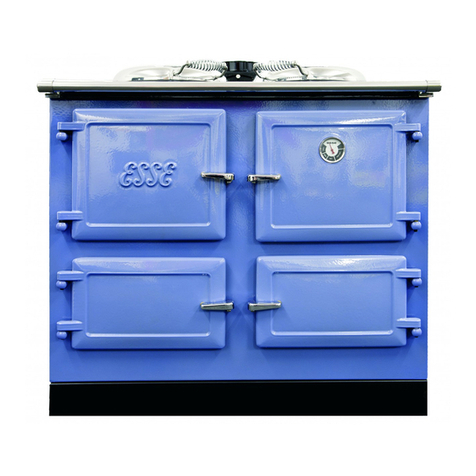
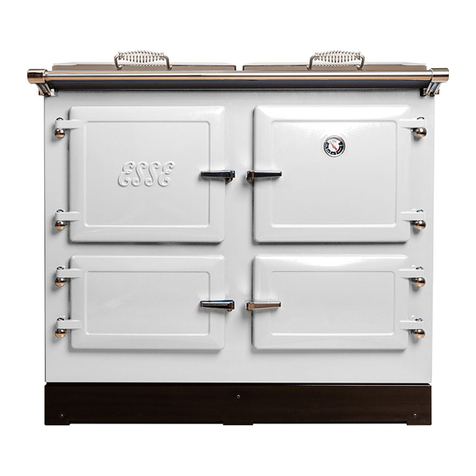
Esse INDUCTION EC2i Product guide

Esse Engineering Limited, Long Ing, Barnoldswick, Lancashire BB18 6BN
Tel: 01282 813235 Fax: 01282 816876 e-mail: enquiries@esse.com
Website: http://www.esse.com On-line Store: http://www.esseparts.com
10/10 (PP)
INSTR.CK-EC2i/u
INFORMATION FOR USE WHEN ORDERING SPARES:
Model:__________________________________
Serial Number: ___________________________
Colour: _________________________________
Conditions of Guarantee
Your ESSE cooker is guarantee against efects arising from faulty manufacture for two years, subject to the following express con itions:
• A suitably qualifie person must install the cooker, an upon installation the etails must be recor e on the warranty car an
registere with ESSE by returning the correctly complete car . The guarantee perio commences upon elivery of the cooker.
• The cooker has been use for normal omestic purposes only, an in accor ance with the manufacturer’s instructions.
• The cooker has not been service , maintaine , repaire , taken apart, or tampere with by any person not authorise by us.
• An approve ealer or representative must un ertake all service work un er this guarantee.
• Any cooker or efective part replace shall become the Company’s property.
Exclusions
This guarantee oes not cover:
• Damage or calls resulting from transportation, improper use or neglect.
• Parts eeme to be replaceable in the normal usage of the cooker; e.g. thermostats, elements, in uction hob elements, fans etc.
• Control Panel Markings; these can become amage if a har abrasive is use .
• Ceramic Glass Hob; any inherent flaw or efect in the ceramic glass will be imme iately evi ent.
• Enamel amage; the vitreous coating on your cooker is in effect an extremely thin layer of glass an as such isplays all the characteristics
of glass. It can easily be amage by impact, or by spillage of col liqui s onto a hot surface. Such amage cannot be covere un er
this guarantee. (See also intermittent use of your cooker, below).
This guarantee is personal to the original purchaser an is non-transferable.
Intermittent Use of Your Cooker
In the event of intermittent use an prolonge shut own, it shoul be note that in some circumstances enamel may be isplace ue to
ingress of amp. Whilst this is rare, it is most likely to occur in situations where the unuse cooker remains in an unheate property. There is a
layer (known as the groun coat) between the vitreous enamel surface an the cast iron. Groun coat is porous an if expose (e.g. after a chip
in the vitreous enamel coat), may allow amp to penetrate behin the vitreous enamel an sprea through the groun coat. Surface oxi isation
of the cast iron may thereafter occur, causing the vitreous enamel to fall off. Such amage will not be covere by your warranty. We
recommen that a light coating of petroleum jelly be applie to any amage areas when the cooker is not in use to help keep out the amp.
Customer Care
In the event you shoul require spare parts, please or er through your ESSE ealer. Alternatively from our online spares store.
Shoul you have cause for issatisfaction with your cooker, you shoul contact your ESSE ealer, who will, in most instances, be able to
offer you imme iate assistance. You will be require to give the following etails:
• Your name, a ress an postco e.
• Your telephone/contact etails.
• Clear an concise etails of the fault.
• Mo el an serial number of the cooker (foun on the ata plate insi e the warming cupboar on the back face).
• Purchase ate (please note that a vali purchase receipt or guarantee ocumentation is require for in-guarantee service calls).
We will then check that we have an accurately complete warranty car , if not then any work carrie out may be charge .
GUARANTEE
ESSE Electric Cooker
OPERATING & INSTALLATION INSTRUCTIONS
OPERATING & INSTALLATION INSTRUCTIONSOPERATING & INSTALLATION INSTRUCTIONS
OPERATING & INSTALLATION INSTRUCTIONS
MODEL: INDUCTION EC2i
0


INTRODUCTION
UNPACKING
CONTENTS
We are please that you have chosen an ESSE cooker. We woul ask you to rea the following
instructions very carefully. Correctly installe an operate , your ESSE cooker will give satisfactory
service for many years.
We feel certain that you will enjoy the warmth an comfort of your ESSE cooker an , perhaps more
importantly, you will more than enjoy the superb quality of the cooking.
The cooker Data Plate is locate insi e the left han si e warming oven oor.
After unpacking the cooker, remove all the packing from the top an bottom ovens inclu ing protective
film on oor liners. Examine the cooker for any amage, particularly to the hob glass.
If there is any amage to the cooker or anything is missing, please contact your supplier for a vice.
If the hob is cracke the cooker must not be connecte , an no part of it may be use .
Grill Page 10
Warming Cupboar Page 11
Before Cooking Page 11
Cleaning Page 11
Servicing Instructions Page 12
Technical Data Page 3
Unpacking Page 3
Your Cooker Page 4
Spacing & Dimensions Page 5
Connecting the Cooker Page 6
Hob Page 6
Operation Page 7
Ovens Page 9
TECHNICAL DATA
ESSE, ENGLAND
ESSE, ENGLANDESSE, ENGLAND
ESSE, ENGLAND
40A
40A40A
40A
ESSE, ELECTRIC
ESSE, ELECTRICESSE, ELECTRIC
ESSE, ELECTRIC
-
--
-
250V
250V250V
250V
50 Hz a.c.
50 Hz a.c.50 Hz a.c.
50 Hz a.c.
VOLTAGE
VOLTAGEVOLTAGE
VOLTAGE
SUPPLY
SUPPLYSUPPLY
SUPPLY
MODEL
MODELMODEL
MODEL
SERIAL No.
SERIAL No.SERIAL No.
SERIAL No.
INPUT
INPUTINPUT
INPUT
314
1. Remove upper & lower locking grub screws from hinges using
3
/
16
" allen key provi e .
2. Using the same allen key, a just either or both eccentric pins in each oor hinge to level the oor.
3. Once the oor is level, lock the eccentric pins in place using the locking grub screws.
DOOR HINGE ADJUSTMENTS

4
YOUR COOKER
1. Top Oven Accessories
AccessoriesAccessories
Accessories
2. Bottom Oven 1 Grillpan Han le
3. Warming Cupboar 1 Roasting Dish
4. Bolster Li 1 Grillpan/Shallow Roasting Tray
5. In uction Hob 2 Oven Shelves
6. Removable Top Oven Shelf Support 1 Oven/Grill Shelf
7. Removable Bottom Oven Shelf Support 1 Plate Rack
8. Control Panel
Fig. 1
13
To Remove t e Fan Unit from t e Main Oven
Unscrew the six screws aroun the unit, pull the unit out with the wires attache , being careful no to allow
them to fall back into the oven. Remove the fan guar by unscrewing the fixing screws on the top an two
on the bottom of the unit.
To Remove the In uction Elements
Lift up the hinge top (see page 12).
Unbolt the 6 bolts hol ing the In uction support panel carefully. Each In uction coil will lift out.
To Replace the Element
Un o the 3 screws hol ing it, insert new element an replace wires.
To Replace the Motor
Unscrew the fan bla e nut, unbolt the 3 fixing bolts, replace motor ensuring the spacing nuts an
wires are correct!
Fig. 6

SERVICING INSTRUCTIONS
General Cleaning
Enamel is simply a coloure glass coating a e to the metal to give a urable an hygienic finish. It can
be amage by scratching or by a su en application of col liqui s onto its surface when hot. Clean
with a cloth an soapy water, preferably while the cooker is still warm. Proprietary non-scratch liqui
cleaners for enamelle surfaces may be use . Spille liqui s shoul be remove as soon as possible.
Fruit juices an other aci ic pro ucts can remove the gloss surface from the enamel if left for any length
of time. A stainless steel cleaner can be use for cleaning the hob li s, the oor han les an the control
knobs. Do not use scouring pow ers or pastes, scouring pa s or oven cleaners on the control panel
fascia plate as this may amage the markings.
The cooker oes not require regular servicing, but has been esigne so that internal components are
easy to replace in the event that they become faulty.
It is preferable that access to internal parts is ma e by lifting the hinge hob.
All the oven an grill elements can be remove an replace from the front of the cooker through the
oven openings.
To inge t e Cooker Top (see Fig. 6 on Page 13)
1. Pull the unit 10mm from the back wall then un o the two screws hol ing the top own. Slowly lift up
the top until the limit chain stops the top lifting up any higher. Pull up the prop an be careful to
position it correctly in the recess on the un ersi e of the top.
To Remove t e Base Element from t e Bottom Oven
1. Remove the shelves an shelf supports from the oven.
2. Remove the two screws hol ing own the oven base at each si e. Remove the base.
3. Un o the screw fastening the element to the si e of the oven. The element can then be pulle out of
the base of the oven. The electrical wire connections shoul stay attache to the element as it is
pulle from the oven. The element wire terminals can then be swappe from the faulty element to the
new element. Take care not to let the element wire connections fall back insi e the cooker before
they are reconnecte to the new element.
To Remove t e Upper Elements/Grill Element from t e Top or Bottom Oven
1. Un o the single screw fastening the element to the si e of the oven.
2. Loosen the screws on the element support brackets. The support brackets can then be rotate clear
of the elements allowing the elements to fall.
3. The electrical wire connections shoul stay attache to the element as it is lowere . The element wire
terminals can then be swappe from the faulty element to the new one. Take care not to let the
element wire connections fall back insi e the cooker before they are reconnecte to the new
element.
Isolate the electrical supply before any repair work.
12 5
All imensions are shown in mm.
The cooker weighs 200kg an so the floor must be capable of withstan ing the loa .
If the floor is not level the cooker shoul be ma e level with the use of packing pieces. The cooker oes
not require access via the si e panels once it is installe an so kitchen units can be butte up to the
si es of the cooker.
It is not recommen e that the cooker be positione below wall cupboar s, as heat an steam from the
cooker may cause amage to the cupboar an its contents.
SPACING & DIMENSIONS
10
Fig. 2 Fig. 3

CONNECTING THE COOKER
The mains supply cable must be securely clampe by the cable clamp so that any
tension applie to the supply cable must not be transmitte through to the terminal block.
For your own safety, we recommen that a competent person, such as a qualifie electrician, install your
cooker. The cooker shoul be installe in accor ance with the latest E ition of the IEE Regulations.
The cooker must be connecte to the correct electrical supply (as state on the rating plate, situate
insi e the warming cupboar oor) through a suitable cooker control unit incorporating a ouble pole
switch having a contact separation of at least 3mm in all poles, a jacent to (but not above) the cooker.
We recommen that the cooker circuit be rate to 45amps. We recommen that 6mm P.V.C. insulate
twin an earth cable is use to connect the cooker to the cooker control unit.
The cable must be BASEC or HAR approve . Preferably allow sufficient cable length for the cooker to be
pulle out if nee be, but o not let it hang closer than 50mm (2") to the floor. The cable can be loope if
necessary, but make sure that it is not kinke or trappe when the cooker is in position.
We supply a length of cable rea y to connect to the 45 amp switch
Access to the cooker terminal block is by lifting the hob, (see Fig 6, page 13).
This pro uct complies with vali EMC stan ar s, therefore no isturbances with other electronic evices
shoul occur. Users fitte with a pacemaker or other electronic implant are recommen e to check with
the manufacturer of that evice to ensure it is in compliance with the appropriate regulations relative to
EMC stan ar s.
HOB SAFETY POINTS
• The cooking surface may get hot even in the case of in uctive heating, as a hot pan will transfer
some heat back to the glass surface.
• Do not leave the hob switche on with the bolster own.
• It is ina visable at any time to leave a heating element switche on without a pan in position as this
wastes energy, an coul make marks more ifficult to remove.
• Never cook irectly on the hob surface without a cooking pan as this will result in amage to the
surface of the hob.
• Never use the hob as a worktop surface as amage may occur to the smooth surface of the hob.
• Never rag or sli e pans on the hob surface, as this will cause scratches in the surface of the hob.
• Never leave any utensils, foo or combustible items on the hob when it is not in use.
• Never place plastic foil, or plastic containers on the hob as amage will occur.
• Always ensure that the base of the utensil is ry before placing it on the hob.
This cooker must be earthe .
HOB
6
WARMING CUPBOARD
The warming cupboar is not in epen ently heate but picks up heat from the top an bottom
oven. The temperature of the warming cupboar epen s on the temperature in the top an the
bottom oven an the length of time for which either oven has been on. As a rough gui e, the warming
cupboar will reach a temperature of 60°C after the top oven has been on for one hour. A plate rack
is supplie in the warming cupboar for hol ing up to eight plates, but this can be remove to allow
larger items to be warme .
Remove plastic protective covers from inner oor linings, lift up li s an hinge covers.
Before you cook for the first time, it is recommen e that the top an the bottom oven be switche
on at full power for about an hour in or er to burn off any initial o ours. The grill shoul also be
turne on, with the top oven oor open, for approximately 15 minutes before it is use for the first
time. Clean the hob surface with Ceramic Hob Cleaner an Con itioner. This applies a thin protective
film to the hob, making it easier to clean, an prolonging its life.
Hob Cleaning
It is recommen e that the hob be cleane aily with Hob Brite cleaner. Normally cleaning shoul be
carrie out when the hob is coole , but, if jam, fruit or anything with a high sugar content is spille on the
hob, or plastic or aluminium is melte onto the hob, clean it off imme iately, as amage to the hob can
result. Switch off the hob an use a metal spatula, palette knife or scraper to remove the spillage. TAKE
CARE, as the spillage an the hob may be very hot.
Do not use scouring pow ers or paste, wire wool scouring pa s or oven cleaners on the hob as these
may cause amage to the hob surface.
Oven Cleaning
Both the ovens an the warming cupboar can be cleane using normal oven cleaners. The shelf
supports in the top an bottom ovens can be remove to make cleaning easier. There is no nee to try to
clean up un er the grill area as this top part of the oven is self cleaning.
Never use excessive amounts of water to clean your cooker.
For your own safety, always switch off your cooker at the mains supply an allow cooling
before cleaning.
BEFORE COOKING
If the cooker is ON for prolonge perio s any plates in the warming cupboar may
become very hot.
CLEANING
11
7
10
• Never use utensils with rough bases.
• It is important that any spillage is ealt with before the hob is use again, otherwise it may become
bake on.
• Remove any spillage of high sugar content, such as jam, imme iately. Use a pan, which is large
enough to prevent boil over or spillage.
• Before using the hob for the first time we recommen you clean the glass surface with ceramic hob
cleaner an con itioner, such as Hob-brite. This applies a thin protective film to the hob, making it
easier to clean an prolonging its life.
Operation
• It is essential to use pans suitable for in uction cooking. These have to have a ferrous content, so
cast iron an magnetic stainless steel are i eal but copper, aluminium an ceramic pans will not
normally work.
• There are left an right in uction zones controlle separately by the 2 knobs as shown in Fig. 4.
• To turn on the zone, lift the bolster li to expose the cooking area an turn the appropriate control
knob clockwise. The further it is turne , the higher the power.
• Temporary extra power boost is achieve by hol ing the control knob against the maximum setting
an manually overri ing the spring resistance built in to the control.
• The hob itself oes not heat up. The power will transfer irectly to a pan place on the hob.
• To re uce power an to turn the power off, turn the control knob counter-clockwise.
• Both left an right zones may be use simultaneously.
• Do not place or leave an empty pan on the hob, nor put metal utensils or objects on or too near the
hob as they may become hot.
C ild Lock Function
This prevents switching on of the in uction hob. Whilst activate , no cooking zone can be use .
The Chil Lock mo e is activate by overwin ing the two knobs clockwise for more than 5 secon s, or
one or both knobs anticlockwise for more than 5 secon s.
The Chil Lock is isable by hol ing both knobs overwoun anticlockwise for more than 5 secon s.
Pan Detection
After 10 minutes without etecting any pan, the hob switches off automatically an can only be switche
on again after the knob has been returne to the 'OFF' position first.
Before cooking for the first time please turn on the ovens an grill in or er to burn off any
newness smells an manufacturing resi ue.
GRILL
The Grill will not operate unless the Top Oven control is in the 'OFF' position. Only use the
grill with the top oven oor open.
Operation
Turn the control knob clockwise to click 'ON' the grill an continue turning clockwise to increase the
grilling temperature. Or, turn an click the grill knob anti-clockwise to instantly turn 'ON' the grill at
maximum setting. The knob can be turne clockwise or anti-clockwise back to '0' to switch 'OFF' the grill.
When grilling, the grillpan/shallow baking tray supplie can be sli un er the grill shelf for catching
crumbs or fat. The grillpan han le will work only if the grill tray is correctly in position un er the grill shelf.
Grillpan Handle/Grill Safety Points
• When attaching the grillpan han le, make sure it is in the mi le of the grillpan.
• Do not leave the grillpan han le attache to the grillpan whilst grilling, as it will become hot. Use it
only when moving the grillpan.
• Only operate the grill with the top oven oor open.
Only operate the grill with the top oven oor open.Only operate the grill with the top oven oor open.
Only operate the grill with the top oven oor open.
• Ensure that the grillpan is correctly place between the shelf runners when grilling.
• The towel rail may become HOT after long perio s using the grill.
• Do not place towels or any other items over the towel rail when grilling.
• Do not line the grillpan with aluminium foil.
Accessible parts may become hot when the grill is in use. Chil ren shoul be kept away.
Grillpan Han le
Oven/Grill Shelf
Grillpan/Shallow Baking Tray
Fig. 5
The grill must never be operate with the top oven oor close .

9
8
Top Oven Control
Bottom Oven Control
Grill Control
Left Si e In uction Hob Control
Right Si e In uction Hob Control
Fig. 4
Operation
The large top oven is fan assiste an the smaller bottom oven is conventional, both are controlle
thermostatically. To switch one of the ovens 'ON', turn the correspon ing knob on the control panel
(see Fig. 4) clockwise to the require temperature marking. The temperature markings on the control
panel are in egrees Celsius. The in icator light will illuminate to show that the oven is heating up. When
the oven reaches the require temperature the in icator light will go out. All the shelves can be use in
either the top or bottom oven.
Top Oven Temperature Guide
A thermometer in the oor gives an in ication of the oven temperature, but since it is in the oor itself, the
thermometer will react if the oor is opene an the thermometer rea ing may fall consi erably. When
the oor is close , the thermometer will recover slowly to in icate the oven temperature.
High efficiency fan oven : It may be necessary to a just either cooking times or temperatures if transferring
recipes from conventional ovens. For example, if a recipe states 180°C, it may require a fanne oven
temperature of 160°C. Ensure there is sufficient space aroun the foo to allow air circulation.
As this is a high efficiency oven you may notice an emission of steam when the oor is opene .
Heat istribution throughout the oven is very even, meaning there are no heat zones an no flavour trans-
fer, thus allowing ifferent ishes to be cooke together if require . However, if more than one item is
being cooke then cooking times may nee to be increase slightly.
Heating
With the bottom oven turne on at a low setting the cooker will become warm to the touch an will ra iate
heat into the kitchen. At a setting of 80°C the bottom oven will consume approximately 1/3 kW of
electricity per hour.
Condensation
Con ensation will be pro uce when cooking foo with a high water content, especially if the bo y of the
cooker is col . Before cooking, pre-heat the oven until the cast iron oor becomes warm, this will re uce
the amount of con ensation when the foo is pro uce .
Excess con ensation may be pro uce when the ovens are operate for the first few times an this will
commonly show itself in the oor thermometer. This will re uce each time the ovens are use .
Oven Safety Points
• When using the oven shelves ensure the shelves are correctly place between the shelf runners.
• Always use the oven gloves provi e when removing foo from either the oven or grill when foo is
cooke .
.
OVENS
The front, top an oors of the cooker may become hot after long perio s of cooking.
Keep chil ren an pets away.
Table of contents
Other Esse Cooker manuals

Esse
Esse 1000X User manual

Esse
Esse WN Installation and operation manual

Esse
Esse 1000 WN User manual

Esse
Esse 500-EL User manual

Esse
Esse CAT User manual

Esse
Esse WN User manual

Esse
Esse 1000T User manual

Esse
Esse 990 CH Installation and operation manual

Esse
Esse 990 CH Installation and operation manual

Esse
Esse W35 User manual

Esse
Esse Plus2 User manual

Esse
Esse 990-EL User manual

Esse
Esse 600T User manual

Esse
Esse 990 ELX User manual

Esse
Esse EL13 AMP User manual

Esse
Esse GN User manual

Esse
Esse CAT Installation and operation manual

Esse
Esse INDUCTION EC4i Product guide

Esse
Esse OC Installation and operation manual

Esse
Esse WN User manual