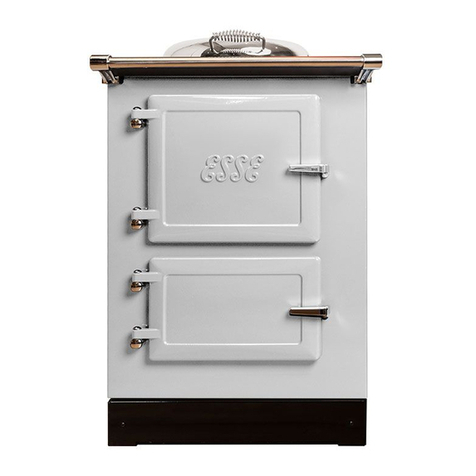
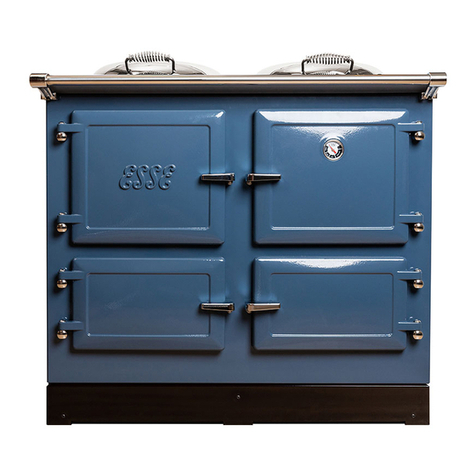
Esse INDUCTION EC4i Product guide

Esse Engineering Limited, Long Ing, Barnoldswick, Lancashire BB18 6BN
Tel: 01282 813235 Fax: 01282 816876 e-mail: enquiries@esse.com
Website: http://www.esse.com On-line Store: http://www.esseparts.com
08/11 (PP)
INSTR.CK-EC4i/u
INFORMATION FOR USE WHEN ORDERING SPARES:
Model:__________________________________
Serial Number: ___________________________
Colour: _________________________________
Conditions of Guarantee
Your ESSE cooker is guaran eed agains defec s arising from faul y manufac ure for wo years, subjec o he following express condi ions:
• A sui ably qualified person mus ins all he cooker, and upon ins alla ion he de ails mus be recorded on he warran y card and
regis ered wi h ESSE by re urning he correc ly comple ed card. The guaran ee period commences upon delivery of he cooker.
• The cooker has been used for normal domes ic purposes only, and in accordance wi h he manufac urer’s ins ruc ions.
• The cooker has no been serviced, main ained, repaired, aken apar , or ampered wi h by any person no au horised by us.
• An approved dealer or represen a ive mus under ake all service work under his guaran ee.
• Any cooker or defec ive par replaced shall become he Company’s proper y.
Exclusions
This guaran ee does no cover:
• Damage or calls resul ing from ranspor a ion, improper use or neglec .
• Par s deemed o be replaceable in he normal usage of he cooker; e.g. hermos a s, elemen s, induc ion hob elemen s, fans, energy
regula ors, swi ches e c.
• Con rol Panel Markings; hese can become damaged if a hard abrasive is used.
• Ceramic Glass Hob; any inheren flaw or defec in he ceramic glass will be immedia ely eviden .
• Enamel damage; he vi reous coa ing on your cooker is in effec an ex remely hin layer of glass and as such displays all he charac eris ics
of glass. I can easily be damaged by impac , or by spillage of cold liquids on o a ho surface. Such damage canno be covered under
his guaran ee. (See also in ermi en use of your cooker, below).
This guaran ee is personal o he original purchaser and is non- ransferable.
Intermittent Use of Your Cooker
In he even of in ermi en use and prolonged shu down, i should be no ed ha in some circums ances enamel may be displaced due o
ingress of damp. Whils his is rare, i is mos likely o occur in si ua ions where he unused cooker remains in an unhea ed proper y. There is a
layer (known as he groundcoa ) be ween he vi reous enamel surface and he cas iron. Groundcoa is porous and if exposed (e.g. af er a chip
in he vi reous enamel coa ), may allow damp o pene ra e behind he vi reous enamel and spread hrough he groundcoa . Surface oxidisa ion
of he cas iron may hereaf er occur, causing he vi reous enamel o fall off. Such damage will no be covered by your warran y. We
recommend ha a ligh coa ing of pe roleum jelly be applied o any damaged areas when he cooker is no in use o help keep ou he damp.
Customer Care
In he even you should require spare par s, please order hrough your ESSE dealer. Al erna ively from our online spares s ore.
Should you have cause for dissa isfac ion wi h your cooker, you should con ac your ESSE dealer, who will, in mos ins ances, be able o
offer you immedia e assis ance. You will be required o give he following de ails:
• Your name, address and pos code.
• Your elephone/con ac de ails.
• Clear and concise de ails of he faul .
• Model and serial number of he cooker (found on he da a pla e inside he warming cupboard on he back face).
• Purchase da e (please no e ha a valid purchase receip or guaran ee documen a ion is required for in-guaran ee service calls).
We will hen check ha we have an accura ely comple ed warran y card, if no hen any work carried ou may be charged.
GUARANTEE
ESSE Elec ric Cooker
OPERATING & INSTALLATION INSTRUCTIONS
OPERATING & INSTALLATION INSTRUCTIONSOPERATING & INSTALLATION INSTRUCTIONS
OPERATING & INSTALLATION INSTRUCTIONS
MODEL: INDUCTION EC4i
0

The cooker does no require regular servicing, bu has been designed so ha in ernal componen s are
easy o replace in he even ha hey become faul y.
I is preferable ha access o in ernal par s is made by lif ing off he hob.
All he oven and grill elemen s can be removed and replaced from he fron of he cooker hrough he
oven openings.
To Remove the Base Element from the Bottom Oven
1. Remove he shelves and shelf suppor s from he oven.
2. Remove he wo screws holding down he oven base a each side. Remove he base.
3. Undo he screw fas ening he elemen o he side of he oven. The elemen can hen be pulled ou of
he base of he oven. The elec rical wire connec ions should s ay a ached o he elemen as i is
pulled from he oven. The elemen wire erminals can hen be swapped from he faul y elemen o he
new elemen . Take care no o le he elemen wire connec ions fall back inside he cooker before
hey are reconnec ed o he new elemen .
To Remove the Upper Elements/Grill Element from the Top or Bottom Oven
1. Undo he single screw fas ening he elemen o he side of he oven.
2. Loosen he screws on he elemen suppor bracke s. The suppor bracke s can hen be ro a ed clear
of he elemen s allowing he elemen s o fall.
3. The elec rical wire connec ions should s ay a ached o he elemen as i is lowered. The elemen wire
erminals can hen be swapped from he faul y elemen o he new one. Take care no o le he
elemen wire connec ions fall back inside he cooker before hey are reconnec ed o he new
elemen .
To Remove the an Unit from the Main Oven
Unscrew he six screws around he uni , pull he uni ou wi h he wires a ached, being careful no o
allow hem o fall back in o he oven. Remove he fan guard by unscrewing he fixing screws on he op
and wo on he bo om of he uni .
To Remove the Induction Elements
Lif off he op.
Unbol he 6 bol s holding he Induc ion suppor panel carefully. Each Induc ion coil will lif ou .
To Replace the Element
Undo he 3 screws holding i , inser new elemen and replace wires.
To Replace the Motor
Unscrew he fan blade nu , unbol he 3 fixing bol s, replace mo or ensuring he spacing nu s and
wires are correc !
SERVICING INSTRUCTIONS
Isola e he elec rical supply before any repair work.
UNPACKING
CONTENTS
The cooker Da a Pla e is loca ed inside he righ hand side lower oven door.
Af er unpacking he cooker, remove all he packing from he op and bo om ovens including pro ec ive
film on door liners. Examine he cooker for any damage, par icularly o he hob glass.
If here is any damage o he cooker or any hing is missing, please con ac your supplier for advice.
If he hob is cracked he cooker mus no be connec ed, and no par of i may be used.
TECHNICAL DATA
ESSE, ENGLAND
ESSE, ENGLANDESSE, ENGLAND
ESSE, ENGLAND
45A
45A45A
45A
ESSE, ELECTRIC
ESSE, ELECTRICESSE, ELECTRIC
ESSE, ELECTRIC
-
--
-
250V
250V250V
250V
50 Hz a.c.
50 Hz a.c.50 Hz a.c.
50 Hz a.c.
VOLTAGE
VOLTAGEVOLTAGE
VOLTAGE
SUPPLY
SUPPLYSUPPLY
SUPPLY
MODEL
MODELMODEL
MODEL
SERIAL No.
SERIAL No.SERIAL No.
SERIAL No.
INPUT
INPUTINPUT
INPUT
Hob Touch Con rols Page 9
Before Cooking Page 15
Cleaning Page 15
Servicing Ins ruc ions Page 16
Wiring Diagram Page 17
Opera ing Ins ruc ions Page 11
Technical Da a Page 3
Unpacking Page 3
Your Cooker Page 4
Spacing & Dimensions/Ex rac ion Page 5
Connec ing he Cooker Page 6
Ovens & Grill Page 6
Induc ion Hob Page 9
152

Remove plas ic pro ec ive covers from inner door linings.
Before you cook for he firs ime, i is recommended ha all ovens be swi ched on a full power for
abou an hour in order o burn off any ini ial odours. The grill should also be urned on, wi h he op
oven door open, for approxima ely 15 minu es before i is used for he firs ime.
Hob Cleaning
I is recommended ha he hob be cleaned daily wi h Hob Bri e cleaner. Normally cleaning should be
carried ou when he hob is cooled, bu , if jam, frui or any hing wi h a high sugar con en is spilled on he
hob, or plas ic or aluminium is mel ed on o he hob, clean i off immedia ely, as damage o he hob can
resul . Swi ch off he hob and use a me al spa ula, pale e knife or scraper o remove he spillage. TAKE
CARE, as he spillage and he hob may be very ho .
Do no use scouring powders or pas e, wire wool scouring pads or oven cleaners on he hob as hese
may cause damage o he hob surface.
Oven Cleaning
Ovens are coa ed in vi reous enamel and can be cleaned wi h normal oven cleaning produc s. Shelf
suppor s are removable for easier cleaning. The areas in he ops of he ovens are self cleaning and
cleaning should no be a emp ed here.
General Cleaning
Enamel is simply a coloured glass coa ing added o he me al o give a durable and hygienic finish. I can
be damaged by scra ching or by a sudden applica ion of cold liquids on o i s surface when ho . Clean
wi h a clo h and soapy wa er, preferably while he cooker is s ill warm. Proprie ary non-scra ch liquid
cleaners for enamelled surfaces may be used. Spilled liquids should be removed as soon as possible.
Frui juices and o her acidic produc s can remove he gloss surface from he enamel if lef for any leng h
of ime. The door handles and he con rol knobs can be cleaned using me al polish. Do no use scouring
powders or pas es, scouring pads or oven cleaners on he con rol panel fascia pla e as his may damage
he markings.
Never use excessive amoun s of wa er o clean your cooker and always clean up any
spillage immedia ely.
For your own safe y, always swi ch off your cooker a he mains supply and allow cooling
before cleaning.
BE ORE COOKING
CLEANING
314
YOUR COOKER
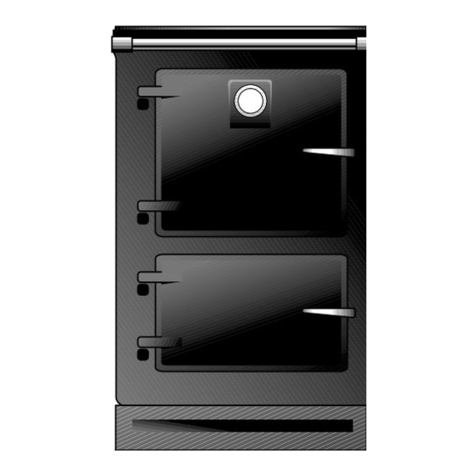
1. Main Fan Oven
2. Main Conven ional Oven & Grill
3. Slow Oven
4. Lower Conven ional Oven
5. 5 Zone Induc ion Hob
6. Oven Con rol Panel
ig. 1
1
2
3
4
5
6
1. Remove upper & lower locking grub screws from hinges using
3
/
16
" allen key provided.
2. Using he same allen key, adjus ei her or bo h eccen ric pins in each door hinge o level he door.
3. Once he door is level, lock he eccen ric pins in place using he locking grub screws.
DOOR HINGE ADJUSTMENTS

4 13
All dimensions are shown in mm.
The cooker weighs 200kg and so he floor mus be capable of wi hs anding he load.
If he floor is no level he cooker should be made level wi h he use of packing pieces. The cooker does
no require access via he side panels once i is ins alled and so ki chen uni s can be bu ed up o he
sides of he cooker.
I is no recommended ha he cooker be posi ioned below wall cupboards, as hea and s eam from he
cooker may cause damage o he cupboard and i s con en s.
An ex rac or may be used wi h his appliance.
SPACING & DIMENSIONS
ig. 2 ig. 3
626
900
990
EXTRACTION
If he appliance is disconnec ed from he mains supply, he lock func ion will be
deac iva ed.
Lock function
The 'LOCK' func ion can be used o preven he hob from being swi ched on unin en ionally, or o preven
he se ings being changed. This is in ended o preven children and hose unfamiliar wi h he produc
from opera ing he hob.
To opera e he lock func ion in order o preven he cooking zones being swi ched on, swi ch on he hob
so ha all he displays show '0'. Now ouch he 'LOCK' sensor (7) for approxima ely 2 seconds. An LED
nex o he sensor will come on, and a one will sound. The hob will swi ch off af er en seconds. Now,
when he power bu on is ouched, all he displays will show '0' and he LED nex o he lock sensor will be
illumina ed. None of he o her sensors will work a his s age, so i is no possible o opera e any of he
cooking zones. To swi ch off he lock func ion, ensure ha displays are on, ( ouch he power bu on o
swi ch on he hob if he LEDs are no illumina ed). Now ouch he lock sensor for wo seconds. The LED
nex o he lock sensor will go ou and he hob can be opera ed normally.
The 'LOCK' func ion can also be used o lock he hea ing elemen s on o he selec ed power se ing.
Af er selec ing he desired hea ing elemen se ing, ouch he 'LOCK' sensor for wo seconds un il he
alarm sounds and he 'LOCK' LED illumina es. The lock func ion is swi ched off as described above.
Noises
Various noises may be heard when using an induc ion cooking pan, depending on how he pan is
cons ruc ed. Noises may include a buzzing sound, par icularly a higher power se ings, clicking/cracking
or whis ling. The noise will ge louder if he pan base is we . I is recommended o use a dry pan base.
In addi ion, he appliance has a cooling fan ha will come on during normal use, and will con inue o run
even af er he cooking zones have been urned off.
Operation limits
The hob will only opera e a a se power level for a limi ed period of ime before i swi ches off au oma ically.
This is o preven overhea ing and o pro ec he elec rical componen s.
Power setting Approximate operation limit
U 2 hours
1 8 hours 40 minutes
2 6 hours 22 minutes
3 5 hours 18 minutes
4 4 hours 20 minutes
5 3 hours 33 minutes
6 2 hours 50 minutes
7 2 hours 19 minutes
8 1 hour 53 minutes
9 1 hour 30 minutes
P 10 minutes (plus a further 80 minutes at level 9)

CONNECTING THE COOKER
The mains supply cable mus be securely clamped by he cable clamp so ha any
ension applied o he supply cable mus no be ransmi ed hrough o he erminal block.
For your own safe y, we recommend ha a compe en person, such as a qualified elec rician, ins all your
cooker. The cooker should be ins alled in accordance wi h he la es Edi ion of he IEE Regula ions.
The cooker mus be connec ed o he correc elec rical supply (as s a ed on he ra ing pla e, see page 3)
hrough a sui able cooker con rol uni incorpora ing a double pole swi ch having a con ac separa ion of
a leas 3mm in all poles, adjacen o (bu no above) he cooker. We recommend ha he cooker circui
be ra ed o 45amps. We recommend ha 6mm P.V.C. insula ed win and ear h cable is used o connec
he cooker o he cooker con rol uni .
The cable mus be BASEC or HAR approved. Preferably allow sufficien cable leng h for he cooker o be
pulled ou if need be, bu do no le i hang closer han 50mm (2") o he floor. The cable can be looped if
necessary, bu make sure ha i is no kinked or rapped when he cooker is in posi ion.
We supply a leng h of cable ready o connec o he 45 amp swi ch
Access o he cooker erminal block is by removing he rear access panel.
Con rolled by he 5 knobs posi ioned on he lef of he hob. Tempera ure markings are in degrees Celcius.
To swi ch one of he ovens on, urn he corresponding knob clockwise o he chosen empera ure. The
indica or ligh will illumina e o show ha he oven is hea ing and will go off when he oven has reached
selec ed empera ure.
Main an Oven
High efficiency fan assis ed 2kW, 37 li re oven. Hea s up quickly from cold and offers even cooking
empera ures hroughou he space; grea for ba ch cooking as he same resul s will be achieved on each
shelf. Recommended cooking imes can be reduced for his oven, saving even more energy. (See Figs. 1
& 4)
Main Conventional Oven
1.9kW 37 li re conven ional oven wi h 2kW grill. This capacious oven is ideal for roas ing and baking;
par icularly perfec for pies, pas ries and breads. A lower empera ures, i can also be used as a slow
cooker - ideal for ender Chris mas urkey! Unlike many radi ional range cookers, he EC4i includes
a full-wid h grill so you don' have o compromise he way you cook. The grill can also make his main
oven a browning oven. (See Figs. 1 & 4)
This cooker mus be ear hed.
OVENS & GRILL
I may be necessary o adjus ei her cooking imes or empera ures if ransferring recipes from
conven ional ovens. For example, if a recipe s a es 180C, i may require a fanned oven
empera ure of 160C. Ensure here is sufficien space around he food o allow air
circula ion.
12 5
Pause function
The pause func ion allows cooking o be suspended, hen re-s ar ed a he original se ings. Wi h a leas
one cooking zone in opera ion he pause func ion is ac iva ed as follows: ouch he 'II' (pause) sensor (4)
for one second. An LED will illumina e nex o he pause bu on, and 'II' will appear in each of he cooking
zone power displays. To re-s ar cooking, ouch he pause sensor again for one second. The LED nex o
he pause bu on will flash for en seconds. During his period, ouch he power sensor (1) and cooking
will re-s ar a he original se ings. If he power sensor is no ouched wi hin en seconds, he hob will be
swi ched off.
Residual heat indication
The cooking surface of he hob can become ho in use hrough con ac wi h he pan. Af er a hea ing zone
has been swi ched off, he power level display (1) will show 'H' un il he area is safe o ouch.
List of display symbols
Timer
A simple 'egg imer' (ranging up o 99 minu es) func ion is provided, and in addi ion each hea ing zone
can be opera ed independen ly on i s own imer. The wo seven segmen LED displays (6) display he
remaining ime in minu es un il he imer alarm is ac iva ed or he selec ed hea ing zone is swi ched off.
The imer can also be se o swi ch off any cooking zone af er a imed period.
The imer can be se o opera e any cooking zone curren ly in use. Selec ing which imer o se is done by
simul aneously ouching he imer '-' and '+' sensors (loca ed above he symbol). LEDs posi ioned
around he imer display indica e which zone imer is selec ed. Wi h each simul aneous ouch of he '-'
and '+' sensors he selec ion of he imer cycles in he following sequence: front left - rear left - centre -
rear right - front right, ignoring hose zones ha are no in use. Having selec ed he zone o be imed, use
he '+' and '-' sensors o selec he imed period in minu es. The LED appropria e o he selec ed zone will
flash. A he end of he imed period he zone will swi ch off and an alarm will sound and he display will
flash. To swi ch off he alarm ouch ei her he imer '+' or '-' sensor.
To opera e jus he 'egg imer', firs swi ch on o 'WAIT' mode, where all he hea ing zone displays show '0'.
Swi ch on he imer by ouching he imer '-' and '+' sensors simul aneously. Now use he '+' and '-'
sensors o selec he imed period in minu es. The LED below he ime display will flash. A he end of he
imed period an alarm will sound and he display will flash. To swi ch off he alarm ouch ei her he imer
'+' or '-' sensor.
1 - 9 Power level
U ood warming (65°)
P Booster
A Auto heat-up
U Pan is absent or not suitable
H Residual heat
E External error
ault
II Pause

116
Main Fan Oven Con rol
Main Conven ional Oven Con rol
Grill Con rol
Lower Conven ional Oven Con rol
Slow Oven Con rol
ig. 4
Automatic heat-up function
The au oma ic hea -up func ion provides full ou pu power during he ini ial hea ing s age, and hen
rever s o a pre-selec ed power level, perhaps for simmering.
To ac iva e he au oma ic hea -up func ion, swi ch on he required cooking zone using he '-' sensor. '9'
will be shown on he display. Now ouch he '+' sensor, he display will change o 'A'. Nex , use he '-'
sensor o cycle hrough o he required lower power se ing. The display will show 'A' and your chosen
se ing al erna ing during he hea -up period, and hen jus your chosen se ing when he ou pu power
drops o your se ing. As an example, se ing he au oma ic hea -up func ion wi h a chosen lower se ing
of '3' resul s in he cooking zone working a full power for wo minu es, and hen rever ing o se ing 3.
Boost function
Each cooking zone can be boos ed o a higher power level for fas er cooking. In some cases his is
achieved by limi ing power o an adjacen cooking zone.
To se he boos func ion, ensure ha he cooking zone is 'ac ive' i.e. '0' o '9' are shown on he display.
Touch he 'P' (Power) sensor (2), An LED nex o he 'P' sensor will flash. Then ouch ei her he '+' or '-'
sensor of he cooking zone o be boos ed. The symbol 'P' will appear in he display of any zone in boos
mode.
To urn off he boos func ion ouch '-' and '+' sensors of he appropria e zone simul aneously. No e,
ouch he '-' sensor and he zone will rever o se ing '9', af er which he zone can be con rolled in he
normal way using he '-' and '+' sensors.
For safe y reasons, he boos func ion is au oma ically ermina ed af er 10 minu es.
Keep warm function
Each cooking zone can be used as a keep warm zone.
To se he keep warm func ion, ensure ha he cooking zone is 'ac ive', i.e. '0' o '9' are shown in he
display. Touch he (keep warm) sensor (3). An LED nex o he 'keep warm' sensor will flash. hen ouch
ei her he '+' or '-' sensor of he cooking zone o be used as he keep warm zone. The symbol 'U' will
appear in he display.
To preven food from drying ou always pu a lid on he pan. Remember, he keep warm func ion can only
work using sui able pans, you canno , for example, use he sys em o keep a pla ed meal warm. The
keep warm func ion is au oma ically ermina ed af er wo hours.
To swi ch off he keep warm func ion ouch he '-' sensor of he appropria e zone and he display will
show '0'. No e, ouch he '+' sensor and he zone will cycle firs o '1' hrough o '9' depending upon how
long he sensor is ouched.
Because of he rapid hea ing ac ion of he boos func ion, your hob should never be lef
unsupervised while i is in use; no even for a shor while.
When using his func ion, food should only be kep warm for a very shor ime. The longer
food is kep warm af er cooking, he grea er he loss of nu rien s and risk of bac erial
con amina ion.

Slow Oven
900W, 25 li re Slow oven (120°C). The slow oven has been designed for cooking mel -in- he-mou h s ews
and casseroles. I 's also well-sui ed o speciali y recipes such as meringues and can be used for warming
pre-cooked dishes wi hou drying hem ou . (See Figs 1 & 4)
Lower Conventional Oven
900W 25 li re, conven ional oven. A useful secondary oven, perfec for Yorkshire puddings and all he
rimmings ha complemen a roas dinner. Thanks o each oven's independen opera ion, you could even
bake desser in here while your meal cooks. (See Figs 1 & 4)
All four ovens are easy
All four ovens are easyAll four ovens are easy
All four ovens are easy-
--
-clean and have handy 'slam
clean and have handy 'slamclean and have handy 'slam
clean and have handy 'slam-
--
-shu ' doors
shu ' doorsshu ' doors
shu ' doors
Oven Safety Points
• When using he oven shelves ensure hey are correc ly placed be ween he shelf runners.
• Always use oven gloves when removing food from ei her he ovens or grill.
Heating
Wi h ei her of he lower ovens urned on he cooker will become warm o he ouch and will radia e hea
in o he ki chen. A a se ing of 80°C he cooker will consume approxima ely 1/3 kW of elec rici y per
hour.
Condensation
Condensa ion will be produced when cooking food wi h a high wa er con en , especially if he body of he
cooker is cold. Before cooking, pre-hea he oven un il he cas iron door becomes warm, his will reduce
he amoun of condensa ion when he food is in roduced.
Oven Cleaning
Ovens are coa ed in vi reous enamel and can be cleaned wi h normal oven cleaning produc s. Shelf
suppor s are removable for easier cleaning. The areas under he ops of he ovens are self cleaning
and cleaning should no be a emp ed here.
Only use grill wi h door open
The fron , op and doors of he cooker may become ho af er long periods of use.
Keep children and animals away.
7
10
Make sure ha here are no objec s over he sensors or on he hob. Me allic objec s such as knives, forks,
spoons and lids should no be placed on he hob surface since hey can ge ho .
Swi ch on he hob a he mains supply. When he hob is swi ched on a he mains, basic calibra ion is
carried ou au oma ically - his will ake abou 5 - 10 seconds.
(Some imes an illumina ed 'H' will appear in he space nex o he con rols for cer ain elemen s when he
hob is firs connec ed o he mains. This is a consequence of he fac ory es ing procedure, and he 'H's will
disappear during he firs hour of connec ion o he mains.)
The hob is now in he 'OFF' mode.
O mode
The hob is swi ched on a he mains supply. All hea ing elemen s are swi ched off, and displays are no
illumina ed. Touch he main 'ON/OFF' sensor (1) o bring he hob o he 'WAIT' mode. No e: a buzzer will
sound o confirm ha he ouch con rol sys em has recognised he ouch.
WAIT mode
When he hob goes o 'WAIT' mode, '0' appears in each hea ing elemen display for 10 seconds. If no
sensor is ouched wi hin 10 seconds he hob re urns o 'OFF'
If a hea ing elemen sensor is ouched while he hob is in 'WAIT' mode, he hob will go in o 'ACTIVE' mode.
ACTIVE mode
When a leas one hea er is on (se ing 1-9), he hob is in he 'ACTIVE' mode.
If no hea ing elemen s are pressed on, and no sensor is ac iva ed wi hin 10 seconds, he hob re urns o
'OFF'.
Pan Detector
Each cooking zone has a pan de ec or, and will no work unless a pan is in place. If a pan is removed from
he cooking zone during cooking, he zone will swi ch off, and he display will al erna e be ween he chosen
power se ing and he U symbol (no pan). The pan de ec or will only recognise pans made of a sui able
ma erial, i.e. ferrous me al, and may no recognise a pan ha is oo small. We do no recommend he use
of pans smaller han he marked ring.
To switch on a heating element
Touch he main 'ON/OFF' sensor o bring he hob in o 'WAIT' mode. All hea ing elemen indica ors will come
on o '0', and remain on for 10 seconds. While '0' is showing on he display, any hea ing elemen can be
swi ched on. To swi ch on an elemen , ensure ha a sui able pan is in place, hen ouch ei her he '+' or '-'
sensor rela ing o ha elemen . When you ouch he '+' sensor o swi ch on any hea ing elemen he display
will show a medium hea se ing ('4'). When you ouch he '-' sensor o swi ch on any hea ing elemen he
display will show high hea se ing ('9'), Use he '+' and '-' sensors o selec he required hea se ing.
To switch off
To swi ch off an individual hea ing elemen , ouch he '-' sensor for ha hea er un il he number in he
display reaches '0', or ouch bo h '+' and '-' sensors simul aneously.
To swi ch off all he hea ing elemen s, ouch he 'ON/OFF' sensor (1).
Af er a hea er has been swi ched off, he display will show 'H' (ho ) un il he glass has cooled.
We recommend ha you swi ch off he hob a he mains when i is no in use, o avoid acciden al ac iva ion
of he sensors.
Please no e ha when he hob is swi ched off a he mains, he 'H' will disappear, and i is
recommended ha you leave he hob swi ched on un il he cooling fans s op opera ing.
OPERATING INSTRUCTIONS (See Page 9 - Fig. 5 for details of icons and symbols)
8
ig. 6 - Glass Hob
Hob Safety Points
• The cooking surface may ge ho even in he case of induc ive hea ing, as a ho pan will ransfer
some hea back o he glass surface.
• I is inadvisable a any ime o leave a hea ing elemen swi ched on wi hou a pan in posi ion as his
was es energy, and could make marks more difficul o remove.
• Never cook direc ly on he hob surface wi hou a cooking pan as his will resul in damage o he
surface of he hob.
• Never use he hob as a work surface as damage may occur o he smoo h surface of he hob.
• Never drag or slide pans on he hob surface, as his will cause scra ches in he surface of he hob.
• Never leave any u ensils, food or combus ible i ems on he hob when i is no in use.
• Never place plas ic foil or plas ic con ainers on he hob as damage will occur.
• Always ensure he base of he u ensil is dry before placing i on he hob.
• Never use u ensils wi h rough bases.
• I is impor an ha any spillage is deal wi h before he hob is used again, o herwise i may become
baked on.
• Remove any spillage of high sugar con en , such as jam, immedia ely. Use a pan, which is large
enough o preven boil over or spillage.
• Before using he hob for he firs ime we recommend you clean he glass surface wi h ceramic hob
cleaner and condi ioner, such as Hob-bri e. This applies a hin pro ec ive film o he hob, making i
easier o clean and prolonging i s life.
Pans
ig. 5 - Hob Touch Controls
INDUCTION HOB
I is essen ial o use pans sui able for induc ion cooking. These have o have a ferrous
con en , so cas iron and magne ic s ainless s eel are ideal bu copper, aluminium and
ceramic pans will no normally work.
Induction
8 8
ront Left Hob ront Right Hob Pause/Resume Icon (4)
Back Left Hob Power Icon - On/Off (1) Lock Icon (7)
Centre Hob Boost Icon (2) Timer Icon (5)
Back Right Hob Simmer Icon (3) Timer LED Display (6)
8 8
9
Table of contents
Other Esse Cooker manuals

Esse
Esse EL13 AMP User manual

Esse
Esse 990 CH Installation and operation manual

Esse
Esse CAT Installation and operation manual

Esse
Esse Plus 1 User manual

Esse
Esse Plus2 User manual

Esse
Esse WN Installation and operation manual

Esse
Esse 1000X User manual

Esse
Esse 600T User manual

Esse
Esse 990 ELX User manual

Esse
Esse W35 User manual
Popular Cooker manuals by other brands

Tricity Bendix
Tricity Bendix SIE454 Operating & installation instructions

Matrix
Matrix MR111SS/2 Manual for installation, use and maintenance

Zanussi
Zanussi ZCG 6600 Operating and installation instructions

Siemens
Siemens HE519GB 6 Series instruction manual

Zanussi
Zanussi ZCG63200BA user manual

Siemens
Siemens HA643510M instruction manual