manuals.online logo
Brands
  1. Home
  2. •
  3. Brands
  4. •
  5. Estes
  6. •
  7. Toy
  8. •
  9. Estes GNOME User manual

Estes GNOME User manual

1749
SUPPLIES / MATERIALES / FOURNITURES
1. 2. 3.
GNOME
072597
Nose cone /
Cono de la nariz /
Nez conique
072601
Nose cone insert /
Inserción del cono de la nariz /
Insertion du nez conique
072629
Launch lug /
Agarradera de
lanzamiento /
Cosse de lancement
030315
Body tube /
Tubo del cuerpo /
Tube du corps
035023
Engine hook /
Gancho del motor /
Crochet de moteur
038365
Shock cord /
Cuerda de tensión /
Sandow
038275
Streamer /
Serpentina /
Banderole
072628
Fin assembly /
Ensamblaje de las aletas /
Assemblage des ailerons
ASSEMBLE NOSE CONE / ENSAMBLAJE DEL CONO DE LA NARIZ / ASSEMBLER LE NEZ CONIQUE
Let dry. /
Dejar secar. /
Laisser sécher.
MODEL ROCKET INSTRUCTIONS / INSTRUCCIONES PARA EL MODELO DE COHETE / INSTRUCTIONS POUR LES FUSÉES MINIATURES
KEEP FOR FUTURE REFERENCE • GUÁRDALAS PARA FUTURA REFERENCIA • À CONSERVER POUR RÉFÉRENCE ULTÉRIEURE
IMPORTANT: Please record date found on decal and keep for future reference. ______________
IMPORTANTE: Favor de escribir la fecha que aparece en la calcomanía y guardarla para futura referencia. _____________
IMPORTANT: Prendre note de la date indiquée sur la décalcomanie et conserver pour toute référence ultérieure. ______________
Read all instructions. Make sure you have all parts and supplies. Test fit all parts before applying glue. Sand as necessary for precision assembly. Product color and shape may vary. /
Leer todas las instrucciones. Asegurarse de tener todas las partes y los materiales. Probar el ajuste de las piezas antes de poner el pagamento. Lijar lo que sea necesario para obtener un
ensamblaje preciso. El color y la forma pueden variar. / Lire toutes les instructions. S’assurer de posséder toutes les pièces et accessoires. Vérifier si les pièces s’assemblent bien avant de
mettre de la colle. Poncer autant que nécessaire pour assurer un assemblage précis. La couleur et la forme du produit peuvent varier.
037311-1
Self-stick decal /
Calcomanía auto-adhesiva /
Décalcomanie autocollante
HOBBY KNIFE /
NAVAJA DE
PRECISIÓN /
COUTEAU DE
BRICOLAGE
FINE SANDPAPER /
LIJA FINA /
PAPIER ABRASIF FIN
MASKING TAPE /
CINTA ADHESIVA
PROTECTORA /
RUBAN-CACHE
CLEAR TAPE /
CINTA ADHESIVA
TRANSPARENTE /
RUBAN ADHÉSIF
INCOLORE
PENCIL /
LÁPIZ /
CRAYON
RULER /
REGLA /
RÈGLE
SCISSORS /
TIJERAS /
CISEAUX
MODEL
PLASTIC CEMENT /
CEMENTO
PLÁSTICO /
COLLE À MATIÈRE
PLASTIQUE
5.
6. 7.
1. 3. 4.
Make sure engine hook lines up with slot in fin assembly. /
Asegurarse de que el gancho del motor esté alineado con
el ensamblaje de las aletas. / S’assurer que le crochet
du moteur s’aligne avec la fente de l’assemblage des ailerons.
Erase line /
Borrar la línea /
Effacer le trait
2.
1 1/2” (3.8 / 3,8 cm)
3/8” (9 mm)
3/8” (9 mm)
ATTACH SHOCK CORD & LAUNCH LUG / PEGAR LA CUERDA DE TENSIÓN & LA AGARRADERA DE LANZAMIENTO /
ATTACHER LE SANDOW ET LA COSSE DE LANCEMENT
1/8”
(3 mm)
Line up slot with end of shock cord. /
Alinear la ranura con el extremo de
la cuerda de tensión. / Aligner la
fente avec l’extrémité du sandow.
Use a pencil to push one end of
shock cord into forward slit. / Usar
un lápiz para pasar un extremo de la
cuerda de tensión hasta la ranura
de enfrente. / Utiliser un crayon pour
pousser une extrémité du sandow
dans l'entaille vers l'avant.
SHOCK CORD /
CUERDA DE
TENSIÓN /
SANDOW
DOOR FRAME /
MARCO DE PUERTA /
CADRE DE PORTE
Use door frame to draw straight line. Mark lightly. /
Usar el marco de una puerta para trazar una
línea recta. Marcarla levemente. / Utiliser un
cadre de porte pour tracer une ligne droite.
Marquer légèrement.
1.
3. 4.
2.
1/8” (3 mm)
Let dry. / Dejar secar. /
Laisser sécher.
Let dry. /
Dejar secar. /
Laisser sécher.
ATTACH FIN UNIT & ENGINE HOOK / PEGAR LA UNIDAD DE LAS ALETAS & EL GANCHO DEL MOTOR /
ATTACHER UN AILERON ET LE CROCHET DU MOTEUR
SHOCK CORD SLOT /
MUESCA PARA LA CUERDA
DE TENSIÓN /
FENTE DU SANDOW
1/8”
(3 mm)
1.
4. 6.
2.
DECAL /
CALCOMANÍA /
DÉCALCOMANIE
DOUBLE KNOT /
DOBLE NUDO /
DOUBLE NŒUD
5. CLEAR TAPE /
CINTA ADHESIVA TRANSPARENTE /
RUBAN ADHÉSIF INCOLORE
PREPARE ENGINE / PREPARAR EL MOTOR / PRÉPARER LE MOTEUR
PREPARE FLIGHT RECOVERY / PREPARACIÓN DE LA RECUPERACIÓN DE VUELO / PRÉPARATION DE LA RÉCUPÉRATION DU VOL
SHOCK CORD /
CUERDA DE TENSIÓN /
SANDOW
APPLY DECAL / PONER LA CALCOMANÍA / POSER LA DÉCALCOMANIE
3.
NOTE: / NOTA: / REMARQUE :
Recovery wadding and streamer must slide easily into body tube. If too tight, redo. /
La guata de recuperación y el serpintina deben deslizarse con facilidad dentro del
tubo. Si están muy apretados, vuélvelos a colocar. /
Le rembourrage et le banderole de récupération doivent coulisser facilement dans le
tube du corps. Si c’est trop serré, recommencer.
NOTE: / NOTA: / REMARQUE :
Only Estes Recovery Wadding recommended. /
Se recomienda únicamente la Guata de
Recuperación de Estes /
Le rembourrage de récupération Estes est le
seul recommandé.
1. 2. 3. 4. 5. 6.
TIP MUST TOUCH
PROPELLANT! /
¡LA PUNTA DEBE
TOCAR EL
PROPULSOR! /
LA POINTE DOIT
TOUCHER LE
PROPERGOL!
To avoid serious injury, read instructions & NAR
Safety Code included with engines. PREPARE YOUR
ENGINE ONLY WHEN YOU ARE OUTSIDE AT THE
LAUNCH SITE PREPARING TO LAUNCH. If you do
not use your prepared engine, remove the starter
before storing your engine.
WARNING: FLAMMABLE
ENGINE /
MOTOR /
MOTEUR
Para evitar lesiones graves, lee las instrucciones & los Códigos de
Seguridad de la Asociación Nacional de Cohetes que se incluyen
con los motores. PREPARA TU MOTOR ÚNICAMENTE YA QUE
TE ENCUENTRES AFUERA PREPARANDO EL LANZAMIENTO
EN EL SITIO DE LANZAMIENTO. Si no utilizas el motor ya
preparado, quítale el arranque antes de guardar el motor
ADVERTENCIA: INFLAMABLE
Pour éviter des blessures graves, lire les instructions et le code de
sécurité N.A.R. (Association nationale de fuséologie, É.-U.) inclus avec
les moteurs. PRÉPARER VOTRE MOTEUR UNIQUEMENT LORSQUE
VOUS ÊTES À L’EXTÉRIEUR, AU SITE DE LANCEMENT,
PRÉPARANT LE LANCEMENT. En cas de non utilisation d’un moteur
préparé, enlever l’démarreur avant de ranger le moteur.
AVERTISSEMENT: INFLAMMABLE
Use 1 each. /
Usar 1 de cada uno. /
Utiliser 1 seul ensemble.
LAUNCH SUPPLIES NEEDED
(Sold Separately)
• Launch Pad
• Launch Controller
• Recovery Wadding
• Starters (with engines)
• Plugs (with engines)
• Recommended Estes®Engines: 1/2A3-2T,
1/2A3-4T (first flight), A3-4T, A10-3T
MATERIALES DE LANZAMIENTO NECESARIOS
(Se venden por separado)
• Plataforma de Lanzamiento
• Controlador de Lanzamiento
• Guata de Recuperación
• Arranques (con motores)
• Tapón de seguridad (con motores)
• Motores recomendados de Estes®:1/2A3-2T,
1/2A3-4T (primer vuelo), A3-4T, A10-3T
ACCESSOIRES DE LANCEMENT
NÉCESSAIRES
(Vendus séparément)
• Base de lancement
• Contrôleur de lancement
• Rembourrage de récupération
• Démarreurs (avec les moteurs)
• Fiches (avec les moteurs)
• Moteurs Estes®recommandés: 1/2A3-2T,
1/2A3-4T (premier vol), A3-4T, A10-3T
PRECAUTIONS /
PRECAUCIONES /
PRÉCAUTIONS
PRE-LAUNCH CHECK For safety, never launch a damaged rocket. Check the rocket's body, nose cone and fins. Also, check the engine mount, recovery system and launch lug(s).
Repair any damage before launching the rocket.
FLYING YOUR ROCKET Choose a large field (500 ft [152 m] square) free of dry weeds and brown grass. The larger the launch area, the better your chance of recovering your rocket.
Football fields and playgrounds are great. Launch only with little or no wind and good visibility. Always follow the National Association of Rocketry (NAR) SAFETY CODE.
MISFIRES TAKE THE KEY OUT OF THE CONTROLLER. WAIT ONE MINUTE BEFORE GOING NEAR THE ROCKET! Disconnect the starter clips and remove the engine. Take the
plug and starter out of the engine. If the starter has burned, it worked but did not ignite the engine because it was not touching the propellant inside the engine. Put a new starter all the
way inside the engine without bending it. Push the plug in place. Repeat the steps under Countdown and Launch.
REVISIÓN ANTES DEL LANZAMIENTO Por tu seguridad, nunca lances un cohete dañado. Revisa el cuerpo del cohete, el cono de la nariz y las aletas. También, revisa el soporte del
motor, el sistema de recuperación y la(s) agarradera(s) de lanzamiento. Si hay algún daño, repáralo antes de lanzar el cohete.
PARA VOLAR EL COHETE Encuentra un campo grande (500 pies [152 m] cuadrados) sin maleza o pasto café. Entre más grande sea el área de lanzamiento, más grandes serán las
probabilidades de que recuperes tu cohete. Los campos de futbol y los parques son muy buenos. Lánzalo únicamente cuando haya muy poco viento o no haya viento y cuando haya
buena visibilidad. Siempre sigue las instrucciones del Código de Seguridad de la Asociación Nacional de Cohetes (NAR por sus siglas en inglés)
FALLAS SACA LA LLAVE DEL CONTROLADOR. ¡ESPERA UN MINUTO ANTES DE ACERCARTE AL COHETE! Desconecta las pinzas del arranque y quita el motor. Saca el tapón
de seguridad y el arranque del motor. Si el arranque se quemó, funcionó pero no encendió el motor ya que no estaba tocando el propulsor de adentro del motor. Pon otro arranque
hasta adentro del motor sin doblarlo. Empujar el tapón de seguridad hasta ponerlo en su lugar. Repite los pasos indicados en Conteo Regresivo y Lanzamiento.
CONTRÔLE AVANT LANCEMENT Pour des raisons de sécurité, ne jamais lancer une fusée endommagée. Vérifier le corps, le nez conique et les ailerons de la fusée. Vérifier aussi le
bâti moteur, le système de récupération et la ou les cosses de lancement. Réparer tout dommage avant de lancer la fusée.
VOL DE LA FUSÉE Choisir un grand champ (152 m2) sans mauvaises herbes sèches ni herbe marron. Plus l’aire de lancement est grande, meilleures sont les chances de récupération
de la fusée. Les terrains de football et terrains de jeux sont parfaits. Lancer seulement quand il y a peu ou pas de vent et une bonne visibilité. Toujours observer le CODE DE SÉCURITÉ
de l’Association nationale de fuséologie (N.A.R., É.-U.).
RATÉS D’ALLUMAGE ENLEVER LA CLÉ DU CONTRÔLEUR. ATTENDRE UNE MINUTE AVANT DE S’APPROCHER DE LA FUSÉE! Déconnecter les pinces de l’démarreur et retirer
le moteur. Retirer la fiche et l’démarreur du moteur. Si l’démarreur a brûlé, il a fonctionné mais n’a pas allumé le moteur parce qu’il ne touchait pas le propergol à l’intérieur du moteur.
Placer un démarreur neuf dans le moteur sans le courber. Pousser la fiche en place. Répéter les étapes de compte à rebours et lancement.
© 2005-2016 Estes-Cox Corp. All rights reserved. / Todos los derechos están reservados. / Tous droits réservés.
Estes-Cox Corp. 1295 H Street, Penrose, CO 81240-9698 Made in / Hecho en / Fabriqué en : Guangdong, China / Chine PN 083888-2 (7-16)
22
PAP
NAR SAFETY CODE /
CÓDIGO DE
SEGURIDAD NAR /
CODE DE SÉCURITÉ
N.A.R.
NO DRY GRASS OR
WEEDS /
NO PASTO SECO O
MALEZA /
PAS D’HERBE OU DE
MAUVAISES HERBES
SÈCHES
2.
4...
3...
2...
1...
16.4 ft (5 m)
KEY / LLAVE / CLÉ
MASKING TAPE /
CINTA ADHESIVA /
PROTECTORA RUBAN-CACHE
1.
3. 4.
5.
6.
7.
8.
9.
10.
Insert key, push down hard.
Bulb will light. / Poner la llave,
empujarla hacia abajo con
fuerza. El foco se encenderá. /
Insérer la clé, enfoncer
vigoureusement. L’ampoule va
s’allumer
While holding key down FIRMLY, press launch button until LIFTOFF! /
¡Mientras sostienes la llave con FIRMEZA hacia abajo, oprime el botón de
lanzamiento hasta que DESPEGUE! /
Out en maintenant FERMEMENT la clé enfoncée, appuyer sur le bouton de
lancement jusqu’au DÉCOLLAGE!
NOTE: / NOTA: / REMARQUE :
Key always out until final
countdown! /
¡Nunca pongas la
llave antes del conteo
regresivo final! /
Clé jamais introduite
avant la fin du
compte à
rebours!
4”
(10.2 /
10,2 cm)
FULLY EXTEND YOUR LAUNCH CONTROLLER WIRE BEFORE LAUNCHING. / EXTIENDE TODO EL CABLE DEL
CONTROLADOR DE LANZAMIENTO ANTES DE LANZARLO. / DÉPLOYER COMPLÈTEMENT LE FIL DU VOTRE
CONTRÔLEUR DE LANCEMENT AVANT LE LANCEMENT.
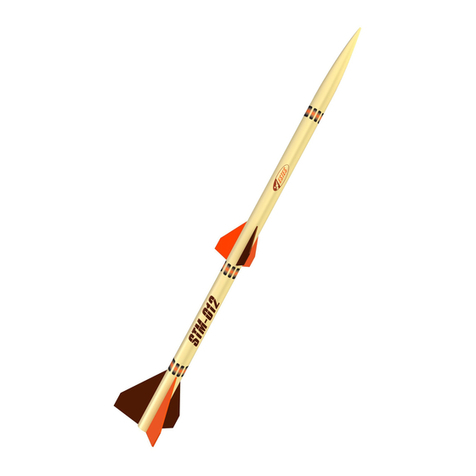
This manual suits for next models

1

Other Estes Toy manuals

Estes BLACK DIAMOND Series User manual

Estes

Estes BLACK DIAMOND Series User manual

Estes Executioner 1951 User manual

Estes

Estes Executioner 1951 User manual

Estes BULLPUP 12D User manual

Estes

Estes BULLPUP 12D User manual

Estes SUPER SHOT Series User manual

Estes

Estes SUPER SHOT Series User manual

Estes EST 2183 User manual

Estes

Estes EST 2183 User manual

Estes Control Mad Cat 4608 User manual

Estes

Estes Control Mad Cat 4608 User manual

Estes ASRAAM PYTHON 4 EST 2054 User manual

Estes

Estes ASRAAM PYTHON 4 EST 2054 User manual

Estes STM-012 Series User manual

Estes

Estes STM-012 Series User manual

Estes V2 User manual

Estes

Estes V2 User manual

Estes Fire Bug User manual

Estes

Estes Fire Bug User manual

Estes 2463 User manual

Estes

Estes 2463 User manual

Estes Alpha 1225 User manual

Estes

Estes Alpha 1225 User manual

Estes Control Diamondback Helicopter 4604 User manual

Estes

Estes Control Diamondback Helicopter 4604 User manual

Estes INTERCEPTOR 1250 User manual

Estes

Estes INTERCEPTOR 1250 User manual

Estes GBU-24 PAVEWAY III EST 1247 User manual

Estes

Estes GBU-24 PAVEWAY III EST 1247 User manual

Estes Baby Bertha EST 1261 User manual

Estes

Estes Baby Bertha EST 1261 User manual

Estes 2231 User manual

Estes

Estes 2231 User manual

Estes STAR STRIKE User manual

Estes

Estes STAR STRIKE User manual

Estes CLUSTER BOMB BLU-97B EST 2055 User manual

Estes

Estes CLUSTER BOMB BLU-97B EST 2055 User manual

Estes ROCKET-STAR 1908 Setup guide

Estes

Estes ROCKET-STAR 1908 Setup guide

Estes Copperhead User manual

Estes

Estes Copperhead User manual

Estes Converter 2029 User manual

Estes

Estes Converter 2029 User manual

Estes X-15 Series User manual

Estes

Estes X-15 Series User manual

Estes Payloader II User manual

Estes

Estes Payloader II User manual

Popular Toy manuals by other brands

marklin START UP 20612 manual

marklin

marklin START UP 20612 manual

Buki Wind turbine manual

Buki

Buki Wind turbine manual

Eduard LaGG-3 S.A. manual

Eduard

Eduard LaGG-3 S.A. manual

Faller 120191 quick start guide

Faller

Faller 120191 quick start guide

Eduard MiG-21PF quick start guide

Eduard

Eduard MiG-21PF quick start guide

Madcow Rocketry mini Aerobee Hi Assembly

Madcow Rocketry

Madcow Rocketry mini Aerobee Hi Assembly

Pilot RC 50cc Yak-54 Assembly manual

Pilot RC

Pilot RC 50cc Yak-54 Assembly manual

AMW Plux Re 460 manual

AMW

AMW Plux Re 460 manual

Phoenix Model Dolphin 40 instruction manual

Phoenix Model

Phoenix Model Dolphin 40 instruction manual

Hasbro Marvel Legends Doctor Strange Eye of... manual

Hasbro

Hasbro Marvel Legends Doctor Strange Eye of... manual

Eduard Mask B-17G Flying Fortress Assembly instructions

Eduard

Eduard Mask B-17G Flying Fortress Assembly instructions

Fisher-Price HIT Entertainment my first Thomas & Friends Railway Pals... instructions

Fisher-Price

Fisher-Price HIT Entertainment my first Thomas & Friends Railway Pals... instructions

marklin 37492 user manual

marklin

marklin 37492 user manual

LEGO 44010 instructions

LEGO

LEGO 44010 instructions

Faller BW-Set manual

Faller

Faller BW-Set manual

Fisher-Price Imaginext Ultra T-Rex instructions

Fisher-Price

Fisher-Price Imaginext Ultra T-Rex instructions

Vollmer 45529 Mounting instruction

Vollmer

Vollmer 45529 Mounting instruction

PARKZONE T-28 Trojan instruction manual

PARKZONE

PARKZONE T-28 Trojan instruction manual

manuals.online logo
manuals.online logoBrands
  • About & Mission
  • Contact us
  • Privacy Policy
  • Terms and Conditions

Copyright 2025 Manuals.Online. All Rights Reserved.