manuals.online logo
Brands
  1. Home
  2. •
  3. Brands
  4. •
  5. Estes
  6. •
  7. Toy
  8. •
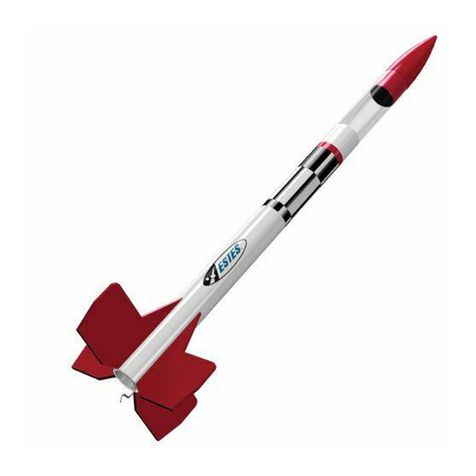
  9. Estes BULLPUP 12D User manual

Estes BULLPUP 12D User manual

ESTES INDUSTRIES
1295 H Street
Penrose, CO 81240
1972
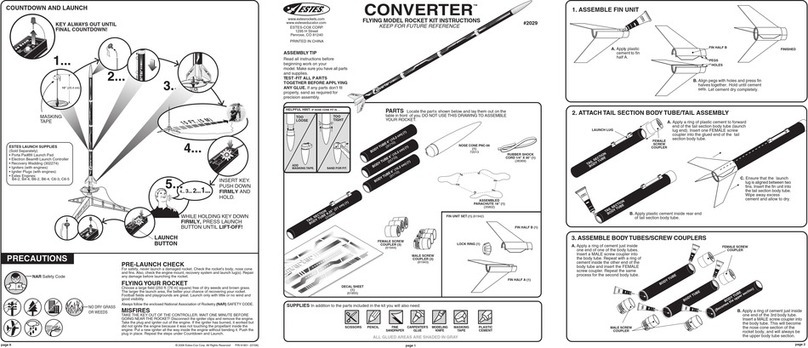
FLYING MODEL ROCKET KIT INSTRUCTIONS
www.estesrockets.com
KEEP FOR FUTURE REFERENCE
ASSEMBLY TIP: Read all
instructions before beginning
work on your model. Make sure
you have all parts and supplies.
TEST FIT ALL PARTS
TOGETHER BEFORE
APPLYING ANY GLUE!
If any parts don't fit properly,
sand as required for precision
assembly.
PARTS Locate the parts shown below and lay them out on the table in front
of you. DO NOT USE THIS DRAWING TO ASSEMBLE YOUR ROCKET.
SUPPLIES In addition to the parts included in the kit you will also need:
HELPFUL HINT:
IF NOSE CONE/COUPLER FIT IS. . .
TOO
TIGHT
TOO
LOOSE
ADD
MASKING TAPE. SAND FOR FIT.
SCISSORS
CARPENTER'S
GLUE
PLASTIC
CEMENT
4
© 2003 Estes-Cox Corp. All rights reserved.
FLYING YOUR ROCKET
Choose a large field (500 ft. [152 m] square) free of dry weeds and brown grass. The
larger the launch area, the better the chance of recovering your rocket. Football fields
and playgrounds are great. Launch only with little or no wind and good visibility.
Always follow the National Association of Rocketry (NAR) Safety Code.
MISFIRES
TAKE THE KEY OUT OF THE CONTROLLER. WAIT ONE MINUTE
BEFORE GOING NEAR THE ROCKET! Disconnect the igniter clips and remove the
engine. Take the plug and igniter out of the engine. If the igniter has burned, it worked
but did not ignite the engine because it was not touching the propellant inside the
engine. Put a new igniter all the way inside the engine without bending it. Push the plug
in place. Repeat the steps under Countdown and Launch.
NAR Safety Code
NO DRY GRASS
OR WEEDS P/N 83847 (10-03)
PRINTED IN CHINA
ENGINE SPACER
TUBE
(35003)
SHOCK CORD
MOUNT
SECTION 3
SECTION 2
SECTION 1
PENCIL RULER
FINE
SANDPAPER
MODELING
KNIFE
MASKING
TAPE
SPRAY
PRIMER
(WHITE)
CLEAR
SPRAY
PRIMER
(OPTIONAL)
HOBBY SAW SPRAY
PAINT
(WHITE)
BULLPUP 12D
HOW TO USE THESE INSTRUCTIONS:
READ ALL INSTRUCTIONS BEFORE STARTING WORK ON THIS MODEL.
A. Read each step first and visualize the
procedure thoroughly in your mind before
starting construction.
B. Lay the parts out on the table in front of
you. (Check inside tubes for any small parts.)
C. Use the parts layout to match all parts
contained in kit.
D. Collect all construction supplies that are
not included in this kit.
E. Sand parts as necessary for proper fit.
F. The construction supplies required for each
step are listed at the beginning of each step.
G. Check off each step as you complete it.
ENGINE BLOCK
(GREEN)
(30162-2)
LAUNCH LUG
(38175)
BODY TUBE
(30384)
ENGINE MOUNT
TUBE
(30324)
TAIL CONE
(30101)
NOSE CONE
(71070)
CENTERING
RINGS
(30125)
SHOCK CORD
(38374)
CLAY WEIGHT (2)
(85705)
ASSEMBLED PARACHUTE
12" (30 CM) (35801)
WRAP LINES LOOSELY AROUND THE
PARACHUTE AND INSERT THE PARACHUTE
INTO THE ROCKET.
COUNTDOWN
AND LAUNCH
LAUNCH SUPPLIES
To launch your rocket, you will need the
following:
• Launch Pad (Estes Porta-Pad®II)
• Launch Controller (Electron Beam®)
• Recommended Estes Engines: A8-3 (First
Flight) B4-4, B6-4, B8-5, C6-5
Use an A8-3 engine for your first flight to
become familiar with your rocket's flight
pattern.
• Recovery Wadding (EST 302274)
• Igniters and Igniter Plugs (included with
Estes engines)
Use only Estes products to launch this
rocket.
SEPARATE IGNITER PLUG AND IGNITER.
HOLD ENGINE
UPRIGHT,
DROP IN
IGNITER.
IGNITER MUST
TOUCH
PROPELLANT.
INSERT
IGNITER
PLUG.
FIRMLY PUSH
ALL THE WAY IN.
FOLD BACK
AND BEND TIPS
AS SHOWN.
INSERT ENGINE
INTO ROCKET.
KEY ALWAYS OUT UNTIL
FINAL COUNTDOWN!
HOLD KEY DOWN AND PRESS
LAUNCH BUTTON UNTIL LIFT-OFF!
15 FT. (5 M)
4... 3... 2...1...
INSERT KEY.
PUSH DOWN
AND HOLD.
8” (20.4 cm)
MASKING
TAPE
ROCKET PREFLIGHT
PREPARE ENGINE
CRUMPLE AND INSERT
3 SQUARES OF
RECOVERY WADDIING SPIKE FOLD ROLL
NOTE: Parachute
may be dusted with
talcum powder to
avoid sticking.
NOTE: Igniter plugs come with rocket engines. If your
engines did not come with plugs, follow the instructions
that came with the engines.
WRAP WITH 1 OR
2 WRAPS OF
MASKING TAPE
1...
1...
2...
2... 3...
3...
4...
4...
LAUNCH BUTTON
PRECAUTIONS
KEY
NOTE: Use Estes Wadding
(EST 302274) Only.
FINS
FINS
FINS
FINS
LAUNCH LUG
MATCH LINES
MATCH LINES
TUBE MARKING
GUIDE
DIE-CUT BALSA
SHEET
(32702)
DECAL
(37289)
NO
1”
(25 mm)
GLUE
2 3
SHOCK CORD
MOUNT
SECTION
3
SECTION
2
SECTION
1
3
GLUE
SHOCK CORD
3
2
1
GLUE
A. Compare fins to patterns to find front (leading) and
gluing (root) edges.
B. Position and glue fins on alignment lines as shown,
one at a time. Bottom fins should be positioned 18
mm (3/4”) from end of body tube. Let each dry
several minutes before applying the next one.
C. Adjust fins to project straight out from tube.
D. Do not set rocket on fins while glue is wet. FINS
MUST BE ATTACHED CORRECTLY FOR STABLE
FLIGHT!
1.
A. Remove centering rings from die-cut sheet. Slide
over Engine Mount Tube as shown.
B. Apply glue to both sides of both ring/tube joints.
C. Mark yellow spacer tube 6 mm (1/4”) from one end.
Using a piece of scrap balsa, smear glue 51 mm
(2”) inside engine mount tube.
D. Insert green engine block into rear of tube. Insert
spacer tube and push engine block into tube until
1/4” (6 mm) mark is even with end of tube. NOTE:
The yellow spacer tube is a tool and must be
removed as soon as you match the mark with the
end of the engine mount tube. Don’t accidentally
2.
3.
A. Locate the plastic tail cone.
B. Cut the excess plastic parts off as indicated in
diagram and discard.
C. Sand front and rear of tail cone flat and remove any
excess plastic with modeling knife.
A. Fine sand balsa die-cut sheet. Carefully remove fins
by freeing edges with sharp knife.
B. Stack fins together. Sand all edges smooth.
4.
A. Using a piece of scrap balsa, smear glue inside body
tube 2” (51 mm) from one end.
B. Slide engine mount into body tube until both rings
are inside tube. Push tail cone (no glue yet) over
Engine Tube until snug against Body Tube.
C. Push Engine Mout Tube the rest of the way in (until
it is flush with end of Tail Cone).
D. Remove tail cone. Apply plastic cement to tail cone
as shown and push tail cone back into place.
5.
A. Cut out Tube Marking Guide from front of instructions.
Wrap guide around the Body Tube and tape.
B. Mark tube at arrows. Label Launch Lug Line 'LL'.
Remove guide.
C. Using door frame, extend all lines the full length of
tube.
6.
ROCKET ASSEMBLY
A. Form loop in shroud lines
and push shroud lines
through eyelet.
B. Pass 'shute through loop.
C. Pull 'chute tight.
D.Tie free end of shock cord
to eyelet with double knot.
7.
A. Glue launch lug straight on launch lug line with its
rear edge 73 mm (2-7/8”) from rear of tube.
8.
A. Cut out shock cord mount located on page one of
the instructions.
B. Crease on dotted lines by folding. Spread glue on
section 2 and lay end of shock cord into glue. Fold
over section 1 and apply glue to section 3. Fold
forward again.
C. Clamp unit together with fingers until glue sets.
9.
A. Apply glue to shock cord mount.
B. Press mount into body tube about 25 mm (1”) in
from end of tube to allow for the nose cone.
C. Hold until glue sets.
10.
A. Apply a glue reinforcement to each fin/body tube
joint and each side of launch lug. Smooth with finger.
B. Support rocket as shown until glue dries.
11.
A. Trim excess plastic from around sides of nose cone
with sharp knife. Remove any excess plastic from
inside molded eyelet. Enlarge hole in rear of nose
cone.
B. Roll clay into a “snake” about 3 mm (1/8”) diameter.
Poke clay through the hole in nose cone. Use pencil
or dowel to push clay into end of nose cone. Pack
clay tightly. Use all of the clay.
C. Wipe nose cone with damp cloth to remove oil and
dirt.
12.
FINISHING YOUR ROCKET
Apply sanding sealer to fins. When sealer is dry, lightly sand parts.
Repeat sanding and sealing until balsa grain lines are filled. Optional:
Spray a light coat of automotive primer over entire rocket. Lightly sand
(600 grit) when primer is dry. This allows the paint to adhere better and
gives a smoother finish.
Spray paint the entire rocket gloss white. Follow instructions on spray
can for best results. Allow paint to dry overnight before applying decals.
Refer to photo on front of instructions and photo on panel for decal
placement. To apply decals, cut out each decal, dip in lukewarm water
for 20 seconds, and hold until it uncurls. Slip decal off backing sheets
and onto model. Blot away excess water. For a more realistic appearance
and to protect decals, spray a flat clear coat on the rocket.
A.
C.
B.
D.
GLUE
GLUE
GLUE
GLUE
FRONT REAR
1/8" (3 mm)
2" (51 mm)
GREEN
ENGINE
BLOCK
REMOVE SPACER
TUBE IMMEDIATELY
AFTER INSERTING
ENGINE BLOCK!
YELLOW
SPACER
TUBE
FRONT
REAR
1/4"
(6 mm)
2" (51 mm)
ENGINE
MOUNT
TUBE
TAIL CONE
CUT CUT
DISCARDDISCARD
A.
B.
BOTTOM FINS TOP FINS
A.
B.
2"
(51 mm)
C.
D.
A.
FINS
TUBE MARKING
GUIDE
TAPE
LAUNCH LUG
DOOR
FRAME
TOP
VIEW
GLUE
GLUE
3/4" (18 mm)
GLUING EDGE
90˚
90˚
90˚
90˚
YES
NO
A.
B.
C.
GLUE
2 7/8" (75 mm)
A.
A.
B.
C.
GLUE
GLUE
GLUE
GLUE
GLUE
YES
A.
B.
A. B.
A. B.
C. D. DOUBLE
KNOT
A.
B.
C.

Other Estes Toy manuals

Estes Sky Writer User manual

Estes

Estes Sky Writer User manual

Estes V2 User manual

Estes

Estes V2 User manual

Estes Baby Bertha EST 1261 User manual

Estes

Estes Baby Bertha EST 1261 User manual

Estes Fire Bug User manual

Estes

Estes Fire Bug User manual

Estes CLUSTER BOMB BLU-97B EST 2055 User manual

Estes

Estes CLUSTER BOMB BLU-97B EST 2055 User manual

Estes STM-012 Series User manual

Estes

Estes STM-012 Series User manual

Estes Control Mad Cat 4608 User manual

Estes

Estes Control Mad Cat 4608 User manual

Estes BLACK DIAMOND Series User manual

Estes

Estes BLACK DIAMOND Series User manual

Estes Copperhead User manual

Estes

Estes Copperhead User manual

Estes SUPER SHOT Series User manual

Estes

Estes SUPER SHOT Series User manual

Estes GBU-24 PAVEWAY III EST 1247 User manual

Estes

Estes GBU-24 PAVEWAY III EST 1247 User manual

Estes Control Diamondback Helicopter 4604 User manual

Estes

Estes Control Diamondback Helicopter 4604 User manual

Estes GNOME User manual

Estes

Estes GNOME User manual

Estes Jetliner User manual

Estes

Estes Jetliner User manual

Estes ROCKET-STAR 1908 Setup guide

Estes

Estes ROCKET-STAR 1908 Setup guide

Estes ASRAAM PYTHON 4 EST 2054 User manual

Estes

Estes ASRAAM PYTHON 4 EST 2054 User manual

Estes SHOCKWAVE 4190 User manual

Estes

Estes SHOCKWAVE 4190 User manual

Estes STAR STRIKE User manual

Estes

Estes STAR STRIKE User manual

Estes Executioner 1951 User manual

Estes

Estes Executioner 1951 User manual

Estes EST 2183 User manual

Estes

Estes EST 2183 User manual

Estes Payloader II User manual

Estes

Estes Payloader II User manual

Estes BIG DADDY 2162 User manual

Estes

Estes BIG DADDY 2162 User manual

Estes Converter 2029 User manual

Estes

Estes Converter 2029 User manual

Estes ORBIS 3D User manual

Estes

Estes ORBIS 3D User manual

Popular Toy manuals by other brands

Playmates Toys Spy Ninjas SN-12 manual

Playmates Toys

Playmates Toys Spy Ninjas SN-12 manual

Associated Electrics RC12L3 4015 instruction manual

Associated Electrics

Associated Electrics RC12L3 4015 instruction manual

MGA Entertainment Poopsie Sparkly Critters manual

MGA Entertainment

MGA Entertainment Poopsie Sparkly Critters manual

Deerc DE51 user manual

Deerc

Deerc DE51 user manual

TWM Super Chipmunk-90 RF instruction manual

TWM

TWM Super Chipmunk-90 RF instruction manual

Mattel Polly Pocket GKL24 instructions

Mattel

Mattel Polly Pocket GKL24 instructions

ALZRC DEVIL X360 instruction manual

ALZRC

ALZRC DEVIL X360 instruction manual

Fisher-Price FXC58 instructions

Fisher-Price

Fisher-Price FXC58 instructions

Faller 120097 manual

Faller

Faller 120097 manual

GRAUPNER Micro Star 400 manual

GRAUPNER

GRAUPNER Micro Star 400 manual

Faller LARGE ALPINE FARM quick start guide

Faller

Faller LARGE ALPINE FARM quick start guide

Spirit Halloween Spirit Ghost Trap Wheels Upgrade kit manual

Spirit Halloween

Spirit Halloween Spirit Ghost Trap Wheels Upgrade kit manual

Eduard P-51D exterior Assembly instructions

Eduard

Eduard P-51D exterior Assembly instructions

Eduard Pz. Kpfw. IV Ausf. H quick start guide

Eduard

Eduard Pz. Kpfw. IV Ausf. H quick start guide

Bachmann Branch-Line OO Scale DCC Train Set instruction sheet

Bachmann

Bachmann Branch-Line OO Scale DCC Train Set instruction sheet

Haba The Little Orchard 4460 instructions

Haba

Haba The Little Orchard 4460 instructions

Radica Games 74063 Tetris instruction manual

Radica Games

Radica Games 74063 Tetris instruction manual

MGA Entertainment BABY born SURPRISE quick start guide

MGA Entertainment

MGA Entertainment BABY born SURPRISE quick start guide

manuals.online logo
manuals.online logoBrands
  • About & Mission
  • Contact us
  • Privacy Policy
  • Terms and Conditions

Copyright 2025 Manuals.Online. All Rights Reserved.