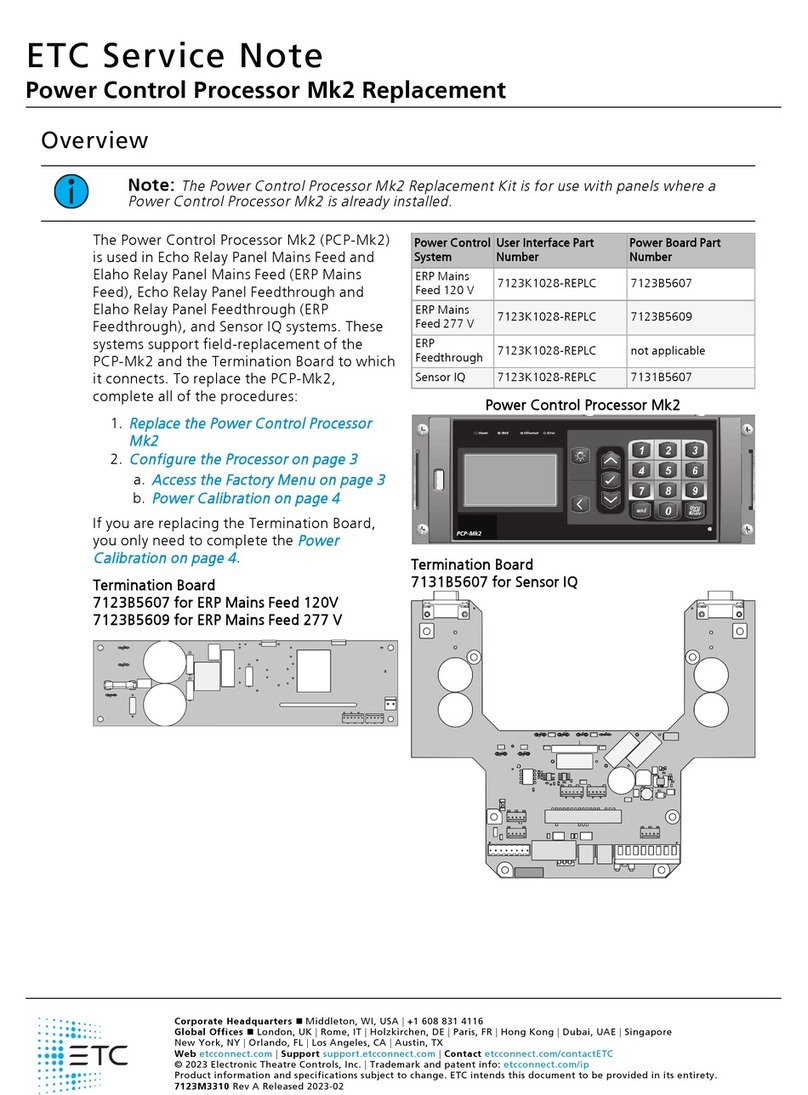
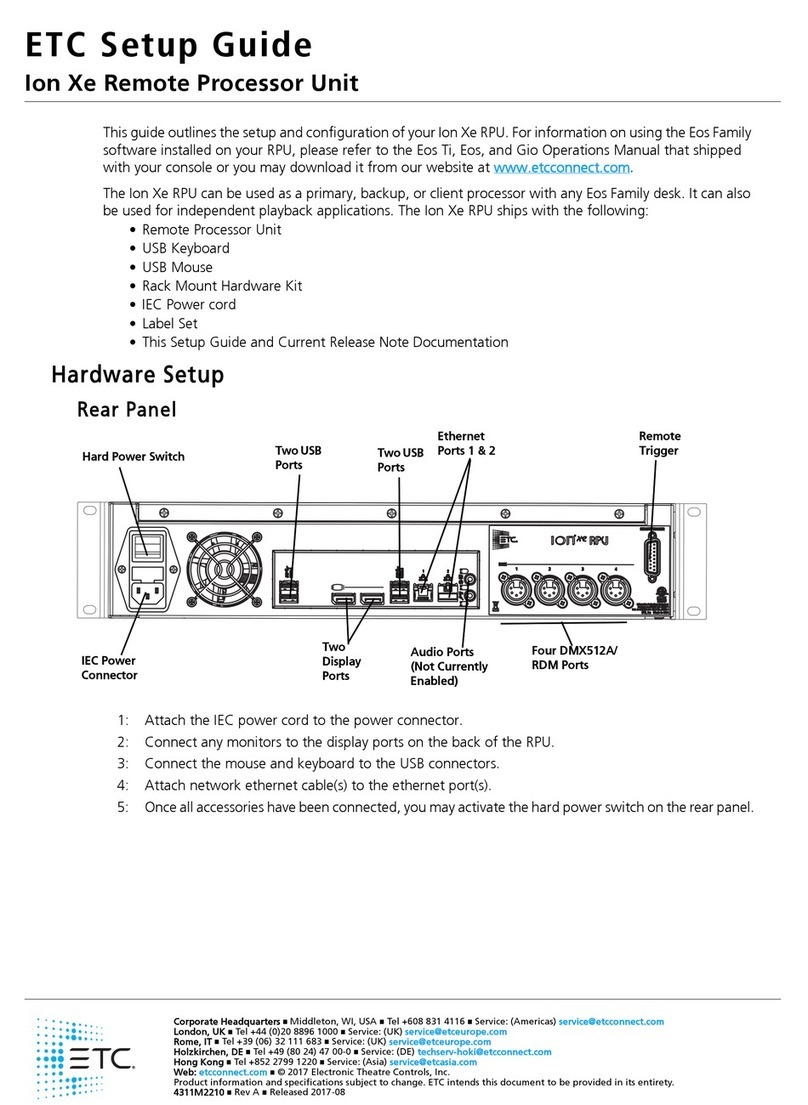
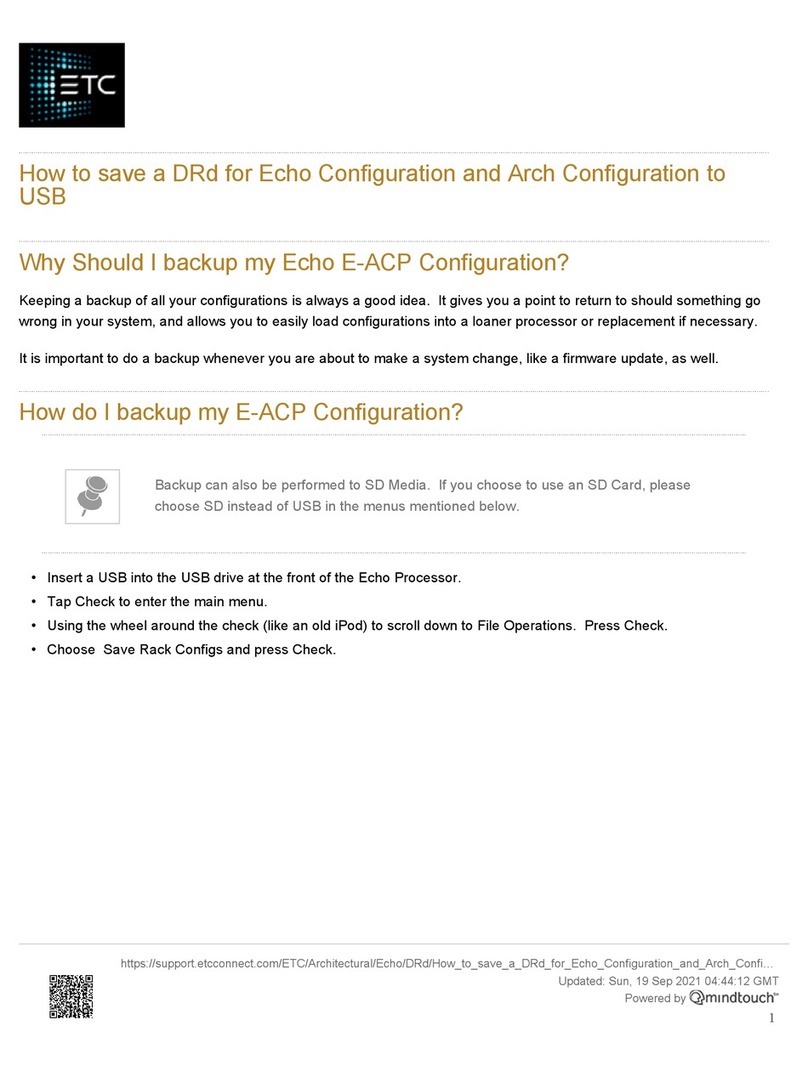
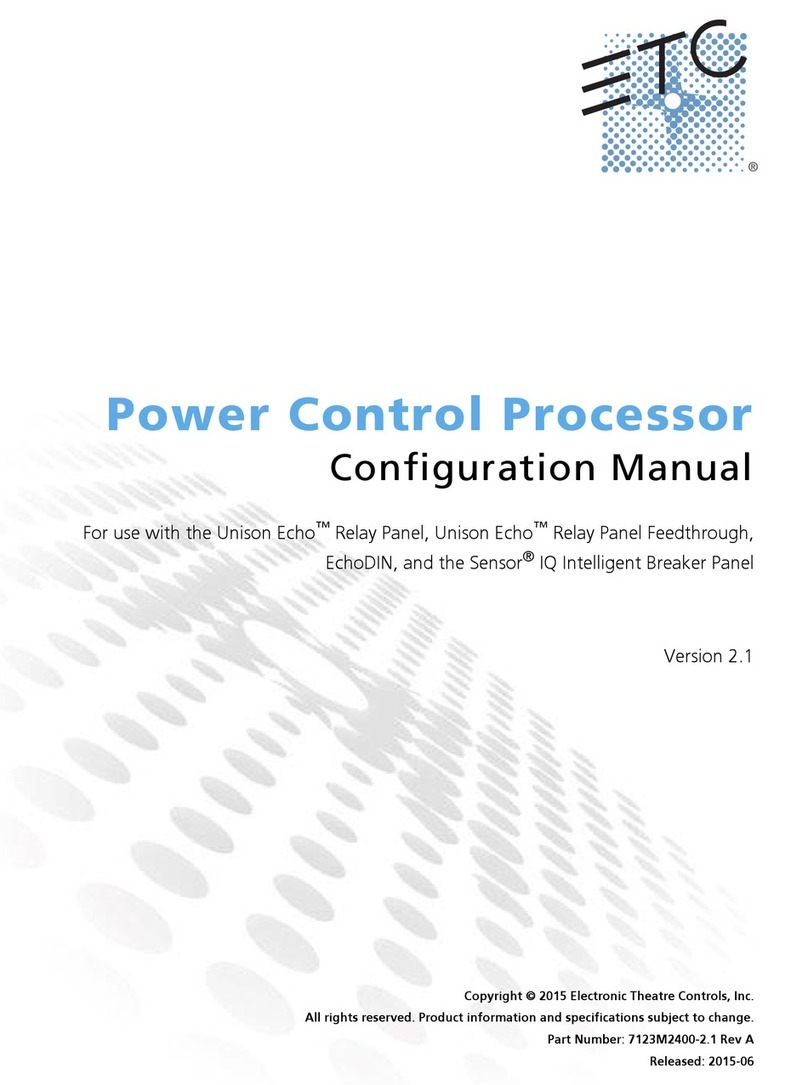
ETC F-Drive R12 Series User manual

F-Drive Series R12
Installation Manual
Part Number: 7148M2100 Rev: A
Released: 2020-02

Table of Contents
Table of Contents i
Introduction 1
Document Conventions 1
Help from ETC Technical Services 2
Safety 3
IMPORTANTSAFEGUARDS 3
Chapter 1 Overview 4
Features 4
Driver Cards 5
FTW-150Card 5
CC-150Card 6
CV-150Card 6
ChromaCard 7
ArcLamp150Card 7
Before You Begin Installation 8
Installation Requirements 8
Power Disconnect Device 9
Chapter 2 Prepare to Install the R12 10
Inspect the Shipment 10
Parts and Tools 10
Electrical and Wiring Specifications 10
Rack-Mount Safety 11
Chapter 3 Install 48 VDCPower Supplies 12
Technical Information from MEANWELL 12
MEANWELLRKP-1UI 13
Features 13
Install the Power Supply in the Rack 14
Connect Ground/Earth 14
Wire the DCPower Output 15

Final Installation Steps 18
Chapter 4 Install the R12 19
Rack-Mount the R12 19
Connect the DCPower Input 19
Connect DMX 20
DMXCable Preparation and Termination 21
DMXCat5 Preparation and Termination 22
DMX Termination 22
Panic 22
R12 Driver Cards 22
Finish Installation 22
Chapter 5 Install R12 Driver Cards 23
ChromaCard DMXFootprint 24
Mismatched Cards 24
Wire the Driver Card Outputs 24
Driver Card RJ45 Output to Navis Luminaires 25
Driver Card Terminal Block Output to Navis Luminaires 25
Driver Card Terminal Block Output to ArcLamps 26
Driver Card Terminal Block Output to Lighting by Other
Manufacturers 26
Configure the CV-150Card and ArcLamp150Card 27
Configure the CC-150Card 27
Record Installed Driver Cards 28
Chapter 6 Panic Connector 29
Panic Switches 29
Wire the Panic Connector 30
Non-Isolated (Dry) Contact 30
Isolated (Wet) Contact (+48 VDC Signal) 30
How to Use R12 with a W1EmergencyDriver 31
Additional Non-Isolated (Dry) Contact 31
Chapter 7 Power Up and Control 32
Power Up Procedure 32
Identify 32
ii R12 Installation Manual

DMX System Control 32
ArcSystem Navis Luminaire DMXPersonalities 33
Edit and Save Configuration Files 33
RDM Parameters 34
Update Firmware 37
R12 Control and Driver Card Firmware 37
Maintenance 37
Troubleshooting 38
F-Drive R12 Control Card LEDIndicators 38
F-Drive R12 Driver Card LED Indicators 39
Errors 40
MEANWELL LED Indicators 40
Appendix A Compliance 41
cULus 41
EU 41
FCC-Part 15 Class A 41
DMX 41
Table of Contents iii

iv R12 Installation Manual

Introduction 1
Introduction
Congratulations on your purchase of the ETC F-Drive Series R12. The F-Drive Series R12
LEDpower control solutionprovides a modular, centralized approach for controlling
LEDluminaires. The R12 is a card cage enclosure that can hold up to 12 low-voltage driver
cards, providing power and data to multiple circuits per card. By maintaining remote, easy
access to the driver cards and power supplies, LED-based systems can be easily installed and
serviced, while ensuring critical components are readily accessible to support staff.
Document Conventions
This document uses the following conventions to draw your attention to important information.
Note:
Notes are helpful hints and information that is supplemental to the main text.
CAUTION:
A Caution statement indicates situations where there may be
undefined or unwanted consequences of an action, potential for data loss or
an equipment problem.
WARNING: A Warning statement indicates situations where damage may
occur, people may be harmed, or there are serious or dangerous
consequences of an action
WARNING: RISK OF ELECTRIC SHOCK! This warning statement indicates
situations where there is a risk of electric shock.
All ETC documents are available for free download from our website: etcconnect.com.
Please email comments about this manual to: TechComm@etcconnect.com.

2 R12 Installation Manual
Help from ETC Technical Services
If you are having difficulties and your problem is not addressed by this document, try the ETC
support website at support.etcconnect.com or the main ETC website at etcconnect.com. If none
of these resources are sufficient, contact ETC Technical Services directly at one of the offices
identified below. Emergency service is available from all ETC offices outside of normal business
hours.
When calling for help, take these steps first:
•
Prepare a detailed description of the problem
•
Go near the equipment for troubleshooting
•
Find your notification number if you have called in previously
Americas United Kingdom
ETC, Inc. ETC Ltd
Technical Services Department Technical Services Department
3031 Pleasant View Road 26-28 Victoria Industrial Estate
Middleton, WI 53562 Victoria Road,
800-775-4382 (USA, toll-free) London W3 6UU England
+1-608 831-4116 +44 (0)20 8896 1000
service@etcconnect.com techservltd@etcconnect.com
Asia Germany
ETCAsia ETC GmbH
Technical Services Department Technical Services Department
Room 1801, 18/F Ohmstrasse 3
Tower 1, Phase 1 Enterprise Square 83607 Holzkirchen, Germany
9 Sheung Yuet Road +49 (80 24) 47 00-0
Kowloon Bay, Kowloon, Hong Kong techserv-hoki@etcconnect.com
+852 2799 1220
techserv-asia@etcconnect.com
France
ETC France
Zone Urbaparc -
Bâtiment E
6 Boulevard de la Libération
Saint-Denis, 93200
+33 1 4243 3535
techservltd@etcconnect.com

Introduction 3
Safety
The F-Drive Series R12 is intended for professional use only. Read the entire manual before
using this equipment.
IMPORTANTSAFEGUARDS
When using electrical equipment, basic safety precautions should always be followed
including the following:
•
READ AND FOLLOW ALL SAFETY
INSTRUCTIONS.
•
Do not use outdoors.
•
Do not let power supply cords touch hot surfaces.
•
Do not mount near gas or electric heaters.
•
Equipment should be mounted in locations and at heights where it will not
readily be subjected to tampering by unauthorized personnel.
•
The use of accessory equipment not recommended by the manufacturer may
cause an unsafe condition.
•
Do not use this equipment for other than intended use.
•
To reduce the risk of fire and overheating, make sure all connections are tight.
•
Turn off electrical power before modifying the lighting system in any way.
SAVE THESE INSTRUCTIONS
Note:
Cable bundling limitations apply to F-Drive R12 Class 2 output cables. For
reference on maximum number of four-pair cables in a bundle, see NFPA 2017 National
Electric Code, table 725.144 and table 310.16.

4 R12 Installation Manual
Chapter 1
Overview
+
+
+
+
+
+
+
+
+
+
+
+
+
F-Drive R12 Driver
Features
•
Compatible with a wide range of control systems
•
Compact size:fits EUor US19-inch rack, 2U height, 12.8 inch depth
•
Requires 48 VDCinput from an external power supply, recommended minimum 1500 W
•
Holds up to 12 low-voltage driver cards for remote control of up to 48 circuits
•
Hot-swappable output cards
•
DMX/RDM control input with per-circuit patching
•
48 VDC pass-through for connection to downstream sense equipment
•
Panic/emergency contact input suitable for connection to external emergency systems

Overview 5
Driver Cards
R12 driver cards are available for a variety of low-voltage load types. Driver cards are sold
separately.
FTW-150Card
The FTW-150Card is designed for use with Navis Fade to Warm luminaires.
+
Output constant current, maximum 450 mA per channel
Output Channels four channels on a single RJ45 or eight-pin terminal block
Loads up to four Navis Fade to Warm luminaires per card
Maximum Load 50 Wper channel, 150 Wper card
Model Number FDROCFTW150
Part Number 7148K1010
Label Stripe Color green to match Navis Fade to Warm luminaire face and cap labeling
Note:
Use ONEtype of output connector for each card. For example, use the RJ45
receptacle OR the eight-pin terminal block on a FTW-150Card or a CC-150Card.

6 R12 Installation Manual
CC-150Card
The CC-150Card is designed for use with Navis White luminaires, most ArcSystem Pro One-Cell
White luminaires, and 200–700 mA fixtures by other manufacturers.
+
Output adjustable 200–700mA constant current per channel, default output 600 mA
(see
Configure the CC-150Card on page27
)
Output Channels four channels on a single RJ45 or eight-pin terminal block
Loads
•
up to four Navis White luminaires per card
•
up to four ArcSystem Pro One-Cell White luminaires per card
-
Pro One-Cell
-
Pro One-Cell Small
-
Pro One-Cell Micro
•
200–700 mA fixtures manufactured by others
Maximum Load 50 Wper two-pin channel, 150 W total per card
Model Number FDROCCC150
Part Number 7148K1011
Label Stripe Color yellow to match Navis White luminaire face and cap labeling
Note:
The CC-150Card does not support ArcSystem Pro One-Cell High Output
luminaires.
Note:
Use ONEtype of output connector for each card. For example, use the RJ45
receptacle OR the eight-pin terminal block on a FTW-150Card or a CC-150Card.
CAUTION:
Setting the F-Drive CC-150Card to output more current than the
manufacturer recommends for the loads may reduce the lifetime or cause
damage to the load. See Configure the CC-150Card on page27.
CV-150Card
The CV-150Card is designed for use with 24 VDC fixtures by other manufacturers.
+
Output adjustable 24–28 VDC constant voltage
Output Channels four channels on an eight-pin terminal block*
Loads 24 VDCfixtures
Maximum Load 50 Wper channel, 150 Wper card
Model Number FDROCCV150
Part Number 7148K1013
Label Stripe Color blue
*The RJ45 receptacle is present, but disabled.

Overview 7
ChromaCard
The ChromaCard is designed for use with Navis RGBWluminaires.
+
Output 48 VDCpower and data
Output Channels four channels on a single RJ45†
Loads up to four Navis RGBW luminaires per card
Maximum Load 22 Wper channel, 100 Wper card
Model Number FDROCCHC100
Part Number 7148K1014
Label Stripe Color purple to match Navis RGBW luminaire face and cap labeling
†The eight-pin terminal block is present, but disabled.
ArcLamp150Card
The ArcLamp150Card is designed for use with ETCArcLamp retrofit screw-in LEDlamps. For
information on the installation of ArcLamps, see the
ArcLamp System Installation Manual
.
ETCdocuments are available free of charge at etcconnect.com.
+
Output adjustable 24–28 VDCpower and data
Output
Connectors four channels on an eight-pin terminal block*
Loads up to eight ArcLamps per channel and a maximum of thirty-two ArcLamps per
card
Maximum Load 50 Wper channel, 150 Wper card
Model Number FDROCAC150
Part Number 7148K1012
Label Stripe Color white
*The RJ45 receptacle is present, but disabled.

8 R12 Installation Manual
Before You Begin Installation
Review the following information before installing the F-Drive R12.
Installation Requirements
•
Ambient operating temperature 0–40°C (32–104°F), 5–95% non-condensing humidity.
•
Dry locations only.
•
The R12 requires a 19-inch equipment rack that must support the weight of an R12 frame,
12driver cards, and any power supplies and accessories.
•
The R12 is a 48 VDC input product that requires an external power supply for operation.
Clearance Requirements
MEANWELLPower Supply Frame
If you are installing a MEAN WELL RKP-1UI or RKP-1UI-CMU1 three-bay external power supply
frame, the built-in DCfans require 10 cm clearance around the ventilation holes after mounting
the three-bay frame in the 19-inch equipment rack.
WARNING: RISKOFELECTRICSHOCK! Maintain 20mm (3/4in) clearance
behind the installed MEANWELLthree-bay frame. Equipment mounted
above or below a MEANWELLthree-bay frame must be 35cm(14in)or less
in depth. Equipment with a depth of more than 35cm(14in) mounted
immediately above or below a MEANWELL three-bay frame may cause an
unsafe electrical connection due to mechanical interference with the power
bussing connections.
AVERTISSEMENT : RISQUE DE CHOC ÉLECTRIQUE! Conservez un espace
de 20 mm (3/4 po) derrière le châssis du rack MEAN WELL installé. Tout
équipement monté au-dessus ou au-dessous d'un rack MEAN WELL doit
avoir une profondeur de 35 cm (14 po) ou moins. Tout équipement d'une
profondeur de plus de 35 cm (14 po) monté immédiatement au-dessus ou
au-dessous d'un rack MEAN WELL peut provoquer une connexion électrique
dangereuse en raison d'interférences mécaniques avec les connexions de bus
d'alimentation.
Note:
If you are bussing two or more RKP-1UIor RKP-1UI-CMU1 rack systems
together, they must be installed vertically adjacent in the equipment rack.
F-Drive R12 Driver
CAUTION:
To reduce risk of fire, do not install closer than 3 inches to
cabinet wall.
ATTENTION :
Pour reduire les risques d'incendie, n'installez pas plus de 3
pouces au mur de l'armoir.

Overview 9
Voltage Drop
Voltage drop along load wiring is an issue for constant voltage loads. Voltage drop calculations
vary by project and are based on the type, length, and gauge of wire. The CV-150Card and the
ArcLamp150Card have an adjustabledial on the front of the driver card to set the 24–28 VDC
(+/-5%) output. Measure the voltage at the load and adjust the dial to achieve 24 VDC at the
load. Contact a qualified electrician and read the following sections for additional information.
•
Configure the CV-150Card and ArcLamp150Card on page27
•
ArcLamp below
for special considerations for ArcLamp installations
•
R12 Driver Card Wire and Terminal Specifications on page11
for recommended wire
gauges
ArcLamp
Voltage drop is an important factor to consider when determining the installation location of an
R12 with ArcLamp150Cards. The installation location determines the maximum wire distance
to the ArcLamp loads. For your convenience, an interactive voltage drop calculator is available
at etcconnect.com/ArcLamp.
Note:
Do not bridge outputs on R12 ArcLamp driver cards. If your installation requires
more than eight ArcLamps per circuit, consider a standalone ArcLamp wall-mount or
rack-mount driver.
Power Disconnect Device
Before installation, make sure you have an accessible input power disconnect device installed
ahead of your F-Drive R12.
WARNING: RISK OF DEATH BY ELECTRIC SHOCK! Failure to disconnect all
power to the system before installation, maintenance, cleaning, or any
other system modification could result in serious injury or death.
AVERTISSEMENT : RISQUE DE MORT PAR DÉCHARGE ÉLECTRIQUE!
Négliger de débrancher toutes les sources d’alimentation du système avant
l’installation, l’entretien, le nettoyage ou toute autre modification du
système peut causer des blessures graves ou la mort.
De-energize main feed to F-Drive Power Control products and follow
appropriate Lockout/Tagout procedures as mandated by NFPA 70E. It is
important to note that electrical equipment such as breaker panels can
present an arc flash hazard if improperly serviced. This is due to the high
amounts of short-circuit current available on the electrical supply to this
equipment. Any work must comply with OSHA Safe Working Practices.
WARNING: Circuits that are installed without an accessible power
disconnect device cannot be serviced or operated safely.
AVERTISSEMENT : Il est imprudent d'utiliser ou de réparer les circuits
installés sans qu'un dispositif de déconnexion de l'alimentation ne soit
accessible.

10 R12 Installation Manual
Chapter 2
Prepare to Install the R12
Inspect the Shipment
Before you begin installation, check your shipment and confirm that it arrived complete and
undamaged.
1. Check the shipping container for physical damage.
•
If you find damage, document it to help with a claim against the shipper.
2. Inspect the order for completeness.
•
Check the box contents received against the packing list to ensure that your order is
complete.
•
If you discover a problem with the contents of the shipment, contact ETC. See
Help
from ETC Technical Services on page2
.
R12 ships with the control card (ETCpart number 7148K1000) installed and with blanks covering
the slots for the driver cards.
Note:
All driver cards and accessories are packaged separately.
Parts and Tools
The following supplies are required, but not provided:
•
Phillips screwdriver
•
Flatblade screwdriver
•
Wire stripping and cutting tool
•
Wire ties
Electrical and Wiring Specifications
Terminal/Connector Wire Range/Specifications Strip Length
Power Input
Use provided DCpower
harness:2.4m (8ft) of 10mm2
(8AWG)
11 mm (7/16 in)
DMXIn/Thru three-
pin screw-terminal
connectors
Belden 9279 or equivalent See wiring instructions at
Connect DMX on page20
.
DMX In/Thru
three-pin
IDCconnectors
Cat5e (or better) 0.2mm2
(24AWG) or larger conductors
terminated to T568B standard
See wiring instructions at
Connect DMX on page20.
Panic three-pin
connector
0.05–2.5 mm2(30–12 AWG)
Follow class 2 wiring methods 6 mm (1/4 in)

Prepare to Install the R12 11
R12 Driver Card Wire and Terminal Specifications
Driver Card Terminal/Connector Wire Range/Specifcation Strip
Length
Torque
Rating
ChromaCard
FTW-150Card
CC-150Card
RJ45 connector for
output power or
power/data
You must use 0.25mm2
(23AWG) or larger conductors
in Category-type cable.
Terminate to
T568B standard.
FTW-150Card
CC-150Card
CV-150Card and
ArcLamp150Card
eight-pin connector
for power output
0.2–2.5mm2(26–14AWG)
Follow Class 2 wiring methods.
6 mm
(1/4in)
0.4–
0.5Nm
(3.5–
4.4in-lb)
Note:
Use ONEtype of output connector for each card. For example, use the RJ45
receptacle OR the eight-pin terminal block on a FTW-150Card or a CC-150Card.
Note:
Cable bundling limitations apply to F-Drive R12 Class 2 output cables. For
reference on maximum number of four-pair cables in a bundle, see NFPA 2017 National
Electric Code, table 725.144 and table 310.16.
Rack-Mount Safety
The R12 and R12ExternalPowerSupply install into a standard 19-inch rack enclosure.
•
Elevated Operating Ambient: If the R12 is installed in a closed or multi-unit rack
assembly, the operating ambient temperature of the rack environment may elevate above
the room ambient. Do not operate the device in an enclosed environment above 40°C
(104°F).
•
Reduced Air Flow: When installing the R12 in an equipment rack, the rack must be
vented and have adequate airflow to maintain an operating temperature below 40°C
(104°F).
•
Mechanical Loading: The R12 and R12ExternalPowerSupply must be installed in a rack
in a horizontal flat orientation to ensure even mechanical loading in the rack, avoiding
hazardous or dangerous loading conditions.
•
Circuit Overloading: When installing the R12 in an equipment rack, consider the
connection of the equipment to the rack or power source to avoid overloading the rack
circuit or supply wiring. Consider the rack or power distribution in the equipment rack
during installation.
•
Reliable Grounding: Maintain reliable grounding of the rack-mounted equipment. Give
particular attention to any supply connections other than direct connections to the branch
circuit (for example, the use of power strips).

12 R12 Installation Manual
Chapter 3
Install 48 VDCPower Supplies
The MEANWELL RKP-1UI rack-mount units are 1U, low-profile power distribution solutions
perfectly suited for providing 48 VDCpower to the ETCF-Drive R12.
The MEANWELLrack-mount unit should only be installed by a qualified electrician or service
technician.
Note:
Each MEANWELLthree-bay frame ships with an RJ45 terminator that must be
installed in one of the JK1 ports if you are bussing multiple three-bay frames together.
See Bussing Kits on page16.
Note:
Each MEANWELLthree-bay frame ships with a DB-25 terminator that must be
installed in the CN500 port in order for the three-bay frame to power on. See Final
Installation Steps on page18.
ETCPart Number MEANWELLModel Description
PS505 MEANWELLRKP-1UI custom RKP-1UI rack-mount unit for ETC
PS504 MEANWELLRCP-2000 2000 Wpower supply module
Technical Information from MEANWELL
For current technical information, view the RKP-1UI specifications on the MEANWELL website
at https://www.meanwell.com. The RCP-2000/RKP-1UI Instruction Manual is available at
https://www.meanwell.com/webapp/product/search.aspx?prod=RCP-
2000&pdf=UkNQLTIwMDAsUktQLTFVLUUucGRm&a=4.

Install 48 VDCPower Supplies 13
MEANWELLRKP-1UI
Features
•
RKP-1UI three-bay frames fit in an EUor US 19 inch equipment rack
•
Each RKP-1UIrack-mount unit (three-bay frame)supports up to three RCP-2000 power
supply modules from MEANWELL.
•
Three RCP-2000 power supply modules provide up to 6000 W to a single RKP-1UI rack-
mount unit.
•
Bussing kits are available to bus together up to three rack systems. See
Bussing Kits on
page16
.
•
Three bussed RKP-1UI rack-mount units bussed together and containing nine RCP-2000
power supplies can provide a maximum of 18000 W.
•
ETCprovides three power supply cord options for the RKP-1UI rack-mount unit:
-
15A Edison plug to locking IECconnector (Model FDRPSCICE2, ETCPart W6638)
-
20A Ceeform plug to locking IECconnector (Model FDRPSICC16, ETCPart W6639)
-
16A Schuko plug to locking IECconnector (Model FDRPSICS16, ETCPart W6640)
MEAN WELLRKP-1U with three RCP-2000 modules
29.48 mm
(1-5/32 in)
7.42 mm
(9/32 in)
466.1 mm (18-11/32 in)
483.6 mm (19 in)
44 mm
(1-23/32 in)
7.1 mm
(9/32 in)
7.1 mm
(9/32 in)
10.2 mm (13/32 in)
C B A
G H
DE F
I
J
K L
AModule A GDC output terminal "+"
BModule B HDCoutput terminal "-"
CModule C IMounting bracket
DACinput for module A JGround/Earth stud
EACinput for module B KJK1 ports
FACinput for module C LCN500 port
Note:
Each MEANWELLthree-bay frame ships with an RJ45 terminator that must be
installed in one of the JK1 ports if you are bussing multiple three-bay frames together.
See Bussing Kits on page16.
Note:
Each MEANWELLthree-bay frame ships with a DB-25 terminator that must be
installed in the CN500 port in order for the three-bay frame to power on. See Final
.

14 R12 Installation Manual
Install the Power Supply in the Rack
WARNING: RISKOFELECTRICSHOCK! Maintain 20mm (3/4in) clearance
behind the installed MEANWELLthree-bay frame. Equipment mounted
above or below a MEANWELLthree-bay frame must be 35cm(14in)or less
in depth. Equipment with a depth of more than 35cm(14in) mounted
immediately above or below a MEANWELL three-bay frame may cause an
unsafe electrical connection due to mechanical interference with the power
bussing connections.
AVERTISSEMENT : RISQUE DE CHOC ÉLECTRIQUE! Conservez un espace
de 20 mm (3/4 po) derrière le châssis du rack MEAN WELL installé. Tout
équipement monté au-dessus ou au-dessous d'un rack MEAN WELL doit
avoir une profondeur de 35 cm (14 po) ou moins. Tout équipement d'une
profondeur de plus de 35 cm (14 po) monté immédiatement au-dessus ou
au-dessous d'un rack MEAN WELL peut provoquer une connexion électrique
dangereuse en raison d'interférences mécaniques avec les connexions de bus
d'alimentation.
1. Ensure power to the rack is off.
2. Mount all rack-mountunits in a 19-inch equipment rack using the supplied rack-mounting
rails.
•
Each three-bay frame is equipped with built-in fans that require 10 cm clearance
around the ventilation holes after mounting in the 19-inch rack.
•
See
Rack-Mount Safety on page11
.
3. Insert MEANWELL RCP-2000 power supplies with the same output voltage and current
into the three-bay frames.
Note:
MEANWELL power supplies are factory-calibrated. If you find it necessary to
calibrate the output of each MEANWELLpower supply for optimal current-sharing, see
the
Output Voltage Adjustment
section of the
RCP-2000/RKP-1U Instruction Manual
from MEANWELL. See Technical Information from MEANWELL on page12.
Connect Ground/Earth
Each RKP-1UI three-bay frame has a ground/earth stud for connection to the equipment rack
ground/earth. ETCprovides a 0.6m (2ft) harness of 8 AWG insulated wire with a ring terminal
on one end and a bare end on the other with the R12 bussing kits for this purpose. See
Bussing
Kits on page16
for more information about bussing kits. Follow all local and national codes.
Other manuals for F-Drive R12 Series
2
Table of contents
Other ETC Computer Hardware manuals
Popular Computer Hardware manuals by other brands

Rockwell Automation
Rockwell Automation Pico GFX-70 installation instructions

Ashly
Ashly Protea 24.24M Specification sheet

Renesas
Renesas M34559T-PTCB user manual

National Semiconductor
National Semiconductor LM628 Programming guide

Parker
Parker Compumotor OEM-AT6400 installation guide

Commodore
Commodore Amiga 2630 user guide