manuals.online logo
Brands
  1. Home
  2. •
  3. Brands
  4. •
  5. Eureka
  6. •
  7. Tent
  8. •
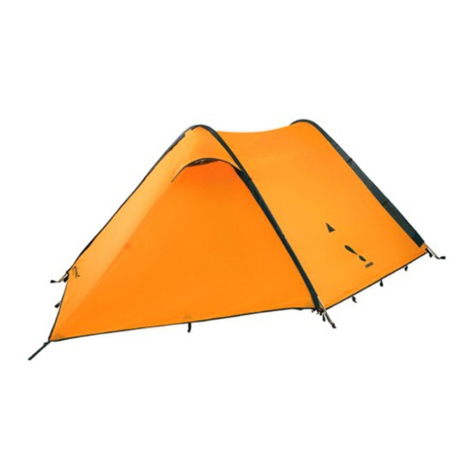
  9. Eureka Grand Manan User manual

Eureka Grand Manan User manual

 

• Tent Body
• Tent Fly sheet
• Equal length main frame poles (2)
• Tent bag with separate pole bag
• Stake bag
• Stakes (14)
• Fly rod
• Guy line ropes (4)

1. Choose a level site that offers drainage away from the
tent in the event of a heavy rain. Be sure to clear site of
any sharp or protruding objects that could damage the
floor of the tent.
2. Spread the tent body in the area you have selected. (If
using a Footprint/Floorsaver or ground sheet, spread it
first laying the tent body on top.)
3. Assemble the two main poles being sure to fully insert
ferrule connections. Improperly fitted ferrule connections
can result in pole breakage.
4. Insert the poles through the pole sleeves that run diago-
nally across the tent body. Always push poles through.
ulling can result in separation of ferrules and possible
breakage. Once both pole have been inserted they
should now create an X pattern.
5. Select a corner and insert the pole tip into the corner
web grommet. Using the same pole, flex it into shape and
insert the opposite end pole tip into the diagonally oppo-
site web grommet. When flexing the pole you may need
to grab the end of the pole sleeve while pushing the pole
into the sleeve.
6. Repeat step 5. The Tent body should now be assembled
and can be accurately positioned on your site and staked
in place, (If using a Footprint/Floorsaver or ground sheet,
it is important that the edges of the groundcover are not
extending beyond the tent floor. Ideally the tent floor
should extend about 10cm beyond the groundcover.)
7. Stretch out the fly sheet with the underside facing up.
Locate the fly pole pockets. Insert one end of the fly pole
into one pocket. Flex the pole enough to allow you to
insert the opposite end into the second pole pocket.
Locate any Velcro fasteners along the length of the fly
pole seam and wrap around the fly pole.
8. Lift and place the fly sheet onto the tent with the out-
side of the fly sheet now facing upwards. osition the fly
sheet vestibules over the tent body doors.
9. On the underside of the fly sheet are 8 velcro fasteners.
4 are located at the pre-bent tent shoulders ( B Velcro)
and 4 are located further up the seam at a higher point
(H Velcro). Fasten the H Velcro around the poles. There
are cutaways in the pole sleeve allowing you to do this.
10. Now attach the H Velcro at the pre-bent shoulders. The
B Velcro uses a ‘sandwich’ system with the Velcro
attaching to both sides of the pole sleeve.

• Tente
• Double toit
• Arceaux solidarisés (2)
• Sac pour tente et sac pour arceaux
• Sac pour piquets
• iquets (14)

1. Inspecter le site et s’assurer qu’il ne présente pas d’objet
pointus, tranchants ou protubérants. (Nous recomman-
dons l’utilisation d’une toile Eureka Floorsaver sous la
tente afin d’en protéger d’autant mieux le tapis de sol.)
S’assurer que le site est bien drainé de manière à ce qu’il
éloigne l’eau de pluie de la tente.
2. Étendre la tente au sol sur l’emplacement choisi. ar
temps venteux, fixer au sol à l’aide d’un piquet le coin qui
est au vent. Joindre bout à bout les sections solidarisées
des arceaux en s’assurant que les sections s’emboîtent à
fond dans les viroles.
3. Insérer un premier arceau dans les gaines d’armature
situées sur le dessus de la tente. L’arceau passe ainsi en
diagonale d’un coin à l’autre. Toujours pousser l’arceau au
travers des gaines. (Le fait de le tirer peut occasionner la
séparation des joints, ce qui peut causer le bris lors de la
mise sous tension.)
4. Répéter l’étape 3 avec le deuxième arceau solidarisé. Une
fois les deux arceaux dans leurs gaines, ils doivent former
un X sur la tente.
5. Depuis l’un des coins (par temps venteux, celui qui est au
vent), insérer dans l’œillet du coin de la tente un des
bouts de l’arceau. Du coin diagonalement opposé, arquer
l’arceau et en insérer le bout dans l’œillet correspondant.
(Note : si de la résistance se fait alors sentir, s’assurer de
libérer tout coincement du tissu. Si une deuxième per-
sonne est présente, elle peut soutenir l’arceau et en
décoincer tout tissu.)
6. Répéter l’étape 5 avec le deuxième arceau. La tente
devrait alors être montée. Fixer les crochets d’armature
aux arceaux.
7. Les quatre coins de la tente peuvent maintenant être
assujettis au sol à l’aide des piquets. Enfoncer les piquets
dans le sol à un angle tel que la tête du piquet s’éloigne
de la tente.
8. Étendre le double toit sur la tente en alignant les portes
de vestibule sur les portes de tente. Fixer aux arceaux les
pattes de velours-crochet situées sur l’envers du double
toit. Joindre chacune des boucles à détente latérale,
situées aux coins du double toit, à sa moitié correspon-
dante des coins de la tente. Régler la tension des sangles
de manière à ce que le double toit s’ajuste de près et
uniformément à la tente.
9. Assujettir les deux vestibules au sol à l’aide des piquets.
10. ar temps pluvieux surtout, il est recommandé d’assujet-
tir aussi, à l’aide des piquets, les anneaux latéraux du dou-
ble toit.
11. At each corner you will locate a web strap with buckle
attached to the pre-bent shoulder. Connect this to the
receptor buckle located lower down at the tent corner.
Tighten web adjustment as required.
12. Now you can stake down the lower edges of the fly sheet.
At the 4 corners the loop attachment can be secured to
the same stake used to stake down the tent body. Midway
along the lower edge of the sides of the fly sheet you will
find loops for staking out. Stretch and stake.
13. Now stretch out the vestibules and stake securely.
14. If strong winds are anticipated attach the guy lines to the
guy out locations, one at each pre-bent corner, and stake
securely.

• We have made these tents using quality fabrics with water
proof coatings and have taped all exposed seams.
However there are locations, guy out attachments as an
example, where stitch lines are sewn through the tape. It
is possible that during a heavy rain small leaks can occur. If
this occurs simply apply a seam sealant to the area where
water is leaking through.
• We do recommend the use of a tent Footprint, Floorsaver
or groundsheet as this protects the tent floor from abra-
sion for years of use.
• Whenever possible pitch your tent in a shaded location.
The Ultraviolet rays of the sun damage all forms of mate-
rials, tents included, therefore sheltered sites will help pro-
long the life of your tent by reducing UV exposure.
• Open zippers at ‘moderate’ speed. ‘Ripping’ zippers open
at high speed can result in snagged fabrics and or a ‘soft-
ening’ of the slider mechanism. The result will see the zip-
per coils failing to mesh, which is repairable but causing
concern when in use.
• Never take food into a tent. Rodents, raccoons, bears are
naturally attracted to food smells and can cause damage
to a tent and possibly to tent users.

• Eureka offers a Lifetime Warranty against manufacturers
defects
• The warranty does not cover damage from abuse or mis-
use
• The warranty does not cover normal wear and tear
breakdown which will occur naturally over time and use.
Any questions regarding warranty then call 905 634 0023
11. ar temps venteux, il est possible d’attacher des haubans aux
quatre points d’attache situés aux « épaules » de la tente et
des les fixer au sol à l’aide de piquets afin d’accroître la stabil-
ité.

• Les rayons U.V. du soleil peuvent être dommageables, malgré
les progrès techniques en matière de tissu. L’exposition pro-
longée peut causer la décoloration et possiblement la désinté-
gration du tissu. Lors du choix d’un site, tenter de monter la
tente à un endroit ombragé. Ne pas laisser une tente à l’état
monté plus longtemps que nécessaire.
• Les combustibles peuvent endommager les tentes comme le
peut le DEET trouvé dans de nombreux insectifuges.
• Toutes les coutures principales sont étanchées en usine. Au fil
du temps, le ruban d’étanchéité pourrait se décoller.
Simplement nettoyer la couture et appliquer un enduit à cou-
ture offert dans la plupart des boutiques d’équipement de
camping.
• Éviter de ranger la tente dans un endroit chaud.
• S’assurer de ranger la tente à l’état sec. La moisissure peut se
manifester sur l’enduit imperméable lorsque la tente est
rangée à l’état humide.
• Nous recommandons l’utilisation d’une mince toile ou
Floorsaver sous toute tente afin de la protéger de l’abrasion.
La toile devrait être moins grande de 10 cm (4 po) que le
tapis de sol de la tente afin d’empêcher la possibilité de l’a-
cheminement de l’eau sous la tente.

Other Eureka Tent manuals

Eureka Solar Shade User manual

Eureka

Eureka Solar Shade User manual

Eureka Solitaire User manual

Eureka

Eureka Solitaire User manual

Eureka Grand Manan Tour User manual

Eureka

Eureka Grand Manan Tour User manual

Eureka Wild Basin 4 Parts list manual

Eureka

Eureka Wild Basin 4 Parts list manual

Eureka Zeus Classic User manual

Eureka

Eureka Zeus Classic User manual

Eureka Northern Breeze User manual

Eureka

Eureka Northern Breeze User manual

Eureka Timberline User manual

Eureka

Eureka Timberline User manual

Eureka EI Capitan 2 User manual

Eureka

Eureka EI Capitan 2 User manual

Eureka Tundern Cove 4 User manual

Eureka

Eureka Tundern Cove 4 User manual

Eureka Scenic Pass 2 Scenic Pass 2 User manual

Eureka

Eureka Scenic Pass 2 Scenic Pass 2 User manual

Eureka Condo User manual

Eureka

Eureka Condo User manual

Eureka Assault Outfitter 08 User manual

Eureka

Eureka Assault Outfitter 08 User manual

Eureka Alpenlite 2XT User manual

Eureka

Eureka Alpenlite 2XT User manual

Eureka Grand-Annex User manual

Eureka

Eureka Grand-Annex User manual

Eureka Twin Tube User manual

Eureka

Eureka Twin Tube User manual

Eureka Summerside User manual

Eureka

Eureka Summerside User manual

Eureka Tundraline Installation guide

Eureka

Eureka Tundraline Installation guide

Eureka VISTA Owner's manual

Eureka

Eureka VISTA Owner's manual

Eureka alpenlite 2XT User manual

Eureka

Eureka alpenlite 2XT User manual

Eureka Tent User manual

Eureka

Eureka Tent User manual

Eureka Copper Canyon 10 User manual

Eureka

Eureka Copper Canyon 10 User manual

Eureka Susten 2 XP Installation instructions

Eureka

Eureka Susten 2 XP Installation instructions

Eureka Backcountry 1 User manual

Eureka

Eureka Backcountry 1 User manual

Eureka Genesis User manual

Eureka

Eureka Genesis User manual

Popular Tent manuals by other brands

Nordcap Easy Up 400 Build-up instructions

Nordcap

Nordcap Easy Up 400 Build-up instructions

Zempire Neo Series instructions

Zempire

Zempire Neo Series instructions

CampTrails Grand Manan Assembly instructions

CampTrails

CampTrails Grand Manan Assembly instructions

Maanta ULISSE 90 Instructions and warnings

Maanta

Maanta ULISSE 90 Instructions and warnings

OZTENT JV SIGNATURE EDITION owner's manual

OZTENT

OZTENT JV SIGNATURE EDITION owner's manual

GigaTent Summer Chalet Mini Tent owner's manual

GigaTent

GigaTent Summer Chalet Mini Tent owner's manual

Outsunny 84C-230 manual

Outsunny

Outsunny 84C-230 manual

Crivit Outdoor 96716 instruction manual

Crivit Outdoor

Crivit Outdoor 96716 instruction manual

Reimo Marina instructions

Reimo

Reimo Marina instructions

Outsunny 84C-063 Assembly instruction

Outsunny

Outsunny 84C-063 Assembly instruction

EuroTrail ATLANTIS PRO manual

EuroTrail

EuroTrail ATLANTIS PRO manual

TiiTENT TB300 manual

TiiTENT

TiiTENT TB300 manual

Coleman 2000033134 Assembly & instruction manual

Coleman

Coleman 2000033134 Assembly & instruction manual

Ozark Trail W784.1 Assembly instructions and owner's manual

Ozark Trail

Ozark Trail W784.1 Assembly instructions and owner's manual

SlingFin CrossBow 2 instructions

SlingFin

SlingFin CrossBow 2 instructions

Coleman 9600-141 instructions

Coleman

Coleman 9600-141 instructions

Palram Arizona 5000 Wave - WINGS manual

Palram

Palram Arizona 5000 Wave - WINGS manual

COVERPRO 56184 Owner's manual & safety instructions

COVERPRO

COVERPRO 56184 Owner's manual & safety instructions

manuals.online logo
manuals.online logoBrands
  • About & Mission
  • Contact us
  • Privacy Policy
  • Terms and Conditions

Copyright 2025 Manuals.Online. All Rights Reserved.