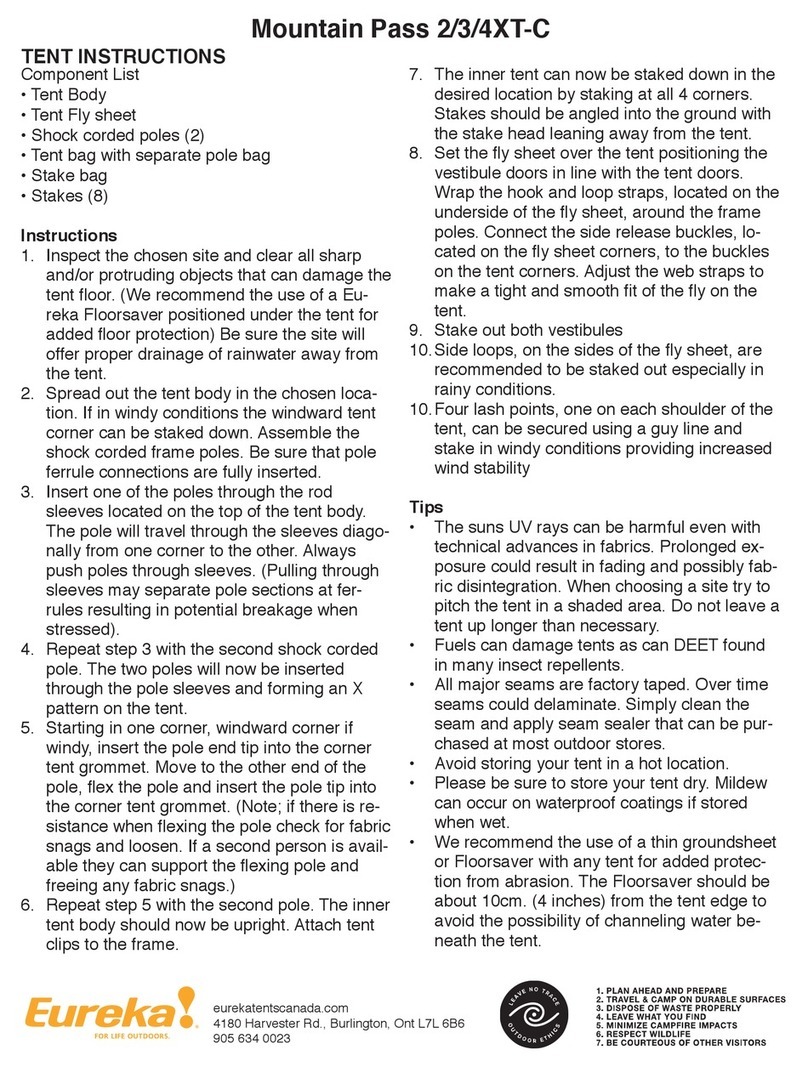
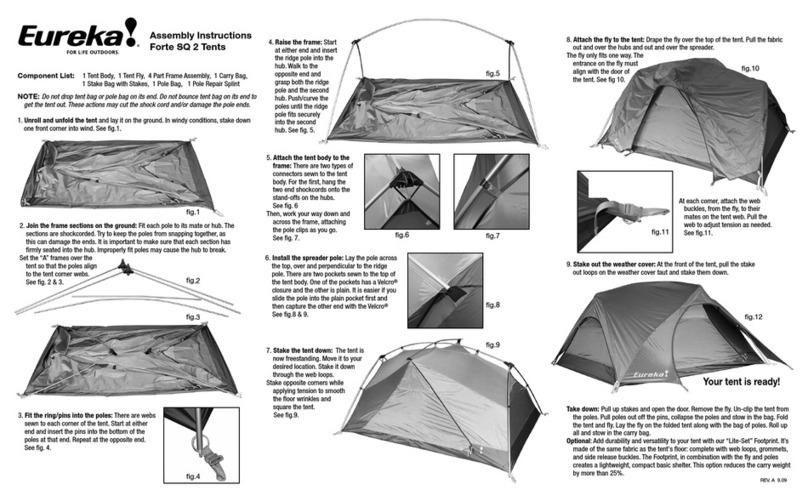
manuals.online logo
Brands
  1. Home
  2. •
  3. Brands
  4. •
  5. Eureka
  6. •
  7. Tent
  8. •
  9. Eureka Genesis User manual

Eureka Genesis User manual

www.eurekatents.com fax: 607.779.2291
REV.G 5.07
genesis
Instructions for:
30' Wide with 7'or 8' Aluminum or Wood side poles
40' Wide with 7'or 8' Aluminum or Wood side poles
50' Wide with 8' Aluminum or Wood side poles
60' Wide twin center poles with 8' Aluminum or Wood side poles
Genesis Tent Construction Features
• SNYDER 14-18 oz. Translucent or blockout vinyl
laminate tent fabric that is flame retardant and
mildew resistant
• Cast aluminum side pole and center pole fittings
• Reinforced pole positions
• Catenary Web belts
• Rope and grommet lace lines
• Double rain flaps
• Sealed valances with Velcro closures
• Removable ropes with carabiner fasteners on
30'-50', optional on 60'
• Side pole and center pole jump ropes
• Sidewall rope permanently installed
• Ring and snap attachments for tent sections
• Genesis tents are provided with storage bags
• Genesis tents are professionally designed,
patterned, cut, manufactured and finished
The Genesis
®
is a professionally designed tent series offering an elegant
profile and spacious interiors. Like a building pre-fabricated of tensile
components, each element is designed to specific load and weather
protection criteria. Extensive field testing and years of rental experience
now identifies the Genesis as a proven leader in rental tents.
Genesis tents are a Todd Dalland/FTL Happold design
genesis
www.eurekatents.com fax: 607.779.2291
REV.G 5.07
genesis
genesis
For safe, easy assembly we
recommend:
• Steel toe shoes
• Hard hats
• Safety gloves
• Utility aprons
• Step ladders
• Drop cloths
• Cleaning supplies
• Tape measures
• Sledge hammers
• Carpet dolly
• Stake driver
• Wooden coasters for side poles
• Read instructions thoroughly.
• Review all appendices
• Make sure you have everything
listed on the parts and shipping lists
as soon as you receive the shipment.
Pre-Assembly
Safety Considerations
Inspect the tent top to make sure there are no holes, rips or tears in
the fabric and web belts. Inspect all hardware, plates, grommets
and other fittings for signs of fatigue, wear or breakage.
Also inspect ropes and guy lines for general overall condition and
wear and tear. Inspect poles and stakes for fatigue, splintering or
breakage.
Repair or replace any item as needed. Failure to do so will
compromise the overall integrity and performance of the tent.
Conduct a Site Survey
A site survey should be conducted by a qualified sales or tent
installation professional. All information should be given to the
foreman of the installation.
Specify Tent
Be certain that the proper tent (size and type) is specified for the
location and function.
Environment
Evaluate the overall location — inspect for overhead and underground
obstructions and utilities. Determine exposure to wind. Test for soil
anchoring stability and ground conditions. Determine method and
type of staking that will be suitable for the tent and the tent site.
Lace the Tent
See Appendix A and G for additional instructions.
Square and Stake the Tent
See Appendix B and C for additional instructions.
A
With the site determined and evaluated, measure and mark the correct stake pattern for the tent. Use
and follow the stake templates from the following pages. Set the stake bars and stakes and drive
the stakes flush. See fig 1 and 2. If using ropes only, drive the stake so its head is 6" above ground.
Depending upon soil conditions, additional stakes may be necessary.
1
2
www.eurekatents.com fax: 607.779.2291
REV.G 5.07
B
Lay out the side poles and then spread the drop cloths. See fig 3 and 4.
C
Lay out the top
panels. Arrange
the panels
according to the
pattern.
See fig 5.
D
Stack and secure the center
pole plates. The plates only
fit one way. Stacking order is
important; plate of grommet end
on top. See fig 6.
genesis
genesis
3
4
5
6
www.eurekatents.com fax: 607.779.2291
REV.G 5.07
genesis
genesis
E
Start at the center pole plates and lace the top sections. Work toward the eave. When you reach the
longer web, go to the eave and work backwards to reweave the last lace loops back into the seam.
Tie a knot to finish. See fig 7 and 8.
7
8
F
Attach the clips and rings along the rain flap to cover the lace seam. Snap the tent sections
together. See fig 9 and 10.
9
10
www.eurekatents.com fax: 607.779.2291
REV.G 5.07
Raise The Tent:
Note: Whenever you assemble a tent with hardware at
or above the shoulders, wear a hard hat.
H
Snap the top sections together. Fit pole pin into the top grommets and corner plates. Raise
the four corner poles. It may be necessary to place the poles on a wooden pad or coaster.
This will minimize or prevent the poles from sinking into the ground when tension is applied
to the tent top. Insert the corner side poles into the corner fittings. Raise the poles to a slight
angle with the base of the pole set inside the tent perimeter. See fig 13 and 14.
genesis
genesis
G
Attach web / ratchets or ropes / carabiners to the corner pole plates. Then, attach remaining web /
ratchets or ropes / carabiners to the side pole plates. See fig 11 and 12.
11
12
13
14
www.eurekatents.com fax: 607.779.2291
REV.G 5.07
genesis
genesis
I
Fit the side pole pins into the side plates and raise the side poles. See fig 15 and 16.
15
J
Tie jump ropes to the top half of poles and pull down until snug. See fig 17 and 18.
17
16
www.eurekatents.com fax: 607.779.2291
REV.G 5.07
genesis
genesis
Assemble The Center Poles:
K
Each center pole is in sections. Align the holes and insert threaded bolts with a washer on each
side. Tighten the bolts to secure.
Raise The Center Poles:
Note: Whenever you assemble a tent with hardware at or above the shoulders, wear a hard hat.
L
Balance the center pole assembly on a carpet dolly and roll the pole into the tent near the center
pole plates. See fig 19 and 20.
OR
19
20
M
Manually lift and insert the center pole. With two people at a stake inserted through the lift hole and
two at the tip, walk the pole into the tent and fit the tip into top plate assembly. See fig 21
21
www.eurekatents.com fax: 607.779.2291
REV.G 5.07
genesis
genesis
Tensioning:
N
Tension the tent top in the following
sequence:
1 Web belts (ends of tent)
2 Lace lines
3 Corners
4 Intermediate pole positions
Manually:
Slant the side pole so the base of the pole is
inside the tent perimeter. Shorten the distance
of the rope going from the tent to its stake and
tie off using a clove hitch knot. Straighten the
side pole to a near vertical position. (The pole
should be slanting in slightly).
Mechanically:
Attach the web strap from the web and ratchet
assembly onto the side pole fitting. Position the
base of the side pole in its final position [ in line
and where you want it to be when you are finished ]. Pull the excess web through the ratchet.
Tighten the web strap until the side pole is in a near vertical position and the web strap is taut.
Continue to tighten the web belts (ends), lace lines, corners and intermediate poles. After all ropes
or webs are installed and tensioned, check to make sure the center poles are straight. Adjust the
tensioning if poles need to be altered slightly. See fig 22 and 23.
22
23
www.eurekatents.com fax: 607.779.2291
REV.G 5.07
genesis
genesis
30'
7'6"
7'
11'
18'
30'
15'
15'
top
15' mid
end
side
42' 5"
30' Wide Single Pole
www.eurekatents.com fax: 607.779.2291
REV.G 5.07
genesis
genesis
18'
15'11"
7'
7' 45'
7'6"
54' 1" inside
73' 7.2" outside
30' Wide x 45' Single Pole
Normal Install:
Stake bars at the lace lines, web
belts and corners.
42” Nailhead stake with 5/8”
rope and carabiner at all other
locations.
Full Wind Kit Install:
Stake bars:
Ratchet and stake plate assembly
installed at all locations.
Important: Wind Kit diagram is only a
suggestion. Soil conditions can vary
from site to site and within a specific
setup site. Installer must refer to the
specific tent design's blueprint for
stake load requirements in order to
satisfy full wind load requirements.
www.eurekatents.com fax: 607.779.2291
REV.G 5.07
genesis
genesis
40'
21'
7'
10'
40'
20'
20'
top
20' mid
end
side
56' 6.7"
40' Wide Single Pole
Can be installed with a Standard
4" dia. x 21' center pole.
( Not wind rated )
www.eurekatents.com fax: 607.779.2291
REV.G 5.07
genesis
genesis
60'
21' 19'4"
10'
7'
7'
72' 1" inside
91' 7.2" outside
40' Wide x 60' Single Pole
Normal Install:
Can be installed with a Standard
4" dia. x 21' center pole.
( Not wind rated )
Stake bars at the lace lines, web
belts and corners.
42” Nailhead stake with 5/8”
rope and carabiner at all other
locations.
Full Wind Kit Install:
Stake bars:
Ratchet and stake plate assembly
installed at all locations.
Important: Wind Kit diagram is only
a suggestion. Soil conditions can
vary from site to site and within a
specific setup site. Installer must
refer to the specific tent design's
blueprint for stake load requirements
in order to satisfy full wind load
requirements.
www.eurekatents.com fax: 607.779.2291
REV.G 5.07
genesis
100'
21'
19'4"
10'
7'
7'
107' 8.4" inside
126' 1.5" outside
Full Wind Kit Install:
Stake bars:
Stake bars:
Ratchet and stake plate
assembly installed at all
locations.
locations.
Important: Wind Kit diagram
is only a suggestion. Soil
conditions can vary from
site to site and within a
specific setup site. Installer
must refer to the specific
tent design's blueprint for
stake load requirements in
order to satisfy full wind load
requirements.
requirements.
40' Wide x 100' Single Pole
Normal Install:
Normal Install:
Can be installed with a
Standard 4" dia. x 21' center
pole. ( Not wind rated )
Stake bars at the lace lines,
web belts and corners.
42” Nailhead stake with 5/8”
rope and carabiner at all
other locations.
other locations.
www.eurekatents.com fax: 607.779.2291
REV.G 5.07
genesis
50' Wide Single Pole
40'
40'
25'
20'
25'
17'
8'
10'
50'
50'
50'
30'
20'
50'
top
30' mid
25' mid
20" mid
end
side
64' .3"
www.eurekatents.com fax: 607.779.2291
REV.G 5.07
20'
25'
22'6"
8'
8' 80'
94' 4" inside
116' 6" outside
genesis
genesis
50' Wide x 80' Single Pole
Normal Install:
Stake bars at the lace lines, web
belts and corners.
42” Nailhead stake with 5/8”
rope and carabiner at all other
locations.
Full Wind Kit Install:
Stake bars:
Ratchet and stake plate assembly
installed at all locations.
Important: Wind Kit diagram is
only a suggestion. Soil conditions
can vary from site to site and
within a specific setup site.
Installer must refer to the specific
tent design's blueprint for stake
load requirements in order to
satisfy full wind load requirements.
www.eurekatents.com fax: 607.779.2291
REV.G 5.07
genesis
genesis
60' Wide Twin Pole
10'
17'
15'
25'
20'10"
8'
60'
60'
30'
30'
60'
30'
30'
10'
top
30' mid
20' mid
end
side
84' 10.25"
www.eurekatents.com fax: 607.779.2291
REV.G 5.07
genesis
genesis
90'
25'
8'
20'10"
10'
8'
108' 2" inside
130' 5.1" outside
60' Wide x 90' Twin Pole
Normal Install:
Stake bars at the lace lines, web
belts and corners.
42” Nailhead stake with 5/8”
rope and carabiner at all other
locations.
Full Wind Kit Install:
Stake bars:
Ratchet and stake plate assembly
installed at all locations.
Important: Wind Kit diagram
is only a suggestion. Soil
conditions can vary from site to
site and within a specific setup
site. Installer must refer to the
specific tent design's blueprint
for stake load requirements in
order to satisfy full wind load
requirements.
www.eurekatents.com fax: 607.779.2291
REV.G 5.07
genesis
120'
25'
8'
20'10"
10'
8'
155'-9.5" outside
134'-2" inside
60' Wide x 120' Twin Pole
Normal Install:
Stake bars at the lace
lines, web belts and
corners.
42” Nailhead stake with
5/8” rope and carabiner at
all other locations.
Full Wind Kit Install:
Stake bars:
Ratchet and stake plate
assembly
installed at all locations.
Important: Wind
Kit diagram is only
a suggestion. Soil
conditions can vary from
site to site and within
a specific setup site.
Installer must refer to
the specific tent design's
blueprint for stake load
requirements in order
to satisfy full wind load
requirements.
requirements.
www.eurekatents.com fax: 607.779.2291
REV.G 5.07
30X30
2 PC VINYL
2406500
30X30
2 PC BLOCKOUT
2406510
2 PC 18' ALUM C.P.
1
2470806
7' WOOD SIDE POLE
16
2470007
42” NAILHEADS
26
2470124
NI
Fwind
2' Stake bar
10
2470832
18
4' Stake bar (Lace Lines)
2
2470833
2
Web & Winch
12
2470834
20
40” DBL Nailhead Stakes
42
2470123
66
42” Nailhead Stakes
8
2470124
15' MID FOR 30' VINYL
2406600C
15' MID FOR 30' BLK/OUT
2406610
2 PC 18' ALUM Center Pole
1
2470806
7' WOOD Side Pole
4
2470007
42” NAILHEADS
6
2470124
40X40 2 PC VINYL
2406000
40X40 2 PC BLOCKOUT
40X40 2 PC BLOCKOUT 40X40 2 PC BLOCKOUT
2406010
2 PC 18' ALUM CENTER POLE
1
2470806
3' EXTENSION
1
2470807
7' WOOD S.P.
16
2470007
42' NAILHEADS
30
2470124
NI
Fwind
2' Stake bar
10
2470832
18
4' Stake bar (Lace Lines)
2
2470833
2
Web & Winch
12
2470834
20
40” DBL Nailhead Stakes
42
2470123
66
42” Nailhead Stakes
8
2470124
2O' MID FOR 40' VINYL
2406200
20' MID FOR 40' BLOCKOUT
20' MID FOR 40' BLOCKOUT 20' MID FOR 40' BLOCKOUT
2406210
2 PC 18' ALUM CENTER POLE
1
2470806
3' EXTENSION
1
2470807
7' WOOD SIDE POLE
4
2470007
42' NAILHEADS
6
2470124
NI
Fwind
2' Stake bar
0
2470832
2
4' Stake bar (Lace Lines)
2
2470833
2
Web & Winch
2
2470834
4
40” DBL Nailhead Stakes
12
2470123
18
42” Nailhead Stakes
2
2470124
50 X 40 2 PC TOP VINYL
2406020
50 X 40 2 PC TOP BLOCKOUT
2406021
2 PC 25' ALUM CENTER POLE
1
2470817
8' / 4” HEX WOOD S.P.
18
2470005
42” NAILHEADS
34
2470124
50 X 50 2 PC TOP VINYL
2406030
50 X 50 2 PC TOP BLOCKOUT
2406031
2 PC 25' ALUM CENTER POLE
1
2470817
8' / 4” HEX WOOD S.P.
22
2470005
42” NAILHEADS
36
2470124
NI
FWind
2' Stake bar
12
2470832
20
4' Stake bar (Lace Lines)
2
2470833
2
Web & Winch
14
2470834
22
40” DBL Nailhead Stakes
48
2470123
72
42” Nailhead Stakes
8
2470124
20' MID FOR 50' WHT
2406220
20' MID FOR 50' BLOCKOUT
20' MID FOR 50' BLOCKOUT 20' MID FOR 50' BLOCKOUT
2406221
2 PC 25' ALUM CENTER POLE
1
2470817
4” HEX WOOD SIDE POLE
4
2470005
42” NAILHEADS
6
2470124
NI
FWind
2' Stake bar
0
2470832
2
4' Stake bar (Lace Lines)
2
2470833
2
Web & Winch
2
2470834
4
40” DBL Nailhead Stakes
12
2470123
18
42” Nailhead Stakes
2
2470124
25' MID FOR 50' VINYL
2406230
25' MID FOR 50' BLOCKOUT
25' MID FOR 50' BLOCKOUT 25' MID FOR 50' BLOCKOUT
2406231
2 PC 25' ALUM CENTER POLE
1
2470817
4” HEX WOOD SIDE POLE
6
2470005
42” NAILHEADS
8
2470124
NI
FWind
2' Stake bar
0
2470832
4
4' Stake bar (Lace Lines)
2
2470833
2
Web & Winch
2
2470834
6
40” DBL Nailhead Stakes
12
2470123
24
42” Nailhead Stakes
4
2470124
genesis
genesis
NI = normal installation
FW = full wind kit
www.eurekatents.com fax: 607.779.2291
REV.G 5.07
30' MID FOR 50' VINYL
2406240
30' MID FOR 50' BLOCKOUT
30' MID FOR 50' BLOCKOUT 30' MID FOR 50' BLOCKOUT
2406241
2 PC 25' ALUM CENTER POLE
1
2470817
4” HEX WOOD SIDE POLE
6
2470005
42” NAILHEADS
8
2470124
NI
FWind
2' Stake bar
0
2470832
4
4' Stake bar (Lace Lines)
2
2470833
2
Web & Winch
2
2470834
6
40” DBL Nailhead Stakes
12
2470123
24
42” Nailhead Stakes
4
2470124
TWIN POLE 60X60 T.P. GEN VINYL
2406301
60X60 T.P. GEN BLOCKOUT
2406320
25'- 5” 2 PC ALUM CENTER POLE
2
2470817
8' - 4” HEX SIDE POLE
24
2470005
42” NAILHEADS
56
2470124
NI
FWind
2' Stake bar
10
2470832
26
4' Stake bar (Lace Lines)
2
2470833
2
Web & Winch
12
2470834
28
40” DBL Nailhead Stakes
42
2470123
90
42” Nailhead Stakes
16
2470124
20' MID 60' T.P. GN VIN
2406430
20' MID 60' T.P. GN BLOCKOUT
2406431
25'- 5” 2 PC ALUM CENTER POLE
2
2470817
8' - 4” HEX SIDE POLE
4
2470005
42” NAILHEADS
12
2470124
NI
FWind
2' Stake bar
0
2470832
2
4' Stake bar (Lace Lines)
2
2470833
2
Web & Winch
2
2470834
4
40” DBL Nailhead Stakes
12
2470123
18
42” Nailhead Stakes
2
2470124
30' MID 60' T.P. GN VIN
2406401
30' MID 60' T.P. GN BLOCKOUT
2406420
25'- 5” 2 PC ALUM CENTER POLE
2
2470817
8' - 4” HEX SIDE POLE
6
2470005
42” NAILHEADS
14
2470124
NI
FWind
2' Stake bar
0
2470832
4
4' Stake bar (Lace Lines)
2
2470833
2
Web & Winch
2
2470834
6
40” DBL Nailhead Stakes
12
2470123
24
42” Nailhead Stakes
4
2470124
genesis
genesis

Other Eureka Tent manuals

Eureka Tetragon 1210 User manual

Eureka

Eureka Tetragon 1210 User manual

Eureka EI Capitan 2 User manual

Eureka

Eureka EI Capitan 2 User manual

Eureka Tetragon 1610 User manual

Eureka

Eureka Tetragon 1610 User manual

Eureka Timberline User manual

Eureka

Eureka Timberline User manual

Eureka Apex XT User manual

Eureka

Eureka Apex XT User manual

Eureka Copper Canyon 1312 User manual

Eureka

Eureka Copper Canyon 1312 User manual

Eureka APEX 2 User manual

Eureka

Eureka APEX 2 User manual

Eureka Chrysalis User manual

Eureka

Eureka Chrysalis User manual

Eureka Timberline Outfitter User manual

Eureka

Eureka Timberline Outfitter User manual

Eureka Spitfire User manual

Eureka

Eureka Spitfire User manual

Eureka Mountain Pass 2XT-C User manual

Eureka

Eureka Mountain Pass 2XT-C User manual

Eureka Suite 4 User manual

Eureka

Eureka Suite 4 User manual

Eureka Sunrise EX 4 Manual

Eureka

Eureka Sunrise EX 4 Manual

Eureka Solar Shade User manual

Eureka

Eureka Solar Shade User manual

Eureka OTC User manual

Eureka

Eureka OTC User manual

Eureka Copper Canyon 10 User manual

Eureka

Eureka Copper Canyon 10 User manual

Eureka BON ECHO AIR 99 User manual

Eureka

Eureka BON ECHO AIR 99 User manual

Eureka N!ergy Screen House User manual

Eureka

Eureka N!ergy Screen House User manual

Eureka Solitaire User manual

Eureka

Eureka Solitaire User manual

Eureka Tundern Cove 4 User manual

Eureka

Eureka Tundern Cove 4 User manual

Eureka 6 User manual

Eureka

Eureka 6 User manual

Eureka Backcountry 1 User manual

Eureka

Eureka Backcountry 1 User manual

Eureka N!ergy 1210 User manual

Eureka

Eureka N!ergy 1210 User manual

Eureka Lone Tree 3 Parts list manual

Eureka

Eureka Lone Tree 3 Parts list manual

Popular Tent manuals by other brands

Vango KAROO Pitching instructions

Vango

Vango KAROO Pitching instructions

Kiwi Camping KC072-44 7 Pitching instructions

Kiwi Camping

Kiwi Camping KC072-44 7 Pitching instructions

encompass Hunter's Den HB-060 instruction manual

encompass

encompass Hunter's Den HB-060 instruction manual

MSW MSW-CC-450-130 user manual

MSW

MSW MSW-CC-450-130 user manual

Burton BIG AGNES X quick start guide

Burton

Burton BIG AGNES X quick start guide

Coleman EAGLE ROCK 9277F950 instructions

Coleman

Coleman EAGLE ROCK 9277F950 instructions

mitko DOME M5 manual

mitko

mitko DOME M5 manual

Wechsel VENTURE 1 Pitching instructions

Wechsel

Wechsel VENTURE 1 Pitching instructions

Force 10 Classic Standard quick start guide

Force 10

Force 10 Classic Standard quick start guide

Texsport 02906 instructions

Texsport

Texsport 02906 instructions

Bergans HELIUM DOME manual

Bergans

Bergans HELIUM DOME manual

Harol SC900 installation instructions

Harol

Harol SC900 installation instructions

toolport L1-Q2 Series Assembly instructions

toolport

toolport L1-Q2 Series Assembly instructions

Palram Juniper 3x3 manual

Palram

Palram Juniper 3x3 manual

Coleman SUNDOME 9260F304 instructions

Coleman

Coleman SUNDOME 9260F304 instructions

Dancover TentZing CT168300 manual

Dancover

Dancover TentZing CT168300 manual

Outwell Regent YOSEMITE LAKE 5TC quick start guide

Outwell

Outwell Regent YOSEMITE LAKE 5TC quick start guide

Anchor 10’ Assembly instructions

Anchor

Anchor 10’ Assembly instructions

manuals.online logo
manuals.online logoBrands
  • About & Mission
  • Contact us
  • Privacy Policy
  • Terms and Conditions

Copyright 2025 Manuals.Online. All Rights Reserved.