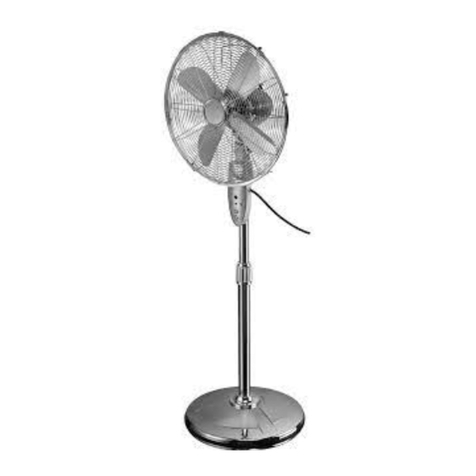
Eurocool FSH-75 User manual

FSH-75

Hvala vam na odabiru našeg uređaja. Molimo pročitajte ove uputeza uporabu pažljivo prije korištenja.1VAŽNE SIGURNOSNE UPUTE ............................................................................................IDENTIFIKACIJA / SASTAVLJANJE DIJELOVA .............................................................................UPORABA ...................................................................................................................................ČIŠĆENJE I POHRANJIVANJE ......................................................................................................ODRŽAVANJE .............................................................................................................................

VAŽNE SIGURNOSNE UPUTE2PROČITAJTE I SPREMITE OVE SIGURNOSNE UPUTE ZA UPORABU PRIJE KORIŠTENJA UREĐAJA UPOZORENJE: Prilikom korištenja električnog uređaja uvijek se držite osnovnih sigurnosnih mjera kako bi se smanjio rizik od požara, strujnog udara i ozljeda.Koristite ovaj uređaj samo onako kako je opisano u ovom priručniku. Drugačija uporaba, koja nije preporučena, može uzrokovati požar, strujni udar ili ozljede.Ovaj je proizvod namijenjen SAMO za kućanstvo, a ne za komercijalnu, industrijsku ili vanjsku upotrebu.Za zaštitu od strujnog udara: nemojte postavljati uređaj na prozorsku klupčicu, nemojte uranjati uređaj, utikač ili kabel u vodu te nemojte prskati tekućinom.Zbog smanjenja rizika od udara, ovaj utikač namijenjen je da pristaje utičnici. Ukoliko utikač ne pristaje utičnici u potpunosti, okrenite utikač. Ako i dalje ne pristaje utičnici, kontaktirajte kvalificiranog električara. NE pokušavajte zanemariti ovu sigurnosnu značajku.Nije namijenjeno da osobe (uključujući djecu) smanjene fizičke, senzorne ili mentalne sposobnosti, ili s nedostatkom iskustva i znanja, koriste ovaj uređaj , osim ako im je osoba odgovorna za njihovu sigurnost dala uputu o upotrebi uređaja ili ih nadzire.Djecu treba nadzirati kako bi se osiguralo da se ne igraju s uređajem.Ugasite uređaj te ga isključite iz struje kada nije u upotrebi, prilikom premještanja s jednog mjesta na drugo i prije čišćenja.Da biste odspojili uređaj, prvo ga ugasite, zgrabite utikač i izvadite ga iz zidne utičnice. Nikada ne povlačite utikač za kabel.Ne upravljajte uređajem u prisutnosti eksplozivnih i/ili zapaljivih para.Ne postavljajte uređaj ili dijelove u blizini otvorenog plamena, uređaja za kuhanje ili ostalih uređaja za grijanje.Ne koristite uređaj ukoliko su utikač ili kabel oštećeni, ukoliko je proizvod u kvaru ili ako je proizvod pao ili je oštećen na bilo koji način.Izbjegavajte kontakt s pomičnim dijelovima ventilatora.Korištenje priključaka koje proizvođač nije preporučio može uzrokovati štetu.Postavite ventilator na suhu ravnu površinu.Nemojte objesiti ili montirati uređaj na zid ili strop.Ne koristite ako je kućište uređaja oštećeno.Slabi spoj između električne utičnice i utikača može uzrokovati pregrijavanje ili izobličenje utikača. Kontaktirajte kvalificiranog električara kako biste promijenili neispravnu ili istrošenu utičnicu.Koristite na napajanju koje odgovara onome iskazanome na naljepnici uređaja.Kako bi se izbjegla opasnost, oštećeni kabel za napajanje mora zamijeniti proizvođač, njegov servis ili slične kvalificirane osobe.Ovaj uređaj mogu koristiti djeca starija od 8 godina i osobe smanjene fizičke, senzorne ili mentalne sposobnosti, ili osobe s nedostatkom iskustva i znanja, uz nadzor ili uz danu uputu o korištenju uređaja na siguran način te ako razumiju moguće opasnosti. Djeca se ne smiju igrati s uređajem. Djeca ne smiju čistiti i održavati uređaj bez nadzora.

4NAČIN UGRADNJE VENTILATORANapomena: Prije instalacije provjerite je li dio nedostajao ili je uređaj oštećen. Napomena: U uređaj sipati destiliranu vodu!DIJELOVI UREĐAJA1. Prednja maska2. Matica s noževima3. Oštrica4. Net-okvir5. Sigurnosni vijak6. Stražnja maska7. Tipka za kontrolu oscilacije8. Stražnje kućište motora9. Motorna cijev10. Pričvrsni vijak11. Stajaća cijev12. Osnovni pokrov13. Baza14. Tipka za upravljanje15. VratUpute za sastavljanje:1. Otvorite pakiranje i pregledajte dijelove koji su prikazani na gornjem dijagramu.2. Postavite dvije brtve u cijevi, a zatim umetnite u odgovarajuće rupebazu, kao prikaz osnovne dijagnostičke instalacije. Pritegnite ih vijcima od mesona istavite na podnožje.3. Izvadite glavno tijelo ventilatora (ovaj dio je instaliran) Odvijte vijakvijcima u stražnjem dijelu i zatim postavite cijevi stalka. I zategnite pričvrsne vijkeopet.4. Postavite stražnju stražnju stranu stražnjeg vijka u smjeru kazaljke na satu na glavi ventilatora.5. Pritegnite oštricu s maticom oštrice u smjeru suprotnom od kazaljki na satu na vratilu motora.6. Za zategnuti prednji stražar, najprije otpustite vijak na mrežastom okviru, poravnajte i poravnajtestražnja straža i stražnja straža zatim zategnite vijak.

UPORABA5NAČIN ISPITIVANJA1. Izvadite ovlaživač zraka iz ambalaže.2. Preokrenite spremnik za vodu.3. Otvorite poklopac spremnika vode u suprotnom smjeru.4. Ispunite čistom i čistom vodom.5. Ručnite poklopac spremnika vode u smjeru kazaljke na satu ..DJELOVANJE:1. ISKLJUČENO: Isključite ventilator, ali je ovlaživač još uvijek uključen.2. UKLJ / BRZINA: Uključite ventilator, postoje tri brzine za osobni izbor.3. NAČIN: Postoje tri načina - priroda, normalna i san.· Priroda - Ventilator radi u nepravilnom stanju u skladu s unaprijed određenim programom.· Normalno - Ventilator će raditi pri niskoj i srednje velikoj brzini.· Spavanje - Ventilator će raditi oko pola sata velike brzine, a zatim pola sata medijabrzinu i malu brzinu dok se ne isključi.4. MREŽA: Uključite / isključite ovlaživač zraka, ali ne možete podesiti glasnoću magle.5. SWING: Ventilator počinje oscilirajući kada pritisnete ovu tipku. On će prestati raditi kadaisključivanje ventilatora.6. TIMER: Postavljanje radnog vremena. 7,5 sati ukupno i postavljeno je s 0,5h, 1h, 1,5h, 2h,2.5h, 3h, 3.5h, 4h, 4.5h, 5h, 5.5h, 6h, 6.5h, 7h, 7.5h.

6Opis funkcijaObavijest:· Prije čišćenja odspojite ventilator.· Čistite s blagim deterdžentom i mekom krpom.· Prije svake uporabe stavite motorno ulje između osovine motora i ležaja.· Ako je utikač oštećen, mora ga zamijeniti proizvođač ili njegova uslugaagenta ili sličnu stručna osoba kako bi izbjegli opasnost.· Ne izlažite ventilator na sunčevoj svjetlosti ili u vlažnu okolinu.ČIŠĆENJE I ODRŽAVANJE 1. Prije čišćenja odspojite uređaj.2. Čistite spremnik za vodu i bazu za ovlaživanje jednom tjedno.· Ako postoji ljestvica u spremniku za vodu i bazu, koristite deterdžent limunske kiselineopremljen ventilatorom ili kupiti od trgovina.Drugi izbor na ljestvici je: stavite malo sode bikarbone i bijeli ocatzajedno u vodu.· Izlijepite vodu nakon uklanjanja ljestvice i ispirite spremnik vode i vodubazu čistom vodom.3. Očistite vanjski ovlaživač.· Jasno očistite prljavštinu i prljave tragove mekom vlažnom krpom.Dijagram 1 RastavljanjeDijagram 274. Napomene o čišćenju:· Nemojte dodirivati pretvornik s oštrim alatom.Očistite mekom vlažnom krpom.· Koristite samo čistu i čistu vodu, ali izbjegavajte kontakt s unutarnjim dijelovima kao što je ovajmože uzrokovati kvar proizvoda.· Nemojte rastavljati trup i dijelove.5. Pohrana ovlaživača zraka:· Kad se proizvod ne koristi dulje vrijeme, očistite ga i stavite u pakiranje.Zatim ga držite na suhom i hladnom mjestu. Ne izlažite sunčevoj svjetlosti ili vlaziokoliš.

Thank you for choosing our appliance. Please read this OWNER'SMANUAL carefully prior to using and keep it for further reference. 7IMPORTANT SAFETY INSTRUCTIONS ............................................................................................PARTS IDENTIFICATION / ASSEMBLY ............................................................................................OPERATION ...................................................................................................................................CLEANING AND STORAGE ..........................................................................................................MA .............................................................................................................................INTAINENCE

IMPORTANT SAFETY INSTRUCTIONS
8
READ AND SAVE THESE SAFETY INSTRUCTIONS BEFORE USING THIS APPLIANCEWARNING: When using electrical appliance, basic safety precautions should always be followed to reduce the risk of fire, electrical shock and personal injury.Use this fan only as described in this manual. Other use not recommended may cause fire, electric shock or injury to persons.This product is intended for household use ONLY and not for commercial, industrial or outdoor use.To protect against electric shock: do not place fan on windowsills, immerse unit, plug or cord in water or spray with liquids.To reduce the risk of shock, this plug is intended to fit the outlet. If the plug does not fit fully in the outlet, reverse the plug. If it still does not fit, contact a qualified electrician. DO NOT attempt to defeat this safety feature.To reduce the risk of fire or electric shock, do not use this fan with any solid-state speed control device.This appliance is not intended for use by person (including children) with reduced physical, sensory or mental capabilities, or lack of experience and knowledge, unless they have been given supervision or instruction concerning use of the appliance by a person responsible for their safety.Children should be supervised to ensure that they do not play with the appliance.Turn the fan OFF and unplug the fan from the outlet when not in use, when moving the fan from one location to another and before cleaning.To disconnect the fan, first turn the unit OFF, grip the plug and pull it from the wall outlet. Never pull the plug by the cord.Do not operate the fan in the presence of explosive and/or flammable fumes.Do not place the fan or any parts near an open flame, cooking or other heating appliance.Do not operate fan with a damaged cord or plug, or if the product malfunctions, or dropped and damaged in any manner.Avoid contact with moving fan parts.The use of attachments not recommended by the manufacturer may be hazardous.Place the fan on a dry level surface.Do not hang or mount fan on a wall or ceiling.Do not operate if the fan housing is damaged. A loose fit between the AC outlet (receptacle) and plug may cause overheating and a distortion of the plug. Contact a qualified electrician to replace loose or worn outlet.Only use on a power supply that matches that shown on the unit’s rating label.If the supply cord is damaged, it must be replaced by the manufacturer, its service agent or similarly qualified persons in order to avoid hazard.This appliance can be used by children aged from 8 years and above and persons with reduced physical, sensory or mental capabilities or lack of experience and knowledge if they have been given supervision or instruction concerning use of the appliance in a safe way and understand the hazards involved. Children shall not play with the appliance. Cleaning and user maintenance shall not be made by children without supervision.

PARTS IDENTIFICATION / ASSEMBLY 9METHOD OF FAN INSTALLATIONNotice: Before installation, please check if any part misses or damages. Please pack andsend to the local service agents or purchase spots.PARTS DIAGRAM1. Front Guard2. Blade Nut3. Blade4. Net-frame5. Guard Screw6. Rear Guard7. Oscillation Control Knob8. Motor Rear Housing9. Motor tube10. Fasten Screw11. Stand tube12. Base Cover13. Base14. Control Button15. NeckFAN ASSEMBLY INSTRUCTION1. Open the packaging and examine the parts, which are shown on the above diagram.2. Place two gaskets into the stand tubes, and then insert into corresponding holes ofthe base, as the base installation diagram shown. Tighten them with meson screws andput on the base cover.3. Take out the fan’s main body.(This part has been installed) Unscrew the fastenscrews in the rear body and then mount the stand tubes. And tighten the fasten screwsagain.4. Install the rear guard with a guard nut clockwise on the fan head.5. Tighten the blade with blade nut counter-clockwise on the motor shaft.6. To tighten the front guard, first loosen the screw on the net-frame, align and hoopthe front guard and rear guard then tighten the screw.

10
METHOD OF FILLING WITH WATER ON HUMIDIFIER1. Take out the humidifier from the packaging.2. Overturn the water tank.3. Open the water tank lid counter-clockwise.4. Fill with clean and clear water.5. Tighten the water tank lid clockwise..OPERATION OF MIST FAN1. OFF: Turn off the fan but humidifier is still on.2. ON/SPEED: Turn on the fan, there are three speed for personal choice.3. MODE: There are three modes-nature, normal and sleep.· Nature-The fan will operate under irregular status according to a pre-set program.· Normal-The fan will work at Low-Medium-High speed.· Sleep-The fan will work about half an hour high speed, then half an hour mediumspeed and low speed until being turned off.4. MIST: Turn on/turn off the humidifier but cannot adjust the mist volume.5. SWING: The fan starts oscillating when press this button. It will stop working whenturning off the fan.6. TIMER: Setting working time. 7.5 hours in total and it is set with 0.5h, 1h, 1.5h, 2h,2.5h, 3h, 3.5h, 4h, 4.5h, 5h, 5.5h, 6h, 6.5h, 7h, 7.5h.

OPERATION11Notice:· Unplug the fan before cleaning.· Clean with mild detergent and soft cloth.· Before each use, put some engine oil between the motor shaft and bearing.· If the plug is damaged, it must be replaced by the manufacturer or its serviceagent or a similarly qualified person in order to avoid a hazard.· Don’t expose the fan to the sunlight or place it in damp environment.CLEANING AND MAINTAINANCE OF HUMIDIFIER1. Unplug the unit before cleaning.2. Clean the water tank and humidifier base once a week.· If there’s scale in the water tank and base, please use the citric acid detergentequipped with the fan or buy from shops.· The second solution to the scale is: put some baking soda and white vinegartogether into the water.· Pour out the water after the scale is removed and flush the water tank and waterbase with clean water.3. Clean the outer humidifier.· Clearly clean the dirt and dirty marks with soft damp cloth.Diagram 1 DisassemblyDiagram 274. Notes on cleaning:· Don’t touch the transducer with sharp tools.Clean with soft damp cloth.· Only use clean and clear water, but avoid contact with the internal parts as thiscould cause the product to malfunction.· Don’t disassemble the fuselage and components.5. Storage of humidifier:· When the product will not use for a long time, clean and pack it into the packaging.Then keep it in a dry and cool place. Don’t expose to sunlight or dampenvironment.

Table of contents
Languages:
Other Eurocool Fan manuals
Popular Fan manuals by other brands
Honeywell
Honeywell HSF600BE operating instructions

cocoweb
cocoweb ZAMBRANOCF-A-ZA Installation and operation instruction
KDK
KDK K40DSH2NET operating instructions

Scarlett
Scarlett COMFORT SC-SF111B09 instruction manual

Johnson
Johnson Casablanca Instructions for use
Marley
Marley MS 100VFN installation instructions
Maico
Maico ESR 12-2 Mounting and operating instructions

Meridian
Meridian M2022MBKRV owner's manual

John Lewis
John Lewis 85573601 instruction manual
Monte Carlo Fan Company
Monte Carlo Fan Company 3OVR60 D Series Owner's guide and installation manual

Airflow
Airflow QuietAir Installation and operating instruction
Matsui
Matsui MSF13SSRE instruction manual


