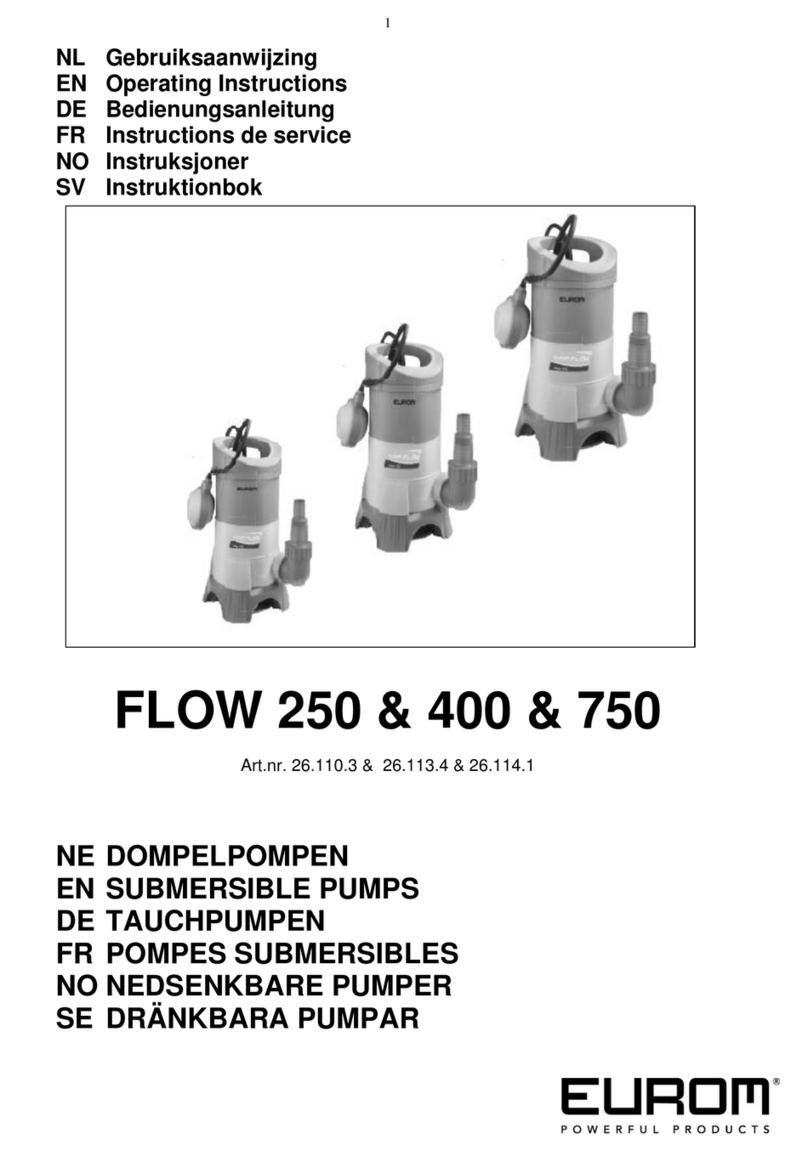
EUROM FLOW-PRO 350MOP User manual

1
Instructieboek –Gebrauchsanweisung
Manual –Manuel d’instructions
FLOW-PRO 350MOP
DOMPELPOMP
SUBMERSIBLE PUMP
TAUCHPUMPE
POMPE SUBMERSIBLE
Art.nr. 26.146.2

2

3
NL
VOORDAT U DE POMP IN BEDRIJF NEEMT…
Lees dit instructieboekje zorgvuldig en in zijn geheel door; het bevat belangrijke
informatie aangaande het gebruik en voorzorgsmaatregelen. Door de instructies
zorgvuldig op te volgen verkrijgt u optimale prestaties en wordt de veiligheid
maximaal gewaarborgd. Gebruik, anders dan in dit boekje beschreven, kan schade,
letsel en gevaar opleveren en doet de garantie vervallen.
Bewaar het boekje om later nog eens te raadplegen.
VEILIGHEIDSVOORSCHRIFTEN
Controleer voor gebruik uw nieuwe pomp (incl. kabel en stekker) op zichtbare
beschadigingen. Neem een beschadigde pomp niet in gebruik maar biedt hem uw
leverancier aan ter vervanging.
Om veiligheidsredenen dient uw dompelpomp altijd te worden aangesloten op
een geaard stopcontact dat volgens de landelijke regels is geïnstalleerd, deel
uitmaakt van een elektriciteitsvoorziening die maximaal 16 Amp. is gezekerd en
voorzien is van een aardlekschakelaar (nominale stroom ≤30 mA).
Controleer uw pomp, elektrokabel, stekker en stopcontact voor elk gebruik.
Gebruik ze niet wanneer u beschadigingen constateert maar laat ze repareren
door een erkend elektricien. De kabel is van het type H05RN-F 3G 0.75mm².
Zorg ervoor dat elektrische aansluitingen te allen tijde droog zijn en blijven.
Controleer voor gebruik of het stopcontact waarop u de pomp wilt aansluiten
geschikt is voor de pomp (zie typeplaatje).
Bescherm de elektrokabel en de stekker tegen hitte, olie en scherpe hoeken.
Maak voor gebruik eerst de afvoerslang schoon.
Controleer voor gebruik of de opvoerhoogte het vermogen van uw pomp niet
overschrijdt.
Gebruik de elektrokabel niet om de pomp aan op te hangen, aan te laten zakken
of mee te verplaatsen. Bevestig daartoe evt. een touw aan de handgreep. Trek de
stekker ook niet aan de kabel uit het stopcontact maar neem de stekker in de
hand!
Nadat u water hebt verpompt waaraan bijv. chloor was toegevoegd of wat een
bepaalde neerslag bevatte, dient u de pomp met schoon water door te spoelen.
Houdt er rekening mee dat zand en alle andere schurende en bijtende stoffen de
slijtage versnellen en het vermogen van de pomp beïnvloeden.
Voorkom dat de pomp werkt terwijl hij om wat voor reden dan ook het water niet
af kan voeren: verstopte afvoer, te hoge opvoer enz. Dit beschadigt de pomp!
Gebruik de pomp niet wanneer zich personen in het leeg te pompen object
bevinden. Het is te allen tijde verboden deze pomp in een zwembad te gebruiken.
Drooglopen van de pomp versnelt slijtage en veroorzaakt oververhitting. Voorkom
dus te allen tijde dat de pomp draait terwijl er geen water meer wordt verplaatst
en schakel hem onmiddellijk uit wanneer dat gebeurt.

4
Voordat u controle- of schoonmaakwerkzaamheden aan uw pomp uitvoert dient u
hem uit te schakelen door de stekker uit het stopcontact te nemen.
Om letsel te voorkomen nooit vingers of andere voorwerpen in de
aanzuigopening van de pomp steken als de stekker in het stopcontact zit!
Zorg voor zorgvuldig toezicht wanneer dit apparaat wordt gebruikt in de
aanwezigheid van kinderen, handelingsonbekwame personen of huisdieren. Dit
apparaat is niet geschikt om te worden gebruikt door personen (incl. kinderen)
met een fysieke- zintuiglijke- of mentale beperking, of gebrek aan ervaring en
kennis, ongeacht of er toezicht is of instructie is gegeven aangaande het gebruik
van het apparaat door een persoon die verantwoordelijk is voor hun veiligheid
Houd het apparaat buiten het bereik van kinderen en laat ze nooit alleen met het
apparaat. Houd er bij het kiezen van een plaats voor het apparaat rekening mee
dat die onbereikbaar is voor kinderen. Er dient op te worden toegezien dat
kinderen niet met het apparaat spelen.
Repareer pomp, kabel en/of stekker nooit zelf maar laat dat aan een bevoegde
vakman over. Importeur en fabrikant aanvaarden geen aansprakelijkheid voor
ondeskundig uitgevoerde reparaties en/of wijzigingen aan de pomp. Dergelijke
ingrepen doen tevens de garantie vervallen.
WAAR IS DE POMP VOOR BEDOELD?
Deze dompelpomp is ontworpen voor privégebruik in en om huis en tuin.
Dompelpompen worden voornamelijk gebruikt voor waterafvoer, voor het verplaatsen
van vloeistoffen en het leegpompen van waterreservoirs, kelders, boten enz., als ook
voor het voor beperkte tijd laten circuleren van water.
De pompen zijn volledig waterdicht en mogen tot een diepte van max. 5 meter in
vloeistof worden gedompeld.
Deze pompen zijn niet geschikt voor tafelfonteintjes en aquariums. Als de pomp in
een vijver met vis wordt gebruikt, dient u maatregelen te nemen om te voorkomen
dat de vis in de pomp wordt gezogen.
Met deze pomp kunnen schone en licht-vervuilde, niet agressieve vloeistoffen
worden verpompt. De vloeistof mag deeltjes van max. 3mm doorsnee bevatten.
Zand (en vergelijkbaar materiaal) in de te verpompen vloeistof heeft een schurende
werking en leidt tot snellere slijtage.
Bijtende, licht-ontvlambare of explosieve vloeistoffen (zoals benzine, diesel,
petroleum, thinner enz.), zeewater, vetten, olie, zout- of vervuild water uit toiletten,
chemische producten enz. mogen niet worden verpompt!
De temperatuur van de verpompte vloeistof dient de 35°C niet te overschrijden.
Voorkom te allen tijde dat de pomp draait terwijl er geen water meer wordt verplaatst.
Let op: deze pompen mogen niet in een zwembad worden gebruikt!
Deze pomp is niet geschikt voor continu gebruik, zoals het voortdurend laten
circuleren van water. Door deze vorm van gebruik zal de levensduur van de pomp
aanzienlijk worden verkort.

5
BESCHRIJVING
1. Handgreep
2. Slangaansluiting
3. Pomphuis
4. Vlotterschakelaar
5. aanzuigopening
VOOR GEBRUIK
Tijdens de voorbereidende werkzaamheden de stekker uit het stopcontact!
Slangaansluiting
De FlowPro 350MOP wordt geleverd met twee slangaansluitingen: 19mm en 25mm.
Naar keuze schroeft u die op de pomp. Evt. kan ook een 1” schroefaansluiting
worden gebruikt. Bevestig de slang met een slangklem op het passende deel van de
aansluiting (of draai hem erop).
Plaatsen en verplaatsen
- Zet de pomp stabiel neer, zeker wanneer u hem automatisch laat werken.
- Zorg ervoor dat de aanzuigopeningen niet worden geblokkeerd (ook niet
gedeeltelijk). Plaats de pomp, als hij op een zachte (bijv. zanderige) bodem staat,
bijv. op een tegel.
- Gebruik de elektrokabel of de afvoerslang niet om de pomp op te tillen of op te
hangen. Als u de pomp wilt neerlaten in bijv. een bron of schacht, gebruik dan
een touw dat u aan de handgreep bevestigt.
- Gebruikt u de pomp voor tijdelijke toepassingen, gebruik dan flexibele slang die u
met een slangklem op de pomp bevestigt. Bij een permanente installatie kunt u
vaste afvoerleidingen monteren.
- Let op! Een put of schacht waarin u de pomp gebruikt dient minimale afmetingen
van 40x40x50 cm. te hebben, zodat de vlotter vrij kan bewegen!

6
WERKING
De elektrokabel dient minimaal van het type HO5RN-F 3x0,75mm² te zijn en een
lengte van minimaal 10 meter te hebben.
Een eventuele verlengkabel dient van het type HO5RN-F 3x1,0mm² te zijn.
Controleer voor gebruik of de waarden van het stopcontact, waar u de pomp op
wilt aansluiten, corresponderen met die op het typeplaatje op de pomp (230V-
50Hz) en of het stopcontact geaard is en voorzien is van een aardlekschakelaar
(nominale stroom ≤30 mA).
Zorg ervoor dat elektrische aansluitingen te allen tijde droog zijn en blijven!
Controleer of de pomp stevig op de bodem van put, kelder etc. staat.
Controleer of het stopcontact in goede conditie verkeert.
Controleer of de afvoerslang correct bevestigd zit en geen knikken vertoont..
Overtuig u ervan dat er zich géén personen in de leeg te pompen ruimte (kelder/
boot/vijver enz.) bevinden.
Wanneer aan alle bovenstaande voorwaarden is voldaan, kunt u de stekker in het
stopcontact steken. De pomp zal beginnen te werken.
Automatische werking
Nadat u de stekker in het stopcontact hebt gestoken schakelt de pomp automatisch
in wanneer het water boven het ingestelde minimumniveau komt en schakelt hij uit
wanneer het ingestelde minimumniveau is bereikt.
Op deze wijze kan de pomp continu ingeschakeld staan en zal hij het waterniveau in
bijv. een kelder of boot op peil houden. Houdt er daarbij rekening mee dat deze
pomp niet is ontworpen om continu te werken; hij dient ook regelmatig af te slaan.
Ondanks het feit dat de pomp automatisch werkt is er toch regelmatig toezicht vereist
om vast te stellen dat er zich geen problemen voordoen bij de werking, er geen
beschadigingen zijn opgetreden enz. (zie ook: oververhittingsbeveiliging).
Handmatige werking
Bij handmatige werking zal uw pomp beginnen te werken wanneer u de stekker in
het stopcontact steekt en u er handmatig voor zorgt dat de vlotterschakelaar op de
stand “in werking” staat. Dat doet u door de vlotterschakelaar rechtop te houden
(vlotterkabel aan de onderzijde). Als u de vlotter zó vasthoudt (of vastzet) zal de
pomp blijven draaien. Stop de werking evenwel onmiddellijk wanneer er geen
vloeistof meer wordt verpompt: de verpompte vloeistof koelt tevens de motor, die
zonder koeling oververhit kan raken en stuk kan lopen! Houdt de pomp bij handmatig
gebruik dus voortdurend in de gaten; drooglopen leidt ook tot verhoogde slijtage!
Handmatige werking wordt uitsluitend geadviseerd voor kortdurende
werkzaamheden waarbij u de pomp voortdurend in de gaten houdt.
Bij automatische werking zal de pomp afslaan wanneer er nog relatief veel water in
uw kelder/boot/vijver enz. over is, omdat de automatische vlotterschakelaar ruimte
nodig heeft om om te schakelen. Wanneer u ook het laatste water wilt verpompen
adviseren wij op dat moment over te schakelen op handmatige werking. Door de

7
pomp op het laagste punt (of in een uitholling) te plaatsen bereikt u minimaal
restwater. Pas wel op voor drooglopen!
Voorkom te allen tijde dat de pomp droog loopt!
OVERVERHITTINGBEVEILIGING
Uw dompelpomp is voorzien van een oververhittingbeveiliging. Deze schakelt de
pomp automatisch uit wanneer de motor te heet wordt. Wanneer hij voldoende is
afgekoeld zal de pomp ook automatisch weer aanslaan.
Oververhitting heeft evenwel altijd een oorzaak: de schoep kan zijn vastgelopen, er
kan een lager versleten zijn, de pomp kan drooglopen enz. Wanneer die oorzaak niet
wordt verholpen zal de oververhitting opnieuw optreden en wanneer zich dit proces
te vaak herhaalt veroorzaakt dat serieuze schade aan uw pomp. Probeer dus vast te
stellen wat er mis is en los dit probleem op. Indien de pomp hiervoor geopend moet
worden dient u zich tot uw leverancier of een erkend vakman te wenden.
Wanneer er bij een pomp die automatisch werkt te weinig controle wordt uitgeoefend
kan de pomp dus ondanks de oververhittingbeveiliging stuklopen. De verantwoorde-
lijkheid voor het toezicht blijft te allen tijde bij de gebruiker rusten!
ONDERHOUD
Voordat u controle- of schoonmaakwerkzaamheden aan uw pomp uitvoert
dient u hem uit te schakelen door de stekker uit het stopcontact te nemen.
Uw dompelpomp is nagenoeg onderhoudsvrij. Het enige wat u hoeft te doen is het
volgende:
Voer regelmatig een visuele inspectie uit. Is de pomp niet beschadigd? De
elektrokabel, de stekker en de vlotterschakelaar met z’n kabel ook niet? Indien u
wel beschadigingen constateert dient u zich tot uw leverancier of een erkend
vakman te wenden. Probeer nooit zelf reparaties uit te voeren en haal zelf de
pomp niet open!
Controleer regelmatig de werking van de vlotterschakelaar, zeker wanneer u de
pomp voor automatische werking hebt geïnstalleerd (elke 3 maanden). Verwijder
regelmatig de aanslag op de vlotter met schoon water.
Controleer regelmatig of er zich geen vuil (vezels, resten) rond de schoep heeft
opgehoopt. Is dat wel het geval, verwijder dat dan door de pomp door te spoelen
met schoon water. Evt. kunt u het bodemzeefje even verwijderen en met een
pincet het vuil op de schoep proberen te verwijderen. Lukt u dat niet, wend u dan
tot uw leverancier of een erkend vakman en laat deze de pomp openen en het
vuil verwijderen.
Spoel de pomp minimaal elke 3 maanden goed door met schoon water.
Als u de pomp regelmatig op verschillende plaatsen gebruikt dient hij na elk
gebruik met schoon water te worden door- en afgespoeld.
Houd de bodem van de put (of de tegel waar de pomp op rust) vrij van modder en
neerslag.

8
Zorg ervoor dat de pomp niet bevriest. Laat hem tegen de winter volledig
leeglopen en sla hem vorstvrij op.
STORINGEN –OORZAAK –REMEDIE
Storing
Oorzaak
Remedie
Pomp start niet
-Geen stroom
-Oververhittingsbeveiliging
geactiveerd
-Vlotter schakelt de pomp niet
in
-Controleer de stroomvoorziening
-Zie: oververhittingsbeveiliging
.
-Breng de vlotter in een hogere stand
Pomp stopt niet in
AUTO-stand
-Pomp staat niet verticaal
-De vlotter zit vast
-Zet de pomp rechtop
-Geef de vlotter ruimte
Pomp draait, maar
geeft geen water
-Inlaatopeningen zijn verstopt
-Knik in waterafvoerslang, of de
slang zit verstopt
-Lucht rond de schoep
- Schoep vastgelopen
-Waterpeil is de laag
-Maak ze schoon
-Leg de slang recht of verwijder de
verstopping
-Schakel de pomp uit en beweeg hem
wat heen en weer. Wacht tot de lucht
ontsnapt is en start opnieuw
-Probeer de belemmering te verwij-
deren of wend u tot een vakman
-Dompel de pomp dieper in het water
Onvoldoende water
-Inlaatopeningen zitten (deels)
verstopt
-Afvoerleiding (deels) verstopt
-Versleten schoep
-Maak ze schoon
-Verwijder de verstopping
-Schoep laten vervangen
Pomp slaat tijdens de
werking plotseling af
-Thermische beveiliging stopt
pomp vanwege oververhitting
door vuil water
-Het water is te warm
-Stroomuitval
-Vuil of steentjes in de water-
aanvoer
-Schoep zit vast
-Storing in de motor
-Zie: oververhittingbeveiliging
-Max. watertemperatuur 35°C
-Controleer zekeringen en aardlek
-Verwijder vuil en steentjes
-Hef z.m. blokkade op of raadpleeg
servicedienst
-Raadpleeg de servicedienst
Als deze tips geen oplossing bieden, neem dan contact op met uw leverancier of
servicedienst.

9
GARANTIE
Op de door u gekochte dompelpomp is de normale garantie op productie- en
materiaalfouten van toepassing.
De volgende schade en storingen zijn uitgesloten van garantie:
Slijtage en defecten van roterende mechanische afdichtingen, veroorzaakt door
drooglopen of de aanwezigheid van bepaalde stoffen en/of voorwerpen in het
water.
Blokkade van de waaier door vreemde voorwerpen
Transportschade
Beschadigingen veroorzaakt door onoordeelkundig gebruik
Storingen die door onbevoegden tevergeefs zijn getracht te repareren, of door
onoordeelkundige reparatie zijn veroorzaakt
Schade door oververhitting
Het openen van de pomp door onbevoegden als ook het aanbrengen van wijzigingen
of toevoegingen aan de pomp doen de garantie en aansprakelijkheid van leverancier,
importeur en fabrikant vervallen.
TECHNISCHE GEGEVENS
Type
FLOW-PRO 350
Aansluitspanning
230V –50Hz
Opgen. verm.
350W
Cap. max.
5.000 l/u
Isolatieklasse
IP68
Opv. hoogte max.
6,5m
Dompeldiepte max
5m
Watertemp. max.
35°C
Slangaansluiting
19mm - 25mm –1”
Max. doorlaat vuil
3mm
Resterend water (Manual)
3mm
Kabel
H05RN-F 3G 0.75mm²
Kabellengte
10m
Afmetingen (cm)
Ø 16 x 22,5
Gewicht
2,3 + 1 kg

10
EN
BEFORE USING YOUR PUMP…
Read this entire instruction leaflet carefully. It contains important information in
relation to the use of your pump and precautionary measures that may need to be
taken. Reading these instructions thoroughly will ensure you get the very best
performance from the product and ensure maximum safety. Any use, other than set
out in this leaflet, could cause damage, injury and represent a hazard; it will also
invalidate the guarantee.
Keep this booklet in a safe place for reference.
SAFETY RECOMMENDATIONS
Before using your new pump, check it, including cord and plug, for any visible
damage. Do not use a damaged pump, but send it back to your dealer for
replacement.
For safety reasons, your submersible pump must always be connected to an
earthed socket that has been installed according to national regulations, forms
part of an electricity network that is equipped with a fuse of at most 16 Amp and
has an earth leakage circuit breaker (nominal voltage ≤30 mA).
Check your pump, electrical cable, plug and socket before each use. Do not use if
the device is damaged and have this damage repaired by an accredited
electrician. The cable is an H05RN-F 3G 1.00mm² type.
Ensure that electrical connections stay dry at all times.
Before use, ensure that the socket to which you are connecting the pump is
suitable for the pump itself (see type plate).
Protect the electrical cable and plug from heat, oil and sharp corners.
Clean the drainage pipe before use.
Before use, check to ensure that elevation height does not exceed your pump’s
capacity.
Do not use the electrical cable to hang up, lower or move the pump. Attach a rope
to the handle in order to do this. Never pull on the cable to remove the plug from
the socket but remove by pulling on the plug!
Rinse the pump with clean water if you have used it to pump water that contains
chlorine, for example, or deposits. Bear in mind that sand and all other abrasive
and corrosive substances will increase wear and tear and impact upon the
effectiveness of the pump.
Ensure the pump is not used if it cannot drain off the water due to issues such as
blocked drainage, elevation too high, etc. This will damage the pump!
Do not use the pump if there are persons present in the object to be pumped out.
It is forbidden to use this pump in a swimming pool.
Allowing the pump to run dry will increase wear and tear and cause overheating.
Always prevent the pump from running if no water is being moved and switch it off
immediately if this is the case.

11
Before you carry out checking or cleaning tasks on the pump you must switch it
off by removing the plug from the socket.
In order to prevent injury, never put your fingers or other objects into the suction
opening on the pump when the device is plugged in!
Close supervision is necessary when the product is used near children,
incapacitated persons or pets. The device is not suitable for use by persons
(including children) with a physical, sensual or mental limitation or a lack of
experience and knowledge, irrespective of whether they are being supervised or
have been issued with instructions in relation to the use of the device by a person
who is responsible for their safety.
Keep out of reach of children and never leave them unsupervised with the
appliance. Consequently, when selecting the location for your machine, do so in
such way that children do not have access to the appliance. Always ensure that
children cannot play with the device.
Never repair the pump, cable and/or plug yourself; always have this maintenance
carried out by an authorised expert. The importer and manufacturer accept no
liability for repairs and/or modifications to the pump if they have been carried out
by someone who is not qualified to do so. Such interventions also nullify the
guarantee.
WHERE CAN THE PUMP BE USED?
This submersible pump has been designed for private usage in or around the home
and garden.
Submersible pumps are primarily used for draining water, moving liquids and
emptying water reservoirs, cellars, boats etc., and also for temporary circulation of
water.
The pumps are completely watertight and can be submerged in liquid with a
maximum depth of 5 metres.
These pumps are not suitable for table fountains or aquariums. If the pump is used in
a pond containing fish, you must take measures to prevent the fish being sucked into
the pump.
This pump can be used to pump clean and lightly polluted, non-aggressive liquids.
The liquid may contain particles of max. 3mm diameter.
Sand (and similar materials) in the liquid that is to be pumped will have a corrosive
effect and will lead to increased wear and tear.
Corrosive, lightly flammable or explosive liquids (such as petrol, diesel, paraffin,
thinners etc), seawater, fats, oil, salty or contaminated water from toilets, chemical
products etc. cannot be pumped!
The temperature of the pumped liquids must not exceed 35°C.
Always prevent the pump from running if no water is being moved.
Note: these pumps may not be used in a swimming pool!
This pump is not suitable for continuous use, such as the continual circulation of
water. This type of use will substantially shorten the pump’s life expectancy.

12
DESCRIPTION
1. Handle
2. Hoseconnector
3. Pump house
4. Float switch
5. Suction opening
BEFORE USE
When preparing the device for use, take the plug out of the electrical socket!
Hose connection
The FlowPro 350 is supplied with two hose connections: 19mm and 25mm. You can
optionally screw these onto the pump. A 1" screw connection may also be used if
necessary. Attach the hose to the appropriate part of the connector with a hose
clamp (or turn it on it).
Locating and moving
- Make sure the pump is positioned at a stable location, particularly if you want it to
work automatically.
- Ensure that the suction openings are not blocked (not even partially). If the pump
is positioned on a soft surface (e.g. a sand bed), place it on a tile or something
similar.
- Do not use the electrical cable or the hose to lift the pump or hang it up. If you
wish to locate the pump in a water source or shaft, use a rope that is attached to
the handle to do so.
- If you are using the pump temporarily, you may use a flexible hose that is
connected to the pump using a hose clamp. You can attach fixed discharge pipes
if you have a permanent installation.
-Take note! If you use the pump in a pit or shaft, this must have minimum
dimensions of 40x40x50 cm, to enable the float to move freely.

13
OPERATION
The electrical cable must be at least a HO5RN-F 3x0.75mm², with a length of at
least 10 metres.
Any extension cable must be of the type HO5RN-F 3x1.0mm².
Before use, check that the values of the socket to which you wish to connect the
pump correspond to those on the type plate on the pump itself (230V-50Hz) and
that the socket is earthed and has an earth leakage circuit breaker (nominal
voltage ≤30 mA).
Ensure that electrical connections stay dry at all times.
Check that the pump stands firmly on the bottom of the pit, cellar, etc.
Check if the socket is in good condition.
Check if the discharge pipe is properly secured and shows no signs of buckling.
Make sure that no people present in the space to be pumped out
(cellar/boat/pond etc).
If the above conditions have been met, then you may insert the plug in the socket.
The pump will start operating.
Automated function
Once you have plugged the device into the socket, the pump will switch on
automatically when the water exceeds the set minimum level and switch off when the
set minimum level has been obtained.
This means that the pump can be left on at all times and will keep the water in a
cellar or boat, for example, at the required level. Bear in mind that this pump is not
designed to be used continuously; it must be switched off at regular intervals.
Despite the fact that the pump works automatically, regular supervision is required in
order to ascertain that it has not encountered any functional problems and that it has
not been damaged (see also: overheating safeguard).
Manual function
If used manually, your pump will start to work when you insert the plug into the
socket and you ensure that the float switch is set to ‘on’. You do this by holding the
float switch upright (float cable underneath). The pump will continue to work if you
hold the float in this way (or fix it like this). Stop the pump from functioning as soon as
liquid is no longer being pumped; the pumped liquid also cools the motor and without
this cooling effect it may overheat and break down! Always supervise a pump that is
working manually; drying out will lead to increased wear and tear!
You are advised to use the pump manually for short periods only. You should keep
your eye on the pump at all times during manual functioning.
During automatic operation, the pump will turn itself off when there is still some water
in your cellar/boat/pond because the automatic float switch needs space in which to
switch. If you wish to pump out the remaining water, we advise you to use the pump
manually in order to do so. Placing the pump at the lowest point (or in a hollow) will
allow you to remove almost all of the remaining water. Make sure it does not dry out!
At all times prevent the pump from running dry!

14
OVERHEATING SAFEGUARD
Your submersible pump is equipped with an overheating safeguard. This switches
the pump off automatically if the motor gets too hot. Once it has cooled down
sufficiently, the pump will automatically switch on again.
There is always a cause for overheating: the fan may have become jammed, a
bearing may be worn, the pump can run dry etc. and if the cause is not removed, the
device will overheat once again. If this process is repeated too often it may cause
serious damage to your pump. Try to establish what is wrong and resolve the
problem. If the pump needs to be opened up you must take it to your supplier or an
accredited professional.
If there is insufficient supervision of a pump that is functioning automatically, the
pump may break down despite the presence of the overheating safeguard. The user
is always responsible for supervising the device!
MAINTENANCE
Before you carry out checking or cleaning tasks on the pump you must switch
it off by taking the plug from the socket.
Your submersible pump is more or less maintenance-free. The only tasks you must
carry out are as follows:
Carry out a regular visual inspection. Make sure the pump is not damaged. Check
the electrical cable, the plug, the float switch and the float cable for damage too. If
you discover damage, you must take the device to your supplier or an accredited
professional. Never attempt to carry out repairs yourself and never open the
pump!
Regularly check that the float switch is working effectively, particularly if you have
set the pump to work automatically (every 3 months). Regularly remove residues
from the float with clean water.
Regularly check whether any dirt (fibres, residues) has accumulated around the
blade. Remove it if this is the case by cleaning the pump with clean water. You
can remove the bottom filter and attempt to remove dirt from the blade with
tweezers.
If you cannot do so, take the pump to your supplier or to an accredited
professional to open the device and remove the residue.
Rinse the pump thoroughly with clean water at least every 3 months.
If you regularly use the pump at different locations, you must rinse with clean
water (inside and out) after each use.
Keep the base of the well (or the tile on which the pump is positioned) free from
mud and residue.
Ensure that the pump does not freeze. Before winter sets in, run the pump dry
and store it in a frost-free location.

15
DEFECTS –CAUSES –SOLUTIONS
Defects
Causes
Solutions
Pump does not start
-No electricity
-Overheating safeguard
activated
-The float doesn't activate the
pump
-Check electrical supply
-See: overheating safeguard.
-Put the float at a higher level
Pump does not stop in
AUTO setting
-Pump is not vertical
-The float is blocked
-Make sure the pump is standing up
straight
-Give the float space
Pump runs but does
not pump water
-Inlet openings are clogged
-Water drainage pipe is bent or
hose is blocked
-Air around the blade
- Blade is jammed
- Water level is too low (manual
usage)
-Clean them
-Straighten the hose or remove the
blockage
-Switch the pump off and move it from
side to side. Wait until the air has
escaped and switch on again
-Try to remove the blockage or ask a
professional to do so
-Submerge the pump in deeper water
Insufficient water
-Inlet openings are (partially)
blocked
-Outlet drain (partially) blocked
-Broken fan
-Clean them
-Remove blockage
-Replace the fan
Pump suddenly
switches off while
functioning
-Thermal safeguard stops pump
due to overheating by f.e. dirty
water
-Water is too hot
-Power outage
-Dirt or stones in the water
supply
-Blade is stuck
-Problem with the motor
-See: overheating safeguard
-Max. water temperature 35°C
-Check fuses and earth leakage
-Remove dirt and stones
-Remove blockage if possible or
consult service point
-Consult service point
If these tips do not provide a solution, contact your supplier or service point.
GUARANTEE
The submersible pump you have purchased comes with the usual guarantee which
applies to production and material defects.
The following damage and defects are not covered by the guarantee:
Wear and tear and defects in relation to mechanical seals caused by drying out or
the presence of specific substances and/or objects in the water.

16
Blockage of the blade by foreign objects
Transport damage
Damage caused by unreasonable use
Defects that unauthorised persons have attempted to resolve or which have been
caused by improper repairs
Damage due to overheating
The guarantee and liability of the supplier, importer and manufacturer will be nullified
if the pump is opened by unauthorised persons or modifications or additions are
made to the pump.
TECHNICAL SPECIFICATIONS
Type
FLOW-PRO 350
Connection voltage
230V –50Hz
Power consumption
350W
Cap. max.
5.000 l/h
Class of insulation
IP68
Max. supply depth
6,5m
Max. submersion depth
5m
Max. water temp.
35°C
Hose connection
19mm - 25mm –1”
Max. size of contamination
3mm
Residual water (Manual)
3mm
Cable
H05RN-F 3G 1.00mm²
Cable length
22x16x31
Dimensions
Ø 16 x 22,5
Weight
2,3 + 1 kg

17
DE
VOR INBETRIEBNAHME DER PUMPE
Lesen Sie diese Anleitung vollständig und sorgfältig durch, sie enthält wichtige
Informationen bezüglich Benutzung und Sicherheit. Durch das Befolgen der
Anweisungen wird eine optimale Leistung erzielt und höchste Sicherheit
gewährleistet. Wird das Gerät anders verwendet als in der Anleitung beschrieben,
kann dies zu Schäden am Produkt führen und der Garantieanspruch erlischt.
Außerdem ist jede andere Verwendung mit Gefahren und Verletzungen verbunden.
Bewahren Sie dieses Handbuch zum späteren Nachschlagen auf.
SICHERHEITSVORSCHRIFTEN
Kontrollieren Sie vor der Benutzung Ihre neue Pumpe (inkl. Kabel und Stecker)
auf sichtbare Beschädigungen. Nehmen Sie eine beschädigte Pumpe nicht in
Betrieb, sondern bitten Sie Ihren Lieferanten um Austausch.
Aus Sicherheitsgründen muss Ihre Tauchpumpe immer an eine Steckdose mit
Erdung angeschlossen werden, die gemäß der Vorschriften Ihres Landes
installiert ist, und Teil eines Stromkreises von meistens 16 Ampere ist und in dem
ein Fehlerstrom-Schutzschalter eingebaut ist (Nennstrom ≤30 mA).
Überprüfen Sie vor jeder Inbetriebnahme Ihre Pumpe, das Anschlusskabel, den
Netzstecker und die Steckdose. Werden Beschädigungen festgestellt, dann
dürfen sie nicht verwendet werden und müssen von einem autorisierten
Elektrofachmann repariert werden. Kabeltyp: H05RN-F 3G 1.00mm².
Achten Sie darauf, dass die Elektroanschlüsse immer trocken sind und trocken
bleiben.
Prüfen Sie vor der Benutzung, ob die vorhandene Netzspannung der Steckdose,
an die Sie die Pumpe anschließen wollen, auch für die Pumpe geeignet ist (siehe
Typenschildangaben).
Schützen Sie das Anschlusskabel und den Netzstecker vor Hitze, Öl und
scharfen Kanten.
Reinigen Sie vor der Benutzung den Ablaufschlauch.
Prüfen Sie vor der Benutzung, ob die Förderhöhe die Pumpenleistung Ihrer
Pumpe nicht übersteigt.
Das Anschlusskabel darf nicht zum Befestigen, Absenken oder
Transportieren/Umpositionieren der Pumpe verwendet werden. Dazu sollten Sie
ein Seil am Tragegriff befestigen. Ziehen Sie den Netzstecker nicht am Kabel,
sondern am Steckergehäuse aus der Steckdose!
Nach dem Pumpen von Wasser, dem zum Beispiel Chlor beigefügt war oder das
bestimmte Sedimente enthielt, müssen Sie die Pumpe mit klarem Wasser
durchspülen. Es ist zu berücksichtigen, dass Sand und andere schmirgelnde und
ätzende Stoffe zu schnellerem Verschleiß und einer Leistungsminderung der
Pumpe führen.

18
Vermeiden Sie den Betrieb der Pumpe, wenn diese aus welchem Grund auch
immer das Wasser nicht abtransportieren kann: Verstopfter Abfluss, zu hohe
Förderhöhe, usw. Dies führt zu Beschädigungen der Pumpe!
Die Pumpe darf keinesfalls betrieben werden, wenn sich Personen in dem
auszupumpenden Objekt befinden. Es ist grundsätzlich verboten, diese Pumpe in
einem Schwimmbecken zu betreiben.
Trockenlauf der Pumpe erhöht den Verschleiß und führt zu Überhitzung.
Vermeiden Sie daher grundsätzlich den Betrieb der Pumpe bei Ausbleiben der
Förderflüssigkeit und schalten Sie in solch einem Fall die Pumpe sofort aus.
Bevor Sie Inspektions- oder Reinigungsarbeiten an Ihrer Pumpe durchführen, ist
das Gerät unbedingt vom Netz zu trennen (Netzstecker aus der Steckdose
ziehen).
Um Verletzungen zu vermeiden, greifen Sie niemals in die Ansaugöffnung der
Pumpe, wenn der Netzstecker in der Steckdose steckt! Stecken Sie auch keine
Gegenstände darin!
Achten Sie auf sorgfältige Aufsicht, wenn das Gerät in der Anwesenheit von
Kindern oder handlungsunfähigen Personen oder Haustieren benutzt wird. Dieses
Gerät ist nicht geeignet, um durch Kinder oder Personen mit körperlichen,
sensorischen oder geistigen Behinderungen oder durch Personen ohne Wissen
oder Erfahrung mit diesem Gerät bedient zu werden, auch nicht unter Aufsicht
oder nach Unterweisung durch eine Person, die für die Sicherheit der oben
genannten Personen verantwortlich ist.
Halten Sie das Gerät außerhalb der Reichweite von Kindern und lassen sie diese
niemals mit dem Gerät allein. Berücksichtigen Sie bei der Wahl eines Standorts
für das Gerät, dass dieser für Kinder nicht zugänglich ist. Achten Sie darauf, dass
sie nicht mit dem Gerät spielen.
Reparieren Sie die Pumpe, das Kabel und/oder den Netzstecker niemals selbst,
sondern überlassen Sie dies einem autorisierten Fachmann. Der Importeur und
Hersteller haftet nicht für unsachgemäß durchgeführte Reparaturen und/oder
Änderungen an der Pumpe. Durch derartige Eingriffe erlischt jeglicher
Garantieanspruch.
WOFÜR IST DIESE PUMPE BESTIMMT?
Diese Tauchpumpe ist für die private Benutzung in Haus und Garten bestimmt.
Tauchpumpen werden vorwiegend zum Entwässern, zum Umpumpen von
Flüssigkeiten und zum Auspumpen von Behältern, Kellern, Booten usw. verwendet.
Die Pumpen sind vollkommen wasserdicht und können bis zu max. 5 Meter in das
Fördermedium eingetaucht werden.
Diese Pumpen sind nicht geeignet für Zimmer- bzw. Tischbrunnen und Aquarien.
Wenn die Pumpe in einem Fischteich verwendet wird, sind entsprechende
Maßnahmen zu treffen, dass keine Fische in die Pumpe gezogen werden.
Mit dieser Pumpe können saubere und leicht verschmutzte, nicht aggressive
Flüssigkeiten gefördert werden. Die Flüssigkeit darf max. 3 mm große Teilchen
enthalten.

19
Sand (und vergleichbares Material) in der Förderflüssigkeit hat eine schmirgelnde
Wirkung und führt zu einem schnelleren Verschleiß.
Ätzende, leicht brennbare oder explosive Stoffe (wie Benzin, Diesel, Petroleum,
Nitroverdünner usw.),Meerwasser, Fette, Öle, Salzwasser oder Abwasser aus
Klosettanlagen, chemische Produkte usw. dürfen nicht gefördert werden.
Die Temperatur der Förderflüssigkeit darf 35°C nicht überschreiten.
Vermeiden Sie grundsätzlich den Betrieb der Pumpe bei Ausbleiben der
Förderflüssigkeit.
Achtung: Diese Pumpen dürfen nicht in einem Schwimmbecken betrieben
werden.
Diese Pumpe ist nicht für den Langzeitbetrieb (wie Dauerbetrieb zur
Wasserumwälzung) geeignet. Bei dieser Betriebsart wird die Lebensdauer der
Pumpe beträchtlich verkürzt.
BEZEICHNUNG
1. Tragegriff
2. Schlauchanschluss
3. Pumpengehäuse
4. Schwimmerschalter
5. Ansaugöffnung
VOR DER INBETRIEBNAHME
Bei den vorbereitenden Arbeiten ist das Gerät unbedingt vom Netz zu trennen
(Netzstecker aus der Steckdose ziehen)!
Schlauchanschluss
Der FlowPro 350 wird mit zwei Schlauchanschlüssen geliefert: 19 mm und 25 mm.
Wählen Sie einen aus und schrauben ihn an die Pumpe. Evtl. kann auch eine 1”-
Schraubverbindung genutzt werden. Befestigen Sie den Schlauch mit einer
Schlauchschelle auf den passenden Teil des Anschlusses (oder darauf schrauben).

20
Aufstellen und Umpositionieren
- Stellen Sie die Pumpe standsicher auf, vor allem im Automatikbetrieb.
- Achten Sie darauf, dass die Ansaugöffnungen nicht blockiert werden (auch nicht
teilweise). Stellen Sie die Pumpe z. B. auf eine Terrassenplatte oder einen
Ziegelstein, wenn sie auf einem weichen (z.B. sandigen) Untergrund steht.
- Verwenden Sie nie das Kabel oder den Schlauch zum Anheben oder Aufhängen
der Pumpe. Wenn Sie die Pumpe in einen Brunnen oder Schacht absenken
wollen, dann verwenden Sie ein Seil, das Sie am Tragegriff befestigen.
- Für einen vorübergehenden Einsatz der Pumpe verwenden Sie am besten einen
flexiblen Schlauch, den Sie mit einer Schlauchklemme auf der Pumpe befestigen.
Bei einer Dauerinstallation können Sie feste Abflussleitungen montieren.
-Wichtiger Hinweis! Ein Einlaufschacht, in dem Sie die Pumpe verwenden, muss
mindestens die Abmessungen 40x40x50 cm haben, so dass sich der Schwimmer
frei bewegen kann!
FUNKTIONSWEISE
Es muss mindestens ein Stromkabel der Bauart HO5RN-F 3x0.75 mm2mit einer
Mindestlänge von 10 Metern verwendet werden.
Ist eventuell ein Verlängerungskabel erforderlich, dann ist ein Kabel der Bauart
HO5RN-F 3x1,0 mm2zu verwenden.
Überprüfen Sie vor der Inbetriebnahme, ob die Daten des Stromnetzes der
Steckdose, an die Sie die Pumpe anschließen möchten, mit den Angaben auf
dem Typenschild der Pumpe (230 V –50 Hz) übereinstimmen und ob die
Steckdose geerdet ist und in dem ein Fehlerstrom-Schutzschalter eingebaut ist
(Nennstrom ≤30 mA).
Achten Sie darauf, dass die Elektroanschlüsse immer trocken sind und trocken
bleiben.
Prüfen Sie, ob die Pumpe fest auf dem Boden von Schacht, Keller usw. steht.
Prüfen Sie, ob die Steckdose in ordentlichem Zustand verkehrt.
Prüfen Sie, ob der Ablaufschlauch korrekt befestigt ist und keine Knicke aufweist.
Stellen Sie sicher, dass sich keine Personen im auszupumpenden Raum
(Keller/Boot/Teich, usw.) befinden.
Wenn allen obengenannten Bedingungen genügt ist, können Sie den Stecker in
die Steckdose stecken. Die Pumpe beginnt ihren Betrieb.
Automatikbetrieb
Sobald Sie den Netzstecker in eine Steckdose stecken, schaltet sich die Pumpe
automatisch ein, wenn die Wasserhöhe die eingestellte minimale Einschalthöhe
überschritten hat und sie schaltet sich automatisch aus, wenn sie die eingestellte
minimale Ausschalthöhe erreicht hat.
Auf diese Art und Weise kann die Pumpe ständig in Betrieb sein und wird sie den
Wasserstand beispielsweise im Keller oder Boot auf dem gewünschten Niveau
halten. Beachten Sie jedoch, dass diese Pumpe nicht für Dauerbetrieb ausgelegt ist
und daher regelmäßig ausgeschaltet werden muss.
Table of contents
Languages:
Other EUROM Water Pump manuals
Popular Water Pump manuals by other brands

Becker
Becker Picchio 2200 Maintenance Guide

Fieldmann
Fieldmann FVC 3002 ED user manual

Glentronics
Glentronics Basement Watchdog SIT-33D Instruction manual & safety warnings

Reefe
Reefe RPS036 Instruction manual & warranty

Graco
Graco Check-Mate L100CM Instructions - parts

Graco
Graco Dyna-Star 224912 instructions

Wilo
Wilo Extract FIRST Series Installation and operating instructions

Grundfos
Grundfos SP-G Installation and operating instructions

Little Giant
Little Giant APCP-1700 owner's manual

GÜDE
GÜDE HWW 1000 E Original instructions

teel
teel 4RJ58 Operating instructions & parts manual

Clarke
Clarke CSP1530 Operation & maintenance instructions