DE
8
– Drücken Sie erneut die Taste [DATUMSZEIT]
und dann die Taste [+] oder [-], um die Stunde
einzustellen.
– Drücken Sie erneut die Taste [DATUMSZEIT]
und dann die Taste [+] oder [-], um die Minute
einzustellen.
– Drücken Sie zum Abschluss die Taste [OK].
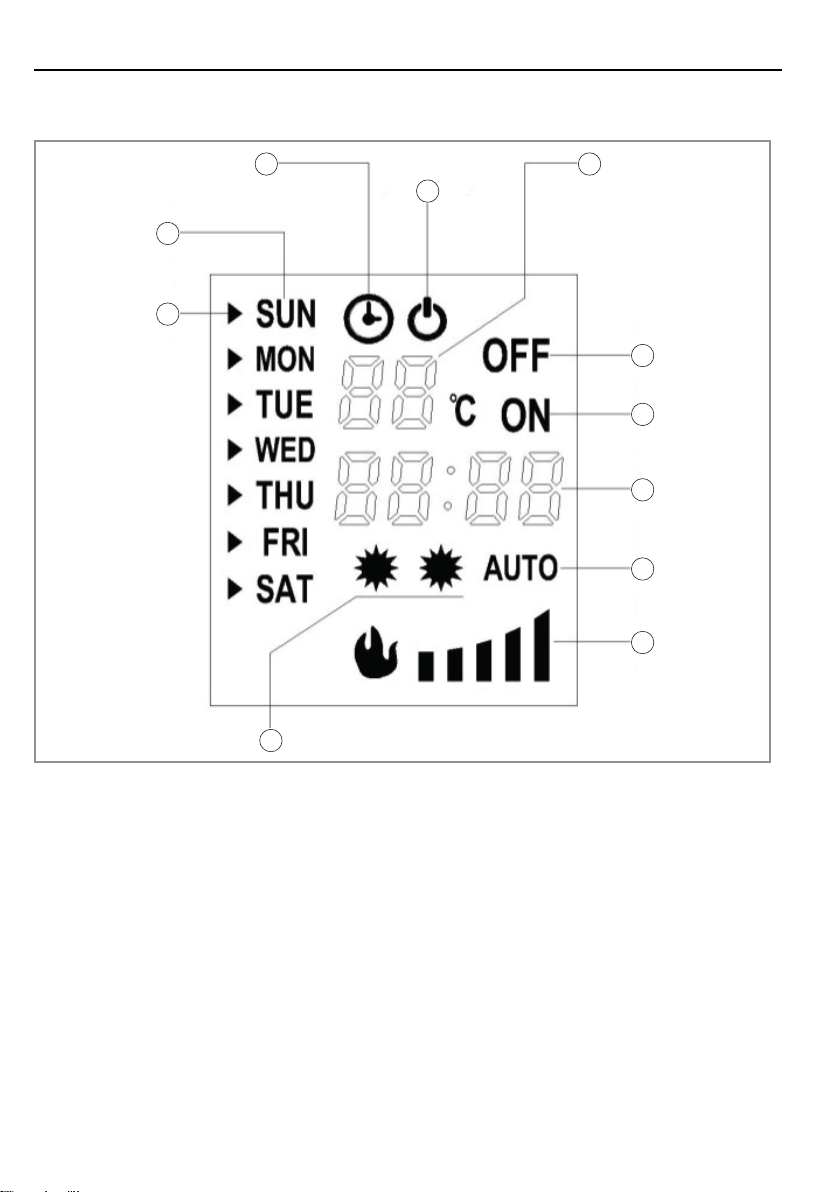
Einstellung der Temperatur
Die voreingestellte Temperatur beträgt 22 °C, drü-
cken Sie [+] oder [-] auf der Fernbedienung, um die
Temperatur einzustellen, die zwischen 15 und 30 °C
liegt, und dies ist die normalerweise eingestellte Tem-
peratur (der Timer ist ausgeschaltet).
Timer-Einstellung
Beschreibung der Einstellung
Es gibt bis zu 10 Punkte für die Einstellung des
Timers
Jeder Einstellpunkt hat sein Datum, seine Einschalt-
und Ausschaltzeit
Die maximale Dauer jeder Einstellung beträgt 23
Stunden und 50 Minuten.
Das eingestellte Datum für jeden Artikel kann ein
beliebiger Tag oder mehrere Tage einer Woche sein.
Das Datum in jedem Einstellpunkt stellt das Datum
der Einschaltzeit dar.
Wenn die eingestellte Abschaltzeit auf den zweiten
Tag fällt, ist es unnötig, das Datum einzustellen – Sie
stellen nur die Abschaltzeit ein
Schritte zur Anzeige der Timer-Einstellung
– Drücken Sie die Taste [ZEIT EINSTELLEN].
– Drücken Sie die Taste [+] oder [-], um die vom
Timer eingestellte Einschaltzeit Punkt für Punkt
zu überprüfen.
– Um die Abschaltzeit zu überprüfen, drücken Sie
die Taste [▲].
– Drücken Sie die Taste [+] oder [-], um mit der
Anzeige fortzufahren
– Zum Löschen des aktuellen Einstellungsele-
ments drücken Sie [ABBRECHEN], um zu
löschen
Zeiteinstellschritte für die Timer-Einstellung
•Wählen Sie die Einstellungen
– Drücken Sie die Taste [ZEIT EINSTELLEN],
und die Programmnummer der Einstellung
beginnt zu blinken.
– Drücken Sie die Taste [+] oder [-], um die Pro-
grammnummer zu ändern, bis Sie die Pro-
grammnummer der Einstellung erhalten, die
Sie einstellen oder ändern müssen.
•Datum auswählen
– Drücken Sie die Taste [ZEIT EINSTELLEN]
erneut, und der Cursor auf der linken Seite des
Datums beginnt zu blinken.
– Drücken Sie die Tasten [▲]oder [▼], um den
Cursor auf das entsprechende Datum zu
bewegen, drücken Sie die Taste [+], um das
entsprechende Datum hinzuzufügen, oder
drücken Sie die Taste [-], um das Datum zu
löschen, bis Sie die Auswahl aller Daten abge-
schlossen haben.
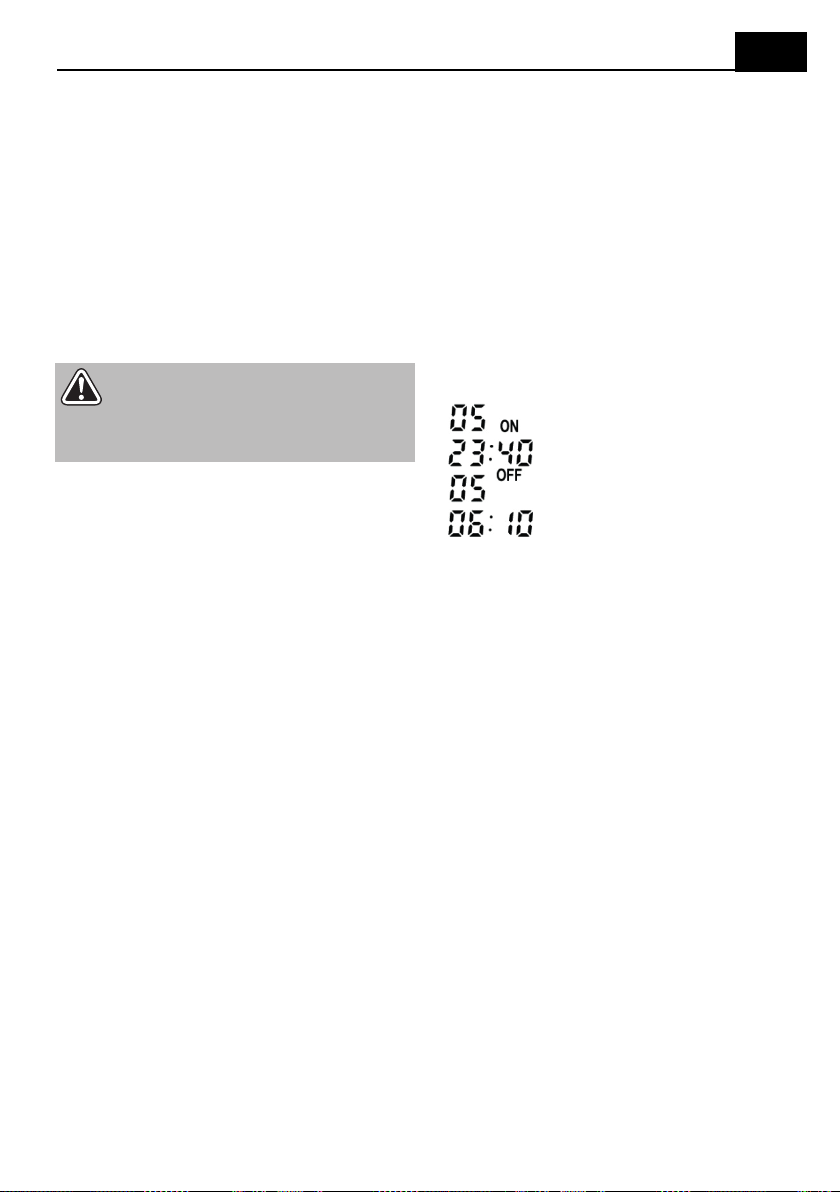
•Setzen Sie die Startzeit
– Drücken Sie weiterhin die Taste [ZEIT EIN-
STELLEN], die Stunde beginnt zu blinken
– Drücken Sie die Taste [+] oder [-], um die
Stunde einzustellen.
– Drücken Sie weiterhin die Taste [ZEIT EIN-
STELLEN], die Minute beginnt zu blinken.
– Drücken Sie die Taste [+] oder [-], um die
Minuten einzustellen.
•Einstellen der Abschaltzeit
– Drücken Sie dann die Taste [ZEIT EINSTEL-
LEN], die Anzeige ist ausgeschaltet, und die
Stunde beginnt zu blinken.
– Drücken Sie die Taste [+] oder [-], um die
Stunde einzustellen.
– Drücken Sie weiterhin die Taste [ZEIT EIN-
STELLEN], die Minute beginnt zu blinken.
– Drücken Sie die Taste [+] oder [-], um die
Minuten einzustellen.
•Temperatur einstellen
– Drücken Sie dann die Taste [ZEIT EINSTEL-
LEN], und die eingestellte Temperatur beginnt
zu blinken. In diesem Moment ist die ange-
zeigte Temperatur normalerweise die einge-
stellte Temperatur, die durch Drücken von [+]
oder [-] eingestellt werden kann.
– Drücken Sie die Taste [ZEIT EINSTELLEN],
um die Einstellung fortzusetzen, und drücken
Sie [OK], um die Einstellung abzuschließen.
Zeitschaltuhr
[ZEIT EIN/AUS] dient zur Steuerung des zeitgesteu-
erten Öffnens und Schließens
Nach dem Abschalten der Stromversorgung wird die
ursprüngliche Einstellung beibehalten, aber das aktu-
elle Datum und die Uhrzeit müssen neu eingestellt
werden.
Sicherheitsabschaltung
Dieses Gerät ist mit einer Sicherheitsabschaltung
ausgestattet, die bei einer Überhitzung des Feuers
(z.B. durch blockierte Lüftungsöffnungen) in Betrieb
geht. Aus Sicherheitsgründen wird das Feuer NICHT
automatisch zurückgesetzt.
– Um das Gerät zurückzusetzen, trennen Sie das
Gerät für mindestens 15 Minuten vom Netz.
Schließen Sie die Stromversorgung wieder an
das Stromnetz an und schalten Sie das Gerät
ein.
Reinigung
– Gerät ausschalten und vollständig abkühlen las-
sen.
– Netzstecker ziehen.
Hinweis: Die Geräte verwenden ein elekt-
ronisch gesteuertes LED-System zur
Erzeugung des Flammeneffekts, so dass
keine Teile ausgetauscht werden müssen.
Dieses Gerät hat keine vom Benutzer zu
wartenden Teile. Das Gerät darf unter kei-
nen Umständen von anderen Personen als
einem qualifizierten Elektriker gewartet
werden.
GEFAHR! Verletzungsgefahr! Vor allen
Arbeiten am Gerät immer den Netzstecker
ziehen.