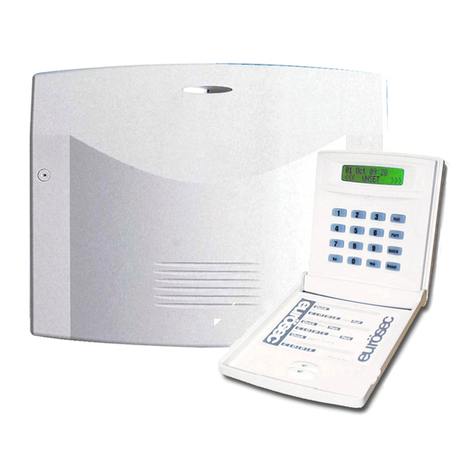
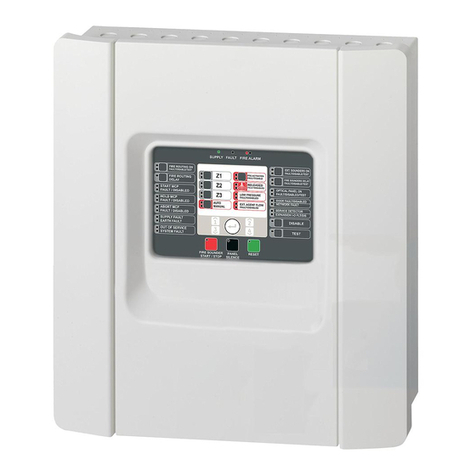
EUROSEC CP8L User manual

CC
CCPP
PP88
88LL
LL
LL
LLCC
CCDD
DD
UU
UUSS
SSEE
EERR
RR
MM
MMAA
AANN
NNUU
UUAA
AALL
LL
TM
TM
USER.qxd 22/10/01 15:04 Page 1

Contents
Introduction . . . . . . . . . . . . . . . . . . . . . . . . . . . . . . . . . 1
Display Status Blanking . . . . . . . . . . . . . . . . . . . . . . . . 2
IMPORTANT USER INFORMATION . . . . . . . . . . . . . . 2
Full Setting the System . . . . . . . . . . . . . . . . . . . . . . . . 3
Setting & Unsetting the System via a Keyswitch . . . . . . 3
Pre Exit Check . . . . . . . . . . . . . . . . . . . . . . . . . . . . . . . 4
Part Setting the System (using Part 1) . . . . . . . . . . . . . 4
Part Setting the System (using Part 2 or 3) . . . . . . . . . . 5
Unsetting the System . . . . . . . . . . . . . . . . . . . . . . . . . . 6
Display After Alarm . . . . . . . . . . . . . . . . . . . . . . . . . . . 6
Resetting After Alarm . . . . . . . . . . . . . . . . . . . . . . . . . . 7
Tamper Reset . . . . . . . . . . . . . . . . . . . . . . . . . . . . . . . 9
Setting the System with Mains Fail . . . . . . . . . . . . . . . . 10
Re-setting the display after a Mains Fail . . . . . . . . . . . . 12
Programming User Codes . . . . . . . . . . . . . . . . . . . . . . 13
Programmable User Options . . . . . . . . . . . . . . . . . . . . 16
Zone Remove Option . . . . . . . . . . . . . . . . . . . . . . . . . . 16
System Test . . . . . . . . . . . . . . . . . . . . . . . . . . . . . . . . . 17
Turning Chime On/Off . . . . . . . . . . . . . . . . . . . . . . . . . 18
Setting Time & Date . . . . . . . . . . . . . . . . . . . . . . . . . . . 19
Reading the Log . . . . . . . . . . . . . . . . . . . . . . . . . . . . . . 21
Keypad Alert . . . . . . . . . . . . . . . . . . . . . . . . . . . . . . . . 22
Keypad Tamper . . . . . . . . . . . . . . . . . . . . . . . . . . . . . . 22
Tamper . . . . . . . . . . . . . . . . . . . . . . . . . . . . . . . . . . . . 22
System Details . . . . . . . . . . . . . . . . . . . . . . . . . . . . . . . 23
PR5202 Rev 14 CP8L LCD User EN.qxd 11/07/2006 14:54 Page 1

Introduction
Welcome to the eurosec control panel. Your installation company will
have programmed your system to protect your premises to the highest
possible standards. Several user programmable options are available
that will be covered later in this manual. Throughout this manual,
reference will be made to the Master User Code, the factory set
default is 5678. This code is programmable along with eight other User
Codes.
The Control Panel will have been supplied with either an icon
style keypad or text style keypad. Please follow the instruction
relevant to your keypad style.Text commands will be shown in
brackets.
If an Engineer is on site, it may be necessary to authorise them to
access your system. Do this by entering your User Code when
asked to do so by the engineer.
Icon style keypad Text style keypad
Full
Part
Quick
Yes
No
PP
PPaa
aagg
ggee
ee
11
11
PR5202 Rev 14 CP8L LCD User EN.qxd 11/07/2006 14:54 Page 1

PP
PPaa
aagg
ggee
ee
22
22
Display Status Blanking
Depending on Control Panel installed, it may be a requirement that
the Status (Set or Unset display) of the security system is not
displayed. Set or Unset Status will only be displayed for ten seconds
when the system is Set or Unset. The bottom line of the display will
then be blanked off.
If the Control Panel is non EN then all displays will be shown and
“CHECK” will not be displayed.
All information displays will remain until cleared by the User.
IMPORTANT USER INFORMATION
PR5202 Rev 14 CP8L LCD User EN.qxd 11/07/2006 14:54 Page 2

PP
PPaa
aagg
ggee
ee
33
33
Full Setting the System.
Two methods are available for Full Set.
After checking the premises are secure:
1) Enter a valid User Code followed by . (Full).
or
Press *.(Quick)*.
* If enabled by the installation engineer.
2) The exit tone will now sound.
3) Exit the premises via an authorised exit route.
4) Once the premises are secure, listen (from outside the
protected area) for the exit tone to finish.
Note: Pressing the (Quick) key during exit will shorten the exit
time to 3 seconds.
Note: To abort the exit, enter a valid User Code.
Setting & Unsetting the System via a Keyswitch (if fitted).
Biased Keyswitch
To set the system with a biased keyswitch, insert the key and turn it,
then return the key to the original position and remove. Follow the
instructions from step 3 (above).To unset, repeat this operation.
PR5202 Rev 14 CP8L LCD User EN.qxd 11/07/2006 14:54 Page 3

PP
PPaa
aagg
ggee
ee
44
44
Pre Exit Check.
At the start of the setting procedure, a fault
tone will sound if any non exit routes are
open. The display will show, for example:-
If the fault clears within 20 seconds then the exit tone will begin, if not,
the fault tone will continue until a valid User code is entered.
Part Setting the System (using Part 1).
Up to three Part Sets may be available for your system. Please refer to
the customer details at the rear of this manual for information about
Part Set zones. Part Set zones will be omitted from the system when
that particular Part Set is used. To set the system using Part 1.
1) Enter a valid User Code followed by . (Part).
or
Press * (Quick)* followed by . (Part).
2) Retire to an unprotected area.
Note: Pressing the Quick key during exit will shorten the exit time
to 3 seconds.
Note: To abort the exit, enter a valid User Code.
Exit Now ! . . .
Zone 3
* If enabled by installation engineer
PR5202 Rev 14 CP8L LCD User EN.qxd 11/07/2006 14:54 Page 4

PP
PPaa
aagg
ggee
ee
55
55
Part Setting the System (using Part 2 or 3).
Two other Part Sets may be available for your system. Part 2 is a
second set of zones that may be omitted and Part 3 will combine Part
1 and Part 2. To use Part 2 or 3.
1) Enter a valid User Code followed by 2 or 3.
or
Press * (Quick)* followed by 2 or 3.
2) Retire to an unprotected area.
Note: Pressing the Quick key during exit will shorten the exit time
to 3 seconds.
Note: To abort the exit, enter a valid User Code.
3) The exit tone may or may not be heard depending on the
system settings programmed by the installation company.
4) Exit the premises or retire to an unprotected part of the
system. At the end of the exit time, either the exit sounder
will stop (if the exit tone has been audible) or a single beep
will be emitted (if the exit tone has been silent).
5) The system is now Part Set.You are free to move around the
zones that have been removed by the Part Set but other
zones on the system are active.
* If enabled by installation engineer
PR5202 Rev 14 CP8L LCD User EN.qxd 11/07/2006 14:54 Page 5

PP
PPaa
aagg
ggee
ee
66
66
Unsetting the System.
1) Enter the premises via an authorised Entry Point.
2) The entry tone will sound.
3) Proceed to the keypad and enter a valid User Code.
Display After an Alarm.
If an alarm occurs when the system is set, the cause of the alarm will
be displayed for 10 seconds after you unset the system.
1) The display will show, for
example:-
2) Then, after 10 seconds the display
will show:-
3) To view the cause of the alarm again, enter your User code.
Then press 0.
! ! ! ALARM ! ! !
Zone 4
!!!! CHECK ! ! ! ! !
PR5202 Rev 14 CP8L LCD User EN.qxd 11/07/2006 14:54 Page 6

PP
PPaa
aagg
ggee
ee
77
77
Resetting After an Alarm
After an alarm the system needs to be reset.
Your installation company will have programmed the reset modes for
your system so that it complies with your insurance company and
legislation requirements.
Your installation company will have informed you as to the type of
reset that your system is set for.
Before attempting to reset your system, ensure that the system
is Un-set and the fault has been rectified.
1) If the system has been
programmed for Anycode reset;
2) With the display showing:-
Enter your User code
3) Then press Reset.
The system is now reset.
!!!! CHECK ! ! ! ! !
PR5202 Rev 14 CP8L LCD User EN.qxd 11/07/2006 14:54 Page 7

PP
PPaa
aagg
ggee
ee
88
88
If a Master Code Reset has been programmed by the engineer, a
higher level of code will be required.
If Alarm Reset has been programmed for Master, then the display will
show, for example, each time the User attempts to set
the system.
Use a Master code to reset the system.
1) With the display showing:-
Enter a valid Master code.
2) Press Reset.
The system is now reset.
If an Engineer Code Reset has been programmed, please call the
Installation Company.
If Alarm Reset has been programmed for Engineer, then the display
will show, for example, each time the User attempts to
reset the system.
! ! ! ALARM ! ! !
Zone 4
!!!! CHECK ! ! ! ! !
! ! ! ALARM ! ! !
Zone 4
PR5202 Rev 14 CP8L LCD User EN.qxd 11/07/2006 14:54 Page 8

PP
PPaa
aagg
ggee
ee
99
99
If Anti has been programmed for Alarm Reset, contact the Central
Station or Engineer, (as instructed by the Installation Company) and
quote the number given by the display.
1) The central station or engineer will give a return
Anti-Code (this may contain the (YES) & (NO) keys)
for example: 5, (YES), 2, 4.
2) Enter this Anti-Code into the keypad.
The system is now reset.
Tamper Reset
If a fault or tamper occurs when the system
is in Day (Unset) mode, the fault sounder
will operate. The display will show:-
1) To view the cause of the fault, enter
your User Code.The display will
show, for example:-
2) The message will stay on the
display for 10 seconds or until you
press the 0key. The display will
then return to:-
After the cause of the fault has been rectified, the system will need to
be reset.
The terms of your insurance may prohibit User reset. If Tamper
Reset has been programmed for Engineer Reset the display will
show for 10 seconds each time the user
attempts to set the system. Please contact your installation
company.
!!!! CHECK ! ! ! ! !
!!!! CHECK ! ! ! ! !
Tamper
!!!! CHECK ! ! ! ! !
! ! SERVICE DUE !
PR5202 Rev 14 CP8L LCD User EN.qxd 11/07/2006 14:54 Page 9

PP
PPaa
aagg
ggee
ee
11
1100
00
Tamper Resetting
1) With the display showing:-
Enter a valid User code.
2) Press Reset.
The system is now reset.
Setting the system with Mains Fail
In the event of a short term power cut, where it is known when power
will be restored, (e.g. Engineers working on power lines that affect
your premises) it might be necessary to set the system. Please follow
the steps outlined below:
1) With the display showing:-
2) Enter your User code. The display
will show:-
!!!! CHECK ! ! ! ! !
!!!! CHECK ! ! ! ! !
!!!! CHECK ! ! ! ! !
Mains Flt
PR5202 Rev 14 CP8L LCD User EN.qxd 11/07/2006 14:54 Page 10

PP
PPaa
aagg
ggee
ee
11
1111
11
3) Enter your User Code again followed by . (Full).
or
Press *.(Quick)*.
* If enabled by the installation engineer.
4) The exit tone will now sound.
5) Exit the premises via an authorised exit route .
Note: Pressing the (Quick) key during exit will shorten the exit
time to 3 seconds.
Note: To abort the exit, enter a valid User Code.
If Part Setting
1) With the display showing:-
2) Enter your User code. The display
will show:-
3) Enter your User Code again followed by Part, 2 or 3.
4) The exit tone will now sound.
5) Retire to an unprotected area.
Note: To abort the exit, enter a valid User Code
!!!! CHECK ! ! ! ! !
!!!! CHECK ! ! ! ! !
Mains Flt
PR5202 Rev 14 CP8L LCD User EN.qxd 11/07/2006 14:54 Page 11

Re-setting the display after a Mains Fail
1) If the system has been
programmed for Anycode reset;
2) With the display showing:-
Enter your User code
3) Then press Reset.
The display is now reset.
!!!! CHECK ! ! ! ! !
PP
PPaa
aagg
ggee
ee
11
1122
22
PR5202 Rev 14 CP8L LCD User EN.qxd 11/07/2006 14:54 Page 12

Programming User Codes
Up to nine user codes may be programmed on predetermined levels.
These are.
User Numbers 1 to 3 Master Level.
Allows Set, Part Set, Unset and User Programming Mode.
User Numbers 4 to 7 User Level.
Allows Set, Part Set and Unset.
User Numbers 8 to 9 Set Only Level.
Allows Set Only
User Number 1 is factory default 5678. This code may only be
changed, there is no facility for deleting this code.
All other codes may be changed or deleted as required.
To program User Codes.
1) Enter a valid Master User Code
followed by (No).
The display will show:-
2) Press (No).
The display will show:-
3) Press (No).
The display will show:-
4) Press (Yes).
The display will show:-
Do You Want to. .
Test ?
Do You Want to. .
Delete Zone ?
Do You Want to. .
Select Options ?
Do You Want to. .
Program Chime ?
PP
PPaa
aagg
ggee
ee
11
1133
33
PR5202 Rev 14 CP8L LCD User EN.qxd 11/07/2006 14:54 Page 13

5) Press (No).
The display will show:-
6) Press (Yes).
The display will show:-
7) Press a single digit corresponding to the user number
(1 to 9) that you wish to program.
The display will show for example:-
8) To change the code press (No).
The display will show,
for example:-
(To delete a code enter 0000).
9) Enter your required code,
followed by (Yes).
The display will show for example:-
10) To accept the current text press (Yes)
or
To change the text press (No).
The display will show for example:-
Do You Want to. .
Program Codes ?
Select 1 . . 9
Code 2
# # # #
Code 2
0 0 0 0 <-
Code 2 Text
User 2
Code 2 Text
-
PP
PPaa
aagg
ggee
ee
11
1144
44
PR5202 Rev 14 CP8L LCD User EN.qxd 11/07/2006 14:54 Page 14

11) Text is entered in a similar way that you would enter text on
a mobile telephone. Select characters from the list below:-
1= ABC 2= DEF
3= GHI 4= JKL
5= MNO 6= PQR
7= STU 8= VWX
9= YZ blank 0= 1234567890
Enter the required character followed by (Yes). Continue
until you have entered eight characters.
12) The display will show:-
13) Press (Yes) to program more codes
or
Press 0twice to return to the Unset Mode.
Do You Want to. .
Program Codes ?
PP
PPaa
aagg
ggee
ee
11
1155
55
PR5202 Rev 14 CP8L LCD User EN.qxd 11/07/2006 14:54 Page 15

PP
PPaa
aagg
ggee
ee
11
1166
66
Programmable User Options
Several user programmable options are available via user codes 1, 2
or 3. To use these options please follow instructions below.
Delete Zone Option
This option allows individual zones to be deleted (omitted) when the
system is being set. Note: Zone delete is only effective for one Set and
will need to be repeated for subsequent Sets. If you are removing
particular zones on a regular basis ask your installation company to
include them in a Part Set.
The system will reinstate the detectors and set normally the next time
you set the system.
1) Enter a valid Master User Code
followed by (No). The display
will show:-
2) Press (No).
The display will show:-
3) Press (Yes).
The display will show:-
4) Press the zone numbers corresponding to the zones you
wish to delete from the set procedure.
The display will show, for example:-
Do You Want to. .
Test ?
Do You Want to. .
Delete Zone ?
Enabled Zones . . .
1 2 3 4 5 6 7 8
Enabled Zones . . .
1 - 3 4 5 - 7 8
PR5202 Rev 14 CP8L LCD User EN.qxd 11/07/2006 14:54 Page 16

PP
PPaa
aagg
ggee
ee
11
1177
77
5) Press 0 twice.
The display will show for example:-
6) Press (Full) for Full Set
or
Press (Part) for Part 1 Set
or
Press 2 for Part 2 Set
or
Press 3 for Part 3 Set
7) The system will now start the relevant Set, with the zones
you deleted removed from the Set.
Note: This will be for the one Set state only.
System Test
This option allows the User to test zones, bells and strobes on the
system.
1) Enter a valid Master User Code
followed by (No). The display will
show:-
2) Press (Yes).
The display will show:-
Do You Want to. .
Test ?
Walktesting . . . . .
O.k !
Do You Want to. .
Set User 1 ?
PR5202 Rev 14 CP8L LCD User EN.qxd 11/07/2006 14:54 Page 17

PP
PPaa
aagg
ggee
ee
11
1188
88
3) Walk around the area being tested. As each device is
operated there will a tone from the internal sounders and
the display will show the triggered circuit.
4) To test the bells (external sounders) and strobe press 9.
To stop the bell test press 9 again.
5) To escape back to Unset press 0 three times.
Turning Chime On/Off
Your installation company may have programmed the system so that a
chime tone sounds when certain doors are opened, or a detector is
triggered. This Chime function may be turned on or off by the User.
1) Enter a valid Master User Code
followed by (No).
The display will show:-
2) Press (No).
The display will show:-
3) Press (No).
The display will show:-
4) Press (Yes).
The display will show:-
Press (Yes) again.
5) The current Chime Mode will be displayed. Use the (No)
key to change it to the mode you require.When finished press
0three times to return to the Unset mode.
Do You Want to. .
Test ?
Do You Want to. .
Delete Zone ?
Do You Want to. .
Select Options ?
Do You Want to. .
Program Chime ?
PR5202 Rev 14 CP8L LCD User EN.qxd 11/07/2006 14:54 Page 18
Other manuals for CP8L
2
Table of contents
Other EUROSEC Control Panel manuals
Popular Control Panel manuals by other brands
Honeywell
Honeywell IFP-2100ECS Basic operating instructions
Fourgroup
Fourgroup Full-App 2 USE AND INSTALLATION HANDBOOK

Spectra
Spectra 1759MG System Programming Guide and SCPI Reference
Philips
Philips Antumbra installation guide
Bosch
Bosch ICP-CC488 Quick reference guide

INIM
INIM SmartLiving 515 Installation and programming guide
