Eurotronic OXON User manual

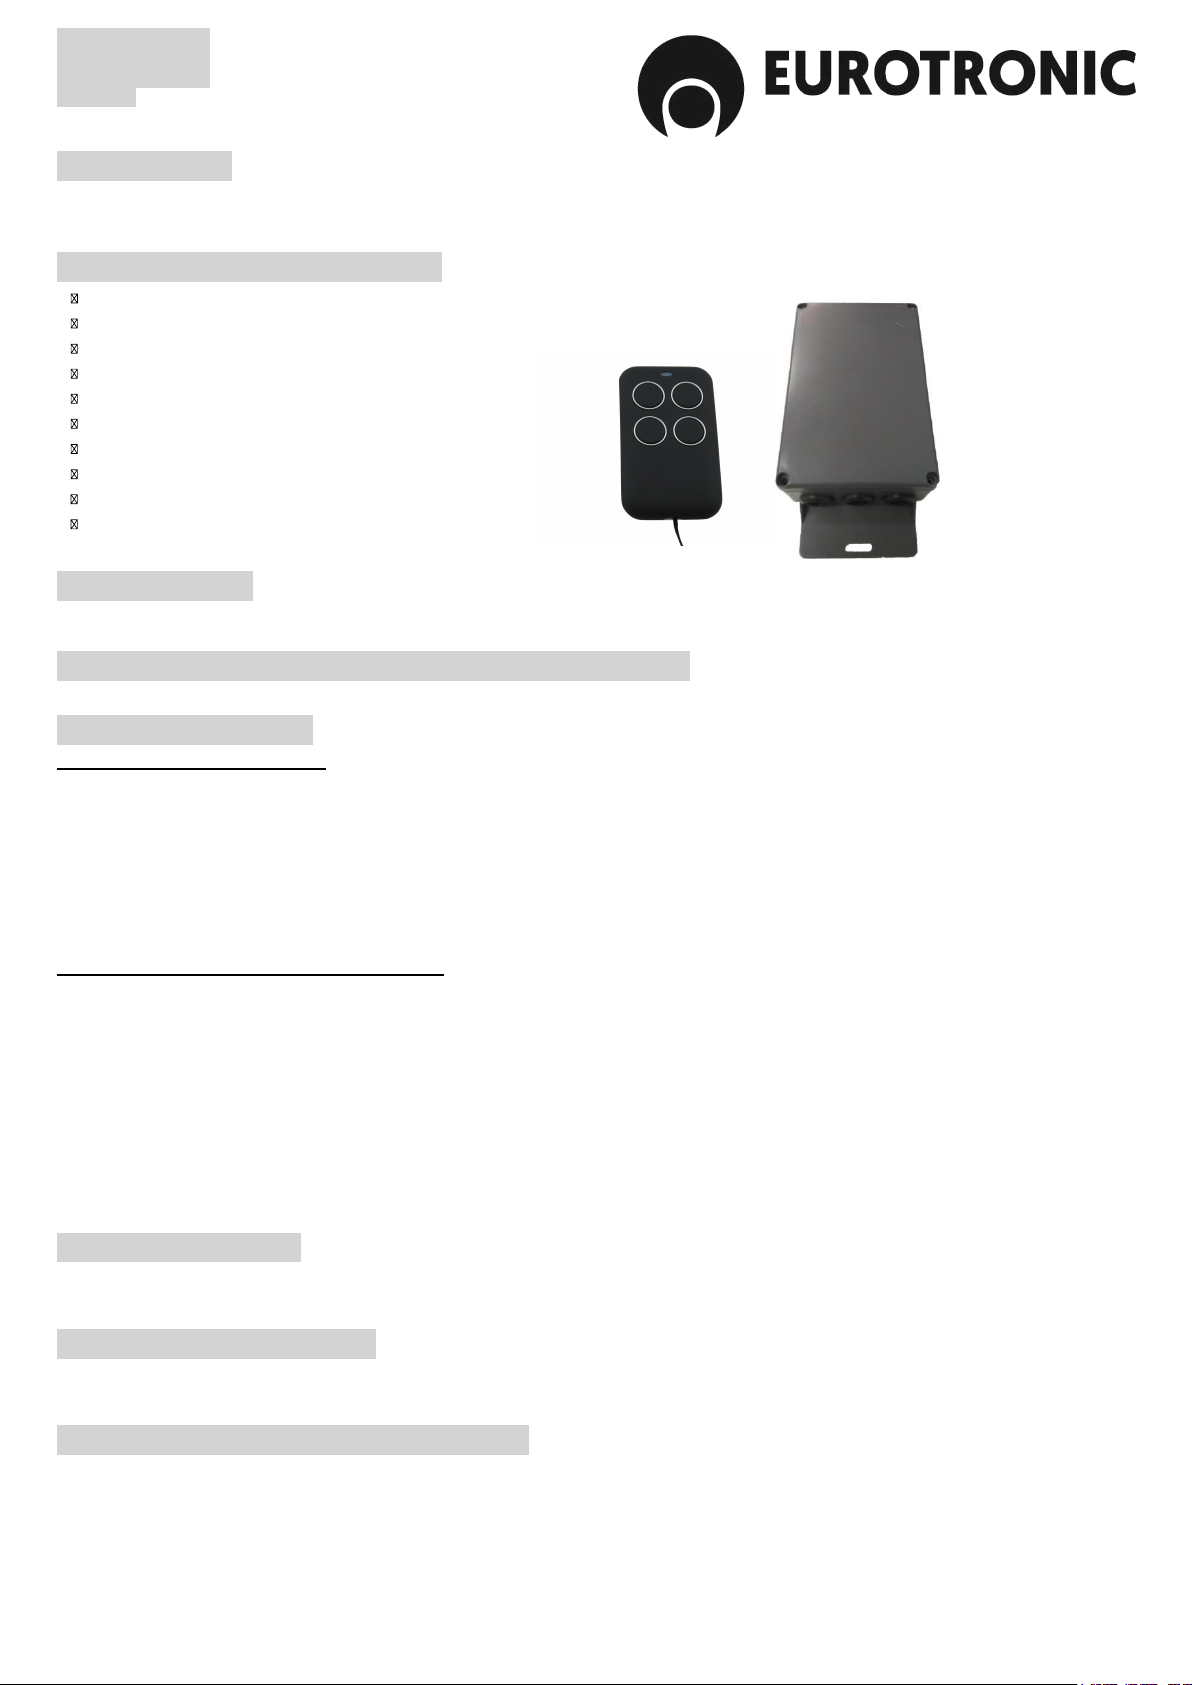
OXON
ESP REV 6.1
ADVERTENCIAS
Estimado cliente, gracias por haber comprado un producto EUROTRONIC. Esta hoja de instrucciones contiene informaciones importantes acerca de los modos de uso y la
seguridad de la instalación. Respete las instrucciones y consérvelas para consultas futuras. Las instalaciones radio no se pueden utilizar en los lugares que tienen
factores de influencia (por ejemplo cerca de policía, aeropuertos, bancos y hospitales). Es importante que un técnico haga un control antes de utilizar el sistema radio. Las
instalaciones radio pueden ser utilizadas solamente si las influencias no crean problemas al funcionamiento del receptor y del emisor.
CARACTERÍSTICAS TÉCNICAS
Alimentación: 230V~ 50 Hz
Potencia máxima motores 0.45 hp
Tiempo funcionamiento Programable máx. 2,5 minutos
Tiempo cierre automático Programable máx. 3 minutos
Tiempo luz de cortesía 3 minutos
Nº máx. de mando 31
Temperatura de ejercicio: 0°C ÷ + 70°C
Frecuencia radio 433,92 MHz
Medidas 123 x 78 x 35mm
Fusible 230V ~ 6A
OBSERVACIONES
OXON es una central electrónica que permite el manejo de motores con final de carrera mecánico. Puede alimentar directamente una fotocélula que trabaja a 12Vdc.
Permite la conexión de una lámpara de cortesía o de aviso
INDICACIONES Y CONEXIONES ELÉCTRICAS
Ver diagrama en la última hoja de las instrucciones (V2.2-OXON-ELEC)
PROGRAMACIÓN
PROGRAMACION DESDE EL CUADRO
Inserción de emisores (Funcionamiento - 1 sola tecla)
Pulsar el botón de programación (LEARN) de la centralita hasta que el LED de color rojo se encienda y pite la central. Pulsar la tecla del mando que queramos grabar en ese
receptor, el LED parpadeará y emitirá un pitido indicando que el proceso se ha realizado de manera correcta. Después de 8 segundos saldrá de programación y pitara dos
veces.
Inserción de emisores (Funcionamiento - 2 teclas)
Pulsar el botón de programación (LEARN) de la centralita hasta que el LED de color rojo se encienda y pite la central. Pulsar la tecla del mando que queramos que sea la
subida, el LED parpadeará y pitara una vezindicando que el proceso se ha realizado de manera correcta. Después pulsar la tecla que queremos que sea la bajada, el
LED parpadeará y pitara una vezindicando que el proceso se ha realizado de manera correcta . Después de 8 segundos saldrá de programación y pitara dos veces.
PROGRAMACION DESDE UN EMISOR YA EN MEMORIA
Inserción de emisores (Funcionamiento - 1 sola tecla)
Pulsar el botón 2-3 del mando que ya tenga programado en memoria durante 5 segundos hasta que el LED de color rojo se encienda y pite la central.Pulsar la tecla del
mando que queramos grabar en ese receptor, el LED parpadeará y pitara la central indicando que el proceso se ha realizado de manera correcta. Después de 8 segundos
saldrá de programación y pitara dos veces.
Inserción de emisores (Funcionamiento - 2 teclas)
Pulsar el botón 2-3 del mando que ya tenga programado en memoria durante 5 segundos hasta que el LED de color rojo se encienda y pite. Pulsar la tecla del mando que
queramos que sea la subida, el LED parpadeará y pitara la central indicando que el proceso se ha realizado de manera correcta. Después pulsar la tecla que queremos que
sea la bajada, el LED parpadeará y pitara la central indicando que el proceso se ha realizado de manera correcta. Después de 8 segundos saldrá de programación y pitara
dos veces.
Reset de los emisores.
Mantenga presionado el botón ‘LEARN’ se encenderá el LED rojo y la central pitara, mantenga pulsado hasta que la central realice dos pitidos largos. Soltar el botón de
programación y esperar 10 segundos hasta que la central cierre programación pintando dos veces de forma rápida y apagándose el LED rojo.
TIEMPO DE TRABAJO
Con la puerta cerrada por completo, ponga el Microinterruptor 3 en ON y pulse el botón de subida del emisor. Un pitido indicara el inicio de la programación, cuando la
puerta este completamente subida pulse nuevamente el botón del emisor y otro pitido indicara el final de programación. Ponga nuevamente el Microinterruptor 3 en posición
OFF.
CIERRE AUTOMÁTICO
Ponga el Microinterruptor 2 y 3 en ON y pulse un botón del mando, la central pitara empezando a memorizar el tiempo de cierre automático el led rojo se encenderá y el azul
empezara a parpadear. Pulse el botón del mando cuando quiera finalizar el aprendizaje del tiempo de cierre automático, la central hará un pitido largo y se apagaran los led
rojo y azul. Ponga nuevamente el Microinterruptor 3 en posición OFF.
RESTABLECER LOS TIEMPOS
Ponga los Microinterruptores 1, 2, 3, 4 y 5 en ON. Pulse el botón (LEARN) hasta que la central emita dos pitidos. La central restablecerá los tiempos de fábrica. Vuelva a
colocar los microinteruptores como estaban antes.
OXON

OXON
ING REV 6.1
WARNINGS
Dear customer, thank you for purchasing a EUROTRONIC product. This instruction sheet contains important information about the usage modes and the safety of the
installation. Follow the instructions and keep them for future references. Radio installations cannot be placed in influencing factors places (e.g. near police, airports, or
hospitals). It is important that a technician check it before using the radio system. Radio installations may only be used if influences do not create problems to the operation of
both receiver and transmitter.
TECHNICAL CHARACTERISTICS
Power: 230V~ 50 Hz
Motor maximum power: 0.45 hp
Operating time: 2,5 minutes max. programmable
Automatic closing time: 3 minutes max. programmable
Courtesy light time: 3 minutes
Max number of transmitters: 31
Operating temperature: 0°C ÷ + 70°C
Radio frequency: 433,92 MHz
Sizes: 123 x 78 x 35mm
Fuse: 230V ~ 6A
OBSERVATIONS
OXON is an electronic control unit that allows the operation of motors with mechanical limit switches. It can directly feed a photocell working at 12Vdc. Allows the connection
of a courtesy light or a warning lamp.
INDICATIONS AND ELECTRICAL CONNECTIONS
Go the diagram in the last sheet of the instructions.
PROGRAMMING
PROGRAMMING FROM THE ELECTRONIC CONTROL UNIT
Insertion of transmitters (Operating - 1 single key)
Press the programming button (LEARN) in the receiver until the red LED will light up and the receiver makes a sound. Press the button of the transmitter you want to
memorize in this receiver, the LED will flicker and makes a sound; this will indicate that the process has been successfully. After 8 seconds the receiver will get out from the
programming mode and will make two sounds.
Insertion of transmitters (Operating - 2 keys)
Press the programming button (LEARN) in the receiver until the red LED will light up and the receiver makes a sound. Press the button of the transmitter that you want to be
the up button, the LED will flicker and makes two sounds; this will indicate that the process has been successfully. After then, press the button you want to be the down
button, the LED will flicker and makes two sounds; this will indicate that the process has been successfully. After 8 seconds the receiver will get out from the programming
mode and will make two sounds.
PROGRAMMING FROM AN ALREADY MEMORIZEDTRANSMITTER
Insertion of transmitters (Operating - 1 single key)
Press the 2-3 button in the memorized transmitter for 5 seconds until the red LED will light up and makes a sound. Press the button in the transmitter you want to
memorize in the receiver, the LED will flicker and makes a sound; this will indicate that the process has been successfully. After 8 seconds the receiver will get out from the
programming mode and will make two sounds.
Insertion of transmitters (Operating - 2 keys)
Press the 2-3 button in the memorized transmitter for 5 seconds until the red LED will light up and makes a sound. Press the button in the transmitter you want to be the
up button, the LED will flicker and makes a sound; this will indicate that the process has been successfully. Then press the button you want to be the down button, the LED
will flicker and makes a sound; this will indicate that the process has been successfully. After 8 seconds the receiver will get out from the programming mode and will make
two sounds.
Reset of transmitters
Press the ‘LEARN’ button until the red LED will light up and the receiver makes a sound , keep pressing until the receiver makes two long sounds. Release the programming
button and wait 10 seconds until the receiver will go out of programming mode making two quickly sounds and the Led light turns off.
WORKING TIME
With the door completely closed, put the Microswitch 3 in ON position and press the up button of the transmitter. A sound will indicate the start of the programming. When the
door will be completely up press again the button and another sound will indicate the end of the programming. Put then, the Microswitch 3 in OFF position.
AUTOMATIC CLOSING
Put the Microswitch 2 and 3 in ON position and press any button in the transmitter, the receiver will make a sound and will start to memorize the automatic closing time. The
red LED will light up and the blue one will flicker. Press the button in the transmitter when you want to stop with the memorizing time of the automatic closing time. The
receiver will make a long sound and the blue and red led will turn off. Put then, the Microswitch 3 in OFF position.
RESET TIMES
Putt he Microswitch 1, 2, 3, 4 and 5 in ON position. Pres the LEARN button until the receiver makes two sounds. The receiver will restore factory values. Put the
Microswitches in the original position.
OXON

OXON
FRA REV 6.1
ADVERTISSEMENTS
Cher client, merci d'avoir acheté un produit EUROTRONIC. Ces instructions contiennent des informations importantes à propos de l'utilisation et de la sécurité de
l'installation. Veuillez respecter les instructions et conservez-les pour le futur. Les installations radio ne doivent pas être utilisées dans des endroits ayant des facteurs
d'influence (par exemple les commissariats de police, les aéroports, les banques et les hôpitaux Il est important qu'un technicien fasse un contrôle avant d'utiliser le système
radio. Les installations radio peuvent être utilisées uniquement sur les influences ne créent pas de problème dans le fonctionnement du récepteur et de l'émetteur.
CARACTERISTIQUES TECHNIQUES
Alimentation: 230V~ 50 Hz
Puissance max. de moteurs 0.45 hp
Temps de fonctionnement Programmable max. 2,5 minutes
Temps de fermeture automatique Programmable max. 3 minutes
Temps lumière de courtoisie 3 minutes
Nº max.de émetteurs 31
Température de travail: 0°C ÷ + 70°C
Fréquence radio 433,92 MHz
Dimension 123 x 78 x 35mm
Fusible 230V ~ 6A
OBSERVATIONS
OXON est une central électronique qui permet le control de moteurs avec fin de course mécanique. Peut alimenter directement une photocellule que travaille à 12Vdc.
Permet la connexion d’ une lampe de courtoisie o d’avis
INDICATIONS ET CONEXIONS ELECTRIQUES
Voire diagramme dans la dernière feuille des instructions
PROGRAMMATION
PROGRAMMATION A PARTIR DE L’EMMETEUR
Insertion d’émetteurs (Fo nctionnement - 1 seule touche)
Pressez le bouton de programmation (LEARN) de la central jusqu’au que le LED de couleur rouge s’allume et la central fera un bip. Presser la touche de le télécommande
qu’on veut enregistrer en ce récepteur, le LED clignotera et émettra un bip en indiquant que le procès s’ ha fait de façon correcte . Apres de 8 secondes sortira de
programmation et fera bip deux fois.
Insertion d’é metteurs (Fonctionnement - 2 touches)
Pressez le bouton de programmation (LEARN) de la central jusqu’au que le LED de couleur rouge s’allume et la centra fera un bip. Pressez la touche de la télécommande
que nous voulons que ce soit le montée, le LED clignotera et fera bip deux fois en indiquant que le procès a fini correctement, après pressez la touche que nous voulons
que ce soit la descente, le LED clignotera et fera bip deux fois en indiquant que le procès a finalisé correctement. . Après de 8 secondes sortira de programmation et fera bip
deux fois.
PROGRAMMATION A PARTIR D’UN EMMETEUR DEJA MEMORISE
Insertion d’émetteurs (Fonctionnement - 1 seule touche)
Pressez le bouton 2-3 de la télécommande que soit programmé en mémoire pendant 5 secondes jusqu’au ce que le LED de couleur rouge s’allume et la central fera un
bip. Pressez la touche de la télécommande que vous voulez enregistrer en ce récepteur, le LED clignotera et la central fera un bip pour indiquer que le procès a finalisé
correctement. Apres de 8 secondes sortira de programmation et fera un bip deux fois.
Insertion d’émetteurs (Fonctionnement - 2 touches)
Pressez le bouton 2-3 de la télécommande que soit programmé en mémoire pendant 5 secondes jusqu’au que le LED de couleur rouge s’allume et fera un bip. Pressez la
touche de la télécommande que nous voulons que soit le montée, le LED clignotera et la central fera un bip en indiquant que le procès a fini correctement, après pressez la
touche que nous voulons que soit la descente, le LED clignotera et la central fera un bip indiquer que le procès a finalisé correctement. Apres de 8 secondes sortira de
programmation et fera un bip deux fois.
Reset des émetteurs.
Maintenir presse le bouton ‘LEARN’ s’allumera le LED rouge et la central fait un bip, maintenir pressé jusqu’au que la central effectue deux bips longs. Relâchez le bouton
de programmation et attendre 10 secondes jusqu’au ce que la central ferme programmation fai t un bip deux fois de manière rapide et éteindra le LED rouge.
TEMPS DE TRAVAIL
Avec la porte complètement fermé, placer le Micro-interrupteur 3 en ON et presser le bouton de monter de l’émetteur. Un bip indiquera le début de la programmation,
quand la porte soit complétement montée pressez à nouveau le bouton de l’émetteur et autre bip vous indiquera le nde la programmation. Placer à nouveau le Micro-
interrupteur 3 en position OFF.
FERMETURE AUTOMATICO
Placer le Micro-interrupteur 2 et 3 en ON et pressez un bouton de la télécommande, la central fera un bip et commencera à mémoriser le temps de fermeture automatique,
le LED rouge s’allumera et le bleu commencera à clignoter. Pressez le bouton de la télécommande quand on veut naliser l'ap prentissage du temps de fermeture
automatique, la central fera un bip long et s’éteindra les LED rouge et bleu. Placer à nouveau les micro-interrupteur 3 en position OFF.
RESTAURER LES TEMPS
Placer les Micro-interrupteurs 1, 2, 3, 4 et 5 en ON. Pressez le bouton (LEARN) jusqu’au ce que la central fait deux bits.. Le central restaurera les temps d’usine . Placer à
nouveau les micro-interrupteurs dans la position antérieure.
OXON
OXON
IT REV 6.1
AVVERTENZE
Gentile Cliente, Grazie per aver acquistato un prodotto EUROTRONIC. Questo foglio di istruzioni contiene informazioni importanti sulle modalità di utilizzo e la sicurezza
dell'impianto. Seguire le istruzioni e conservarle per un riferimento futuro.
Le centraline non possono essere utilizzati in luoghi che sono influenzate da fattori eccezzionali (ad esempio vicino a polizia, aeroporti, banche e ospedali)
CARATTERISTICHE TECNICHE
Alimentazione: 230V~ 50 Hz
Potenza massima motore 1350 W
Tempo funzionamento Programmabile max 2,5 minuti
Tempo chiusura automatica Programmabile max 3 minuti
Tempo luce di cortesia 3 minuti
Nº máx. di telecomandi 31
Temperatura di lavoro: 0°C ÷ + 70°C
Frequenza radio 433,92 MHz
Dimensioni 123 x 78 x 35mm
Fusibile 230V ~ 6A
OSSERVAZIONI
OXON è una centralina che permette la movimentazione di motori con fine corsa meccanico. È possibile alimentare direttamente una fotocellula che lavora a 12 Vdc. È
possibile collegare finecorsa esterni. Esso consente il collegamento di una luce di cortesia o un lampeggiante.
PROGRAMMAZIONE E CONNESSIONE ELETTRICA
Vedi il diagramma nell'ultimo foglio delle istruzioni (V2.2-OXON-ELEC)
PROGRAMMAZIONE
PROGRAMMAZIONE DALLA CENTRALE
Inserimento di trasmettitori (Funzionamento - 1 tasto singolo)
Premere il pulsante di programmazione (LEARN) dell'unità di controllo fino a quando il LED rosso si accende e il pannello di controllo emette un segnale acustico. Premere il
tasto del TELECOMANDO salita che vogliamo registrare in quel ricevitore, il LED lampeggerà ed emetterà un segnale acustico che indica che il processo è stato eseguito
correttamente. Dopo 8 secondi uscirà dalla programmazione e suonerà due volte.
Inserimento di emettitori (Funzionamento - 2 tasti)
Premere il pulsante di programmazione (LEARN) dell'unità di controllo fino a quando il LED rosso si accende e il pannello di controllo emette un segnale acustico. Premere il
pulsante salita del telecomando che vogliamo aggiungere, il LED lampeggia e suona due volte per indicare che il processo è stato eseguito correttamente, quindi premere il
pulsante di discesa per assegnare la discesa, il LED lampeggia e suona due volte per indicare che il processo è stato eseguito correttamente. Dopo 8 secondi uscirà dalla
programmazione e suonerà due volte.
PROGRAMMAZIONE DA UN EMITTENTE GIÀ IN MEMORIA
Inserimento di trasmettitori (Funzionamento - 1 tasto singolo)
Premere i pulsanti 2 -3 del telecomando che sono già stati programmati in memoria per 5 secondi fino a quando il LED rosso si accende e il pannello di controllo emette un
segnale acustico. Premere il tasto del nuovo telecomando che vogliamo registrare in quel ricevitore, il LED lampeggerà e la centrale suonerà indicando che il processo è
stato eseguito correttamente. Dopo 8 secondi uscirà dalla programmazione e suonerà due volte.
Inserimento di Telecomandi (Funzionamento - 2 tasti)
Premere i pulsanti 2-3 del telecomando che è già stato programmato in memoria per 5 secondi fino a quando il LED rosso si accende e emette un segnale acustico.
Premere il pulsanteche vogliamo sia la salita, il LED lampeggia e indica che il processo è stato eseguito correttamente, quindi premere il tasto che è la discesa, il LED
lampeggia e un segnale acustico che indica che la centrale il processo è stato eseguito correttamente. Dopo 8 secondi uscirà dalla programmazione e suonerà due volte.
Reset della centrale
Premere e tenere premuto il pulsante 'LEARN', il LED rosso si accende e la centrale emette un segnale acustico, tenere premuto fino a quando il pannello di controllo emette
due segnali acustici lunghi. Rilasciare il pulsante di programmazione e attendere 10 secondi fino a quando il pannello di controllo non chiude la programmazione
lampeggiando due volte rapidamente e spegnendo il LED rosso.
TEMPO DI LAVORO
Con la serranda completamente chiusa, impostare il microinterruttore 3 su ON e premere il pulsante salita dal telecomando. Un segnale acustico indica l'inizio della
programmazione, quando la serranda è completamente sollevata premere di nuovo il pulsante del telecomando e un altro segnale acustico indica la fine della
programmazione. Riposizionare il microinterruttore 3 in posizione OFF.
CHIUSURA AUTOMATICA
Impostare i microinterruttori 2 e 3 su ON e premere un pulsante sul telecomando, la centrale inizia a memorizzare il tempo di chiusura automatica, il led rosso si accende e il
blu inizia a lampeggiare. Premere il pulsante sul telecomando quando si desidera terminare l'apprendimento del tempo di chiusura automatica, il pannello di controllo
emetterà un lungo bip e i LED rosso e blu si spegneranno. Riposizionare il microinterruttore 3 in posizione OFF.
REIMPOSTARE IL TEMPO DI LAVORO
Impostare i microinterruttori 1, 2, 3, 4 e 5 su ON. Premere il pulsante (LEARN) fino a quando l'unità di controllo emette due segnali acustici. La centrale ripristinerà i tempi di
lavoro. Riposizionare il microinterruttore 1, 2, 3, 4, 5 in posizione OFF.
OXON

Microswitch 1
OFF Luz intermitencia activa.
ON Luz cortesía activa
Microswitch 1
OFF Active flashing light
ON Active courtesy light
Micro Switch 1
OFF Lumière clignotant active
ON Lumière de courtoisie active
Micro Switch 1
OFF Luce intermittenza attiva.
ON Luce cortesia attiva
Microswitch 2
OFF Función cierre automático desactivado
ON Función cierre automático activado
Microswitch 2
OFF Automatic closing function deactivated
ON Automatic closing function activated
Microswitch 2
OFF Fonction fermeture automatique désactivé
ON Fonction fermeture automatique activé
Microswitch 2
OFF Funzione chiusura automatica DISATTIVATA
ON Funzione chiusura automatica ATTIVATA
Microswitch 4
OFF Funcionamiento continuo.
ON Hombre presente en bajada (si el
microswitch 2 esta también en ON
el hombre presente será en subida también .
Microswitch 4
OFF Continuous operation
ON Present man in lowering (if the microswitch 2
is also in ON, the present man will be in rise mode too) .
Microswitch 4
OFF Fonctionnement continu
ON Homme présent en descente (si le microswitch 2 est aussi en
ON L’homme présent sera en hausse aussi).
Microswitch 4
OFF Funcionamiento continuo.
ON Uomo presente in discesa (se il microinterruptor 2
posizionato in ON anche l’uomo presente diventa AUTOMATICO.
Microswitch 3
ON Permite configurar el tiempo de trabajo,
una vez ajustado, ponga SW3 en la
posición OFF (valor predeterminado 1 min).
Microswitch 3
ON Allows configuring work time,
when adjusted; put SW3 in OFF
position (predetermined value 1 minute).
Microswitch 3
ON Permet configurer le temps de travail, une fois ajusté, placer
SW3 dans la position OFF (valeur prédéterminé 1 min.)
Microswitch 3
ON Permette di impostare il tempo di lavoro,
Una volta impostato, mettere SW3 nella posizione
OFF (valore predeterminato 1 min).
Microswitch 5
OFF Buzzer apagado.
ON Buzzer encendido .
Microswitch 5
OFF Buzzer OFF
ON Buzzer ON
Microswitch 5
OFF Buzzer éteint
ON Buzzer allumé
Microswitch 5
OFF Buzzer sonoro spento.
ON Buzzer sonoro acceso
Puente J6 insertado
J6 bridge inserted
Pont J6 inséré
J6 ponte inserito
Puente J6 NO insertado.
J6 bridge NOT inserted.
Pont J6 NON inséré.
Ponte J6 NON inserito.
OXONREV V6.1-OXON-ELEC INDICACIONES Y CONEXIONESELÉCTRICAS
INDICATIONS AND ELECTRICALCONNECTIONS
INDICATIONS ET CONNEXIONS ÉLECTRIQUES
INDICAZIONI E COLLEGAMENTI ELETTRICI
Table of contents
Languages:
Other Eurotronic Control Unit manuals

Popular Control Unit manuals by other brands


ElMod
ElMod ThinkTank Tank Module ECO Instructions for Assembly and Handling

Viessmann
Viessmann VITOTRONIC 100 operating instructions

Cypress
Cypress CapSense Express SmartSense CY3280-MBR2 quick start guide

Rockwell Automation
Rockwell Automation Bulletin 193 E1 PLUS Application and Installation

Lowenstein Medical
Lowenstein Medical prismaCONNECT Instructions for use

Hitachi
Hitachi CH-6.0N2 Installation and operation manual


