Everdure RBES62 Guide

DESIGNED TO PERFECTION
INSTALLATION, OPERATION
& MAINTENANCE INSTRUCTIONS
FOR EVERDURE RANGE HOOD
Models Included:
RBES62 BERLEY
RBES62B
INSTALLATION, OPERATION AND MAINTENANCE INSTRUCTIONS

DESIGNED TO PERFECTION
FOR EVERDURE RANGE HOODS RBES62 & RBES62B
CONTENTS
SECTION PAGE NO.
Important Safety Instructions……………… 3
Appliance Details ………………………… 4
General Information …………………….. 4
What Is Supplied ………….……………… 4
What May Be Needed For Installation … 4
Installation Instructions …………………… 5-6
Operating Instructions …………………… 6
Replacing The Bulbs …………………….. 7
Cleaning …………………………………… 7
Troubleshooting ……………………………… 7
It is important that you retain these instructions, proof of purchase as well as
other important documents about this product for future reference.
Due to continual product development, Everdure reserves the right to alter
specifications or appearances without notice.
Dispose of packaging responsibly – recycle where facilities are available.
2

DESIGNED TO PERFECTION
IMPORTANT SAFETY INSTRUCTIONS
IMPORTANT: Read the assembly instruction section and safety precautions of this booklet
carefully before removing the contents of this carton.
1. In certain circumstances electrical appliances may be a danger hazard.
2. This appliance is not intended for use by persons (including children) with reduced physical, sensory or
mental capabilities, or lack of experience or knowledge, unless they have been given supervision or
instruction concerning the use of the appliance by a person responsible for their safety. Children should
be supervised to insure that they do not play with the appliance.
3. Do not check the status of the filters while the cooker hood is operating.
4. Do not touch the light bulbs after appliance use.
5. Take care with the RBES62B glass front fascia. Do not use harsh abrasives or excessive force on the
panel. Do not open the unit by pulling the glass panel.
6. Do not disconnect the appliance with wet hands and do not disconnect the power cord with extreme
force.
7. Do not flambé underneath range hood.
8. Avoid free flame, as it may cause damage to the filters and be a fire hazard.
9. If frying food, ensure to check regularly to avoid the oil overheating and becoming a fire hazard.
10. Unplug the appliance before carrying out maintenance or replacing lamps.
11. If the power cord is damaged, it must be replaced by the manufacturer, an authorised service centre or
similarly qualified persons to avoid a hazard.
12. Indoor use only.
13. When the appliance is not in use and before cleaning, unplug the appliance from the outlet.
14. It is recommended to operate the range hood prior to cooking.
15. It is recommended to leave the range hood in operation for 15 minutes after cooking is terminated in
order to completely eliminate cooking vapours and odours.
16. Turn off the range hood when not in use.
17. Don’t use the range hood if it is damaged, especially the supply cord and the case.
18. Don’t immerse the range hood in liquid.
19. The exhaust air must not be discharged into a flue which is used for exhausting fumes from appliance
burning gas or other fuels (not applicable to appliances that only discharge the air back into the room).
20. Regulations concerning the discharge of air have to be fulfilled. There shall be adequate ventilation of
the room when the range hood is used at the same time as appliances burning gas of other fuels.
21. Clean the surface of the cooker hood regularly using cloth moistened with denatured alcohol of non-
abrasive liquid detergent.
22. For hoods using optional charcoal filters, replace the filters approximately every 3 - 4 months.
23. There is a fire risk if cleaning is not carried out in accordance with the instruction.
24. The unit is intended for use above hobs with four elements.
25. If the instruction for the minimum distance between the supporting surface of the cooking vessels on the
hob and the lowest part of the range hood are specified by hob instructions, these instructions should be
taken into account.
DO NOT OPERATE THIS APPLIANCE BEFORE READING THE
INSTRUCTION BOOKLET
3

DESIGNED TO PERFECTION
APPLIANCE DETAILS
Voltage: 220-240V
Frequency: 50Hz
Lamp Max: 2x28W E14 Halogen
Rated Input Power: 256W
GENERAL INFORMATION
Before installing and operating the range hood, carefully read the following important information regarding
installation safety and maintenance. Keep this information booklet accessible for further consultations.
The appliance has been designed to exhaust cooking fumes through the hole in the top of the unit only. The
fumes can be exhausted externally using optional ducting, or it may be used to re-circulate the air back into
the room (charcoal filters are required for re-circulating installation).
Before installation, please ensure that the following have been supplied and that the tools listed below are
readily available.
TOP VIEW
SIDE VIEW
282
178
40
600
282
308
600
EXTENDED VIEW
455
REAR VIEW
552
WHAT IS SUPPLIED
Range hood (including one way valve for ducting) x 1
Installation kit (long screws x 4, short screws x 2, long bolts x 6, short bolts x 2, washers x 6, plastic plugs x 4,
small brackets x 2, long bracket x 1) x 1
Instruction booklet x 1
Note: Flexible tubing and charcoal filters are NOT supplied with the unit.
WHAT MAY BE NEEDED FOR INSTALLATION
Electric Drill Duct Tape
Tape Measure Jig Saw
Spirit Level Ladder
Screwdrivers Torch (If natural lighting is minimal)
4

DESIGNED TO PERFECTION
INSTALLATION INSTRUCTIONS
Please ensure that all power is switched off before installing the range hood.
Installation must be in accordance to the local electrical authority and codes.
The switched power outlet for the range hood should be positioned to enable the user to turn the power off,
to enable cleaning and any maintenance required.
The switched power outlet should be installed within 600mm from the rear of the unit.
Ensure that when installing the range hood, that it is protected from any possible damage from tools etc.
Ducting for this unit must be installed in accordance to the local authority.
Ensure that the fixings used for this range hood are suitable.
Check the area where the range hood is to be fitted, to ensure that it is structurally sound.
Before using the appliance, remove the plastic coatings protecting the stainless steel finish.
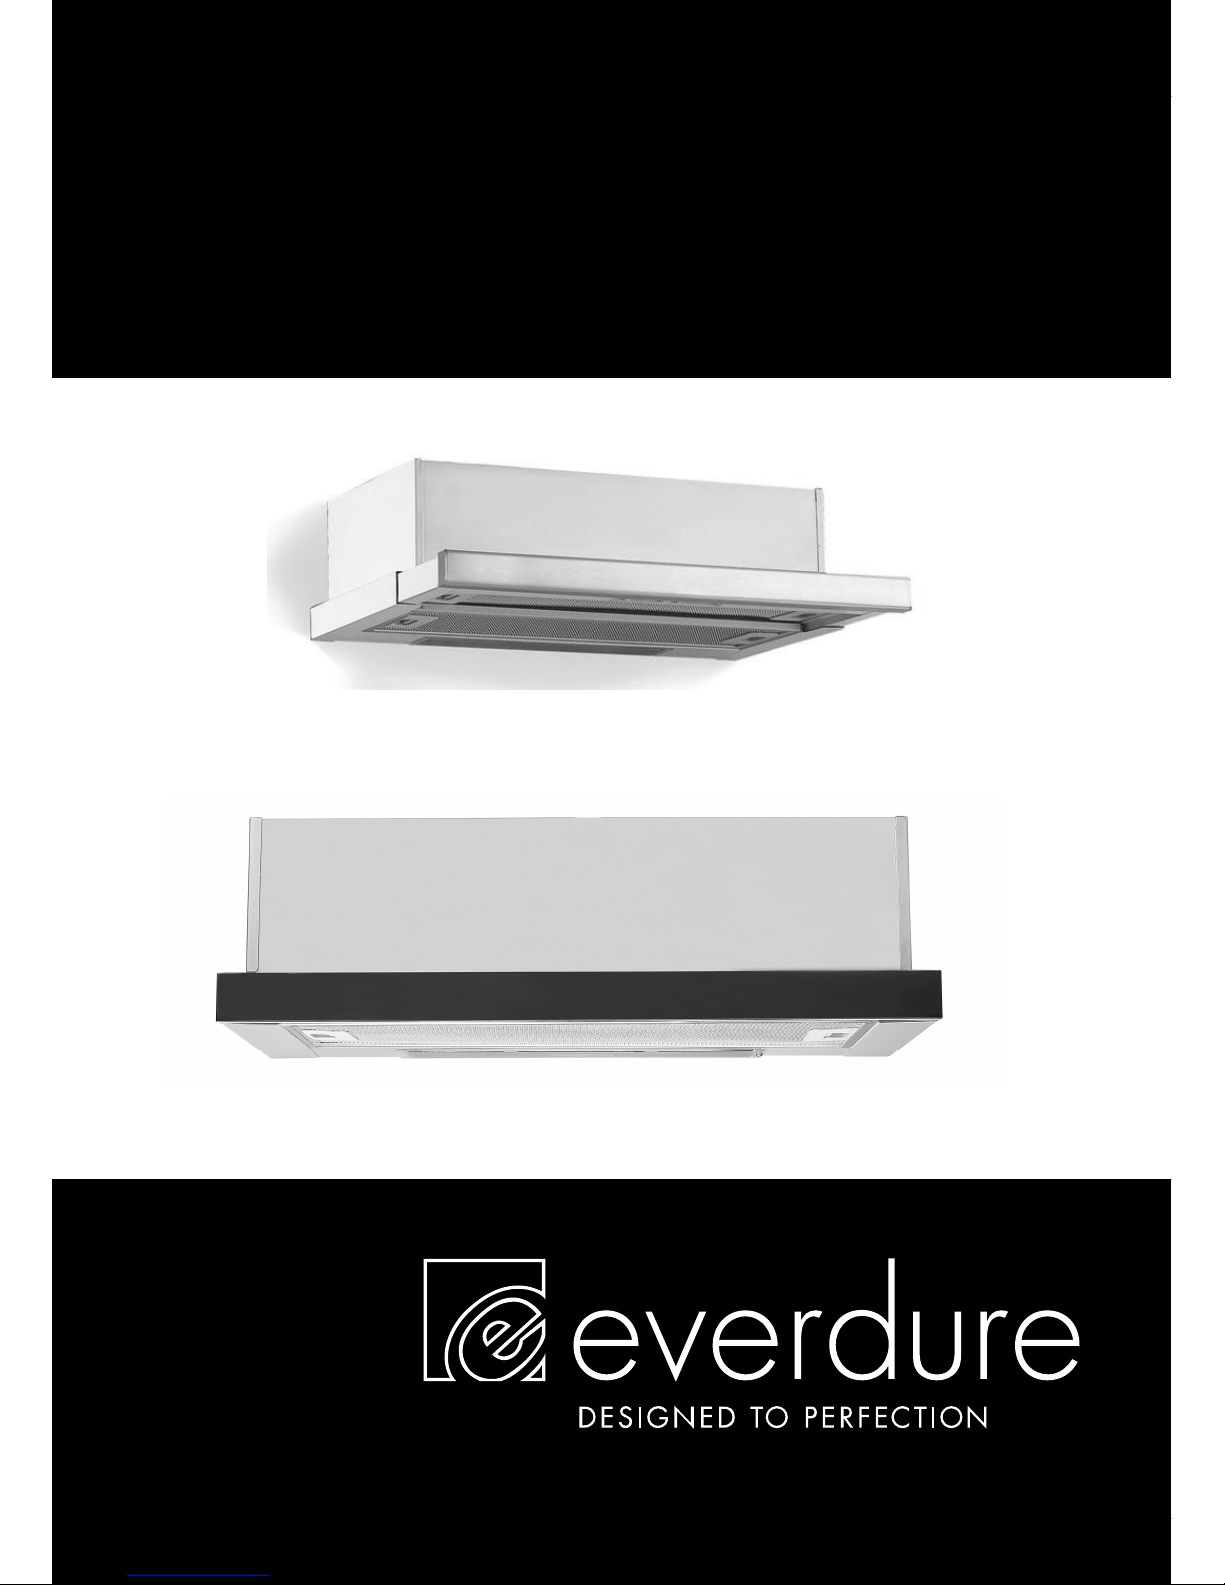
The Everdure RBES62 & RBES62B range hoods are intended to be fitted into kitchen cabinetry. They can also
be installed directly onto a wall if required.
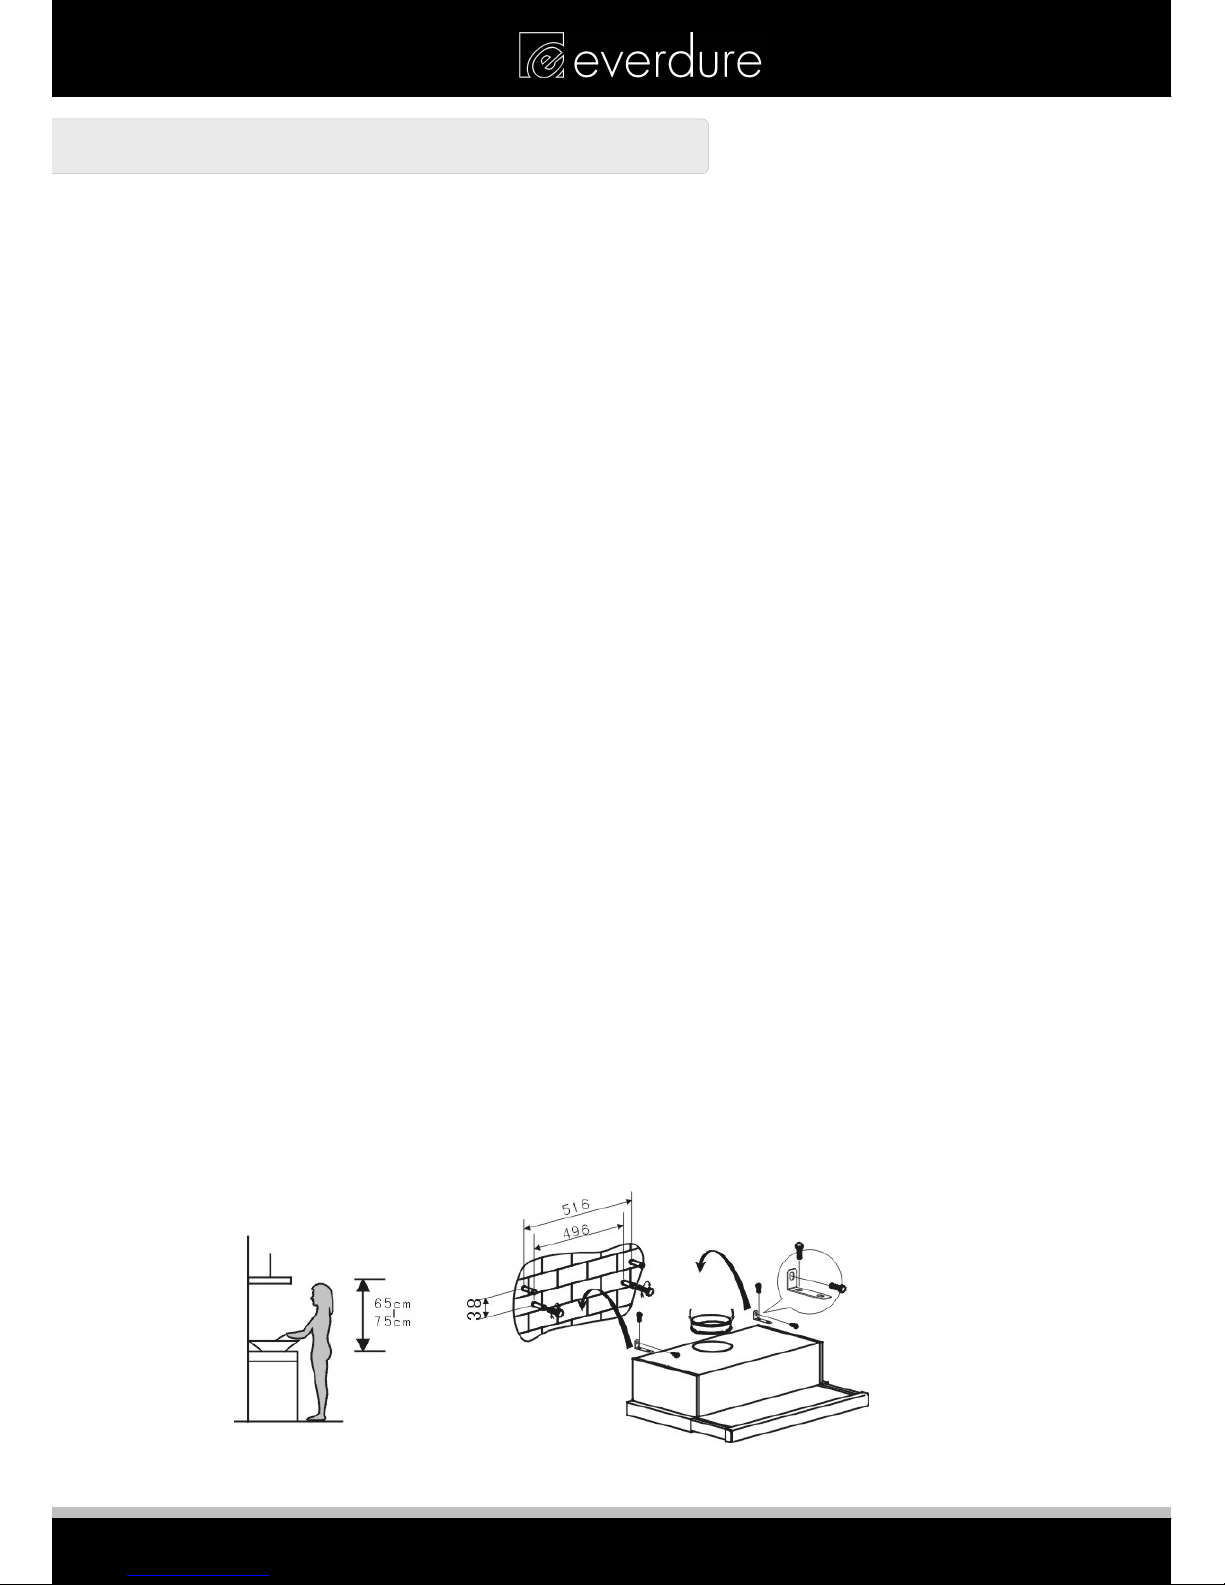
INSTALLATION OF THE EVERDURE RBES62/RBES62B RANGE HOOD DIRECTLY TO A WALL
Ensure that the wall is structurally sound, and is capable of carrying the weight of the range hood.
The range hood can be placed at a minimum of 600mm away from an electric cooktop, or 650mm
minimum from a gas cooktop.
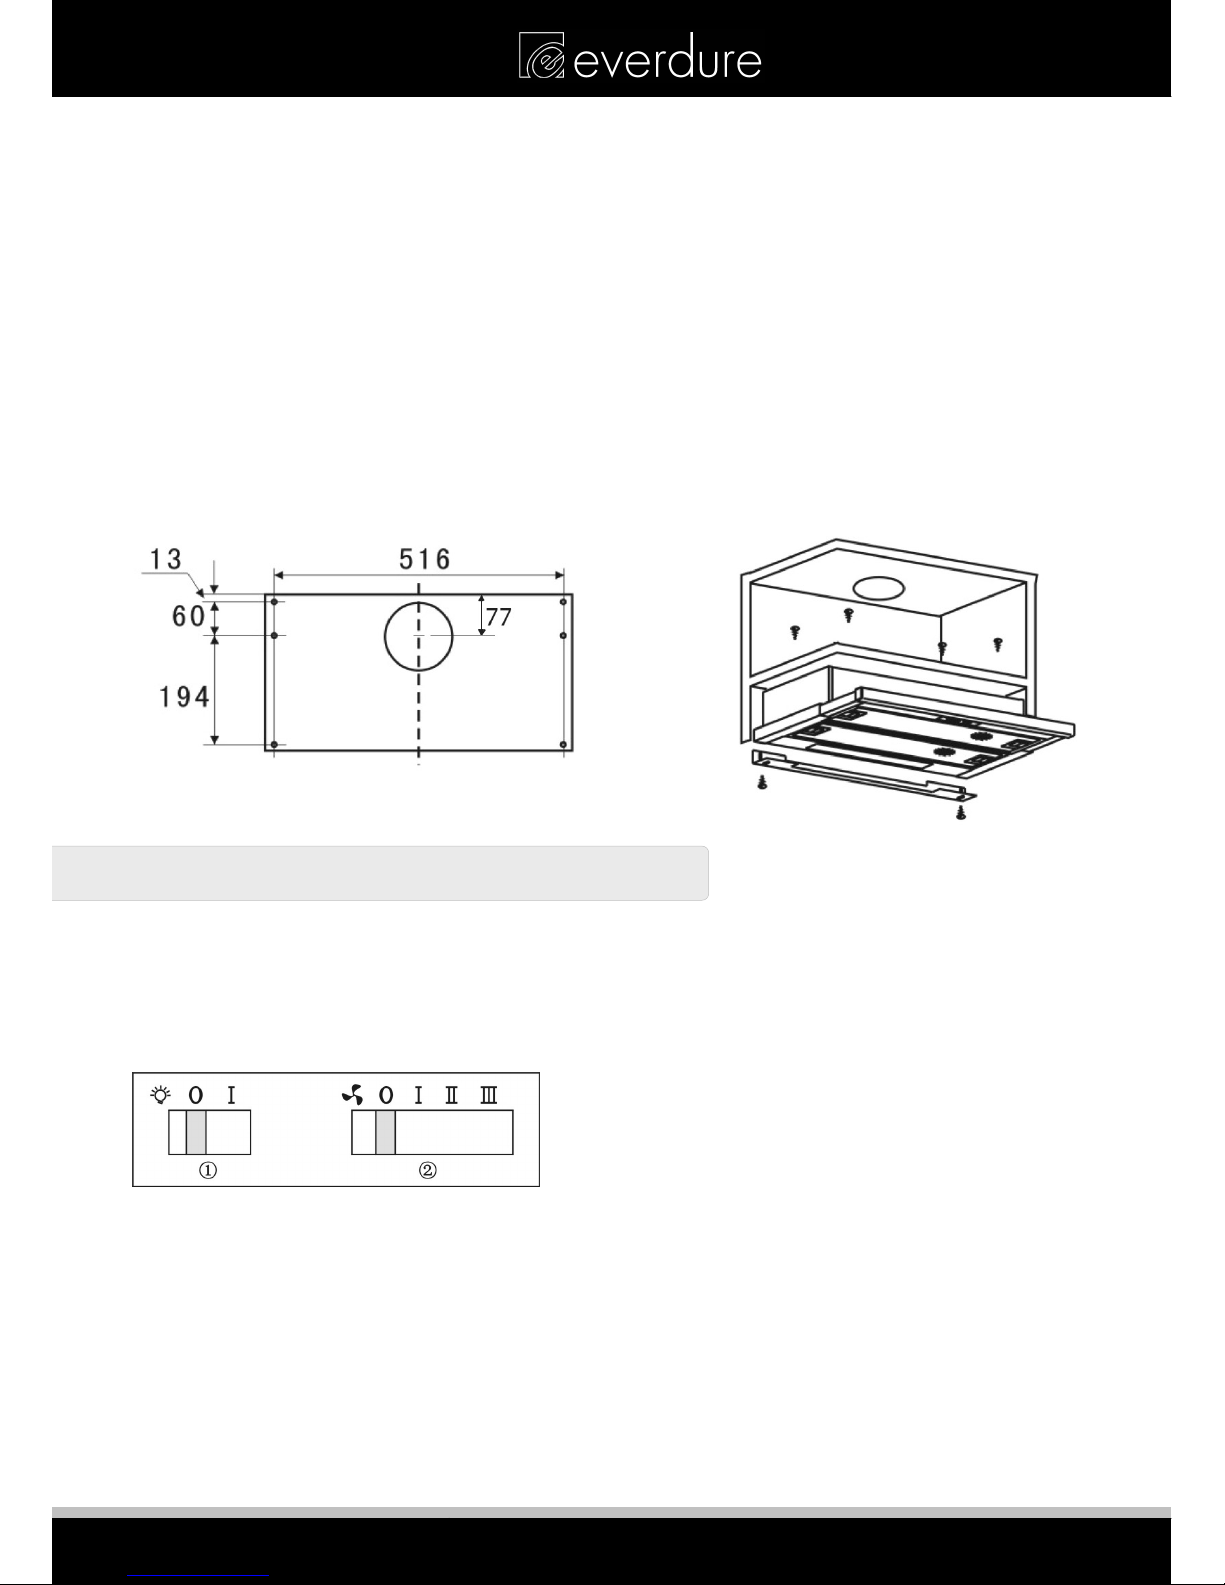
Measure the distance between the two fixing holes on the back of the unit. Due to manufacturing processes,
there may be slight variations on each range hood produced.
Mark the distance on the wall in the desired location, at the correct distance above the cooktop.
For timber framed houses, the range hood should be attached to a wall stud. Drill holes of a suitable size to
fix the screws into, which will take the weight of the range hood. Using a screwdriver, attach the screws to the
studs in the pre drilled holes, leaving an adequate amount for the range hood to rest on. Locate the range
hood onto the screws, via the mounting holes in the back of the unit.
For masonry walls, mark the position of the holes on the wall, and drill holes of a suitable size, to accept the
size of masonry anchor to be used. Alternatively, a wall plug of a suitable size may be fitted. Fit the masonry
anchor (if being used) into the hole, or if using wall plugs, attach a screw into the plug. Allow an adequate
amount of the screw or anchor out for the range hood to be fitted onto. Locate the range hood onto the
anchor or the screw, via the mounting holes in the back of the unit. Fit the right angled brackets onto either
side of the unit. Mark the position required onto the wall to fit the brackets. Drill the holes in the wall, to
accept either a screw or wall plug, depending on the wall structure. Attach screws through the brackets and
into the hole or wall plug drilled previously.
Fit the one way valve onto the range hood, ready for the ducting to be installed. If no ducting is used, it is
recommended that the optional charcoal filters be installed to clean the air being exhausted back into the
room.
See diagram below for any clarification required.
5

DESIGNED TO PERFECTION
INSTALLATION OF THE EVERDURE RBES62/RBES62B RANGE HOOD TO A CABINET
The diagram below shows the distance required between the holes in the top of the range hood. Due to
manufacturing procedures, it is recommended that the dimension be checked on the range hood before
installing. Please note that the exhaust air MUST flow through the opening at the top of the unit, either via
flexible ducting to the outside, or into the room through the cupboard itself (using optional charcoal filters).
Drill the 6 x Ø4mm mounting holes & Ø130mm venting hole into the bottom of the cupboard. For a ducted
installation, drill a Ø120-Ø130mm hole for the ducting to exit. For a recycling installation, a Ø120-
Ø130mm hole should be cut out at the top of the cabinet to allow the exhaust to re-enter the room.
Fit the one way valve onto the range hood.
Install the range hood to the bottom of the cupboard using the screws supplied with the range hood. The
holes in the range hood are already threaded. Fully tighten the screws. Install the flashing plate supplied
with the range hood, to the back of the range hood and underneath of the cupboard. This is used to hide
any gaps that may exist after fitting the range hood. Ducting & charcoal filters can then be fitted (if needed)
before the unit is connected to the power supply & turned on.
See diagram below for any clarification required.
OPERATING INSTRUCTIONS
Note: Before the unit can be operated, it must either be ducted or, if the model is installed as a re-circulating
range hood, it must be fitted with charcoal filters.
Connect the plug into the power.
Below is a diagram of the light and fan functions, with an explanation of how the light and the fan functions
operate.
To operate the light, push the switch ①into “I” position to switch the light on, or into “0” to turn the light off.
To operate the fan, push the switch ②onto either:
I – Low Fan Speed
II – Medium Fan Speed
III – High Fan Speed
0 – To turn the fan Off.
If your range hood does not function correctly when attempting any of the above, please ensure that your
power is on and is functioning correctly. If the power seems to be functioning correctly in the house, there
may be a problem with the range hood. Please call your authorised service centre in this case to organise a
service call or replacement unit.
6

DESIGNED TO PERFECTION
REPLACING THE BULBS
1. Switch the unit off and disconnect from the mains power.
2. Open the aluminium filter.
3. Unscrew the light bulb carefully and replace it with a
similarly rated halogen light bulb (230V E14 base 28W
MAX).
4. Replace the aluminium filter.
CLEANING
SAFETY PRECAUTION
Before cleaning your range hood or performing any maintenance, please ensure that the range hood is
turned off at the power point.
Do not use abrasive cleaners to clean the range hood. The use of warm soapy water and a cloth are
recommended.
Ensure that the range hood is cleaned regularly, as a build-up of grease and fat may occur otherwise.
The filters on the range hood must be cleaned regularly to maintain efficiency, and prevent grease build up.
It is recommended that this is undertaken every 4 – 6 weeks, depending on frequency of use.
The filters can be cleaned with warm soapy water or a cloth, or they may be washed in a dishwasher. If
washed in a dishwasher, discolouration may occur to the mesh and frame.
Cleaning of the range hood must be performed as described above, otherwise there is a possibility of a fire
hazard due to grease and fat build up.
If the range hood is fitted with charcoal filters (for re-circulating) it is recommended that the filters be
changed every 3 – 4 months. Filter replacement will ensure correct function of the range hood, and ensure
that the air being re-circulated back into the room is clean.
TROUBLESHOOTING
Fault Possible Cause
Solution
Light on, but
motor does not
work
Fan switch turned off Select a fan switch position.
Fan switch failed Contact Everdure Service.
Motor failed Contact Everdure Service.
Light does not
work, motor does
not work
House fuses blown Reset/Replace fuses.
Power cord loose or disconnected
Refit cord to power outlet.
Switch power outlet on.
Oil leakage
One way valve and the air ventilation
entrance are not tightly sealed
Take down the one way valve and seal
with sealant.
Leakage from the connection of U-shaped
section and cover
Take U-shaped section down and seal.
Lights not working Broken/Faulty globes Replace globes as per this instruction.
Insufficient suction The distance between the range hood and
the gas top is too far
Refit the range hood to the correct
distance.
The Range hood
inclines
The fixing screw not tight enough
Tighten the hanging screw and make it
horizontal.
NOTE: Any electrical repairs to this appliance must conform to your local, state and federal laws.
Please contact the service centre if in any doubt before undertaking any of the above.
Always disconnect the unit from the power source when opening the unit.
7
7
7

DESIGNED TO PERFECTION
All Service and Assembly Enquiries:
1300 766 066
A division of Shriro Australia Pty Ltd
104 Vanessa St Kingsgrove NSW 2208
In Australia: 1300 355 541
In New Zealand: (09) 414 5755
www.everdure.com
IM Ref: RBES62(B) 14/2014/08FC
FOR INDOOR USE ONLY
This manual suits for next models
1
Table of contents
Other Everdure Ventilation Hood manuals

Everdure
Everdure RBEE61 User manual

Everdure
Everdure RUES51 Manual

Everdure
Everdure RBES63 Guide

Everdure
Everdure RBES692 Guide

Everdure
Everdure RBEE61 Guide

Everdure
Everdure RBES622 Guide

Everdure
Everdure RBES67 Guide

Everdure
Everdure RBES691 Guide

Everdure
Everdure RBES632 Guide

Everdure
Everdure RBBQ120S Owner's manual