Evil Mad Scientist AxiDraw V3 User manual

User Guide
High Performance
Writing and Drawing Machines
Models:
AxiDraw V3 (Model 2510), AxiDraw V3/A3 (Model 2520),
AxiDraw SE/A3 (Model 2530), AxiDraw V3 XLX (Model 2550)
AxiDraw®V3
Version 4.0
Last updated: June 16, 2019

2
Preliminaries
0.1 Welcome to AxiDraw!
This is the user guide for the AxiDraw V3 family of high-performance personal
writing and drawing machines. This guide is here to help you get started. There
is a lot here — covering how you set up and use the machine, tips for operation,
details about the software, and pointers to additional resources.
This guide covers operation of the following AxiDraw models:
• AxiDraw V3
• AxiDraw V3 XLX
• AxiDraw V3/A3
• AxiDraw SE/A3
0.2 This guide is updated from time to time.
Both this guide, and the AxiDraw software are updated from time to time. We
encourage you to check back occasionally for the latest version of this manual,
and to check that you have the latest version of the software. You can also use
the Config tab of AxiDraw Control to check online to see if you have the latest
version.
Recent changes to this guide include updates to the current software version,
which is v2.5.3, new advanced features for plot optimization, plotting to multiple
AxiDraw machines, and an all-new version of Hershey Text.
You can download the latest version of this guide at http://axidraw.com/guide
Look at the front cover of the guide to find the date and version number of the
guide that you are looking at.
0.3 Copyright notice
Software and manual: © 2019 Windell H. Oskay, Evil Mad Science LLC

3
Contents
Preliminaries .............................................................................. 2
0.1 Welcome to AxiDraw!......................................................2
0.2 This guide is updated from time to time. .....................2
0.3 Copyright notice .............................................................2
1. Introducing the AxiDraw....................................................... 7
1.1 Credits and History ...........................................................7
2. Checking out your AxiDraw ................................................. 9
2.1 Parts and accessories ......................................................9
2.2 AxiDraw anatomy.............................................................10
2.3 Unboxing AxiDraw ..........................................................12
2.4 Safe handling of the AxiDraw ........................................15
3. Software for AxiDraw ........................................................... 16
3.1 Installing software ............................................................16
3.2 Inkscape and the extensions ..........................................16
3.3 Aside: Alternative software, CLI, and APIs ..................17
4. Quick start: Making your first plot...................................... 18
4.1 Pen, paper, and the clip easel .........................................18
4.2 Move to the Home corner .............................................18
4.3 Connect Power and USB................................................19
4.4 Check pen-up and pen-down positions .......................20
4.5 Insert your pen.................................................................21
4.6 Position your paper.........................................................21
4.7 Open a document and print it .......................................22
4.8 Recap: Setting up a print................................................23
4.9 Setting the machine size ................................................23
5. In detail: The Home Corner.................................................. 24
6. In detail: Workholding........................................................... 25
6.1 Printing on large workpieces .........................................25
6.2 Workholding with the Clip Easel....................................25
6.3 Document orientation....................................................26

4
6.4 Using multiple Clip Easels ..............................................27
6.5 Moving beyond the Clip Easel .......................................27
6.6 Magnetic easel accessories............................................27
7. In detail: Power and USB....................................................... 28
8. In detail: Setting up pen and paper ..................................... 29
8.1 Pen choices .......................................................................29
8.2 Setting the pen angle......................................................29
8.3 Inserting a pen .................................................................30
8.4 Pen up and pen down positions.....................................31
8.5 Positioning your paper....................................................34
9. Working with AxiDraw Control............................................ 36
9.1 Plotting the document.....................................................36
9.1.1 Number of copies.............................................................. 37
9.1.2 Delay between pages ....................................................... 37
9.2 Pausing, resuming, and canceling plots........................38
9.2.1 To resume after pausing................................................... 38
9.2.2 To return to the Home Corner after pausing .............. 38
9.2.3 Canceling a plot ............................................................... 39
9.3 Plotting with multiple layers and colors.......................39
9.3.1 Inkscape’s Layers panel.................................................... 39
9.3.2 The Layers tab in AxiDraw Control ............................... 40
9.3.3 An example with multiple colors................................... 41
9.3.4 Multiple copies from the layers tab.............................. 42
9.3.5 Additional layer control features................................... 42
9.4 The Timing tab..................................................................43
9.4.1 Suggested starting speeds.............................................. 44
9.4.2 Pen lift speeds.................................................................. 45
9.5 Advanced options............................................................46
9.6 Preview Mode ..................................................................47
9.7 Plot order and optimization............................................49
9.7.1 How plot order is determined......................................... 49
9.7.2 The Plot optimization option.......................................... 49

5
9.7.3 Default option: No reordering....................................... 50
9.7.4 Reorder but preserve groups......................................... 50
9.7.5 Full reordering.................................................................. 50
9.7.6 Optimization tips and an example ................................. 51
9.8 Manual Controls ..............................................................53
9.8.1 Walk Carriage (X), or (Y) ................................................. 53
9.8.2 Raise the Pen, Lower the Pen ........................................ 53
9.8.3 Enable Motors, Disable Motors..................................... 54
9.8.4 Enter EBB Bootloader Mode......................................... 54
9.8.5 Strip plotter data from file............................................. 54
9.9 The Config tab..................................................................55
9.9.2 Machine selection............................................................ 56
9.9.3 Check for updates ........................................................... 57
10. AxiDraw Utilities.................................................................. 58
10.1 AxiDraw Naming .............................................................58
10.1.1 Read AxiDraw Name ....................................................... 59
10.1.2 Write AxiDraw name ...................................................... 59
10.2 Disable XY Motors..........................................................60
10.3 Hatch Fill.........................................................................60
10.4 Hershey Text...................................................................60
10.5 Plot Optimization...........................................................60
11. Designing for AxiDraw......................................................... 62
11.1 General considerations ...................................................62
11.1.1 Objects that are not paths............................................... 62
11.1.2 Importing graphics........................................................... 62
11.2 Templates..........................................................................63
11.3 Visualizing paths in your document..............................64
11.4 Fonts, characters, and languages .................................65
11.5 About outline fonts.........................................................66
11.5.1 Handwriting-like output with outline fonts.................. 67
11.5.2 Block and display output ................................................ 67
11.6 Stroke fonts .....................................................................68

6
11.7 Hershey Text ....................................................................69
11.8 Hershey Advanced and AxiDraw Merge......................70
11.8.1 Hershey Advanced........................................................... 70
11.8.2 AxiDraw Merge ............................................................... 70
11.9 Capturing signatures and handwriting.........................71
11.10 Aside: Tracing of scanned handwriting.......................71
11.11 Filling shapes and text....................................................72
11.12 Vectorizing images ........................................................74
12. Maintenance and troubleshooting ..................................... 76
12.1 Troubleshooting plot area ..............................................76
12.2 No lubrication required .................................................76
12.3 Cleaning...........................................................................76
12.4 Storage ............................................................................76
12.5 Belt tension .....................................................................76
12.6 The wrenches ..................................................................76
12.7 Wiring ...............................................................................77
12.8 The pen-lift servo motor...............................................77
12.9 Loss of position...............................................................77
12.10 Service, repair, and parts support ..............................77
13. AxiDraw Tips and Tricks....................................................... 78

7
1. Introducing the AxiDraw
The AxiDraw is a simple, modern, precise, and versatile pen plotter, capable of
writing or drawing on almost any flat surface. It can write with your favorite foun-
tain pens, permanent markers, and other writing implements to handle an end-
less variety of applications. Its unique design features a writing head that extends
beyond the machine, making it possible to draw on objects bigger than the ma-
chine itself.
The AxiDraw is an extremely versatile machine, designed to serve a wide variety
of everyday and specialized drawing and writing needs. You can use it for almost
any task that might normally be carried out with a hand-held pen.
It allows you to use your computer to produce writing that appears to be hand-
made, complete with the unmistakable appearance of using a real pen (as op-
posed to an inkjet or laser printer) to address an envelope or sign one’s name.
And it does so with precision approaching that of a skilled artist, and — just as
importantly — using an arm that never gets tired.
1.1 Credits and History
The AxiDraw project has been active since 2014, when it was first created by Dr.
Lindsay Robert Wilson of IJ Instruments Ltd. in the UK.
Early AxiDraw units had a dierent design. It had a smaller format with a chassis
made from machined Delrin plastic. It had two independent timing belts, one
driven by a stepper motor on the base, and the other by a stepper motor on the
moving carriage. For software, it used a modified version of the WaterColorBot
driver developed at Evil Mad Scientist.
AxiDraw, 2014

8
AxiDraw V2
In 2015, Wilson began collaborating with Windell Oskay and Lenore Edman of Evil
Mad Scientist Laboratories towards a new AxiDraw model that would be designed
and manufactured in the USA.
This second-generation AxiDraw was enlarged to reach twice the travel area, to
cover a full page of A4 or US Letter paper. Its geometry was changed to use a
single drive belt, with two larger stepper motors stationary on the base. Its major
components would now be made of aluminum (machined or stamped and fold-
ed), and the new pen holder could be mounted vertically or at 45° to the paper.
AxiDraw V3
The third generation, the AxiDraw V3 family, is a full redesign of the machine for
higher performance.
While previous models had steel shafts and linear ball bearing slides, this new
version features custom aluminum extrusions with rolling wheels. The vastly in-
creased stiness of the structures — without added weight — allow the machine
to operate at significantly higher speeds and with higher precision than older ge-
ometries based around steel shafts.
The AxiDraw V3 family is currently available in several models that dier principal-
ly in available travel area: AxiDraw V3, AxiDraw V3 XLX, and the AxiDraw V3/A3.
There is also a Special Edition, AxiDraw SE/A3, which features a base machined
from a solid block of aluminum.
AxiDraw V2, 2016
AxiDraw V3

9
2. Checking out your AxiDraw
2.1 Parts and accessories
Here are the parts that come with AxiDraw:
1. The AxiDraw itself
2. Clip Easel and binder clips (4 on AxiDraw V3, 8 on larger models)
3. Plug-in power supply
4. USB cable
5. Hex drivers and wrenches
Sizes include 2 mm, 2.5 mm, and 3 mm hex drivers, and low-profile 8 mm
and 10 mm wrenches. Of these, only the smallest (2 mm) hex driver is
used in regular operation. The rest are normally not needed.
6. Rubber bands
These can be used to add a little extra pen-down force if needed.
See the last chapter, AxiDraw Tips and Tricks.
7. Not shown: Extra rubber feet (AxiDraw V3 and V3 XLX only)
Normally not needed. But, just in case a rubber foot gets bumped o of
the base during shipping, spares are included.
8. Not shown: Special accessories included with AxiDraw SE/A3
The SE/A3 also includes an XL pen clip and an italic pen adapter.
These are available separately for use with other AxiDraw models.
To learn more about available AxiDraw accessories, please visit: emsl.us/902
Power
supply
USB Cable
Clip
Easel
Binder clips
1. AxiDraw
Hex drivers and wrenches

10
2.2 AxiDraw anatomy
Let us look at the dierent parts of the AxiDraw. We will refer to these parts
by name throughout this guide. These features are common to each model of
AxiDraw, though appearances may vary slightly. For example, the AxiDraw V3/
A3 and SE/A3 have extended “outrigger” feet, and the AxiDraw SE/A3 base is
colored black and covers the two motors.
Pen holder
Base; Central strut
Base; Central strut
Left motor & cover
Right motor
& cover
Cable Guides
(Not handles!)
Carriage (X-axis part)
Pen holder
Top View
Carriage (Y-axis part)
Timing (drive) belt

11
Detail: Left side of base
Rubber
Feet
Power Jack
EBB
Cover
Stepper motor
Pause Button
“EBB” Control board
USB Port
Home Position Label
Detail: Pen holder
Pen-lift
servo motor
Vertical slide
Thumbscrew
Pen Clip
Pen Clip
Screws
Vertical shafts
Note: AxiDraw ships with its pen clip disconnected; see the next section.
Y Carriage

12
2.3 Unboxing AxiDraw
The pen-lift motor cable and the pen clip are disconnected for shipping.
Your first two steps, out of the box, are to re-attach these parts.
Locate the disconnected cable end
on the left hand side of the base.
The cable has three wires: Black, red, and white.
Plug its connector into the bottom three pins on the EBB Control Board
as shown. The black wire faces back, towards the edge of the board.

13
The pen clip is also
disconnected for shipping.
2 mm ball-end
hex wrench
Thumbscrew
Vertical slide
Thread the black plastic thumbscrew into the pen clip.
Attach the pen clip to the vertical slide with the two small black M3 screws, using
the 2 mm hex wrench, which has a ball end for easier access. The pen clip may be
attached either in a vertical or diagonal orientation, depending on what kind of a
writing implement you are using.
Pen clip
M3 Screws

14
Aside: If you have an older AxiDraw...
First-generation AxiDraw V3 units had four threaded holes on the vertical slide
and two holes in the pen clip (rather than two threaded holes and four holes on
the pen clip.) If you have one of these machines, it looks a little dierent, but you
still use the two screws to attach the pen clip in the vertical or diagonal position.
The pen clip can be attached in two dierent positions: Vertical, which positions
the pen straight down, or diagonally, which holds the pen at a 45° angle to the
paper.

15
2.4 Safe handling of the AxiDraw
1). Lifting: Lift AxiDraw by the central strut of the base, or by the stepper motors
if necessary. Do not lift by the cables, cable guides, carriages, or pen holder. The
AxiDraw SE/A3 has a handle milled into the back of the central strut, to provide
an additional lifting point in the middle of the machine.
2). Heat: Please note that the two stepper motors may get warm. This is normal,
but it is helpful to be aware of it. They should not get too hot to touch.
3). Moving parts: AxiDraw has exposed moving parts. Keep fingers, hair, and oth-
er things that could get caught, crushed, or tangled safely away from the belt and
the pinch points between the moving carriage, the pen holder, and the motor
covers.
!Warning: Keep fingers away from pinch
points while AxiDraw is operating.

16
3. Software for AxiDraw
3.1 Installing software
You will need to install software on your computer to operate the AxiDraw.
Current instructions and download links are available at: http://axidraw.com/sw
From there, follow the directions specific for your operating system:
• For Mac and Windows, there are easy installers that you can download.
• For Linux, one or more manual steps are required.
The software that you will install includes Inkscape, the superb (and free) drawing
program, and a set of extensions that operate the AxiDraw from within Inkscape.
If you run into any diculty while following along with the installation steps,
please contact us for technical support —we are here to help. You can find our
contact information on the back page of this user guide.
3.2 Inkscape and the extensions
Once you have installed the software, launch Inkscape. The AxiDraw software is
located within the Extensions menu of Inkscape.
There are two relevant items in the Extensions menu: AxiDraw Control, the pri-
mary software interface to AxiDraw, and the AxiDraw Utilities submenu, which
contains several supplemental tools.
Later in this user guide, we will go into depth about the dierent features of the
software and how to use it.

17
3.3 Aside: Alternative software, CLI, and APIs
The AxiDraw software is available in two alternate versions that may be helpful
for developers or for anyone who would to control the machine programatically
rather than through Inkscape. There is a stand-alone command-line interface
(CLI) tool, as well as a full-featured python library. You can learn more about
these tools at:
https://axidraw.com/doc/cli_api and https://axidraw.com/doc/py_api
If you would like to directly interface to the AxiDraw’s EBB motor control board,
it has a fully documented serial command protocol that you can control from
any programming interface that can address your USB port.
RoboPaint is an alternative software package vailable for painting and drawing
robots. It requires a separate install process, but does support AxiDraw. It also
has a built-in REST API. There are also various other third-party software tools
that can control the AxiDraw.
For more information about these alternatives, please see the documentation
and links on our wiki site: http://axidraw.com/docs

18
4. Quick start: Making your first plot
In this section, we will briefly walk through the steps to make your first plot. After this
section, we will discuss each part of this process in additional depth.
As you get started, please make sure that you have gone through §2.3 Unboxing
AxiDraw, on page 12 (so that you have connected the pen-lift cable and in-
stalled the pen clip) and §3.1 Installing software, on page 16.
4.1 Pen, paper, and the clip easel
For your first plot, you’ll need a pen (or something else to write with) and paper
(or something else to write on).
The easiest way to get started is to use the Clip Easel, a hardboard with binder
clips, included with the AxiDraw. Clip a piece of paper to the top of it.
For more information about the Clip Ea-
sel and other methods of workholding,
see §6. In detail: Workholding, on page
25.
4.2 Move to the Home corner
Prior to plotting, it is necessary to move the AxiDraw carriage to the Home Cor-
ner. This is where the carriage is as far left and as far back as it can go: where the
pen holder is closest to the engraved label “Home”.
Home
Position
Label

19
Once you have identified the Home Corner, slide the carriage there by hand.
You can move the carriage by the solid block of
metal behind the vertical slide of the pen hold-
er. (Do not push the vertical slide itself or the
pen clip directly.)
If the carriage does not move easily, you may
need to turn o the motors. To do so, select
from the Extensions menu in Inkscape:
AxiDraw Utilities > Disable XY Motors
For more about the Home corner, please see
§5. In detail: The Home Corner, on page 24.
4.3 Connect Power and USB
Next, connect the power and USB cables to the AxiDraw as shown below. Con-
nect the USB cable to any available USB port on your computer, and plug the
power adapter into a working outlet.
For more information about the power and USB cables, please see
§7. In detail: Power and USB, on page 28.
USB Cable
Power Adapter Cable

20
Pen up
Pen down
4.4 Check pen-up and pen-down positions
Within Inkscape, open up AxiDraw Control: Extensions > AxiDraw Control.
Then, select the Setup tab:
Select the Toggle pen between UP, DOWN option, and click the Apply button.
If everything is hooked up correctly, the pen lift motor should alternately move
the vertical slide to the pen-up or pen-down positions each time that you press
Apply.
If there is no movement, double check that you have power and USB connected
as given in the previous section. If it still does not move, also check that you have
correctly hooked up the pen-lift motor cable. (See §2.3 Unboxing AxiDraw, on
page 12.)
Other manuals for AxiDraw V3
1
This manual suits for next models
7
Table of contents
Other Evil Mad Scientist Robotics manuals
Popular Robotics manuals by other brands
Windoro
Windoro WCR-1001 user manual

Eddyfi Technologies
Eddyfi Technologies INUKTUN MAGGHD user manual

Envirologic
Envirologic EVO Cleaner user manual
Segway
Segway RMP 210 user manual
Kitronik
Kitronik BUMP AND SPIN BUGGY Build instructions
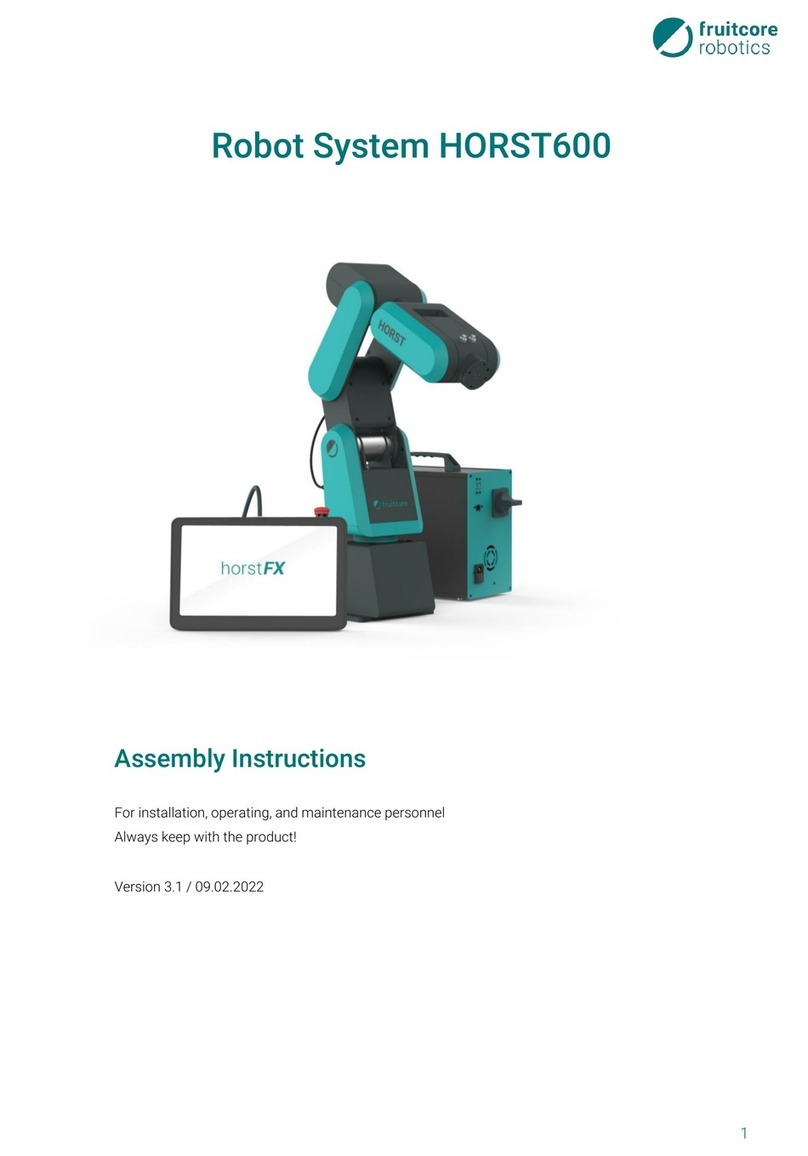
fruitcore robotics
fruitcore robotics HORST600 Assembly instructions
