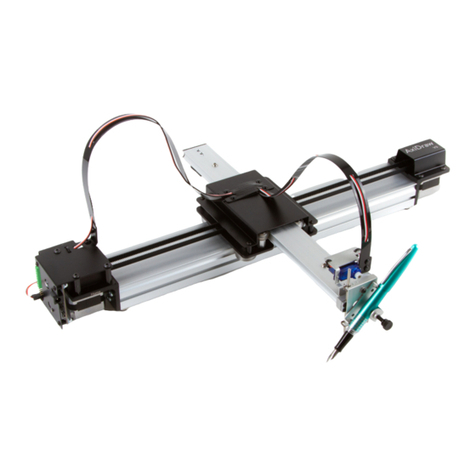
Evil Mad Scientist AxiDraw MiniKit User manual

Assembly Guide
Model 2540
https://emsl.us/924
AxiDraw
MiniKit
Assembly guide v 1.0
Last updated: December 13, 2019

About this guide and this kit
This is the assembly guide for the AxiDraw MiniKit, a spe-
cial compact “DIY kit” version of the AxiDraw writing and
drawing machine.
It covers the steps needed to build the AxiDraw MiniKit,
from opening the box to a working machine. This guide
also covers model-specific usage information about the
MiniKit, as a supplement to the main AxiDraw User Guide.
This guide is provided as a PDF download, with the intent
that it can be viewed on-screen (desktop, laptop, tablet or
phone) while you assemble your kit. The latest version is
available at: wiki.evilmadscientist.com/minikit
Getting help
If you should need any kind of assistance while building
your AxiDraw MiniKit, please do not hesitate to contact
us: shop.evilmadscientist.com/contact
Whether you need help with an assembly step, parts sup-
port, assistance troubleshooting an issue, or reassurance
that you’re building something correctly, please feel wel-
come to drop us a line. We are here to help.
Software
Towards the end of this guide, there is an assembly step
that requires that you have AxiDraw software installed on
your computer. To get a head start, visit axidraw.com/sw
Warning: Small parts
This kit is not a toy. It contains a great number of small
parts that should be kept out of reach of children.
Warning: Sharp edges and points
While the finished kit should not present any excessively
sharp edges, components within this kit – particularly the
aluminum extrusions – may have edges and points that are
razor sharp. Exercise appropriate care when handling these
parts, and keep out of the reach of children.
After assembly
After assembling your AxiDraw MiniKit, you will want to
review the usage information in the AxiDraw user guide,
available at: axidraw.com/guide
More about AxiDraw and MiniKit
To learn more about AxiDraw in general please visit its main
site: AxiDraw.com
To learn more about the AxiDraw MiniKit, please visit its
product page: emsl.us/924
The main documentation site for AxiDraw can be found on
our wiki, at axidraw.com/docs
Copyright
This guide © 2019 Windell H. Oskay, Evil Mad Science LLC
2

Table of Contents
About this guide and this kit........................ 2
Getting help................................................... 2
Software......................................................... 2
Warning: Small parts..................................... 2
Warning: Sharp edges and points ............... 2
After assembly .............................................. 2
More about AxiDraw and MiniKit ............... 2
Part 1: Tools .......................................................5
1.1 Required tools .......................................... 6
1.2 Included tools .......................................... 7
Part 2: The Base ................................................8
2.1 Parts in the base assembly ..................... 9
2.2 Add pulleys to motors ........................... 10
2.3 X Endstops............................................... 12
2.4 Mount the motors.................................. 14
2.5 Ballast and motor wire........................... 16
2.6 Base Endcap............................................ 18
2.7 EBB Support............................................ 19
2.8 Mounting the EBB.................................. 20
Part 3: The X Carriage......................................23
3.1 Parts in the X Carriage Assembly.......... 24
3.2 Install the Y Endstop .............................. 25
3.3 Spacers, shims, and washers ................. 26
3.4 X Carriage Idler Pulleys......................... 27
3.5 Y-Wheel Supports................................... 28
3.6 Preset Y Eccentrics................................ 31
3.7 Front X Wheels........................................ 32
3.8 Rear X Wheels......................................... 34
3.9 Tuning the X Carriage ............................ 36
Part 4: Y, Belt, and Z.........................................38
4.1 Parts in the Y, Belt, and Z assemblies ... 39
4.2 Tensioning block..................................... 40
4.3 Y Carriage Idler Pulley........................... 41
4.4 Y Carriage Travel Limits......................... 42
4.5 Y Endcap and pre-threading................. 43
4.6 Fixed Y Wheels ....................................... 44
4.7 Aside: AxiDraw kinematics.................... 45
4.8 Belt Staging ............................................ 46
4.9 Add the Y Carriage ................................ 48
4.10 Belt tensioning...................................... 49
4.11 Trim the belt ends.................................. 53
4.12 Tuning the Y Carriage........................... 54
4.13 Adding the Z Slide................................. 56
Part 5: Servo and wiring...................................58
5.1 Parts used in wiring................................. 59
5.2 Stepper wiring 1 ...................................... 60 3

5.3 Stepper wiring 2 ..................................... 61
5.4 Cable guide wrapping............................ 62
5.5 Mounting the servo................................ 64
5.6 Mount the cable guide .......................... 65
5.7 Complete the wiring .............................. 67
5.8 Servo horn............................................... 71
5.9 Servo calibration .................................... 72
Part 6: Using AxiDraw MiniKit ........................75
6.1 Accessories ............................................. 76
6.2 The AxiDraw User Guide ...................... 77
6.3 Special considerations for MiniKit ....... 77
6.3.1 Pause button.................................................77
6.3.2 Home corner ...............................................77
6.3.3 Travel limits ..................................................78
6.3.4 Pen weight ...................................................78
6.3.4 Rubber bands...............................................78
6.3.5 Speed and acceleration..............................78
4

Part 1: Tools 5

1.1 Required tools
To assemble the AxiDraw MiniKit, you will need certain
general-purpose tools that are not included with the kit.
These required tools are:
1. Either Ascissors or Bwire clippers
2. A Phillips #1 size screwdriver, C
3. A Phillips #0 size screwdriver, D
4. A small flat head screwdriver, E
Blade width: about 2 mm or 5/64”
And, recommended but not required:
• Miniature pliers, F
• A small hobby knife, G
• A small adjustable wrench (not shown)
A
B
C
D
E
F
G
6

1.2 Included tools
Several specific tools are included with the kit.
We will refer to these, and other parts included with the kit, by part numbers.
The included tools are:
#1, 15 cm / 6 inch ruler
#2, T20-size Torx L-wrench
#3, 2.0 mm ball-end hex L-wrench
#4, 2.5 mm hex L-wrench
#5, 10 mm low-profile wrench
#6, 8 mm low-profile wrench
#7, 7 mm low-profile wrench
You can distinguish the L-wrenches quickly, since only #2 is a Torx (star-shaped)
wrench, and only the 2 mm wrench, #3, has the ball end. The three low-profile
wrenches are very similar in appearance; you might want to label them with a marker.
Most of the wrenches are only needed during assembly, but #3, the ball-end wrench,
will continue to be useful in regular everyday operation of the AxiDraw MiniKit.
#1
#2
#3
#4
#5
#6
#7
7

Part 2: The Base 8

#8, MiniKit Base Rail (1)
#9, Stepper Motor (2)
#10, Timing Belt Pulley (2)
#11, M4 Square Nut (5)
#12, X Endstop (2)
#13, M4×16 Button-head Screw (4)
#14, Aluminum Spacers (8)
#15, M3×16 Button-head Screw (12)
2.1 Parts in the base assembly
#9
#10
#20 #21
#22 #23
#24
#25
#26
#8
#11 #12
#13 #14 #15
#16 #17
#18
#19
#16, Rail Endcap (2)
#17, M4×8 Torx Tapping Screw (6)
#18, Ballast Weight (1)
#19, Nylon Loop Clamp (2)
#20, Motor Wire Harness, Long (1)
#21, M4×20 Torx Tapping Screw (2)
#22, EBB Support (1)
#23, EBB Driver Board (1)
#24, White Nylon Washer (4)
#25, Black Nylon Spacers (4)
#26, M3 Kep Nut (4)
Some quantities will be used in future
steps as well.
9

8 mm
2.2 Add pulleys to motors
1. Locate the flat face (A) on the shafts of the stepper motors, #9.
2. Observe that the timing belt pulleys, part #10, each have two set
screws (B). The wrench for these screws is the 2 mm ball-end hex
wrench (#3).
3. Slide a pulley onto a motor shaft, “teeth” up. You may need to
loosen the set screws to do so.
4. Position the pulley with a set screw in front of the flat face, and
its bottom 8 mm above the uppermost part of the motor face (C).
You can use a ruler to measure the gap or – better – borrow the
long 8 mm hex stando (#35) from a future step (“3.5 Y-Wheel
Supports” on page 28) and use it as a spacer (D).
A
CD
B
(Continues on next page)
10

E
F
5. Firmly tighten the set screw against the flat face of the motor shaft, using
the short end of the hex wrench (E).
6. Tighten the second set screw on the pulley, again using the short end of the
hex wrench.
7. Use the same method to add the second pulley to the second motor (F).
§2.2 Add pulleys to motors, continued
11

!
2.3 X Endstops
In this step we will begin working with the extrusions. These extrusions have
extremely sharp points and edges. Handle them with appropriate care.
1. Identify the M4 square nuts #11, the X-endstops, #12, and the M4×16 button
socket cap screws, #13. This screw type can be identified by its silver color,
a hex socket on its head, and a length of approximately 16 mm, as measured
below the head (A).
2. Orient the MiniKit base rail, #8, such that the four holes in the middle – and
the larger cutouts near the ends – are facing up (B).
3. Within the large cutout at the end, there is a half-height ledge, and within
that ledge, a little slot. Set one of the M4 square nuts #11 into that slot (C).
A
BC
#11 #12
#13
(Continues on next page)
12

§2.3 X Endstops, continued
4. Using your 2.5 mm hex L-wrench (#4) – not your fingers – press the
square nut in a little further, until it lines up with the first hole (D).
5. Carefully turn the base rail upside down, keeping the square nut in
place (E). Insert one of the M4×16 screws through an X-endstop,
then into the first hole and square nut.
D
E
F
G
6. Align the sides of the endstop parallel to the sides of the base rail,
and tighten the screw to anchor the endstop in place (F). The endstop
may have a small “tab” on one side. If so, point the tab towards the
big hole. Repeat the steps above, to add the second endstop at the
other end of the MiniKit base rail (G).
Tip: You can skewer the L-wrench through the hole and
the nut to keep the nut in place while you flip it over.
13

2.4 Mount the motors
1. Before mounting the motors, check for any stray or loose aluminum
“flashing” or burrs on the exposed outer edges of the Base Rail. If there
are any, you can remove them with the side of a screwdriver blade or
a hobby knife.
2. Identify the aluminum spacers #14, and the M3×16 button socket cap
screws, #15. These spacers are cylindrical tubes, about 9.5 mm (3/8”)
long. The screw can be identified by its black color and length of ap-
proximately 16 mm, as measured below the head.
3. With the two X Endstops pointing up, set the Base Rail on top of the
two motors, such that the pulleys fit through the large holes (A). Ori-
ent the motors such that their connectors face towards the center of
the Base Rail (B).
#14 #15
A
(Continues on next page)
B
14

CD
§2.4 Mount the motors, continued
4. Insert the 8 aluminum spacers into the four pockets around each pulley (C), and
then insert an M3×16 screw into each spacer.
5. Use the 2 mm ball-end hex wrench (#3) to thread each screw into the place (D).
6. Finally, firmly tighten all 8 screws into place.
15

2.5 Ballast and motor wire
1. Identify the two nylon loop clamps #19 and the M4×20 Torx tapping screws,
#21. These screws can be identified by the star-shaped socket on their heads
and length of approximately 20 mm, as measured below the head.
2. Also locate two larger parts, the ballast weight #18 and the long motor wire
harness #20, referring to the image on page 9.
3. Check the ballast weight for any sharp edges, and dull them if necessary
using (for example) the side of a screwdriver blade (A).
4. Connect the long motor wire harness to one of the motors.
5. With the base assembly upside down and the motor with the
connector on the left side, place the ballast weight over the two
holes further away from you (B).
6. Slip one of the nylon loop clamps over the motor wire in the
orientation shown, and insert a screw through the clamp into
the hole in the ballast weight (C).
!The ballast weight may have sharp edges;
Handle with care.
#19 #21
A
B
(Continues on next page)
C
16

§2.5 Ballast and motor wire, continued
D
E
F
7. Use the Torx L-wrench, #2, to fasten the screw into place
(D). Take care to only tighten it until it is just secure; do not
over-tighten.
8. Add the second nylon loop clamp in the same way and fasten
it into place (E). Set the base assembly back upright again (F).
17

2.6 Base Endcap
1. Identify the rail endcap #16 and the M4×8 Torx tapping
screws, #17. These screws can be identified by the star-
shaped socket on their heads and length of approxi-
mately 8 mm, as measured below the head.
2. Position the endcap on the end of the base rail that has
the “connectorized” motor. Align its two holes with the
matching holes in the end of the base rail, and its out-
line to the shape of the base rail.
3. Use the Torx L-wrench, #2, to fasten the endcap into
place with two of the screws. It may be easiest to hold
the hold the base rail vertically while doing so. As you
tighten it into place, keep its edges lined up with the
base rail.
#16 #17
18

2.7 EBB Support
1. Position the EBB support #22 at the open end of the base rail, where the loose
wires are. Set it upright, such that you can read the text, and align the two large
holes up with the matching holes in the end of the base rail.
2. Use two more of the M4×8 Torx Tapping Screws #17 and your Torx L-wrench, #2,
to securely tighten the EBB support in place.
3. Tuck the loose wire ends through the large vertical slot in the EBB Support.
19

2.8 Mounting the EBB
1. Identify the EBB driver board #23, the white nylon washers #24, the
black nylon spacers #25, and the M3 kep nuts #26. The spacers are
short black plastic tubes, and the nuts are distinguished by having a
built-in toothed washer. You will also need four more of the M3×16
button socket cap screws, #15.
2. Place one of the white nylon washers over each corner hole of the
EBB, and insert one of the M3×16 screws through each hole.
3. Holding the EBB vertically, slide one of the black nylon spacers over
each M3×16 screw (B).
#23
#24
#25
#26
#15
(Continues on next page)
A
B
Tip: Set the EBB on top of the Base Rail for easy access.
20
This manual suits for next models
1
Table of contents
Other Evil Mad Scientist Robotics manuals
