Evil Mad Scientist WaterColorBot v 2.0 User manual

WaterColorBot v 2.0
Quick Start Guide
Super-Awesome Sylvia’s
WaterColorBot!
Rev A1, December 2014
☐1. WaterColorBot Chassis (upper deck),
pre-fitted with controller board, motors,
winches, shafts, carriage, and stowage straps
☐2. Spoilboard (the lower deck that holds
paper, paints and water dishes), pre-fitted with
a binder clip to hold paper
☐3. Power Supply (9V, universal input)
☐4. USB cable (“A to mini-B” type)
☐5. Paint set with brush
☐6. Petri dishes, plastic (3)
☐7. Beaker, plastic, 50 mL
☐8. Water dropper, plastic
☐9. Hex L-wrench, 3/32”
☐10. Binder clip and screw (extra)
☐11. Watercolor paper, 9×12”
(5 sheets)
☐12. Sandpaper square (in envelope)
Not otherwise required, but if you
happen to find an unexpected rough
edge on one of the wooden parts,
this could be helpful.
Introduction: The History of the WaterColorBot What’s in this guide?
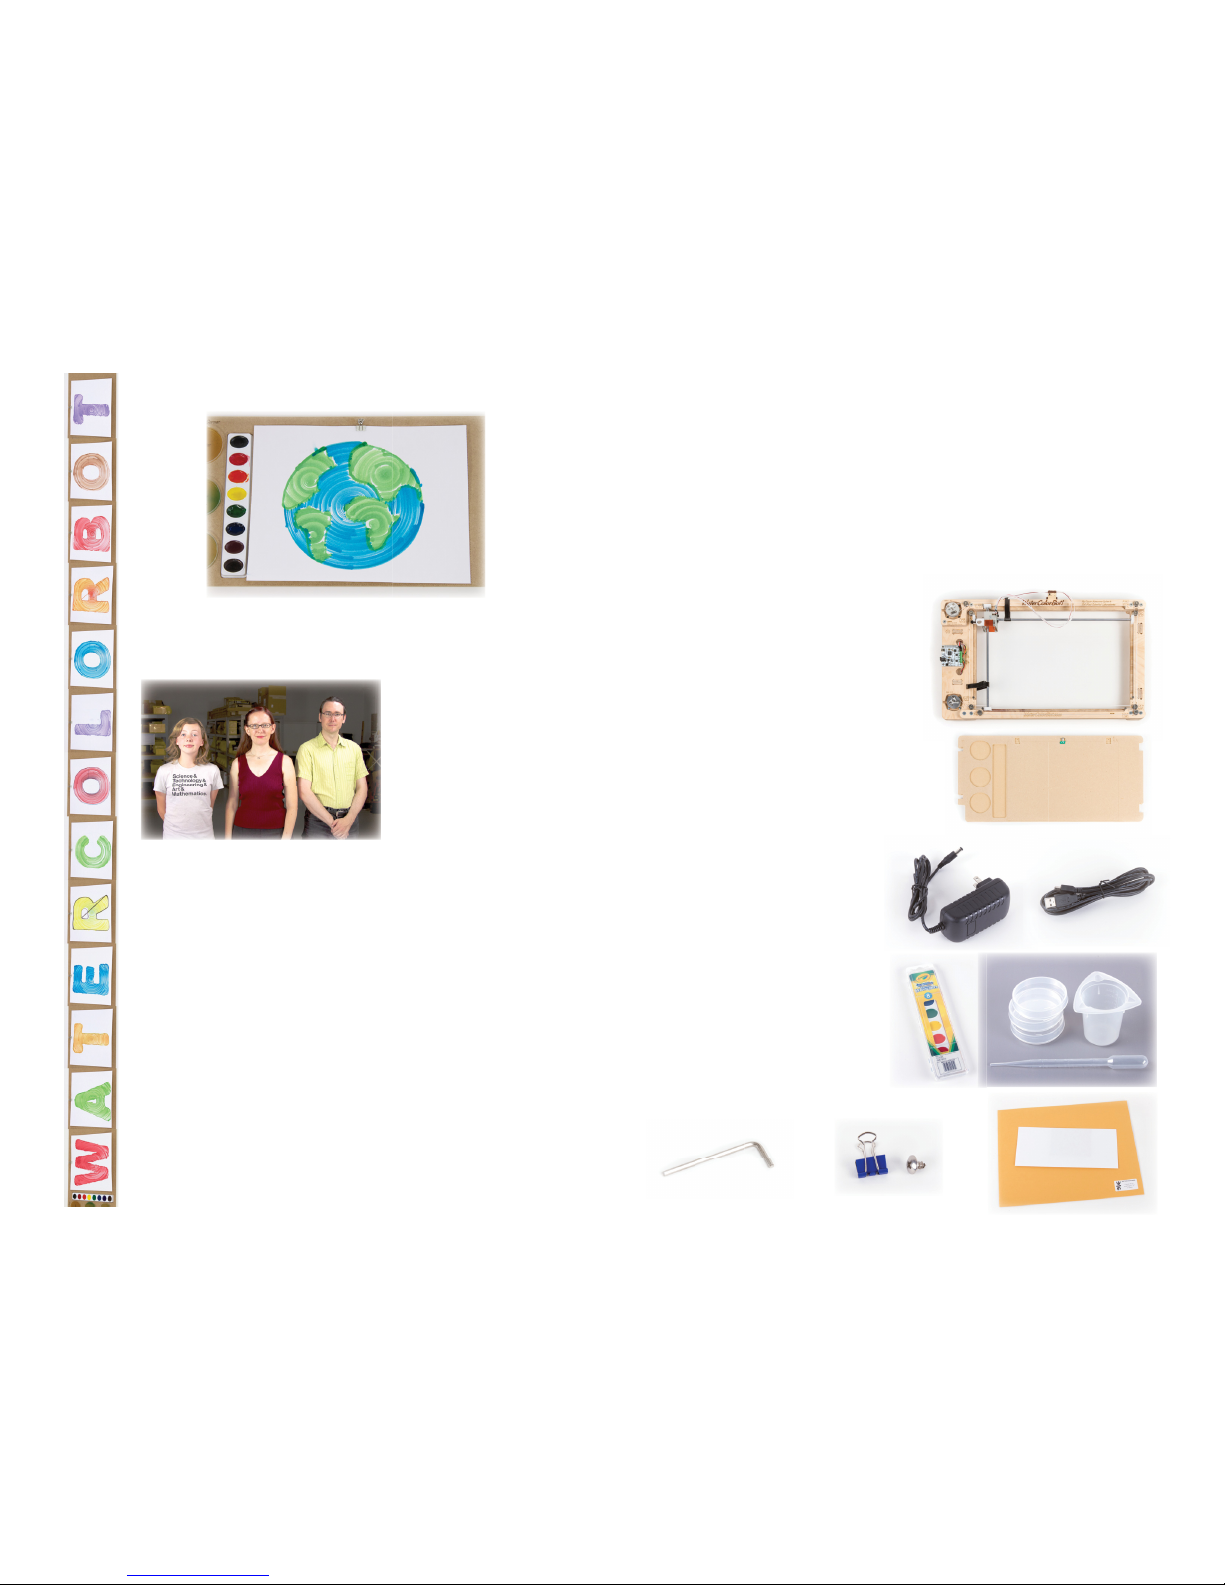
The WaterColorBot is a friendly art robot that moves a paintbrush to paint
your digital artwork onto paper, using a set of watercolors. It was originally
designed as a collaboration between “Super-Awesome” Sylvia Todd and Evil
Mad Scientist Laboratories.
This guide is here to help walk you through the first steps with your new WaterColorBot:
Here are the parts that come with WaterColorBot 2.0:
• Making sure that you’ve got everything
• WaterColorBot anatomy and principles
• Basics of using the WaterColorBot
• Basic maintenance and troubleshooting
• Additional tips, tricks, and resources for WaterColorBot.
Sylvia Todd, star of Sylvia’s Super-Awesome Maker Show (available online at
sylviashow.com), came up with the idea for the WaterColorBot because she
wanted to create an art robot and enter it in the RoboGames competition.
We had met Sylvia at Maker Faire in the previous few years, and she knew us
from our EggBot and other kits and projects. She approached us at Evil Mad
Scientist Laboratories about collaborating on the project, and we loved it.
Together we designed and built our first prototype in February 2013, and had
a nicely-working robot about a month later. As we realized that this project
had a lot of appeal beyond just a one-o project, we started developing it
into a kit. Sylvia exhibited her prototype at RoboGames (and won a Silver
medal), and we brought the WaterColorBot to Maker Faire, where thousands
of people got to play with it. Sylvia was also invited to the White House Sci-
ence Fair in April 2013, where she got to demonstrate the WaterColorBot for
President Obama.
We launched the WaterColorBot on Kickstarter in July 2013, and the rest is
(modern, recent) history. In November 2014, we released version 2.0 of the
WaterColorBot, incorporating the lessons that we learned in the first year of
making and using WaterColorBot. Version 2.0 features a refined chassis, and
an all-new carriage for improved precision when plotting with pens.
Sylvia with Lenore Edman and
Windell Oskay, co-founders of
Evil Mad Scientist Laboratories
Part 1: Checking out your WaterColorBot
1.1 Kit Contents
1. Chassis
2. Spoilboard
4. USB cable
5. Paints
6. Petri Dishes
8. Dropper
9. L-wrench 10. Clip and screw
11. Watercolor paper
12. Sandpaper
7. Beaker
3. Power supply
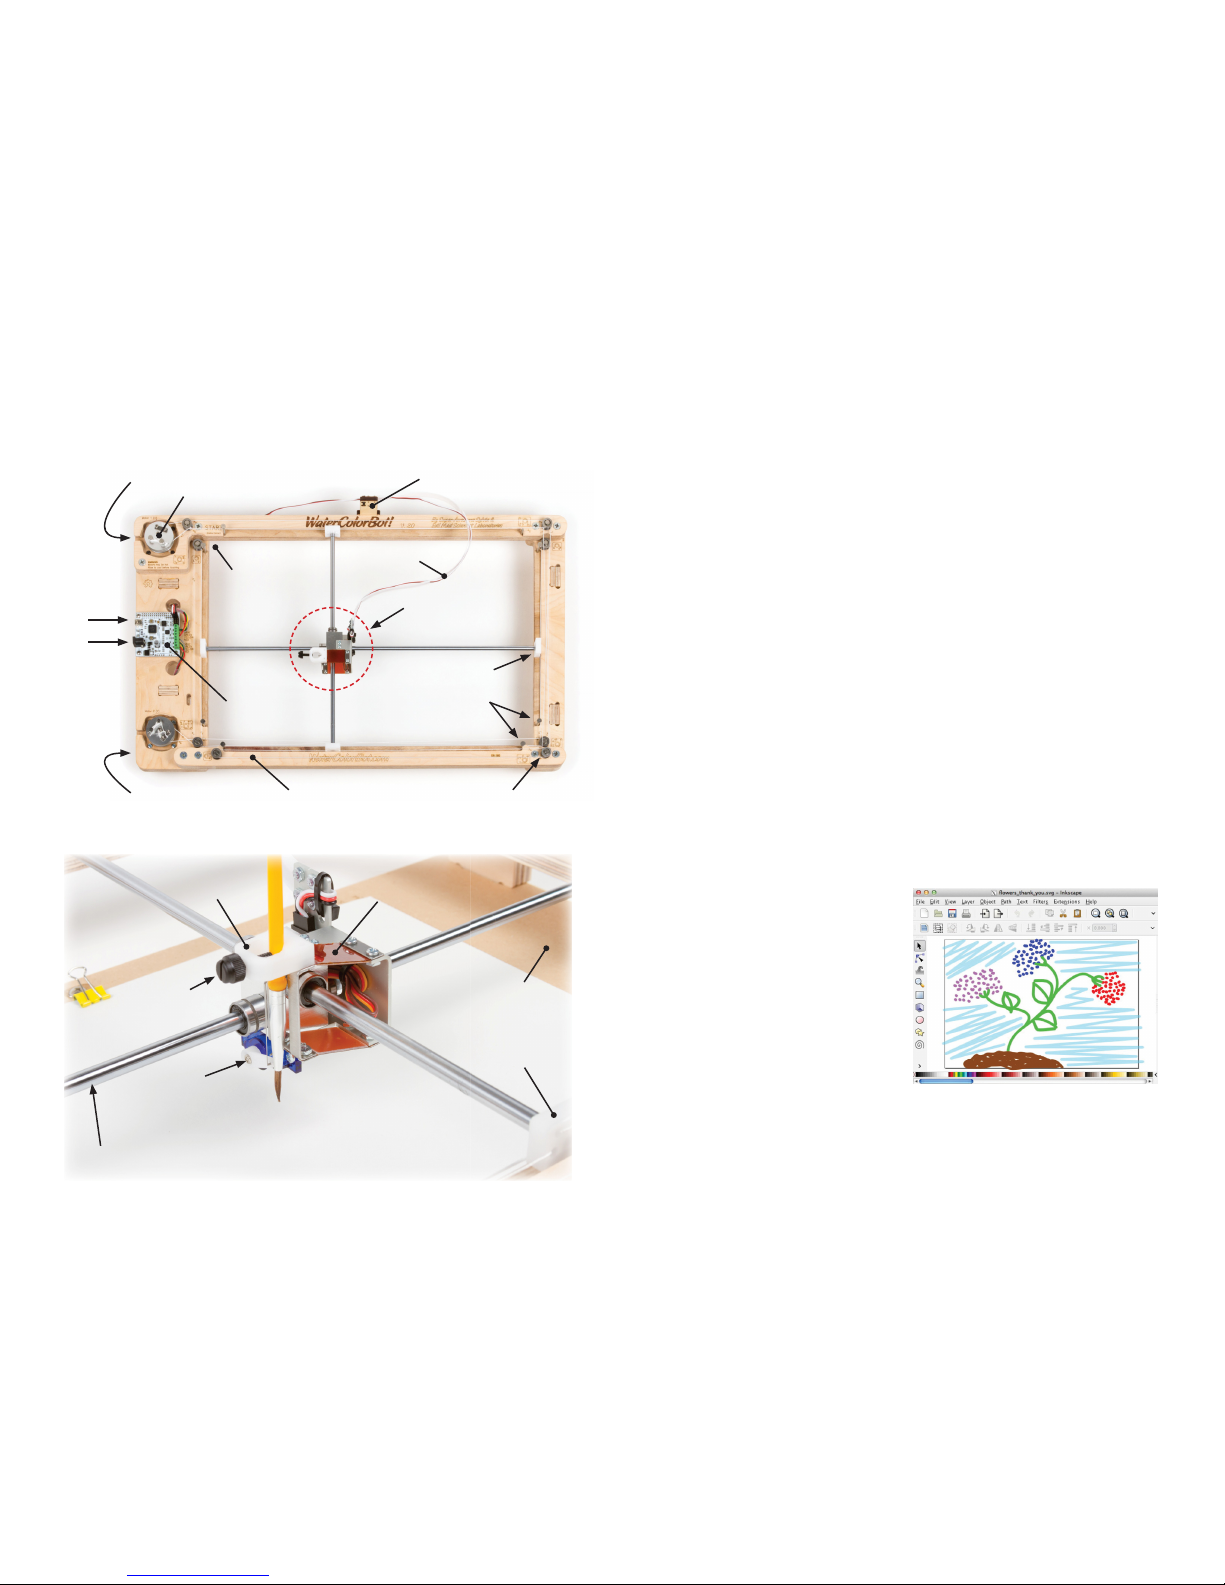
Let’s take a brief look at what the dierent parts of the machine are called. We’ll refer
to many of these parts in the instructions, so it is helpful to know what’s what.
1.2 WaterColorBot Anatomy
Carriage
Rod-end
sliders
Rods (6 mm shafts)
Brush-lift
(servo) motor
Spoilboard
Paper
clip
Brush
holder
Thumbscrew
Vertical Flexure stage
{
Rod-End Sliders
Travel Endstops
Cable guide support
Control Board:
EBB (EibotBoard)
Carriage
START Position
(Home Corner)
Motor 2 (Y)
USB Port
Power Jack
Motor 1 (X)
Winch (atop motor)
V-Groove Bearings
Spectra cord
Cable guide
In brief, here are the steps to getting started with WaterColorBot 2.0:
Part 3 of this guide goes through the first item on the list: The dierent software options
for WaterColorBot. Part 4 goes through the “preflight check,” and Part 5 goes through
the rest of setup. It is followed by a sections on troubleshooting and tips and tricks for
using your WaterColorBot.
Part 2: Quick Start / Overview
1) Install WaterColorBot software.
2) Preflight checks: Remove stowage straps. Make sure that carriage moves smoothly.
3) Move the carriage by hand to the START (home corner; upper left) position.
4) Set up desired media on spoilboard. For example,
• When painting with watercolors: Paper, a paint palette, and water dishes
• When sketching with a felt-tip pen: Paper alone
• When using a dip pen: Paper and one well of ink
5) Connect power and USB cables.
6) Insert the brush into the brush holder, and check its height.
In this context, the term “brush” means the object mounted in the brush holder.
You can use essentially any tool or writing implement that (a) fits in the brush
holder, (b) doesn’t weigh too much, and (c) doesn’t require substantial down-
ward pressure. Yes, you can use literal paintbrushes, but also pens and pencils,
and perhaps (with some experimentation) a conductive ink pen, laser module, hot
wax pen (for batik), tube dispensing frosting or adhesives, a vacuum pick-up tool,
stylus for your tablet, or something entirely dierent. But for brevity, we simply
use the term “brush.”
7) Open or create the artwork that you would like to print, and begin painting from
within the software.
3.1 Overview and Installation
Part 3: Software
All of our software is free to download, cross platform, and open-source in nature.
For current software download links and instructions, please visit:
http://watercolorbot.com/software
Before you can actually begin using your
WaterColorBot, you will need to download
and install software.
There are three main programs that we
use to control the WaterColorBot, each of
which has unique advantages.
In what follows, we will introduce the dif-
ferent programs and interfaces. For in-
terested developers and hackers, we’ll also
mention what’s “under the hood” of each
one.

3.2 RoboPaint
3.3 RoboPaint RT
Robopaint is a dedicated application for driving the WaterColorBot. In it, you can you can
open existing vector artwork in SVG format, snap the colors to your paint palette, and
paint the document. It also has a rudimentary edit mode that lets you create new drawings
to print, as well as a short menu of sample drawings to try out.
If you’re starting with existing SVG artwork, RoboPaint is generally the best of the three
programs to use for a few dierent reasons. Most importantly, it can automatically fill in
large solid regions of a painting with various textures. Options allow you to use paints or
pens, and fine tune many parameters of how it prints. That said, it tends to err on the side
of being simple to use, rather than necessarily providing the highest degree of control.
We recommend that all WaterColorBot users download and install RoboPaint.
Windows users in particular should download and install RoboPaint prior to the other pro-
grams, as it also installs the WaterColorBot’s USB driver.
Robopaint RT is a independent “real time” application that allows you to paint with the
WaterColorBot. It’s straightforward and manual: Click on a color in the paint palette to
change to that color, click on the water to dip the brush in the water, and drag the brush
to paint on your paper.
With RoboPaint RT, you can also replay your drawing to make multiple copies, and save
the file (in its own format) to open up and print again later by replaying your actions. This
program can be a lot of fun to play with and is a great way to get acquainted with the
WaterColorBot, or to manually test out dierent things on the WaterColorBot without
creating any digital artwork first. For those with good artistic skill, it can also be a remark-
ably powerful program.
There is also a separate version of the program, RoboPaint RT BB, originally designed
for use with a Buddha Board water-painting surface. It does away with the color palette,
and uses only the water dish. However, it can equally be used with a single well of ink, for
example with a dip pen or with a brush for Chinese calligraphy.
Skill Level: Novice to Intermediate
Level of control: Very automatic
Under the hood: Javascript, plus the WaterColorBot’s API
Recommended for: All users
Skill Level: Novice to Expert
Level of control: Very manual
Under the hood: Java, in Processing
Note: Requires a recent version of Java on your computer
Recommended for: Artists, beginners, younger audiences, hands-on demos

Strap 2: Around rod and through
slot in “West” side of chassis
Strap 1: Loop around rod
and “North” side of chassis
3.4 Inkscape, with WaterColorBot Extensions for Inkscape
Inkscape is a superb, free vector graphics editor, for which we have written an extension (a
plugin) that directly controls the WaterColorBot.
Our extension provides a fine grain level of control over exactly what will be painted, but
more-or-less requires that you create the artwork within Inkscape to take full advantage
of the features. For example, layers within a drawing are used to indicate which parts of the
drawing will be painted with which colors. You can read much more about that process in
our online documentation: http://watercolorbot.com/software
Inkscape itself (even ignoring the WaterColorBot extensions) is also capable of importing
artwork in various vector graphics formats, as well as PDF (and tracing bitmap graphics
to some extent). You can use it to create or edit SVG graphics that you can then open in
RoboPaint
Users who have experience with the EggBot (and its Inkscape based driver) may wish
to start with this Inkscape and the WaterColorBot extensions, before trying the other
interfaces.
Skill Level: Intermediate to Expert
Level of control: Very high
Under the hood: Python (for the WaterColorBot extensions)
Note: Requires you to install Inkscape. Mac users will also need to install XQuartz.
Recommended for: Artists, hackers, those seeking a finer level of control. RoboPaint
users who need a more powerful tool for importing, creating, or editing vector graphics.
Before operating the WaterColorBot 2.0 on a given day, take a moment to give the
machine a once-over to make sure that everything is working properly. Doing so will
improve the performance of the machine and prolong its life, as well as avoid several
potential sources of frustration.
The “real” preflight check is to try out the drive system and make sure that everything is
working properly. With power still disconnected, turn the winches by hand to move the
carriage once through its range of travel– all the way to the far corner and back. The
mechanism works (and feels) like an Etch A Sketch. If everything is set up correctly, the
carriage should move smoothly there and back, without requiring excessive force.
This routine serves a couple of purposes. First, it gets all the parts moving – pulleys and
bearings and all –to overcome any stiness in the joints after sitting still for a while. More
importantly, it serves as an overall diagnostic and health check for the machine. If the
4.1 Overview
4.2 Stowage Straps
4.3 Test the Drive System
Part 4: Preflight Checks
Two reusable velcro straps lock the carriage
in the home corner during shipping and/or
storage. The first setup step is to remove
and set aside these two straps.
When packing up again, dis-
connect from power and
move the carriage to the
home corner. Then, gently
but securely, re-apply the two
straps in the locations shown.
Turn Winch
Turn Winch
Move carriage
through its full
range of travel

§4.3,Test the Drive System, continued:
carriage moves consistently and smoothly when you turn the winches by hand, it will
also move consistently and smoothly under computer control. On the other hand, if the
winches or carriage cannot be moved by hand, then the motors on the WaterColorBot
will not be able to move them either. (And, it is much better to discover issues here in the
setup process than in the middle of a painting.)
Here are some additional things to watch for during the preflight:
• Make sure that the four rod-end sliders ride in their grooves.
• Make sure that the two rods are “square” to the frame. You can check this with the
carriage in the home corner: All four rod-end sliders should rest against their endstops.
• Watch for “slop” in the motion: Extra slack in the Spectra cord can cause the cord to
droop as the winches turn, with a corresponding loss of precision.
If you encounter any issues during the preflight, please see §6, Maintenance and Trou-
bleshooting.
Before running the WaterColorBot, always position the carriage in the aptly-named
START (Home Corner) position: As far to the left, and as far back as it will go.
When automatically painting, the carriage will normally return to this position when the
painting is complete, leaving it ready for the next painting. In some cases, you may need
to use the “Park” (AKA “Move Home”) command to send the carriage back to its home
position.
If you need to move the carriage by hand (for example, before your first painting), make
sure to turn o the motors first, so that you are not forcing them under power. You can
either physically unplug the WaterColorBot from power or use software to turn o only
the motors. (The software command to do so may read as “unlock motors” or “turn o
motors.”)
5.1 The Home Corner
The “spoilboard” is the lower deck of the WaterColorBot, which holds the paint palette,
water dishes, and the paper.
The standard-issue spoilboard is made of MDF (fiberboard), and is designed to hold paper
with one or more clips. It has engraved marks to help you center the paper.
The paint set indexes into the long slot.
When using the standard Crayola paint set, ori-
ent black at the top and brown at the bottom.
There are 3 round recesses, to fit the little wa-
ter dishes. Always install all 3 dishes. The water
dishes are the lids (the shallow, larger diame-
ter halves) of the plastic petri dishes. They are
made of washable plastic.
The small plastic beaker is also made of wash-
able plastic. It has three little spouts, and is
very helpful for pouring water into the dishes.
When you pour water into the dishes, fill them
only about halfway, to help avoid splashing and
spilling.
The paper is normally held in place by a sin-
gle binder clip in the center. You can also hold
down the paper by other traditional means,
such as with masking tape.
An extra clip and screw (#10 from §1.1) are
provided in case you would prefer to hold down
your paper with clips in the left and right po-
sitions instead of center. (That gives more “ri-
gidity,” but it is harder to insert and remove the
paper.)
5.2 The Spoilboard
Part 5: Basics of Using the WaterColorBot
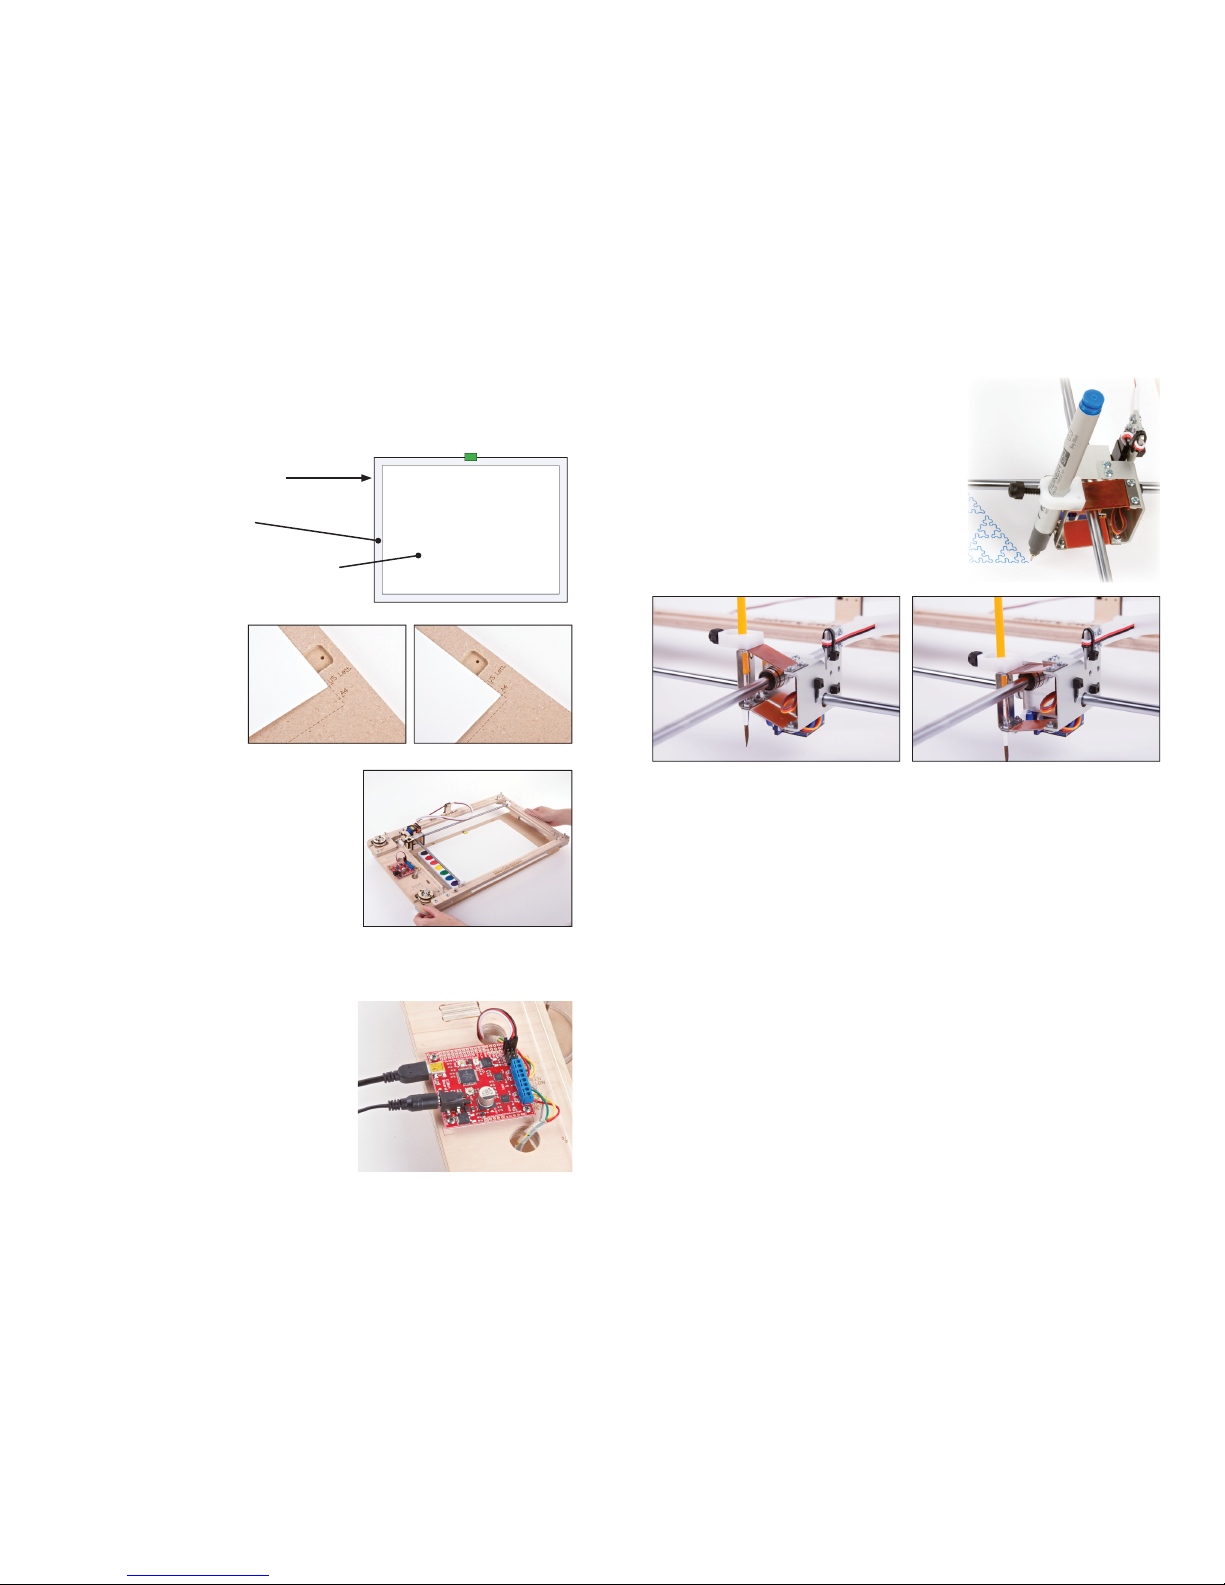
The WaterColorBot is designed to fit 9x12” watercolor paper (one of
the most common sizes), and to paint up to within 1/2” of the edges. The brush holder is located at the front-left corner of
the carriage. The brush holder can fit any writing im-
plement up to about 0.44”, or 11.1 mm in diameter.
A black plastic thumbscrew holds the brush in place.
(In the photo here, the “brush” is an art pen.)
To insert a brush, loosen the thumbscrew enough that
the brush can fit through, lower the brush into place,
and tighten the thumbscrew by hand.
The brush moves up and down, driven by the little servo motor on the carriage.
In the “Brush Up” position, the brush must be high enough to clear the lip of the water
dish, the top of the paint pans, and to travel over the paper without dragging. When down,
it needs to be low enough to paint on the paper, dip into the water, and get paint from the
palette. There is also usually a “Wash” position, lower than the Down position, for washing
the brush in the water dish.
The best way to set the brush to the right height is to use the software to raise and lower
the brush. Insert the brush by hand while the carriage is in the “brush down” position.
1. Move the carriage, by hand, to the upper-left (Home) corner, marked START
2. Load your media (paper, paint set, water dishes ) on the spoilboard as desired
3. Lower the upper frame (main chassis) of the WaterColorBot onto the spoilboard
4. Connect power and USB cables
5. Insert the brush and check the height
6. Begin painting from the software
When trying out the WaterColorBot for the very first time, we suggest printing the “Sim-
ple Face” example file, which you can find in the Examples menu of RoboPaint.
Before every subsequent print, make sure that the carriage is back in the Home Corner.
And, if you need to move the carriage by hand, first make sure that the motors are o.
To use US Letter or A4 paper
sizes— both are a little smaller
than 9x12” —align the paper
to the top, and center it, us-
ing the marks provided on the
spoilboard.
The chassis of the WaterColorBot indexes into the
spoilboard with its feet. This “upper frame” is re-
movable for easy access to paint, water, and paper.
When removing the upper frame from the spoil-
board, take care to lift it directly upwards, so that
it comes o cleanly, without spilling your water or
paints.
The WaterColorBot comes with a universal-input
power supply that takes worldwide voltage (al-
though it will need a plug-shape adapter in some
countries).
It also comes with a USB cable to connect to
your computer.
If your computer is running Windows, install the
RoboPaint software (§3.2) before hooking the
WaterColorBot up to your computer.
Overall paper size: 9x12”
(22.8 cm x 30.5 cm)
Margin width: 1/2”
(12.7 mm)
Painting area (inside margins): 8x11”
(20.3 cm x 27.9 cm)
§5.2,The Spoilboard, continued:
5.3 USB and Power
5.4 Inserting the Brush and Setting the Height
5.5 Summary: Basics of setting up the WaterColorBot for Use
Brush up Brush down

The WaterColorBot is designed to last for years of use with proper care. Using the stow-
age straps and performing the preflight check will help to prolong its life and to detect
(and let you correct) issues before they become serious.
Little regular maintenance is needed. While the Spectra cord is strong (ten times stronger
than steel by weight), it can gradually stretch, and you may on occasion need to take out
a small amount of resulting slack from the cords.
In case of continued diculty or an issue that we have not discussed, you may wish to read
through our extended documentation and extensive troubleshooting guide (which can
be found at watercolorbot.com/docs), post in our support forums, or contact support by
e-mail. (See the last page of this guide for contact information and links.)
wise (or at least prevent it from turning clockwise) in order to do so.
Loop the cord back and forth, as a figure 8, around the two rivets on the top of the winch,
until nearly all of the loose cord is tied up between them. Guide the free end of the cord
underneath the cord clamp, and rotate the cord clamp into place. Replace the second
screw and tighten both screws to secure the cord in place. Take care that the loose end of
the Spectra cord is short enough that it can’t get caught in the winch as it winds.
It may be necessary on occasion to take out some slack from the cords. Experience with
first-generation units has shown that a properly configured WaterColorBot will typically
(if used regularly but not every day) go 3-6 months between adjustments, after its initial
settling-in period. (WaterColorBot 2.0 comes assembled so that the initial settling-in
period happens during factory testing and calibration.)
The procedure for taking out slack is as follows. With power o, move the carriage to
the lower right position, diagonally opposite from the home corner. Use the two stow-
age straps – one each around each rod and a chassis side – to hold the carriage in that
position. The cord is clamped atop the winch with a little metal plate (the “cord clamp”),
held down by two screws. Loosen one screw and remove the other, to free the cord end.
Unwind the cord from the two rivets atop the winch, so that you are left only with the cord
itself, coming up through the hole in the winch top. Pull the cord through the hole until all
of the slack in the system is removed. You will need to gently turn the winch counterclock-
If the motors do not move but (1) everything looks correct, and (2) your computer doesn’t
report any errors, triple check that the 9 V power supply is plugged into a working outlet.
If the winches do not turn easily in the preflight, the first check is to see if the two rods
are square to the chassis, for example by looking to see if all four rod-end sliders are up
against their stops when the carriage is in the home corner. If they are not, you may need
to slightly reposition the rod end sliders on the cord.
If the carriage loses its position (e.g., does not return home properly), “crashes” into the
wall, or makes “cogging” noises when the motor skips steps, then return to the preflight
condition with motors o, and see if you can identify the issue.
Extra slack in the Spectra cord, or “slop”, can cause the cord to droop as the winches turn.
That can degrade print quality (since small motions of the winch will not necessarily trans-
late into movements of the carriage), cause the cord to fall out of the V-groove bearings,
or in some rarer cases create a “knot” that cause binding in the Spectra cord as the winch-
es turn. Catching and correcting minor slack early can prevent these more serious issues.
In extreme cases of knotting or binding where the carriage does not move smoothly, it
may be necessary to re-lace the Spectra cord from scratch. Please consult our extended
online instructions or contact support for guidance.
6.1 Overview
6.4 Support Resources
6.3 Taking out slack
6.2 Performance Issues
Part 6: Maintenance and troubleshooting
Part 7: WaterColorBot Tips and Tricks
7.1 Paint
• A high-end set of watercolor paints can cost hundreds of dollars. That said, there is more
dierence between a $5 Crayola paint set and a $20 Cotman set than there is between a
$20 set and a $200 set. We recommend splurging on a $20 set, once in a while, if you’re
so inclined.
•When learning to use the WaterColorBot or giving demos, low-end watercolor paints
(Crayola, Prang, etc) are generally the best choice. The online documentation for the
WaterColorBot includes a guide to common paint sets.
• When your Crayola paint palette is empty,
wash it out gently with cold water: it can be
reused as a palette for tube-based watercolor
paints.
7.2 Paper
•You can slide paper in and out, under the front
of the chassis, without removing the upper
chassis from the spoilboard.
•You can use smaller-yet paper (e.g., notecards) on the WaterColorBot, even if they don’t
fill up the spoilboard. Either ax it to a larger sheet of paper (9x12”, US letter or A4) with
masking tape, or to clip it above larger paper on the spoilboard.
• Other types of paper not intended for watercolor often work quite well. “Bristol board”
Extensive online documentation
& resources for WaterColorBot:
watercolorbot.com/docs
Blog: www.evilmadscientist.com
Store: shop.evilmadscientist.com
Support: forum.evilmadscientist.com
Humans: [email protected]
drawing paper is great for both pens and painting.
• Paper tends to warp as it gets wet, particularly with uneven wetting and lower grades of
paper. Methods of dealing with this include pre-wetting and stretching paper, as well as
holding paper down with tape or in blocks. Watercolor painting is an old art, and people
have been solving these problems for hundreds of years; read up on the subject online or
in books.
7.3 Painting Style
•Watercolor painting is unusual versus other painting techniques in that paint colors are
frequently mixed on the paper, rather than in a palette. While there are only 8 colors in
the palette, you can have a continuous range of colors in your completed painting.
•When making your drawings on the computer, exaggerate your motions to compensate
for the way that a brush bends and flexes when painting. A square will have rounded
corners. A small circle may end up as just a dot. When painting by hand you compensate
naturally, since you watch the tip of the brush. But when asking a robot to paint for you,
you may want to think about it in advance.
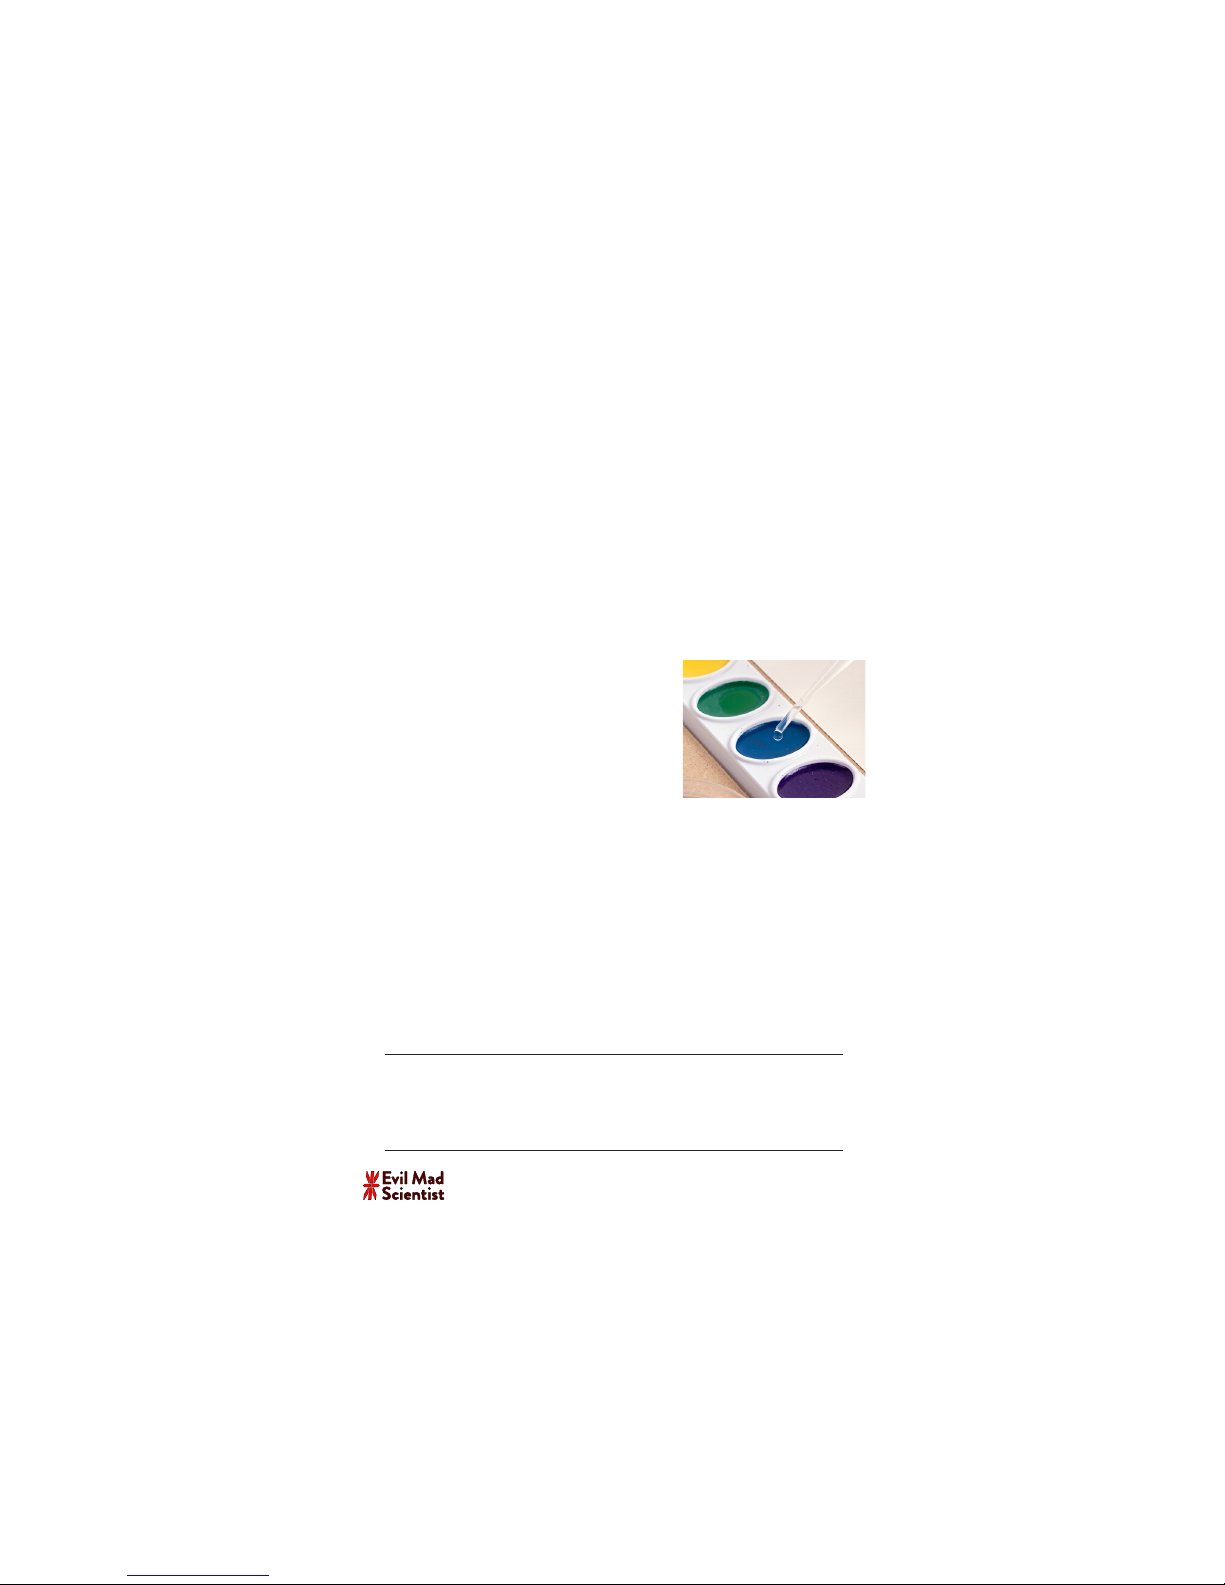
•You get very dierent eects and more paint mixing
on the paper if your paint has more water in it. You can
use the water dropper to add a drop of water to pre-
wet your paint pans– which can have a dramatic eect
on painting style.
• The WaterColorBot is not limited to working with
watercolors, nor even to using a brush. Some of the
WaterColorBot software interfaces provide options for
regular pencils and pens, watercolor pencils, dip pens,
and painting with water alone.
7.4 Storing and shipping the WaterColorBot
•The WaterColorBot comes in a sturdy, reinforced carrying case that is suitable for long-
term use. For shipping, also use an external box that oers impact and scu resistance.
•Make sure that the paint brush, spoilboard, water dishes, dropper, beaker, and paint set
are fully dry before packing the WaterColorBot for long-term storage. Moisture can dam-
age the wood, electronics, and other components in long-term storage.
•Remember to use the stowage straps (§4.2) when packing up the machine, to lock the
carriage and rods in a stable configuration for storage. It is also recommended to lower the
brush holder into the “pen down” position for storage.
Table of contents
Other Evil Mad Scientist Robotics manuals


Popular Robotics manuals by other brands


WEISS ROBOTICS
WEISS ROBOTICS GRIPLINK-ET4 manual

New Scale Technologies
New Scale Technologies MPM-System Kit System manual

Unitree
Unitree Go2 user manual

ORION ROBOTICS
ORION ROBOTICS Odyssey Assembly guide

Omron
Omron Medium & Heavy Payload TM12 Series Hardware installation manual

ROKAE
ROKAE xMate CR12 Hardware installation manual