6
6.0 DOSAGE
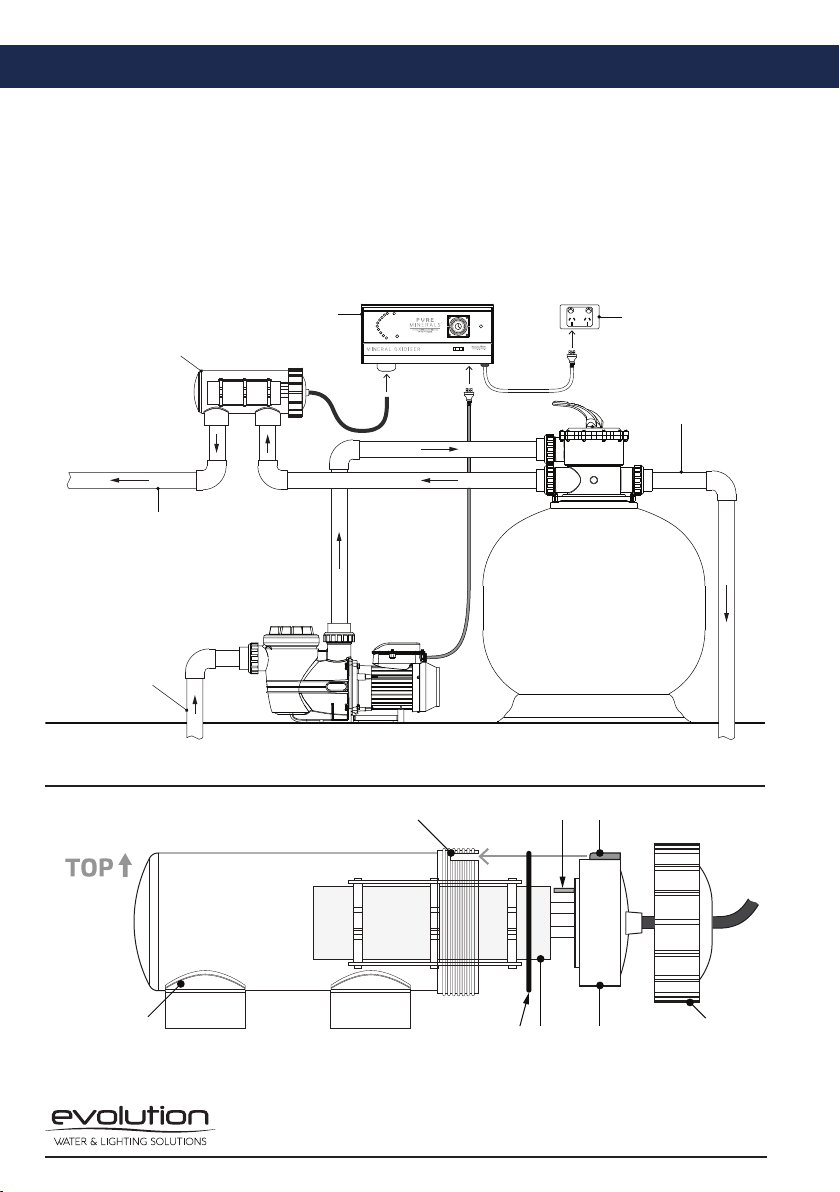
6.1 The Mineral Oxidiser is designed to work with all mineral blend products to sanitise your
pool effectively, but works best as a complete system with high-quality Pure Minerals™
Magnesium Crystals. Using Pure Minerals™ in conjunction with pool salt will produce
a magnesium-rich and precisely sanitised pool with minimal maintenance. You will
need to follow the given dosage guidelines for properly activating and maintaining your
blended pool salinity levels. These tables are designed to help you integrate or maintain
Pure Minerals™ and pool salt at the right ratios with a target salinity of 4,000ppm.
6.2 If your pool water is not yet conditioned with Pure Minerals™ follow 7.3 Table 1:
Pure Minerals™ Start-Up and Activate Dosage.
6.3 If your pool water has already been enhanced with Pure Minerals™ follow 7.4 Table 2:
Pure Minerals™ Maintenance Dosage.
6.4 To begin using Pure Minerals™ and your Mineral Oxidiser, you will need to know the
pool water salinity level. A pool care professional can perform this test for you. Once
the salinity level is known, add the appropriate Pure Minerals™ amount by following
the dosage tables.
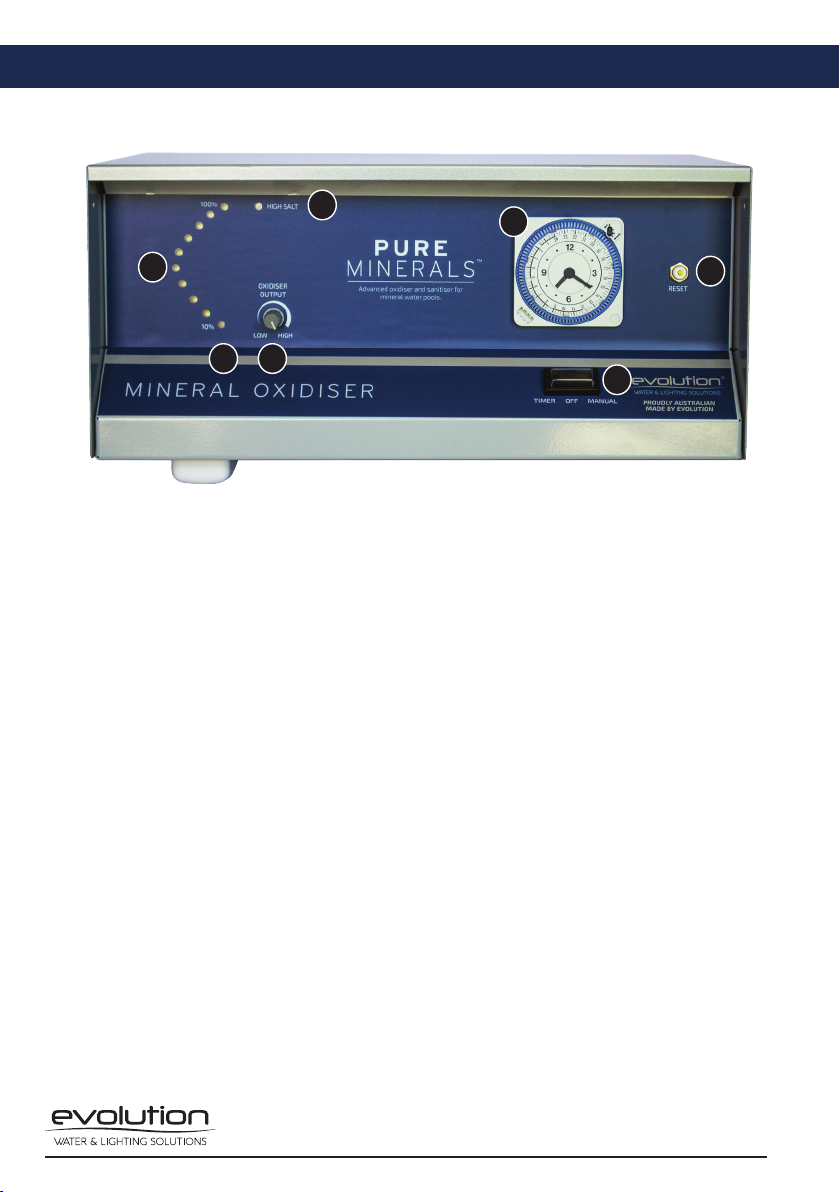
6.5 Your Mineral Oxidiser is designed to operate with a primary salinity of 4,000ppm.
6.6 Note: Before adding minerals and salt to the swimming pool, please ensure the
Mineral Oxidiser is switched off to avoid overload damage. FAILURE TO DO SO MAY
VOID WARRANTY.
7.0 ADDING PURE MINERALS™
7.1 1. Ensure pool water is correctly balanced before adding Pure Minerals™. Free
chlorine level must be between 1.5 and 3.0ppm, pH level must be between 7.2 and 7.6.
2. Add the recommended amount of Pure Minerals™ into the shallow end of the pool
and allow to dissolve (sweep in with a broom if required).
3. Run the filter pump for 8 hours (with Mineral Oxidiser turned off) to allow for
complete dilution.
4. You may swim in the pool at any time during this process.
7.2 Note: As magnesium dissolves into the water, the water may sometimes take on
a green tinge. This is a natural effect of the magnesium, and the water colour will
return to normal after 48-72 hours.