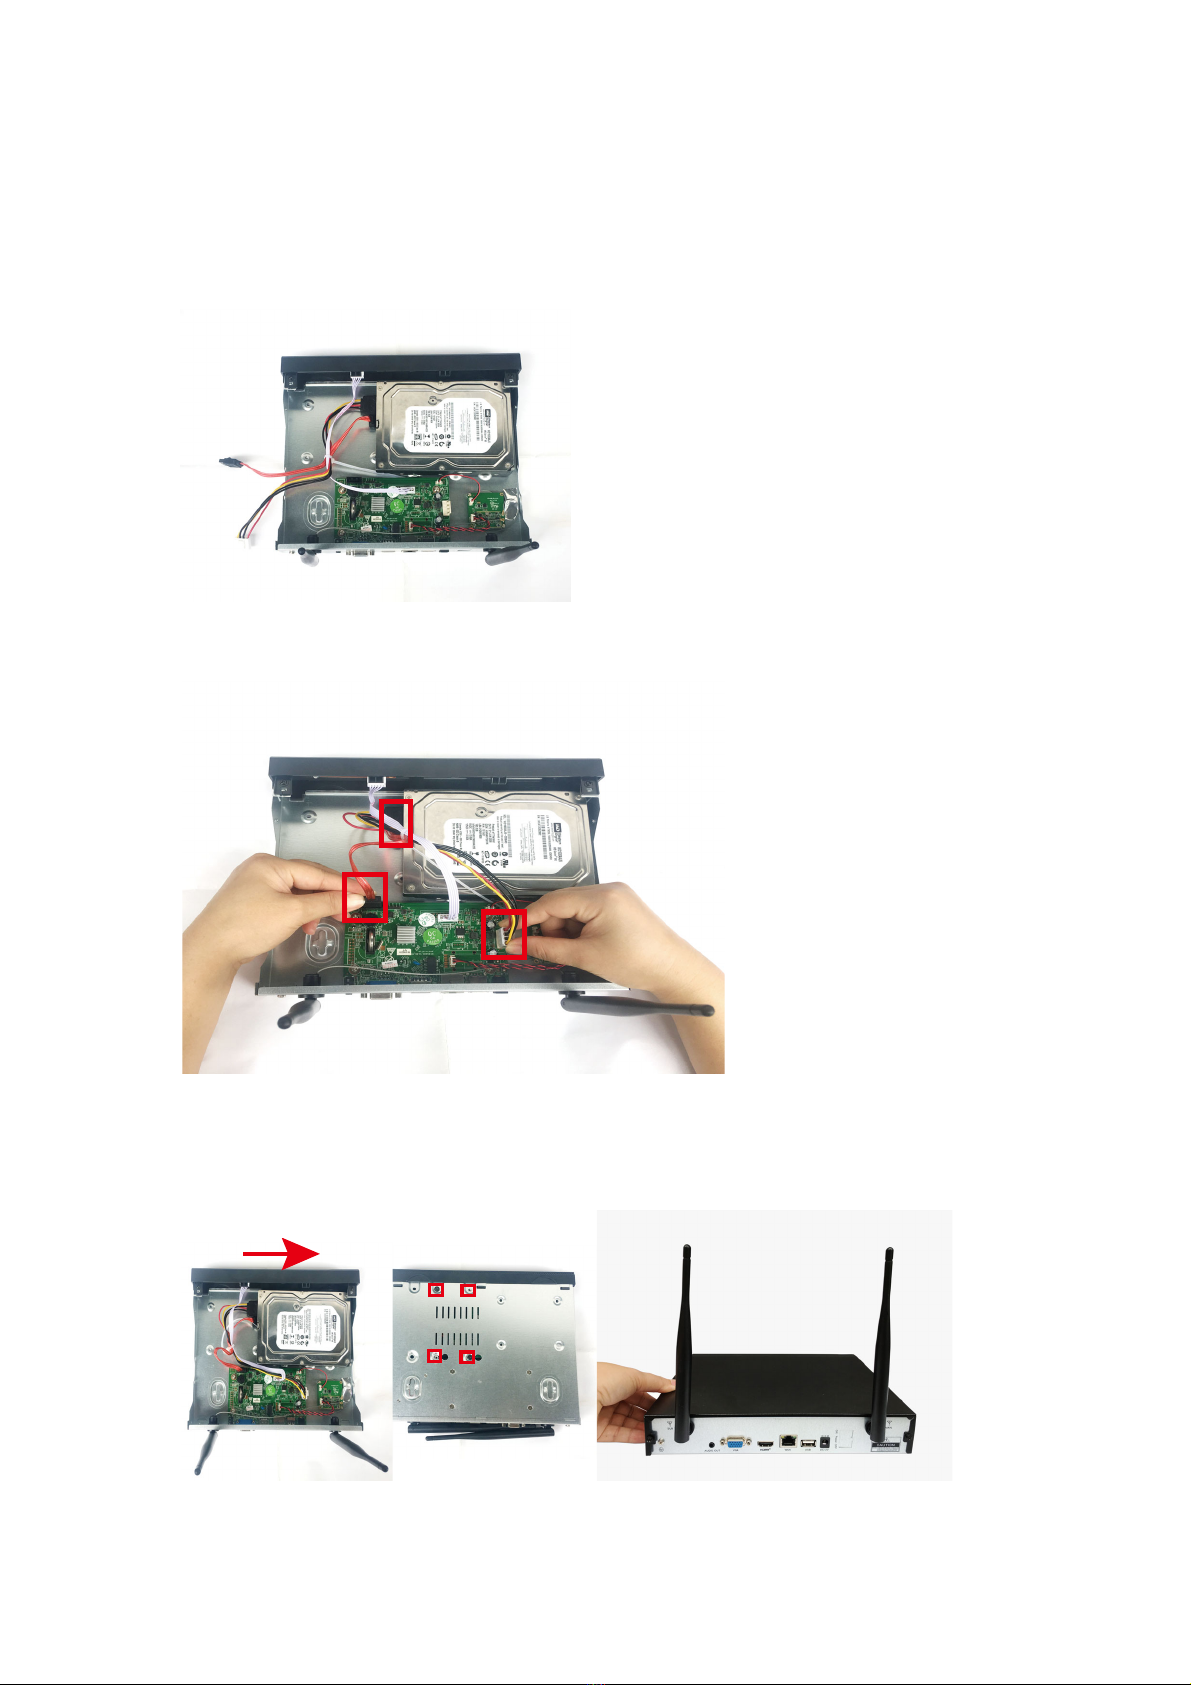
TogetbetterWIRELESSsignal,ithadbetterplacetheNVRinopenareaandhighposition.
RecordVideo
Recordvideoisveryeasyoncamerasystem.
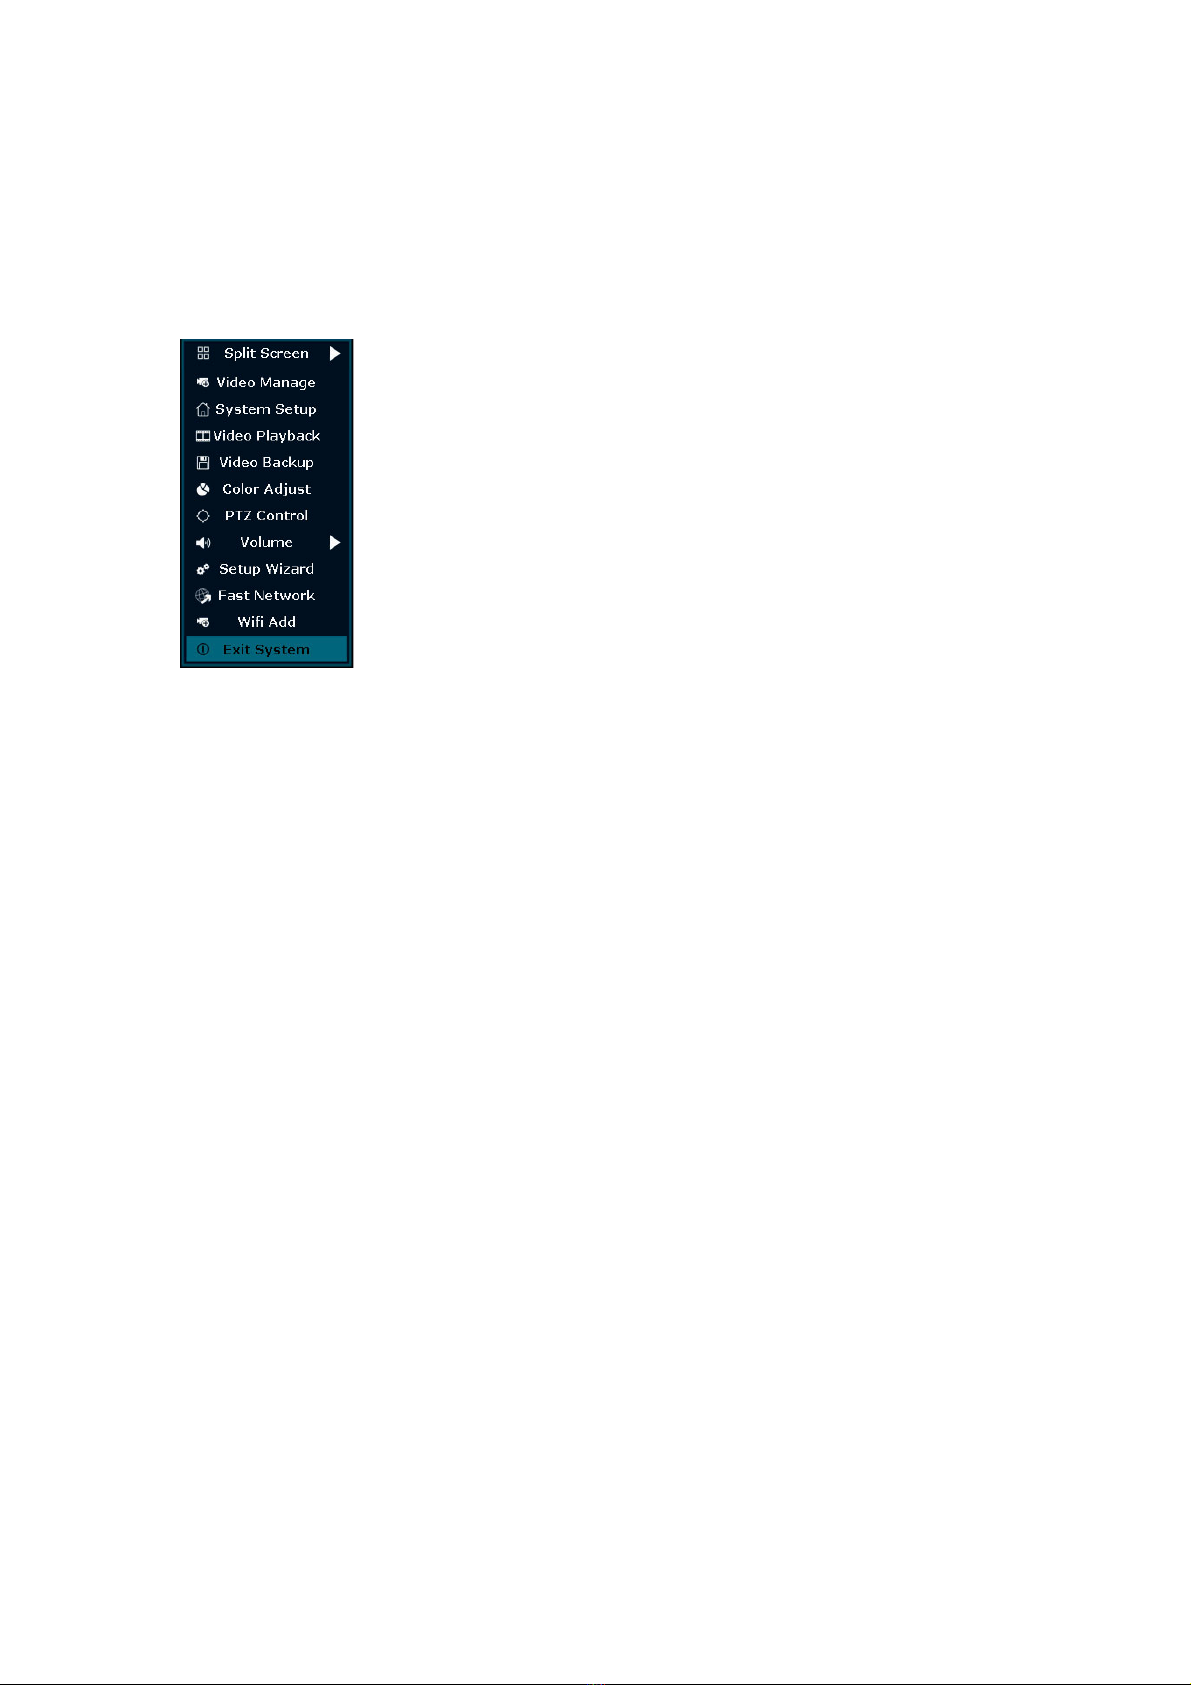
1. TimeRecording:SetupperiodoftimeofrecordingonNVRGUI.Right click mouse→
SystemSetup→Record setup→RecordPlan. Click“time”andput mouseicon on the
upperleftcorner(forexample“1”aspictureshows),pressanddragthemousetothe
righttochoosethetime.Thelistwillturntored.
2. Motion Recording: Only detect motion and then start recording. Right click mouse→
SystemSetup→Recordsetup→RecordPlan.Click“motion”andputmouseicononthe
upperleftcorner(for example“1”as pictureshows),pressanddragthe mouse tothe
righttochoosethetime.Thelistwillturntogreen.
3. Alarm recording: Right click mouse→System Setup→Record setup→Record Plan. Click
“Alarm”and put mouse icon on the upper left corner(for example “1”as picture
shows),press and drag the mouse tothe right tochoose the time.Thelist willturn to
yellow.
Note:Users cansetupany period oftime theywant, for example0:00:00‐23:59:59,That’s24
hours*7daysrecording.WhenNVRdetectsharddisk,thedefaultsettingwillbe24hours*7days
recording.
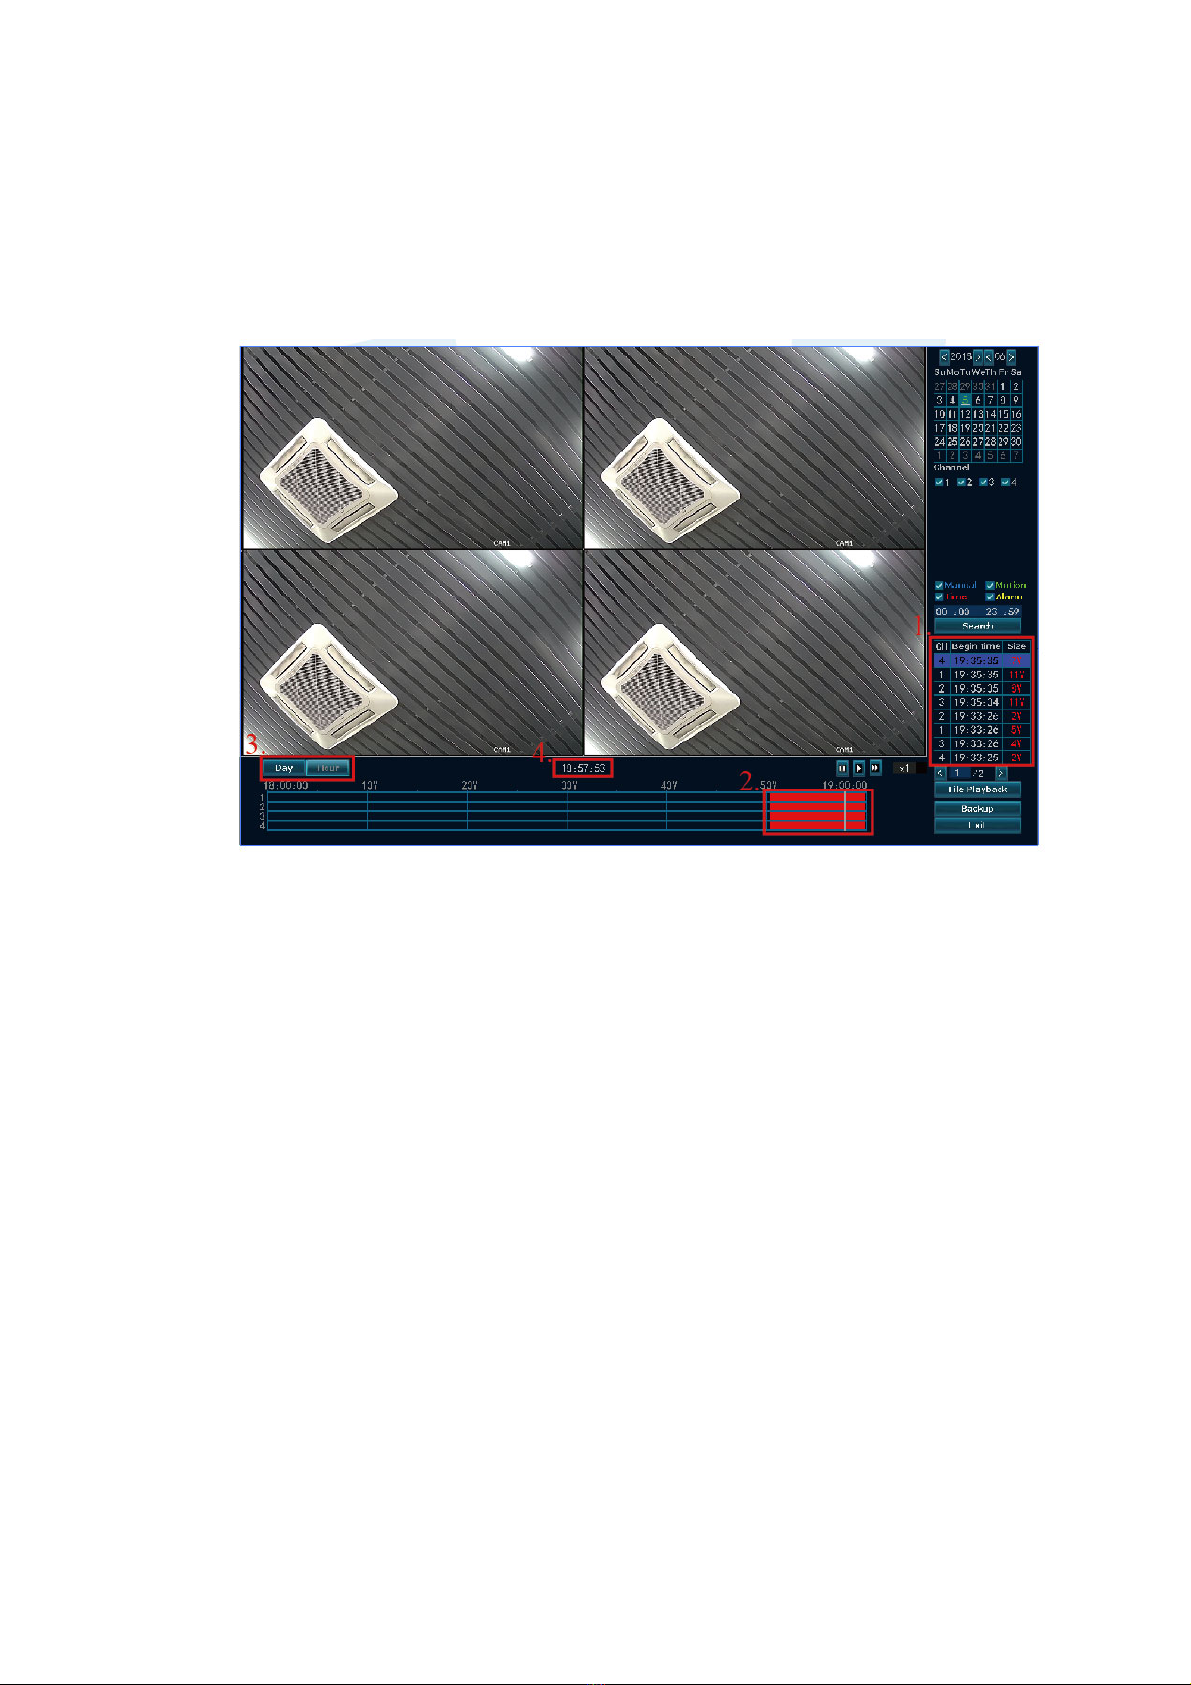
VideoPlayback
Steps:rightclickmouseinmainmenu→Videoplayback→choosedate,channel,recordmode→
clicksearch→thencanviewplaybackfile.
Warmprompt:
1. IIustrationforplaybackbutton: play, pause: fastforward*2,*4,*8;
2. Playfile:Choosetherecordingfileinfilelist,asnumber“1”showninpicture.Chooseone