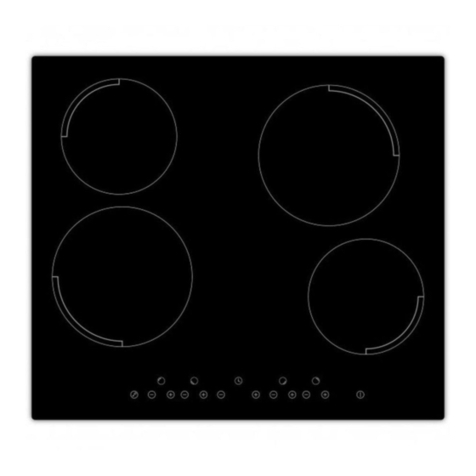
Exquisit EKC 601-2.2 User manual

KERAMISCHE KOOKPLAAT
Lees de gebruiksaanwijzing aandachtig door
voordat u uw nieuwe kookplaat in gebruik neemt
.
Beste koper: Bedankt voor de aankoop van onze kookplaat die specifiek ontworpen is om u vele jaren
kookplezier te bezorgen. Lees voor het gebruik van uw nieuwe toestel de gebruiksaanwijzing aandachtig
door en bewaar deze op een veilige plaats zodat u deze naderhand, indien nodig, kunt raadplegen.
DIT APPARAAT MAG ALLEEN WORDEN GEÏNSTALLEERD DOOR EEN GEKWALIFICEERD ELEKTRICIEN.
DE FABRIKANT WIJST ALLE VERANTWOORDELIJKHEID AF VOOR EEN ONJUISTE INSTALLATIE DIE
SCHADE KAN VEROORZAKEN VOOR EN/OF TOEBRENGEN AAN PERSONEN, DIEREN, EIGENDOMMEN OF
OVERIGE MATERIELE ZAKEN. DIT TOESTEL MAG ALLEEN WORDEN GEBRUIKT VOOR HET DOEL
WAARVOOR HET EXPLICIET IS ONTWORPEN. ELK ANDER GEBRUIK VAN DIT TOESTEL (BIJV. HET
VERWARMEN VAN EEN RUIMTE) WORDT ALS ONJUIST GEBRUIK BESCHOUWD EN DE FABRIKANT WIJST
ALLE VERANTWOORDELIJKHEID AF VOOR SCHADE(S) ALS GEVOLG VAN DIT ONJUISTE EN
ONVERANTWOORDELIJK GEBRUIK.
INBOUWMODEL
GEBRUIKSAANWIJZING
EKC601-2.2

INHOUD
EKC601-2.2 pag 1 van 9 versie NL 07-2020
Veiligheidsrichtlijnen …………………………………………………….. 2
Gebruik ……………………………………………………..…………………..….
3
Bedienen ……………………………………………………………………….….
3
Technische informatie …………………………………………………... 4
Reinigen ……………………………………………………………….…. 5
Aansluitrichtlijnen ……………………………………………………...... 5
Reinigen en Onderhoud ………………………………………………... 7
Problemen oplossen …………………………………………………..… 8
Technische gegevens………………………………………………….... 8
Garantiebepalingen &
Service ……………………………………
…
…
.
9

VEILIGHEIDSRICHTLIJNEN
1. Controleer na het uitpakken de keramische kookplaat op beschadigingen en of alle bijbehorende
materialen aanwezig zijn. Als er problemen zijn, neem dan contact op met de leverancier.
2. Leg het verpakkingsmateriaal (plastic zak, piepschuim, spijkers, verpakking enz.) niet op een plaats
waar kinderen er gemakkelijk bij kunnen.
3. Verander in geen geval de bedrading van het toestel.
4. Voer het toestel op een milieuvriendelijke manier af.
5. Wanneer het stroomsnoer is beschadigd, moet dit door de servicedienst van de leverancier of door
gekwalificeerde technici worden vervangen, dit om (elektrocutie)gevaar te voorkomen.
6. Dit toestel kan worden gebruikt door kinderen vanaf 8 jaar en door personen met verminderde
fysieke-, zintuiglijke- of mentale capaciteiten of door personen met gebrek aan ervaring en kennis,
mits zij onder toezicht staan of instructies hebben gekregen over het correct gebruik van het toestel
en de mogelijke gevaren en risico’s bij gebruik ervan begrijpen.
7. Kinderen moeten onder toezicht staan bij gebruik van dit toestel om ervoor te zorgen dat ze niet met
het toestel spelen. Reiniging en onderhoud mag niet zonder toezicht door kinderen worden uitgevoerd.
8. Staar niet naar de kookplaatelementen wanneer u het toestel gebruikt.
9. Onderdelen binnen bereik kunnen tijdens het gebruik heet worden. Houd jonge kinderen uit de buurt
om brandwonden te voorkomen.
10. WAARSCHUWING: Wanneer het glaskeramieken oppervlak (of soortgelijk materiaal) van de kookplaat,
die onder spanning staande (onder)delen afdekt, gescheurd of gebarsten is, schakel dan het toestel
onmiddellijk uit om het risico op een elektrische schok en/of letsel te voorkomen.
11. Er mag geen stoomreiniger worden gebruikt voor de reiniging van dit toestel.
12. Plaats geen metalen voorwerpen, zoals messen, vorken, lepels en deksels op het oppervlak van de
kookplaat, deze kunnen dan erg heet worden.
13. LET OP: De temperatuur van het oppervlak kan warmer worden dan 95°C. Om (verbrandings)gevaar
te voorkomen, moet de toegang tot de ruimte onder de kookplaat/het werkblad worden afgeschermd.
Kijk bij de installatierichtlijnen voor meer informatie hierover.
14. LET OP: Het toestel en alle toegankelijke onderdelen worden tijdens gebruik heet. Kinderen jonger
dan 8 jaar moeten uit de buurt worden gehouden, mits ze voortdurend onder toezicht staan.
15. Het is niet de bedoeling het toestel aan-/ uit te schakelen met een externe schakelklok of een separaat
op afstand werkend systeem.
16. WAARSCHUWING: Laat nooit kookmaterialen met vet of olie onbeheerd achter op de kookplaat,
dit kan brand veroorzaken. Probeer NOOIT een brand met water te blussen, maar schakel het toestel
uit en dek dan de vlammen af met een deksel of een blusdeken.
17. WAARSCHUWING: Brandgevaar: bewaar geen voorwerpen op het kookoppervlak.
18. LET OP: Het gehele bereidingsproces op de kookplaat moet onder continu toezicht gebeuren. Zelfs bij
een kort bereidingsproces moet continu toezicht zijn.
19. WAARSCHUWING: Gebruik uitsluitend kookplaat afschermingen die door de fabrikant van het toestel
zijn ontworpen of door de fabrikant/leverancier van het toestel als geschikt worden aangeduid in de
gebruiksaanwijzing of welke meegeleverd zijn in de verpakking (indien van toepassing).
Het gebruik van ongeschikte kookplaat afscherming kan ongelukken veroorzaken.
EKC601-2.2 pag 2 van 9 versie NL 07-2020

In dit boekje vindt u een duplicaat van het gegevenslabel en het bedradingsdiagram. Bevestig deze labels op een
eenvoudig bereikbare plaats in de buurt van de kookplaat, zodat u deze snel kunt raadplegen. De fabrikant kan niet
aansprakelijk worden gesteld voor eventuele onnauwkeurigheden in dit handboek als gevolg van druk- en/of
transcriptiefouten. Ook de tekeningen in de afbeeldingen zijn louter indicatief. De fabrikant behoudt zich tevens het recht
voor om wijzigingen aan de producten door te voeren - die in het belang van de gebruiker noodzakelijk of nuttig worden
geacht - zonder de voornaamste functionele- en veiligheidskenmerken van het product zelf in gevaar te brengen.
Gebruik
Aanwijzingen en suggesties voor het gebruik:
1. Raak de ingebouwde keramische kookplaat niet aan met natte handen of -voeten.
2. Bedien de ingebouwde elektrische kookplaat niet op blote voeten.
3. Laat jonge kinderen de ingebouwde keramische kookplaat niet bedienen.
4. Gelieve de stroomtoevoer te onderbreken voordat u onderhoud en reiniging uitvoert.
5. Wanneer de ingebouwde keramische kookplaat in gebruik is, wordt de temperatuur van de elektrische
kookplaat en diens directe omgeving hoger, dus raak niet aan en houd de kinderen uit de buurt van de
kookplaat.
6. Gebruik geen stoomreiniger voor het schoonmaken van het toestel!
7. Het is niet de bedoeling het toestel te bedienen met een externe schakelklok of een separaat op
afstand werkend systeem.
8. De inbouw keramische kookplaat moet in een hittebestendige kast worden ingebouwd. Bij het eerste
gebruik kan het voorkomen dat er rookontwikkeling is. Laat het toestel kort aanstaan om overtollig kitmateriaal
af te branden.
Bedienen van de kookzones
Een goed gekozen pan bespaart energie. Een pan moet een dikke, vlakke bodem hebben met een diameter die gelijk is
aan de diameter van de kookzone, zodat de warmte zo efficiënt mogelijk wordt overgedragen.
Advies over het gebruik van de kookplaten. Om energie te besparen en de levensduur van de keramische kookzones te
verlengen, adviseren wij het gebruik van pannen met een vlakke bodem en met een diameter die niet kleiner is dan de
diameter van de kookzones. Let erop dat er geen vloeistoffen op de keramische kookzones terechtkomen. Laat de
kookzones nooit aanstaan zonder pannen erop of met lege pannen erop en gebruik de kookzones nooit om borden te
verwarmen. Zet de kookzones pas aan nadat de pannen erop zijn geplaatst. Wanneer de kookzones zijn uitgeschakeld,
blijven deze een poosje warm. Raak deze niet aan. Schakel eerst de kookzone uit voordat u de pan eraf tilt.
kookzone
(Φ145mm)
kookzone
(Φ180mm)
kookzone
(Φ180mm)
kookzone
+
(Φ145mm)
!
Tiptoets bediening
• Alle bedieningshandelingen worden uitgevoerd door middel van het aantippen van de tiptoetsen op
het bedieningspaneel.
• Elke tiptoets heeft een bijbehorend indicatielampje.
• U hoort een pieptoon telkens wanneer de tiptoets een aanraking registreert.
De keramische kookplaat inschakelen
• Tik op de AAN/UIT knop (afb.1) om het toestel in te schakelen.
• De kookplaat piept 1x en alle kookzone indicatielampjes lichten kort op; de kookplaat staat nu
in de stand-by modus.
Let op: Zet binnen 1 minuut een gevulde pan op een kookzone,
anders zal de kookplaat zich weer uitschakelen.
Een kookzone inschakelen en instellen van een vermogensniveau
• Tik op de tiptoets behorend bij de gewenste kookzone (afb. 2)
• Selecteer het gewenste vermogensniveau(1-9) m.b.v. de en toetsen (afb. 3).
Door uw vinger op een van deze toetsen te laten liggen, zal het vermogensniveau hoger
of lager worden ingesteld.
Opmerking: Ziet u vermogensniveau 0, tik op de toets, de instelling gaat dan naar 9
.
afb.1
afb.2
EKC601-2.2 pag 3 van 9 versie NL 07-2020

De keramische kookplaat uitschakelen
1. Tik op de AAN/UIT knop, de kookplaat wordt uitgeschakeld. Het is mogelijk om de kookplaat op elk
willekeurig moment uit te schakelen door op de AAN/UIT knop te tikken.
2. Zet met de of toets op 0, dan zal de kookplaat uitschakelen.
Nadat een kookzone is uitgeschakeld, zal de bijbehorende vermogensniveau weergave op het display
een knipperende letter "H" tonen. Dit betekent dat de temperatuur van de zone boven de 60°C ligt en
dus nog steeds warm genoeg is om letsel te veroorzaken.
•
Wanneer de temperatuur van de zone onder de 60°C daalt, gaat de letter "H" uit. Let op, het is nog
steeds mogelijk om jezelf te verbranden aan deze kookzone, zelfs als de temperatuur onder de 60°C
is gezakt.
BELANGRIJK: Deze restwarmte indicator zal verdwijnen wanneer de stroomtoevoer naar het product
wordt onderbroken.
De keramische kookplaat vergrendelen
Om de keramische kookplaat te vergrendelen, tikt u - wanneer het toestel is ingeschakeld - op de
vergrendelingstoets (afb. 4). Wanneer de vergrendeling is geactiveerd, worden alle toetsen op het
bedieningspaneel vergrendeld, behalve de AAN/UIT toets. Om de vergrendeling op te heffen, tikt u
nogmaals op de vergrendelingstoets. U kunt dan weer het vermogensniveau van elke willekeurige
kookzone op de kookplaat aanpassen
.
Timer
Uw kookplaat heeft een timer die u kunt instellen (van 1 tot 99 minuten) voor elke kookzone.
Aan het einde van de aftelperiode hoort u een signaal en wordt de betreffende kookzone
uitgeschakeld.
•
Kies de kookzone (afb. 2) en het vermogensniveau (afb. 3).
•
Tik op de timer toets (afb. 5) en stel de afteltijd in m.b.v. de en toetsen.
•
Bij elke tik op de of toetsen van de timer wordt de tijd in stappen van 1 minuut
verhoogd of verlaagd.
Automatische uitschakeling
• Wanneer 1 of meerdere kookzones per ongeluk worden aangelaten, zal er na een poos
een beveiliging worden geactiveerd en de kookzones worden automatisch uitgeschakeld.
De tijdsduur is afhankelijk van het ingesteld vermogensniveau voor die specifieke
zone. In de tabel hiernaast ziet u welk tijdslimiet hoort bij welk vermogensniveau.
• Als meer dan 1 zone is ingeschakeld - wanneer 1 van de kookzones diens
tijdslimiet heeft bereikt - wordt alleen de zone die de tijdslimiet heeft bereikt,
uitgeschakeld.
Technische informatie
afb.3
afb.4
afb.5
Model
Voeding (V)
Vermogen (W)
Afmeting
(mm)
Inbouwafmetingen
uitsparing
(mm)
EKC
601-2.2
220-240V- 50/60Hz
1200W
(145mm)
1800W
(180mm)
580X510X52
560(L)X490(W)
Kookmaterialen
Gebruik pannen met een vlakke bodem. Ongelijkmatige of dunne bodems verspillen energie en zijn traag om mee te koken.
Gebruik pannen die iets groter zijn dan de kookzones. Met kleinere pannen wordt energie verspild.
Gebruik geen te grote pannen. Als een pan meer dan 50 mm oversteekt, kunnen de kookplaatonderdelen oververhitten
en dit kan leiden tot fijne scheurtjes in de glaskeramiek laag van de kookplaat, waar vuil zich kan nestelen.
Gebruik alleen droge keukenmaterialen. Plaats geen natte of bestoomde onderdelen (bijv. deksels) op de kookplaat.
Gebruik
Gebruik geen pannen die onstabiel of wiebelig zijn of kunnen omkantelen. Schakel de
kookzones niet te lang aan zonder een pan erop.
goed niet goed niet goed niet goed niet goed niet goed niet goed
bodem niet vlak bodem bol te klein te groot vocht op kookzone geen pan erop
EKC601-2.2 pag 4 van 9 versie NL 07-2020

Reinigen
Schakel de stroomtoevoer naar het toestel uit voordat u onderhoud uitvoert en wacht totdat de
kookplaat geheel is afgekoeld. Wij adviseren de geëmailleerde en glaskeramiek elementen te
reinigen met lauwwarm water en een mild reinigingsmiddel.
Gebruik nooit schurende producten. Neem de bovenzijde, de glazen kookplaat, af met wat water en
droog deze vervolgens af met een zachte doek. Gebruik een spons of een vochtige doek om de
kookzones te reinigen en denk er altijd aan dat teveel water gebruiken de elektrische elementen kan
beschadigen. Reinig hardnekkige vlekken met niet-schurende schoonmaakmiddelen of opgewarmde
azijn. Alleen gekwalificeerde technici mogen het apparaat onderhouden.
U kunt dit regelen via de website van uw leverancier.
Aansluitrichtlijnen
De elektrisch aansluiting van dit toestel met een 5-aderige kabel is voorbereid voor het gebruik op wisselstroom met
de spanning (voltage) en frequentie die op het typeplaatje zijn aangegeven. De benodigde Perilex stekker wordt niet
standaard meegeleverd. Bekijk het aansluitschema. De aardkabel is geel/groen. Het aansluiten op het stroomnetwerk
dient te worden uitgevoerd door een gekwalificeerd elektricien, strikt volgens de geldende voorschriften.
Wanneer het toestel boven een inbouwoven worden geïnstalleerd, moeten de 2 toestellen apart van
elkaar worden aangesloten voor de elektrische veiligheid en om het uitnemen van de toestellen, indien nodig, te
vergemakkelijken.
De voedingskabel moet zo worden aangelegd dat nergens nabij de kabel de temperatuur hoger kan worden dan
reguliere omgevingstemperatuur + 50°C.
Controleer ook of het voedingsnetwerk een goede aardverbinding/randaarding heeft, het netwerk voldoet aan alle
geldende voorschriften en dat de stroomonderbreker/zekering gemakkelijk te bereiken is wanneer het toestel wordt
geïnstalleerd.
Aansluitschema
L1
L2
N1 N2
AANSLUITSCHEMA
Pas op! Spanning van verwarmingselementen
220-240V Pas op! In geval van aansluiten
(volgens dit schema)
altijd de aardkabel aan-
sluiten op de
aardaansluiting
L1 L2
N1 N2
Aansluitschema
E L L N
N
• Wanneer de kabel is beschadigd of deze moet worden vervangen, laat dit dan altijd doen door een medewerker
van de servicedienst van de leverancier of door een gekwalificeerde elektricien.
• Wanneer het toestel rechtstreeks op het stroomnet wordt aangesloten, moet er een meerpolige
stroomonderbreker/zekering(automaat) tussen worden geïnstalleerd met een minimale opening van 3 mm
tussen de contacten.
• De installateur moet goed controleren dat de kabels op de juiste aansluitpunten zijn aangesloten en dat de
installatie voldoet aan alle geldende normen en veiligheidsvoorschriften.
• De kabel mag niet gebogen, verdraaid of beklemd zitten.
• De kabel moet periodiek worden gecontroleerd en, indien nodig, alleen door een erkend en gekwalificeerd elektricien
worden vervangen.
EKC601-2.2 pag 5 van 9 versie NL 07-2020

WAARSCHUWING
Sluit de kabelklem nadat u de kabels
heeft aangesloten. Sluit de afdekklep
van het aansluitingspunt door deze
naar beneden te draaien.
De fabrikant wijst alle verantwoordelijkheid en aansprakelijkheid af wanneer de geldende normen en
voorschriften niet in acht zijn genomen.
TECHNISCHE INFORMATIE VOOR INSTALLATIE PERSONEEL:
Dit apparaat mag alleen worden geïnstalleerd door erkend en gekwalificeerd personeel en in overeenstemming met de
geldende regelgeving van de Elektriciteit autoriteiten. De wand- en werkbladoppervlakken moeten hittebestendig zijn voor
temperaturen tot 95 graden Celsius. Alle laminaat-, verlijmings-, bekledings- en afwerkingsmaterialen moeten
gecertificeerd en geschikt zijn bevonden voor deze temperatuur. Installeer en gebruik het toestel niet op een niet
brandveilige locatie (zoals bijv. bij een gordijn enz.) want de fabrikant en leverancier stellen zich hiervoor niet
aansprakelijk. Zaag een vierkant gat in het werkblad, zoals aangegeven op onderstaande tekening en plaats de inbouw
kookplaat erin. De kookplaat kan op elk werkblad worden gemonteerd met een dikte tussen de 40 en 50
mm.
EKC601-2.2 pag 6 van 9 versie NL 07-2020

Kookplaat plaatsen en bevestigen
Voordat u de kookplaat in het werkblad plaatst, plaatst u eerst de zelfklevende afdichtingsstrip rondom op de rand aan
de onderzijde van de kookplaat . Het is belangrijk om deze afdichting gelijkmatig verdeeld te bevestigen, zonder
openingen of overlappingen, zodat wordt voorkomen dat vloeistoffen onder de kookplaat wegsijpelen.
afdichting
kookplaat
schroef
schroef
werkblad
bevestigingsbeugel
1. Plaats de afdichtingsstrip rondom, onder de rand van de kookplaat, zoals hierboven weergegeven.
2. Plaats de kookplaat in de uitsparing in het werkblad en duw deze naar beneden zodat de kookplaat goed op
de werkbank rust.
3. Zet de kookplaat vast m.b.v. de meegeleverde beugels.
Bevestig de kookplaat aan de onderkant van het werkblad met de meegeleverde bevestigingsmaterialen. Schroef het
ene uiteinde van de beugel vast in de voorgeboorde gaten aan de onderkant van de kookplaat. Het andere uiteinde
van de beugel moet zich onder het werkblad bevinden om de kookplaat op zijn plaats te houden.(zie afb.)
Opmerking 1:
De minimale hoogte van eventueel aangrenzende eenheden (inclusief (profielkrans)verlichting) moet 450
mm zijn, tenzij ze zijn vervaardigd van een vuurbestendig materiaal (bijv. staal, keramische tegels).
Opmerking
2:
Er mogen geen overhangende items, bijv. bovenkast, afzuigkap of – installatie, boven de kookzones worden
geplaatst tot een hoogte/afstand van min. 600 mm.
Opmerking 3:
Laat een ruimte van tenminste 50 mm vrij tussen de onderkant van het toestel en een brandbaar oppervlak. Laat de
verpakkingsmaterialen (plastic zakken, spijkers, piepschuim etc.) nooit binnen bereik van de kinderen liggen, omdat
ze een potentieel gevaar vormen.
Afdichting:
De kookplaat heeft een speciale afdichtingstrip waardoor er geen vloeistoffen in de kast eronder kunnen sijpelen
.
Schraper om de kookplaat te reinigen
REINIGING EN ONDERHOUD
• Gebruik geen reinigingsmaterialen met schurende onderdelen, bijv. schuurspons, staalborstel, staalwol
zeepspons etc. om (de onderdelen van) de kookplaat te reinigen.
• Gebruik geen reinigingsmiddelen met schurende bestanddelen, zoals bijv. schuurpoeder, puimsteen, Jif
etc. omdat deze krassen veroorzaken op het oppervlak van de kookplaat, die niet meer te herstellen zijn.
• Gemorste vloeistoffen die vastzitten aan de kookplaat kunnen met een speciale schraper (niet
meegeleverd) worden verwijderd. Let wel op dat u tijdens deze handeling de keramische omlijsting/rand van
de kookplaat niet beschadigd.
Let op!
Het scherpe mes moet altijd worden beschermd door het deksel te verstellen (gewoon met de duim duwen).
Wees voorzichtig met het gebruik van dit hulpmiddel. Houd buiten het bereik van kinderen.
Gebruik van milde reinigingsmiddelen wordt aanbevolen, zoals bijv. alle soorten kant & klaar spuitflacons
tegen vetresten. Als alternatief kan een oplossing van warm water met een beetje afwasmiddel of een
reinigingsmiddel speciaal voor roestvrijstalen spoelbakken worden gebruikt.
EKC601-2.2 pag 7 van 9 versie NL 07-2020

Symbool
Info
Eenheid
Modelnaam
--
EKC
601-2.2
Type kookplaat
--
inbouw kookplaat
Aantal kookzones
--
4
Verwarmingstechniek:
(inductie
kookzones en kook-
zones met stralingswarmte
,
massieve elektrische platen
)
--
Kookzones met
stralingswarmte
Voor ronde kookzones
of
oppervlakken
: diameter van te
gebruiken oppervlak per
elektrisch verwarmde
kookzone, afgerond op 5 mm
0
0
kookzone
1
(links voor)
18.0
0
kookzone II (rechts voor)
14.5
0
kookzone
111
(links achter)
14.5
0
kookzone IV (rechts achter)
18.0
cm
Voor niet-ronde kookzones
of
oppervlakken
: lengte en breedte
van te gebruiken oppervlak per
elektrisch verwarmde kookzone,
afgerond op 5mm
L,
W
N.V.T.
cm
Energieverbruik per kookzone of
-oppervlak per kg
EC elektrisch
koken
0
cooking zone
1
(links voor)
:199.8
0
cooking zone II (rechts voor)
:192.4
0
cooking zone III (links achter)
:192.4
0
cooking zone IV (rechts achter)
191.1
Wh/kg
Energieverbruik van de
kookplaat berekend per kg
EC
193.9
Wh/kg
PROBLEMEN OPLOSSEN
Probleem
Oplossing
Kookplaat doet het niet • Controleer of de kabels (correct) aangesloten zijn
• Controleer de zekering in de meterkast
Rookvorming tijdens
gebruik
•
Dit is normaal bij het 1e gebruik
• Reinig de (afwerk)rand rondom de kookplaat en/of de kookzones
De kabel is beschadigd • Neem contact op met de service afdeling van de leverancier
Dit apparaat voldoet aan de Europese Richtlijnen 2002/96/EC voor Elektrisch en Elektronisch Afval (WEEE).
Door ervoor te zorgen dat dit apparaat op de juiste wijze wordt afgevoerd, draagt u bij om mogelijke schade
aan milieu en volksgezondheid te voorkomen.
Het symbool op dit product geeft aan dat het niet met het gewone huishoudelijk afval afgevoerd mag worden.
Het moet naar een inzamelpunt worden gebracht voor elektrisch- en elektronisch apparatuur.
Dit apparaat vereist gespecialiseerde afvalverwerking. Voor meer informatie over het recyclen, hergebruik en
verwerking van dit product, neemt u contact op met uw gemeentelijke afvalverwerkingsinstantie, uw
gemeente of uw leverancier.
.
.
TECHNISCHE GEGEVENS
elektrische
kookplaat
EKC601-2.2 pag 8 van 9 versie NL 07-2020

GARANTIEBEPALINGEN
Deze garantiebepalingen gelden uitsluitend voor de oorspronkelijke koper en voor
huishoudelijk
gebruik van het
apparaat in Nederland. Bij doorverkoop van gebruiker aan gebruiker vervalt de garantie.
De garantie geldt slechts indien, bij eventueel beroep op de garantiebepalingen, dit garantiebewijs wordt
getoond, samen met de originele aankoopnota.
Geen garantie zal van toepassing zijn op gebreken, veroorzaakt door beschadigingen, ruwe of
onoordeelkundige behandeling, nalatigheid van de gebruiker, het gebruik van het apparaat op een onjuiste
spanning, of gebruik voor een ander doel dan waarvoor het geleverd werd. Er kan ook geen beroep op de
garantie gedaan worden als het typeplaatje met serienummer is veranderd of verwijderd en wanneer door
ondeskundigen aan het apparaat is gewerkt.
Buiten garantie vallen: glas, gloeilampen, kunststof onderdelen of accessoires, draadmanden en/of separatie
schotten, lak- en/of emaille beschadigingen.
De garantie vangt aan op de dag van plaatsing en houdt in:
Twee jaar garantie op het gehele koel-vriesmeubel en de elektrische apparatuur zoals thermostaat,
thermische beveiliging, relais, ventilator, transformator, schakelaar enz, met uitzondering van de onder 4
genoemde onderdelen.
De garantie omvat uitsluitend het vervangen van defecte of beschadigde onderdelen voor zover wij ons
volgens deze garantiebepalingen verantwoordelijk hebben gesteld.
Voorrijdkosten, arbeidsloon, transport- en/of verpakkingskosten, alsmede het transportrisico (voor apparaten die
slechts in onze eigen werkplaats gerepareerd kunnen worden) worden niet door de garantie gedekt en zijn voor
rekening van de gebruiker. Zie ook onze 'servicebepalingen' waarin o.a. de berekening van de voorrijdkosten en
het arbeidsloon worden omschreven.
NB: Reparatiekosten moeten direct voldaan worden. lndien facturering van de monteurskosten wordt verlangd,
zullen deze worden verhoogd met een bepaald bedrag aan administratiekosten.
Wij zijn niet verantwoordelijk voor werkzaamheden of reparatiekosten, niet in onze opdracht door derden
uitgevoerd en evenmin voor kosten of gevolgen, hoe dan ook, direct of indirect uit een storing, gebrek of
onoordeelkundig gebruik van het apparaat voortvloeiend.
Vervanging van onderdelen verlengt de garantietermijn niet.
EXQUISIT SERVICEBEPALINGEN
Beschadigde apparaten bij ontvangst niet in gebruik nemen maar direct melden bij uw leverancier. Eventuele van
beschadigde, gebruikte apparaten is niet mogelijk.
De eerste 24 maanden na aankoopdatum wordt voor serviceverlening ten aanzien van gevallen, welke onder deze
garantiebepalingen ressorteren, niets in rekening gebracht.
Vanaf twee jaar na de aankoopdatum worden in rekening gebracht:
a. de voorrijdkosten
b. het arbeidsloon
c. alle vervangen onderdelen.
Bij klantenbezoek dienen alle kosten en gebruikte materialen a contant te worden voldaan met inachtneming van
het onder de punten 2-4 van de servicebepalingen genoemde, ongeacht de aard der werkzaamheden.
Eventuele toezending van onderdelen geschiedt onder rembours.
SERVICE
Exquisit: www.domest.nl – zie service
E-mail: servic[email protected]
Tel. 0314 - 362244 (optie 2)
Fax. 0314 - 378232 Naam/adres/woonplaats koper:
.................................................................................................................................................................…………………………………
…………………….………………………………………………………………………..........................................................................………………….……
……………………………………………………………………………………………………......................................................................…....................
.............................………………………………………………………………………………………………………………………………………………………………….
Importeur:
DOMEST Multibrand Sales & Services
J.F. Kennedylaan 101b
7001 CZ Doetinchem NL
Tel. 0314 - 362244
Fax 0314 – 378232
E-mail: servic[email protected]
EKC601-2.2 pag 9 van 9 versie NL 07-2020

BUILT-IN CERAMIC HOB
INSTALLATION AND OPERATION MANUAL
EKC 601-2.2
Please read the instruction manual carefully before operating your new hob.
Dear Owner: Thank you for purchasing our cooktop which is designed to give you many years of cooking
pleasure. Before using your new appliance please read the user's manual carefully and keep it in a safe place
for future reference.
THIS APPLIANCE MUST BE INSTALLED ONLY BY A QUALIFIED PERSON IN INSTRUCTIONS
PROVIDED. THE MANUFACTURER DECLINE ALL RESPONSIBILITY FOR IMPROPER INSTALLATION
WHICH MAY HARM PERSONS AND ANIMALS OR CAUSE DAMAGE TO PROPERTY. THE APPLIANCE
MUST BE USED ONLY FOR THE PURPOSE FOR WHICH IT WAS EXPRESSLY DESIGNED. ANY OTHER
USE (e.g. HEATING ROOMS) IS CONSIDERED TO BE IMPROPER AND MANUFACTURER DECLINES ALL
RESPONSIBILITY FOR DAMAGE RESULTING FROM IMPROPER AND IRRESPONSIBLE USE.
1

SAFETY WARNING
1. Please check the built-in ceramic hob's integrity after opening the package. If there are
any problems please refer to the supplier.
2. Do not throw the package materials (plastic bag, foam, nails, package etc) in a place
where children can easily access. Please dispose of packaging in an environmentally
friendly manner.
3. Do not change the wiring under any circumstances.
4. Dispose of the appliance in an environmentally friendly manner.
5. If the supply cord is damaged,it must be replaced by the manufacturer its service agent
or similarly qualified persons in order to avoid a hazard.
6. This appliance can be used by children aged from 8 years and above and persons with
reduced physical, sensory or mental capabilities or lack of experience and knowledge if
they have been given supervision or instruction concerning use of the appliance in a safe
way and understand the hazards involved
7. Children should be supervised to ensure that they do not play with the
appliance.Cleaning and user maintenance shall not be made by children without
supervision.
8. Do not stare at the hob elements when the appliance is working.
9. Accessible parts may become hot during use. To avoid burns young children should be
kept away
10.
If the surface is cracked, switch off the appliance to avoid the possibility
of electric shock, for hob surfaces of glass-ceramic or similar material which protect live
parts
11.Shall state a steam cleaner is not be used.
12.Metallic objects such as knives, forks, spoons and lids should not be placed on the hob
surface since they can get hot.
13. The surface temperature exceeds 95°C.To avoid a hazard,under bench
access must be restricted.Refer to the installation instructions.
14. The appliance and its accessible parts become hot during use. Care
should be taken to avoid touching heating elements.Children less than 8 years of age
shall be kept away unless continuously supervised.
15.The appliance is not intended to be operated by means of an external timer or
separate remote-control system.
16.
Unattended cooking on a hob with fat or oil can be dangerous and may
result in fire. NEVER try to extinguish a fire with water, but switch off the appliance and
then cover flame e.g. with a lid or a fire blanket.
17.
Danger of fire: do not store items on the cooking surfaces.
18. The cooking process has to be supervised. A short term cooking process
has to be supervised continuously.
19. Use only hob guards designed by the manufacturer of the cooking
appliance or indicated by the manufacturer of the appliance in the instructions for use as
suitable or hob guards incorporated in the appliance. The use of inappropriate guards can
cause accidents.
2

A duplicate data label and wiring diagram are contained in this booklet.Please attach these labels to an
accessible and near by surface for easy reference. The Manufacturer shall not be held responsible for any
innaccuracies in this handbook due to printing or transcription errors,also the designs in the figures are purely
indicative. The Manufacturer also reserves the right to make any modifications to the products as may be
considered necessary or useful also in the interests of the user, without jeopardizing the main functional and
safety features of the products themselves.
Use
Directions and suggestions for using
1.Do not touch the built-in ceramic hob with wet hands or feet.
2.Do not operate the built-in electric hob when you are bare footed.
3.Do not let young children operate the built-in ceramic hob.
4.Please disconnect the power supply before you do any maintenance and cleaning.
5.When the built-in ceramic hob is working, the temperature of the electric hob and the ambience become
higher, so please do not touch it and keep the children away from it.
6.A steam cleaner must not be used for cleaning the appliance.
7.The appliance is not intended to be operated by means of an external timer or separate remote-control
system.
8.The built-in ceramic hob must be built into a heat resistant cabinet. Some smoking may occur when first
used. Leave on for a short period to burn off excess sealant.
Operation of the top with the heating area
An appropriately selected pan saves energy. A pan should have a thick, flat base with a diameter equal to the
plate diameter as in that case heat is transferred most efficiently.
Advice on the use of cooking tops. To save energy and to have a longer life of the ceramic tops, we advise
using pans with flat bottom and with a diameter not less than the diameter of the tops. Care must be taken that
fluids do not spill on the ceramic plates. Never leave the tops on without pans on them or with empty pans, and
never use the tops to heat the plates. Switch on the plates after having set the pans on them. Once switched
off, the plates remain warm for a while, do not touch. Switch off the heating element before removing the pans.
Notice: The crystallite glass is still hot after use,please do not touch!
Heating area
(Φ145mm)
Heating area
(Φ145mm)
Heating area
(Φ180mm)
Heating area
(Φ180mm)
+
-
3
fig.1
fig.2
Touch control
•All operations are performed by means of the touch controls on the control panel.
•Each touch control has a corresponding visual display (indicator light).
•You will hear a beep each time a touch is registered.
Switching on the ceramic hob
•Press the ON/OFF button (fig. 1) to switch on the appliance.
•The hob will beep once and all cooking zone indicators will light up briefly. Indicating
that the hob has entered stand-by mode .
Notice: To make the next step within one minute, otherwise the controller will automatically
shut down.
Switching on a cooking zone and setting a power level
•Press the cooking zone select button (fig. 2) for the zone you want to use.
•Select the heat level required (1-9) by using the up and down buttons (fig. 3). By holding
down either of these buttons, the value on the heat level display will adjust up or down.
Note: when the power displayed 0, press the down button, the power will set to 9.

Timer
Your hob has a timer which you can set (from 1 to 99 minutes) for each cooking zone. At
the end of the countdown period, a buzzer will sound and the relevant cooking zone will
be switched off.
•Select the cooking zone (fig. 2) and heat level (fig. 3).
• Press the timer button (fig. 5), and then use the up and down buttons to set the countdown time.
•Each time the timer up or down button is pressed, the timer display will increase or
decrease in 1 minute increments.
Safety cut-off
•If one or more of the cooking zones are accidentally left on, a safety cut-off will activate
after a certain period of time. The length of time depends on the set power level for that
zone. The table on the right gives the time limits for each power level.
•If more than one zone is operating when one of the zones reaches its safety cut-off
point, only the zone that has reached its safety cut-off point will switch off.
1-2
3-4
5
5
6
Time
limit
(hours)
4
1.56-9
Power
level
fig.3
fig.4
fig.5
Switching off the ceramic hob
1. Press the ON/OFF button, the hob will switch off. It is possible to turn the hob off at any
time by pressing the ON/OFF button.
2. Press the up or down buttons to 0, then hob will switch off.
After a zone is switched off, the corresponding heat level display will show a flashing letter “H” .
This means that the temperature of the zone is above 60°C and is therefore still high enough
to cause injury.
• When the temperature of the zone falls below 60°C the letter “H” will go out. It is still
possible to burn yourself on a hob zone, even when its temperature has dropped below 60°C.
IMPORTANT: The residual heat indicator will disappear if the mains supply to the product is cut.
Locking the ceramic hob
To lock the ceramic hob, press the safety lock button (fig. 4) while the appliance is switched
on. With the safety lock activated, all buttons on the control panel will be disabled, except
the ON/OFF button. To disable the safety lock feature, press the safety lock button again.
And you are then able to adjust the heat level of any zone on the hob.
4
Utensils
Use pans with flat bottoms. Uneven or thin bottoms will waste energy and are slow to cook.
Use pans slightly larger than the hotplates. Smaller pans will waste energy.
Do not use oversized pans. More than 50mm overhang can overheat cooktop components and can
cause fine cracks in the enamel hob which will trap dirt.
Use only dry utensils. Do not place wet or steamy parts (eg.lids) on the hotplates.
Use
Do not use pots and pans that are unsteady and likely to rock or overbalance.
Do not operate the cooktop for an extended time without utensil on the hotplate.
Good Bad
(recessed base) (convex base) (undersize) (oversize) (moisture on hotplate) (no utensil)
Bad Bad Bad Bad Bad
Technical Data
Model Power Supply Power(W) Size (mm)
Buit-in Hole Size
(mm)
220-240V~ 50/60Hz 1800W(180mm) 580X510X52 560(L)X490(W)
1200W (145mm)
EKC 601-2.2

Cleaning
Turn off the mains to the equipment before carrying out any maintenance and wait for it cool down. We
advise using lukewarm water and detergents to clean enameled elements.Never use abrasive products.
Rinse the glass worktop with water and dry using a soft cloth. Use sponges or a moist cloth to clean the
tops, and remember that water in excess can damage the electric elements. Clean tough stains using
non abrasive detergents, or warm vinegar.
Clean the electric tops using a moist cloth, then lightly oil the the top when it is still warm.
Only licensed repairers should service the appliance.
Installation
Fitting guidelines
The voltage rating of the hob heating elements is 220-240V .Appliance with three-pole cable are set
upfor operation current at the voltage and frequency indicated on the rating plate Look at the connection
wiring diagram.The earth conductor is yellow/green. The connection to the electricity supply must be
made by a qualified person and followingthe regulations in force. When the appliance is to be installed
above a built-in oven,the two apliances must be connected separately, to make it easier to take the
appliances out and for electrical safety.
5
Recommended type of
connection lead
E
L1
LL
L2
N
N1
N
N2
CONNECTION DIAGRAM
Caution! Voltage of heating
elements 220-240V Caution! Inthe event
of any connection the safety Wire
must be connected tothe E terminal.
L1 N1 N2L2
• If the cable is damaged or to be replaced, the operation must be carried out the by a service agent or a suitably
qualified professional.
• If the appliance is being connected directly to the mains, an omnipolar circuit breaker must be installed with a minimum
opening of 3mm between contacts.
•The installer must ensure that the correct electrical connection has been made and that it is compliant with all
applicable standards and safety regulations.
•The cable must not be bent or compressed.
•The cable must be checked regularly and replaced by authorised technicians only.
This appliance is equipped with a five-pole cable suitable for electrical connection to alternating current
at the voltage and frequency indicated on the rating plate Look at the connection wiring diagram. The
earth conductor is yellow/green. The connection to the electricity supply must be made by a qualified
person and following the regulations in force.
When the appliance is to be installed above a built-in oven, the two appliances must be connected
separately. The supply cable must be so positioned that no point can reach a temperature 50°C higher
than ambient temperature. Also check that the supply system has an effective earth connection and
corresponds to the standards in force and that the breaker can be reached easily when the appliance is
installed.

WARNING
Close the cable clamp after making the
electrical connection. Close the terminal
board cover by twisting it down.
Recommended installation
Wood block
6
≥600
450
580
560
490
510
52
46
Ventilation slot ≥mm30
50mm MIN. Heat outlet
5mm MIN.
Brackets
OR
Screw
200
50
200
Front edge of worktop
Rear wall
The manufacturer refuses all responsibility if the standards in force are not respected.
TECHNICAL INFORMATION FOR INSTALLATION PERSONNEL:
This appliance must be installed only by authorised personnel and in accordance with the
regulations of Electricity authorities. The wall and bench surfaces must be capable of sustaining
temperatures of 95 degrees Celsius. All laminates, fixing adhesive and surfacing
materials should be certified suitable for this temperature. Do not install it in the unfireresistant
place (like curtain etc). When you operate, the manufacturer has no responsibility.
According to the picture as follows, cut the square hole in bench and place the built-in electric hob in it.
Your hob can be fitted to any worktop with a thickness of 40 to 50 mm.

Scraper for cleaning the hob
Inserting and fixing the hob
Before inserting the hob into the work surface, place the adhesive seal arount the underside edge of the
hob. It is important to fix this gasket evely, without gaps or overlapping to prevent liquids from seeping
underneath the hob.
1. Place the gasket around the bottom edge of the hobs as shown in the illustration overleaf.
2. Place the hob in the installation opening and push it down so that the hob is resting frimly on the cabinet.
3. Secure the hob in position using the fixing brackets supplied.
Secure the hob to the underside of the worktop using the fixings provided.Screw one end of the bracket
into the pre-drilled holes in the underside of the hob.The other end of the bracket should be located
underneath the worktop to secure the hob in position.
Note 1:
The minimum height of any adjacent units (including light pelmets) is 450mm, unless they are
manufactured from a material resistant to fire (steel, ceramic tiles for example).
Note 2:
No overhanging surface or rangehood and exhaust system are not permitted within 600mm above
burner tops.
Note 3: Leave at least 50 mm clearance between the base of the appliance and a combustibile
surface.Never leave the packing components (plastic bags, nails, foamed polystyrene, etc..) within the
reach of the children since they are a source of potential danger.
The hob has a special seal which prevents liquid from entering the cabinet .
Seal:
CLEANING AND MAINTENANCE
-Do not use cleaning products containing abrasive materials for the cleaning and maintenance of the
glass front panel.
-When cleaning do not use cleaning agents with a strong abbrasive effect,such as e.g. scouring
powders containing an abrasive, abrasive compounds, abrasive stones, pumice stones, wire brushes
and so on. They may scratch the hob surface, causing irreversible
damage.
-Large spillages that are firmly stuck to the hob can be removed by a special scraper (not include); but
be careful not to damage the ceramic hob frame when doing this.
Caution!
The sharp blade should always be protected by adjusting the cover(just push it with you thumb). Injuries
are possible so be careful when using this instrument-keep out of reach of children.
Appropriate light cleaning or washing products are recommended,such as e.g. any kind of liquids
emulsions for fat removal. Alternatively a solution of warm water with a little washing up liquid or
cleaning products for stainless steel sinks can be used.
7
seal
Worktop
Screw
Screw
Fixing bracket
Hob

Malfunction
Hob doesn't work
Eliminating guide
•Check the connection of wires
•Check the fuse and the current limit
There is some smoke
when it is working
•It is normal the first time you use.
•Clean the drail around the electric hob and the heating area.
The wire is damaged •Connect the nearest maintainance center to change the equipment parts.
Symbol Value Unit
Model identification
Type of hob
Number of electric cooking
zones and/or areas
Heating technology (induction
cooking zones and cooking
areas, radiant cooking zones,
solid plates)
For circular cooking zones or
area: diameter of useful surface
area per electric heated cooking
zone, rounded to the
nearest 5 mm
For non-circular cooking zones or
areas: lengthand widthof useful
surface area per electric heated
cooking zone or area, rounded to
the nearest 5 mm
Energy consumption per cooking
zone or area calculated per kg
Energy consumption for the
hob calculated per kg
Ø
L, W
--
--
--
--
ECelectric cooking
ECelectric hob
Built-in hob
4
Ø cooking zone I (front left) 18.0
Ø cooking zone II (front right) 14.5
Ø cooking zone III (rear left) 14.5
Ø cooking zone IV (rear right) 18.0
Ø cooking zone I (front left) :199.8
Ø cooking zone II (front right) :192.4
Ø cooking zone III (rear left) :192.4
Ø cooking zone IV (rear right) 191.1
N/A
cm
cm
Wh/kg
Wh/kg
Radiant cooking
zones
193.9
Erp
MALFUNCTION ELIMINATION
This appliance is labelled in compliance with European directive 2012/19/EC for Waste Electrical and Electronic
Equipment (WEEE). By ensuring that this appliance is disposed of correctly, you will help prevent any possible harm to
the environment and to human health which might otherwise be caused if disposed of in the wrong way.
The symbol on the product indicates that it may not be treated as normal household waste.
It should be taken to a collection point for the recycling of electrical and electronic goods.
This appliance requires specialist waste disposal. For further information regarding the treatment, recovery and
recycling of this product, please contact your local council, household waste disposal service or the shop where you
purchased the product.
For more detailed information about treatment, recovery and recycling of this product, please contact your local local
council, household waste disposal service or the shop where you purchased the product.
EKC 601-2.2
8
Table of contents
Languages:
Other Exquisit Hob manuals

Exquisit
Exquisit EKC301-5 User manual

Exquisit
Exquisit EKI801-2 Guide

Exquisit
Exquisit EKC630 Parts list manual

Exquisit
Exquisit EKI801-5 Operation manual

Exquisit
Exquisit EKI301-5 Operation manual

Exquisit
Exquisit EKI1.5 User manual

Exquisit
Exquisit EKI600-2 Guide

Exquisit
Exquisit EKI601-2 Guide

Exquisit
Exquisit EKI901-2 Guide

Exquisit
Exquisit EKC625 User manual