Exsys EX-1116HMVS User manual

Anleitung
Vers. 1.0 / 27.09.18
Manual
16 Port USB 3.1 (Gen1) Metal HUB
wit 1,5A power for eac port and
15KV ESD Surge Protection
EX-1116HMVS
16 Port USB 3.1 (Gen1) Metall HUB
mit 1,5A Strom pro Port und
15KV ESD Überspannungssc utz

2
EX-1116HMVS
1. Besc reibung······················································································ 3
2. Lieferumfang ······················································································ 3
3. Aufbau, Ansc lüsse & Jumper Einstellungen ···········································4-5
3.1 Aufbau······································································································ 4
3.2 Ansc lüsse······························································································4-5
3.3 Jumper Einstellungen ·················································································· 5
4. Hardware Installation············································································ 6
5. Treiber Installation ··············································································· 7
6. Reinigung ·························································································· 7
7. Tec nisc e Daten················································································ 8
8. Tec nisc e Zeic nung·········································································· 8
1. Description ························································································· 9
2. Extent of Delivery ················································································ 9
3. Layout, Connections & Jumper Settings ············································· 10-11
3.1 Layout ·····································································································11
3.2 Connections ························································································ 10-11
3.3 Jumper Settings ························································································11
4. Hardware Installation···········································································12
5. Driver Installation················································································13
6. Cleaning ···························································································13
7. Tec nical Information ··········································································14
8. Tec nical Drawing ··············································································14
Inhaltsverzeichnis
Index
© Copyrig t 2018 by EXSYS Vertriebs GmbH. All Rig ts Reserved
3
EX-1116HMVS Deutsch
© Copyrig t 2018 by EXSYS Vertriebs GmbH. All Rig ts Reserved
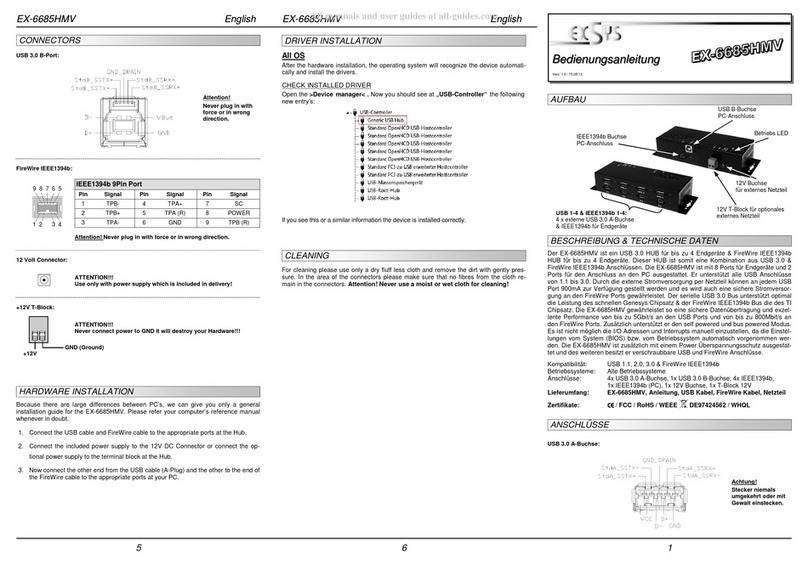
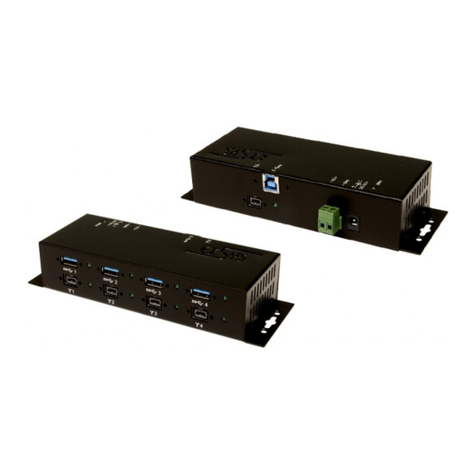
Der EX-1116HMVS ist ein USB 3.1 (Gen1) Metall HUB für bis zu 16 Endgeräte. Der Hub
ist mit 16 USB A-Buc sen für Endgeräte und 2 USB B-Buc se für den Ansc luss an die
PC‘s ausgestattet. Mittels des Kippsc alters wä lt man welc e USB B-Buc se auf die
angesc lossenen Endgeräte zugreift. Er unterstützt alle USB Ansc lüsse von 1.1 bis 3.1.
Jeder Ansc luss an der EX-1116HMVS ist zusätzlic versc raubbar. Durc die Stromver-
sorgung über den Terminal Block können an jedem Port 1,5A zur Verfügung gestellt wer-
den. Der USB 3.1 Bus unterstützt optimal die Leistung des sc nellen Genesys C ipsatz.
Der EX-1116HMVS gewä rleistet so eine sic ere Datenübertragung und exzellente Per-
formance von bis zu 5Gbit/s. Er unterstützt den Self Powered und Bus Powered Modus.
Zusätzlic ist der EX-1116HMVS mit einem 15KV ESD Überspannungssc utz ausgestat-
tet. Der EX-1116HMVS unterstützt die Norm IP30. Im Lieferumfang sind zwei DIN-Rail
Kits für die Installation auf einer Tragsc iene ent alten oder zwei Montagewinkel für die
Installation in einen 19“ Rack. Die DIN-Rail Kits werden jeweils mit zwei Sc rauben auf
der Rückseite festgesc raubt und die Montagewinkel werden jeweils mit drei Sc rauben
an der Seite festgesc raubt.
Merkmale:
• Kompatibel zu USB 1.1, 2.0, 3.0 & 3.1
• Bis zu 5Gbit/s
• Es werden alle Betriebssysteme unterstützt
• Alle Ansc lüsse sind versc raubbar
• 15KV ESD Überspannungssc utz
• Zerti iziert ür
Bevor Sie den EX-1116HMVS an I ren PC ansc ließen, überprüfen Sie bitte zuerst den
In alt der Lieferung:
• EX-1116HMVS
• USB 3.1 (Gen1) Kabel (versc raubbar)
• 2x DIN-Rail Kit (EX-6096)
• 2x Montagewinkel
• Anleitung
1. Beschreibung
2. Lie erum ang

4
Deutsch EX-1116HMVS
3.1 Au bau
3. Au bau, Anschlüsse & Jumper Einstellungen
© Copyrig t 2018 by EXSYS Vertriebs GmbH. All Rig ts Reserved
3.2 Anschlüsse
+12V - 24V T-Block:
+12V - 24V GND (Ground)
ACHTUNG!!!
Schließen Sie niemals Strom an Ground an,
dadurch kann Ihre Hardware zerstört werden!!!
10x USB 3.1 (Gen1)
Downstream A-Buc se
2x USB 3.1 (Gen1)
Upstream B-Buc se
Betriebs LED
12-24V T-Block
für optionales
externes Netzteil
Achtung!
Stecker niemals
umgekehrt oder mit
Gewalt einstecken.
USB 3.1 (Gen1) A-Buchse:
StdB_SSTX -
StdB_SSTX+
GND_DRAIN
VCC
StdB_SSTX +
StdB_SSTX -
D+D- GND
Kippsc alter zur
Auswa l der Upstream
USB B-Buc se

5
EX-1116HMVS Deutsch
3. Au bau, Anschlüsse & Jumper Einstellungen
© Copyrig t 2018 by EXSYS Vertriebs GmbH. All Rig ts Reserved
3.2 Anschlüsse
USB 3.1 (Gen1) B-Buchse:
D-
GND
StdB_SSTX -
StdB_SSTX +
GND_DRAIN
StdB_SSTX+
StdB_SSTX -
D+
VBus
Achtung!
Stecker niemals
umgekehrt oder mit
Gewalt einstecken.
3.3 Jumper Einstellungen
Die EX-1116HMVS wird mit der Einstellung Self-Power ausgeliefert. Sie aben aber
die Möglic keit die EX-1116HMVS mit Bus-Power zu versorgen. Dafür müssen Sie zu
erst das Ge äuse mit den zwei Sc rauben auf den Seiten öffnen. Nun müssen Sie
den Jumper JP1 von DIS (Disable) auf ENA (Enable) setzen. Sie e nac folgende
Abbildung.
JP1
ENA DIS

6
Deutsch EX-1116HMVS
© Copyrig t 2018 by EXSYS Vertriebs GmbH. All Rig ts Reserved
4. Hardware Installation
Beac ten Sie bitte die folgenden Installations inweise. Da es große Untersc iede zwi-
sc en PC‘s gibt, können wir I nen nur eine generelle Anleitung zum Einbau der EX-
1116HMVS geben. Bei Unklar eiten alten Sie sic bitte an die Bedienungsanleitung
I res Computersystems.
1. Installieren Sie die EX-1116HMVS an die Wand oder mit dem mitgelieferten DIN-
Rail Kit auf einer Tragsc iene oder mit den Wandmontagewinkel in einem 19“ Rack.
2. Verbinden Sie das mitgelieferte USB 3.1(Gen1) Kabel mit dem von I nen ausgewä l-
ten USB 3.0/3.1(Gen1) Upstream B-Ansc luss des Hubs und stellen Sie den Kipp-
sc alter in die Position des aktiven USB B-Ansc lusses.
3. Sc ließen Sie jetzt den Stromansc luss des optionalen Netzteils an den Terminal
Block des Hubs an und stecken Sie den Netzstecker des Netzteils in eine Steckdose.
4. Verbinden Sie nun das andere Ende (A-Ansc luss) des mitgelieferten USB 3.0/3.1
(Gen1) Kabels mit der USB A-Buc se an I rem PC.
Löc er für
Wandmontage
DIN-Rail Clip Montage an
Tragsc iene

7
EX-1116HMVS Deutsch
© Copyrig t 2018 by EXSYS Vertriebs GmbH. All Rig ts Reserved
6. Reinigung
5. Treiber Installation
Alle Betriebssysteme
Nac Absc luss der Hardwareinstallation erkennt das Betriebssystem den EX-
1116HMVS automatisc und installiert diesen.
ÜBERPRÜFEN DES INSTALLIERTEN TREIBER
Öffnen Sie den >Geräte-Manager<. Jetzt müssten Sie unter „USB-Controller“ folgen-
de Einträge se en:
Sind diese oder ä nlic e Einträge vor anden, ist der USB Hub ric tig installiert.
Zur Reinigung des Gerätes verwenden Sie bitte aussc ließlic ein trockenes nic t fa-
serndes Tuc und entfernen Sie die Versc mutzung mit leic tem Druck. Im Bereic der
Ansc lüsse bitte darauf Ac ten, dass keine Fasern des Tuc s in der Buc se interlas-
sen werden. Verwenden Sie bitte zu Reinigung in keinem Fall ein euchtes oder
nasses Tuch!

8
Deutsch EX-1116HMVS
© Copyrig t 2018 by EXSYS Vertriebs GmbH. All Rig ts Reserved
8. Technische Zeichnung
7. Technische Daten
Chip-Set: Genesys
Datentrans er-Rate: 5Gbit/s
Anschlüsse: 16x USB 3.1 (Gen1) A-Buc se, 2x USB 3.1 (Gen1)
B-Buc se, 1x Terminal Block 12-24V
Hardwaresystem: USB 1.1, 2.0, 3.0 & 3.1
Betriebssystem: Alle Betriebssysteme
Betriebstemperatur: 0° bis 55° Celsius
Lagertemperatur: -20° bis 85° Celsius
Rel. Lu t euchtigkeit: 5% bis 95%
Stromversorgung: +12 bis +24 Volt
Abmessung: 308,00 x 130,00 x 44,00 mm
Gewicht: 1800g

9
EX-1116HMVS English
© Copyrig t 2018 by EXSYS Vertriebs GmbH. All Rig ts Reserved
T e EX-1116HMVS is a plug & play ig -speed USB 3.1 (Gen1) metal ub for 16 USB
devices. T e EX-1116HMVS provides 16 USB A-Ports for devices and 2 USB B-Ports
for t e PC’s. Wit t e toggle switc you select w ic USB B-Port accesses to t e
connected devices. It supports all USB connections from 1.1 to 3.1. All ports can fix wit
screw lock. Via a external power supply it is possible to provide a maximum of 1,5A on
eac USB port. T e EX-1116HMVS design fully utilize t e Genesys c ipset, w ic rep-
resents t e latest in SuperSpeed USB interface tec nology. It uses data transfer rates
up to 5Gbit/s. It provides a secure and very ig data transfer on eac single port. T e
EX-1116HMVS support t e Self Powered and Bus Powered mode. In addition t e EX-
1116HMVS is equipped wit an 15KV ESD surge protection. T e EX-1116HMVS is
IP30 compliant. T e two DIN-Rail Kits and t e two Mounting Angles are included in t e
extent of delivery for installation in a 19” Rack. T e DIN-Rail Kits will be tig tened wit
two screwed on t e back and t e Mounting Angles will be tig tened wit t ree screws
on t e side of t e EX-1116HMVS.
Features:
• Compatible for USB 1.1, 2.0, 3.0 & 3.1
• Up to 5Gbit/s
• All Operating Systems are supported
• All ports are Screw Lock
• 15KV ESD Surge Protection
• Certi icate or
1. Description
Before you connect t e EX-1116HMVS to your PC, you s ould first c eck t e contents
of t e delivery:
• EX-1116HMVS
• USB 3.1 (Gen1) Cable (screw lock)
• 2x DIN-Rail Kit (EX-6096)
• 2x Mounting Angles
• Manual
2. Extent o Delivery

10
English EX-1116HMVS
© Copyrig t 2018 by EXSYS Vertriebs GmbH. All Rig ts Reserved
3.1 Layout
3. Layout, Connections & Jumper Settings
3.2 Connections
+12V - 24V T-Block:
+12V - 24V GND (Ground)
ATTENTION!!!
Never connect power to GND, it will destroy
your Hardware!!!
16x USB 3.1 (Gen1)
Downstream A-Port
2x USB 3.1 (Gen1)
Upstream B-Port
Power LED
12-24V T-Block
for optional externeal
Power Supply
Attention!
Never plug in with orce
or in wrong direction.
USB 3.1 (Gen1) A-Port:
StdB_SSTX -
StdB_SSTX+
GND_DRAIN
VCC
StdB_SSTX +
StdB_SSTX -
D+D- GND
Toggle Switc to
select t e Upstream
USB B-Port

11
EX-1116HMVS English
© Copyrig t 2018 by EXSYS Vertriebs GmbH. All Rig ts Reserved
3. Layout, Connections & Jumper Settings
3.2 Connections
USB 3.1 (Gen1) B-Port:
D-
GND
StdB_SSTX -
StdB_SSTX +
GND_DRAIN
StdB_SSTX+
StdB_SSTX -
D+
VBus
3.3 Jumper Settings
T e EX-1116HMVS comes wit t e setting Self-Power. You also ave t e possibility
t e EX-1116HMVS to supply Bus-Power. For t is you open t e case wit t e two
screws on bot sides. T en you must set t e jumper JP1 from DIS (Disable) to ENA
(Enable). See t e following picture.
Attention!
Never plug in with orce
or in wrong direction.
JP1
ENA DIS

12
English EX-1116HMVS
© Copyrig t 2018 by EXSYS Vertriebs GmbH. All Rig ts Reserved
4. Hardware Installation
Because t ere are large differences between PC’s, we can give you only a general in-
stallation guide for t e EX-1116HMVS. Please refer your computer’s reference manual
w enever in doubt.
1. Install t e EX-1116HMVS to t e wall, DIN-Rail or 19” Rack if required.
2. Connect t e USB 3.1(Gen1) cable wit t e selected USB 3.0/3.1(Gen1) Upstream B-
Port at t e EX-1116HMVS and set t e toggle switc to t e position of t e USB B-Port.
3. Connect t e optional power supply to t e Terminal Block at t e Hub.
4. Now connect t e ot er end from t e USB 3.1(Gen1) cable (A-Plug) to t e USB
A-Port at your PC.
Holes for
Wall Installation
DIN-Rail Clip Installation to
DIN-Rail

13
EX-1116HMVS English
© Copyrig t 2018 by EXSYS Vertriebs GmbH. All Rig ts Reserved
6. Cleaning
5. Driver Installation
All Operating Systems
After t e ardware installation t e OS will recognize t e device automatically and install
t e drivers.
CHECK INSTALLED DRIVER
Open t e >Device manager<. Now you s ould see at „USB-Controller“ t e following
new entry's:
If you see t is or a similar information t e device is installed correctly.
For cleaning please use only a dry fluff less clot and remove t e dirt wit gently pres-
sure. In t e area of t e connectors please make sure t at no fibres from t e clot re-
main in t e connectors. Attention! Never use a moist or wet cloth or cleaning!

14
English EX-1116HMVS
© Copyrig t 2018 by EXSYS Vertriebs GmbH. All Rig ts Reserved
Chip-Set: Genesys
Data Trans er Rate: 5Gbit/s
Connectors: 16x USB 3.1 (Gen1) A-Port, 2x USB 3.1 (Gen1) B-Port,
1x Terminal Block 12-24V
Hardware System: USB 1.1, 2.0, 3.0 & 3.1
Operating System: All Operating Systems
Operating Temperature: 32°F to 131°Fa ren eit
Storage Temperature: -40°F to 185°Fa ren eit
Rel. Humidity: 5% to 95%
Power: +12 to +24 Volt
Size: 308,00 x 130,00 x 44,00 mm
Weight: 1800g
7. Technical In ormation
8. Technical Drawing


Other manuals for EX-1116HMVS
1
Table of contents
Languages:
Other Exsys Switch manuals

Exsys
Exsys EX-1181 User manual

Exsys
Exsys EX-1134-2 User manual

Exsys
Exsys EX-1178S User manual

Exsys
Exsys EX-1189HMVS-2 User manual

Exsys
Exsys EX-1167 User manual

Exsys
Exsys EX-11214HMVS User manual

Exsys
Exsys EX-62025 User manual

Exsys
Exsys EX-1163HMS-WT User manual

Exsys
Exsys EX-1178 User manual

Exsys
Exsys EX-1189HMVS-3 User manual

Exsys
Exsys EX-1250V User manual

Exsys
Exsys EX-1144HMVS User manual

Exsys
Exsys EX-1163 User manual

Exsys
Exsys EX-1144HMVS User manual

Exsys
Exsys EX-1126 User manual

Exsys
Exsys EX-1184HMV User manual

Exsys
Exsys EX-1112HMS User manual

Exsys
Exsys EX-1183HMVS-2W User manual

Exsys
Exsys EX-1144HMVS User manual

Exsys
Exsys EX-1177HMVS User manual