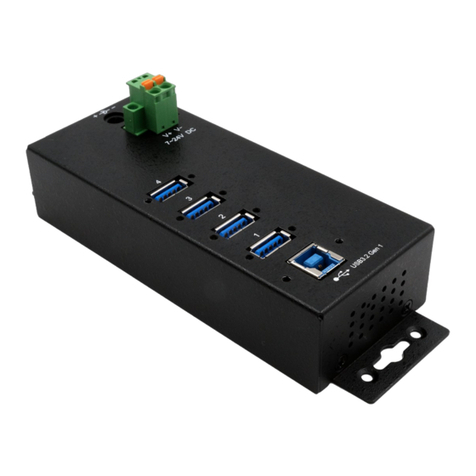
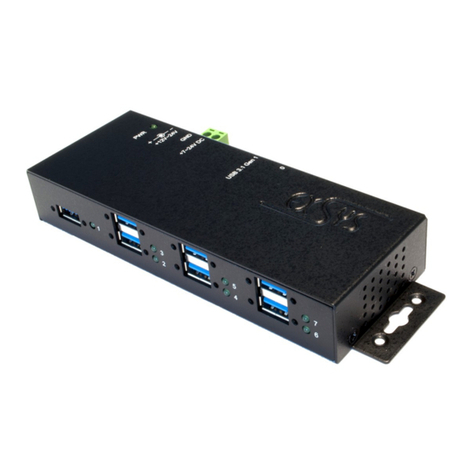
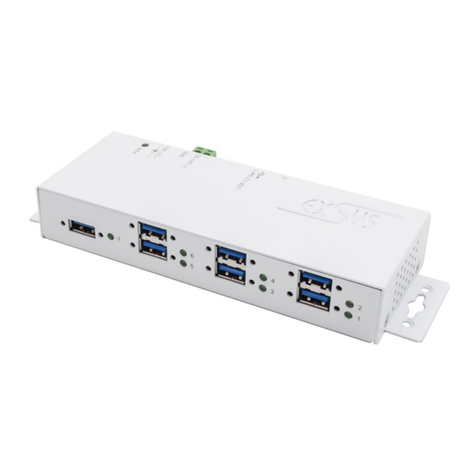
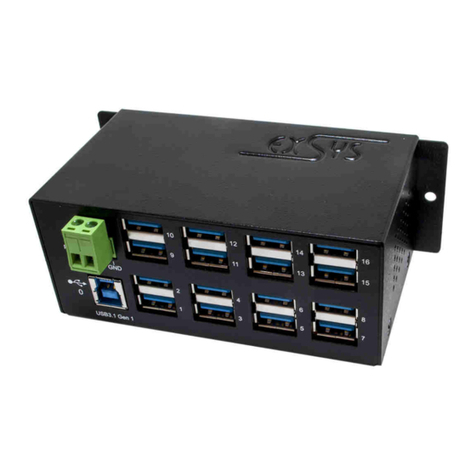
Exsys EX-1184HMV User manual

g
a
l
Manuale
EX
-1184HM
V
HUB 4 Porte USB 3.1 (Gen1) in
Metallo,
con blocco a vite
4Port USB 3.1 (Gen1) Metal
HUB
,
screw
lock
Manu Vers. 1.0 /21.02.18

EX-1184HMV
2
INDICE
1.
Descrizione ·······················································································
3
2. Confezione ···
····················································································
3
3. Layout, connessioni e impostazioni dei Jumper
·········································
4-6
3.1
Struttura······································································································
4
3.2 Attacchi
······························································································
4-5
3.3 Impostazioni Jumper
···················································································
6
4.
Installazione
Hardware
···········································································
7
5. Installazione Driver ············
··································································
7
6. Pulizia ·······
·························································································
7
7. Dati Tecnici ············
··········································································
8
8. Disegno Tecnico ············
······································································
8
Index
1. Description
·························································································
9
2. Extentof Delivery
················································································
9
3. Layout, Connections &Jumper Settings
·············································
10-12
3.1 Layout
·····································································································
10
3.2 Connections
························································································
10-11
3.3 JumperSettings
························································································
12
4. Hardware
Installation···········································································
13
5. Driver
Installation················································································
13
6. Cleaning
···························································································
13
7. TechnicalInformation
··········································································
14
8. TechnicalDrawing
··············································································
14
©Copyright2018by EXSYSVertriebsGmbH.All RightsReserve
EX-1184HMV
Italiano
3
1. Descrizione
L’EX-1184HMV è un HUB con struttura in metallo USB 3.1 (Gen1) per aggiungere un
massimo di 4 dispositivi. L'HUB è dotato di 4 porte IN/OUT e 1 porta per il collegamento al
PC. Supporta tutte le porte USB da 1.1 a 3.1. Inoltre è possibile avvitare ogni dispositivo alla
porta UBS della EX-1184HMV. L'alimentazione viene fornita mediante un alimentatore
esterno da 12V oppure mediante la morsettiera (T-Block) e può fornire 900 mA a ciascuna
porta. Il bus USB 3.1 supporta in modo ottimale le prestazioni del veloce chipset Genesys.
EX-1184HMV garantisce una trasmissione dati sicura e prestazioni eccellenti fino a 5 Gbit/s.
Supporta la modalità Auto Powered e Bus Powered.
Caratteristiche:
Compatibile con USB 1.1, 2.0, 3.0 & 3.1
Fino a 5Gbit/s
Tutti i sistemi operativi sono supportati Tutte le
connessioni possono essere avvitate
Certificazioni per:
2. Contenuto
Prima di collegare EX-1184HMV al PC, controlla il contenuto della consegna:
•EX-1184HMV
•Alimentatore (12V/3A)
•Cavo USB 3.1 (Gen1)(avvitabile)
•Manuale
©Copyright2018by EXSYSVertriebsGmbH.All RightsReserved

4
Italiano
EX-1184HMV
3. Layout, Connessione & Impostazione Jumper
3.1 Layout
1x USB 3.1 (Gen1)
Upstream B-
Femmina
Led di funzionamento
Connessione a 12V DC
Alimentatore incluso
7-24VT-Blockper
alimentazione
opzionale
4x USB 3.1 (Gen1)
DownstreamA-
Femmina
Status LED
per ogni porta
3.2 Attacchi
+7V - 24VT-Block:
Attenzione!!!
Non collegare mai l'alimentazione a terra (GND),
questo può distruggere il tuo hardware !!!
+7V - 24VGND (Ground)
12VPresa di Corrente:
ATTENZIONE !!!
Usare solo con alimentatore incluso!!!
©Copyright2018by EXSYSVertriebsGmbH.All RightsReserved

5
EX-1184HMV
Italiano
3. Layout, Attacchi & Impostazione Jumper
3.2 Attacco
USB 3.1 (Gen1) A-Porta:
StdB_SSTX +
StdB_SSTX -
GND_DRAIN
StdB_SSTX+
StdB_SSTX -
Attenzione!
Non collegare mai con
forza o nella direzione
sbagliata
VCC D-
GND
D+
USB 3.1 (Gen1) B-Porta:
GND_DRAIN
StdB_SSTX +
StdB_SSTX -
D-
D+
StdB_SSTX+
StdB_SSTX -
VBus
GND
Attenzione!
Non collegare mai con
forza o nella direzione
sbagliata
©Copyright2018by EXSYSVertriebsGmbH.All RightsReserved

6
Italiano
EX-1184HMV
SELF
BUS
3. Layout, Attacchi & Impostazione Jumper
3.3 Impostazione Jumper
EX-1184HMV viene fornito con l'impostazione Bus Power. Ma hai la possibilità
cambiare l’uscita del’EX-1184HMV. Per fare questo devi prima aprire l'alloggiamento
con le quattro viti sui lati. Ora è necessario impostare il ponticello JP1 da BUS (Bus-
Powered) a SELF (Self-Powered). Vedi figura.
JP1
©Copyright2018by EXSYSVertriebsGmbH.All RightsReserved

7
EX-1184HMV
Italiano
4. Installazione Hardware
Si prega di osservare le seguenti istruzioni d’installazione. Poiché ci sono grandi
differenze tra i PC,in questo caso possiamo solo darti una guida in generale per
l'installazione della EX-1184HMV. In caso di domande, fare riferimento alle istruzioni
d'uso (manuale) del computer.
1. Collegare il cavo USB in dotazione alla presa USB B dell'HUB.
2. Collegare l'alimentatore incluso al connettore CC sull'hub o collegare l'alimentatore
opzionale alla morsettiera (T-BLock) dell'hub.
3. Ora collega l'altra estremità (presa A) del cavo USB in dotazione alla presa A del PC.
5. Installazione Driver
Tutti i sistemi operativi
Al termine dell'installazione dell'hardware, il sistema operativo rileva L’EX-1184HMV
Automaticamente e installa questo.
CONTROLLARE IL DRIVER INSTALLATO
Apri> Gestione dispositivi <. Ora dovresti vedere la seguente voce sotto "USB Controller":
Se queste voci o simili sono presenti, l'Hub USB è installato correttamente.
6. Pulizia
Per pulire il dispositivo, utilizzare solo un panno asciutto non abrasivo e rimuovere lo
sporco con una leggera pressione. Assicurarsi che nell'area delle connessioni non
rimangano fibre di tessuto. Non usare mai un panno umido o bagnato per la pulizia!
©Copyright2018by EXSYSVertriebsGmbH.All RightsReserved

8
Italiano
EX-1184HMV
7. Dati Tecnici
Chip-Set: Genesys
Trasferimento dati:5Gbit/s
Attacchi :4x USB 3.1(Gen1)A-Femmina,1x USB 3.1(Gen1)B-Femmina
1x TerminalBlock 7-24V, 1x 12VDC
Sistema Hardware: USB 1.1, 2.0, 3.0 &3.1
Sistema Operativo :tutti i S.O.
Temperatura d’esercizio :0° sino 55°Celsius
Temperatura di conservazione :-20°sino 85° Celsius
Umidità :5% bis 95%
Alimentazione :+7 fino a+24 Volt (con morsettiera) &+12 Volt Alimentatore
Dimensione : 178,40 x58,50 x24,11 mm
Peso :850g
8. Disegno Tecnico
©Copyright2018by EXSYSVertriebsGmbH.All RightsReserved

9
EX-1184HMV
English
1. Description
The EX-1184HMV is aplug &playhigh-speedUSB 3.1 (Gen1)metal hubfor 4USB
devices. The EX-1184HMV provides4ports for USB devices and 1uplink port for PC. It
supports allUSB connections from 1.1 to 3.1. All ports can fix with screw lock. Via a
externalpower supply it is possible to provideamaximum of 900mA on each USB port.
The EX-1184HMV design fully utilize the Genesys chipset, whichrepresents the latest
in SuperSpeed USB interface technology. It uses data transfer rates up to 5Gbit/s. It
providesasecure andvery high data transfer on each single port. The EX-1184HMV
support the Self Powered and Bus Powered mode.
Features:
Compatible for USB 1.1, 2.0, 3.0 &3.1
Up to 5Gbit/s
All OperatingSystems are supported
All ports are Screw Lock
Certificate for
2. Extent of Delivery
Before you connectthe EX-1184HMV to yourPC, you should first check the contents of
the delivery:
EX-1184HMV
Power Supply(12V/3A)
USB 3.1 (Gen1)Cable (screw lock)
Manual
©Copyright2018by EXSYSVertriebsGmbH.All RightsReserved

English
EX-1184HMV
10
3. Layout, Connections & Jumper Settings
3.1 Layout
1x USB 3.1 (Gen1)
Upstream B-Port
Power LED
12VDC Connector for
includedPower Supply
7-24VT-Block
for optionalexternal
Power Supply
4x USB 3.1 (Gen1)
DownstreamA-Port Status LED
for each Port
3.2 Connections
+7V - 24VT-Block:
ATTENTION!!
Neverconnectpower to GND,it will destroy
your Hardware!!!
+7V - 24VGND (Ground)
12VConnector:
ATTENTION!!!
Useonly with Power Supplywhichis included in delivery!
©Copyright2018by EXSYSVertriebsGmbH.All RightsReserved

EX-1184HMV
English
11
3. Layout, Connections & Jumper Settings
3.2 Connections
USB 3.1 (Gen1) A-Port:
StdB_SSTX +
StdB_SSTX -
GND_DRAIN
StdB_SSTX+
StdB_SSTX -
Attention!
Neverplug in with force
or in wrong direction.
VCC D-
GND
D+
USB 3.1 (Gen1) B-Port:
GND_DRAIN
StdB_SSTX +
StdB_SSTX -
D-
StdB_SSTX+
StdB_SSTX -
VBus
Attention!
Neverplug in with force
or in wrongdirection.
D+ GND
©Copyright2018by EXSYSVertriebsGmbH.All RightsReserved

English
EX-1184HMV
12
SELF
BUS
3. Layout, Connections & Jumper Settings
3.3 Jumper Settings
The EX-1184HMV willbe delivered with the settingBus-Power. But you have the pos-
sibility to cutthe power at thedata line. For thisyou open the case with the four
screws on both sides. Thenyou must set the jumper JP1 from BUS (Bus-Powered)to
SELF (Self-Powered). See the followingpicture.
JP1
©Copyright2018by EXSYSVertriebsGmbH.All RightsReserved

EX-1184HMV
English
13
Power LED
+7V - 24VT-Block:
4. Hardware Installation
Because there are large differences betweenPC’s, we cangive you onlyageneral in-
stallation guide. Please refer yourcomputer’s reference manualwhenever in doubt.
1. Connect the USB cableto the USB B-Port at the Hub.
2. Connect the included power supplyto the DC connector at the hub or connectthe
optionalpower supplyinto the terminalblock at the Hub.
3. Now connectthe other end from the USB cable(A-Plug)to the A-Port at yourPC.
5. Driver Installation
All Operating Systems
After the hardware installationthe OS willrecognize the device automaticallyandinstall
the drivers.
CHECKINSTALLED
DRIVER
Openthe>Devicemanager<. Now you shouldsee at „USB-Controller“thefollowing
newentry's:
If you see thisor asimilarinformationthedevice is installedcorrectly.
6. Cleaning
For cleaningpleaseuseonlyadry fluff less cloth and remove the dirt with gently pres-
sure. In the area of the connectors pleasemake sure thatno fibres from the cloth re-
mainin the connectors. Attention! Never use amoist or wet cloth for cleaning!
©Copyright2018by EXSYSVertriebsGmbH.All RightsReserved

English
EX-1184HMV
14
7. Technical Information
Chip-Set: Genesys
Data Transfer Rate: 5Gbit/s
Connectors: 4x USB 3.1 (Gen1)A-Port, 1x USB 3.1 (Gen1)B-Port,
1x TerminalBlock 7-24V, 1x 12VConnector
Hardware System: USB 1.1, 2.0, 3.0 &3.1
Operating System:All OperatingSystems
Operating Temperature: 32°F to 131°Fahrenheit
Storage Temperature: -40°F to 185°Fahrenheit
Rel. Humidity: 5% to 95%
Power: +7 bis +24 Volt &+12 Volt
Size:178,40 x58,50 x24,11 mm
Weight: 850g
8. Technical Drawing
©Copyright2018by EXSYSVertriebsGmbH.All RightsReserved

Other manuals for EX-1184HMV
1
Table of contents
Languages:
Other Exsys Switch manuals

Exsys
Exsys EX-1195HMS User manual

Exsys
Exsys EX-1189HMVS-3W User manual

Exsys
Exsys EX-1183HMVS-2W User manual

Exsys
Exsys EX-1163HM User manual

Exsys
Exsys EX-1187HMVS User manual

Exsys
Exsys EX-1167 User manual

Exsys
Exsys EX-1180HMS User manual

Exsys
Exsys EX-1163 User manual

Exsys
Exsys EX-1137 User manual

Exsys
Exsys EX-1183HMVS User manual

Exsys
Exsys EX-1181HMS User manual

Exsys
Exsys EX-1113HMS User manual

Exsys
Exsys EX-6128 User manual

Exsys
Exsys EX-1144HMVS User manual

Exsys
Exsys EX-1182VIS User manual

Exsys
Exsys EX-1191HMVS-PD User manual

Exsys
Exsys EX-1186HMVS User manual

Exsys
Exsys EX-1178-W User manual

Exsys
Exsys EX-6685HMV User manual

Exsys
Exsys EX-1113HMS User manual