2
PS 1220EB eBUS Power Supply and Distribution Block • Installation Guide (Continued)
© 2016 Extron Electronics All rights reserved. All trademarks mentioned are the property of their respective owners. www.extron.com
Extron Headquarters
+1.800.633.9876 (Inside USA/Canada Only)
Extron USA - West Extron USA - East
+1.714.491.1500 +1.919.850.1000
+1.714.491.1517 FAX +1.919.850.1001 FAX
Extron Europe
+800.3987.6673
(Inside Europe Only)
+31.33.453.4040
+31.33.453.4050 FAX
Extron Asia
+65.6383.4400
+65.6383.4664 FAX
Extron Japan
+81.3.3511.7655
+81.3.3511.7656 FAX
Extron India
1800.3070.3777 (Inside India Only)
+91.80.3055.3777
+91.80.3055.3737 FAX
Extron Middle East
+971.4.299.1800
+971.4.299.1880 FAX
Extron Australia
+61.8.8351.2188
+61.8.8351.2511 FAX
Extron China
+86.21.3760.1568
+86.21.3760.1566 FAX
Safety Instructions
68-2218-50
Rev. B
02 16
Safety Instructions • English
This symbol is intended to alert the user of
important operating and maintenance (servicing)
instructions in the literature provided with the
equipment.
This symbol is intended to alert the user of the
presence of uninsulated dangerous voltage
within the product enclosure that may present a
risk of electric shock.
Cautions and General Guidelines
Read instructions —Read and understand all safety and operating
instructions before using the equipment.
Retain instructions • The safety instructions should be kept for future
reference.
Follow warnings —Follow all warnings and instructions marked on the
equipment or in the user information.
Avoid attachments —Do not use tools or attachments that are not
recommended by the equipment manufacturer because they may
be hazardous.
Avoid water — Do not use this or other electrical equipment near water.
Clean the device with a dry cloth only.
Warnings
Power and electrical safety
CAUTION:
• To reduce the risk of fire or electric shock, do not expose this
apparatus to rain or moisture. This apparatus shall not be
exposed to dripping or splashing and no objects filled with
liquids, such as vases shall be placed on the apparatus.
• The PS1220EB is a Class I product, which must be
connected only to a mains socket outlet with a protective
earthing (grounding) connection.
ATTENTION :
• Afin de réduire les risques d’incendie ou de choc électrique,
protégez cet appareil de la pluie ou de l’humidité. Cet
appareil doit être conservé à l’abri des éclaboussures et
des projections, et aucun objet contenant un liquide, tel
qu’un vase, ne doit être posé sur l’appareil.
• Cet appareil est un produit de Classe1. Ce produit doit
être connecté à une prise femelle secteur équipée d’une
connexion de mise à la terre.
CAUTION:
Power sources • This equipment should be operated only
from the power source indicated on the product. This
equipment is intended to be used with a main power
system with a grounded (neutral) conductor. The third
(grounding) pin is a safety feature, do not attempt to
bypass or disable it.
Power disconnection • To remove power from the equipment
safely, remove all power cords from the rear of the
equipment, or the desktop power module (if detachable),
or from the power source receptacle (wall plug).
ATTENTION :
Les sources d’alimentation • Ce matériel ne devrait être alimenté
qu’à partir de la source d’alimentation stipulée sur le
produit. Ce matériel est prévu pour être relié à un circuit
d’alimentation général doté d’un conducteur (neutre) mis
à la terre. La troisième broche (de terre) est un composant
de sécurité. N’essayez pas de l’éviter ou de la désactiver.
Déconnection de l’alimentation • Pour déconnecter le
matériel de sa source d’alimentation en toute sécurité,
débranchez tous les cordons d’alimentation de l’arrière
du matériel ou débranchez l’adaptateur secteur (si
débranchable) ou de la prise secteur (prise murale).
Power plug as a disconnection device — The mains plug is used as
the disconnect device and shall remain readily operable. In other
words, it the power plug must be accessible and easy to unplug
from the power source.
When to unplug the unit • Unplug this device during lightning storms
or when it will be unused for long periods. Unplug the device
before servicing.
Power cord protection — Power cords should be routed so that they
are not likely to be stepped on or pinched by items placed upon or
against them. Protect the cord particularly at plugs, convenience
receptacles, and the points where they exit the devices.
Polarized and grounding plugs — Do not defeat the safety purpose
of the polarized or grounding type plug. A polarized plug has two
blades with one wider than the other. A grounding type plug has
two blades and a third grounding prong. The wide blade or the
third prong are provided for your safety. If the provided plug does
not fit into your outlet, consult an electrician to replace the obsolete
outlet with a safer one.
Servicing — Refer all servicing to qualified service personnel. Servicing is
required when the apparatus has been damaged in any way, such
as when the power-supply cord or plug is damaged, liquid has been
spilled into or objects have fallen into the device, or when the device
has been exposed to rain or moisture, does not operate normally,
or has been dropped. To prevent the risk of shock, do not attempt
to service this equipment yourself because opening or removing
covers may expose you to dangerous voltage or other hazards.
Ventilation, mounting, and temperature
Ventilation slots and openings — If the equipment has slots or holes
in the enclosure, these are provided to prevent overheating of
sensitive components inside. Do not block any ventilation opening,
as this may cause the product to malfunction. Install the device in
accordance with the manufacturer’s instructions.
Temperature — Do not install electronic devices near any heat sources
such as radiators, heat registers, stoves, or other apparatus
(including amplifiers) that produce heat.
Consignes de Sécurité •
Français
Ce symbole sert à avertir l’utilisateur que la
documentation fournie avec le matériel contient
des instructions importantes concernant
l’exploitation et la maintenance (réparation).
Ce symbole sert à avertir l’utilisateur de la
présence dans le boîtier de l’appareil de tensions
dangereuses non isolées posant des risques
d’électrocution.
Attention
Lire les instructions —Prendre connaissance de toutes les consignes
de sécurité et d’exploitation avant d’utiliser le matériel.
Conserver les instructions —Ranger les consignes de sécurité afin de
pouvoir les consulter à l’avenir.
Respecter les avertissements —Observer tous les avertissements
et consignes marqués sur le matériel ou présentés dans la
documentation utilisateur.
Eviter les pièces de fixation —Ne pas utiliser de pièces de fixation
ni d’outils non recommandés par le fabricant du matériel car cela
risquerait de poser certains dangers.
Avertissement
Alimentations —Ne faire fonctionner ce matériel qu’avec la source
d’alimentation indiquée sur l’appareil. Ce matériel doit être utilisé
avec une alimentation principale comportant un fil de terre (neutre).
Le troisième contact (de mise à la terre) constitue un dispositif de
sécurité : n’essayez pas de la contourner ni de la désactiver.
Déconnexion de l’alimentation —Pour mettre le matériel hors tension
sans danger, déconnectez tous les cordons d’alimentation de
l’arrière de l’appareil ou du module d’alimentation de bureau (s’il
est amovible) ou encore de la prise secteur.
Protection du cordon d’alimentation —Acheminer les cordons
d’alimentation de manière à ce que personne ne risque de marcher
dessus et à ce qu’ils ne soient pas écrasés ou pincés par des objets.
Réparation-maintenance —Faire exécuter toutes les interventions
de réparation-maintenance par un technicien qualifié. Aucun des
éléments internes ne peut être réparé par l’utilisateur. Afin d’éviter
tout danger d’électrocution, l’utilisateur ne doit pas essayer de
procéder lui-même à ces opérations car l’ouverture ou le retrait des
couvercles risquent de l’exposer à de hautes tensions et autres
dangers.
Fentes et orifices —Si le boîtier de l’appareil comporte des fentes ou
des orifices, ceux-ci servent à empêcher les composants internes
sensibles de surchauffer. Ces ouvertures ne doivent jamais être
bloquées par des objets.
•
—
—
—
—
—
—
—
—
—
Sicherheitsanleitungen •
Deutsch
Dieses Symbol soll dem Benutzer in der im
Lieferumfang enthaltenen Dokumentation
besonders wichtige Hinweise zur Bedienung und
Wartung (Instandhaltung) geben.
Dieses Symbol soll den Benutzer darauf
aufmerksammachen, daß im Inneren des
Gehäuses dieses Produktes gefährliche
Spannungen, die nicht isoliert sind und die
einen elektrischen Schock verursachen können,
herrschen.
Achtung
Lesen der Anleitungen — Bevor Sie das Gerät zum ersten Mal
verwenden, sollten Sie alle Sicherheits-und Bedienungsanleitungen
genau durchlesen und verstehen.
Aufbewahren der Anleitungen — Die Hinweise zur elektrischen
Sicherheit des Produktes sollten Sie aufbewahren, damit Sie im
Bedarfsfall darauf zurückgreifen können.
Befolgen der Warnhinweise — Befolgen Sie alle Warnhinweise und
Anleitungen auf dem Gerät oder in der Benutzerdokumentation.
Keine Zusatzgeräte — Verwenden Sie keine Werkzeuge oder
Zusatzgeräte, die nicht ausdrücklich vom Hersteller empfohlen
wurden, da diese eine Gefahrenquelle darstellen können.
Vorsicht
Stromquellen — Dieses Gerät sollte nur über die auf dem Produkt
angegebene Stromquelle betrieben werden. Dieses Gerät wurde für
eine Verwendung mit einer Hauptstromleitung mit einem geerdeten
(neutralen) Leiter konzipiert. Der dritte Kontakt ist für einen
Erdanschluß, und stellt eine Sicherheitsfunktion dar. Diese sollte
nicht umgangen oder außer Betrieb gesetzt werden.
Stromunterbrechung — Um das Gerät auf sichere Weise vom Netz zu
trennen, sollten Sie alle Netzkabel aus der Rückseite des Gerätes,
aus der externen Stomversorgung (falls dies möglich ist) oder aus
der Wandsteckdose ziehen.
Schutz des Netzkabels — Netzkabel sollten stets so verlegt werden, daß
sie nicht im Weg liegen und niemand darauf treten kann oder Objekte
darauf- oder unmittelbar dagegengestellt werden können.
Wartung — Alle Wartungsmaßnahmen sollten nur von qualifiziertem
Servicepersonal durchgeführt werden. Die internen Komponenten
des Gerätes sind wartungsfrei. Zur Vermeidung eines elektrischen
Schocks versuchen Sie in keinem Fall, dieses Gerät selbst öffnen,
da beim Entfernen der Abdeckungen die Gefahr eines elektrischen
Schlags und/oder andere Gefahren bestehen.
Schlitze und Öffnungen — Wenn das Gerät Schlitze oder Löcher im
Gehäuse aufweist, dienen diese zur Vermeidung einer Überhitzung
der empfindlichen Teile im Inneren. Diese Öffnungen dürfen niemals
von anderen Objekten blockiert werden.
Instrucciones de seguridad •
Español
Este símbolo se utiliza para advertir al usuario
sobre instrucciones importantes de operación
y mantenimiento (o cambio de partes) que
se desean destacar en el contenido de la
documentación suministrada con los equipos.
Este símbolo se utiliza para advertir al usuario
sobre la presencia de elementos con voltaje
peligroso sin protección aislante, que puedan
encontrarse dentro de la caja o alojamiento del
producto, y que puedan representar riesgo de
electrocución.
Precaucion
Leer las instrucciones —Leer y analizar todas las instrucciones de
operación y seguridad, antes de usar el equipo.
Conservar las instrucciones —Conservar las instrucciones de
seguridad para futura consulta.
Obedecer las advertencias —Todas las advertencias e instrucciones
marcadas en el equipo o en la documentación del usuario, deben
ser obedecidas.
Evitar el uso de accesorios —No usar herramientas o accesorios que
no sean especificamente recomendados por el fabricante, ya que
podrian implicar riesgos.
Advertencia
Alimentación eléctrica —Este equipo debe conectarse únicamente a
la fuente/tipo de alimentación eléctrica indicada en el mismo. La
alimentación eléctrica de este equipo debe provenir de un sistema
de distribución general con conductor neutro a tierra. La tercera
pata (puesta a tierra) es una medida de seguridad, no puentearia
ni eliminaria.
Desconexión de alimentación eléctrica —Para desconectar con
seguridad la acometida de alimentación eléctrica al equipo,
desenchufar todos los cables de alimentación en el panel trasero
del equipo, o desenchufar el módulo de alimentación (si fuera
independiente), o desenchufar el cable del receptáculo de la pared.
Protección del cables de alimentación —Los cables de alimentación
eléctrica se deben instalar en lugares donde no sean pisados ni
apretados por objetos que se puedan apoyar sobre ellos.
Reparaciones/mantenimiento —Solicitar siempre los servicios
técnicos de personal calificado. En el interior no hay partes a las
que el usuario deba acceder. Para evitar riesgo de electrocución,
no intentar personalmente la reparación/mantenimiento de este
equipo, ya que al abrir o extraer las tapas puede quedar expuesto a
voltajes peligrosos u otros riesgos.
Ranuras y aberturas —Si el equipo posee ranuras o orificios en
su caja/alojamiento, es para evitar el sobrecalientamiento de
componentes internos sensibles. Estas aberturas nunca se deben
obstruir con otros objetos.
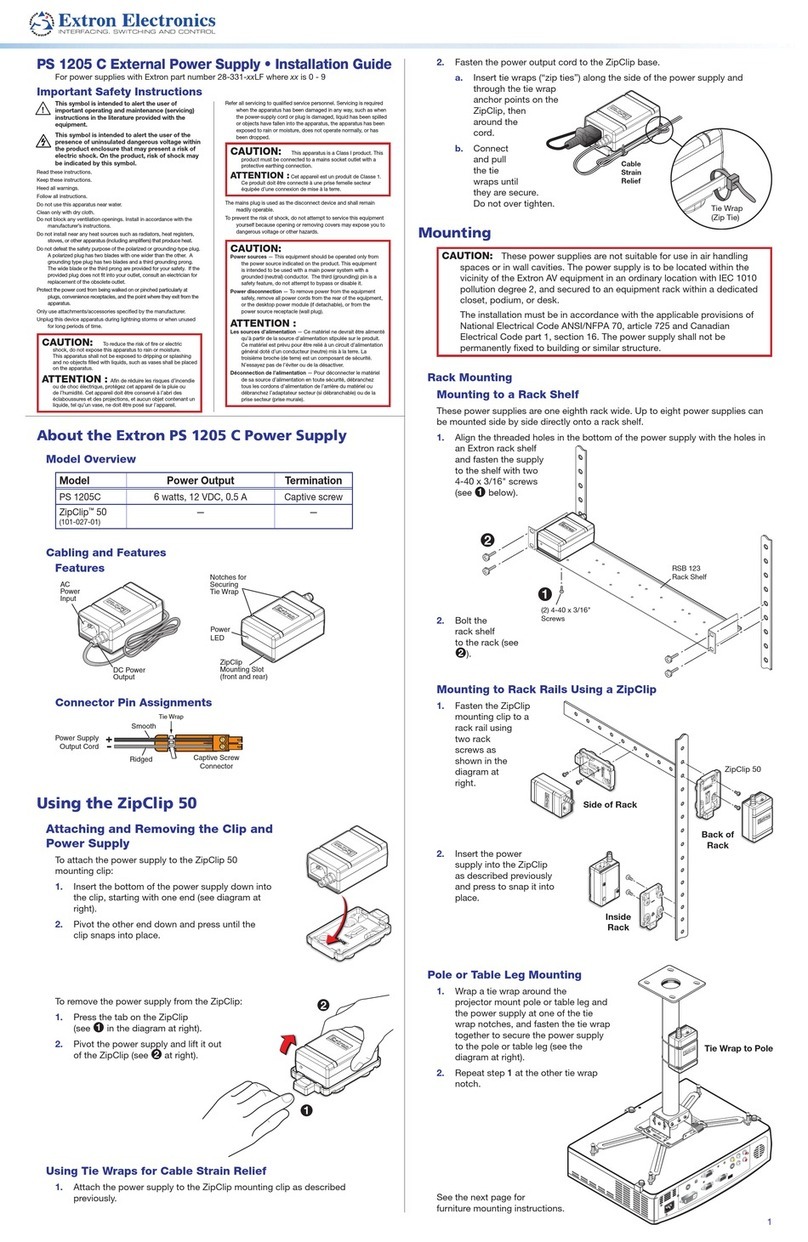
Furniture Mounting
NOTE: The ZipClip is shipped with a set of four wood screws.
1. Attach the ZipClip to the furniture using two or more wood screws as shown
below. Make sure the clip is oriented with the appropriate side facing the
mounting surface and with the
tab accessible from the
front of the furniture.
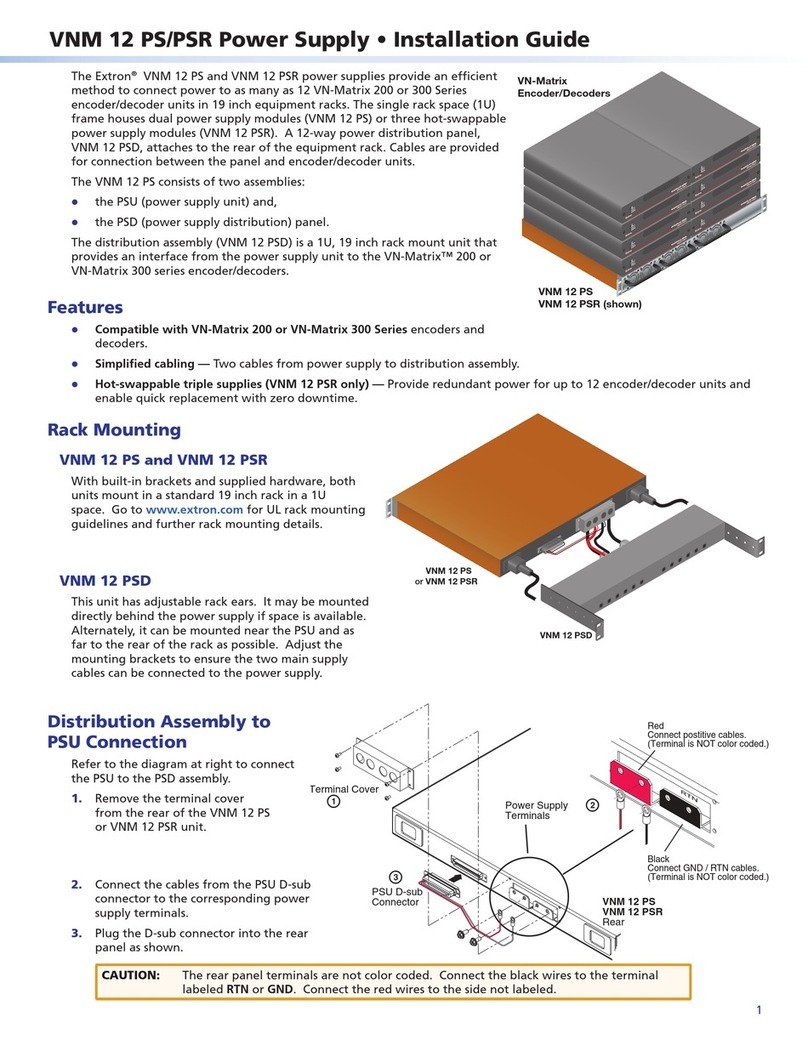
2. Insert the
power supply
into the ZipClip
as described
previously and
press to snap it
into place.
PS 1220EB
2
1
Under a Desk
eBUS 2 4WAT T S MAX
100-240V 50-60H z
0.6A MAX
+
V
+
SG
–
S
+
V
+
SG
–
S
+
V
+
SG
–
S
+
V
+
SG
–
S
+
V
+
SG
–
S
+
V
+
SG
–
S
Use only at altitudes not more than 2000 m above
sea level.
Use only in non-tropical conditions.
<2000m
Contact Information


