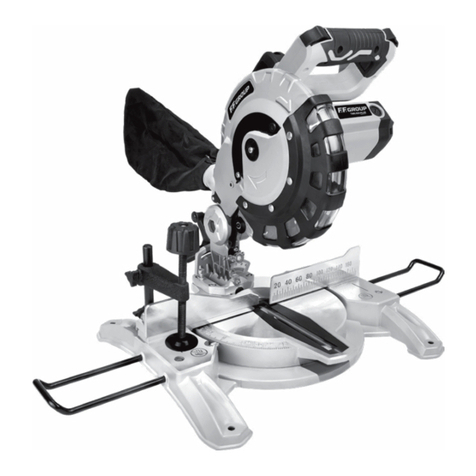
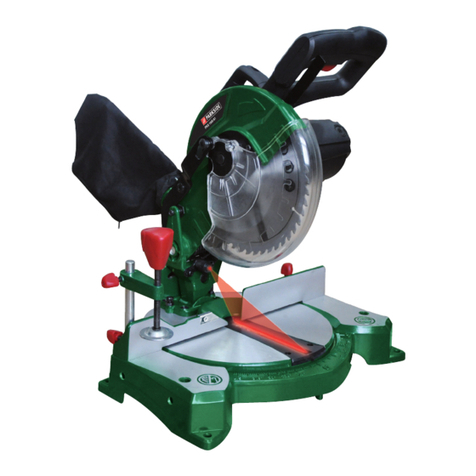
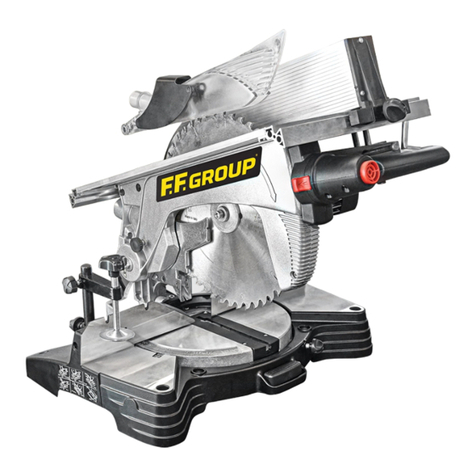
F.F. Group SCMS 210 PLUS User manual

SCMS 210 PLUS
ORIGINAL INSTRUCTIONS
ISTRUZIONI ORIGINALI
IT
ORIGINALNO UPUTSTVO ZA RAD
SR
RO
ORIGINALIOS INSTRUKCIJOS
LT
HR
HU

2SCMS 210 PLUS
08
10
16
IT 23
30
SR 37
HR 43
RO 49
HU 55
LT 62
68

3
www.ffgroup-tools.com
SCMS 210 PLUS
1
15 4
1
3
211
13
8
5
12
6
7
14
10
9
17
16

4SCMS 210 PLUS
2.1
3
5 6
2.2
4

5
www.ffgroup-tools.com
SCMS 210 PLUS
7 8
910
1211

6SCMS 210 PLUS
13
15
17 18
14
16

7
www.ffgroup-tools.com
SCMS 210 PLUS
19.1 19.2 20
21 22
24
23

8SCMS 210 PLUS
ITALIANO SRPSKI HRVATSKI
EXPLANATION
OF SYMBOLS EXPLICATION
DES SYMBOLES SPIEGAZIONE
DEI SIMBOLI ΕΠΕΞHΓΗΣΗ
ΣΥΜΒOΛΩΝ OBJAŠNJENJE
SIMBOLA OBJAŠNJENJE
SIMBOLA EXPLICAREA
SIMBOLURILOR SZIMBÓLUMOK
JELENTÉSE SIMBOLIŲ
PAAIŠKINIMAS
Always read and
understand the
instructions before
operating
Toujours lire et
comprendre les
instructions avant
d’opérer
Leggere e com-
prendere sempre le
istruzioni prima di
operare
razumejte uputstva
pre rada
shvatite upute prije
operacije
de a utiliza
mindig olvassa el
és értse meg az
dirbti, visada perska-
itykite ir supraskite
instrukcijas
Always wear appro-
priate eye protection
when operating
Portez toujours une
protection oculaire
appropriée lorsque
vous utilisez
Indossare sempre
un'adeguata protezi-
one oculare quando
si opera
Uvek nosite odgov-
kada radila
Uvijek nosite odgov-
kada djelujete
a ochilor atunci când
Munka közben
mindig viseljen
-
Dirbdami visada
priemones
Always wear appro-
priate protective
breathing mask when
operating
Portez toujours un
masque respiratoire
protecteur approprié
lors de l’opération
Indossare sem-
pre un'adeguata
maschera protettiva
durante il funziona-
mento
Uvek nosite odgo-
masku za disanje
prilikom rada
Prilikom rada uvijek
zaštitnu masku za
disanje
-
Munka közben
mindig viseljen
-
Dirbdami visada
-
Always wear appro-
priate ear protection
when operating
Portez toujours une
protection de l’oreille
appropriée lors de
l’exploitation
Indossare sempre
un'adeguata protezi-
one dell'orecchio
quando si opera
Uvek nosite odgov-
kada radila
Uvijek nosite odgov-
prilikom rada
mindig viseljen
Dirbdami visada
priemones
Always wear
appropriate eye and
hearing protection
when operating
Portez toujours une
protection oculaire et
auditive appropriée
lors de l'utilisation
Indossare sempre
protezioni adeguate
per gli occhi e l'udito
durante il funziona-
mento
Uvek nosite odgov-
i sluh prilikom rada
Tijekom rada uvijek
Munka közben
mindig viseljen
Dirbdami visada
-
saugos priemones
Always wear appropri-
ate hand protection
when operating
Portez toujours une
protection appro-
priée pour les mains
lors de l’exploitation
Indossare sempre
la protezione della
mano appropriata
quando si opera
Uvek nosite odgov-
kada radila
Prilikom rada uvijek
zaštitu ruku
Munka közben
mindig viseljen
-
Dirbdami visada
Never wear accesso-
ries or loose clothing
and always tie up
your hair
Ne portez jamais
d'accessoires ou de
vêtements amples et
attachez toujours vos
cheveux
Non indossare mai
accessori o abiti larghi
e legare sempre i
capelli
Nikada ne nosite pri-
Nikada ne nosite
dodatke ili široku
kosu
accesorii sau haine
Soha ne viseljen
suriškite plaukus
Inspect the power
cord regularly for
plug from the mains
immediately if the
cable is damaged
or cut
-
ment que le cordon
vous assurer qu’il ne
soit pas endommagé.
Débranchez immédi-
atement la prise si le
câble est endommagé
ou coupé
Ispezionare rego-
larmente il cavo di
alimentazione per
eventuali danni.
-
atamente la spina
dall’alimentazione se
o tagliato
-
vajte kabl za napa-
Odmah izvadite
prerezan
-
avajte je li kabel za
Odmah izvucite
ili prerezan
regulat cablul de
-
húzza ki a dugót a
konnektorból, ha
-
nuo elektros tinklo,
arba supjaustytas
Do not keep or
operate in wet envi-
ronment
Ne pas conserver ou
opérer dans un envi-
ronnement humide
Non tenere o operare
in un ambiente umido
ne raditi u mokrom
mediu umed
nedves környezet-
ben
Negalima laikyti
aplinkoje
Important, danger,
warning, or caution Important, danger ou
avertissement Importante, pericolo
o avviso
upozorenje
upozorenje Important, pericol
sau avertisment
Fontos, veszély,
Svarbu, pavojus,
-
gumas
Double insulation Double insulation Doppio isolamento Dvostruka izolacija Dvostruka izolacija Dupla szigetelés Dviguba izoliacija
Must be recycled
and should always
be disposed in accor-
dance with applicable
directives
Doit être recyclé et
doit toujours être
éliminé conformé-
ment aux directives
applicables
Deve essere riciclato
e deve essere sempre
smaltito secondo le
direttive applicabili
Mora se reciklirati i
uvek ga treba raspo-
lagati u skladu sa
Mora se reciklirati
i uvijek zbrinuti u
direktivama
-
mitate cu directivele
aplicabile
kell, és mindig
a vonatkozó
šalinamas pagal tai-
komas direktyvas
Complies with appli-
cable safety directives
and relative standards
Conforme aux
directives de sécurité
applicables et aux
normes relatives
Conforme alle
direttive di sicurezza
applicabili e alle
relative norme
bezbednosnim
direktivama i rela-
tivnim standardima
U skladu s primjen-
jivim sigurnosnim
direktivama i rela-
tivnim standardima
-
aferente
Megfelel a vonat-
és a vonatkozó
Atitinka taikomas
saugos direktyvas
ir santykinius stan-
dartus

9
www.ffgroup-tools.com
SCMS 210 PLUS
ITALIANO SRPSKI HRVATSKI
EXPLANATION
OF SYMBOLS EXPLICATION
DES SYMBOLES SPIEGAZIONE
DEI SIMBOLI ΕΠΕΞHΓΗΣΗ
ΣΥΜΒOΛΩΝ OBJAŠNJENJE
SIMBOLA OBJAŠNJENJE
SIMBOLA EXPLICAREA
SIMBOLURILOR SZIMBÓLUMOK
JELENTÉSE SIMBOLIŲ
PAAIŠKINIMAS
Always read and
understand the
instructions before
operating
Toujours lire et
comprendre les
instructions avant
d’opérer
Leggere e com-
prendere sempre le
istruzioni prima di
operare
razumejte uputstva
pre rada
shvatite upute prije
operacije
de a utiliza
mindig olvassa el
és értse meg az
dirbti, visada perska-
itykite ir supraskite
instrukcijas
Always wear appro-
priate eye protection
when operating
Portez toujours une
protection oculaire
appropriée lorsque
vous utilisez
Indossare sempre
un'adeguata protezi-
one oculare quando
si opera
Uvek nosite odgov-
kada radila
Uvijek nosite odgov-
kada djelujete
a ochilor atunci când
Munka közben
mindig viseljen
-
Dirbdami visada
priemones
Always wear appro-
priate protective
breathing mask when
operating
Portez toujours un
masque respiratoire
protecteur approprié
lors de l’opération
Indossare sem-
pre un'adeguata
maschera protettiva
durante il funziona-
mento
Uvek nosite odgo-
masku za disanje
prilikom rada
Prilikom rada uvijek
zaštitnu masku za
disanje
-
Munka közben
mindig viseljen
-
Dirbdami visada
-
Always wear appro-
priate ear protection
when operating
Portez toujours une
protection de l’oreille
appropriée lors de
l’exploitation
Indossare sempre
un'adeguata protezi-
one dell'orecchio
quando si opera
Uvek nosite odgov-
kada radila
Uvijek nosite odgov-
prilikom rada
mindig viseljen
Dirbdami visada
priemones
Always wear
appropriate eye and
hearing protection
when operating
Portez toujours une
protection oculaire et
auditive appropriée
lors de l'utilisation
Indossare sempre
protezioni adeguate
per gli occhi e l'udito
durante il funziona-
mento
Uvek nosite odgov-
i sluh prilikom rada
Tijekom rada uvijek
Munka közben
mindig viseljen
Dirbdami visada
-
saugos priemones
Always wear appropri-
ate hand protection
when operating
Portez toujours une
protection appro-
priée pour les mains
lors de l’exploitation
Indossare sempre
la protezione della
mano appropriata
quando si opera
Uvek nosite odgov-
kada radila
Prilikom rada uvijek
zaštitu ruku
Munka közben
mindig viseljen
-
Dirbdami visada
Never wear accesso-
ries or loose clothing
and always tie up
your hair
Ne portez jamais
d'accessoires ou de
vêtements amples et
attachez toujours vos
cheveux
Non indossare mai
accessori o abiti larghi
e legare sempre i
capelli
Nikada ne nosite pri-
Nikada ne nosite
dodatke ili široku
kosu
accesorii sau haine
Soha ne viseljen
suriškite plaukus
Inspect the power
cord regularly for
plug from the mains
immediately if the
cable is damaged
or cut
-
ment que le cordon
vous assurer qu’il ne
soit pas endommagé.
Débranchez immédi-
atement la prise si le
câble est endommagé
ou coupé
Ispezionare rego-
larmente il cavo di
alimentazione per
eventuali danni.
-
atamente la spina
dall’alimentazione se
o tagliato
-
vajte kabl za napa-
Odmah izvadite
prerezan
-
avajte je li kabel za
Odmah izvucite
ili prerezan
regulat cablul de
-
húzza ki a dugót a
konnektorból, ha
-
nuo elektros tinklo,
arba supjaustytas
Do not keep or
operate in wet envi-
ronment
Ne pas conserver ou
opérer dans un envi-
ronnement humide
Non tenere o operare
in un ambiente umido
ne raditi u mokrom
mediu umed
nedves környezet-
ben
Negalima laikyti
aplinkoje
Important, danger,
warning, or caution Important, danger ou
avertissement Importante, pericolo
o avviso
upozorenje
upozorenje Important, pericol
sau avertisment
Fontos, veszély,
Svarbu, pavojus,
-
gumas
Double insulation Double insulation Doppio isolamento Dvostruka izolacija Dvostruka izolacija Dupla szigetelés Dviguba izoliacija
Must be recycled
and should always
be disposed in accor-
dance with applicable
directives
Doit être recyclé et
doit toujours être
éliminé conformé-
ment aux directives
applicables
Deve essere riciclato
e deve essere sempre
smaltito secondo le
direttive applicabili
Mora se reciklirati i
uvek ga treba raspo-
lagati u skladu sa
Mora se reciklirati
i uvijek zbrinuti u
direktivama
-
mitate cu directivele
aplicabile
kell, és mindig
a vonatkozó
šalinamas pagal tai-
komas direktyvas
Complies with appli-
cable safety directives
and relative standards
Conforme aux
directives de sécurité
applicables et aux
normes relatives
Conforme alle
direttive di sicurezza
applicabili e alle
relative norme
bezbednosnim
direktivama i rela-
tivnim standardima
U skladu s primjen-
jivim sigurnosnim
direktivama i rela-
tivnim standardima
-
aferente
Megfelel a vonat-
és a vonatkozó
Atitinka taikomas
saugos direktyvas
ir santykinius stan-
dartus

| English10 SCMS 210 PLUS
WARNING!
instructions listed below may result in electric shock,
The term “power tool” in all of the warnings list-
ed below refers to your mains operated (corded)
power tool or battery operated (cordless) power
tool.
1.
and dark workplaces invite accidents.
2. Do not operate power tools in explosive at-
-
mable liquids, gases or dust. Power tools cre-
ate sparks which may ignite the dust or fumes.
3. -
erating a power tool. Distractions can cause
you to lose control.
1. Power tool plugs must match the outlet. Nev-
er modify the plug in any way. Do not use any
adapter plugs with earthed (grounded) power
will reduce risk of electric shock.
2. Avoid body contact with earthed or grounded
surfaces such as conduits, radiators, and re-
frigerators. There is an increased risk of elec-
tric shock if your body is earthed or grounded.
3. Do not expose power tools to rain or wet
increase the risk of electric shock.
4. Do not abuse the cord. Never use the cord
for carrying, pulling or unplugging the power
tool.
5.
moving parts. Damaged or entangled cords
-
ating a power tool outdoors, use an extension
cord suitable for outdoor use. Use of a cord
suitable for outdoor use reduces the risk of
electric shock.
1. Stay alert, watch what you are doing and use
common sense when operating a power tool.
Do not use a power tool while you are tired
medication. A moment of inattention while
operating power tools may result in serious
personal injury.
2. Use safety equipment. Always wear eye pro-
tection. Safety equipment such as dust mask,
non- skid safety shoes, hard hat,or hearing
protection used for appropriate conditions
will reduce person- al injuries.
3. Avoid suddenly starting. Ensure the switch is
-
er tools that have the switch on invites acci-
dents.
4.
turning the power tool on. A wrench or a key
left attached to a rotating part of the power
tool may result in personal injury.
5.
balance at all times. This enables better con-
trol of the power tool in unexpected situa-
tions.
6. Dress properly. Do not wear loose clothing or
away from moving parts. Loose clothes, jew-
ellery or long hair can be caught in moving
parts.
7. If devices are provided for the connection of
dust extraction and collection facilities, en-
sure these are connected and properly used.
Use of these devices c an reduce dust related
hazards.
1. Do not force the power tool. Use the correct
power tool for your application. The correct
power tool will do the job better and safer at
the rate for which it was designed.
2. Do not use the power tool if the switch does
cannot be controlled with the switch is dan-
gerous and must be repaired.
3. Disconnect the plug from the power source
before making any adjustments, changing
accessories, or storing power tools. Such pre-
ventive safety measures reduce the risk of
starting the power tool accidentally.
4. Store idle power tools out of the reach of
children and do not allow persons unfamiliar
with the power tool or these instructions to
operate the power tool. Power tools are dan-
gerous in the hands of untrained users.
5. Maintain power tools. Check for misalignment
or binding of moving parts, breakage of parts
power tools operation. If damaged, have the
power tool repaired before use. Many acci-
dents are caused by poorly maintained power
tools.
6.
maintained cutting tools with sharp cutting
edges are less likely to bind and are easier to
control.
7. Use the power tool, accessories and tool bits
etc., in accordance with these instructions and
in the manner intended for the particular type
of power tool, taking into account the work-
ing conditions and the work to be performed.
from those intended could result in a hazard-
ous situation.

English | 11
www.ffgroup-tools.com
SCMS 210 PLUS
must be followed to avoid the risk of equipment that
-
cur to users. For the safety of users, please read the
manual carefully before using the machine.
Never wedge or tie lower blade guard open. Check
operation of lower blade guard before each use.
Do not operate if lower blade guard does not close
briskly over saw blade.
intended for use outdoors and so marked.
Sharp blades minimize stalling and kickback.
-
neath work while blade is rotating. Do not attempt
to remove cut material when blade is moving.
WARNING
If damaged, have repaired by authorized service cen-
tre. Stay constantly aware of cord location and keep
it well away from rotating blade.
Always use a fence or straight edge guide when rip-
ping.
Be sure the depth, bevel and miter adjustments are
tight.
Do not use blades with incorrect size holes. Never
use blade washers or bolts that are defective or in-
correct. The maximum blade capacity of your saw is
254mm.
AVOID CUTTING NAILS
Inspect and remove all nails from timber before cut-
ting.
Touch the blade or moving parts during use.
Start the saw when the blade is in contact with the
work piece.
Do not stare into beam. Only turn laser beam on
when tool is on work piece.
Cross cutting wood & plastic Cross cutting miters,
joints, etc., for picture frames, moldings, door
aluminium cutting only.
NOTE
The crosscut blade provided is for most wood cut-
ting operations.
Article number 46 041
Model SCMS 210 PLUS
220-240
Frequency
Input Power 1.450
No load speed min-1 5.000
Blade size mm 210x1,8
mm 62x310
mm 34x310
mm 62x215
mm 34x215
kg 11,0
Sound emission values determined according
Typically the A-weighted noise levels of the
product are:
Sound pressure level dB(A) 70
Sound power level dB(A) 80
dB 3
Vibration total values ah (triax vector sum)
Vibration level max:
ah 2,5
1,5
1.
2. Laser
3. Blade guard
4. Safety switch
5. Miter adjustment handle
6. Miter table
7. Clamp assembly
8. Miter lock
9. Dust bag
10. Trenching depth adjustment screw
11. Fence
12. Mitre scale
13. Table insert (kerf plate)
14. Bevel lock

| English12 SCMS 210 PLUS
15.
16. Carrying handle
17. Dust extraction port
WARNING
Before starting any cutting operations, bolt your
compound mitre saw to a workbench. Never operate
Failure to heed this warning can result in serious per-
sonal injury.
WARNING
Use the vice to secure your work piece remain free
on one side of the blade to prevent the blade from
binding in work piece. The work piece binding blade
will cause motor stalling and kickback. This situation
could cause an accident resulting in serious personal
injury.
CROSSCUTTING
A crosscut is made by cutting across the grain of
the work piece. A 90°crosscut is made with the
mitre table set at the zero degree position. Mitre
crosscuts are made with the mitre table set at
some other angle other than zero.
1. Pull out the lock pin and lift the saw head to
its full height.
2. Unlock the mitre table.
3.
with the desired angle on the mitre scale.
4. Lock the mitre table lock knob.
NOTE
You can quickly locate 0, 5, 10, 15, 22.5, 25, 31.35,
40, 45° left or right on the scale.
5. The mitre table can be seated in one of the
positive stop notches, located in the mitre ta-
-
ter table with one edge securely against the
fence. If the concave edge of a board is placed
against the fence, the board could collapse on
the blade at the end of the cut, jamming the
blade.
6. -
ing, support the opposite end of the stock
with the material supports.
7. Align cutting line on the work piece with the
edge of saw blade.
8. Use the vice to secure the work piece (Fig. 2.1,
Fig. 2.2).
WARNING
To avoid serious personal injury,keep your hands out-
side the no hands zone;at least 75mm from blade.
Never perform any cutting operation freehand
(without holding workpiece against the fence). The
blade could grab the workpiece if it slips or twists.
9. Before turning on the saw, perform a dry run
of the cutting operation just to make sure that
no problems will occur when the cut is made.
10. -
ger. Allow several seconds for the blade to
reach maximum speed.
11.
12. Press the lower guard release lever and then
slowly lower the blade into and through the
work piece.
13.
to stop rotating before raising the blade out
of the work piece.
A bevel cut is made by cutting across the grain of
the work piece with the blade angled to the fence
and mitre table. A bevel cut is made with the mi-
tre table set at zero degree position and the blade
set at an angle between 0°and 45°.
1. Pull out the lock pin and lift the saw head to
its full height.
2. Loosen the mitre table locking handle.
3.
with zero on the mitre scale.
4. Lock the mitre table by rotating the mitre ta-
ble lock knob in a clockwise direction.
WARNING
To avoid serious personal injury, always push the
mitre table clamp back down before making a cut.
Failure to do so could result in movement of the mi-
tre table while making a cut causing serious personal
injury.
5. Loosen the bevel lock lever and move the saw
head to the left to the desired bevel angle.
6. Bevel angles can be set from 0°to 45°.
7. Align the indicator point with the desired an-
gle.
8. Once the saw arm has been set at the desired
angle, securely tighten the bevel lock lever.
9.
with one edge securely against the fence. If
the board is warped, place the convex side
against the fence. If the concave edge of the
board is placed against the fence, the board
could collapse on the blade at the end of the
cut, jamming the blade.
10. -
ing, support the overhanging end(s) of the
stock with the material supports.
11. Align cutting line on the work piece with the
edge of saw blade.
12. -
cure it against the fence. Tighten vice to se-
cure the work piece.
WARNING
To avoid serious personal injury,keep your hands
outside the no hands zone; at least 75mm from
the blade. Never perform any cutting operation
freehand (without holding workpiece against the
fence). The blade could grab the workpiece if it slips
or twists.
13. Before turning on the saw, perform a dry run
of the cutting operation just to make sure that
no problems will occur when the cut is made.
14.
trigger. Allow several seconds for the blade to
reach maximum speed.

English | 13
www.ffgroup-tools.com
SCMS 210 PLUS
15.
on.
16. Unlock the safety knob of locking lower guard
and then slowly lower the blade into and
through the work piece.
17.
to stop rotating before raising the blade out
of work piece.
A compound mitre cut is a cut made using a mi-
tre angle and a bevel angle at the same time. This
type of cut is used to make picture frames, cut
molding, make boxes with sloping sides, and for
certain roof framing cuts. To make this type of cut
the mitre table must be rotated to the correct an-
gle and the saw arm must be tilted to the correct
bevel angle. Care should always be taken when
making compound mitre setups due to the inter-
action of the two angle setting. Adjustments of
mitre and bevel settings are interdependent with
one another. Each time you adjust the mitre set-
Also, each time you adjust the bevel setting you
several settings to obtain the desired cut. The
the second angle, since adjusting the second an-
Once the two correct settings for a particular
cut have been obtained, always made a test cut
wood.
1. Pull out the lock pin and lift the saw head to
its full height.
2. Loosen the mitre table lock knob.
3.
with the desired angle on the mitre scale.
4. Tighten the mitre table lock knob.
5. Loosen the bevel lock lever and move the saw
arm to the left to the desired bevel angle.
6. Bevel angles can be set from 0°to 45°.
7. Align the indicator point with the desired an-
gle.
8. Once the saw arm has been set at the desired
angle, securely tighten the bevel lock lever.
9.
with one edge securely against the fence. If
the board is warped, place the convex side
against the fence, if the concave edge of the
board is placed against the fence, the board
could collapse on the blade at the end of the
cut, jamming the blade.
10. -
ing, support the opposite end of the stock
with the material supports.
11. Align the cutting line on the work piece with
the edge of saw blade.
12. -
cure it against the fence. Tighten the vice to
secure the work piece.
13. Before turning on the saw, perform a dry run
of the cutting operation just to make sure that
no problems will occur when the cut is made.
14.
on.
15.
squeeze the trigger. Allow several seconds for
the blade to reach maximum speed.
16.
to stop rotating before raising the blade out
of work piece.
ACTION
1.
slide action, the work piece is placed squarely
the vice.
2.
3. Slide the cutting head away from the rear
fence to the outer most position, and then
depress the trigger (Fig. 5).
4. Slowly lower the blade into and through the
work piece and push the cutting head to have
the blade through the larger work piece to-
wards the rear fence (Fig. 6).
WARNING
Never place undue force on the saw handle in a right
or left direction as this will misalign the head and re-
sult in an inaccurate cut.
The light from the laser beam gives you a guide-
line showing precisely a line where the blade has
to cut on the work piece from the table. The laser
beam can be switched on as required:
network cable supplies power to the laser. The
laser beam should be aligned before being used
the laser on and align the beam so that it points.
Exactly at the 0°gauge mark of mitre cut adjuster.
APPLICATIONS
To prevent accidental starting that could cause
possible serious personal injury, assemble all
parts, and make sure all warnings: adjustments
are complete, make sure all fasteners are secure
before connecting saw to power supply. Saw
should never be connected to power supply when
you are assembling parts, making adjustments, in-
stalling or removing blades , or when not in use.
To attach the vice, push the round attachment
rod into the vice attachment hole and turn the
rear locking knob in a clockwise direction to lock.
Attach the dust bag by pressing the two metal
springs together.

| English14 SCMS 210 PLUS
Your machine features a lock down pin for easier
transportation. To unlock the head pull the pin
out and pull the saw arm to the upright position.
To prevent sliding movement of the saw head
during transportation, lock the slide lock knob as
shown in.
Your machine mitre cuts from 0°to 45°both right
and left, with positive stops at 0, 5, 10, 15, 22.5,
25, 31.35, 40, 45°.Loosen the mitre table lock
knob and move the mitre table to the desired cut-
lock table in position.
The rear fence on your slide compound mitre
saw has been provided to hold your work piece
securely against when making all cuts.
The lower blade guard is made of shock-resistant,
see-through plastic that provides protection from
each side of the blade. It retracts over the upper
blade guard as the saw is lowered into the work
piece.
WARNING: Your slide compound mitre saw has 4
holes for mounting to the workbench. Always make
sure your compound mitre saw is securely mounted
to a workbench or an approved work stand. Failure
to do so could result in an accident causing serious
personal injury.
You saw has a precision built electric motor. It
should be connected to a power supply that is
current). Do not operate this tool on direct cur-
rent (DC). A substantial voltage drop will cause a
loss of power and the motor will overheat. If your
tool does not operate when plugged into an out-
let, double check the power supply.
WARNING
The operation of any power tool can result in foreign
objects being thrown into your eyes, which can re-
sult in severe eye damage. Before beginning power
tool operation, always wear safety goggles or safety
glasses with side shields and a full face shield when
for use over eyeglasses or standard safely glasses
with side shields.
WARNING
Do not attempt to modify this tool or create acces-
sories not recommended for use with this tool. Any
result in a hazardous condition leading to possible
serious personal injury.
Your compound mitre saw has been adjusted at
the factory for making very accurate cuts.
been jarred out of alignment during shipping.
Also, over a period of time, readjustment will
probably become necessary due to wear.
After unpacking your saw, check the following ad-
justments before you begin using saw. Make any
readjustments that are necessary and periodically
check the parts alignment to make sure that your
saw is cutting accurately.
WARNING
To prevent accidental starting that could cause pos-
sible serious personal injury, assemble all parts to
your saw before connecting it to the power supply.
The saw should never be connected to power sup-
ply when you are assembling parts, making adjust-
ments, installing or removing blades, or when not in
use.
DANGER
A 254mm x 2.0mm diameter blade is the maximum
blade capacity of your saw. Never use a blade that
is too thick to allow outer blade washer to engage
arm screw and loosen the screw on the blade bolt
cover until the lower blade guard assembly can be
raised to expose the blade bolt.
1. Depress the spindle lock button while rotat-
ing the blade. The spindle lock button will en-
gage the spindle lock (Fig. 10).
2.
and replace the blade. Use wrench to loosen
the blade bolt. Please Note-this is a left hand
the blade bolt tightly and reattach the lower
blade guard (Fig. 11).
WARNING
If the inner blade washer has been removed, replace
it before placing blade on spindle. Failure to do so
could cause an accident since the blade will not
tighten properly.
CAUTION
Always install the blade with the blade teeth point-
ing in a downward direction.
Pull the saw arm all the way down and engage the
lock down pin to hold the saw arm in the trans-
port position. Unlock the bevel lock lever and
move the saw arm to the 0° position and lock the
bevel lock lever (Fig.12).
Lay the set square on the mitre table and against
the blade. If the blade and mitre table do not align
adjust as follows (Fig.13).
1. Unscrew the 0° bevel positioning bolt at the
right hand side as shown (Fig.14).
2. Correctly align the blade and mitre table using
the set square and lock the bevel lock lever.
3. Move the saw arm until the pointer bottoms
out at the 0°bevel position and tighten the 0°
bevel positioning bolt. Check 0° angle by using
90°set square from the table to the blade. If
the table and blade do not align, readjust the 0°

English | 15
www.ffgroup-tools.com
SCMS 210 PLUS
bevel positioning bolt until aligned then adjust
the pointer to 0° mark and secure by tightening
the pointer screw (Fig.15).
1. Move the saw arm to the 45° bevel position
(Fig.16).
2. If the saw arm cannot reach a full 45°position,
the 45°bevel positioning bolt will have to be
reset (Fig.17).
3.
bevel position, check 45° angle by using a 45°
set square from the table to the blade. If the
table and blade do not align, readjust the
4. 45°positioning bolt until aligned. Adjust the
-
ing the pointer screw.
1. Unplug the power cord.
2. To adjust the depth of cut, either a wrench or
adjustable wrench to loosen the hex nut will
need to be applied.
3. Use a hex key to adjust the depth of cut adjust-
ment screw. The saw blade can be lowered by
turning the screw counterclockwise and can
be raised by turning the screw clockwise.
4. Lower the blade into the throat plate of mi-
tre table, then check the blade clearance and
maximum cutting distance (which is the dis-
tance measured from the fence where the
blade enters) to the front of mitre table slot.
5.
6. Tighten the hex nut.
7. To prevent the depth of cut adjustment screw
from turning, while tightening the hex nut,
carefully hold it with the hex key when tight-
ening the hex nut (Fig.18).
1.
2.
switch.
1.
screw that secures the blade bolt cover (Fig.
20).
2. Pull the rotating blade guard down then
swing it up together with the blade bolt cover.
to access the blade bolt (Fig. 21).
3. -
spindle locks (Fig. 22).
4. Use the hex key provided to loosen and re-
move the blade bolt. (Loosen in a clockwise
direction as the blade screw has a left hand
thread) (Fig. 23).
5. Lower the blade guard, hold the rotating low-
er blade guard and blade bolt cover in posi-
1. Before any work on the machine itself, pull
the power plug or take out of the battery pack
2. Use clean cloths and mild soap to remove dirt,
dust, etc.
3. Never use gasoline, benzene, diluent, alcohol or
similar to clean tools, otherwise will cause the
tools discoloration, deformation, or cracking.
4.
tool, clean dust periodically to prevent debris
from entry.
5. All service MUST only be performed by Autho-
rize Service Centre.
WARNING
Do not allow the water enter the motor and the tool
full immersed in the ware, which will result in motor
malfunction and electric shock.
WARNING
Do not allow the water enter the motor and the tool
full immersed in the ware, which will result in motor
malfunction and electric shock.
Machine, accessories and packaging should be sort-
ed for environment - friendly recycling. The plastic
components are labeled for categorized recycling.
This product is warranted in accordance with the le-
-
able to normal wear and tear, overload or improp-
er handling will be excluded from the warranty. In
case of a claim, please send the machine, completely
assembled, to your dealer or the service center for
electric power tools.

| Français16 SCMS 210 PLUS
AVERTISSEMENT! Lisez toutes les instructions. Le
non-respect de toutes les instructions ci-dessous
ou des blessures graves.
Le terme «outil électrique» dans tous les aver-
Les lieux de travail encombrés et sombres in-
vitent aux accidents.
2. N'utilisez pas d'outils électriques dans des
-
ou les vapeurs.
3. Tenez les enfants et les spectateurs éloignés
lors de l'utilisation d'un outil électrique. Les
distractions peuvent vous faire perdre le con-
trôle.
-
-
dantes réduiront le risque de choc électrique.
des conduits, des radiateurs et des réfrigéra-
teurs. Il existe un risque accru de choc élec-
dans un outil électrique augmentera le risque
de choc électrique.
4. N'abusez pas du cordon. N'utilisez jamais le
cordon pour transporter, tirer ou débrancher
l'outil électrique.
5. Tenez le cordon éloigné de l'huile chaude, des
-
dons endommagés ou emmêlés augmentent
le risque de choc électrique. Lorsque vous
-
une utilisation en extérieur réduit le risque de
choc électrique.
faites preuve de bon sens lorsque vous utilisez
un outil électrique. N'utilisez pas d'outil élec-
de drogues, d'alcool ou de médicaments. Un
moment d'inattention lors de l'utilisation
-
ures graves.
2. Utilisez un équipement de sécurité. Por-
tez toujours des lunettes de protection. Un
équipement de sécurité tel qu'un masque
-
tidérapantes, un casque ou une protection au-
ditive utilisé dans des conditions appropriées
réduira les blessures personnelles.
3. Empêchez tout démarrage involontaire. As-
surez-vous que l'interrupteur est en position
-
ou de transporter l'outil. Porter des outils
électriques avec votre doigt sur l'interrupteur
ou des outils électriques sous tension dont
l'interrupteur est allumé provoque des acci-
dents.
-
lumer l'outil électrique. Une clé ou une clé
un meilleur contrôle de l'outil électrique dans
des situations inattendues.
cheveux, vos vêtements et vos gants éloignés
bijoux ou les cheveux longs peuvent être pris
7. Si des dispositifs sont fournis pour le raccord-
ement d'installations d'extraction et de col-
connectés et correctement utilisés. L'utilisa-
tion de ces appareils peut réduire les risques
1. Ne forcez pas l'outil électrique. Utilisez l'outil
électrique approprié fera le travail mieux et
été conçu.
2. N'utilisez pas l'outil électrique si l'interrupteur
ne permet pas de l'allumer et de l'éteindre.
Tout outil électrique qui ne peut pas être con-
trôlé avec l'interrupteur est dangereux et doit
être réparé.
-
changer d'accessoires ou de ranger des out-
ils électriques. De telles mesures de sécurité
préventives réduisent le risque de démarrage
accidentel de l'outil électrique.
des enfants et ne laissez aucune personne ne
connaissant pas l'outil électrique ou ces in-
structions utiliser l'outil électrique. Les outils
électriques sont dangereux entre les mains
d'utilisateurs non formés.

Français | 17
www.ffgroup-tools.com
SCMS 210 PLUS
le mauvais alignement ou le coincement
fonctionnement des outils électriques. S'il est
endommagé, faites réparer l'outil électrique
avant de l'utiliser. De nombreux accidents
sont causés par des outils électriques mal en-
tretenus.
Les outils de coupe correctement entretenus
avec des arêtes de coupe tranchantes sont
moins susceptibles de se coincer et sont plus
7. Utilisez l'outil électrique, les accessoires et les
-
-
ticulier d'outil électrique, en tenant compte
-
fectuer. L'utilisation de l'outil électrique pour
Lors de l'utilisation de cet outil, il faut être con-
scient de la sécurité et doit être suivi pour éviter
le risque d'équipement qui pourrait provoquer un
-
nant aux utilisateurs. Pour la sécurité des utilisa-
teurs, veuillez lire attentivement le manuel avant
d'utiliser la machine.
ferme pas vivement au-dessus de la lame de scie.
-
térieur et ainsi marquées.
Les lames tranchantes minimisent le calage et le
rebond.
tourne. N'essayez pas d'enlever le matériau
coupé lorsque la lame est en mouvement.
AVERTISSEMENT:
mise hors tension.
S'il est endommagé, faites-le réparer par un cen-
courant de l'emplacement du cordon et tenez-le
Utilisez toujours une clôture ou un guide de bord
droit lors du déchirement.
Assurez-vous que les réglages de profondeur, de
biseau et d'onglet sont serrés.
N'utilisez pas de lames avec des trous de taille
incorrecte. N'utilisez jamais de rondelles ou de
boulons de lame défectueux ou incorrects. La ca-
pacité maximale de la lame de votre scie est de
254 mm.
Inspectez et enlevez tous les clous du bois avant
de couper.
JAMAIS
l'utilisation.
JAMAIS
Démarrez la scie lorsque la lame est en contact
Coupe transversale du bois et du plastique Coupe
croisée des onglets, joints, etc., pour cadres, mou-
Utilisez une lame en aluminium uniquement pour
la coupe de l'aluminium.
REMARQUE: La lame de coupe transversale
fournie est pour la plupart des opérations de
coupe de bois.
46 041
Modèle SCMS 210 PLUS
Tension 220-240
Fréquence
Puissance nominale 1.450
min-1 5.000
Taille de la lame mm 210x1,8
mm 62x310
mm 34x310
mm 62x215
mm 34x215
Poids kg 11,0

| Français18 SCMS 210 PLUS
Les mesures réelles (A) des niveaux sonores de
l’appareil sont:
Niveau de pression
acoustique dB(A) 70
Niveau d’intensité acoustique dB(A) 80
dB 3
Valeurs totales des vibrations ah (somme
vectorielle des trois axes directionnels) et
Valeurs totales des vibrations:
ah 2,5
1,5
1.
2. Laser
3.
4. Interrupteur de sécurité
5. Poignée de réglage de l'onglet
6.
7. Ensemble de serrage
8.
9.
10.
11. Clôture
12.
13. Insertion de table (plaque de trait de scie)
14.
15.
16. Poignée de transport
17.
AVERTISSEMENT! Avant de commencer toute
composée sur un établi. N'utilisez jamais votre scie
blessures graves.
AVERTISSEMENT! Utilisez l'étau pour sécuriser
de la lame pour empêcher la lame de se coincer dans
travail provoquera le calage du moteur et le rebond.
Cette situation pourrait provoquer un accident en-
Une coupe transversale est réalisée en coupant
-
-
le pointeur s'aligne avec l'angle souhaité sur
l'échelle d'onglet.
-
REMARQUE: vous pouvez localiser rapidement 0, 5,
sur l'échelle.
des encoches d'arrêt positives, situées dans le
bord solidement contre le guide. Si le bord
concave d'une planche est placé contre le
6. Lorsque vous coupez de longs morceaux de
bois ou de moulure, soutenez l'extrémité op-
posée du stock avec les supports de matériau.
-
ler avec le bord de la lame de scie.
(Fig. 2.1, Fig. 2.2).
AVERTISSEMENT! Pour éviter des blessures graves,
gardez vos mains en dehors de la zone sans mains;
sec de l'opération de coupe juste pour vous
lors de la coupe.
10. Saisissez fermement la poignée de la scie,
appuyez sur la gâchette. Attendez quelques
secondes pour que la lame atteigne sa vitesse
maximale.
laser pour allumer le laser.
12. Appuyez sur le levier de dégagement de la
protection inférieure, puis abaissez lentement
s'arrêter de tourner avant de sortir la lame de
Une coupe en biseau est faite en coupant dans
2. Desserrez la poignée de verrouillage de la ta-
que le pointeur s'aligne sur zéro sur l'échelle
d'onglet.

Français | 19
www.ffgroup-tools.com
SCMS 210 PLUS
dans le sens des aiguilles d'une montre.
AVERTISSEMENT! Pour éviter des blessures graves,
blessures graves.
5. Desserrez le levier de verrouillage du biseau
et déplacez la tête de scie vers la gauche
6. Les angles de biseau peuvent être réglés de 0°
7. Alignez le point indicateur avec l'angle sou-
haité.
-
gle souhaité, serrez fermement le levier de
verrouillage du biseau.
onglets avec un bord fermement contre le
guide. Si la planche est déformée, placez le
côté convexe contre la clôture. Si le bord con-
cave de la planche est placé contre le guide,
10. Lors de la coupe de longs morceaux de bois
ou de moulures, soutenez la ou les extrémités
en surplomb du stock avec les supports de
matériau.
-
ler avec le bord de la lame de scie.
12. Saisissez fermement le support d'une main et
-
AVERTISSEMENT! Pour éviter des blessures graves,
gardez vos mains en dehors de la zone sans mains;
sec de l'opération de coupe juste pour vous
lors de la coupe.
14. Saisissez fermement la poignée de la scie, puis
appuyez sur la gâchette. Attendez quelques
secondes pour que la lame atteigne sa vitesse
maximale.
laser pour allumer le laser.
16. Déverrouillez le bouton de sécurité de la pro-
tection inférieure verrouillable, puis abaissez
travailler.
s'arrêter de tourner avant de soulever la lame
Une coupe d'onglet composée est une coupe
réalisée en utilisant un angle d'onglet et un an-
gle de biseau en même temps. Ce type de coupe
est utilisé pour réaliser des cadres, découper des
pour certaines coupes de charpente de toiture.
Des précautions doivent toujours être prises lors
-
sont interdépendants les uns avec les autres. Ch-
d'onglet. Plusieurs réglages peuvent être néces-
saires pour obtenir la coupe souhaitée. Le premier
Une fois que les deux réglages corrects pour une
-
jours une coupe d'essai dans du bois de rebut avant
2. Desserrez le bouton de verrouillage de la table
le pointeur s'aligne avec l'angle souhaité sur
l'échelle d'onglet.
onglets.
5. Desserrez le levier de verrouillage du biseau et
l'angle de biseau souhaité.
6. Les angles de biseau peuvent être réglés de 0 °
7. Alignez le point indicateur avec l'angle s o u -
haité.
souhaité, serrez fermement le levier de ver-
rouillage du biseau.
guide. Si la planche est déformée, placez le
côté convexe contre le guide, si le bord con-
cave de la planche est placé contre le guide, la
de la coupe, bloquant la lame.
10. Lors de la coupe de longs morceaux de bois ou
de moulures, soutenez l'extrémité opposée du
stock avec les supports de matériau.
avec le bord de la lame de scie.
12. Saisissez fermement le support d'une main et
de l'opération de coupe juste pour vous assur-
coupe.
laser pour allumer le laser.

| Français20 SCMS 210 PLUS
15. Saisissez fermement la poignée de la scie, puis
appuyez sur la gâchette. Attendez quelques
secondes pour que la lame atteigne sa vitesse
maximale.
s'arrêter de tourner avant de soulever la lame
fermement verrouillée dans l'étau.
2. Saisissez fermement la poignée de la scie (Fig.
4).
3. Faites glisser la tête de coupe loin du guide
appuyez sur la gâchette (Fig. 5).
(Fig. 6).
AVERTISSEMENT! Ne jamais appliquer une force ex-
cessive sur la poignée de la scie dans une direction
droite ou gauche car cela désalignera la tête et en-
directrice montrant précisément une ligne où la
Le faisceau laser peut être activé selon les besoins:
-
terrupteur pour éteindre le laser. Le câble réseau
alimente le laser. Le faisceau laser doit être aligné
-
ment la vis d'alignement laser. Allumez le laser et
alignez le faisceau de sorte qu'il pointe. Exacte-
d'onglet.
APPLICATIONS
Pour éviter un démarrage accidentel qui pourrait
causer des blessures graves, assemblez toutes
-
ments: les réglages sont terminés, assurez-vous
-
fectuez des réglages, installez ou retirez des lames
ou lorsqu'elle n'est pas utilisée.
-
guilles d'une montre pour verrouiller.
-
sorts métalliques ensemble.
-
rouillage pour un transport plus facile. Pour déver-
rouiller la tête, tirez la goupille et tirez le bras de la
scie en position verticale.
Pour empêcher le mouvement de glissement de
la tête de scie pendant le transport, verrouillez le
-
diqué dans.
-
15, 22,5, 25, 31,35, 40, 45°. Desserrez le bouton de
-
-
pour verrouiller la table en position.
coulissante a été fourni pour maintenir fermement
-
tection de chaque côté de la lame. Il se rétracte
AVERTISSEMENT:
-
composée est solidement montée sur un établi ou un
support de travail approuvé. Le non-respect de cette
-
sures graves.
domestique normal). N'utilisez pas cet outil en
courant continu (CC). Une chute de tension im-
nouveau l'alimentation électrique.
AVERTISSEMENT: l'utilisation de tout outil électrique
-
trique, portez toujours des lunettes de sécurité ou
des lunettes de sécurité avec écrans latéraux et un
écran facial complet si nécessaire. Nous recomman-
utilisation sur des lunettes ou des lunettes de sécurité
standard avec écrans latéraux.
Table of contents
Languages:
Other F.F. Group Saw manuals

F.F. Group
F.F. Group TTMS 305i PRO User manual

F.F. Group
F.F. Group CSS 12V PLUS User manual

F.F. Group
F.F. Group CS 14/2400 PRO User manual

F.F. Group
F.F. Group CCS 165-BL 20V PLUS User manual

F.F. Group
F.F. Group CRS-BL 20V PLUS User manual

F.F. Group
F.F. Group BAS 240i PLUS User manual

F.F. Group
F.F. Group CS 65/1500 PLUS User manual

F.F. Group
F.F. Group CS 65/1500 PLUS User manual

F.F. Group
F.F. Group TBS 315 PLUS User manual

F.F. Group
F.F. Group CS 55/1200 PLUS User manual