page10
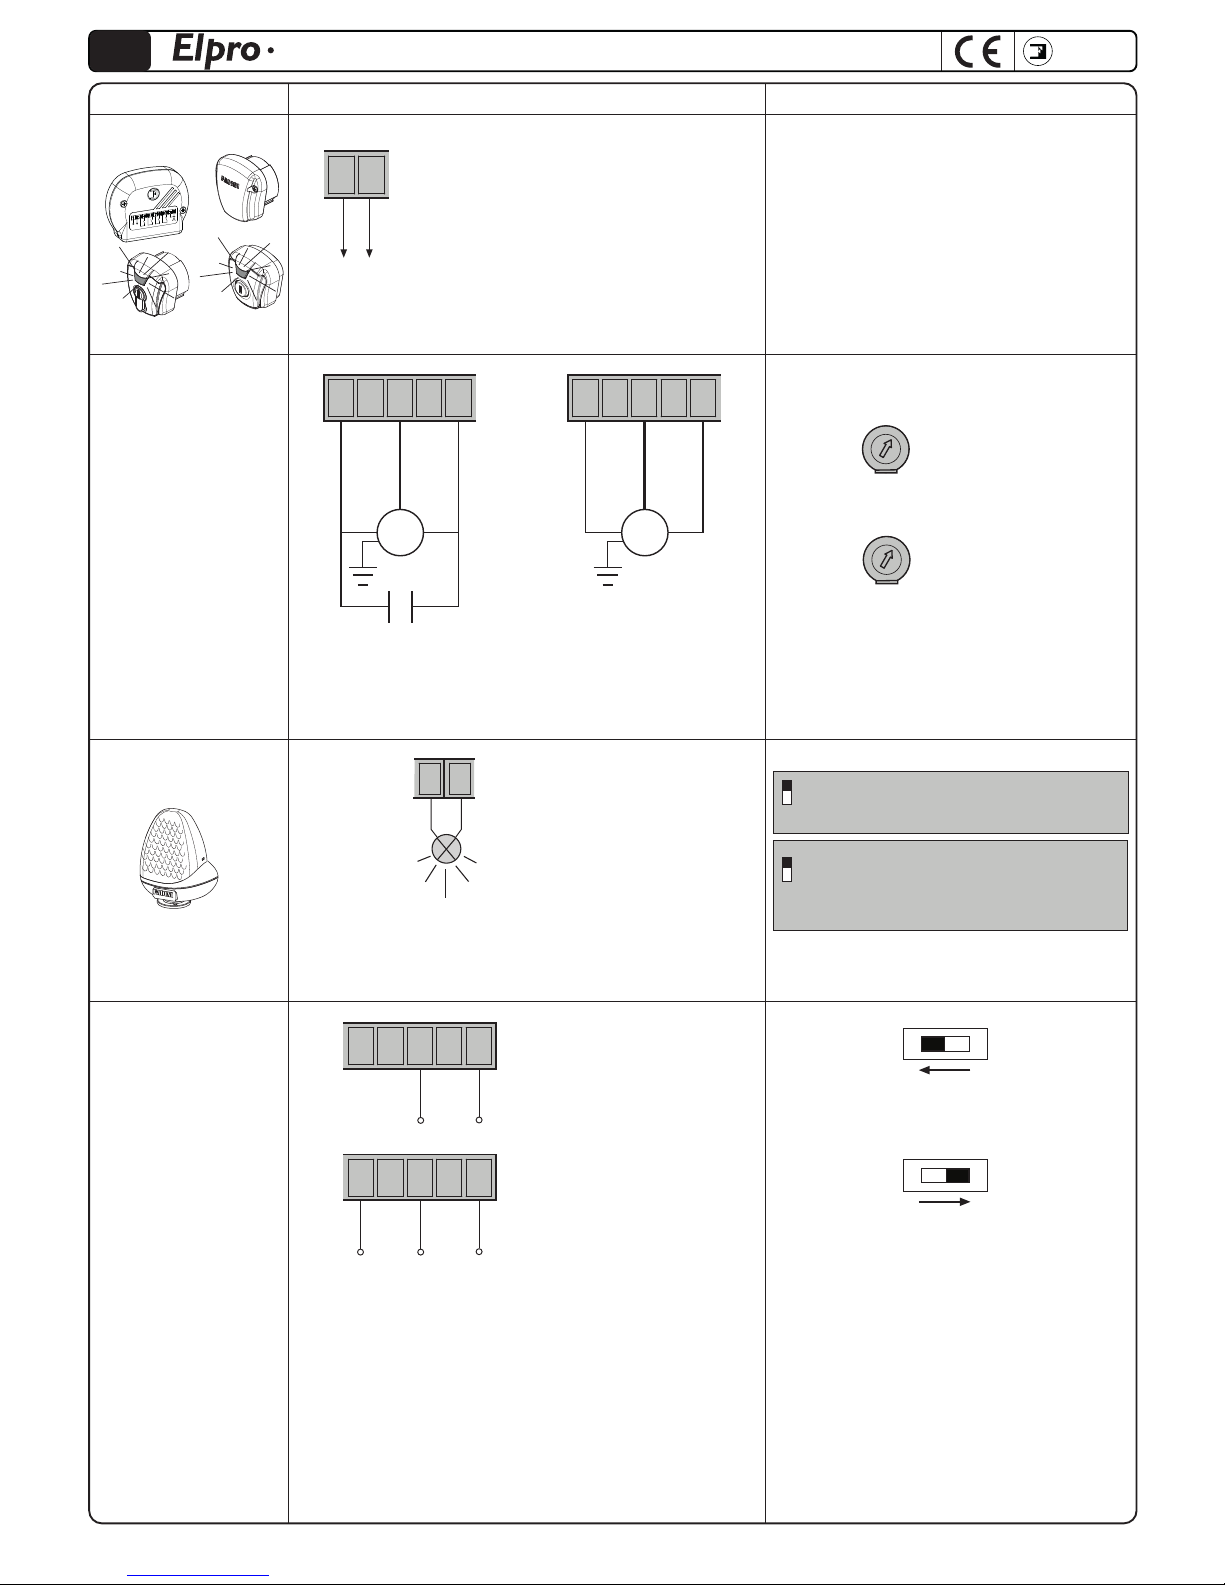
Key-switch:
Photocells in
closing:
1
DIP-SWITCH-A N° 1:
ON: stop gate/s in opening and reverse
travel in closing when cleared
OFF: no stop in opening and reverse travel in
closing when obstructed
Radio Contact
(step by step mode):
Any NO connection to these two terminals
will perform the following:
- Opening only: Dip 2=ON and Dip 5=OFF
- Gate travel reversing by any pulse
Dip 2=OFF and Dip 5=OFF
- Step by step: Open-Stop-Close-Stop
Dip 2=OFF and Dip 5=ON
- No new pulse is accepted in opening. In
Dwell phase and in closing any new pulse
stops and reverses gate travel:
Dip 2=ON and Dip 5=ON
ON: It does not stop and reverse gate travel
in opening
OFF: always stops & reverses in opening
2
ON: step by step with intermediate stop
OFF: gate travel reversed by any radio pulse
5
DIP-SWITCH-A N°2 and N°5:
All NC contacts of safety
accessories such as
Photocells (receivers)
must be connected in
series with terminals
1 and 2
Accessory Electrical connections
NO and NC contacts to be connected
to the respective terminals in the key-
or button-switches.
All of the possible setting combinations
are described in the instructions sheets
included with the respective control
accessories
NC
NC
1 2
3 4 5 6
FA D I N I
FA D I N I
NC
OPEN
CLOSE
STOP
COMMON
RADIO
CONTACT
COMMON
3 7
L1 ON = no obstacle, it goes off
in case of obstruction
L4 OFF = no OPENING contact, it goes on
whenever an opening pulse is given
L5 OFF = no CLOSING contact, it goes on
whenever a closing pulse is given
L6 ON = STOP contact closed, it goes
off whenever a stop pulse is given
L7 OFF = no RADIO contact, it goes on by
any radio pulse
Dip-Switch A
1 = ON Photocells stop gate in opening
2 = ON Radio, no reversing in opening
3 = ON Automatic closing
4 = ON Pre-flashing enabled
5 = ON Radio step-by-step
6 = ON Dead man
7 = ON Flasher off in dwell time in automatic
8 = ON Gate re-closing in opening and dwell on photocells engaging
9 = ON DSA control of photocells before any movement
10 = ON Photocells not obstructed before moving
11 = Blank
12 = ON Electronic brake enabled
Dip-Switch B
1 = ON set braking duration
2 = ON set additional stop time after braking when safety devices are activated
3 = ON set electric lock or courtesy lamp duration
4 = OFF Blank
1 2 3 4
ON
OFF
DIP-SWITCH - B
Dip-Switch setting and LED indication of functions
Output for a 24V max 3W indication lamp
showing the status of the system:
Lamp On = Gate open
Lamp Off = Gate closed
0.5s (fast) flashing = gate closing
1s (normal) flashing = gate opening
Indication lamp
output
24V- max 3W:
COMMON
3 11
12 13
24Vac output max. load:
n°1 radio receiver
n°3 pairs photocells
FADINI
!
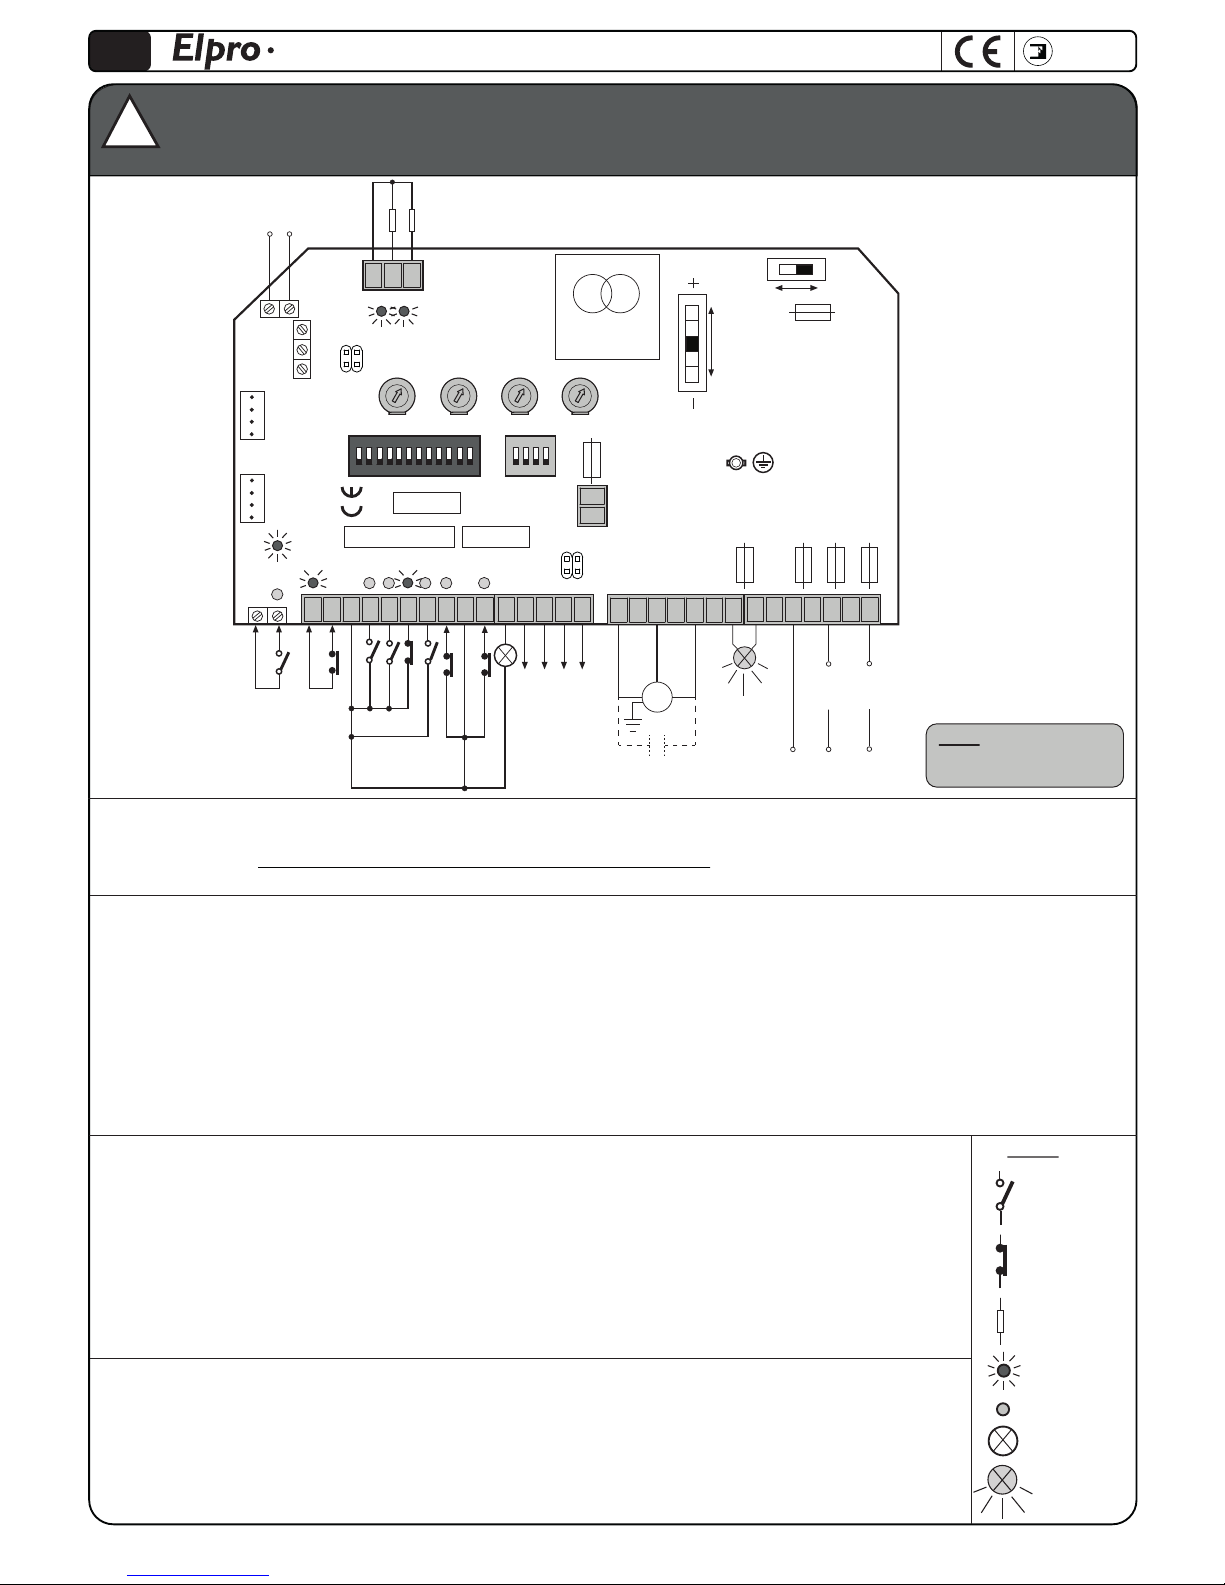
Limit switches:
L8 ON = OFF on engaging L.sw. closing
L10 ON = OFF on engaging L.sw. opening
8 9 10
IMPORTANT: if no limit switches
are involved, link out terminals
8 - 9 - 10.
Limit switches ( L-sw.) must have
normally closed contacts.
meccanica
FADINI
37
common
Opening Limit switch
Closing Limit switch
ATTENTION: Before starting the electrical connections, check the voltage (230V or 400V) selector switch to be
set correctly.
In cases a motor with mechanical brake is used or a control board ELPRO 10 is replaced, the DIP-switch -A
No.12 has to be in OFF.
SINGLE – THREE PHASE ELECTRONIC CONTROL BOARD WITH ELECTRONIC BRAKE
FOR SLIDING GATE AUTOMATIC SYSTEMS WITH OR WITHOUT LIMIT SWITCHES
GB
ON
OFF
1 2 3 4 5 6 7 8 9 10 11 12
DIP-SWITCH - A
FA D I N I
123
456
789
AB
STOP