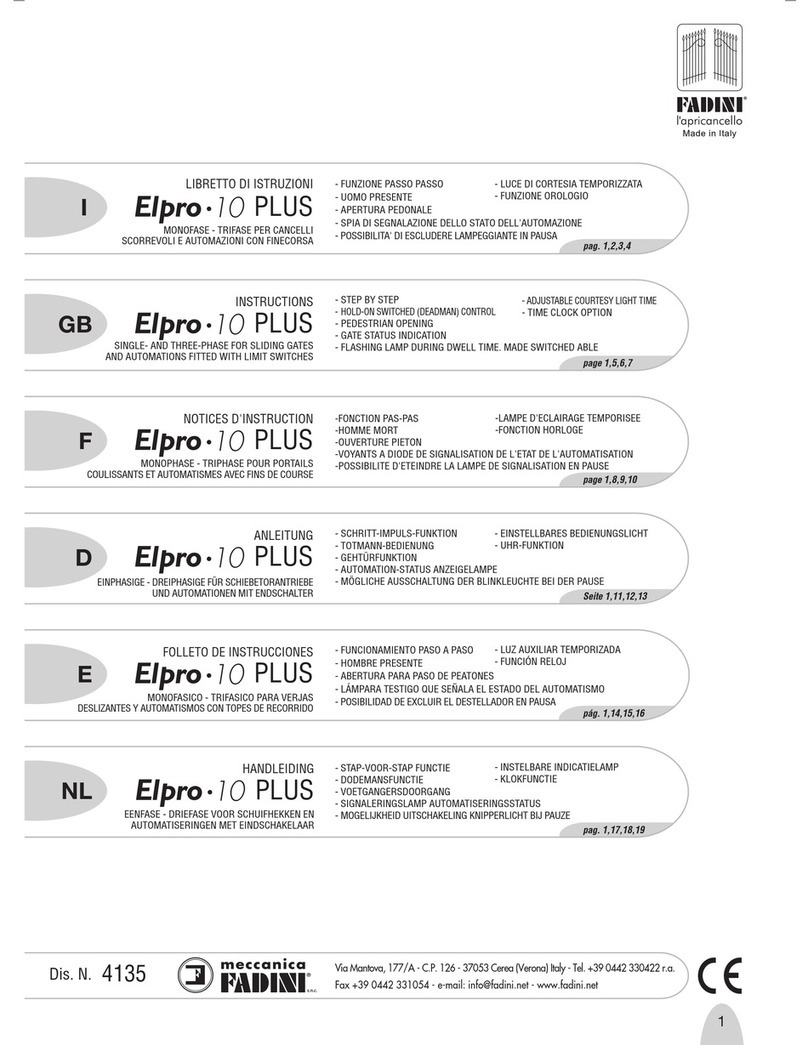
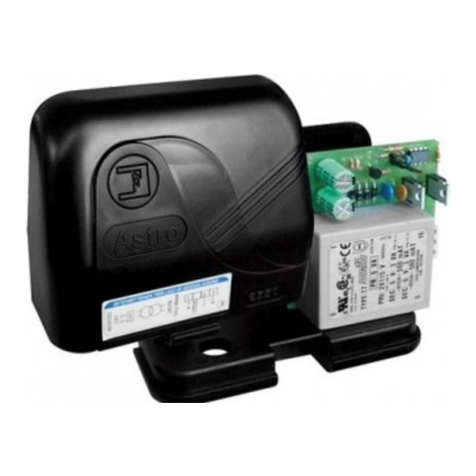
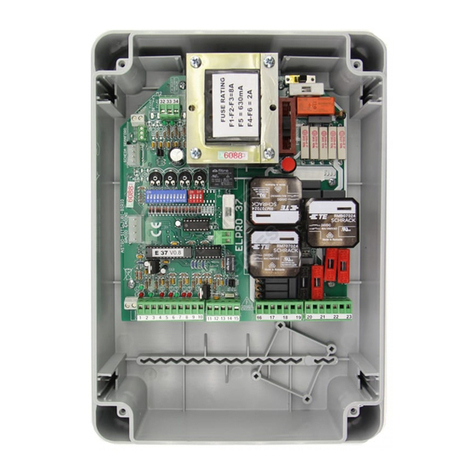
fadini Elpro X User manual

LIBRETTO DI ISTRUZIONI
DEI PROGRAMMATORI ELETTRONICI UNIVERSALI MONOFASE 230V 50/60Hz
PER APRICANCELLI SCORREVOLI CON FINECORSA pag. 3, 4, 5
®
1
ON
OFF
DIP-SWITCH B
1
ON
OFF
DIP-SWITCH B
1
ON
OFF
DIP-SWITCH B
Via Mantova, 177/A - 37053 Cerea (Verona) Italy - Tel. +39 0442 330422 r.a.
Fax +39 0442 331054 - e-mail: info@fadini.net - www.fadini.net
meccanica
FADINI
LIBRETTO DI ISTRUZIONI
DEI PROGRAMMATORI ELETTRONICI UNIVERSALI MONOFASE 230V 50/60Hz
PER APRICANCELLI A BATTENTE OLEODINAMICI ED ELETTROMECCANICI
A 1 O 2 ANTE pag. 6, 7, 8
GB
LIBRETTO DI ISTRUZIONI
DEI PROGRAMMATORI ELETTRONICI UNIVERSALI MONOFASE 230V 50/60Hz
PER APRIBASCULANTI OLEODINAMICI ED ELETTROMECCANICI pag. 9, 10, 11
XE
X
Dis. N. 6739
dotato di regolazione elettrica della coppia, adatto ad attuatori elettromeccanici
privi di frizione meccanica
non dotato di regolazione elettrica della coppia (per attuatori dotati di frizione
meccanica e registri della forza idraulica)
GB
INSTRUCTIONS
SINGLE-PHASE UNIVERSAL ELECTRONIC CONTROL BOXES - 230V 50/60Hz
FOR SLIDING GATE OPERATORS FITTED WITH LIMIT SWITCHES pages 13, 14, 15
INSTRUCTIONS
SINGLE-PHASE UNIVERSAL ELECTRONIC CONTROL BOXES - 230V 50/60Hz
FOR SINGLE OR DOUBLE OIL-HYDRAULIC & ELECTRO-MECHANICAL SWINGING GATES
pages 16, 17, 18
INSTRUCTIONS
SINGLE-PHASE UNIVERSAL ELECTRONIC CONTROL BOXES - 230V 50/60Hz
FOR OIL-HYDRAULIC & ELECTRO-MECHANICAL GARAGE DOOR OPERATORS
pages.19, 20, 21
not equipped with electric torque control (designed for operators fitted with
mechanical clutch and pressure valve adjustment)
equipped with electric torque control, designed for electro-mechanical operators
without mechanical clutch
NOTICES D'INSTRUCTIONS
PROGRAMMATEURS ELECTRONIQUES UNIVERSELS 230V 50/60Hz MONOPHASE
POUR OUVRE-PORTAILS COULISSANTS AVEC FINSDE COURSE pages 23, 24, 25
NOTICES D'INSTRUCTIONS
PROGRAMMATEURSELECTRONIQUES UNIVERSELS 230V 50/60Hz MONOPHASE
POUR OUVRE-PORTAILS A BATTANT HYDRAULIQUES ET ELECTROMECANIQUES
AVEC 1 OU 2 VANTAUX pages 26, 27, 28
NOTICES D'INSTRUCTIONS
PROGRAMMATEURSELECTRONIQUES UNIVERSELS 230V 50/60Hz MONOPHASE
POUR OUVRE-PORTES BASCULANTS HYDRAULIQUES ET ELECTROMECANIQUES
pages 29, 30, 31
sans réglage électrique du couple (pour actuateurs avec friction mécanique et
registres de la force hydraulique)
avec réglage électrique du couple, pour actuateurs électromécaniques sans
friction mécanique
I
F
no dotado de regulación eléctrica de las coplas (para actuadores de fricción
mecánica y registros de la fuerza hidráulica)
E
GB
I
F
Edotado de rugulación electrica de las coplas, adapto para actuadores
electromecánicos falto de fricción mecánica
I
F
FOLLETO DE INSTRUCCIONES
DE LOS PROGRAMADORES ELECTRONICOS UNIVERSALES MONOPHASE 230V
50/60Hz PARA VERJAS CORREDERAS CON FINAL DE CARRERA pág. 33, 34, 35
E
GB
I
F
EFOLLETO DE INSTRUCCIONES
DE LOS PROGRAMADORES ELECTRONICOS UNIVERSALES MONOPHASE 230V 50/60Hz
PARA VERJAS BATIENTE HOLODINAMICOS Y ELECTROMECANICOS A 1 O 2 HOJAS
pág. 36, 37, 38
GB
I
F
EFOLLETO DE INSTRUCCIONES
DE LOS PROGRAMADORES ELECTRONICOS UNIVERSALES MONOPHASE 230V
50/60Hz PARA VERJAS BASCULANTE HOLODINAMICOS Y ELECTROMECANICOS
pág. 39, 40, 41

page 12
meccanica
FADINI
X
GB UNIVERSAL ELECTRONIC CONTROL BOXES
230V 50/60Hz SINGLE-PHASE
174 18 21 23
10 11 12 13 14 15 16 19
17 20 22
2
262728
230V sing e-phase
ELECTRIC MOTORS
85
39
M1 M2
6
L2
L1 L3 L4 L5 L6 L7 L8 L9
F3=2A
24V ow
vo tage
protection
F1=5A
mains fuses
230V MAX 100W
COURTESY LIGHT
230V MAX 100W
Turns on when the
gate starts moving
and remains on for a
set time of 90
se onds after the end
of the motor run
y le
C1
Capacitor
M1Motor
24 25
TRANSFORMER
MICROPROCESSOR
VERSION 03
ON
OFF
123456789101112
DIP-SWITCH - A
TERMINALS FOR THE
CONNECTIONS TO THE LEDs
OF PULIN 3 PUSH BUTTONS
1234567891011 12 13 14 15 16 17 18 19 20 21 22 23 24 25
28 2627
OUTPUT
24Vd - 5W
OPEN/CLOSE RUN TIME
sliding gates: 0-120s
swnging &
garages doors 0- 60s
DWELL TIME
0s - 220s
- GATE DELAY CLOSING: 0-10s
- PEDESTRIAN OPENING: 0-30s
MOTOR POWER
SELECTING
SWITCH on y for
ELPRO XE
PLUG-IN
RADIO PC
CARD
CONNECTOR
NC
1st pair
photoce u s
radio contact
imit switch lose
ommon
open
c ose
stop
Indication ight 24V
max 3W
24Va output (max oad:
1 radio receiver
2 pair photoce s)
12Vac power supp y
15VA max ele tri lo k
FLASHING LAMP
230Va max 25W and
ELECTRIC LATCH
230V - 50/60Hz ±10%
BOARD
VOLTAGE SUPPLY
1234
ON
OFF
DIP-SWITCH - B
!
NC
Symbols
NO contact
Led ON
Led OFF
Indication ight or
amp
F ashing amp
3029
29 30
+-
F1=5A main
fuses
C2
Capacitor
M2Motor
common
imit switch open
common
common
NEUTRAL
LIVE
WARNING: before making ele tri al onne tions sele t the type of automation using Dip Swit h B No. 1 and
read the instru tions for the gate opener being installed:
SLIDING from page 3 to page 5 SWINGING from page 6 to page 8 UP-AND-OVER from page 9 to page 11
2nd pair of
photo ells or NC
contact for safety
edge
IMPORTANT INSTRUCTIONS FOR CORRECT INSTALLATION AND OPERATION:
- The Contro Box must be insta ed in a dry and protected p ace. It has ho es for fastening to a universa FADINI container or to a standard market e ectrica
box.
- Make sure that the power supp y to the e ectronic contro box is 230V ÷ 10%
- Make sure that the power supp y to the e ectrica motor is 230V ÷10%
- Increase wire cross section when distances are greater than 50 meters.
- Insta a type 0.03A high sensitivity Ground Fau t Switch on the power supp y to the contro box.
- Power supp y, E ectrica motor, F ashing ight: use 1.5 mm2 cross section wires for distances up to 50 m.
- Limit switch, Photoce s, Push-button pane s and accessories: use 1 mm2 cross section wires
- If the Photoce s are not used then make a bridge across termina s 1 and 2 and a the inputs with NC contacts
- If no Push-button pane is used make a bridge across termina s 3 and 6
- The Open/C ose Work Time Trimmer setting must a ways be greater than the actua trave time of the gate
NOTE: For app ications such as turn on ights, video cameras, etc., use Static Switches to avoid generating noise in the microprocesso
Diagnosti Leds:
L1 On = 230V grid vo tage Present and fuses F1, F2, F3 (F4 on y for E pro X)
L2 On = 2nd pair of Photoce s or Safety Edge, no obstac e present
L3 On = 1st pair of Photoce s, no obstac e detected
L4 Off = Open, turns on with open command impu se
L5 Off = C ose, turns on with c ose command impu se
L6 On = Stop, turns off with stop command impu se
L7 Off = Radio, turns on with every impu se from the transmitter and radio contact
L8 = C ose imit switch, off with gate c osed. On during movement and when gate is open on the opening imit switch
L9 = Open imit switch, off with gate open. On during movement and when gate is c osed on the c osure imit switch
NC contact
IN CASE OF FAILURE TO OPERATE
- Make sure that the e ectronic contro box is powered at 230V ÷10%
- Make sure that the E ectrica Motor is powered at 230V ÷ 10%
- Check a the fuses
- Check that the Photoce s have c osed contacts
- Check that there is no vo tage drop between the E pro Contro Box and the E ectrica Motor
- Adjust the motor power Se ector switch depending on the weight and the wing
- Check a the NC contacts of the e ectronic board
24V AC output for
photo ell TX assigned
to the DSA check
-
+
-
+
-
+
General des ription: The e ectronic contro boxes ELPRO X and ELPRO XE have been designed and deve oped as a so ution for those insta ation engineers
requiring an universa e ectronic system for any kind of automatic gate to be serviced. It is suitab e a so for s iding gate operators fitted with imit switches,
sing e or doub e swinging gate operators fitted with pressure va ves for ELPRO X, and e ectromechanica operators for ELPRO XE in that it is fitted with torque
contro se ector, and up-and-over garage doors with 1 or 2 motors, with or without imit switches. ELPRO X and ELPRO XE XE units work with sing e-phase
230V 50/60 Hz power supp y and comp y with 2006/95 CE Low Vo tage safety regu ations and 2004/108/CE & 92/31 CEE E ectromagnetic Compatibi ity
regu ations. Insta ation is recommended to be done by qua ified technicians in accordance with existing safety regu ations. The Manufacturer sha
not be responsib e for improper use of the contro boxes and a so reserves the right to modify and update the contro box at any time.
XE
F4=630mA
from mains
only for
ELPRO X

page 13
FOR SLIDING GATES Dip-B N°1=ON
XE
Photocells:
1
DIP-SWITCH-A N° 1:
ON: stop in Opening and reverse in
Closing once cleared from o stacle
OFF: no stop in opening, reverse on closing in
case of o stacle
Radio Contact:
(step- y-step mode)
connecting any NO contact across the two
termina s generates, with each impu se:
- Opening on y: Dip 2=ON and Dip 5 = OFF
- inversion of direction with each impu se
Dip 2 = OFF and Dip 5 = OFF
- Step-by-step: Open-Stop-C ose-Stop
Dip 2 = OFF and Dip 5 = ON
- During opening no new command is
accepted. During dwe or c osing, each new
command stops and reverses trave
direction.Dip 2=ON and Dip 5=ON
ON: no stop and no reversing in opening
OFF: during opening a ways stop and reverse
2
ON:Step-by-step with intermediate stop
OFF: reverse movement by every radio impu se
5
DIP-SWITCH-A N°2 and N°5:
A NC contacts of
safety accessories
such as Photoce s
(receivers) must be
connected in series
with termina s 1 and 2
Accessory Electrical connections
NC
NC
12
RADIO
CONTACT
3 7
L3 ON= no o stacle. It switches off in case
of o stacle
L7 OFF= no RADIO contact, turns on with
every radio contact impu se
ON
OFF
123456789101112
DIP-SWITCH - A
meccanica
FADINI
FOR SLIDING GATES WITH LIMIT SWITCHES:
position Dip Switch B No1= ON
Safet edge: 12
NC contact for safety edge to a ow trave reversing for a short
bit in both cyc es and gate stopping: with DIP A No. 9=ON.
NOTE: if no safety edge is present it is not ne essary to bridge
the onta t input. DIP-SWITCH-A No.9 = OFF
DIP-SWITCH-A N°8 and N°9:
ON: Increase time during inversion
OFF: No increase of inversion time
8
ON: Inversion of direction with safety edge
OFF: No inversion of direction
9
Limit switches:
IMPORTANT: if the imit switches are not
used then bridge inputs 8 - 9 - 10
L8 ON= off when gate c osed
L9 ON= off with gate open
1234
ON
OFF
DIP-SWITCH - B
L2 On = no obstac e detected, turns off in
case of obstac e
234
1
ON
OFF
DIP-SWITCH - B
FADINI
FADINI
Dip-Switches and LED signals of the various functions
12 13
GB
XE
UNIVERSAL ELECTRONIC CONTROL BOXES
230V 50/60Hz SINGLE-PHASE
7 = ON No function
8 = see SAFETY EDGE connections
9 = see SAFETY EDGE connections
10 = ON F ashing ight off during pause
11 = ON C oses during Opening and during pause after passage on the Photoce s
12 = Blank
Dip-Swit h B
1 = ON SLIDING GATE OPENER mode
2 = ON Deadman mode
3 = blank
4 = ON DSA photoce transmitter contro if connected to dedicated termina s
Dip-Swit h A
1 = ON Photoce s stop during opening
2 = ON Radio does not reverse during opening
3 = ON Automatic c osure
4 = ON Pre-f ashing operationa
5 = ON Step-by-step radio
6 = ON Pedestrian service
ELECTRICAL CONNECTIONS TO TERMINALS FOR SLIDING GATE OPENING Dip Swit h B No. 1 = ON
24V a output max. oad:
n°1 radio receiver
n°2 pairs photoce s
Ke -operated
switch: 3456
FADINI
FADINI
NC
OPEN
CLOSE
STOP
COMMON
L4 OFF= no OPEN contact, turns on with
every open impu se
L5 OFF= no CLOSE contact, turns on with
every c ose impu se
NO and NC contacts to connect to the
respective termina s on the se ector
switches or the push-button pane .
A possib e configurations are attached
to the re ated contro accessories. L6 ON= STOP contact c osed, turns off with
every stop impu se
COMMON
8910
imit switch lose
common
imit switch open
X
X
FADINI

page 14
XE
24V Output:
FADINI
Astro 43
FADINI
Output for a 24V max 3W signa amp
showing the state of the automation:
Signa amp On = Gate open
Signa amp OFF = Gate c osed
0.5s (fast) f ashing = c osure movement
1s (normal) f ashing = opening movement
24V signal lamp
Output - max 3W:
COMMON
311
meccanica
FADINI
XE
Single-phase 230V
motor and capacitor
power suppl :
Dip-Switches and LED signals of the various functions
230Va output for
f ashing amp max
25W
18
16 17
M1
16 17 18
C1
Capacitor
Motor M1
Connect the
motor 1 capacitor
to the dedicated
termina s
0,5 HP - 230V
230V Flashing lamp:
2322
FADINI
l'apricancello
DIP-SWITCH-A N°4 e N°10
ON: Pre-f ashes prior to opening
OFF: no pre-f ashing
4
ON: F ashing deactivated during the pause
during Automatic Operation (with Dip 3=ON)
OFF: F ashing during the pause during
Automatic Operation (with DIP 3=ON)
10
230V Control box
power suppl : 24 25
24 25
230V - 50/60Hz ±10%
ontrol box power supply
12 13
Connections to
Pulin 3: ermina board for
connecting the Pulin 3
push-button pane Leds
262728
28 2627
3
24Vdc - 5W Output:
3029
29 30
+-
FOR SLIDING GATES Dip-B N°1=ON
UNIVERSAL ELECTRONIC CONTROL BOXES
230V 50/60Hz SINGLE-PHASE
GB
ELECTRICAL CONNECTIONS TO TERMINALS FOR SLIDING GATE OPENING Dip Swit h B No. 1 = ON
Accessory Electrical connections
No. 1 MOTOR UP TO 0.5 HP (0.36 KW) SINGLE-PHASE 230V:
1) Connect the power supp ies to one of the two outputs M1
or M2
24V ac OUTPUT for max oad:
No. 2 pairs of photoce s
No. 1 radio receiver
No. 1 Led Chis 37 / Chis E37 keyswitch
A instructions are attached to the re ated
contro accessories
No. 1 MOTOR UP TO 1.0 HP (0.72 KW) SINGLE-PHASE 230V:
Connect the outputs from termina s 16-19, 17-21 and 18-20
in para e .
IMPORTANT: with a 1.0 HP motor repla e fuses F1 and F2
with 6.3A fuses
C1
Capacitor
Motor M1
Connect the
motor 1 capacitor
to the dedicated
termina s
FORCE ADJUSTMENT:
Adjust the For e ne essary to move the
gate by the torque sele tor. Bea ause
of the inertia of the gate, too mu h for e
is in orre t in a ordan e with EN 12445
and EN 12453 safety standards. This an
be dangerous!
OPEN/CLOSE
MOTOR RUN TIME: 0-120s
DWELL TIME
0s - 220s
OUTPUT
24V dc 5W max.
NEUTRAL
PHASE
COMMON
-
+
-
+
18 21
16 19
17 20
M1
COMUNE
16 17 18 19 20 21
1,0CV - 230V
X
only ELPRO XE
!
X

page 15
XE
Dip-Switches and LED signa s of the various functions
Pedestrian Trimmer: adjusts the opening
distance of the gate, for the pedestrian
opening contact up to 30 s
3
ON: C oses automatica y
OFF: Semi-automatic
DIP-SWITCH-A N°3:
Description
RE-CLOSING AFTER PASSAGE BETWEEN THE PAIR OF PHOTOCELLS: in opening y le and
in dwell time (Dip-A No.3=ON)
This function a ows automatic re-c osure of the gate 3 seconds after passage between the
pair of photoce s
11
ON: Automatic re-c osure after passage
between the pair of photoce after 3 seconds
OFF: No automatic re-c osure
DIP-SWITCH-A N°11:
PEDESTRIAN OPENING
Opens the gate for pedestrian passage using the OPEN
command, Dip-6 = ON:
- 1 pu se = opens the gate as pre-set by the trimmer;
- 2 pu ses = fu opening of the gate;
(It is advised to use the pedestrian opening mode with
Dip-A No.3 = ON for automatic re-c osing).
The function "Pedestrian Opening" is not in service during
the first operation cyc e, after a power fai ure.
6
ON: Pedestrian opening
OFF: Pedestrian opening exc uded
DIP-SWITCH-A N° :
4
ON: Activates the DSA safety contro
OFF: Deactivates DSA safety contro
DIP-SWITCH-B N°4:
DEADMAN FUNCTION:
The open/c ose operations are achieved by "ho ding on a command switched" (the re ay is
not se f-retaining) and consequent y the user must be active y present during a automation
movements unti the push-button or the key-switch is re eased. 2
ON: Activates the deadman function
OFF: Deactivates the deadman function
DIP-SWITCH-B N°2:
NO
Externa c ock
3
DIP-SWITCH-A N°3:
34
OPEN
1615
FUNCTIONS FOR SLIDING GATE OPENING - Dip Switch B n°1=ON
meccanica
FADINI
X
UNIVERSAL ELECTRONIC CONTROL BOX
230V 50/60Hz SINGLE-PHASE
GB
FOR SLIDING GATES Dip-B N°1=ON
AUTOMATIC / SEMI-AUTOMATIC
Automati Cy le: with one impu se from the open command the gate opens and stops in
Pause mode for the time set on the Pause Trimmer. When this time expires the gate
automatica y c oses
Semi-automati Cy le: with one impu se from the open command the gate opens and
stays open, motor stopped. To c ose the gate you must give the c ose impu se.
DSA: PHOTOCELL AUTOMATIC CONTROL:
For the DSA contro (Device for Safety Auto-test) it is necessary to
connect only the photo ell transmitters (TX) to this specifica y
dedicated output and se ect Dip-B No.4=ON: the ELPRO X and
ELPRO XE wi check that a the connected photoce devices are
c eared from obstac es and proper y working before starting any gate
movements, otherwise the gate does not start.
24V AC output for
photoce TX
assigned to the DSA
ontrol
OPENING THROUGH EXTERNAL CLOCK:
Connection: connect the C ock NO contact in para e
with OPEN termina No. 4 and COMMON No. 3,
activating automatic re-c osure with Dip-Switch No.
3=ON.
Operation: program the opening time on the c ock.
When this present time comes up the gate wi open
and remain open (the f ashing ight turns off) and wi
not accept any other command (not even radio
commands) unti the time set on the c ock expires.
When this time expires the gate automatica y c oses
after the pause time.
During the dwe time, with the gate in open
position and system set to time c ock
operating mode, the indicator ight wi give out
2 consecutive f ashes fo owed by a ong pause.
COMMON
COMMON
ON: C oses automatica y
Important: use only and always
with Dip-switch No.3 = ON
Pause Trimmer: adjusts pause time for
Automatic mode from 1s up to 220 s
-
+
-
+
XE
X

page 16
XE
ON
OFF
123456789101112
DIP-SWITCH - A
meccanica
FADINI
X
FOR SWINGING GATE OPENERS:
position Dip Switch B No 1= OFF
234
1
ON
OFF
DIP-SWITCH - B
12
1234
ON
OFF
DIP-SWITCH - B
Limit Switches: if not
fitted, link out the
terminals or use
terminals 9 and 10 for
the function reverse
direction during
opening (descri ed on
page 18) (*)
IMPORTANT: if the imit switches are not used
then bridge inputs 8 and 10 with common 9 .
The termina s 9 and 10 a so provide inputs
for the NC contact on opening: if activated
during the opening cyc e, gate trave is
reversed for a short distance (see
paragraph Functions on page 18)
FOR SWINGING GATE OPENERS Dip-B N°1=OFF
12 13
GB UNIVERSAL ELECTRONIC CONTROL BOXES
230V 50/60Hz SINGLE-PHASE
Dip-Swit h A
1 = ON Photoce s stop gate during opening
2 = ON Radio does not reverse in opening
3 = ON Automatic c osure
4 = ON Pre-f ashing operationa
5 = ON Step-by-step radio
6 = ON Pedestrian service
7 = ON Stroke Reversing Pu se on Opening
8 = ON No wing de ay during opening. Motors start together
9 = ON Enab es input of the 2nd pair of photoce s
10 = ON F ashing ight off during pause
11 = ON Re-c oses in Opening and Dwe time after crossing the photoce s
12 = ON Memory of time settings when frequent operations are needed
Dip-Swit h B
1 = OFF SWINGING GATE OPENER mode
2 = ON Deadman function
3 = ON reverse direction by means of the safety devices in the operation area
4 = ON DSA contro of the photoce transmitters if conneced to the dedicated termina s
ELECTRICAL CONNECTIONS TO TERMINALS FOR SWIGING GATE OPENING Dip Swit h B No. 1 = OFF
Dip-Switches and LED signals of the various functions
Accessory Electrical connections
2nd pair of
Photocells: installed
internall
With Dip A No.9=ON and the NC onta t onne ted: The
gates stay stopped as ong as the photoce s are obstructed.
- In opening cyc e: obstac e removed, gates go on opening
- In c osing cyc e: obstac e removed, gate trave reversed
NOTE: if no photo ells 2nd pair are used, it is not ne essary
to bridge the onta t input, only set DIP-SWITCH-A No. 9=OFF
24V a output max. oad:
n°1 radio receiver
n°2 pairs photoce s
DIP-SWITCH-A N°9:
ON: Photoce 2nd pair enab ed
OFF: No photoce 2nd pair used
9
L2 On = no obstac e present, turns off with
obstac e present
1° pair Photocells:
installed externall
1
DIP-SWITCH-A N° 1:
ON: stop gate in opening and reverse in
closing when cleared
OFF: no stop in opening and reverse in
closing when o structed
A NC contacts of
safety accessories
such as Photoce s
(receivers) must be
connected in series
with termina s 1 and 2
NC
NC
12
L3 ON= no o stacle. It goes off in case
of o stacle
12 13
Radio contact (step-
b -step mode): ON:during opening does not reverse and does
not stop
OFF: during opening a ways stop and reverses
2
ON:Step-by-step with intermediate stop
OFF: Reverses movement by radio impu se
5
DIP-SWITCH-A N°2 and N°5:
RADIO
CONTACT
3 7
L7 OFF= no RADIO contact, turns on with
every radio contact impu se
FADINI
FADINI
Ke -operated
switch 3456
FADINI
FADINI
NC
OPEN
CLOSE
STOP
COMMON
L4 OFF= no OPEN contact, turns on with
every open impu se
L5 OFF= no CLOSE contact, turns on with
every c ose impu se
NO and NC contacts to connect to the
respective termina s on the se ector
switches or the push-button pane .
A possib e configurations are attached
to the re ated contro accessories. L6 ON= STOP contact c osed, turns off with
every stop impu se
COMMON
L8 ON= off when gate c osed
L9 ON= off with gate open
8910
imit switch lose
common
imit switch open
connecting any NO contact across the two
termina s generates, with each impu se:
- Opening on y: Dip 2=ON and Dip 5 = OFF
- inversion of direction with each impu se
Dip 2 = OFF and Dip 5 = OFF
- Step-by-step: Open-Stop-C ose-Stop
Dip 2 = OFF and Dip 5 = ON
- During opening no new command is
accepted. During dwe or c osing, each new
command stops and reverses trave
direction.Dip 2=ON e Dip 5=ON
24V a output max. load:
n°1 radio receiver
n°2 pairs photoce s
XE
X
FADINI
FADINI

page 17
230V a OUTPUT for
f ashing ight
max. 25 W
motor
delayed in
losing
Electrical latch and
230V Flashing lamp:
2322
FADINI
l'apricancello
DIP-SWITCH-A N°4 e N°10
Electrical lock:
14 15 12V AC output for max 15VA
ele tri al lo k
The e ectrica ock must be
mounted on the gate of the
de ayed c osure M1 motor
18 21
16 19
17 20
M1
16 17 18 19 20 21
M2
meccanica
FADINI
XE
DIP-SWITCH-A N°8
ON: E iminate gate opening de ay
OFF: A 2s gate opening de ay is active
8
230V a OUTPUT for e ectrica
atch: it is important to always
dis onne t power during Dwell
time with Dip-A No. 10= ON
XE
COMMON
FOR SWINGING GATE OPENERS Dip-B N°1=OFF
GB UNIVERSAL ELECTRONIC CONTROL BOXES
230V 50/60Hz SINGLE-PHASE
ELECTRICAL CONNECTIONS TO TERMINALS FOR SWINGING GATE OPENING Dip Swit h B No. 1 = ON
Accessory Electrical connections Dip-Switches and LED signals of the various functions
24V Output:
FADINI
Astro 43
FADINI
Output for a 24V max 3W signa amp
showing the state of the automation:
Signa amp On = Gate open
Signa amp OFF = Gate c osed
0.5s (fast) f ashing = c osure movement
1s (normal) f ashing = opening movement
24V signal lamp
Output - max 3W:
COMMON
311
12 13
24V ac OUTPUT for max oad:
No. 2 pairs of photoce s
No. 1 radio receiver
No. 1 LED Chis 37 / Chis E37 Keyswitch
A instructions are attached to the re ated
contro accessories
If only one motor is installed:
1) Connect the power supp y to the termina s of motor M1
2) Exc ude the wing opening de ay Dip-A No. 8=ON
3) Set the Gate De ay Trimmer to the owest in c osing cyc e
Single-phase 230V
motor and capacitor
power suppl :
If two motors are installed:
The gate opening de ay is set at 2s, if required it must be
enab ed with Dip-A No. 8 = OFF
C1
Capacitor
Motor M1
COMMON
C2
Capacitor
Motor M2
motor
delayed in
opening
OPEN/CLOSE
MOTOR RUN TIME
0-120s
DWELL TIME
0s - 220s GATE DELAY
CLOSING: 0-10s
ON: Pre-f ashes prior to opening
OFF: no pre-f ashing
4
ON: Deactivated during the Dwe time,
Automatic mode (with Dip 3=ON)
OFF: Supp ied with power in dwe time
Automatic mode (with DIP 3=ON)
10
230V Control box
power suppl :
Connections to
Pulin 3 LEDs: termina board for
connecting the Pulin 3
push-button pane Leds
262728
28 2627
3
24 25
24 25
230V - 50/60Hz ±10%
ontrol box power supply
NEUTRAL
PHASE
24Vdc - 5W Output:
3029
29 30
+-
24V dc 5W OUTPUT
-
+
-
+
-
+
X
FORCE ADJUSTMENT:
Adjust the For e ne essary to move the
gates by the torque sele tor. Bea ause of
the inertia of the gates, too mu h for e is
in orre t in a ordan e with EN 12445 and
EN 12453 safety standards. This an be
dangerous!
X
Only ELPRO XE
!

page 18
XE
meccanica
FADINI
XE
6
ON: M1 Pedestrian gate opening
OFF: Pedestrian opening exc uded
DIP-SWITCH-A N° :
STROKE REVERSING PULSE ON OPENING:
This function faci itates disengagement of the E ectrica ock when the gate is fu y c osed,
even in Pedestrian Open mode: the wings of the c osed gate are pushed to c ose for 2
se onds before opening.
DIP-SWITCH-A N°7:
ON: Stroke reversing pu se enab ed for 2 s
OFF: Stroke reversing pu se disab ed
7
Installation in Blo ks of Flats:
This is a function for intense use with frequent inversions of direction: when this function is
enab ed it takes into account the remaining motor run time when there is an inversion of
direction or passage between the photoce s.
DIP-SWITCH-A N°12:
12
ON: Motor run time memory enab ed
OFF: Motor run time memory disab ed
NC
contact
during
opening
COMMON
8910
3
ON: Gate travel reversing in opening activated
y the NC safety devices connected to terminals
9 and 10
OFF:Normal operation with limit switches
DIP-SWITCH-B N°3:
FOR SWINGING GATE OPENERS Dip-B N°1=OFF
UNIVERSAL ELECTRONIC CONTROL BOXES
230V 50/60Hz SINGLE-PHASE
GB
FUNCTIONS FOR SWINGING GATE OPENERS - Dip Switch B n°1=OFF
Dip-Switches and LED signa s of the various functions
Description
3
ON: C oses automatica y
OFF: Semi-automatic
DIP-SWITCH-A N°3:
AUTOMATIC / SEMI-AUTOMATIC
Automati Cy le: with one impu se from the open command the gate opens and stops in
Pause mode for the time set on the Dwell Trimmer. When this time expires the gate automatica y
c oses
Semi-automati Cy le: with one impu se from the open command the gate opens and is
stopped open. To c ose the gate you must give a c ose pu se.
Dwell Trimmer: adjusts pause time for
Automatic mode from 1s up to 220 s
INVERSION OF DIRECTION DURING OPENING:
IMPORTANT: (*) if limit swit hes are onne ted to terminals 9
and 10, this fun tion annot be used (see page 16)
Gate trave is reversed on y in the opening cyc e. The function is
aimed at protecting those areas of moviment between the opening
gates and possib e fixed obstac es ( perimeter wa s or gate posts)
to prevent crashing.
On expiring of the Dwe time, the gate c oses (if automatic mode
is pre-se ected: Dip-A No. 3=ON)
PEDESTRIAN OPENING FOR MOTOR M1 ONLY
With the gates in c osed position: a first opening command opens the M1 gate for pedestrians
A second opening pu se wi operate the gate fu y open, a ong with the other gate, M2
motor.
The function "Pedestrian Opening" is not in service during the first operation cyc e, after a
power fai ure.
RE-CLOSING AFTER PASSAGE BETWEEN THE PAIR OF PHOTOCELLS: during the opening cyc e
and in Dwe time (DIP-A No.3 = ON)
This function a ows automatic re-c osing of the gates 3 seconds after passage between
the pair of photoce s. If a 2nd pair of photoce s is a so insta ed, they must be enab ed
by setting Dip-A No. 9=ON.
11
ON: Automatic re-c osure after passage
between the pair of photoce after 3 seconds
OFF: No automatic re-c osure
DIP-SWITCH-A N°9 and N°11:
9
ON: Enab es the 2nd pair of photoce s
OFF: 2nd pair of photoce s not used
4
ON: Activates the DSA safety contro
OFF: Deactivates DSA safety contro
DIP-SWITCH-B N°4:
1615
DSA: PHOTOCELL AUTOMATIC CONTROL:
For the DSA contro (Device for Safety Auto-test) it is necessary to
connect only the photo ell transmitters to this output and to se ect
Dip-B No.4=ON: if this function is enab ed, E pro X and E pro XE wi
check that a the connected photoce devices are c eared from
obstac es, and proper y working, before starting any gate movements,
otherwise the gates are not started. 24V a output for photoce TX
assigned to the DSA ontrol
DEADMAN mode:
The open/c ose operations are achieved by ho ding on a command switched (the re ay is
not se f-retaining) and consequent y the user must be active y present during a automation
movements unti the push-button or the key-switch is re eased. 2
ON: Activates the deadman function
OFF: Deactivates the deadman function
DIP-SWITCH-B N°2:
OPENING THROUGH EXTERNAL CLOCK:
Connection: connect the C ock NO contact in para e
with OPEN termina No. 4 and COMMON No. 3, activating
automatic re-c osure with Dip-Switch No. 3=ON.
Operation: program the opening time on the c ock.
When this present time comes up the gate wi open
and remain open (the f ashing ight turns off) and wi not
accept any other command (not even radio
commands) unti the time set on the c ock expires.
When this time expires the gate automatica y c oses
after the pause time.
NO
Externa c ock
34
OPEN
COMMON
COMMON
3
DIP-SWITCH-A N°3:
ON: C oses automatica y
Important: use only and always
with Dip-switch No.3 = ON
-
+
X
X

page 19
ON
OFF
123456789101112
DIP-SWITCH - A
meccanica
FADINI
XE
FOR UP-AND-OVER GARAGE DOOR OPENER:
posizionare il Dip Switch B N°1= ON
234
1
ON
OFF
DIP-SWITCH - B
1234
ON
OFF
DIP-SWITCH - B
Safet edge: 12
DIP-SWITCH-A N°8 E N°9:
ON: Increase time during inversion
OFF: Increase time during inversion
8
ON: Inversion of direction with safety edge
OFF: No inversion of direction.
9
L2 ON= no obstac e present, turns off with
obstac e present
ELECTRICAL CONNECTIONS FOR UP-AND-OVER DOOR OPENING - Dip Switch B n°1=ON
FOR UP-AND-OVER GARAGE OPENER Dip-B N°1=ON
GB UNIVERSAL ELECTRONIC CONTROL BOXES
230V 50/60Hz SINGLE-PHASE
Dip-Swit h A
1 = ON Photoce s stop motion in opening
2 = ON Radio does not reverse in opening
3 = ON Automatic c osure
4 = ON Pre-f ashing in service
5 = ON Step-by-step radio
6 = B ank
7 = B ank
8 = see SAFETY EDGE connections
9 = see SAFETY EDGE connections
10 = ON F ashing ight off during pause
11 = ON Re-c oses during Opening and during pause after passage on the Photoce s
12 = ON Run Time memory enab ed for very frequent cyc ing
Dip-Swit h B
1 = ON UP-AND-OVER DOOR mode
2 = ON Deadman Mode
3 = B ank
4 = ON DSA photoce transmitter checking, if connected to dedicated termina s
Accessory Electrical connections Dip-Switches and LED signals of the various functions
The safety edge permits inversion of direction for a short section
of trave , stopping the gate: with DIP A No. 9=ON.
In both trave directions
NOTE: if no safety edge is present it is not ne essary to
bridge the onta t input, only DIP A No. 9=ON
Photocells:
1
DIP-SWITCH-A N° 1:
ON: stop travel in opening and reverse in
closing once cleared from o stacle
OFF: no stop in opening and reverse in closing in
case of o stacle
A NC contacts of
safety accessories
such as Photoce s
(receivers) must be
connected in series
with termina s 1 and 2
NC
NC
12
L3 Acceso= no o stacle. It goes off in case
of o stacle.
12 13
24V a output max. load:
n°1 radio receiver
n°2 pairs photoce s
Radio contact step-
b -step: ON:during opening does not reverse and does
not stop
OFF: during opening a ways stop and reverses
2
ON:Step-by-step with intermediate stop
OFF: reverses movement by every radio impu se
5
DIP-SWITCH-A N°2 and N°5:
RADIO
CONTACT
3 7
L7 OFF= no RADIO contact, turns on with
every radio contact impu se
FADINI
FADINI
Ke -operated
switch: 3456
FADINI
FADINI
NC
OPEN
CLOSE
STOP
COMMON
L4 OFF= no OPEN contact, turns on with
every open impu se
L5 OFF= no CLOSE contact, turns on with
every c ose impu se
NO and NC contacts to connect to the
respective termina s in the key- switches
or the push-button pane s.
A possib e configurations are attached
to the re ated contro accessories. L6 ON= STOP contact c osed, turns off with
every stop contact
COMMON
by connecting any NO contact across the
two termina s, the fo owing can be achieved
by each pu sing:
- Opening on y: Dip 2=ON and Dip 5 = OFF
- inversion of direction with each impu se
Dip 2 = OFF and Dip 5 = OFF
- Step-by-step: Open-Stop-C ose-Stop
Dip 2 = OFF and Dip 5 = ON
- During opening no new command is
accepted. During dwe or c osing, each new
command stops and reverses trave
direction.Dip 2=ON and Dip 5=ON
Limit switch:
IMPORTANT: if the imit switches are not
used then bridge inputs 8 and 10 with
common 9
L8 ON= off when gate c osed
L9 ON= off with gate open
8910
imit switch lose
common
imit switch open
XE
X
X
FADINI

page 20
18 21
16 19
17 20
M1
16 17 18 19 20 21
M2
meccanica
FADINI
XE
UNIVERSAL ELECTRONIC CONTROL BOXES
230V 50/60Hz SINGLE-PHASE
GB
FOR UP-AND-OVER GARAGE OPENER Dip-B N°1=ON
XE
ELECTRICAL CONNECTIONS FOR UP-AND-OVER DOOR OPENING - Dip Switch B n°1=ON
Accessory Electrical connections Dip-Switches and LED signals of the various function
Electrical lock:
14 15 12V AC output for max 15VA
ele tri al lo k
24V Output:
FADINI
Astro 43
FADINI
Output for a 24V max 3 W signa amp
showing the status of the automation:
Signa amp On = Gate open
Signa amp OFF = Gate c osed
0.5s (fast) f ashing = c osure movement
1s (normal) f ashing = opening movement
24V signal lamp
Output - max 3W:
COMMON
311
12 13
24V AC OUTPUT for max oad:
No. 2 pairs of photoce s
No. 1 radio receiver
No. 1 LED Chis 37 / Chis-E37 key-switch
A instructions are attached to the re ated
contro accessories
Single-phase 230V
motor and capacitor
power suppl :
C1
Capacitor
Motor M1
C2
Capacitor
Motor M2
COMMON
COMMON
FORCE ADJUSTMENT:
Adjust the For e ne essary to move the door
by the torque sele tor. Bea ause of the inertia
of the door, too mu h for e is in orre t in
a ordan e with EN 12445 and EN 12453
safety standards. This an be dangerous!
OPEN/CLOSE
MOTOR RUN TIME
0-60s
DWELL TIME
0s - 220s
230V a OUTPUT for max
25W f ashing ight
Electrical latch and
230V Flashing lamp:
2322
FADINI
l'apricancello
DIP-SWITCH-A N°4 e N°10
230V a OUTPUT for e ectrica
atch:
it is important to
always dis onne t power
during Dwell time with Dip-A
No. 10= ON
ON: Pre-f ashes prior to opening
OFF: no pre-f ashing
4
ON: Deactivated during the Dwe time,
Automatic mode (with Dip 3=ON)
OFF: Supp ied with power in dwe time
on Automatic mode (with DIP 3=ON)
10
230V Control box
power suppl :
Pulin 3 power
suppl : Termina board for
connecting the LEDs of
the Pulin 3 push-button
pane
262728
28 2627
3
24 25
24 25
230V - 50/60Hz ±10%
ontrol box power supply
NEUTRAL
PHASE
24Vdc - 5W Output:
3029
29 30
+-
24V dc 5W
OUTPUT
-
+
-
+
X
X
Only ELPRO XE
!

page 21
meccanica
FADINI
XE
FOR UP-AND-OVER GARAGE OPENER Dip-B N°1=ON
XE
GB UNIVERSAL ELECTRONIC CONTROL BOXES
230V 50/60Hz SINGLE-PHASE
FUNCTIONS FOR UP-AND-OVER DOOR OPENING - Dip Switch B n°1=ON
Dip-Switches and LED signa s of the various functions
Description
3
ON: C oses automatica y
OFF: Semi-automatic
DIP-SWITCH-A N°3:
AUTOMATIC / SEMI-AUTOMATIC
Automati Cy le: with one pu se from the open command the door opens and stops in
Dwe mode for the time pre-set on the Dwell Trimmer. When this time expires the door
automatica y c oses
Semi-automati Cy le: with one pu se from the open command the door opens and stays
stopped. To c ose the door, a c ose pu se is needed.
Dwell Trimmer: adjusts pause time for
Automatic mode from 1s up to 220 s
RE-CLOSING AFTER PASSAGE BETWEEN THE PHOTOCELLS: in opening and dwe cyc es
(DIP-A No. 3 = ON
This function a ows automatic re-c osing of the door 3 seconds after passing between
the photoce s.
11
ON: Automatic re-c osure after passage
between the pair of photoce after 3 seconds
OFF: No automatic re-c osure
DIP-SWITCH-A N°11:
INSTALLATIONS WITH VERY HIGH FREQUENCY OF USE:
This is a function for intense use with frequent inversions of direction: when this function is
enab ed it takes into account the remaining motor run time when there is an inversion of
direction or passage between the photoce s.
DIP-SWITCH-A N°12:
12
ON: Run Time memory enab ed
OFF: No memory enab ed
4
ON: Activates the DSA safety contro
OFF: Deactivates the DSA safety contro
DIP-SWITCH-B N°4:
1615
DSA: PHOTOCELL AUTOMATIC CONTROL:
For the DSA contro (Device for Safety Auto-test) it is necessary
to connect only the photo ell transmitters (TX) to this output
and to se ect Dip-B No.4=ON: if this function is enab ed, ELPRO
X and ELPRO XE wi check that a the connected photoce
devices are c eared from obstac es and proper y working before
starting any door movements, otherwise the door is not started.
24V a output for
photoce TX assigned
to the DSA ontrol
DEADMAN FUNCTION:
The open/c ose operations are achieved by " ho ding on a command switched" (the re ay is
not se f-retaining) and consequent y the user must be active y present during a automation
movements unti the push-button or the key-switch is re eased. 2
ON: Activates the deadman mode
OFF: Deactivates the deadman mode
DIP-SWITCH-B N°2:
OPENING THROUGH EXTERNAL CLOCK:
Connection: connect the C ock NO contact in para e
with OPEN termina No. 4 and COMMON No. 3, activating
automatic re-c osure with Dip-Switch No. 3=ON.
Operation: program the opening time on the c ock.
When this present time comes up the gate wi open
and remain open (the f ashing ight turns off) and wi not
accept any other command (not even radio
commands) unti the time set on the c ock expires.
When this time expires the gate automatica y c oses
after the pause time.
NO
Externa c ock
34
OPEN
COMMON
COMMON
3
DIP-SWITCH-A N°3:
ON: C oses automatica y
Important: use only and always
with Dip-switch A No.3 = ON
-
+
X
X

La ditta costruttrice si riserva di apportare modifiche al presente libretto senza preavviso
Via Mantova, 177/A - 37053 Cerea (Verona) Italy - Tel. +39 0442 330422 r.a. - Fax +39 0442 331054
®
s.n.c.
Prima dellinstallazione da parte di personale tecnico qualificato, si consiglia di prendere visione del
Libretto Normative di Sicurezza che la Meccanica Fadini mette a disposizione.
Please note that installation must be carried out by qualified technicians following Meccanica Fadinis
Safety Norms Manual.
Linstallation doit être effectuée par un technicien qualifié suivant le manuel des Normes de Sécurité
de Meccanica Fadini.
Antes de la instalación por parte del personal técnico cualificado, se aconseja consulter el Libreto
con las Normativas de Seguridad que Meccanica Fadini pone a disposición.
I -
GB -
F -
E -
VIETATO GETTARE NEI RIFIUTI
MATERIALI NOCIVI PER LAMBIENTE
Direttiva 2003/108/CE
Smaltimento dei materiali
elettrici ed elettronici
I
DISPOSE OF PROPERLY
ENVIRONMENT-NOXIOUS MATERIALS
2003/108/CE Directive
for waste electrical and
electronic equipments
GB
07-2014
Other manuals for Elpro X
1
This manual suits for next models
1
Table of contents
Other fadini Control Unit manuals
Popular Control Unit manuals by other brands

Hi-Link
Hi-Link HLK-B20 user manual

Cooper Menvier
Cooper Menvier Scantronic 9651 user guide

Crestron
Crestron C2N-VEQ4 quick start guide

Extron electronics
Extron electronics AC 102 installation guide

Viessmann
Viessmann VITOTRONIC 100 Installation and service instructions

Nordson EFD
Nordson EFD 752V-HL operating manual

DeZurik
DeZurik APCO CSD-800 user manual

Quectel
Quectel M35 Command manual

ALM
ALM O/A/x2 Operation manual

AEB
AEB Galileo Fitting Instructions and Guarantee workbook

Brandywine
Brandywine PMC-SYNCCLOCK32-UNIV Operation & maintenance manual

Watts
Watts 980GD-16-19 Installation, operation and maintenance manual