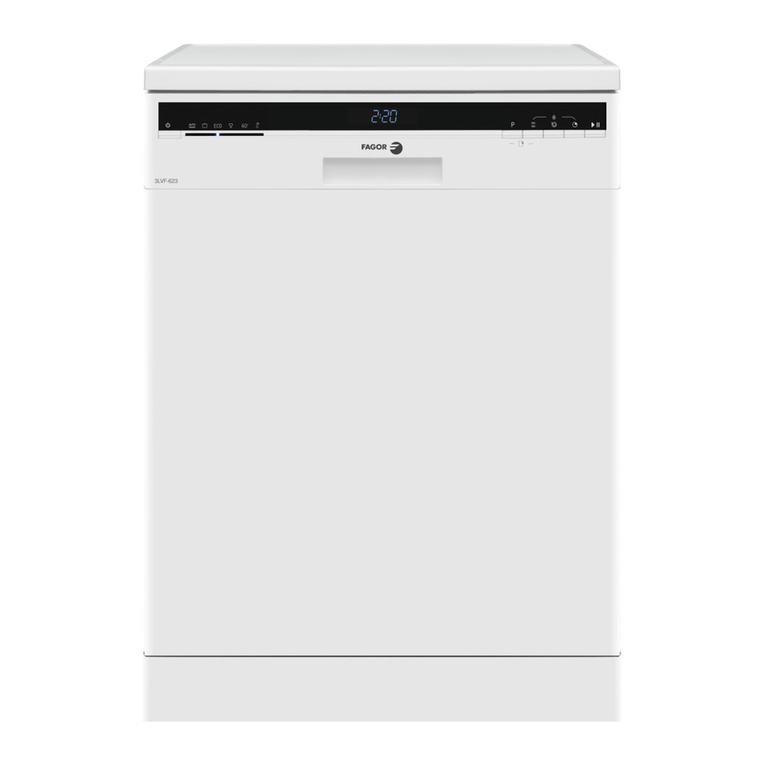
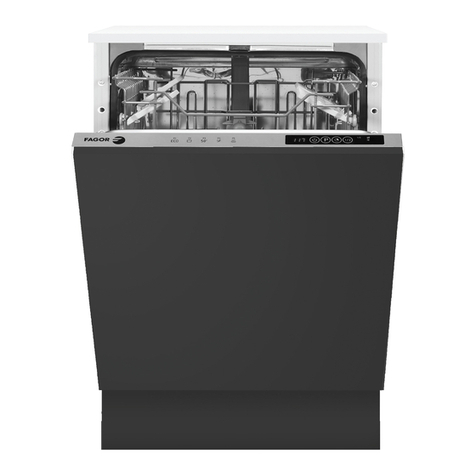
Fagor 3LVF-434.1IT User manual

IO-DWS-3521/1
(01.2022)
Dishwasher / Myčka / Umývačka / Mosogatógépe
3LVF-434.1IT
OPERATING INSTRUCTIONS EN
NÁVOD K OBSLUZE CS
NÁVOD NA OBSLUHU SK
HASZNÁLATI UTASÍTÁS HU

2

3
EN - TABLE OF CONTENTS
SAFETY INSTRUCTIONS FOR USE 8
BEFORE YOU INSTALL THE APPLIANCE 8
BEFORE FIRST USE 8
CHILD SAFETY 8
DAILY MAINTENANCE 9
IN CASE OF PROBLEMS 9
RECOMMENDATIONS 9
DISHES AND UTENSILS THAT ARE NOT SUITABLE FOR DISHWASHERS. 10
UNPACKING 11
DISPOSAL OF OLD APPLIANCE 12
INSTALL THE APPLIANCE 13
PLACE YOUR APPLIANCE 13
WATER SUPPLY CONNECTION 13
WATER SUPPLY HOSE 13
THE DRAIN HOSE 14
ELECTRICAL CONNECTION 14
PREPARE THE APPLIANCE FOR OPERATION 15
BEFORE FIRST USE 15
THE IMPORTANCE OF WATER DESCALING 15
ADD SPECIAL SALT 15
THE TEST STRIP 16
MULTI-COMPONENT (MULTITAB) DETERGENTS (EG. 2-IN-1, 3-IN-1, ETC.) 16
WATER HARDNESS TABLE 17
THE USE OF DETERGENTS 17
STANDARD LOADING AND TEST RESULTS: 18
INFORMATION FOR COMPARABILITY TEST IN ACCORDANCE WITH EN 60436 18
CUTLERY BASKET 19
CUTLERY RACK 19
LOAD DISHES INTO DISHWASHER 20
UPPER BASKET 20
FOLD THE MUGS AND CUPS SHELVES 20
FOLD THE DISHWASHER BASKET SPIKES 21
TIPS FOR USING THE DISHWASHER BASKET: 21
LOWER BASKET 22
FILL THE DETERGENT DISPENSER 23
ADD RINSE AID TO THE DISPENSER AND ADJUST SETTING 24
TURN ON THE APPLIANCE AND SELECT PROGRAMME 27
TURN ON THE APPLIANCE 27
CHANGE PROGRAMME 27
ADD DISHES DURING THE PROGRAMME: 27
GLASS HOLDER (SELECT MODELS ONLY) 30
Glass rack (select models only) 30
BAKING TRAY HOLDER (SELECT MODELS ONLY) 31
BLUE DOT (SELECT MODELS ONLY) 31
CLEANING AND MAINTENANCE 32
CLEAN EXTERNAL SURFACES 32
CLEAN INTERNAL SURFACES 32
SPRAY ARMS 33
CLEAN THE DISHWASHER 33
PROBLEM SOLVING GUIDE 35
INSTALL THE APPLIANCE 37
IN A CABINET 37
1. PLACE YOUR APPLIANCE 37
BUILT-ON INSTALLATION 39
WARRANTY AND AFTER SALES SERVICE 44
WARRANTY 44

4
CS - OBSAH
POKYNY K BEZPEČNÉMU POUŽÍVÁNÍ 46
PŘED INSTALACÍ 46
PŘED PRVNÍM POUŽITÍM 46
BEZPEČNOST DĚTÍ 46
KAŽDODENNÍ OBSLUHA 47
V PŘÍPADĚ PROBLÉMŮ 47
DOPORUČENÍ 48
NÁDOBÍ, KTERÉ NENÍ VHODNÉ PRO MYTÍ V MYČCE 48
VYBALENÍ 50
LIKVIDACE OPOTŘEBOVANÝCH ZAŘÍZENÍ 51
INSTALACE ZAŘÍZENÍ 52
UMÍSTĚNÍ ZAŘÍZENÍ 52
PŘÍPOJKA VODY 52
HADICE PŘIVÁDĚJÍCÍ VODU 52
ODTOKOVÁ HADICE 53
ELEKTRICKÁ PŘÍPOJKA 53
PŘÍPRAVA ZAŘÍZENÍ DK PROVOZU 54
PŘED PRVNÍM POUŽITÍM MYČKY 54
VÝZNAM ODVÁPŇOVÁNÍ VODY 54
NAPLŇOVÁNÍ SOLI 54
TESTOVACÍ PROUŽEK 55
VÍCESLOŽKOVÉ DETERGENTY (NAPŘ.: ”2 V 1”, ”3 V 1” ATP.) 55
TABULKA TVRDOSTI VODY 56
SPOTŘEBA DETERGENTŮ 57
NAPLŇOVÁNÍ MYČKY NÁDOBÍM 60
HORNÍ KOŠ 60
SKLÁDÁNÍ POLIC NA HRNÍČKY/ŠÁLKY 60
SKLÁDÁNÍ STOJANŮ KOŠE 60
POKYNY K POUŽÍVÁNÍ KOŠE: 61
SPODNÍ KOŠ 62
NAPLŇOVÁNÍ DÁVKOVAČE DETERGENTU 63
NAPLŇOVÁNÍ DÁVKOVAČE LEŠTICÍHO PROSTŘEDKU A VÝBĚR NASTAVENÍ 64
ZAPNUTÍ ZAŘÍZENÍ A VÝBĚR PROGRAMU 67
ZAPNUTÍ ZAŘÍZENÍ 67
ZMĚNA PROGRAMU 67
PŘIDÁVÁNÍ NÁDOBÍ V PRŮBĚHU PROGRAMU 67
PO UKONČENÍ MYCÍHO CYKLU 68
DRŽÁK NA SKLENIČKY (JEN VYBRANÉ MODELY) 71
STOJÁNEK NA SKLENIČKY (JEN VYBRANÉ MODELY) 71
DRŽÁK NA PEČICÍ PLECH (JEN VYBRANÉ MODELY) 72
BLUE DOT (JEN VYBRANÉ MODELY) 72
ČIŠTĚNÍ A ÚDRŽBA 73
ČIŠTĚNÍ VNĚJŠÍCH POVRCHŮ 73
ČIŠTĚNÍ VNITŘNÍCH POVRCHŮ 73
POSTŘIKOVACÍ RAMENA 74
ČIŠTĚNÍ MYČKY 74
ZJIŠŤOVANÍ ZÁVAD 76
MONTÁŽ ZAŘÍZENÍ DO NÁBYTKOVÉ SESTAVY 78
UMÍSTĚNÍ ZAŘÍZENÍ 78
MONTÁŽ DO NÁBYTKU 80
ZÁRUKA, POPRODEJNÍ SERVIS 85
ZÁRUKA 85

5
SK - OBSAH
POKYNY TÝKAJÚCE SA BEZPEČNÉHO POUŽÍVANIA 87
PRED MONTÁŽOU 87
PRED PRVÝM POUŽITÍM 87
BEZPEČNOSŤ DETÍ 88
KAŽDODENNÉ POUŽÍVANIE 88
V PRÍPADE PROBLÉMOV 89
ODPORÚČANIA 89
RIAD, KTORÝ NIE JE URČENÝ NA UMÝVANIE V UMÝVAČKE 89
ROZBALENIE 91
LIKVIDÁCIA ZARIADENÍ 92
INŠTALÁCIA ZARIADENIA 93
UMIESTNENIE ZARIADENIA 93
PRÍPOJKA VODY 93
PRÍTOKOVÁ HADICA 93
ODTOKOVÁ HADICA 94
PRIPOJENIE K EL. NAPÄTIU 94
PRÍPRAVA ZARIADENIA NA POUŽÍVANIE 95
PRED PRVÝM POUŽITÍM UMÝVAČKY 95
VÝZNAM ODSTRAŇOVANIA VODNÉHO KAMEŇA 95
NAPLŇOVANIE SOĽOU 95
TESTUJÚCA PÁSKA 96
TABLETY (NAPR.: „2 V 1“, „3 V 1“ AP.) 96
TABUĽKA TVRDOSTI VODY 97
SPOTREBA DETERGENTOV 98
NAPLŇOVANIA UMÝVAČKY RIADOM 101
HORNÝ KÔŠ 101
SKLADANIE POLÍC NA HRNČEKY/ŠÁLKY 101
SKLADANIE STOJANOV KOŠA 102
TIPY TÝKAJÚCE SA POUŽÍVANIA KOŠA: 102
DOLNÝ KÔŠ 103
NAPLŇOVANIE ZÁSOBNÍKA (DÁVKOVAČA) UMÝVACIEHO PROSTRIEDKU 104
NAPLŇOVANIE DÁVKOVAČE LEŠTIACEHO PRÍPRAVKU A VOĽBA NASTAVENIA 105
ZAPÍNANIE ZARIADENIA A VOĽBA PROGRAMU 108
ZAPÍNANIE ZARIADENIA 108
ZMENA PROGRAMU 108
VKLADANIE RIADU V PRIEBEHU PROGRAMU 108
PO SKONČENÍ UMÝVACIEHO CYKLU 109
DRŽIAK NA POHÁRE (IBA V NIEKTORÝCH MODELOCH) 112
STOJAN NA POHÁRE (IBA V NIEKTORÝCH MODELOCH) 112
DRŽIAK NA PLECH (IBA V NIEKTORÝCH MODELOCH) 113
BLUE DOT (IBA V NIEKTORÝCH MODELOCH) 113
ČISTENIE A ÚDRŽBA 114
ČISTENIE VONKAJŠÍCH POVRCHOV 114
ČISTENIE VNÚTORNÝCH POVRCHOV 114
STRIEKACIE RAMENÁ 115
UMÝVANIE UMÝVAČKY 116
STANOVENIE PORÚCH 117
MONTÁŽ ZARIADENIA ZASTAVANIE V NÁBYTKU 119
UMIESTENIE ZARIADENIA 119
MONTÁŽ V NÁBYTKU 121
ZÁRUKA, POPREDAJNÝ SERVIS 126
ZÁRUKA 126

6
HU - TARTALOMJEGYZÉK
A BIZTONSÁGOS HASZNÁLATRA VONATKOZÓ FELTÉTELEK 128
FELSZERELÉS ELŐTT 128
ELSŐ HASZNÁLAT ELŐTT 128
GYEREKEK BIZTONSÁGA 128
A MINDENNAPI HASZNÁLAT 129
PROBLÉMA ESETÉN 130
JAVASLATOK 130
A MOSOGATÓGÉPBEN NEM TISZTÍTHATÓ EDÉNYEK 130
KICSOMAGOLÁS 132
A HASZNÁLT KÉSZÜLÉKEK ELTÁVOLÍTÁSA 133
A KÉSZÜLÉK FELSZERELÉSE 134
A KÉSZÜLÉK BEÁLLÍTÁSA 134
VÍZCSATLAKOZÁS 134
VÍZBEVEZETŐ TÖMLŐ 134
VÍZELVEZETŐ TÖMLŐ 135
ELEKTROMOS CSATLAKOZTATÁS 135
A KÉSZÜLÉK ÜZEMBE HELYEZÉSE 136
ELSŐ HASZNÁLAT ELŐTT 136
A VÍZKŐMENTESÍTÉS FONTOSSÁGA 136
SÓ BEÖNTÉSE 136
TESZTCSÍK 137
ÖSSZETETT MOSOGATÓSZEREK (PL.: ”2AZ1-BEN”, ”3AZ1-BEN” STB.) 137
VÍZKEMÉNYSÉGI TÁBLÁZAT 138
MOSOGATÓSZEREK FOGYASZTÁSA 139
AZ EDÉNYEK BEHELYEZÉSE 142
FELSŐ KOSÁR 142
POHARAK/CSÉSZÉK POLCRA TÖRTÉNŐ ELHELYEZÉSE 142
A KOSÁR ÁLLVÁNYAINAK ÖSSZECSUKÁSA 143
TIPPEK A KOSÁR HASZNÁLATÁHOZ: 143
ALSÓ KOSÁR 144
A MOSOGATÓSZER ADAGOLÓ FELTÖLTÉSE 145
AZ ÖBLÍTŐSZER ADAGOLÓ BETÖLTÉSE ÉS BEÁLLÍTÁSOK 146
A KÉSZÜLÉK BEKAPCSOLÁSA ÉS A PROGRAM KIVÁLASZTÁSA 149
A KÉSZÜLÉK BEKAPCSOLÁSA 149
PROGRAM MÓDOSÍTÁSA 149
EDÉNY HOZZÁRAKÁSA MOSOGATÁS KÖZBEN 149
A MOSÁSI CIKLUS BEFEJÉSÉT KÖVETŐEN 150
POHÁRTARTÓ (CSAK EGYES MODELLEKNÉL) 153
POHÁRÁLLVÁNY (CSAK EGYES MODELLEKNÉL) 153
SÜTŐTÁLCA TARTÓ (CSAK EGYES MODELLEKNÉL) 154
BLUE DOT (CSAK EGYES MODELLEKNÉL) 154
TISZTÍTÁS ÉS KARBANTARTÁS 155
KÜLSŐ FELÜLETEK TISZTÍTÁSA 155
BELSŐ FELÜLETEK TISZTÍTÁSA 155
PERMETEZŐKAROK 156
A MOSOGATÓGÉP TISZTÍTÁSAI 157
A HIBA MEGHATÁROZÁSA 158
A KÉSZÜLÉK TELEPÍTÉSE BŐTORBA VALÓ BEÉPÍTÉSE 160
A KÉSZÜLÉK BEÁLLÍTÁSA 160
BEÉPÍTÉS A BÚTOROKBA 162
GARANCIA ÉS VÁSÁRLÁS UTÁNI SZERVIZ 166
GARANCIA 166

7
Dear customer,
From now on, your daily housework will be easier
than ever before.Your appliance is excep-
tionally easy to use and extremely ecient. After
reading these Operating Instructions, operating
the appliance will be easy.
Before being packaged and leaving the manufac-
turer, the appliance was thoroughly checked with
regard to safety and functionality.
Before using the appliance, please carefully read
these Operating Instructions. By following these
instructions carefully you will be able to avoid any
problems in using the appliance. It is important to
keep these Operating Instructions and store them
in a safe place so that they can be consulted at
any time.
Follow these instructions carefully in order to
avoid possible accidents.
Sincerely,

8
SAFETY INSTRUCTIONS FOR USE
Before you install the appliance
• Check the appliance for transport damage. Never install or
use a damaged appliance. If in doubt, contact your seller.
• Carefully read the operating instructions before plugging
dishwasher to a power outlet and using the appliance. Op-
erating instruction include tips that will help you avoid the
risk of injury and damage to the appliance.Keep dishwash-
er documentation in a safe place for possible future use.
• These operating instructions have been prepared for a
range of appliances and some features described herein
may not apply to your appliance.
• See installation notes (below).
• Refer the grounding system installation to a qualied elec-
trician.
• The manufacturer shall not be liable for any damage aris-
ing from the use of a non-grounded appliance.
• Before using the appliance, verify that the data given on
the rating plate matches that of local power outlets.
• Do not plug in the appliance before and during installation.
• Always use the original plug that came with the appliance.
• Do not use an extension cord to connect the appliance to
the wall outlet. Extension cords are not suciently safe
(e.g. they may overheat).
• Make sure the plug is easily accessible after installing the
appliance.
Child safety
• This appliance can be used by children aged 8 years and
older or persons with physical, mental or sensory hand-
icaps, or those who are inexperienced or unfamiliar with
the appliance, provided they are supervised or have been
instructed how to safely use the appliance and are familiar
with the associated risks. Ensure that children do not play
with the appliance.Children should not be allowed to clean
or maintain the appliance.
• Children less than 3 years of age shall be kept away unless
continuously supervised.
• Do not allow children to play with the appliance.
• Dishwashing detergents can be caustic and irritate the
eyes, mouth and throat. Read the safety notes from deter-

9
gent manufacturer.
• Never leave children unsupervised when the appliance is
open. It can contain residue detergent.
• Dishwasher water is not suitable for drinking. Danger of in-
jury from the caustic chemicals.
• When you open the door during a programme, be careful
as water temperature is high.
• To avoid injury always place long and sharp/pointed items
(e.g. forks, knives) in the cutlery basket, pointing down, or
at on the top basket.
Daily maintenance
• Use the appliance for household dishwashing only.
• Do not use solvents in the appliance as there is a risk of
explosion.
• Do not sit or stand on the open door and do not place any
objects on it.The device may overturn.
• Do not open the door when the appliance is operating.Hot
water or steam can be released.
• Do not leave the door open, because they it can pose a
hazard.
• Washing tableware in a household dishwasher usually
uses less energy and water than washing up by hand.
In case of problems
• Refer repair and modications of the appliance to quali-
ed technicians only.
• In the event of problems or repairs, unplug the appliance
from the wall outlet:
• Unplug the appliance by pulling the plug,
• Turn o the circuit breaker.
• Do not pull the power cord, pull the plug only. Close the
water supply.
Recommendations
• Loading the dishwasher to the capacity indicated by the
manufacturer will save energy and water.
• To save energy and water, rinse food residue of the dish-
es before loading the dishes into the dishwasher. Run the
dishwasher with full load.
• Do not put dishes with food leftovers in the appliance.
• Use pre-wash programme only when needed.
• Load bowls, cups and mugs bottom facing up.
• Do not load in the appliance any dishes that are not dish-
washer safe and do not load too many dishes.
• It is not recommended to pre-rinse the tableware, as this
leads to an increase in water and energy consumption.

10
Dishes and utensils that are not suitable for dishwashers.
• Ashtrays, candles, cleaning pastes, paints, chemicals, fer-
ro-alloys;
• Forks, spoons and knives with a handle made of wood,
ivory or Nacre, glued items, items contaminated with abra-
sive powders, acid or base
• Plastic dishes that are not resistant to high temperature,
containers made of copper or tin;
• Aluminium and silver items (may be stained or loose lus-
tre)
• Some delicate types of glass, porcelain with decorative
prints, as prints may fade even after the rst wash; some
crystal dishes as they may lose their transparency, glued
silverware sensitive to high temperatures, lead crystal
glass, chopping boards, items made with synthetic bres;
• Absorbent objects such as a sponge or kitchen cloths are
not suitable for the dishwasher.
• Before buying dishes in the future make sure they are dish-
washer safe.
• Pursuant to Commission Regulation (EU) 2019/2022, the min-
imum availability period for spare parts necessary to repair the
appliance is 7 or 10 years depending on the type and purpose
of the spare part.
• The list of spare parts and the ordering procedure are available
on the websites of the manufacturer, importer or an authorized
representative.
• For more information about the product, please refer to the EU
EPREL Product Database at https://eprel.ec.europa.eu. For
more information, please use your mobile device to scan the
QR code on the energy label or enter the product model listed
on the energy label in the EPREL search engine https://eprel.
ec.europa.eu/

11
UNPACKING
During transportation, protective packaging
was used to protect the appliance against
any damage. After unpacking, please dis-
pose of all elements of packaging in a way
that will not cause damage to the environ-
ment.
All materials used for packaging the appli-
ance are environmentally friendly; they are 100% recyclable
and are marked with the appropriate symbol.
Important! Packaging materials (bags, polyethylene, poly-
styrene, etc.) should be kept away from children during un-
packing.

12
DISPOSAL OF OLD APPLIANCE
In accordance with European Directive
2012/19/EU and local legislation regarding
used electrical and electronic goods, this
appliance is marked with the symbol of the
crossed-out waste container. This marking
indicates that the appliance must not be
disposed of together with other household
waste after it has been used.
The user is obliged to hand it over to waste collection centre
collecting used electrical and electronic goods. The collec-
tors, including local collection points, shops and local au-
thority departments provide recycling schemes.
Proper handling of used electrical and electronic goods
helps avoid environmental and health hazards resulting from
the presence of dangerous components and the inappropri-
ate storage and processing of such goods.

13
INSTALL THE APPLIANCE
Place your appliance
• When choosing the place of installation, make sure you will be able to easily
load and remove dishes and utensils from the dishwasher.
• Do not place the appliance in a room where the temperature can fall below 0°C.
• Before installing unpack the appliance following the instructions on the packag-
ing.
• When you move the appliance do not handle it by the door or control panel.
• Leave some room on all sides to have convenient access to the dishwasher
when cleaning.
• Make sure that when you set the dishwasher you do not crush the water supply
and drain hose. Also, make sure that the appliance is not places on the power
cord.
• Level the appliance using the adjustable legs. Proper level ensures trouble-free
opening and closing the dishwasher doors.
• If the dishwasher door will not close properly, check that the appliance stands
rmly on the oor, if not, adjust using the adjustable legs.
Water supply connection
Make sure that domestic water supply system is suitable for the dishwasher. It is rec-
ommended to install a lter in the water supply line to avoid damage to the appliance
due to impurities (such as sand, clay, rust, etc.) that occasionally occur in water.This
will also prevent accumulation of sediment after dishwashing.
Water supply hose
Do not use the water supply hose from the old dishwasher. Use
the new water supply hose provided with the appliance. Before
connecting, rinse the hose with water. Connect the water supply
hose directly to the water feed valve. The domestic water system
pressure should be at least 0.03 MPa and up to 1 MPa. If the water
pressure exceeds 1 MPa, install pressure reducing valve.
When the connection is ready, open the valve completely and
check for leaks.
For safety reasons, close the water supply tap after every wash.
NOTE: Aquastop water supply is used in some
dishwasher models. Dangerous voltage could oc-
cur with Aquastop. Do not cut the Aquastop water
supply. Do not allow it to bend or twist.
Note: For safety reasons, close the water tap after
every wash

14
The drain hose
The drain hose can be connected directly to a water drain or kitchen sink stub pipe.
You can also drain the water directly into the sink using the special bracket (if availa-
ble), placing the drain hose outlet on the kitchen sink edge. The drain hose connec-
tion should be made at least 50 cm and up to 110 cm from the oor.
min 50cm/max 110cm min 50cm/max 110cm
If the drain hose is longer than 4m,
dishes may not be washed prop-
erly. The manufacturer will not be
held responsible.
Electrical connection
Grounded plug must be connected to a grounded power outlet with a proper voltage.
If there is no grounding, refer this to a qualied electrician. If you operate the appli-
ance without proper grounding, the manufacturer does not assume any liability for
the possible resulting damage.
• Domestic electrical system must be protected with a 10-16A fuse.
• The appliance must be supplied with 220-240V/50Hz AC.
• Always use the plug provided with the appliance. When you operate the appli-
ance at lower voltage the dishwashing eciency will deteriorate and may dam-
age the appliance.
• The power cord may only be replaced by authorized service or a qualied elec-
trician. Failure to comply with these rules may lead to an accident.
• For safety reasons, you should always unplug the appliance after you have n-
ished using it.
• In order not to avoid electric shock, do not remove the plug from the wall outlet
with wet hands.
• When you unplug the appliance from the wall outlet, always pull the plug. Never
pull the power cord.

15
PREPARE THE APPLIANCE FOR
OPERATION
• Before using the appliance, verify that the data given on the rating plate matches
that of local power outlets.
• Remove all packing materials from inside of the appliance.
• Prepare special salt (water softener).
• Pour water into the special salt dispenser and then add about 1.5 kg of special
salt (dishwasher salt).
• Pour rinse aid into the dispenser.
The importance of water descaling
A dishwasher requires soft water (with low calcium content) to operate eciently.
Otherwise, white residue main remain on the dishes and inside the appliance. This
has a negative impact on the quality of dishwashing, rinsing and drying. When the
water ows through the softener, ions responsible for the water hardness are re-
moved, and the water becomes soft, for best dishwashing results. Depending on
the degree of water hardness, the ions responsible for water hardness accumulate
quickly inside the water softener.Therefore, the water softener must be regenerated
to operate with the same eciency during the next wash. This is why special salt is
used in the dishwasher.
Add special salt
Only use special salt intended for dishwashers.
Any other type of salt that is not intended for use in a dishwasher, especially regular
kitchen salt, will damage the water softener. In the event of damage caused by the
use of the wrong salt, the manufacturer’s warranty is void and we will not be liable
for damage.
Fill with special salt before running the washing programme.
This will prevent spilled special salt or salty water from remaining on the bottom of
the device, which may cause corrosion.
1. Remove the lower basket from the appliance and unscrew the special salt dis-
penser cap.
2. Place the end of the funnel (included) in the hole and pour about 1.5 kg of salt.
3. Pour water into the dispenser until full. It is normal that a small amount of water
spills out of the special salt dispenser.
4. After you ll the dispenser, screw the cap on.
5. When you l the dispenser with special salt, the add salt indicator goes out.
6. Start the washing programme immediately after lling the dispenser with special
salt (the quick wash is recommended). Otherwise, salty water can damage the
lters, the pump or other important appliance components This is not covered
by the warranty.

16
NOTE:
• Fill the special salt dispenser when the special salt indicator ( ) on the control
panel lights up. Depending on the rate of salt dissolution, the special salt indica-
tor may still be on even after lling the dispenser.
• If there is no special salt indicator on the control panel (on some models), you
can estimate when to top up the dispenser based on the number of wash cycles
performed.
• If some special salt spills, run the soaking programme or a quick wash pro-
gramme.
• Use only the special salt intended for dishwashers!
The test strip
The dishwashing eectiveness is linked to water hardness. Therefore, the appliance
is equipped with a system to reduce the hardness of the water supply. The dish-
washing eectiveness is improved when the system is set correctly. To check water
hardness contact the municipal water company or determined the water hardness
using test strip (if available).
1 [min] 1 [sec] 1 [min]
:) :| :(
Multi-component (multitab) detergents (eg. 2-in-1, 3-in-1, etc.)
There are three types of detergents:
1. Containing phosphates and chlorine,
2. Containing phosphates and no chlorine,
3. Containing no phosphates and no chlorine.
The latest tablets are generally phosphate-free. Since phosphates have water sof-
tening properties, we recommend adding salt to the container even if the water hard-
ness is only 6°dH. If you use phosphate-free detergent where water is hard, white
residue may be visible on the dishes.
You can prevent this by increasing the amount of detergent. Chlorine-free deter-
gents have less bleaching eect. Stains may not be entirely removed. Select the
programme with a higher wash temperature.
Generally, using multi-component detergents suitable results are obtained only un-
der certain conditions. Such detergents contain rinse aid and/or special salt in a
specic amount. It is recommended to use special salt when using multi-component
tablets.
What you should pay attention to when using these tablets.
• Always check the type of detergent used and whether it is a multi-component
product.
• Make sure that the detergent used is appropriate for tap water hardness.
• Follow the instructions on the product packaging.
• If the detergent is in the form of tablets, never place it the cutlery basket. Always
place the tablet in the detergent dispenser compartment.
• The use of these detergents yields good results only in certain applications. Us-
ing this type of detergent you should contact the manufacturer for information
about proper use.
• If you use the detergent properly and dishwasher settings are correct you can
save on salt and/or rinse aid.
• If dishwashing results while using 2-in-1 or 3-in-1 detergents are not satisfactory
(traces of lime scale on the dishes), please contact the detergent manufactur-
er. The warranty does not cover complaints due to the use of multi-component
detergents.

17
Recommended use: For best results using multi-component cleaning agents, add
special salt and rinse aid in the dishwasher and set the water hardness and amount
of rinse aid to the lowest setting.
The solubility of the detergent tablets made by dierent manufacturers can vary with
regard to temperature and time. It is therefore not recommended to use detergent
tablets in quick programmes. It is recommended to use powder detergents in quick
programmes.
Always store detergents in a dry, cool place, out of reach of children. Add detergent
to the dispenser immediately before using the appliance.
Warning: If encounter another problem when using a multi-component detergent,
please contact the detergent manufacturer.
Stop using multi-component detergents
• Add special salt and rinse aid to dispensers.
• Set the water hardness to the highest level (6) and run an empty dishwasher.
• Adjust the water hardness.
• Adjust rinse aid setting.
Warning: Use only rinse aid designed for domestic dishwashers. Wipe up spilled
rinse aid with a cloth as it will cause the formation of large amounts of foam, and thus
will reduce the dishwashing eectiveness.
Water hardness table
Water hardness German degrees
[dH] French degrees
[dF] British degrees
[dE] Water hardness
level indicator
Special salt con-
sumption
[g/cycle]
1 0~5 0~9 0~6 H1 0
2 6-11 10-20 7-14 H2 9
3 12-17 21-30 15-21 H3 12
4 18-22 31-40 22-28 H4 20
5 23-34 41-60 29-42 H5 30
6 35-55 61-98 43-69 H6 60
If the water hardness is higher than the maximum values given in the table above, or
if you use water from a deep well, it is recommended to use lters and water treat-
ment equipment.
NOTE: The factory settings are for the water hardness level 3.
Switch on the appliance;
Press the Start/Pause button for more than 5 seconds to start the water softener set
model within 60seconds after the appliance was switched on;
Press the Start/Pause button to select the proper set according to your local environ-
ment, the sets will change in the following sequence:
H1->H2->H3->H4->H5->H6;
Press the Power button to end the set up model.
The use of detergents
Use a detergent for domestic dishwashers. On the market you can nd detergent
intended for dishwashers in the form of powder, gel and tablets.The detergent must
be placed in the dispenser before starting the dishwasher. Store detergent in a cool
and dry place, out of reach of children.
Do not overll the detergent dispenser, otherwise the detergent may not dissolve
completely and leave streaks on the dishes.
If you need more information on the detergent used, please contact the manufactur-
er directly.

18
Standard loading and test results:
Upper basket
1 Cups
2 Saucers
3 Glasses
4 Mugs
5 Dessert bowls
6 Glass bowl
7 Dessert plates
8 Dinner plates
9 Soup plates
10 Melamine dessert plates
11 Melamine bowl
12 Oval platter
13 Small pot
14 Cutlery basket
Lower basket
Information for comparability test in accordance with EN 60436
Capacity: 10 place settings
Position of the upper basket: lower position
Program: ECO
Rinse aid setting: MAX
Softener setting: H3

19
Cutlery basket
Place knives and forks separately from each other, and make sure they do not touch
as this may cause poor washing results.
For best washing results place knives and forks in the cutlery basket, and make sure:
they do not touch and place objects in the middle.
Item Cutlery
1 Soup spoons
2 Forks
3 Knives
4 Tea spoons
5 Dessert spoons
6 Serving spoons
7 Serving forks
8 Gravy ladles
Cutlery rack

20
LOAD DISHES INTO DISHWASHER
Upper basket
The upper basket is designed for washing delicate dishes such as glasses, cups,
plates, etc. Dishes that are placed in the upper basket should be less soiled than
dishes in the lower basket.
You can place long forks, knives and spoons horizontally on shelves so as not to
obstruct the spray arms.
Fold the mugs and cups shelves
Fold the shelves to increase the capacity of the upper basket. You can place the
glasses and mugs on the shelves. Raise the cup shelf to make more space in the
basket for taller items. You can then lean the taller glasses against the shelf. It can
also be removed if it is not needed.
Table of contents
Languages:
Other Fagor Dishwasher manuals

Fagor
Fagor Eco Concept CCO-120 User manual

Fagor
Fagor 3LVF-635ADIT User manual

Fagor
Fagor LF 073M User manual

Fagor
Fagor LVE-55 User manual

Fagor
Fagor AD?120CW User manual

Fagor
Fagor LVF453ITA User manual

Fagor
Fagor IO-DWS-2841 User manual

Fagor
Fagor AD-21BDD User manual

Fagor
Fagor 3LVF-422IT User manual

Fagor
Fagor 2LF 013 IX User manual

Fagor
Fagor CO-500 User manual

Fagor
Fagor LFA-65 Parts list manual

Fagor
Fagor LFA-073 IT Manual

Fagor
Fagor 3LVF-435ADX User manual

Fagor
Fagor IX LFA-013 SS Manual

Fagor
Fagor AD-48W User manual

Fagor
Fagor Advance User manual

Fagor
Fagor LVF11A User manual

Fagor
Fagor W Series User manual

Fagor
Fagor LFA-75IT User manual