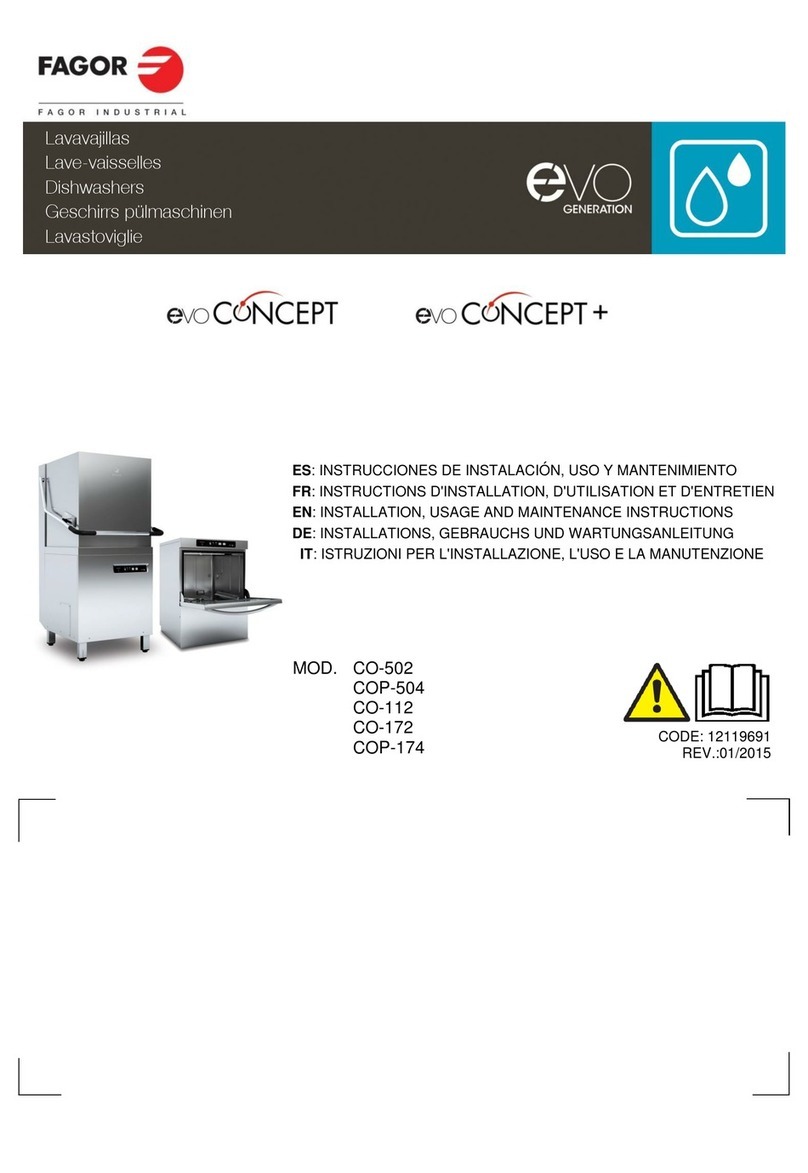
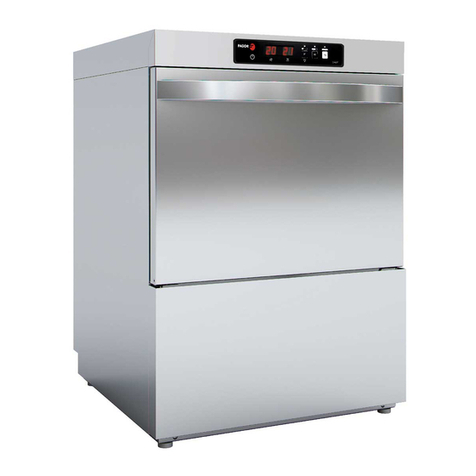
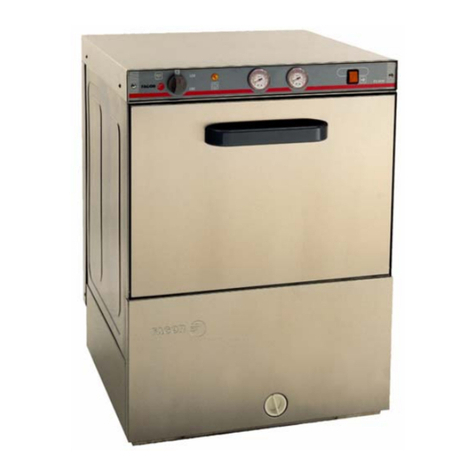
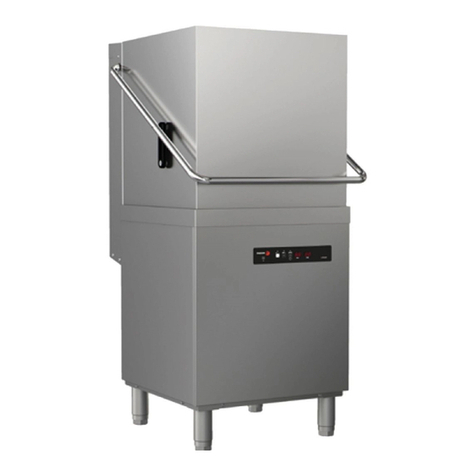
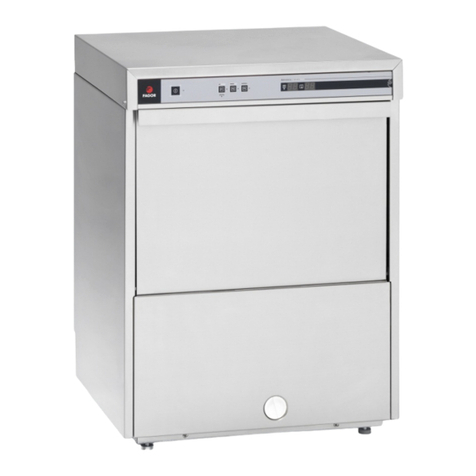
Fagor CO-500 User manual

Service manual
Service Manual
SERVICE MANUAL
“EVO FRONT LOADING DISHWASHER”
22/07/2019

22/07/2019
1
SERVICE MANUAL
EVO FRONT LOADING DISHWASHER
1. INTRODUCTION ................................................................................................................................................................ 4
2. SAFETY INSTRUCTIONS ..................................................................................................................................................... 4
2.1. PICTOGRAMS.................................................................................................................................................................5
2.2. UPKEEP ..........................................................................................................................................................................5
2.3. PROLONGED PERIODS OF INACTIVITY...........................................................................................................................6
3. MAINTENANCE ................................................................................................................................................................. 6
3.1. DAILY MAINTENANCE....................................................................................................................................................6
3.2. SPECIALISED MAINTENANCE ......................................................................................................................................... 8
4. HYGIENE REGULATIONS.................................................................................................................................................... 8
5. REMOVAL OF PACKAGING ................................................................................................................................................ 9
5.1. RECYCLING..................................................................................................................................................................... 9
6. TECHNICAL DATA............................................................................................................................................................ 10
6.1. MACHINE SPECIFICATIONS ..........................................................................................................................................10
6.2. ELECTRICAL POWER..................................................................................................................................................... 11
6.3. DIMENSIONS................................................................................................................................................................ 13
6.4. OTHER DATA................................................................................................................................................................ 14
7. INSTALLATION OF THE MACHINE.................................................................................................................................... 14
7.1. LOCATION....................................................................................................................................................................14
7.2. LEVELLING.................................................................................................................................................................... 15
8. CONNECTIONS ................................................................................................................................................................ 15
8.1. ELECTRICAL CONNECTION ...........................................................................................................................................15
8.2. HYDRAULIC CONNECTION ...........................................................................................................................................16
8.3. WASTE WATER CONNECTION...................................................................................................................................... 18
8.4. CHEMICAL DISPENSERS´ CONNECTION ....................................................................................................................... 19
8.4.1. RINSE AID HYDRAULIC DISPENSER CONNECTION (CONCEPT) ......................................................................21
8.4.2. RINSE AID ELECTRIC DISPENSER CONNECTION (CONCEPT PLUS and ADVANCE) .........................................22
8.4.3. DETERGENT ELECTRIC DISPENSER CONNECTION (ADVANCE model, optional in CONCEPT and CONCEPT
PLUS) 23
9. OPERATION .................................................................................................................................................................... 25
9.1. CONTROL PANEL..........................................................................................................................................................25
9.2. QUICK START-UP GUIDE .............................................................................................................................................. 27
9.3. INITIAL STAR-UP ..........................................................................................................................................................29
9.3.1. PREPARATION OF THE DISH.......................................................................................................................... 30
9.3.2. PREPARATION AND SWITCHING ON THE MACHINE ..................................................................................... 30
9.3.3. FILLING AND HEATING ..................................................................................................................................31
9.3.4. DRAINAGE ..................................................................................................................................................... 31
9.3.5. SWITCHING OFF THE MACHINE .................................................................................................................... 32
9.3.6. SELF-CLEANING CYCLE: ................................................................................................................................. 32
9.4. OPERATION OF THE CONCEPT..................................................................................................................................... 33
9.4.1. NO CLINIC-LINE DISHWASHER ......................................................................................................................33

22/07/2019
2
SERVICE MANUAL
EVO FRONT LOADING DISHWASHER
9.4.2. CLINIC-LINE DISHWASHER ............................................................................................................................ 34
9.4.3. THERMO-STOP .............................................................................................................................................. 35
9.4.4. SOFT START ...................................................................................................................................................35
9.4.5. DIAGNOSTICS ................................................................................................................................................ 35
9.5. OPERATION OF THE CONCEPT PLUS............................................................................................................................ 36
9.5.1. THERMO-STOP .............................................................................................................................................. 36
9.5.2. SWITCHING ON THE MACHINE ..................................................................................................................... 37
9.5.3. FILLING.......................................................................................................................................................... 37
9.5.4. FILLING DISHWASHER WITHOUT AIR BREAK ................................................................................................ 37
9.5.5. FILLING DISHWASHER WITH AIR BREAK .......................................................................................................37
9.5.6. RUN CYCLE ....................................................................................................................................................37
9.5.7. DISHWASHER WITHOUT AIR BREAK .............................................................................................................38
9.5.8. HYDRAULIC DIAGRAM OF DISHWASHER WITHOUT AIR BREAK ................................................................... 38
9.5.9. DISHWASHER WITH AIR BREAK ....................................................................................................................38
9.5.10.HYDRAULIC DIAGRAM OF DISHWASHER WITHOUT AIR BREAK ................................................................... 39
9.5.11.LONG WASH..................................................................................................................................................39
9.5.12.SOFT START ................................................................................................................................................... 40
9.5.13.TANK DRAINAGE ...........................................................................................................................................40
9.5.14.REGENERATION ............................................................................................................................................40
9.5.15.DIAGNOSTICS ................................................................................................................................................ 41
9.6. ADVANCE OPERATION................................................................................................................................................. 41
9.6.1. ADVANCE HYDRAULIC DIAGRAM.................................................................................................................. 43
9.6.2. START -UP .....................................................................................................................................................43
9.6.3. ADJUSTMENT OF PARAMETERS.................................................................................................................... 43
9.6.4. THERMO-STOP .............................................................................................................................................. 45
9.6.5. SOFT START ...................................................................................................................................................45
9.6.6. SOFT MODELS: .............................................................................................................................................. 45
9.6.7. SOFT MODEL HYDRAULIC DIAGRAM ............................................................................................................ 47
9.6.8. LEVELS........................................................................................................................................................... 47
9.6.9. SCREEN ON/OFF............................................................................................................................................ 49
9.6.10.FILL AND PREPARATION................................................................................................................................ 49
9.6.11.STAND-BY AND ENERGY-SAVING..................................................................................................................50
9.6.12.WASHING PROGRAMMES............................................................................................................................. 50
9.6.13.FUNCTIONAL DESCRIPTION OF THE WASH................................................................................................... 51
9.6.14.MANUAL /AUTOMATIC, DRAINAGE.............................................................................................................. 52
9.6.15.AUTOMATIC DRAINAGE FUNCTIONAL DESCRIPTION ...................................................................................53
9.6.16.SELF-CLEANING PROGRAMME...................................................................................................................... 53
9.6.17.FUNCTIONAL DESCRIPTION OF THE SELF-CLEANING.................................................................................... 53
9.6.18.REGENERATION PROGRAMME ..................................................................................................................... 54
9.6.19.FUNCTIONAL DESCRIPTION REGENERATION PROGRAMME.........................................................................54
9.6.20.ENERGY SAVING FUNCTION:......................................................................................................................... 56
9.6.21.USER OPTIONS MENU................................................................................................................................... 56

22/07/2019
3
SERVICE MANUAL
EVO FRONT LOADING DISHWASHER
9.6.22.ADVANCE SAT MENU....................................................................................................................................57
10. TROUBLESHOOTING ....................................................................................................................................................... 58
11. CONCEPT & CONCEPT PLUS ALARMS .............................................................................................................................. 60
12. ADVANCE MODEL ALARMS............................................................................................................................................. 60
13. COMPONENTS ................................................................................................................................................................ 61
13.1. ELECTRONIC CONTROL CARDS, VIEWERS, PROGRAMMERS, REGENERATION PROGRAMMERS,
ELECTRONIC REGENERATION CARD AND BACKLIGHT.........................................................................................................61
13.1.1.PROGRAMMER CYCLE 12092150 (CO-500 and CO-501)...............................................................................63
13.1.2.ELECTRONIC CONTROL CARD 12189021 (CO-500 and COP-501) .................................................................69
13.1.3.ELECTRONIC CONTROL CARD 12008750 (CO-502, CO-502 W, COP-503, COP-504 and COP-504 W)...........76
13.1.4.VIEWER 12024028 (CO-502 and COP-504) ................................................................................................... 83
13.1.5.VIEWER 12010417 (CO-502 W and COP-504 W) .......................................................................................... 87
13.1.6.ELECTRONIC CONTROL CARD 12048024 (AD-505) ....................................................................................... 90
13.1.7.VIEWER 12048027 (AD-505) ........................................................................................................................ 94
13.1.8.ELECTRONIC REGENERATION CARD 12120189 (AD-505) ............................................................................. 97
13.1.9.BACKLIGHT 12097036 (AD-505)..................................................................................................................100
13.2. TEMPERATURE PROBE 12025036 (CO-502, CO-502 W, COP-144, COP-504 W and AD-505) ...................103
13.3. RESISTOR ..................................................................................................................................................104
13.3.1.TANK RESISTANCE 230 V 2,8 kW 324 mm SIMPLE UL 12048965 (CO-500, CO-501, CO-502, CO-502 W, COP-
503, COP-504 and COP-504 W)).............................................................................................................................105
13.3.2.TANK RESISTANCE 230 V 0.8 kW 135 mm SIMPLE UL 12046952 (AD-505 EVO 1.0)...................................106
13.3.3.TANK RESISTANCE 230 V 2,8 kW 325 mm SIMPLE UL 12159451 (CO-500, CO-501, CO-502 and COP-504)107
13.3.4.TANK RESISTANCE 230 V 1 kW 145 mm SIMPLE UL ROH 12212410 (AD-505 EVO 2.0) .............................108
13.3.5.BOILER RESISTANCE 230 V 5,6 kW 430 mm TRIPLE UL 12098745 (CO-501, CO-502 and CO-502 W)......... 109
13.3.6.BOILER RESISTANCE 230 V 5,6 kW 305 mm TRIPLE UL 12090551 (COP-503, COP-504, COP-504 W and AD-
505) 110
13.3.7.BOILER RESISTANCE 230 V 2,8 kW 430 mm SIMPLE UL 12098741 (CO-500)..............................................111
13.4. MOTOR PUMPS ........................................................................................................................................112
13.4.1.WASH MOTOR PUMP 230 V AC 1N 50 Hz 590 W 12043287 (EVO 1.0 only) (CO-500, CO-501, CO-502, CO-
502 W, COP-503, COP-504, COP-504 W and AD-505)............................................................................................ 113
13.4.2.WASH MOTOR PUMP 220 V AC 1N 60 Hz 590 W12102834 (CO-502 W and COP-504 W) .........................114
13.4.3.RINSE MOTOR PUMP 230 V AC 1N 50/60 Hz 12024233 (CO-502 W, COP-503, COP-504, COP-504 W and
AD-505) ..................................................................................................................................................................115
13.4.4.RINSE MOTOR PUMP 50 Hz UP60-UP30-100651431 12187518 (only EVO 2.0) (COP-504 and AD-505)....116
13.4.5.DRAINAGE MOTOR PUMP 220 V AC 50/60 Hz 37 kW 12094265 (CO-500, CO-501, CO-502, CO-502 W, COP-
503, COP-504, COP-504 W and AD-505) ................................................................................................................ 117
22/07/2019
4
SERVICE MANUAL
EVO FRONT LOADING DISHWASHER
1. INTRODUCTION
Dear customer,
We would like to thank you for the confidence you have placed in our brands and in our product. We are
sure that this machine will meet your requirements.
The equipment must only be used for the purposes established by the manufacturer. Inappropriate use of
the same may result in risks to the integrity and safety of users and damage to the equipment. This machine may
only be used by professionals or qualified personnel. Any other use will be in conflict with the intended use and is
therefore hazardous.
The guarantee does not cover damage to glass components, or damage to insulation material or damage
due to the incorrect installation of the equipment, or to inappropriate use, inadequate maintenance or poor repair
processes.
This Service Manual is a guide to help in the maintenance of the machine.
This equipment is subject to changes and modifications for its technical progress.
2. SAFETY INSTRUCTIONS
For your safety:
Do not store or use inflammable and/or corrosive liquids or gases near the equipment.
The operation of the machine must never be entrusted to minors or individuals with physical, mental or
sensory disability. Nor to individuals without the experience and/or necessary knowledge, unless
under the supervision of a safety manager.
The machine must only be operated by hand. Any damage resulting from the use of sharp, pointed
objects or similar will invalidate all warranty rights.
To avoid the risk of accidents and damage to the machine, operators must receive adequate safety training by
means of relevant courses, seminars and programmes.
Warning: The incorrect adjustment, substandard cleaning or installation, or inadequate maintenance
or service, together with the renovation of the machine may result in property damage and/or personal
injury, or even loss of life. Please read the instructions in the manual supplied with the machine
carefully before starting the machine.
Safety measures for the use of the machine.
- Always open the door very slowly (hot steam) (burn hazard).
- Use suitable protective clothing.
- The exterior temperature of the appliance may reach over 60 °C. Only touch the control elements (burn hazard).
- Cleaning - Aggressive chemical action (risk of abrasion).
During cleaning, always use suitable protective equipment: protective goggles and gloves, face mask, etc. Observe
the safety instructions listed in the section “Cleaning”.
- Do not store explosive, corrosive or inflammable substances inside to the appliance (risk of fire).
The positioning and installation, and all repairs and/or modifications, should always be carried out by an
AUTHORISED TECHNICIAN, in accordance with the applicable legislation of the country or geographical region.
The manufacturer does not accept liability for the consequences if the machine is incorrectly installed.
- It is strictly forbidden to delete, alter, manipulate or suppress the safety devices. Failure to comply with this
warning may result in severe risk for the health and safety of individuals.
•Use of spare parts other than original parts will cancel the guarantee.
•To prevent the contamination of recipients and to maintain hygiene standards, the elements in contact with
food and surrounding zones should be cleaned after each use.
•Before switching on the newly installed appliance for the first time, the inside should be cleaned with a
cloth soaked in soapy water. Then switch on the empty machine for at least two full cycles to eliminate the
odours associated with a new appliance.
•This equipment has been designed for use in ambient temperatures between 5 and 40 ⁰C.
•Do not leave flammable products or objects inside the tub or in its vicinity.

22/07/2019
5
SERVICE MANUAL
EVO FRONT LOADING DISHWASHER
•This dishwasher has been designed to wash plates, glasses and other similar dishes containing traces of
food. Any other use will be considered inadequate. Objects other than those described above, or objects
contaminated with petrol, paint, steel or iron shavings, fragile objects or those which are not dishwasher-
resistant must NOT be washed in the dishwasher.
•Abrasive or corrosive products, acids, solvents, or CHLORINE/HYPOCHLORITE-based detergents must
never be used.
•Never use the equipment for any of its components as a ladder or means of support, and do not deposit
objects on top of the machine.
•Do not open the door of the machine while the machine is operating. Do not immerse hands in the washing
solution. Switch off the appliance and drain the tub before accessing the inside of the machine.
•Do not install the appliance in places exposed to jets of water.
USE THE PPE NECESSARY TO GUARANTEE YOUR SAFETY, AND THAT OF THE USER AND THE EQUIPMENT.
IMPORTANT: WAIT AT LEAST 10 MINUTES AFTER SWITCHING OFF THE MACHINE BEFORE CLEANING THE
INSIDE OF THE APPLIANCE.
WARNING: DO NOT INSERT HANDS AND/OR TOUCH INTERNAL PARTS OF THE TANK.
WHILE THE MACHINE IS OPERATING AND FOR 10 MINUTES AFTER DRAINING THE WASH TANK.
2.1.PICTOGRAMS
Danger Risk of imminent danger that may lead to serious physical injury or loss of life. Failure to
observe this instruction may result in property damage or personal injury.
Warning Risk of potential hazard that may lead to serious physical injury or loss of life. Failure
to observe this instruction may result in property damage or personal injury.
Caution Potentially hazardous situation that may lead to minor physical injury. Failure to observe this
instruction may result in property damage or personal injury.
Caustic substances. Failure to observe this instruction may result in property damage or
personal injury.
Risk of fire. Failure to observe this instruction may result in property damage or personal injury.
Risk of burns. Failure to observe this instruction may result in property damage or personal injury.
Danger high voltage. Failure to observe this instruction may result in property damage or personal
injury.
2.2.UPKEEP
To maintain the quality of the stainless steel, ensure good hygiene and prevent the incorrect operation of the
machine, it must be cleaned every day. Follow the instructions given in the “Cleaning” chapter.
If the machine is not cleaned correctly and as often as necessary, dirt, grease and traces of food may
build up in the tub.
- To prevent the tub from rusting, clean away traces of food every day.

22/07/2019
6
SERVICE MANUAL
EVO FRONT LOADING DISHWASHER
- Do not use high pressure cleaners.
- Do not clean the machine with products containing acid or expose it to the effects of acid vapours. Acid damages
the passive layer of the steel and may result in discolouration.
- Use suitable cleaning products for dishwashers. The use of unsuitable products may damage the machine and
invalidate warranty rights.
- Do not use abrasive cleaning products or scrubs.
2.3.PROLONGED PERIODS OF INACTIVITY
If the machine is going to be inactive or out of service for a long period of time (holidays, temporary closure, etc.),
the following should be observed:
•Drain the machine completely, including the boiler.
•Clean the machine thoroughly.
•Leave the door of the machine open.
•Close the water mains inlet tap.
•Switch off the mains power switch.
•The appliance must not be in left in environments with temperatures less than 5 ºC.
3. MAINTENANCE
- Inspection, maintenance and repair work must be performed by a specialised Official Technical
Service.
- When performing cleaning, inspection, repair or maintenance work, the power supply to the machine
must be disconnected.
- When changing the position of the equipment, make sure that the power cable and the water and drainage pipes
have been correctly disconnected. When returning the machine to its original location, it must be immobilised
again. Check that the power supply line and the water and drainage connection pipes are installed in accordance
with the regulations.
- To ensure that the machine is in perfect technical order, it should be inspected at least once a year by an "Official
Technical Service".
3.1.DAILY MAINTENANCE
The appliance should be cleaned every day.
For the correct working and maintenance of the appliance, it should be cleaned every day using degreasing
products specifically designed for this.
IMPORTANT: Sand-based or abrasive products must not be used. Nor should a hose be used to clean
the outside of the appliance as this could affect the internal components.
The appliance must always be switched off for Manual Cleaning.
ATTENTION:The detergents are highly active and therefore extreme caution should be
taken as they could cause irritation to the skin or eyes. The manufacturer’s instructions must be
strictly observed.
When applying detergents and degreasing products, rubber gloves, face mask and protective goggles must be
worn, in accordance with the applicable safety regulations.
If the oven is cleaned every day, the operation can be completed quickly, giving an appliance in perfect condition
and ready for use the next day.
NOTE: Do not use products or tools which may scratch the surface of the equipment.

22/07/2019
7
SERVICE MANUAL
EVO FRONT LOADING DISHWASHER
• To ensure the stainless steel maintains its high quality, for hygienic reasons and to prevent the faulty
operation of the machine, it must be cleaned every day.
• To prevent the tub from rusting, clean the machine every day.
• Leave the machine door ajar if it is to be out of service for a length of time (e.g. overnight).
• Never clean the equipment with a high pressure cleaner.
• Do not clean the machine with products containing acid or expose it to the effects of acid vapours. This
could damage the passivating chrome-plated steel coat, resulting in possible discolouration of the
machine.
•To clean, use detergents suitable for use with products in contact with food.
•Do NOT use abrasive or corrosive products or acids, solvents and chlorine-based detergents as these
may damage the components of the equipment.
• Observe the detergent instructions.
• Do NOT direct jets of pressurised water at the internal parts.
• Never insert detergent and rinse aid tablets.
• Only use cleaning products specifically for dishwashers. The use of unsuitable cleaning products may
damage the machine and invalidate warranty rights.
• Do not use abrasive cleaning products or scrubs.
WARNING
• If the cleaning of the machine is inadequate, the build-up of grease and traces of food inside the
tub may damage the stainless steel.
• Use protective clothing, protective gloves, goggles and face masks in accordance with local
legislation.
• Do not store chemical cleaning products inside the machine.
It is essential to carry out all the necessary and relevant cleaning operations in order to increase the service life of
the machine and to ensure its correct operation. To ensure the efficient washing of the dishes, the dishwasher
must be perfectly clean and disinfected.
Contact a cleaning product distributor for detailed information about the methods and products
available for the regular disinfection of the machine.
Only use products suitable for use with industrial dishwashers.
The guarantee does not cover damage caused by the incorrect use of chemical products.
When handling chemical substances, the product safety instructions and recommended doses
must be observed. Use protective clothing, gloves and safety glasses when handling chemical
products.
The appliance is made of high quality stainless steel. However, under certain conditions, corrosion may appear.
To keep the stainless steel surfaces permanently free of corrosion, only use suitable cleaning products.
To ensure the correct operation of the equipment, Fagor Industrial recommends the following maintenance tasks
are performed daily:
•Check daily that the wash/rinsing arms are correctly positioned and fastened and rotate correctly.
•Check that the filters and the relief valve are clean and correctly fitted.
•At the start of each working day, check and maintain the levels of detergent and rinse aid in the containers to
ensure they last throughout the working day. Check that the tubes and filter are correctly fitted and
submerged. Clean the detergent/rinse aid tube filters regularly to prevent blockages. If the machine has a
SOFT appliance, check the levels of salt.
•Different types of detergent or rinse aid must not be mixed.
•The wash water in the tank should be changed every 40-50 washes or twice a day.
•The machine should be cleaned at the end of each working day.
•ATTENTION: Do not use jets of water, pressure or steam cleaners to clean the machine or its environment.
•Do not use abrasive or corrosive, materials, solvents, chlorine or chlorine-based products or hypochlorites to
clean the machine. Only use products suitable for cleaning industrial dishwashers in the correct doses.
After switching off and draining the machine, wait approximately 10 minutes until the inside of the appliance

22/07/2019
8
SERVICE MANUAL
EVO FRONT LOADING DISHWASHER
cools. Caution, the heating element of the tank may still be hot. Everyday:
•Close the water mains tap.
•Close the gas shut-off tap (only for gas appliances).
•Disconnect the power switch.
•Remove the filters and clean with a brush under a strong jet of water.
•Remove the wash and rinsing arms by undoing the screws and carefully clean the arms and the nozzles.
Rinse with water.
•Replace all the parts correctly.
•Thoroughly clean the tank; food waste attached to the tank or the heating element should be removed with a
brush.
•At the end of the day, the door of the machine should be left open.
3.2.SPECIALISED MAINTENANCE
To ensure that the equipment is in perfect and safe condition, it should be maintained and serviced by an
Authorised Service Centre at least once a year.
DANGER
• High voltage.
• Before removing the panel from the machine, accessing components and carrying out work on live
components, disconnect the machine from the power supply.
Use the resources and tools suited to each operation on the machine.
Call the technical service twice a year to have the machine serviced:
•Cleaning of water filter.
•Cleaning of lime on the resistors, pipes and surfaces of the equipment. The use of phosphoric-based
products is recommended.
•Inspection of the condition of the seals.
•Inspection of the condition of the parts.
•Checking the correct operation of the dispensers.
•Tightening of the electrical connections on the terminals, once a year.
If the power cable is damaged, it must be replaced by the manufacturer, After-sales Service or authorised and
qualified technical personnel in order to prevent risks.
4. HYGIENE REGULATIONS
•The machines are equipped with temperature sensors which indicate the tank and boiler temperatures TANK
TEMPERATURE, BOILER TEMPERATURE on the DISPLAY, or with a MACHINE READY light indicating that the
correct temperatures have been reached. It is necessary to wait until the tank and boiler temperatures are
reached before starting the wash cycle.
•Before placing dishes in the dishwasher, carefully remove food remains to avoid blocking the filters, jets and
tubes.
•Drain the wash tank and rinse the filters at least twice a day or every 40-50 wash cycles.
•Make sure that the quantities of detergent and rinse aid dispensed are correct (as recommended by
supplier). At the start of the work day, check that the quantity of product in the reservoirs is enough for the
daily requirement.
•Remove the basket from the machine and handle the dishes/glasses/cutlery with gloves or clean hands to
prevent contamination. Be careful as the dishes will be hot.
•Do not dry the plates with kitchen towels or cloths that are not sterile.
•The equipment should be kept perfectly clean and maintained.

22/07/2019
9
SERVICE MANUAL
EVO FRONT LOADING DISHWASHER
•Operators must strictly observe all hygiene requirements when handling clean dishes, glasses and cutlery.
5. REMOVAL OF PACKAGING
Remove packaging from the equipment and check for damage during transportation. If any damage is observed,
immediately notify the supplier and the transport company. In the event of doubt, do not use the equipment until
the problem has been assessed.
Packaging (plastic, wood, staples, etc.) must not be left in the reach of children, it is a potential
hazard. It is a potential hazard.
The appliance must be handled using a forklift or similar to prevent damage to the structure of the
machine. Transport the equipment to the installation location and then remove its packaging.
5.1.RECYCLING
All the packaging can be recycled. Dispose of packaging correctly.
This machine does not contain components which may damage the
environment if not correctly processed. The machine must not be
disposed of in the municipal waste.
The machine must be disposed of in accordance with the current local
legislation, which can be obtained from the local authorities.
Recycle packaging material correctly at the selective collection points.
Deposit packaging material in the correct bins for recycling.
Help to protect the environment and public health, and to recycle waste
from electrical and electronic equipment. Do not dispose of the machine
with domestic waste. Take the product to the local recycling centre or
contact your local office.
Packaging (plastic, wood, staples, etc.) must not be left
in the reach of children, it is a potential hazard.
At the end of its useful life, this machine must not be thrown away in a standard rubbish bin, but
must be placed in an electrical waste and electronic equipment collection point for correct
disposal.
Depending on the features, the materials can be recycled. By recycling and other ways of processing electrical
waste and electronic equipment, you can significantly contribute to protecting the environment.
Protect the environment by disposing of waste at the waste disposal points established for this purpose.
The European standard 2012/19/EU Directive on Waste Electrical and Electronic Equipment indicates that this
appliance must not be disposed of as a domestic appliance. It must be correctly disposed of in order to optimise
the recycling of materials and to protect the environment, as indicated by the WEEE symbol on the machine.
For further information on the correct disposal of the machine, please contact the nearest public waste disposal
service or the distributor/supplier of the appliance.

22/07/2019
10
SERVICE MANUAL
EVO FRONT LOADING DISHWASHER
6. TECHNICAL DATA
6.1.MACHINE SPECIFICATIONS
The machine is specially designed for cleaning tableware, glassware and other items of kitchenware, used in the
hotel and catering sector.
All the appliances have a specifications plate which identifies the appliance and indicates its technical
characteristics, it is located on one side of the machine. Do not remove the plate from the unit.
SPECIFICATIONS PLATE
1: NAME OF THE UNIT
2: CODE OF THE UNIT
3: SERIAL NUMBER + DATE OF
MANUFACTURE
4: ELECTRICAL SPECIFICATIONS
5: WATER SPECIFICATIONS

22/07/2019
11
SERVICE MANUAL
EVO FRONT LOADING DISHWASHER
6.2.ELECTRICAL POWER
MOD. CONNECTIONS
Fusible
protec.
Total kW
Total
Amp.
Cable section
RC
(kW)
RT
(kW)
MB
(kW)
CO-500 230V, 1N
16 A 3.4 kW 14.7 A 3G 2.5 mm22.8 2.8 0.6
CO-501
CO-502
COP-504
230V, 1N
16 A 3.4 kW 14.7 A 3G 2.5 mm2 2.8 2.8 0.6
20 A 4.3 kW 18.8 A 3G 2.5 mm23.7 2.8 0.6
400V, 3N
16 A 6.2 kW 14.7 A 5G 2.5 mm25.6 2.8 0.6
230V, 3
20A 6.2 kW 16.6 A 4G 2.5 mm25.6 2.8 0.6
CO-501 CI
CO-502 CI
COP-504 CI
230V, 1N
13 A 2.8 kW 12.1 A 3G 1.5 mm21.9 2.2 0.6
16 A 3.4 kW 14.7 A 3G 2.5 mm2 2.8 2.2 0.6
20 A 4.3 kW 18.8 A 3G 2.5 mm23.7 2.2 0.6
400V, 3N
16 A 6.2 kW 12.1 A 5G 1.5 mm25.6 2.2 0.6
230V, 3
20A 6.2 kW 16.6 A 4G 2.5 mm25.6 2.2 0.6
FACTORY ELECTRICAL SETTING
230V, 1N
, 3.4 kW, 14.7 A 3G 2.5 mm2
CI
230V, 1N
, 2.8 kW, 12.1 A 3G 1.5 mm2
CO-500
230V, 1N
3.4 kW, 14.7 A, 3G 2.5 mm2
MOD. CONNECTIONS
Fusible
protec.
Total kW
Total
Amp.
Cable section
RC
(kW)
RT
(kW)
MB
(kW)
AD-505
230V, 1N
ALT 13 A 2.5 kW 10.7 A 3G 1.5 mm21.9 1 0.6
230V, 1N
SIM
16 A 3.5 kW 15 A 3G 2.5 mm21.9 1 0.6
20 A 4.4 kW 19.1 A 3G 2.5 mm22.8 1 0.6
400V, 3N
SIM 16 A 7.2 kW 15 A 5G 2.5 mm25.6 1 0.6

22/07/2019
12
SERVICE MANUAL
EVO FRONT LOADING DISHWASHER
230V, 3
SIM 25 A 7.2 kW 21 A 4G 4 mm25.6 1 0.6
FACTORY ELECTRICAL SETTING
230V, 1N
SIM , 3.5 kW, 15 A 3G 2.5 mm2
Voltage change connection
230V, 1N
230V, 1N
230V, 1N
400V, 3N
230V, 3
BRIDGE
:
Earth
N: Neutral
L1,
L2,
L3:
Cycle

22/07/2019
13
SERVICE MANUAL
EVO FRONT LOADING DISHWASHER
6.3.DIMENSIONS
GENERAL AND CONNECTION DIMENSIONS (mm)
A
Water inlet and filter
B
Drainage hose
C
Electrical power cable / packing gland
D
Connection box
E
Rinse aid inlet

22/07/2019
14
SERVICE MANUAL
EVO FRONT LOADING DISHWASHER
6.4.OTHER DATA
MOD.
/ h
Cycle (s) Pump Tank Boiler kg NS
CO-500
500mm
x
500mm
30
120/180
2.5
L / cycle 20 L
7 L
70 kg
< 65 dB
CO-501
40 90/120/180
CO-502
COP-504
2.4
L / cycle
AD-505 60
60/90/120/Gla
ss
14 L 71 kg
7. INSTALLATION OF THE MACHINE
7.1.LOCATION
An extractor hood should be installed to prevent the build-up of steam in the premises.
Place the equipment in a sufficiently ventilated room, in accordance with the current regulations, to prevent the
formation of unacceptable concentrations of harmful substances in the installation site.
Inspect final location of the equipment prior to installation to prevent damage during use.
Unless otherwise indicated, the parts that have been protected by the manufacturer must not be manipulated by
the installer.
•The placement, installation, repairs and/or modifications must always be carried out by an Authorised Service
Technician in accordance with the manufacturer's instructions and the applicable regulations.
•Do not change the position of or handle the machine components, as this may affect the operating safety.
•The appliance must be correctly levelled and the electrical cables, gas pipes, water and drainage hoses must
not be trapped or contain kinks.
•The appliance has been designed to operate at ambient temperatures ranging from 5 ⁰C to 40 ⁰C and must not
be used at temperatures below 5 ºC.
•The appliance or any of its parts must never be used as a support and objects must not be placed on top.
•Do not install the appliance in places exposed to jets of water.
•This appliance must be installed in accordance with the current applicable legislation. It may only be installed
on premises which are correctly ventilated in order to prevent the formation of unacceptable concentrations of
substances harmful to human health.
•You must check that there are no gas leaks. NEVER use a flame to check for leaks.
F
Detergent inlet
G
Equipotential connection

22/07/2019
15
SERVICE MANUAL
EVO FRONT LOADING DISHWASHER
•The gases leaving the fluepipe are at high temperatures and may cause burns. Do NOT obstruct the fluepipe
output.
7.2.LEVELLING
The appliances have adjustable legs to ensure they are correctly levelled. Turn the leg to obtain the required height.
The flooring on which the appliance is to be installed must be able to bear its full weight.
For optimum operation, it is essential that the appliance is correctly levelled.
Fagor Industrial recommends that the place where the appliance is to be installed should
be analysed prior to installation to check that it is suitable. The installation location must
be able to withstand the weight of the appliance.
Electrical cables, water and drainage hoses must not be trapped or contain kinks.
Turn the leg clockwise to extend and anticlockwise to shorten.
The installation of this appliance requires electrical and hydraulic connections, and an
adequate ventilation/extraction system due to the steam emitted by the machine.
8. CONNECTIONS
8.1.ELECTRICAL CONNECTION
Before connecting the machine to the power connection, check that the network voltage and frequency correspond
to those indicated on the appliance nameplate. Check that the cross-section of the power cable is appropriate for
the required consumption.
It is essential that the electrical installation where it is going to be connected has an EARTHING SOCKET, in
addition to the appropriate protection of the magneto-thermal switch and differential.
An AUTHORISED TECHNICIAN should always carry out the appliance’s electrical connection.
The legal standards in force in each country on connections to the mains should be taken into account.
•The specifications plate indicates the maximum power in kilowatts (kW) and amperes (A) for the correct
sizing of the installation components (line, power supply cable…). If the configuration is changed, the
values must be revised.
•Check that the mains voltage corresponds to that indicated on the appliance nameplate.
•The electric cable should be flexible, with an oil-proof covering, and it should not weigh less than the cable
in an ordinary sleeve made of standard polychloroprene or an equivalent synthetic elastomer (H05RN-F or
H07RN-F).
•The cross-section of the power cable must be suitable for the rated current of the machine.
•The machine must be connected to earth using the connection on the machine connection strip.
•The manufacturer will not be held liable for damage originated by failure to observe this requirement.
•Near the appliance and easily accessible to the user, between the power supply and the appliance, a

22/07/2019
16
SERVICE MANUAL
EVO FRONT LOADING DISHWASHER
suitable omnipolar cut-off Circuit Breaker with a minimum contact separation of 3 mm must be installed.
This device should be used to disconnect the appliance during installation, repair, cleaning and
maintenance work. It is recommended that it has lockout-tagout capabilities. The manufacturer will not be
held liable for damage originated by failure to observe this requirement.
•A suitable safety switch / Residual current device must be installed near the appliance between the power
supply and the appliance. The manufacturer will not be held liable for damage originated by failure to
observe this requirement.
•If any faults are observed during the installation of the equipment, the supplier should be notified
immediately.
To access the connection strip, release the left side panel, pass the cable sleeve through the stuffing box on the
lower exterior base and connect as shown on the strip.
.
VERY IMPORTANT: Before installing the left side panel, attach the electrical supply hose securely to
the stuffing box.
When several appliances are installed in series, they should be earthed to each other using the point
assigned for this purpose, located in the oven base, at the back. The connection is represented by the
symbol.
8.2.HYDRAULIC CONNECTION
Before connecting the machine to the mains water supply, the
water must be tested and should comply with the following
requirements:
If the water quality does not meet the specified requirements, contact a professional able to advise on the water
treatment systems necessary to make the water suitable and to obtain a satisfactory process.
If the water hardness is higher than that indicated, a descaler should be installed to prevent the build-up of lime on
the machine and to permit optimum cleaning and drying. It is also possible to install a SOFT model with built-in
descaler (n this case if the water hardness is higher than 45 ºfH / 31.5 ºeH / 25.2 ºdH, it will still be necessary to
install an external descaler).
In addition to water quality, the pressure of the mains water supply must be considered. This is important to ensure
the unit operates correctly. The dynamic pressure of the water inlet must be within the values indicated in the
following table.
EQUIVALENCES OF THE DEGREE OF WATER HARDNESS
CaCO3 (ppm)
ºD
ºF
ºA
ºE
ºF
10
0.56
1
10
0.7
ºA
1
0.056
0.1
1
0.07
ºE
14.26
0.8
1.47
14.26
1
ºD
17.85
1
1.785
17.85
1.25
DYNAMIC PRESSURE OF WATER INLET
CONCEPT
MOD.
Min.
200 kPa
2 bar
2kg/cm2
29 psi
Max.
400 kPa
4 bar
4.1 kg/cm
2
58 psi
pH
: 6,5 ÷ 7,5
Total water hardness: 5 ÷ 10 ºfH
3.5 ÷ 7 ºeH
2.8 ÷ 5.6 ºdH
50 ÷ 100 mg CaCo3/L
Impurities: Ø < 0.08 mm
Chlorides: ≤ 150 mg/l
Chlorine:0.2 ÷ 0.5 mg/l
Conductivity:400 ÷ 1,000 µS/cm

22/07/2019
17
SERVICE MANUAL
EVO FRONT LOADING DISHWASHER
If the water pressure is lower than
the recommended, a pressure pump
must be installed. Please contact
your supplier or the manufacturer to
request the PRESSURE PUMP KIT.
The water inlet temperature is also important. Hot water should be used to optimise the machine operation, as the
use of cold water will increase the times required to reach the operating temperatures and productivity will be
reduced. If using hot water, the water temperature must not exceed 60 ⁰C / 140 ºF.
For the correct hydraulic installation of the machine, you must:
•Connect the appliance to a water supply which complies with the requirements specified above. All the
machines have a ¾” screw-on water hose connection. Old or used hoses must NOT be used.
•Install a shut-off valve on the water supply close to the machine in an accessible position.
•Check that the mains pressure is within the range indicated above.
•Check that there are no leaks
Connect the machine to the mains water supply at the points indicated,
using the hose supplied.
The pressure of the incoming water should be between 200 and 400 kPa
(2÷4 kg/cm2= 2÷4 bar). Fagor Industrial recommends 250 kPa.
CONCEPT
PLUS AND
ADVANCE
MOD.
Min.
100 kPa
1 bar
1 kg/cm2
14.5 psi
Max. 400 kPa 4 bar 4.1 kg/cm258 psi
WATER INLET
TEMPERATURE
Min. Max.
Cold Water 15 ºC / 59 ºF
40 ºC / 104
ºF
Hot Water
40 ºC / 104
ºF
60 ºC / 140
ºF
S
Water shut-off valve
H
Water inlet hose
Only AU: Supplies hose and
counterflow prevention device
assembly
A
Water inlet and filter
EV
Electrovalve
BP
Electropump
F
Filter
CD
Drainage tray
B
Drainage hose
Pressure pump connection
Standard
connection

22/07/2019
18
SERVICE MANUAL
EVO FRONT LOADING DISHWASHER
STANDARD FILTER SYSTEMS
A) Fine filter
If the water contains impurities such as sand, iron particles or floating substances, we recommend the use of a fine
filter at the water input.
B) Activated carbon filter
If the water has a high chlorine content over 0.2 mg/l (this information can be obtained from the relevant water
board), an activated carbon filter should be installed.
C) Installation of osmosis recirculation
When the chloride concentration is above 150 mg/l (this information can be obtained from the relevant water
board), an osmosis recirculation installation should be mounted. In this case, please remember that the minimum
conductivity value is 400 µS.
D) Water descaling
For water with a high level of lime scale (without chloride load) the water should be treated. Systems: H+.
Interchange of ions or Kleensteam. We strongly advise against the use of sodium/ion exchangers (normally used in
dish washers) due to the formation of sodium sediment and the delay in boiling with common salt.
When selecting filter systems (A, B, C, D), we recommend you contact a specialist water treatment company.
8.3.WASTE WATER CONNECTION
Incorrect installation of the appliance may result
in the incorrect operation of it.
A drainage must be installed for this (DN40).
The installation should be in such a way as to
ensure that the installed drainage outlet is below
the oven outlet with a suitable slope to ensure
drainage (≈ 5 ÷ 3%).
Ensure the measurements for the drainage are
correct.
Average temperature of waste water: 65 ºC.
Once the drainage has been installed, the
discharge to the general drainage must be via a
type `AA`, `AB` or `AD` change in water level in accordance with EN 1717.
The machine drainage hose must be connected to the drain so that water draining from
the machine flows freely under gravity; therefore, the drain must be lower than the
drainage hose.
If the drain is higher, it will be necessary to use an machine fitted with a drainage pump.
The maximum permitted height of the drain is 500 mm above the drainage level of the
machine. The pump may be requested at the time of purchase or installed subsequently.
The drainage pump must only be installed by personnel authorised by the
manufacturer, and the manufacturer does not accept liability in the event of
incorrect installation.
The machine drainage hose must be connected to a sump with a drain trap to prevent the
return of bad odours.
Check that the drainage system operates correctly and is not blocked.

22/07/2019
19
SERVICE MANUAL
EVO FRONT LOADING DISHWASHER
8.4.CHEMICAL DISPENSERS´ CONNECTION
All machines come equipped with an internal rinse dispenser.
The detergent dispenser is optional in some models and is supplied as standard in
others.
All the dispenser tubes must be full before starting to adjust the dispensers.
To access the dispensers and adjust them, first remove the front cover of the
appliance. Adjustments must be made at machine operating temperature.
The following installation and adjustment must be carried out by authorised and
qualified personnel. Contact a qualified chemical product supplier to determine the most
suitable product and dose in order to optimise the wash.
The guarantee does not cover damage caused by the incorrect installation or use of
dispensers and chemical products.
The correct selection and dosing of detergent and rinse aid is essential for obtaining an optimum wash. Only use
liquid detergent especially designed for use with industrial dishwashers and which is non-foam forming at high
temperatures.Detergents designed for domestic use should not be used under any circumstances.
The detergent and rinse aid containers must be placed close to the appliance. The results of the wash should be
assessed after two fills and at least three wash cycles in order to stabilise the doses. There should not be any foam
in the tub after running the cycles.
Scratched dishes and the formation of foam in the wash solution are usually an indication of excess rinse aid.
Dishes with too many water drops or which are slow to dry are usually a sign of insufficient rinse aid.
Contact a chemical product supplier to determine the most suitable product and dose in order to
optimise the wash.
The guarantee does not cover damage caused by the incorrect use of dispensers and chemical products.
When handling chemical substances, the product safety instructions and recommended doses
must be observed. Use protective clothing, gloves and safety glasses when handling chemical
products.
Do not mix different detergents.
Correct selection and dosing of detergent and rinse aid is essential for obtaining an optimum wash.
The quantities/doses recommended by the detergent/rinse aid supplier must be observed.
Check and maintain the levels of detergent and rinse aid in the containers; always
check the levels at the start of every workday.
Make sure that the weight and filter are correctly fitted on the ends of the rinse aid
and detergent intake tubes and that they are correctly immersed in the correct
containers.
Clean the filters regularly to prevent blockages.
Each tube has a label on the end indicating «Rinse Aid» or «/Detergent» to identify them; the blue tube is for rinse
aid and the clear tube for detergent.
Place the containers close to the appliance.
IMPORTANT
Do not mix different detergents or rinse aids as they could crystallise and damage the dispensers. Whenever the
type of detergent or rinse aid is changed, it is ABSOLUTELY ESSENTIAL to clean and bleed the dispenser and its
hoses, by placing the detergent/rinse aid pipe in water for several cycles.
If the rinse aid or detergent is changed, the settings should be adjusted accordingly by qualified personnel.
Detergent /
Rinse Aid
Filter
This manual suits for next models
7
Table of contents
Other Fagor Dishwasher manuals

Fagor
Fagor LFI-046IT User manual

Fagor
Fagor 2LF 013 IX User manual

Fagor
Fagor 3LVF-438X User manual

Fagor
Fagor FI - 48 W Parts list manual

Fagor
Fagor LF 073M User manual

Fagor
Fagor 3LVF-421 User manual

Fagor
Fagor 3LVF-635AD User manual

Fagor
Fagor LFU-45IT User manual

Fagor
Fagor 3LVF-620M User manual

Fagor
Fagor V28F013W3 User manual

Fagor
Fagor LVE-55 User manual

Fagor
Fagor 3LVF-638ADIT User manual

Fagor
Fagor AD-48BDD User manual

Fagor
Fagor 3LVF-623 User manual

Fagor
Fagor HDWF-CL User manual

Fagor
Fagor Evo Concept Series Setup guide

Fagor
Fagor AD - 21 W User manual

Fagor
Fagor 3LVF-422IT User manual

Fagor
Fagor evoCONCEPT Quick start guide

Fagor
Fagor 3LVF-424IT User manual