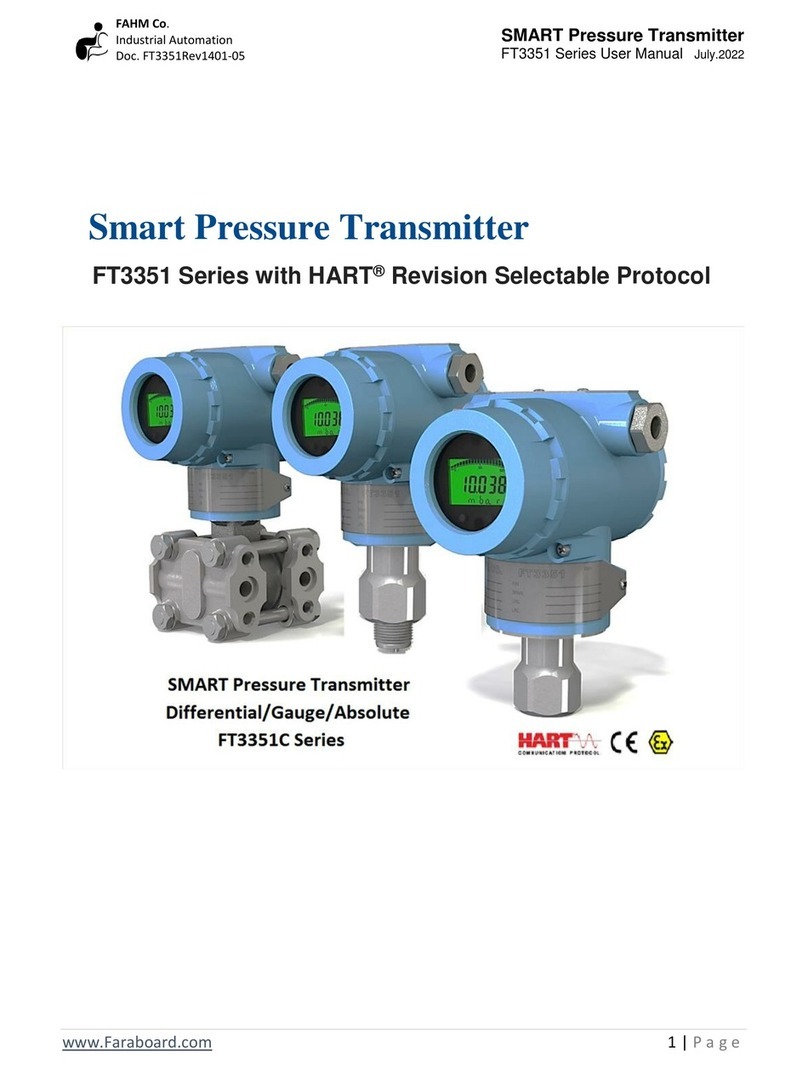
FAHM HART PTT74-E Series User manual

SMART Temperature Transmitter
PTT74-Ex Series User Manual Sep.2020
1
www.faraboard .com
FAHM Co.
Industrial Automation
Doc. PTT74-ExRev99/07M
User Manual
Smart Temperature Transmitter
PTT74-Ex Series with HART® Revision Selectable Protocol

SMART Temperature Transmitter
PTT74-Ex Series User Manual Sep.2020
2
www.faraboard .com
FAHM Co.
Industrial Automation
Doc. PTT74-ExRev99/07M
Contents
Smart Temperature Transmitter................................................................................................1
1. Introduction .......................................................................................................................3
1.1 Preface.........................................................................................................................3
1.2 Transmitter overview..................................................................................................3
1.3 PTT74-Ex features .......................................................................................................4
2. General considerations......................................................................................................4
2.1 Environmental considerations ....................................................................................5
2.2 Installation Process .....................................................................................................5
2.2.1 Dimension ............................................................................................................5
2.2.2 Mount the Transmitter ........................................................................................6
2.2.3 Housing rotation ..................................................................................................6
2.3 Electrical considerations .............................................................................................7
2.3.1 Conduit installation..............................................................................................7
2.3.2 Wiring Instruction ................................................................................................7
2.3.3 Grounding ..........................................................................................................10
3. Configuration ...................................................................................................................11
3.1 LCD display ................................................................................................................11
3.2 Device setup..............................................................................................................11
3.2.1 Primary Variable ................................................................................................12
3.2.2 Custom Variable.................................................................................................15
3.2.3 LCD Parameters..................................................................................................16
3.2.4 Analog Output Parameters ................................................................................17
3.2.5 Communication Parameters..............................................................................17
3.2.6 Reset Factory .....................................................................................................18
3.2.7 Sensor Configuration .........................................................................................18
Appendix A...............................................................................................................................24
Assembly Drawing - PTT74-EX-H .........................................................................................24
Accessories / Spare parts.........................................................................................................25

SMART Temperature Transmitter
PTT74-Ex Series User Manual Sep.2020
3
www.faraboard .com
FAHM Co.
Industrial Automation
Doc. PTT74-ExRev99/07M
1.Introduction
1.1 Preface
Welcome to use smart temperature transmitter, please read this manual before working
with the product. For personal and system safety, and for optimum product performance,
make sure you thoroughly understand the contents before installing, using, or maintaining
this product.
1.2 Transmitter overview
The PTT74-ex are used to measure universal temperature sensor for gas, liquid, vapor,
widely applied in petroleum, metallurgy, chemicals, power, light industry, mechanical and
environmental protection fields. The PTT74-Ex utilizes Thermocouple, RTD and NTC sensor
technology for temperature measurements. The major components of the PTT74-Ex are the
sensor element and the electronics housing. The sensor element contains the temperature
sensor, isolating body, associated connections and thermo-well. The electronic board
includes a temperature sensor as cold junction temperature measurement, a memory
module, A/D converter t measure sensor value, D/A converter to transmit the 4-20mA
signal, communication circuits and optional local indicator module. Powerful interface
features without hand held communicator are able to ensure good interaction. LCD
indicator can display the digital temperature and 0-100% analog indication. All parameter
setting, zero shift, range setting and damping adjustment can be done by press key buttons;
and also recalibration on the transmitter are greatly convenient for on-site calibration (see
Figure 1) .
Figure 1 PTT74-Ex Temperature transmitter

SMART Temperature Transmitter
PTT74-Ex Series User Manual Sep.2020
4
www.faraboard .com
FAHM Co.
Industrial Automation
Doc. PTT74-ExRev99/07M
1.3 PTT74-Ex features
◆ Best-in-Class performance with 0.1% reference accuracy.
◆ Two kinds of device including head-mounted and rail-mounted version provides
flexibility to transmitter usage and installation.
◆ Provides two channels temperature transmitter option in rail-mounted version
◆ Power Advisory Diagnostics provide predictive visibility to the health of entire electrical
loop.
◆ Local Operator Interface (LOI) offers easy to use configuration capabilities at the
transmitter.
◆ Selectable HART™Revision prepares your plant for the latest HART capabilities while
ensuring seamless integration with today's systems.
◆ Excellent long term stability of ±0.1% URL per year.
◆ Low Temperature Drift of ±0.1% URL in full range of ambient temperature (-40 ... 85°C).
◆ Easy installation with all solutions fully assembled, sealed and calibrated
2. General considerations
Measurement accuracy depends upon proper installation of the transmitter and impulse
cabling. Mount the transmitter close to the process and use a minimum of cabling to
achieve best accuracy. Keep in mind the need for easy access, personnel safety, practical
field calibration, and a suitable transmitter environment. Install the transmitter to minimize
vibration, shock, and temperature fluctuation. Procedures and instructions may require
special precautions to ensure the safety of the personnel performing the operation.
Explosions could result in death or serious injury: installation of this transmitter in an
explosive environment must be in accordance with the appropriate local, national, and
international standards, codes, and practices. Please review the following safety messages
for any restrictions associated with a safe installation
◆In an Explosion-Proof/Flameproof installation, do not remove the transmitter covers
when power is applied to the unit. Process leaks may cause harm or result in death.
◆Install and tighten process connectors before applying temperature.
◆Avoid contact with the leads and terminals. High voltage that may be present on leads
can cause electrical shock. Electrical shock can result in death or serious injury.
◆do not attempt to loosen or remove thermo-well while the transmitter is in service.

SMART Temperature Transmitter
PTT74-Ex Series User Manual Sep.2020
5
www.faraboard .com
FAHM Co.
Industrial Automation
Doc. PTT74-ExRev99/07M
2.1 Environmental considerations
Best practice is to mount the transmitter in an environment that has minimal ambient
temperature change. The transmitter electronics temperature operating limits are –40 to
185 °F (–40 to 85 °C). Mount the transmitter so that it is not susceptible to vibration and
mechanical shock and does not have external contact with corrosive materials.
2.2 Installation Process
2.2.1 Dimension
Standard PTT74-EX Dimensional Drawings shown in next figures.
Figure 4 PTT74-Ex Head Mounted Drawing without housing
Figure 3 PTT74-Ex Rail Mounted Drawing
Figure 2 PTT74-Ex head mounted with Indicator drawing

SMART Temperature Transmitter
PTT74-Ex Series User Manual Sep.2020
6
www.faraboard .com
FAHM Co.
Industrial Automation
Doc. PTT74-ExRev99/07M
2.2.2 Mount the Transmitter
The PTT74-Ex temperature transmitter can be mounted directly in the sensor head as head
–mounted temperature transmitter or on the rail in cabinet as rail-mounted temperature
transmitter. A mounting bracket for wall or pipe mounting (2" pipe) is also available as an
accessory if yser want to use the device remotely.
2.2.3 Housing rotation
To improve field access to the wiring or the visibility of the optional LCD meter, the
transmitter housing may be rotated through 360° and fixed in any position (see Figure 6). A
stop prevents the housing from being turned too far.In order to proceed with housing
rotation, the housing
stop tang-screw has to be unscrewed by approximately 1 rotation (do not pull it out) and,
once the desired position has been reached, retightened.
Figure 5 Smart Temperature transmitter mounting diagrams
Figure 6 Housing rotation

SMART Temperature Transmitter
PTT74-Ex Series User Manual Sep.2020
7
www.faraboard .com
FAHM Co.
Industrial Automation
Doc. PTT74-ExRev99/07M
2.3 Electrical considerations
Make sure all electrical installation is in accordance with national and local code
requirements.
2.3.1 Conduit installation
If all connections are not sealed, excess moisture accumulation can damage the transmitter.
Make sure to mount the transmitter with the electrical housing positioned downward for
drainage. To avoid moisture accumulation in the housing, install wiring with a drip loop, and
ensure the bottom of the drip loop is mounted lower than the conduit connections or the
transmitter housing based on Figure 8.
2.3.2 Wiring Instruction
Do not connect the power signal wiring to the test terminals. Voltage may burn out the
reverse-polarity protection diode in the test connection. Perform the following steps to
make wiring connections:
1. Remove the housing cover on terminal compartment side. Do not remove the cover
in explosive atmospheres when the circuit is live. Signal wiring supplies all power to
the transmitter.
2. Turn the display 90 degrees so that the void and screw are aligned, then Loosen the
screw. Figure 7
3. Gently disconnect the flat cable. Figure 8
4. For 4-20 mA HART output, connect the positive lead to the terminal marked (+) and
the negative lead to the terminal marked (-). Do not connect powered signal wiring
to the test terminals. Power could damage the test diode. Figure 9
5. Plug and seal unused conduit connection on the transmitter housing to avoid
moisture accumulation in the terminal side. Install wiring with a drip loop. Arrange
the drip loop so the bottom is lower than the conduit connections and the
transmitter housing.
Figure 8 Recommended conduit connections

SMART Temperature Transmitter
PTT74-Ex Series User Manual Sep.2020
8
www.faraboard .com
FAHM Co.
Industrial Automation
Doc. PTT74-ExRev99/07M
Transmitter operates on 14 - 30 Vdc (14-29.4 Vdc for satisfaction of EX).
The dc power supply should provide power with less than two percent ripple. The
recommended wiring for transmitter was shown in Figure 7 to 10.
Figure 7 Removing Display
Figure 9 Connecting wires
Figure 8 Connecting wires
90
°

SMART Temperature Transmitter
PTT74-Ex Series User Manual Sep.2020
9
www.faraboard .com
FAHM Co.
Industrial Automation
Doc. PTT74-ExRev99/07M
Figure 10 PTT74-Ex Recommended wiring
Figure 11 PTT74-Ex head mounted transmitter sensor
wiring
Figure 12 PTT74-Ex rail mounted sensor wiring

SMART Temperature Transmitter
PTT74-Ex Series User Manual Sep.2020
10
www.faraboard .com
FAHM Co.
Industrial Automation
Doc. PTT74-ExRev99/07M
2.3.3 Grounding
Use the following techniques to properly ground the transmitter signal wiring and case. Do
not run signal wiring in conduit or open trays with power wiring or near heavy electrical
equipment. It is important that the instrument cable shield be:
◆trimmed close and insulated from touching the transmitter housing
◆Connected to the next shield if cable is routed through a junction box
◆Connected to a good earth ground at the power supply end.
For 4-20 mA HART output, the signal wiring may be grounded at any one point on the signal
loop or may be left ungrounded. The negative terminal of the power supply is a
recommended grounding point. Always ground the transmitter case in accordance with
national and local electrical codes. The most effective transmitter case grounding method is
a direct connection to earth ground with minimal impedance. Methods for grounding the
transmitter case include:
◆Internal Ground Connection: The Internal Ground Connection screw is inside the FIELD
TERMINALS side of the electronics housing. This screw is identified by a ground symbol.
◆External Ground Connection: Grounding the transmitter case via threaded conduit
connection is the second way that may not provide sufficient ground continuity.

SMART Temperature Transmitter
PTT74-Ex Series User Manual Sep.2020
11
www.faraboard .com
FAHM Co.
Industrial Automation
Doc. PTT74-ExRev99/07M
3. Configuration
3.1 LCD display
The LCD indicator connects directly to the interface board which maintains direct access to
the signal terminals. It can display the digital temperature, custom variable which is
proportional with measured temperature, 0-100% analog indication and abbreviated
diagnostic messages. A display cover is provided to accommodate the display. The LCD
display features a three-line display. The first line displays three characters related to
measured parameter. The first character of the first line is <P> related to programing mode
. The second character of first line is <SP> related to set point indication if transmitter be
used as controller .The last character is <FIX>. This character is on when the output current
of transmitter forced to fixed value via hart device or due to use of transmitter in multi-drop
mode. The second line displays the actual measured value of temperature and its sign. The
third line displays the engineering unit for indicated variable. A speed meter located in
above section of the first line displayed the percentage of measured temperature. The LCD
display is shown in Figure .
3.2 Device setup
For configuration and tuning the parameters, three key buttons exist on the indicator. The
key button characterized by <M> is located in above of LCD display and two key buttons
located in the bottom of LCD which characterized by <Z> and <S> signs.
In normal operation LCD shows the desired variable and/or percent range of output signal.
In this mode you can use <M> key to access menu list. In normal operation mode if you
press and hold the <Z> key between 3 to 10 seconds you can set the current value of applied
temperature as low range (LRV) of transmitter and if you press and hold the <S> key
between 3 to 10 seconds you can set the current value of applied temperature as high range
(HRV) of transmitter.
Figure 13 LCD Display

SMART Temperature Transmitter
PTT74-Ex Series User Manual Sep.2020
12
www.faraboard .com
FAHM Co.
Industrial Automation
Doc. PTT74-ExRev99/07M
In operation mode by pressing <M> button, menu for tuning the parameters is available for
users and they can use this button to save new parameters when all characters in display
are in blinking mode. The key button characterized by <Z> is responsible for horizontal
sweeping of parameters and switching between programing mode and operation mode.
Also, the key button characterized by <S> is responsible for vertical sweeping of parameters.
Operation of this key button is mentioned in summery in table 3-1.
Table3-1 keys operation
Users can use the following instruction to perform the configuration of the different
parameters (see table 3-2).
3.2.1 Primary Variable
The primary variable is the most significant variable which in this device represents the
actual value of temperature measurement.
Configuration of primary variable is performed via following parameters:
3.2.1.1 Unit
User can select the unit of primary variable using this parameter.
parameter
display
Parameter tuning structure
Unit
(set the unit of
temperature)
Press <M> until this page is appeared on LCD. Then press
<Z> to access the units (programing mode). You can
select the unit by pressing <S>. After that, press <Z> until
all characters blink. Then press <M> for the saving new
parameter and switching from programing mode to
operation mode.
The available units for temperature value are:
C [Degree of Celsius]
F [degree of Fahrenheit]
R [degree of Rankine]
K [degree of Kelvin]
Key button
operation
M
Accessing to menu list - saving new parameters –canceling the edited
parameter
Z
Horizontal sweeping of parameters - switching between programing mode
and operation mode - Applied temperature LRV setting
S
Vertical sweeping of parameters –Applied temperature HRV setting

SMART Temperature Transmitter
PTT74-Ex Series User Manual Sep.2020
13
www.faraboard .com
FAHM Co.
Industrial Automation
Doc. PTT74-ExRev99/07M
3.2.1.2 Max Range and Min Range and Transfer function
User can determine the maximum and minimum value of temperature which will be
mapped to 4-20mA of output signal. After this configuration the output signal will be
mapped to min and max values. So when the process temperature be equal to min-
temperature, the output signal will be 4.0mA and when it be equal to max- temperature,
the output signal will be 20.0mA.
According to transfer function selected by user, for value between min and max
temperature values, the output signal will be produced with linear or square root curve.
parameter
display
Parameter tuning structure
Max-
Temperature
(The temperature
mapped to 20 mA)
Press <M> until this page is appeared on LCD. Then press
<Z> to access the amount of maximum temperature
(programing mode). You can change the amount of
digits by <S> and change the point and position of digits
by <Z>. After tuning this parameter, press the <Z> until
all characters blink. Then press <M> for the saving new
parameter and switching from programing mode to
operation mode.
Min-
Temperature
(The temperature
mapped to 4 mA)
Press <M> until this page is appeared on LCD. Then press
<Z> to access the amount of minimum temperature
(programing mode). You can change the amount of
digits by <S> and change the point and position of digits
by <Z>. After tuning this parameter, press the <Z> until
all characters blink. Then press <M> for the saving new
parameter and switching from programing mode to
operation mode.
Transfer
Function
(linear or SQRT
function)
Press <M> until this page is appeared on LCD. Then press
<Z> to access the primary variable transfer function
(programing mode). You can select linear or SQRT
function by pressing <S>. After that, press <Z> until all
characters blink. Then press <M> for the saving new
parameter and switching from programing mode to
operation mode
The unit of min and max temperature values is same as primary variable.
According to the temperature sensor type, the entered values should not be out of sensor
range and also user should consider the minimum span of device when determine the
desired min and max value, otherwise device will not accept the user changes.
For more accurate configuration please refer to temperature transmitter datasheet.

SMART Temperature Transmitter
PTT74-Ex Series User Manual Sep.2020
14
www.faraboard .com
FAHM Co.
Industrial Automation
Doc. PTT74-ExRev99/07M
3.2.1.3 Decimal point
User can select the decimal points count of primary variable to display on LCD with DP
menu. For selecting the primary variable as displayed variable please refer to LCD
parameters.
parameter
display
Parameter tuning structure
DP
(Decimal point for
show the primary
variable)
Press <M> until this page is appeared on LCD. Then press
<Z> to access the mapping mode (programing mode).
You can select the position of decimal point by pressing
<S>. After that, press <Z> until all characters blink. Then
press <M> for the saving new parameter and switching
from programing mode to operation mode.
If user select AUTO, according to momentary value of primary variable, the device
determines the number of decimal places.
3.2.1.4 Damping Value
User can determine the desired damping of primary variable and output signal using this
parameter. By setting of this parameter when the process temperature changes suddenly,
the primary variable and output signal will be change smoothly and will be reach to the
changed value after set damping value with a linear curve.
parameter
display
Parameter tuning structure
Damping
( for smoothing the
noisy output (based
on sec))
Press <M> until this page is appeared on LCD. Then press
<Z> to access the amount of time based on second
(programing mode). You can change the amount of
digits by <S> and change the point and position of digits
by <Z>. After tuning this parameter, press the <Z> until
all characters blink. Then press <M> for the saving new
parameter and switching from programing mode to
operation mode.
The unit of damping value is second and the specified value cannot be negative or greater
than 60 seconds.
3.2.1.5 Low Trimming
User can perform low-trim of device with local panel. Often, low-trim is used for offset
calibration of device which may be for removing of ambient temperature effect on
temperature transmitter or sensor cable length.
parameter
display
Parameter tuning structure
Trim-low
( For offset
removing and local
calibration of
temperature)
Press <M> until this page is appeared on LCD. Then press
<Z> to access the amount of temperature (programing
mode). You can change the amount of digits by <S> and
change the point and position of digits by <Z>. After
tuning this parameter, press the <Z> until all characters
blink. Then press <M> for the saving new parameter and
switching from programing mode to operation mode.
The unit of low trim value is same as primary variable.

SMART Temperature Transmitter
PTT74-Ex Series User Manual Sep.2020
15
www.faraboard .com
FAHM Co.
Industrial Automation
Doc. PTT74-ExRev99/07M
When this menu appears on LCD it show the current measurement of process temperature.
So after stabilizing of process temperature user should enter his desired temperature value.
After calibration, the device should show the desired temperature which is specified by
user.
3.2.2 Custom Variable
The custom variable is a mathematical variable which is related to primary variable with a
linear or square root equation. Ordinary this variable is used to represent scaled value on
display instead of the primary variable.
Configuration of custom variable is performed via following parameters:
3.2.2.1 Max Range and Min Range and Transfer function
User can determine the maximum and minimum value of variable which will be mapped to
maximum and minimum of primary variable. After this configuration when the process
temperature be equal to min- temperature, the custom variable represents the minimum
value and when it be equal to max- temperature, the custom variable represents the
maximum value.
According to transfer function selected by user, for value between min and max
temperature values, the custom variable value will be produced with linear or square root
curve.
parameter
display
Parameter tuning structure
Custom Variable
Max-Range
(The value mapped
to 20 mA)
Press <M> until this page is appeared on LCD. Then press
<Z> to access the amount of maximum value
(programing mode). You can change the amount of
digits by <S> and change the point and position of digits
by <Z>. After tuning this parameter, press the <Z> until
all characters blink. Then press <M> for the saving new
parameter and switching from programing mode to
operation mode.
Custom Variable
Min-Range
(The value mapped
to 4 mA)
Press <M> until this page is appeared on LCD. Then press
<Z> to access the amount of minimum value
(programing mode). You can change the amount of
digits by <S> and change the point and position of digits
by <Z>. After tuning this parameter, press the <Z> until
all characters blink. Then press <M> for the saving new
parameter and switching from programing mode to
operation mode.
Custom Variable
Transfer
Function
(linear or SQRT
function)
Press <M> until this page is appeared on LCD. Then press
<Z> to access the custom variable transfer function
(programing mode). You can select linear or SQRT
function by pressing <S>. After that, press <Z> until all
characters blink. Then press <M> for the saving new
parameter and switching from programing mode to
operation mode
The unit of min and max values is arbitrary.

SMART Temperature Transmitter
PTT74-Ex Series User Manual Sep.2020
16
www.faraboard .com
FAHM Co.
Industrial Automation
Doc. PTT74-ExRev99/07M
3.2.2.2 Decimal point
User can select the decimal points count of custom variable to display on LCD with DP
menu. For selecting the custom variable as displayed variable please refer to LCD
parameters.
parameter
display
Parameter tuning structure
Custom Variable
DP
(Decimal point for
show the custom
variable)
Press <M> until this page is appeared on LCD. Then press
<Z> to access the mapping mode (programing mode).
You can select the position of decimal point by pressing
<S>. After that, press <Z> until all characters blink. Then
press <M> for the saving new parameter and switching
from programing mode to operation mode.
If user select AUTO, according to momentary value of custom variable, the device
determines the number of decimal places.
3.2.3 LCD Parameters
LCD is used to display the selected variable of temperature transmitter, the current value of
output signal, diagnostic signs like SQRT, FIX, Locked, Over-range and Under-range signs and
also implementation of configuration menu list.
User can select one or two variable to display on LCD in idle mode. If user select more than
one variable to show, LCD will display selected variables alternately.
parameter
display
Parameter tuning structure
LCD Mode
(configuring LCD to
show your desire
variable(s) and/or
range)
Press <M> until this page is appeared on LCD. Then press
<Z> to access the LCD configuration parameter
(programing mode). You can configure the LCD to show
primary variable (PV), the percent of output range (R),
custom variable (CV), internal temperature (SV) and
some combinations of above by pressing <S>. After that,
press <Z> until all characters blink. Then press <M> for
the saving new parameter and switching from
programing mode to operation mode.
User can configure the LCD to display following variables and some combinations of them:
PV [primary variable (temperature)]
R [the percent of output range]
CV [custom variable]
SV [secondary variable (cold junction temperature)]

SMART Temperature Transmitter
PTT74-Ex Series User Manual Sep.2020
17
www.faraboard .com
FAHM Co.
Industrial Automation
Doc. PTT74-ExRev99/07M
3.2.4 Analog Output Parameters
The output signal of transmitter is a 4-20mA current which in normal condition represents
the current value of primary variable. If the value of primary variable be out of range or the
device conclude that there is a fault in electronic boards or sensor element that takes the
device into mal-function mode, the output signal will represent the alarm condition.
User can simulate and/or trim the output signal using CUR and CTR menu items.
parameter
display
Parameter tuning structure
Alarm
(setting alarm for
over range, under
range or holding the
last value)
Press <M> until this page is appeared on LCD. Then press
<Z> to access the Alarm parameters (programing mode).
You can set the alarm for over range (high) and under
range (low) or maintain the last value (Last) by pressing
<S>. After that, press <Z> until all characters blink. Then
press <M> for the saving new parameter and switching
from programing mode to operation mode.
Test/Trim
Current
(Simulate the
output current to fix
value and/or trim
the current)
Press <M> until this page is appeared on LCD. Then press
<Z> to access the test current value (programing mode).
You can change the amount of digits by <S> and change
the point and position of digits by <Z>. After tuning this
parameter, press the <Z> until all characters blink. Then
press <M> for apply this value to as output current. By
pressing <M> display module go to trimming mode. You
can enter the actual value which you read via series
multi-meter and press <M> key to save new parameter
and switching from programing mode to operation
mode.
In any state to exit from simulating current mode you
can enter zero value as test current value or restart the
transmitter.
3.2.5 Communication Parameters
PTT74-Ex Series transmitter supports Hart multi-drop mode. To identify the device ID in this
mode, user can use the POLL ID menu.
parameter
display
Parameter tuning structure
Hart Protocol
Poll ID
(configuring
identification
number of device in
hart multi-drop bus)
Press <M> until this page is appeared on LCD. Then press
<Z> to access the Poll ID parameter (programing mode).
You can select the device identifier by pressing <S>.
After that, press <Z> until all characters blink. Then press
<M> for the saving new parameter and switching from
programing mode to operation mode.

SMART Temperature Transmitter
PTT74-Ex Series User Manual Sep.2020
18
www.faraboard .com
FAHM Co.
Industrial Automation
Doc. PTT74-ExRev99/07M
According to Hart protocol, user can select a number between 0 and 15 as poll identifier. If
user select zero, the device multi-drop mode will be disabled and the current output will
show the primary variable value. But if user select a number greater than zero, the device
will go into multi-drop mode and the output current will be fixed at 4.0 mA.
3.2.6 Reset Factory
User can recall all factory settings using bellow menu.
The default password for this operation is “74”
parameter
display
Parameter tuning structure
Reset Factory
(Password factory
setting)
Press <M> until this page is appeared on LCD. Then press
<Z> to access the reset factory setting (programing
mode). You can enter the password by <S> and change
the point and position of digits by <Z>. After entering
the correct password, press the <Z> until all characters
blink. Then press <M> for recall the factory settings and
restart the device.
3.2.7 Sensor Configuration
PTT74-Ex series transmitters has universal input terminals to measure the value which
produced by sensor element. So user should configure the transmitter to identify the type
of sensor element and related parameters. There are some menu in this device to configure
the sensor element:
3.2.7.1 Sensor Type
Universal input port of device allow user to connect any temperature sensor element type
to device. User can configure the sensor type using bellow menu:
parameter
display
Parameter tuning structure
Sensor Type
(The sensor element
type)
Press <M> until this page is appeared on LCD. Then press
<Z> to access the Sensor Type (programing mode). You
can select the sensor type by pressing <S>. After that,
press <Z> until all characters blink. Then press <M> for
the saving new parameter and switching from
programing mode to operation mode.
RUI Type
(The electrical signal
type of sensor
element)
Press <M> until this page is appeared on LCD. Then press
<Z> to access the RUI Type (programing mode). You can
identify the electrical signal type of sensor element by
selecting the resistance type (RES) or voltage type (VOL)
by pressing <S>. After that, press <Z> until all characters
blink. Then press <M> for the saving new parameter and
switching from programing mode to operation mode.

SMART Temperature Transmitter
PTT74-Ex Series User Manual Sep.2020
19
www.faraboard .com
FAHM Co.
Industrial Automation
Doc. PTT74-ExRev99/07M
Wire No
(The number of
sensor element
leads)
Press <M> until this page is appeared on LCD. Then press
<Z> to access the Wire No (programing mode). You can
identify the number of sensor leads by selecting the 2-
Leads (2-L), 3-Leads (3-L) or 4-Leads (4-L) by pressing
<S>. After that, press <Z> until all characters blink. Then
press <M> for the saving new parameter and switching
from programing mode to operation mode.
Calibration Type
(the relation
between input
sensors and output)
Press <M> until this page is appeared on LCD. Then press
<Z> to access the Sensor Calibration Type (programing
mode). You can identify the type of calibration by
pressing <S>. After that, press <Z> until all characters
blink. Then press <M> for the saving new parameter and
switching from programing mode to operation mode.
Sensor Factor
(apply a
proportional factor
to measured value)
Press <M> until this page is appeared on LCD. Then press
<Z> to access the Sensor Factor (programing mode). You
can identify the sensor factor by pressing <S>. After that,
press <Z> until all characters blink. Then press <M> for
the saving new parameter and switching from
programing mode to operation mode.
The available sensor types are as follows:
L-LO [Linear Low Range] (Range Limit: -125…125mV or 0...500Ω)
L-HI [Linear High Range] (Range Limit: -125...1150mV or 0…50000Ω)
FREE [Free Style] (sensor lookup table should be enter using Hart communicator)
PT100 *RTD PT100 α=0.3850+ (Range Limit: -200...850°C)
PT100C *RTD PT100 α=0.3916+ (Range Limit: -200...850°C)
PT100D *RTD PT100 α=0.3920+ (Range Limit: -200...850°C)
NI100 [RTD NI100] (Range Limit: -60...250°C)
CU100 [RTD CU100] (Range Limit: -20...150°C)
TH-B [Thermocouple Type-B] (Range Limit: 250...1820°C)
TH-C [Thermocouple Type-C] (Range Limit: -18...2315°C)
TH-D [Thermocouple Type-D] (Range Limit: -18...2315°C)
TH-E [Thermocouple Type-E] (Range Limit: -250...1000°C)
TH-J [Thermocouple Type-J] (Range Limit: -210…1200°C)
TH-K [Thermocouple Type-K] (Range Limit: -250...1372°C)
TH-L [Thermocouple Type-L] (Range Limit: -200...900°C)

SMART Temperature Transmitter
PTT74-Ex Series User Manual Sep.2020
20
www.faraboard .com
FAHM Co.
Industrial Automation
Doc. PTT74-ExRev99/07M
TH-N [Thermocouple Type-N] (Range Limit: -200...1350°C)
TH-R [Thermocouple Type-R] (Range Limit: -50...1768°C)
TH-S [Thermocouple Type-S] (Range Limit: -50...1768°C)
TH-T [Thermocouple Type-T] (Range Limit: -200...400°C)
TH-U [Thermocouple Type-U] (Range Limit: -200...600°C)
NTC-B [NTC Thermistor Beta Equation] (Range Limit: -50...150°C)
NTC-SH [NTC Thermistors Steinhart and Hart Equation] (Range Limit: -50...150°C)
The available RUI Types are as follows:
RES [Resistance]
VOL [Voltage]
This variable is visible if sensor type was selected as “Linear Low/High Range” or “Free
Style”. In this situation user should identify the type of input signal. In other states the
device will select the RUI type automatically.
The available Wire No are as follows:
2-L [Two Lead]
3-L [Three Lead]
4-L [Four Lead]
This variable is visible if RUI type was selected as resistance. In this situation user should
identify the number of resistor leads. In other states the device will select the Wire No
automatically as 2-Wire.
The available sensor calibration types are as follows:
SINGLE [One sensor is connected to input terminals]
DIFF [The difference of two input sensors will be used as actual temperature]
AVG [The average of two input sensors will be used as actual temperature]
This device is able to read two thermocouple or RTD as input sensor element. In this
situation user should determine the relation between them using sensor calibration menu.
The available sensor factors are as follows:
1 [Input value= (Sensor output voltage or resistance)/1.0]
Table of contents
Other FAHM Transmitter manuals
Popular Transmitter manuals by other brands

Foxtech
Foxtech XLINK-30 user manual

One Forall
One Forall Cordless Audio Video Sender user guide

Sonic Alert
Sonic Alert HomeAware HA360VPT Installation and setup guide

Echotouch
Echotouch FLOWLINE US01 Series manual

IMG STAGE LINE
IMG STAGE LINE TXS-220HT instruction manual

Lake Shore
Lake Shore 231 user manual