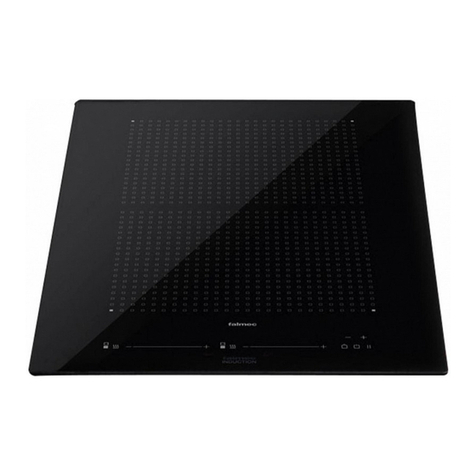
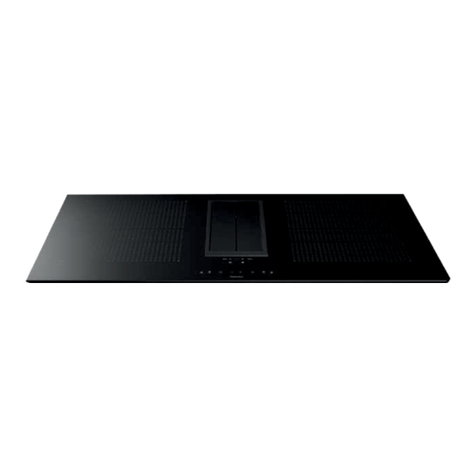
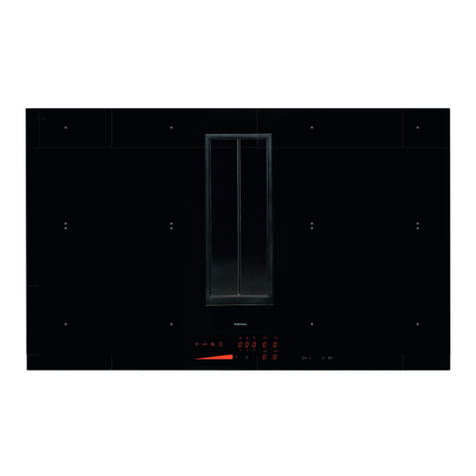
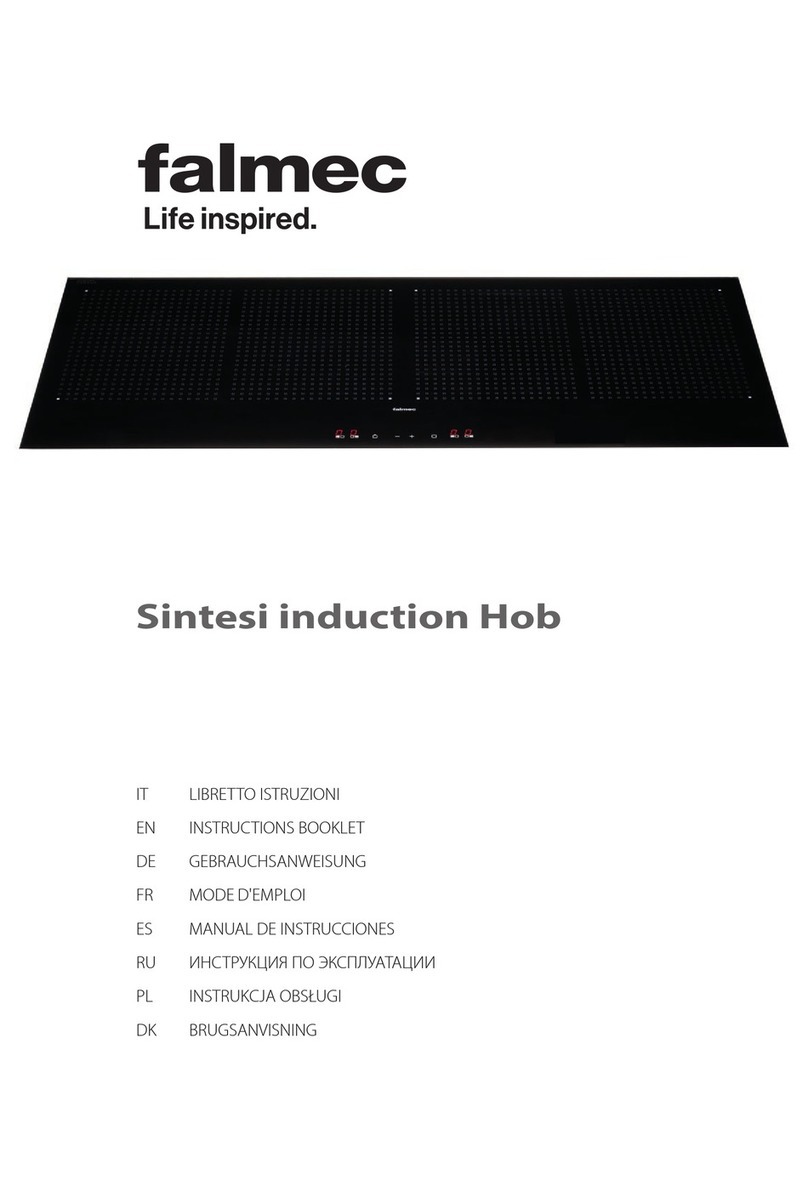
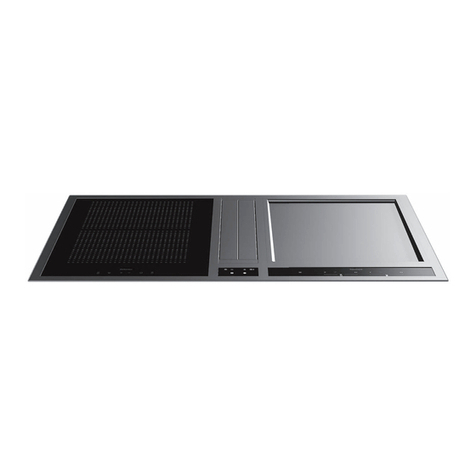
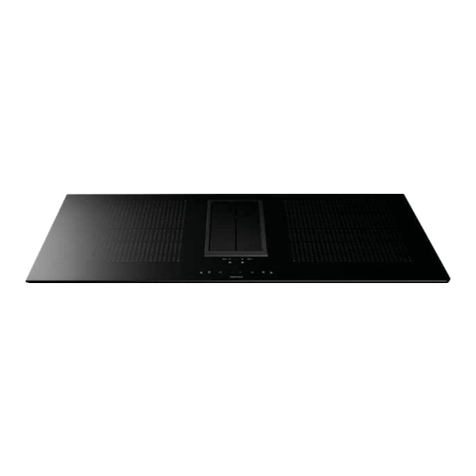
FALMEC Sintesi 90 User manual

Sintesi induction Hob
IT LIBRETTO ISTRUZIONI
EN INSTRUCTIONS BOOKLET
DE GEBRAUCHSANWEISUNG
FR MODE D'EMPLOI
ES MANUAL DE INSTRUCCIONES
RU ИНСТРУКЦИЯ ПО ЭКСПЛУАТАЦИИ
PL INSTRUKCJA OBSŁUGI
DK BRUGSANVISNING

2
PANORAMICO
90
180
240

3
PANORAMICO
90 Plus
180
240

4
min. 50 mm
min. 50 mm
X
min.
15 mm
2 3
1
IT - Distanze di sicurezza tra piano e:
forno (2), ripiano generico(3).
EN -
Safety distance between the top and:
oven (2), general counter (3).
DE -
Sicherheitsabstände zwischen Kochebene und:
Backofen (2), allgemeiner Ablageäche (3).
FR -
Distances de sécurité entre plan et :
four (2), gradin générique (3).
ES - Distancias de seguridad entre la cocina y:
el horno (2), la encimera genérica (3).
RU -
-
: (2), (3).
PL - Odległości bezpieczeństwa między płytą i:
piekarnikiem (2), blatem kuchennym(3).
DK - Sikkerhedsafstand mellem kogeplade og:
Ovn (2), bordplade (3).
IT - Vedi il libretto della cappa.
EN - See the hood handbook.
DE - Siehe die Anweisungen zur Kochebene.
FR -
Voir manuel d’instructions de la hotte.
ES -
Véase el manual de la campana.
RU -
. .
PL - Patrz instrukcja okapu.
DK - Se vejledningen for emhætten.
min.
15 mm

5
2 mm
4 65
7
IT - Incasso piani di cottura.
EN - Embedding for cookers.
DE - Einbau der Kochebenen.
IT - (*) con compensatore.
EN - (*) with compensator.
DE - (*) mit Kompensator.
FR - (*) avec compensateur.
ES - (*) con compensador.
RU - (*) .
PL - (*) z kompensatorem.
DK - (*) med kompensator.
B
A
A
B
8(*) ÷ 45 mm
x4
FR - Encastrement pour plans de cuisson.
ES - Acople de cocinas.
RU -
PL -
Montaż płyt kuchennych.
DK - Kogeplade til indbygning.
IT - Collegamento elettrico.
EN - Electrical connection.
DE - Elektrischer Anschluss.
1 2 3 4
L N 1P+N 220-240 V
220-240 V 2
380-415 V 2N
380-415 V 3N
PANORAMICO 90 PLUS
PANORAMICO 90
5
5
5
1 2 3 4
L2L1
Max 7400W
220-240V / 380-415V 3N
50-60 Hz
N2P+N
51 2 3 4
L2L1 N 3P+N
L3
1 2 3 4
L1 L2 2P
230V
L1 L2 N G
L GN
1P+N 220-240 V
L1
L2 N
GROUND
4x2,5 mm2
220-240 V 2
380-415 V 2N
L1 L2 N G
L1 GL2
L1 L2 N G
L1 L2 GN
Max 7400W
220-240V / 380-415V 2N
50-60 Hz
2P+N
2P
1 2 3 4
L N 1P+N 220-240 V
220-240 V 2
380-415 V 2N
380-415 V 3N
PANORAMICO 90 PLUS
PANORAMICO 90
5
5
5
1 2 3 4
L2L1
Max 7400W
220-240V / 380-415V 3N
50-60 Hz
N2P+N
51 2 3 4
L2L1 N 3P+N
L3
1 2 3 4
L1 L2 2P
230V
L1 L2 N G
L GN
1P+N 220-240 V
L1
L2 N
GROUND
4x2,5 mm2
220-240 V 2
380-415 V 2N
L1 L2 N G
L1 GL2
L1 L2 N G
L1 L2 GN
Max 7400W
220-240V / 380-415V 2N
50-60 Hz
2P+N
2P
8a 8b
IT - Cavo in dotazione
EN - Cable supplied
DE - Mitgelieferte Kabel
FR - Câble fourni
ES - Cable suministrado
RU - Кабель в комплекте
PL - Kabel na wyposażeniu
DK - Medfølgende ledning
FR - Branchement électrique.
ES - Conexión eléctrica.
RU - .
PL - Podłączenie elektryczne.
DK - Elektrisk tilslutning.

6
IT - Collegamento elettrico.
EN - Electrical connection.
DE - Elektrischer Anschluss.
FR - Branchement électrique.
ES - Conexión eléctrica.
RU - -
.
PL - Podłączenie elektryczne.
DK - Elektrisk tilslutning.
IT - Procedura di cambio po-
tenza
(solo PANORAMICO 90).
EN - Power change procedure
(only PANORAMICO 90).
DE - Vorgang der Leistungsänd-
erung
(nur PANORAMICO 90).
FR - Procédure de changement
puissance (seulement
PANORAMICO 90).
ES - Procedimiento de cambio
de potencia
(sólo PANORAMICO 90).
RU -
( PANO-
RAMICO 90).
PL - Procedura zmiany wartości
mocy (tylko model PANO-
RAMICO 90).
DK - Procedure til ændring af
eekt (angår kun PANORA-
MICO 90).
min.
20 mm
9
10
IT - cavo elettrico
EN - electric cable
DE - Elektrokabel
FR - câble d’alimentation
ES - cable eléctrico
RU - электрический шнур
PL - przewód elektryczny
DK - elektrisk kabel
22
55
3
4
(kW)
CONFIRM
CHANGE (kW)
ATTENTION!
2 min. ONLY!
1
3seconds
3seconds

7
ISTRUZIONI DI SICUREZZA
E AVVERTENZE
Queste avvertenze sono state redatte per la vostra sicurezza e per quella
degli altri, Vi preghiamo, dunque, di leggere attentamente questo libret-
to in tutte le sue parti prima di utilizzare l’apparecchio o di eettuare
operazioni di pulizia sullo stesso.
Il Costruttore declina ogni responsabilità per eventuali danni che possano, diretta-
mente o indirettamente, essere causati a persone, cose ed animali domestici con-
seguenti alla mancata osservanza delle avvertenze di sicurezza indicate in questo
libretto.
È molto importante che questo libretto istruzioni sia conservato insieme all’apparec-
chiatura per qualsiasi futura consultazione.
Destinazione d'uso
•Questo piano cottura è destinato all'impiego in ambito domestico per preparare e
tenere in caldo le pietanze.
• Non installare il piano cottura in ambienti esterni e non esporla ad agenti atmosferici
(pioggia, vento, ecc...).
• Qualsiasi altro uso non è ammesso.
• Incassare questo piano cottura solo sopra forni o cucine elettriche, dotati di un siste-
ma di rareddamento.
• L’apparecchio può essere utilizzato da bambini di età non inferiore a 8 anni e da per-
sone con ridotte capacità siche, sensoriali o mentali, o prive di esperienza o della
necessaria conoscenza, purché sotto sorveglianza oppure dopo che le stesse abbia-
no ricevuto istruzioni relative all’uso sicuro dell’apparecchio e alla comprensione dei
pericoli ad esso inerenti.
I bambini non devono giocare con l’apparecchio. La pulizia e la manutenzione a cura
dell’utilizzatore non deve essere eettuata da bambini senza sorveglianza.
• Non assentarsi mai quando il piano cottura è in funzione.
Pericolo di ustioni
• Usare il blocco dei comandi per impedire che persone non autorizzate possano ac-
cendere l'apparecchio da soli.
•posizionare manici e maniglie di padelle e pentole in modo che i bambini non possa-
no toccarle.
•Spegnere le zone di cottura dopo l'uso.
•Non appoggiare nessun oggetto di metallo sulle zone di cottura accese.
Sicurezza tecnica
• Il lavoro d’installazione deve essere eseguito da installatori competenti e qualica-
ti, secondo quanto indicato nel presente libretto e rispettando le norme in vigore.
Se il cavo di alimentazione o altri componenti sono danneggiati, il piano cottura
NON deve essere utilizzata: staccare il piano cottura dall'alimentazione elettrica e con-
tattare il Rivenditore o un Centro Assistenza Tecnica autorizzato per la riparazione.
Non modicare la struttura elettrica, meccanica e funzionale dell'apparecchiatura.
Non tentare di eettuare da soli riparazioni o sostituzioni: gli interventi eettuati
da persone non competenti e qualicate possono provocare danni, anche molto
gravi, a cose e/o persone non coperti da garanzia del Costruttore.
• Prima di installare il piano cottura, controllare l'integrità e funzionalità di ogni sua
parte: se si notano anomalie non procedere nell'installazione e contattare il Rivendi-
tore.
L’impianto elettrico al quale viene collegata il piano cottura deve essere a
norma e munito di collegamento a terra secondo le norme di sicurezza del
Paese di utilizzo; deve essere inoltre conforme alle normative Europee sull’antidi-
sturbo radio.
• I dati di allacciamento (tensione e frequenza) indicati sulla targhetta dati del piano
cottura devono corrispondere con quelli della rete elettrica.
Confrontare questi dati prima dell'allacciamento.
In caso di dubbi rivolgersi a un elettricista.
• Non usare il piano cottura prima di averlo installato.
• E' vietato l'uso del piano induzione su apparati in movimento.
• Mai aprire l'involucro dell'apparecchio.
• Falmec garantisce il rispetto degli standard di sicurezza solo con ricambi originali.
• L'apparecchio non è destinato al funzionamento con timer esterno oppure con tele-
comando.
AVVERTENZE PER L'UTILIZZO
• Prima di mettere in funzione l'apparecchio per la prima volta, rimuovere eventuali
pellicole protettive e adesivi.
• Durante l'uso, pentole e stoviglie possono causare dei rumori che possono dipendere
da:
– un livello di potenza elevato.
– materiali diversi del fondo delle pentole.
• Non utilizzare mai acqua per spegnere il fuoco. Disattivare la zona di cottura. Soffoca-
re le fiamme con un coperchio, una coperta ignifuga o qualcosa di simile.
•Non conservare oggetti inammabili nei cassetti posti sotto il piano cottura. Il porta-
posate, deve essere in materiale resistente al calore.
• Non riscaldare pentole o padelle vuote e controllare sempre che le pentole abbiano
al loro interno una quantità minima di liquidi.
•Spegnere sempre il piano cottura dopo l'uso.
•Controllare continuamente la cottura in caso di uso di grassi e oli, in quanto possono
inammarsi rapidamente.
• Riscaldare grassi e oli al massimo per un minuto e non utilizzare mai la funzione Boo-
ster.
•Prestare attenzione a non ustionarsi durante e dopo l'uso del dispositivo.
•Assicurarsi che nessun cavo elettrico sso o mobile del dispositivo entri in contatto
con il vetro o una padella calda.
•
Non utilizzare il piano cottura per riscaldare barattoli.
• Non applicare nessun tipo di copertura al piano induzione.
• I cavi elettrici non devono entrare in contatto col piano cottura.
• Si consiglia di proteggere le mani dal calore usando delle apposite presine. Utilizzare
esclusivamente guanti o presine asciutti.
• Usare solo pentole e padelle a fondo liscio e magnetico idonee per piani induzione.
• Evitare che zucchero, materiali sintetici o pellicole d'alluminio entrino a contatto con
le zone calde. Queste sostanze, durante il rareddamento, possono provocare crepe
o altre alterazioni sulla supercie vetroceramica: spegnere il dispositivo e rimuovere
immediatamente dalla zona di cottura ancora calda
• Spostare le pentole sollevandole per non strisciare la superficie del piano cottura.
• Pentole e piano cottura devono essere perfettamente puliti prima di entrare in con-
tatto.
• Non far cadere alcun oggetto sopra il piano cottura !
• Usare solo pentole con fondo magnetico.
Altri materiali non sono ammessi.
• Usare pentole di dimensioni adeguate alla zona di cottura desiderata.
• Ulitizzare sempre una pentola o padella su ciascuna zona di cottura, anche in fuzione
BRIDGE.
• Non appoggiare stoviglie calde sui tasti sensori e sulle spie perchè possono danneg-
giare l'elettronica sottostante.
Tenere i comandi e le spie sempre puliti.
• Non conservare oggetti metallici direttamente al di sotto del piano cottura.
• Usare possibilmente sempre dei coperchi per evitare dispersione di calore.
•Cuocere con poca acqua.
•Dopo aver iniziato ad arrostire o a cuocere le pietanze portare il livello di potenza su
un livello più basso.
Indicazioni per la sicurezza e avvertenze
Avvertenza per persone con pacemaker:
tenere presente che nelle immediate vicinanze dell'apparecchio, quando è in funzione,
si genera un campo elettromagnetico. La possibilità che il funzionamento del pacema-
ker ne risenta è molto remota.
In caso di dubbi rivolgersi al produttore del pacemaker o al proprio medico.
Il campo elettromagnetico del piano cottura acceso può pregiudicare il funzionamento
di oggetti magnetizzabili. Carte di credito, dispositivi di salvataggio, calcolatrici tascabili
ecc. non si devono trovare nelle immediate vicinanze di un piano cottura acceso.
Oggetti metallici conservati in un cassetto posto sotto l'apparecchio possono diventare
incandescenti se l'apparecchio viene usato in maniera prolungata. Non conservare og-
getti metallici in un cassetto posto direttamente al di sotto del piano cottura.
L'apparecchio è dotato di ventole di rareddamento. Se al di sotto dell'apparecchio
incassato si trova un cassetto, bisogna interporre un setto di separazione tra lo stesso
cassetto e la parte inferiore dell'apparecchio, così da osservare la necessaria aerazione
del piano cottura e garantire che tali ventole non possano essere ostruite.
Non utilizzare mai contemporaneamente due pentole o padelle su un'unica zona cottu-
ra o una zona cottura rettangolare o un'area cottura PowerFlex.
8
SICUREZZE DEL PIANO COTTURA
Spegnimento di sicurezza
Se una zona di cottura supera il tempo massimo di accensione alla stessa potenza, viene
spenta automaticamente e appare l’indicazione del calore residuo.
Per rimettere in funzione la zona di cottura, toccare i tasti necessari.
Livello di
potenza
low
123456789P
Durata
massima di
funzionamen-
to in ore
8,7 2,0 8,7 6,7 5,3 4,3 3,5 2,8 2,3 1,9 1,5
Il piano di cottura si spegne automaticamente se uno o più comandi rimangono coperti
per oltre 10 secondi.
Per ripristare il corretto funzionamento:
- togliere gli oggetti dal pannello comandi.
- pulire il pannello comandi.
- riaccendere il piano cottura e le zona interessata.
Dispositivo antisurriscaldamento
Prima che gli elementi del piano cottura possano surriscaldarsi, il controllo riduce la po-
tenza utilizzata seguendo questa procedura di protezione:
– Disattivazione booster e power booster se accesi.
– Riduzione del livello di potenza impostato.
– Spegnimento della zona cottura interessata.
Sul display delle zone cottura compare il messaggio "E2".
È possibile rimettere in funzione la zona cottura quando la segnalazione di guasto si
spegne.
ISTRUZIONI DI SICUREZZA
PER IL MONTAGGIO
Installare il piano cottura solo dopo aver installato basi e pensili della cucina.
Assicurarsi che i piani di lavoro siano stati impiallacciati con collante termo-
resistente per non subire deformazioni o distacchi.
E' proibito installare l'apparecchio sopra frigoriferi o congelatori, lavastovi-
glie, lavatrici o asciugabiancheria.
SICUREZZA ELETTRICA
L’impianto elettrico al quale viene collegato il piano deve essere a norma
e munito di collegamento a terra secondo le norme di sicurezza del Paese
di utilizzo; deve essere inoltre conforme alle normative Europee sull’anti-
disturbo radio.
Accertarsi che il cavo di alimentazione del piano cottura dopo l'incasso non sia soggetto a
sollecitazioni meccaniche.
La presa usata per il collegamento elettrico deve essere facilmente raggiungibile con l’ap-
parecchiatura installata: in caso contrario, prevedere un interruttore generale per disconnet-
tere l'apparecchio al bisogno.
Ogni eventuale modica all’impianto elettrico dovrà essere eseguita solo da un elettricista
qualicato.
In caso di malfunzionamenti dell’apparecchio, non tentare di risolvere da soli il problema,
ma contattare il Rivenditore o un Centro di Assistenza autorizzato per la riparazione.
Durante l'installazione del piano, disinserire l’apparecchio togliendo la
spina o agendo sull’interruttore generale.
COLLEGAMENTO ELETTRICO
(parte riservata solo a personale qualicato)
Prima di eettuare qualsiasi operazione sul piano scollegare l’apparecchio
dalla rete elettrica.
Assicurarsi che non vengano scollegati o tagliati li elettrici all’interno del
piano:
in caso contrario contattare il Centro Assistenza più vicino.
Per l’allacciamento elettrico rivolgersi a personale qualicato.
Il collegamento deve essere eseguito in conformità con le disposizioni di legge in
vigore.
Prima di collegare il piano alla rete elettrica, controllare che:
• la tensione di rete corrisponda a quella riportata sui dati di targa posti all’interno del
piano;
• l’impianto elettrico sia a norma e possa sopportare il carico (vedi caratteristiche tecniche
posizionate all’interno del piano);
• la spina e il cavo, di alimentazione, non devono entrare in contatto con temperature
superiori a 70 °C;
• l’impianto di alimentazione sia munito di ecace e corretto collegamento di terra se-
condo le norme vigenti;
•
la presa usata per il collegamento sia facilmente raggiungibile una volta installato il piano.
In caso di :
• apparecchi dotati di cavo senza spina: la spina da utilizzare deve essere di tipo“normaliz-
zato”. Il li devono essere collegati come segue: giallo-verde per la messa a terra, blu per
il neutro e il lo marrone per la fase. La spina deve essere collegata ad un'adeguata presa
di sicurezza.
•
apparecchio sso non provvisto di cavo di alimentazione e di spina, o di altro dispositivo
che assicuri la disconnessione dalla rete, con una distanza di apertura dei contatti che
consenta la disconnessione completa nelle condizioni della categoria di sovratensione III.
Tali dispositivi di disconnessione devono essere previsti nella rete di alimentazione con-
formemente alle regole di installazione.
Il cavo di terra giallo/verde non deve essere interrotto dall’interruttore.
Il Costruttore declina ogni responsabilità nel caso le norme di sicurezza non vengano ri-
spettate.
Collegamento del piano (Panoramico 90):
rete Connessione Sezione
del cavo
Cavo di
alimenta-
zione
Calibro
del
seziona-
tore
220V - 240V~
50/60Hz 1P+N / 2P 3 x 2.5 mm² H 05 VV - F
H 05 RR - F 25 A *
380V - 415V~
50/60Hz 2P+N 4 x 1.5 mm² H 05 VV - F
H 05 RR - F 16 A *
380V - 415V~
50/60Hz 3P+N 5 x 1.5 mm² H 05 VV - F
H 05 RR - F 16 A *
* calcolato con il fattore di contemporaneità conformemente alla norma EN 60 335-2-6.
4321
POTENZE:
Caratteristica 90 90 Plus
Potenza totale 2800-7400W 7400W
Posizione 1
Potenza nominale 1600W 2100W
Potenza booster 1850W 3700W
Posizione 2
Potenza nominale 2100W 2100W
Potenza booster (1/2) 3000W 3700W
Posizione 3
Potenza nominale 2100W 2100W
Potenza booster (1/2) 3000W 3700W
Posizione 4
Potenza nominale 1600W 2100W
Potenza booster 1850W 3700W

9
PANORAMICO
90
Comando descrizione
Piano cottura ON/OFF. In caso non venga attivato
nessun altro comando, il piano si spegne automati-
camente dopo pochi secondi
Selezione zona cottura anteriore. Se premuto assieme
a attiva la funzione BRIDGE.
Selezione zona cottura posteriore. Se premuto assie-
me a attiva la funzione BRIDGE.
Blocco comandi: premuto per più di 2 secondi inibi-
sce tutti i comandi. Per sbloccare i comandi, ripetere
l’operazione.
Incremento livello di potenza per la cottura e selezio-
ne booster, o incremento del tempo di cottura della
funzione TIMER.
Decremento livello di potenza per la cottura, o decre-
mento del tempo di cottura della funzione TIMER.
Visualizzazione
display
descrizione
Zona di cottura in stand-by
Livelli di potenza dal più basso al più alto sele-
zionabili con i tasti + e -.
Power boost : massima potenza di cottura
Indicazione di calore residuo
Livello di potenza tra 0 e 1, adatto per tenere in
caldo le pietanze
(solo
display
destro)
Funzione Bridge attivata.
(diametro minimo pentola: Ø230 mm)
Pentola non presente sul piano cottura o non
adatta per materiale e dimensione.
(diametro minimo pentola: Ø120 mm)
(su
display
centrale)
+Funzione blocco comandi attivata.
PANORAMICO
90 Plus
Comando descrizione
Piano cottura ON/OFF In c aso non venga atti-
vato nessun altro comando il piano si spegne
automaticamente dopo pochi secondi.
Attivazione zona cottura, selezione livello di
potenza di cottura da 1 a 9 e attivazione
Booster. Se premuto assieme all’altro comando
, attiva la funzione BRIDGE.
Blocco comandi: premuto per più di 2 secondi
inibisce tutti i comandi. Per sbloccare i coman-
di, ripetere l’operazione.
incremento del tempo di cottura della funzione
TIMER.
decremento del tempo di cottura della funzio-
ne TIMER.
Funzione Stop and Go.
Imposta un livello di potenza pesonalizzato per
ciascuna zona per: iniziare la cottura, prosegui-
re la cottura, nire la cottura, tenere in caldo.
Funzione di keep warm: consente di selezio-
nare 3 livelli di potenza per tenere in caldo le
vivande.
Visualizzazione
display
descrizione
Zona di cottura in Stand-by.
Livelli di potenza dal più basso al più alto sele-
zionabili con i tasti + e -.
Power boost : massima potenza di cottura.
Indicazione di funzione Stop And Go attiva
Indicazione di calore residuo.
Funzione di inizio cottura automatico.
e
Funzione Bridge attivata.
(diametro minimo pentola: Ø230 mm)
Pentola non presente sul piano cottura o non
adatta per materiale e dimensione.
(diametro minimo pentola: Ø120 mm)
Funzione blocco comandi attivata.

10
FUNZIONAMENTO E
USO DEL PIANO INDUZIONE
USARE SOLO PENTOLE PER PIANI INDUZIONE.
Quando si accende una zona cottura il fondo della pentola si riscalda.
La zona cottura si riscalda solamente grazie al calore ceduto dalla pentola.
L'induzione rileva automaticamente le dimensioni della pentola.
La potenza di riscaldamento deve essere scelta in base a cosa si vuole cucinare .
Qui sotto viene riportata una breve tabella:
AREE DI REGOLAZIONE
1 - 2 Fondere
Riscaldare
Salse, burro, cioccolato,
gelatina
Piatti precotti
2 - 3 Montare
Scongelare
Riso, budino e piatti cotti
Verdure, pesce, prodotti
surgelati
3 - 4 Vapore Verdure, pesce, carne
4 - 5 Bollire Patate lesse, zuppe, pasta
Verdure fresche
6 - 7
Cucinare a fuoco dolce
Carne, fegato, uova, salsicce
Goulash, rolate, trippa
7 - 8 Cuocere
Friggere
Patate, ciambelle, tortini
9Friggere, portare a ebollizione Bistecche, frittate
Bollire
PFriggere, Portare a
ebollizione
Portare a ebollizioni grandi
quantità d'acqua
Nota: il tempo di riscaldamento dei piani cottura a induzione è più breve rispetto a quel-
lo dei piani cottura a gas.
FUNZIONI DI BASE
Vedi tabella del modello corrispondente alla pagina precedente.
FUNZIONE BRIDGE
Questa funzione permette di far funzionare assieme le zone di cottura 1-2 e/o 3-4
Per l’attivazione:
- Attivare il piano cottura;
Per "90":
premere contemporaneamente i simboli + :
- comparirà il simbolo
(solo
display
destro)
sul display dell’area di cottura anteriore;
- Con i tasti + e – regolare la potenza.
Nota: funzione attivabile solo tra le 2 piastre di destra o di sinistra (no le due centrali).
Per "90 Plus":
premere contemporaneamente i simboli :
- Compariranno i simboli sui display delle 2 aree di cottura interessate al BRID-
GE;
- Regolare la potenza con lo slider della zona di cottura più centrale.
DISATTIVAZIONE funzione BRIDGE:
Per "90":
premere contemporaneamente i simboli + .
Per "90 Plus":
premere contemporaneamente i simboli :
FUNZIONE BOOSTER
Il Booster raorza la potenza, anché si possano riscaldare grandi quantità (p.es. di ac-
qua per cuocere la pasta).
Questo raorzamento di potenza è attivo per max. 10 minuti.
Per "90":
- Accendere il piano cottura;
- selezionare la zona di cottura;
- toccare (+) no a quando sul display non viene visualizzato sulla zona di cottura.
Nota: è possibile regolare in solo una piastra di destra e una di sinistra per volta
(in totale non più di 2).
Se la piastra più esterna è regolata in , la vicina non può essere regolata oltre il
livello . Se è la più interna ad essere in , l'esterna si spegne.
Per "90 Plus":
- Accendere il piano cottura;
- toccare lo slider per portare la potenza a e poi tasto (+).
Al termine della modalità Booster, la potenza viene automaticamente ridotta a livello .
Se una zona è in , la zona vicina non può essere regolata oltre il livello .
FUNZIONE KEEP WARM
Versione "90"
42°C - Mantenimento temperatura cibi cotti:
Accendere piano cottura;
Selezionare zona cottura;
Toccare il tasto (+) e poi il tasto (-) : comparira il simbolo .
Versione "90 Plus"
Accendere piano cottura;
Toccare il tasto relativo alla zona cottura interessata e selezionare uno dei 3 livelli di
temperatura:
42°C - Mantenimento temperatura cibi cotti ;
70°C - proseguimento cottura ;
94°C - Portare ad ebollizione ;
Spegnimento Piano cottura
Per spegnere la zona di cottura:
Toccare il tasto ( - ) no a che sul display della zona di cottura viene visualizzato 0.
Se la zona di cottura è ancora molto calda viene indicato il calore residuo .
Spegnere il piano di cottura
Toccare il tasto : tutte le zone di cottura vengono disattivate.
Sui display delle zone di cottura ancora molto calde comparirà il simbolo .
Non toccare le zone di cottura nché la spia è accesa.
FUNZIONE TIMER
E SPEGNIMENTO AUTOMATICO
Il timer ha due funzioni:
1 – TEMPORIZZATORE;
2 – SPEGNIMENTO AUTOMATICO di una o più zone di cottura.
È possibile impostare una durata no a 99 minuti su versione "90" e 119 minuti su ver-
sione "90 Plus".
Al termine del tempo impostato appare 00 sul display relativo al tempo e si attiva un
segnale acustico che si disattiva premendo i tasti ( + ) o ( - ).
TEMPORIZZATORE
Per impostare:
1.
Accendere il piano (se spento) con tasto e toccare contemporaneamente i tasti (+) e (-).
(su versione Plus si attiva la spia );
2. Impostare il tempo desiderato toccando i tasti ( + ) e ( - ) .
Il timer inizia a scorrere.
Per modicare il tempo ripetere la procedura dal punto 1.
Per annullare il timer:
1. Accendere il piano (se spento) e toccare contemporaneamente i tasti ( + ) e ( - ) .
(su versione Plus si spegne la spia ).
2. Premere il tasto ( - ) per portare il tempo a 00.

11
SPEGNIMENTO AUTOMATICO
Per la funzione di spegnimento automatico:
1 - accendere il piano cottura;
2 - selezionare la zona di cottura;
3 - selezionare livello di potenza;
4 - impostare il timer come descritto in precedenza .
Per impostare lo spegnimento automatico per un’altra zona cottura, ripetere la proce-
dura dal punto 2.
TEMPORIZZATORE e SPEGNIMENTO AUTOMATICO possono essere utilizzate contem-
poraneamente.
FUNZIONI AGGIUNTIVE
MODELLO "90 Plus"
STOP AND GO
Questa funzione consente di interrompere temporaneamente la cottura e riattivarla con
le stesse impostazioni.
per l'attivazione toccare il tasto .
Se la funzione non viene disattivata entro 10 minuti, il piano di cottura si spegne.
Per la disattivazione
Toccare il tasto ed entro 5 secondi scorrere completamente lo slider a destra.
PROGRAMMAZIONE AUTOMATICA DELLA COTTURA
Questa funzione permette di accelerare l’inizio della cottura.
La procedura è la seguente:
1 - Accendere il piano cottura
2 - Toccare per più di 2 secondi il livello di cottura desiderato:
sul display comparirà e il livello di cottura desiderato .
Per un certo periodo la zona di cottura funzionerà alla massima potenza per poi portarsi
al livello impostato.
Per disattivare la funzione:
toccare nuovamente il comando e cambiare il livello di potenza.
FUNZIONE RIPRISTINO per spegnimento accidentale
Dopo aver spento il piano, entro qualche secondo, è possibile ripristinare le ultime im-
postazioni selezionate:
· Stato di cottura di tutte le zone di cottura (potenza).
· Minuti e secondi del timer per zone di cottura programmate.
· Programmazione automatica della cottura.
La procedura di ripristino è la seguente:
· attivare il piano.
· toccare entro 6 secondi il tasto .
Le impostazioni precedenti tornano attive.
FUNZIONE CHEF
Permette di impostare per ciascuna zona di cottura una potenza predenita per ciascu-
na fase della cottura
Zona 4:livello potenza 9. Inizio cottura
Zona 3:livello potenza 6. proseguimento cottura
Zona 2:livello potenza 3 .Termina cottura
Zona 1:livello potenza 1. Keep warm
COSA FARE IN CASO DI PROBLEMI
Il piano cottura o le zone di cottura non si accendono:
· Il piano non è collegato alla rete elettrica.
· Il fusibile di protezione è scattato.
· Controllare se il blocco non è attivo.
· I tasti sono ricoperti da acqua o grasso.
· Un oggetto è posizionato sui tasti.
Appare il simbolo .
· Non vi è alcuna casseruola sulla zona di cottura.
· Il contenitore utilizzato non è compatibile con l'induzione.
· Il diametro del fondo della casseruola è troppo piccolo rispetto alla zona di cottura.
Appare il simbolo [ E ]:
· Scollegare e ricollegare il piano cottura.
· Contattare il Servizio di assistenza post-vendita.
Una delle zone o tutto il piano cottura si spegne:
· Il sistema di sicurezza anti surriscaldamento è attivo ;
· Il piano cottura o una zona cottura è rimasta accesa per troppo tempo;
· uno o più tasti sono coperti;
· una delle pentole è vuota e il fondo si è surriscaldato.
La ventola continua a funzionare dopo lo spegnimento del piano:
· Questo non è un'anomalia: la ventola continua a proteggere la centralina elettronica
del dispositivo.
· La ventola si arresta automaticamente.
10 CODICI ERRORE
In caso di errore, ai ni del supporto per l'assistenza tecnica, l'IU visualizza i codici errore.
Insieme al documento fornito "Codici errore Basic 2", che include informazioni dettaglia-
te, è disponibile una descrizione completa di matrici di errore.
Di seguito vengono elencati i codici errore standard E.G.O.. l'IU personalizzata potrebbe
essere diversa. Gli errori generali standard dell'UI (Er xx) e gli errori della zona di cottura
(E/x) dieriscono. In caso di errori della zona di cottura, il display della zona non corretta
di cottura lampeggia, alternando "E" e un codice esadecimale "X".
Codice
errore
Descrizione Possibili
cause
Soluzione
.
In caso di visualiz-
zazione di una "C"
ssa, è possibile
congurare la zona
di cottura
Nessun errore, l'u-
tente è nel menu
impostazioni.
Collocare una casseruo-
la idonea sulla relativa
zona di cottura
.
In caso di visua-
lizzazione di una
"C" lampeggiante,
sarà eseguita la
congurazione della
cottura.
Dopo una corretta
congurazione,
il relativo display
visualizza "-". Se "-"
non viene visua-
lizzato, controllare
le possibili cause
relative a E/5
Nessun errore, l'u-
tente è nel menu
impostazioni
Attendere la visualizza-
zione del simbolo "-" o
interrompere le attività
di congurazione pre-
mendo il selettore; "C"
smetterà di lampeg-
giare.
.
Una "E" lampeggian-
te su ciascuna zona
di cottura indica che
tutte le congu-
razioni saranno
cancellate
Nessun errore, l'u-
tente è nel menu
impostazioni
Congurazione manuale
.
Sono stati superati i
limiti di temperatura
La temperatura
del vetro o Pt è
troppo alta
NTC -> tempera-
tura elettronica
troppo alta
Rareddare il sistema
.
Pentola non ideona,
p.es. perdita delle
proprietà magne-
tiche a causa della
temperatura nel
fondo
Sul modulo, una
pentola crea un
punto di funzio-
namento non
corretto, in grado
di danneggiare i
dispositivi, p.es.
IGBT.
1. L'errore viene auto-
maticamente annullato
dopo 8 secondi ed
è possibile utilizzare
nuovamente la zona di
cottura. In caso di ulte-
riori errori successivi,
sostituire la pentola.
2. Il modulo deve essere
modicato in caso di
visualizzazione di errore
senza una pentola sulla
zona di cottura.

12
PULIZIA E MANUTENZIONE
ATTENZIONE!
Per la pulizia non utilizzare mai un apparecchio a vapore.
Prima di pulire il piano cottura accertarsi che sia a temperatura ambiente.
Pulire sempre il piano cottura dopo ogni uso con un detergente specico per vetroce-
ramica.
Non utilizzare prodotti contenenti:
- agenti corrosivi (soda, acidi, ammoniaca).
- agenti abrasivi (polveri o paste).
Non utilizzare oggetti appuntiti o abrasivi.
Dopo la pulizia asciugare l'apparecchio con un panno morbido.
Se l'apparecchio viene incassato sopra un forno oppure una cucina elettrica dotati di
sistema pirolitico non metterlo in funzione mentre il procedimento pirolitico è in cor-
so, poiché può scattare la protezione di surriscaldamento del piano cottura (v. relativo
capitolo).
SMALTIMENTO A FINE VITA
Il simbolo del cestino barrato riportato sull’apparecchiatura in suo possesso indi-
ca che il prodotto è un RAEE, cioè un “Riuto derivante dalle Apparecchiature
Elettriche ed Elettroniche”e pertanto non deve essere gettato nella spazzatu-
ra indierenziata (cioè insieme ai “riuti urbani misti”), ma deve essere gestito
separatamente così da essere sottoposto ad apposite operazioni per il suo riutilizzo, oppure
a uno specico trattamento, per rimuovere e smaltire in modo sicuro le eventuali sostanze
dannose per l’ambiente ed estrarre le materie prime che possono essere riciclate. Lo smalti-
mento corretto di questo prodotto contribuirà a salvare preziose risorse ed evitare potenzia-
li eetti negativi per la salute umana e per l’ambiente, che potrebbero essere causati da uno
smaltimento inappropriato dei riuti.
Vi preghiamo di contattare le autorità locali per ulteriori dettagli sul punto di smaltimento
designato più vicino. Potrebbero venire applicate delle penali per lo smaltimento scorretto
di questi riuti in conformità alla legislazione nazionale.
INFORMAZIONI SULLO SMALTIMENTO IN ITALIA
In Italia le apparecchiature RAEE devono perciò essere consegnate:
- ai Centri di Raccolta (chiamati anche isole ecologiche o piattaforme ecologiche) allestiti
dai Comuni o dalle Società di igiene urbana (in molte località viene anche eettuato il
servizio di ritiro a domicilio delle apparecchiature RAEE ingombranti);
- al negozio presso il quale si acquista una nuova apparecchiatura, che è tenuto a ritirarle
gratuitamente (ritiro “uno contro uno”);
- ad un negozio qualunque*, che è tenuto a ritirarle gratuitamente e senza obbligo di
acquisto (ritiro “uno contro zero”).
In questo caso:
1) l’apparecchiatura RAEE, per poter essere riconsegnata, deve avere“piccolissime dimen-
sioni”(altezza, profondità e larghezza minori di 25 cm);
* 2) il negozio al quale viene riconsegnata l’apparecchiatura RAEE deve avere una supercie
di vendita superiore a 400 mq.
INFORMAZIONI SULLO SMALTIMENTO IN NAZIONI DELL'UNIONE EUROPEA
La Direttiva comunitaria sulle apparecchiature RAEE è stata recepita in modo diverso da
ciascuna nazione, pertanto se si desidera smaltire questa apparecchiatura suggeriamo di
contattare le autorità locali o il Rivenditore per chiedere il metodo corretto di smaltimento.
INFORMAZIONI SULLO SMALTIMENTO IN NAZIONI NON APPARTENENTI ALL'UNIO
NE EUROPEA
Il simbolo del cestino barrato è valido solamente nell’Unione Europea: se si desidera smaltire
questa apparecchiatura in altri Paesi suggeriamo di contattare le autorità locali o il Rivendi-
tore per chiedere il metodo corretto di smaltimento.
ATTENZIONE!
Il Costruttore si riserva il diritto di apportare modiche alle apparecchiature in qualsiasi
momento e senza preavviso. La stampa, la traduzione e la riproduzione anche parziale del
presente manuale s’intendono vincolate dall’autorizzazione del Costruttore.
Le informazioni tecniche, le rappresentazioni grache e le speciche presenti in questo ma-
nuale sono indicative e non divulgabili.
La lingua di stesura del manuale è l’italiano, il Costruttore non si rende responsabile per
eventuali errori di trascrizione o traduzione.
.
Modulo induzione
non congurato
(tutti i moduli di in-
duzione rispondono
all'IU ma ogni ele-
mento è correlato
alla zona di cottura
specica).
Modulo di
induzione non
congurato
Cancellare la congu-
razione del piano di
cottura e attivare la
congurazione ma-
nuale. Avviare il menu
di impostazioni IU per
congurare il modulo
induzione. Se i punti
elencati non funziona-
no, sostituire il modulo.
.
Nessuna comu-
nicazione tra IU e
modulo induzione
Modulo induzione
non alimentato.
Cablaggio difetto-
so o danneggiato
Controllare l'alimenta-
zione e i collegamenti
LIN. Se il collegamento
è corretto, sostituire il
modulo
.
Guasto alimentazio-
ne di rete
1. Malfunzio-
namento nel
rilevamento
di frequenza
dell'alimentazione
di rete
2. Sovratensione
Controllare la tensione
e la frequenza dell'a-
limentazione di rete.
Se corrette, sostituire il
modulo
.
Nessun guasto
identicabile
Sostituire il modulo o
l'interfaccia utente
.
Guasto ventola Ventola o con-
trollo elettronico
difettosi
Sostituire il modulo
.
Sonda termica difet-
tosa su induttore
Segnale sensore al
di fuori del campo
valido; sensore o
controllo elettrico
difettosi
Sostituire il modulo
.
Difetto hardware del
modulo induzione
Dispositivo har-
dware difettoso
rilevato dal con-
trollo automatico
del modulo
Sostituire il modulo
.
Errore congura-
zione
2 zone di cottura
dedicate allo
stesso elemento
dell'IU
Eliminare la congura-
zione manuale in corso
con il menu imposta-
zioni
.
Valore sso sensore
(funzione di prova
per sonda T su
induttore)
Nessun cambia-
mento termico
rilevante (10 K)
entro 5 minuti
dall'accensione del
piano di cottura
Rareddare il sistema
Nessuna
funzionalità
e nessuna
visualizza-
zione
Sovratensione
sull'alimentazione a
commutazione (nes-
suna funzionalità)
Collegamento a
400 V
Scollegare e retticare il
collegamento della linea
di alimentazione
Nota:
non tutti i guasti possono essere rilevati automaticamente dal sistema, p.es. in caso di
difetto di alimentazione dell'interfaccia utente.

13
ITALIANO
GARANZIA (solo per l'Italia)
La sua nuova apparecchiatura è coperta da garanzia. Le condizioni di garanzia sono riporta-
te per esteso nel paragrafo successivo.
La casa costruttrice non risponde delle possibili inesattezze, imputabili ad
errori di stampa o di trascrizione, contenute nel presente libretto.
Si riserva di apportare ai propri prodotti quelle modiche che ritenesse
necessarie o utili, anche nell’interesse dell’utenza, senza pregiudicare le
caratteristiche essenziali di funzionalità e di sicurezza.
CONDIZIONI DI GARANZIA (solo per l'Italia)
IMPORTANTE!
La presente garanzia è valida solo per l’Italia (Guarantee conditions are
valid only for Italy).
DECRETO LEGISLATIVO DEL 30/06/2003 N. 196 - ART. 7
Codice in materia di protezione dei dati personali.
1. L’interessato ha diritto di ottenere la conferma dell’esistenza o meno di dati personali
che lo riguardano, anche se non ancora registrati, e la loro comunicazione in forma
intelleggibile.
2. L’interessato ha diritto di ottenere l’indicazione:
a) dell’origine dei dati personali;
b) delle nalità e modalità del trattamento;
c) della logica applicata in caso di trattamento eettuato con l’ausilio di strumenti elet-
tronici;
d) degli estremi identicativi del titolare, dei responsabili e del rappresentante designa-
to ai sensi dell’articolo 5, comma 2;
e) dei soggetti o delle categorie di soggetti ai quali i dati personali possono essere co-
municati o che possono venirne a conoscenza in qualità di rappresentante designato
nel territorio dello Stato, di responsabili o incaricati.
3. L’interessato ha diritto di ottenere:
a) l’aggiornamento, la retticazione ovvero, quando vi ha interesse, l’integrazione dei
dati;
b) la cancellazione, la trasformazione in forma anonima o il blocco dei dati trattati in
violazione di legge, compresi quelli di cui non è necessaria la conservazione in relazione
agli scopi per i quali i dati sono stati raccolti o successivamente trattati;
c) l’attestazione che le operazioni di cui alle lettere a) e b) sono state portate a cono-
scenza, anche per quanto riguarda il loro contenuto , di coloro ai quali i dati sono stati
comunicati o diusi, eccettuato il caso in cui tale adempimento si rileva impossibile o
comporta un impiego di mezzi manifestamente sproporzionato rispetto al diritto tute-
lato.
4. L’interessato ha diritto di opporsi, in tutto o in parte:
a) per motivi legittimi al trattamento dei dati personali che lo riguardano, ancorché
pertinenti allo scopo della, raccolta;
b) al trattamento di dati personali che lo riguardano a ni di invio di materiale pubblici-
tario o di vendita diretta o per il compimento di ricerche di mercato o di comunicazione
commerciale.
Titolare del trattamento dei dati è Falmec S.P.A.
Via dell’Artigianato, 42 - Vittorio Veneto (TV).
CONDIZIONI DI GARANZIA
•L’apparecchio è garantito dalla Casa costruttrice Falmec S.p.A (www.falmec.com) per un
periodo di 24 mesi dalla data del suo acquisto comprovata da ricevuta scale o altro
documento reso scalmente obbligatorio.
• La garanzia sarà prestata con la sostituzione o riparazione gratuita delle parti che risultino
difettose per vizi delle stesse imputabili a Falmec S.p.A..
• Non sono coperte dalla presente garanzia tutte le parti che dovessero risultare difetto-
se, danneggiate e/o viziate a causa di uso improprio dell’apparecchio, di negligenza o
trascuratezza nell’uso (mancata osservanza delle istruzioni per il funzionamento dell’ap-
parecchio), di inesatta installazione, di mancata ovvero errata manutenzione, di manu-
tenzioni operate da personale non autorizzato, di danni da trasporto, ovvero per circo-
stanze non riferibili a difetti di funzionamento imputabili a Falmec S.p.A. e/o comunque
direttamente imputabili alla Casa costruttrice. Si precisa inoltre che non rientrano nelle
prestazioni in garanzia gli interventi inerenti l’installazione e l’allacciamento agli impianti
elettrici e/o di alimentazione.
• Vengono peraltro esclusi dalla presente garanzia i componenti dell’apparecchio soggetti
ad usura.
• La Casa costruttrice declina ogni responsabilità per eventuali danni che possono, diret-
tamente o indirettamente, essere causati a persone, cose ed animali domestici in con-
seguenza alla mancanza di tutte le prescrizioni indicate nell’apposito libretto istruzioni
e concernenti, specialmente, le avvertenze in tema di installazione, uso e manutenzione
dell’apparecchio.
• Trascorsi i 24 mesi, l’apparecchio non sarà più coperto da garanzia e l’assistenza verrà pre-
stata addebitando le parti sostituite, le spese di manodopera e di trasporto dei personale
e dei materiali, secondo le tarie vigenti in possesso dei personale dei Servizio Assistenza
Tecnica autorizzato dalla Casa costruttrice. In presenza di un intervento eettuato pres-
so un Centro Assistenza Tecnica autorizzato, l’apparecchio vi sarà recapitato a spese e
rischio dell’utente.
• La presente garanzia è valida per la fornitura ed installazione dell’apparecchio avvenuta
nel solo territorio italiano.
Titolare del trattamento dei dati è Falmec S.P.A.
Via dell’Artigianato, 42 - Vittorio Veneto (TV).
CERTIFICATO DI GARANZIA SOLO PER ITALIA DA CONSERVARE
Questo certicato di garanzia non deve essere spedito, ma conservato con la ricevuta scale, o altro documento reso scalmente obbligatorio, che comprovi la data
d’acquisto del piano cottura. In caso necessiti intervenire per anomalie di funzionamento, si prega di contattare un Centro di AssistenzaTecnica autorizzato, tenendo
a portata di mano i dati sotto indicati:
Matricola/Serial Number (vedere ultima pagina libretto o targhetta dei dati tecnici posta all'interno del piano cottura):
È ASSOLUTAMENTE NECESSARIO INDICARE IL NUMERO MATRICOLA DEL PIANO COTTURA.
Questo apparecchio viene garantito per 2 anni dalla data di acquisto contro difetti di materiale e/o di fabbricazione.
Questo certicato è valido e operante solo se conservato assieme alla ricevuta scale o altro documento reso scalmente obbligatorio.
Rivenditore:
Città:
Data d’acquisto:

14
SAFETY INSTRUCTIONS
AND WARNINGS
These warnings have been drawn up for your personal safety and those
of others. You are therefore kindly asked to read the booklet carefully in
its entirety before using or cleaning the equipment.
The Manufacturer declines all responsibility for any damage caused di-
rectly, or indirectly, to persons, things and pets as a consequence of failing to comply
with the safety warnings indicated in this booklet.
It is imperative that this instructions booklet is kept together with the equipment for
any future consultation.
Intended use
•This cooker is intended to be used in domestic environments to prepare and keep
dishes warm.
• Do not install the cooker outdoors and do not expose it to outdoor environment
(rain, wind, etc.).
• Any other use is not admitted.
• Build in this cooker on ovens or electric kitchens only, if tted with a fume cooling
system.
• The equipment can be used by children over the age of 8 and by persons with re-
duced physical, sensory and mental abilities, or with no experience or knowledge,
as long as they do so under supervision or after having received relative instructions
regarding safe use of the equipment and understanding of the dangers connected
to it.
Children are not to play with the equipment. Cleaning and maintenance by the user
must not be carried out by children without supervision.
• Do not leave the cook top unmanned while it is working.
Danger of burns
• Use the control lock to avoid that unauthorised people can switch on the appliance
by themselves.
•place handles of frying pans and saucepans in a way that children cannot touch
them.
•Switch o the cooking areas after use.
•Do not place any metal object on cooking areas that are on.
Technical safety
• Installation operations are to be carried out by skilled and qualied installers in
accordance with the instructions in this booklet and in compliance with the regu-
lations in force.
If the power cable or other components are damaged, the cook top shall NOT be
used: disconnect the cooker from the power supply and contact the Dealer or an author-
ised Servicing Department for repairs.
Do not modify the electrical, mechanical or functional structure of the equipment.
Do not personally try to carry out repairs or replacements. Interventions carried
out by incompetent and unauthorised persons can cause serious damage to the
unit or physical and personal harm, not covered by the Manufacturer's warranty.
• Before installing the cooker, check the integrity and function of each part. Should
anomalies be noted, do not proceed with installation and contact the Dealer.
The electrical system to which the cooker is to be connected must be in
accordance with local standards and supplied with earthed connection in
compliance with safety regulations in the country of use. It must also comply with
European standards regarding radio antistatic properties.
• The connection data (voltage and frequency) shown on the data plate of the cooker
must match with those of the electric network.
Compare these data before connection.
In case of doubts, refer to an electrician.
• Do not use the cooker before installing it.
• It is forbidden to use the cooktop on moving equipment.
• Never open the case of the appliance.
• Falmec assures the compliance with the safety standards with original spare parts
only.
• The appliance is not intended for use with external timer or remote control.
USE WARNINGS
• Before powering the appliance for the first time, remove any protective films and
adhesives.
• While using, saucepans and kitchenware can cause noise that can depend on:
- a high power level.
- different materials of the bottom of saucepans.
• Never use water to put fire out. Deactivate the cooking area. Choke flames with a
cover, a fireproofing blanket or something similar to it.
•Do not keep inammable objects in the drawers below the cooker. The cutlery tray
shall be made up of re-resistant material.
• Do not heat empty saucepans or frying pans and always check that saucepans have
a minimum quantity of liquids inside.
•Switch o the cooker after use.
•Continuously check the cooking in case of greases and oils used, as they can easily
catch re.
• Heat greases and oils at maximum for one minute and never use the Booster func-
tion.
•Pay attention not to burn yourself during and after using the device.
•Make sure that no xed or mobile power cable of the device is in contact with the
glass or a hot frying pan.
•
Do not use the cooker to heat pots.
• Do not apply any type of cover on the cooktop.
• Electrical cables are not to be in contact with the cooker.
• It is recommended to protect hands from heat using pot holders. Only use dry gloves
or pot holders.
• Only use cookware with smooth and magnetic bottom suitable for induction hobs.
• Avoid that sugar, synthetic materials of aluminium, lms are in contact with the hot
areas. During cooling, those substances can cause cracks or other alterations on the
pyroceram surface: switch o the device and immediately remove from the cooking
area that is still hot
• When moving saucepans, make sure to lift them rather than slide them over the sur-
face.
• Saucepans and cooker are to be perfectly cleaned before being in contact.
• Do not drop objects on the hob!
• Only use saucepans with magnetic bottom.
Other materials are not admitted.
• Use saucepans of appropriate size to the desired cooking area.
• Always use a saucepan or frying pan on each cooking area, even with the BRIDGE
function.
• Do not place hot saucepans on the sensor keys or the LEDs, as this could cause dam-
age to the electronic components underneath.
Keep controls and lamps always clean.
• Do no keep metal objects directly below the cooker.
• Possibly use always covers to avoid heat dispersion.
•Cook with little water.
•After starting grilling or cooking dishes bring the power level to a lower one.
Safety and warning indications
Warning for people wearing pacemakers:
Keep in mind that when the appliance is being used an electromagnetic eld forms in
the immediate proximity. There is therefore a remote possibility that the operation of
the pacemaker might be aected.
If in doubt, contact the pacemaker manufacturer or your GP.
The electromagnetic eld of the hob during operation can aect the operation of ma-
gnetisable objects. Credit cards, life-saving devices, pocket calculators etc. should not
be in the proximity of a hob when in operation.
Metal objects stored in the drawer underneath the appliance may become hot in case of
prolonged use. Do not store metal objects in a drawer immediately underneath the hob.
The appliance is equipped with cooling fans. If there is a drawer under a built-in applian-
ce, a separation must be ensured between the drawer and the bottom of the appliance,
for appropriate hob ventilation and to make sure the fans are not be obstructed.
Never use two saucepans or pans on the same cooking zone, or a rectangular cooking
zone, or a PowerFlex cooking area.

15
ENGLISH
SAFETY DEVICES ON THE COOKER
Safety shutdown
If a cooking area exceeds the maximum time for operation at the same power, it is auto-
matically switched o and the indication of the residual heat is shown.
To reset the cooking area, touch the necessary keys.
Power level
low
123456789P
Maximum
duration of
operation in
hours
8.7 2.0 8.7 6.7 5.3 4.3 3.5 2.8 2.3 1.9 1.5
The cooker switches o automatically if one or more controls stay covered for more than
10 seconds.
To restore the proper operation:
- remove all objects from the control panel.
- clean the control panel.
- restart the cooker and the concerned area.
Overheating device
Before items of the cooker can overheat, the control reduces the used power by follow-
ing this procedure for protection measures:
- Deactivation of booster and power booster if turned on.
- Reduction of the power level set.
- Shutdown of the cooking area concerned.
On the display of the cooking area the message“E2”is displayed.
It is possible to restore the cooking area when the default message is o.
SAFETY INSTRUCTIONS
FOR ASSEMBLY
Install the cooker after installing kitchen cabinets and basis.
Make sure that worktops have been veneered with thermoresistant glue in
order not to suer deections or detachments.
It is forbidden to install the appliance on fridges or freezers, washing ma-
chines, dishwashers, or tumble driers.
ELECTRICAL SAFETY
The electrical system to which the cooker is to be connected must be in
accordance with local standards and supplied with earthed connection in
compliance with safety regulations in the country of use. It must also com-
ply with European standards regarding radio antistatic properties.
Make sure that it can’t be possible to touch the power cable of the cooker after it has been
built-in and that it is not subject to mechanical stress.
The socket used to connect the installed equipment to the electrical power supply must be
within reach: otherwise, install a mains switch to disconnect the machine when required.
Any changes to the electrical system must be carried out by a qualied electrician.
Do not try to solve the problem yourself in the event of equipment malfunction, but contact
the Dealer or an authorised Servicing Department for repairs.
When installing the cooker, disconnect the equipment by removing the
plug or switching o the main switch.
ELECTRICAL CONNECTION
(only intended for qualied personnel)
Disconnect the equipment from mains power network before carrying out
any operation on the cooker.
Make sure that electric wires inside the cooker are not disconnected or cut:
in the event of damage, contact your nearest Servicing Department.
Refer to qualied personnel for electrical connections.
Connection must be carried out in compliance with the provisions of law in force.
Before connecting the cooker to the mains power network, check that:
• the mains voltage corresponds with the voltage indicated on the data plate located
inside the cooker;
• the electrical system is compliant and can withstand the load (see the technical speci-
cations located inside the cooker);
• the power supply plug and cable do not come into contact with temperatures exceed-
ing 70 °C;
• the power supply system is eectively and properly connected to earth in compliance
with regulations in force.
•
the socket used to connect the cooker is within reach.
In case of:
• devices tted with cables without a plug: the type of plug to use is a ''standardised'' one.
The wires must be connected as follows: yellow-green for earthing, blue for neutral and
brown for the phase. The plug must be connected to an adequate safety socket.
•
xed equipment not provided with a power supply cable and plug, or any other device
that ensures disconnection from the electrical mains, with an opening gap of the con-
tacts that enables total disconnection in overvoltage category III conditions.
Said disconnection devices must be provided in the mains power supply in compliance
with installation regulations.
The yellow/green earth cable must not be cut o by the switch.
The Manufacturer declines all responsibility for failure to comply with the safety regulations.
Connection of the cooker (Panoramico 90):
network Connection Cable
section
Power
cable
Switch
gauge
220V - 240V~
50/60Hz 1P+N / 2P 3 x 2.5 mm² H 05 VV - F
H 05 RR - F 25 A *
380V - 415V~
50/60Hz 2P+N 4 x 1.5 mm² H 05 VV - F
H 05 RR - F 16 A *
380V - 415V~
50/60Hz 3P+N 5 x 1.5 mm² H 05 VV - F
H 05 RR - F 16 A *
* calculated with the contemporary factor in compliance with EN 60 335-2-6.
4321
POWER:
Feature 90 90 Plus
Total power 2800-7400W 7400W
Position 1
Rated power 1600W 2100W
Booster power 1850W 3700W
Position 2
Rated power 2100W 2100W
Booster power (1/2) 3000W 3700W
Position 3
Rated power 2100W 2100W
Booster power (1/2) 3000W 3700W
Position 4
Rated power 1600W 2100W
Booster power 1850W 3700W

16
PANORAMICO
90
Control description
Cooker top ON/OFF. In case no other control is
enabled, the cooker switches o automatically after
a few seconds
Selection of the front cooking area. If pressed
together with it enables the BRIDGE function.
Selection of the back cooking area. If pressed
together with it enables the BRIDGE function.
Control block: pressed for more than 2 seconds it
inhibits all controls. To release controls, repeat the
operation.
Increase of the power level for cooking and booster
selection, or increase of cooking time of the TIMER
function.
Decrease of the power level for cooking and booster
selection, or decrease of cooking time of the TIMER
function.
Display
display
description
Cooking area in stand-by
Levels of power from the lowest to the highest one,
which can be selected pressing the keys + and -.
Power boost : maximum cooking power.
Indication of the residual heat
level of power between 0 and 1, suitable to
keep dishes warm
(solo
display
destro)
bridge function enabled.
(minimum saucepan diameter: Ø230 mm)
Saucepan not on the cooker or not suitable for
material and size.
(minimum saucepan diameter: Ø 120 mm)
(su
display
centrale)
+Control block function enabled.
PANORAMICO
90 Plus
Control description
Cooker ON / OFF In case no other control is
enabled, the cooker switches o automatically
after a few seconds.
Cooking area activation, selection of the
cooking power level from 1 to 9 and Booster
activation. If pressed together with
, it enables the BRIDGE function.
Control block: pressed for more than 2 seconds
it inhibits all controls. To release controls, repeat
the operation.
increase of the cooking time of the TIMER
function.
decrease of the cooking time of the TIMER
function.
Stop and Go function.
It sets a customised level of power for each area
to: start cooking, continue cooking, nish co-
oking, keeping warm.
Keep warm function: it allows to select 3 levels
of power to keep dishes warm.
Display
display
description
Cooking area in stand-by.
Levels of power from the lowest to the highest one,
which can be selected pressing the keys + and -.
Power boost : maximum cooking power.
Indication of Stop and Go function enabled
Indication of the residual heat.
Function for the automatic start of cooking.
e
bridge function enabled.
(minimum saucepan diameter: Ø230 mm)
Saucepan not on the cooker or not suitable for
material and size.
(minimum saucepan diameter: Ø 120 mm)
Control block function enabled.
(on
central
display)

17
ENGLISH
OPERATION AND
USE OF THE COOKTOP
ONLY USE COOKWARE SUITABLE FOR INDUCTION HOBS.
When a cooking are is turned on, the bottom of the saucepan heats.
The cooking area only heats thanks to the heat given by the saucepan.
The cooktop automatically detects the size of the saucepan.
The heating power is to be chosen based on what shall be cooked.
Please nd below a short table:
SETTING AREAS
1 - 2 Melt
Heat
Sauces, butter, chocolate,
gelatine
Precooked dishes
2 - 3 Whisk
Defrost
Rice, pudding and cooked
dishes
Vegetables, sh, frozen food
3 - 4 Steam Vegetables, sh, meat
4 - 5 Boil Boiled potatoes, soups, pasta
Fresh vegetables
6 - 7
Cook over a low heat
Meat, liver, eggs, sausages
Goulash, rolate, tripe
7 - 8 Cook
Fry
Potatoes, donuts, cakes
9Fry, bring to the boil Steaks, omelettes
Boil
PFry, bring to the boil
Bring to the boil big
quantities of water
Remark: heating time of cooktops is shorter than the gas cookers.
BASIC FUNCTIONS
See table of the corresponding model in the previous page.
BRIDGE FUNCTION
This function allows having cooking areas 1-2 and/or 3-4 working at the same time.
To enable:
- Enable the cooktop;
For "90":
press simultaneously the symbols + ::
- the symbol
(solo
display
destro)
will be displayed on the screen of the front cooking area;
- Push the keys + and – to set power.
Note: this function can only be activated between the 2 right or the 2 left plates (not the
two centre plates).
For "90 Plus":
press simultaneously the symbols:
- The symbols will appear on the display of the two BRIDGE cooking areas;
- Set the power with the slider of the front cooking area.
DEACTIVATION of the BRIDGE function:
For "90":
press simultaneously the symbols + :.
For "90 Plus":
press simultaneously the symbols:
BOOSTER FUNCTION
The Booster strengthens power, so that big quantities can be heated (e.g. water to cook
pasta).
This power increase is enabled for max. 10 minutes.
For "90":
- Turn on the cooker;
- select the cooking area;
- touch (+) until on the screen is displayed on the back cooking area.
Note: it is not possible to only set to one right or one left plate at the time (and
no more than 2 in total).
If the outermost plate is set to , the one near cannot be set to exceed the level.
If the innermost plate is set to , the outer one switches o.
For "90 Plus":
- Turn on the cooker;
- touch the slider to bring power to and then the key (+).
At the end of the Booster mode, power is automatically reduced to .
If a zone is set to , the zone near cannot exceed level .
KEEP WARM FUNCTION
Version "90"
42°C - Keeping temperature of cooked dishes:
Turn on the cooker;
Select the cooking area;
Touch (+) and then (-): the symbol will appear.
Version "90 Plus"
Turn on the cooker;
Touch the key regarding the concerned cooking area and select one of the 3 levels
of temperature:
42°C - Keeping temperature of cooked dishes ;
70°C - Keep on cooking ;
94°C - Bring to the boil ;
Shutdown of the cooker
To shutdown the cooking area:
Touch the key ( - ) until 0 is displayed on the screen of the cooking area.
If the cooking area is still too hot, the residual heat is specied .
Turn o the cooker
Touch the key : all cooking areas are deactivated.
On the display of the cooking areas that are still too hot, the symbol is displayed .
Do not touch the cooking areas until the lamp is on.
TIMER FUNCTION
AND AUTOMATIC SHUTDOWN
The timer has two functions:
1 – TIMER;
2 – AUTOMATIC SHUTDOWN of one or more cooking areas.
It is possible to set a duration up to 99 minutes for the“90” version and 119 minutes for
the“90 Plus”version.
Once the time set is over, on the display regarding time 00 is shown and a sound warn-
ing is activated that can be deactivated pushing keys (+) or (-).
TIMER
To set:
1. If o, turn the hob on using the key and touch (+) and (-) at the same time.
(on the Plus version the lamp is on );
2. Set the desired time touching keys (+) and (-).
Timer starts passing.
To modify time repeat the procedure from point 1.
To cancel timer:
1. If o, turn the hob on and touch (+) and (-) at the same time.
(on the Plus version the lamp is on ).
2. Touch the key ( - ) to bring time to 00.

18
AUTOMATIC SHUTDOWN
For the automatic shutdown function:
1 - turn on the cooker;
2 - select the cooking area;
3 - select the level;
4 - set the timer as described above.
To set the automatic shutdown for another cooking area, repeat the procedure from
point 2.
TIMER and AUTOMATIC SHUTDOWN can be used simultaneously.
ADDITIONAL FUNCTIONS
"90 PLUS" MODEL
STOP AND GO
This function allows to temporarily stop cooking and restore it with the same settings.
to enable touch the key .
If the function is not deactivated within 10 minutes, the cooker switches o.
For deactivation
Touch the key and within 5 seconds completely slide the slider to right.
AUTOMATIC PROGRAMMING OF THE COOKING
This function allows to speed up the start of cooking.
The procedure is the following:
1 - turn on the cooker
2 - touch for more than 2 seconds the desired level of cooking:
on the display will be displayed and the desired level of cooking .
For a certain period the cooking area will work at the maximum power to then rech the
set level.
To deactivate the function:
touch again the control and change the power level.
RESET FUNCTION for accidental switch o
After turning o the cooker, it is possible to restore the last selected settings:
· Status of cooking of all cooking areas (power).
· Minutes and seconds of the timer by programmed cooking areas.
· Automatic programming of cooking.
The restore procedure is the following:
- turn on the cooker.
· touch within 6 seconds the key .
Previous settings are restored.
CHEF FUNCTION
It allows setting for each cooking area pre-dened power for each cooking phase.
Area 4: power level 9. Cooking start.
Area 3: power level 6. Cooking continuation.
Area 2: power level 3. Cooking end.
Area 1: power level 1. Keep warm.
WHAT TO DO IN CASE OF PROBLEMS
The cooker or cooking areas do not turn on:
· The cooker is not connected to the electric network.
· The protection fuse is released.
· Check if the block is not active.
· Keys are covered with water or grease.
· An object is placed on the keys.
The symbol is displayed .
· There is no saucepan on the cooking area.
· The container used is not compatible with cooktops.
· The diameter of the saucepan bottom is too small compared to the cooking area.
The symbol [E] is displayed:
· Disconnect and connect the cooker.
· Contact the after-sales centre.
One of the area or the entire cooker turns o:
· The safety overheating system is active;
· The cooker or one cooking area remains on for too long;
· one or more keys are covered;
· one of the saucepans is empty and the bottom overheated.
The fan keeps on working after the cooker shutdown:
· This is not a malfunction: the fan keeps on protecting the electronic power unit of the
device.
· The fan stops automatically.
10 ERROR CODES
For supporting a service technician in case of error, the UI displays error codes.
In combination with the provided document "error codes Basic 2" which includes datai-
led information a complete error matrix description is available.
E.G.O's standard error codes are listed following, customized UI can be dierent. In the
standard general UI eroors (Er xx) and cooking zone errors (E/x) dier. In case of cooking
zone errors the display of the incorrect cooking zone blinks alternative "E" and a hexco-
de "X".
Error
code
Description possible
causes
Remedy
.
The cooking zone
can be congured if
a static "C" is shown
No error, the user
is in the service
menu.
A suitably pan must be
placed on the relevant
cooking zone
.
The cooking will be
congured if a a-
shing "C" is shown.
After a successful
conguration the
relevant display
shows "-". If "-" is not
displayed check the
possible causes of
the E/5
User is in the
service menu, no
error
Wait for the symbol "-"
or abort the congu-
ration activities by
pressing the select key
and the "C" will not ash
anymore.
.
A ashing "E" on
each cooking zone
indicates that all
congs will be
deleted
User is in service
menu, no error
Manual conguration
.
Temperature limits
are exceeded
Pt or glass tempe-
rature is too high
NTC -> electronic
temperature too
high
System must cool down
.
Unsuitable pot, e.g.
loss of the magnetic
characteristics be-
cause of temperatu-
re in the bottom
On the module
a pot creates
an improper
operatioing point
which can destroy
devices, e.g IGBTs.
1. The error is automa-
tically cancelled after 8
s and the cooking zone
can be used again. In
case of further upco-
ming errors the pot has
to be replaced.
2. The module has to
be changed if the error
comes without a pot on
the cooking zone.

19
ENGLISH
.
Uncongured in-
duction module (all
induction module
answer to UI, but
any element is rela-
ted to the eected
cooking zone.)
induction module
is not congured
Delete the hob congu-
ration and activate the
manual conguration.
Start the UI service
menu to congure the
induction module if the
listed points are not
successful replace the
module.
.
No communication
between UI and
induction module
No power supply
of induction
module.
Bad cabling or
defect
Check power and LIN
connections. If con-
nection is OK, replace
the module
.
Main power distur-
bance
1. Failure in main
power frequency
detection
2. Overvoltage
Check main power
voltage and frequency,
if ok replace the module
.
Non assignable
failure
Replace module or User
interface
.
Fan failure Fan or control
electronic is defect
Replace the module
.
Defect ive tempe-
rature probe on
inductor
Sensor signal out
of valid range; sen-
sor or electronic is
defect
Replace the module
.
Hardware defect of
induction module
Defect hardware
device detected
by the self-check
of the module
Replace the module
.
Conguration failure 2 cooking zones
are delicated to
the same element
of the UI
Delete the actual con-
guration
manual conguration
with service menu
.
Fixed sensor value
(test function for T
probe on inductor)
Not enough tem-
perature change
(10 K) within 5 min
after switch on
the hob
System must cool down
No
functiona-
lity and no
displaying
Overvoltage on
the switch mode
power supply (no
functionality)
400 V connection Disconnect and correct
the power line con-
nection
Note:
Not each failure can be delected automatically by the system, e.g. in case of defect of the
User interface power supply.
CLEANING AND MAINTENANCE INSTRUCTIONS
ATTENTION!
For cleaning, never use a steam equipment.
Before cleaning the cooker, make sure that it is at room temperature.
Always clean the cooker after each use with a specic cleanser for pyroceram.
Do not use products containing:
- corrosive agents (soda, acids, ammoniac).
- abrasive agents (dusts or paste).
Do not use pointed or abrasive objects.
After cleaning, dry the appliance with a soft cloth.
If the appliance is built-in over an oven or an electric kitchen tted with pyrolytic system
do not operate it while the pyrolytic procedure is under way, as the overheating protec-
tion of the cooker can be released (see relevant chapter).
DISPOSAL AFTER END OF USEFUL LIFE
The crossed-out wheeled bin symbol on the appliance means that the product
isWEEE, i.e. "Waste electrical and electronic equipment", accordingly it must not
be disposed of with unsorted waste (i.e. with "mixed household waste"), but it
must be disposed of separately so that it can undergo specic operations for its
re-use, or a specic treatment, to remove and safely dispose of any substances that may be
harmful to the environment and remove the raw materials that can be recycled. Proper dis-
posal of these products contributes to saving valuable resources and avoid potential nega-
tive eects on personal health and the environment, which may be caused by inappropriate
disposal of waste.
You are kindly asked to contact your local authorities for further information regarding the
designated waste collection points nearest to you. Penalties for improper disposal of such
waste can be applied in compliance with national regulations.
INFORMATION ON DISPOSAL IN EUROPEAN UNION COUNTRIES
The EU WEEE Directive was implemented dierently in each country, accordingly, if you wish
to dispose of this appliance we suggest contacting your local authorities or dealer to nd
out what the correct method of disposal is.
INFORMATION ON DISPOSAL IN NONEUROPEAN UNION COUNTRIES
The crossed-out trash or refuse bin symbol is only valid in the European Union: if you wish
to dispose of this appliance in other countries, we suggest contacting your local authorities
or dealer to nd out what the correct method of disposal is.
WARNING!
The Manufacturer reserves the right to make changes to the equipment at any time and
without prior notice. Printing, translation and reproduction, even partial, of this manual are
bound by the Manufacturer's authorisation.
Technical information, graphic representations and specications in this manual are for in-
formation purposes and cannot be divulged.
This manual is written in Italian. The Manufacturer is not responsible for any transcription
or translation errors.

20
SICHERHEITSANWEISUNGEN
UND WARNHINWEISE
Diese Hinweise wurden für Ihre Sicherheit und die Sicherheit anderer
Personen erstellt, und wir bitten Sie deshalb, die vorliegende
Gebrauchsanweisung vor der Verwendung oder der Reinigung des
Geräts vollständig zu lesen.
Der Hersteller lehnt jegliche Haftung für etwaige direkte oder indirekte Schäden an
Personen, Gegenständen oder Haustieren ab, die durch eine Nichtbeachtung der in
der vorliegenden Gebrauchsanweisung angeführten Sicherheitshinweise verursacht
werden.
Es ist sehr wichtig, dass diese Gebrauchsanweisung zusammen mit dem Gerät
aufbewahrt wird, damit künftig darin nachgelesen werden kann.
Bestimmungszweck
•Diese Kochebene ist für den Einsatz im Haushalt bestimmt, um Speisen zuzubereiten
und warm zu halten.
• DieKochebenedarfnichtinAußenbereicheninstalliertund keinenWitterungseinflüssen
(Regen, Wind, etc.) ausgesetzt werden.
• Jegliche andere Verwendung ist unzulässig.
• Diese Kochebene darf nur über Backöfen oder Elektroherden eingebaut werden, die
mit einem System zum Abkühlen des Dampfs ausgestattet sind.
• Das Gerät darf von Kindern ab 8 Jahren sowie von Personen mit reduzierten physischen,
sensorischen oder mentalen Fähigkeiten oder Mangel an Erfahrung und/oder Wissen
benutzt werden, wenn sie beaufsichtigt werden oder bezüglich des sicheren Gebrauchs
des Gerätes unterwiesen wurden und die damit zusammenhängenden Gefahren
verstanden haben.
Kinder dürfen nicht mit dem Gerät spielen. Kinder dürfen die vom Benutzer
auszuführende Reinigung und Wartung nicht unbeaufsichtigt durchführen.
• Sich nie entfernen, wenn die Kochebene in Betrieb ist.
Verbrennungsgefahr
• Die Bedienungselemente sperren um zu verhindern, dass unbefugte Personen das Gerät
von allein einschalten können.
•Die Grie von Pfannen und Töpfen zu ausrichten, dass Kinder sie nicht erreichen können.
•Die einzelnen Kochbereiche nach Gebrauch ausschalten.
•Keine Metallgegenstände auf den eingeschalteten Kochbereichen ablegen.
Technische Sicherheit
• Die Installation muss von kompetenten und qualizierten Installateuren unter
Befolgung der Angaben der vorliegenden Gebrauchsanweisung sowie unter
Einhaltung der gültigen Sicherheitsvorschriften vorgenommen werden.
Wenn das Speisekabel oder andere Teile beschädigt sind, darf die Kochebene
NICHT benutzt werden: Die Kochebene von der Stromversorgung abtrennen und sich
zwecks Reparatur an den Händler oder an eine autorisierte Kundendienststelle wenden.
Die elektrische, mechanische und funktionelle Struktur des Geräts darf nicht
verändert werden.
Niemals versuchen, Reparaturen oder Austauschtätigkeiten selbst durchzuführen.
Werden diese Arbeiten von Personen durchgeführt, die nicht dazu befähigt und
qualiziert sind, so kann dies zu schweren Personen- und Sachschäden führen, die
von der Herstellergarantie nicht gedeckt sind.
• Vor der Installation der Kochebene muss sichergestellt werden, dass sämtliche
Komponenten unbeschädigt und funktionstüchtig sind. Sollten Schäden festgestellt
werden, nicht mit der Installation fortfahren und umgehend den Händler
kontaktieren.
Die elektrische Anlage für den Anschluss der Kochebene muss den
geltenden Normen entsprechen und mit einem Erdungssystem ausgestattet
sein, das den Sicherheitsvorschriften des Installationslandes entspricht. Sie muss
außerdem der EU-Gesetzgebung bezüglich der Funkentstörung entsprechen.
•
Die auf dem Typenschild der Kochebene angegebenen Anschlussdaten (Spannung und
Frequenz) müssen mit denen des Stromnetzes übereinstimmen.
Diese Daten vor Anschluss überprüfen.
Im Zweifelsfall wenden Sie sich bitte an einen Elektriker.
• Die Kochebene nicht vor ihrer Installation benutzen.
• Die Benutzung der Induktionsebene auf Geräten, die sich bewegen könnten, ist verboten.
• Nie das Gehäuse des Geräts önen.
• Falmec gewährleistet die Einhaltung der Sicherheitsstandards nur, wenn
Originalersatzteile verwendet werden.
• Das Gerät ist nicht für den Betrieb mit einer externen Zeitschaltuhr oder einer
Fernbedienung bestimmt.
HINWEISE FÜR DEN BENUTZER
• Vor der ersten Inbetriebnahme des Geräts eventuelle Schutz- bzw. Haftfolien
entfernen.
• Während des Gebrauchs können Pfannen und Geschirr Lärm verursachen, was von
Folgendem abhängen kann:
- von einer hohen Wärmeleistung.
- von unterschiedlichen Materialien der Topfböden.
• Nie Wasser zum Löschen eines Feuers benutzen. Den Kochbereich ausschalten. Die
Flammen mit einem Deckel, einer feuerfesten Decke oder etwas Ähnlichem ersticken.
•Keine brennbaren Gegenstände in den Schubladen unterhalb der Kochebene
aufbewahren. Der Besteckeinsatz muss aus hitzebeständigem Material sein.
• Keine leeren Töpfe oder Pfannen erhitzen und immer sicherstellen, dass in den
Töpfen eine Mindestmenge an Flüssigkeit vorhanden ist.
•Die Kochebene nach dem Gebrauch immer ausschalten.
•Bei Verwendung von Fetten und Ölen den Kochvorgang immer gut überwachen, da
diese Substanzen sich leicht entzünden können.
• Fette und Öl höchstens eine Minute lang erhitzen und dazu nie die „Booster“-
Funktion benutzen.
•Vorsichtig mit dem Gerät umgehen, damit es während und nach seinem Gebrauch zu
keinen Verbrennungen kommt.
•Sicherstellen, dass kein festes oder loses Elektrokabel der Vorrichtung mit dem
heißen Glas oder einer heißen Pfanne bzw. Topf in Berührung kommt.
•
Die Kochebene nicht zum Erwärmen von Konservendosen benutzen.
• Die Induktionsebene in keiner Form abdecken.
• Die Elektrokabel dürfen nicht mit der Kochebene in Berührung kommen.
• Zum Schutz der Hände vor Hitze wird die Verwendung von Topappen empfohlen.
Ausschließlich trockene Kochhandschuhe bzw. Topappen benutzen.
• Nur Töpfe und Pfannen mit glattem und magnetischem Boden für Induktionskoch-
felder verwenden.
• Verhindern, dass Zucker, synthetische Materialien oder Aluminiumfolie mit den hei-
ßen Bereichen in Kontakt kommen. Diese Substanzen können beim Abkühlen zu
Rissen oder anderen Schäden an der Oberäche des Ceranfeldes führen: Das Gerät
ausschalten und die Substanzen sofort von dem noch heißen Kochbereich entfernen.
• Die Töpfe zum Bewegen anheben und nicht auf der Oberfläche des Kochfelds
verschieben
• Töpfe und Kochebene müssen einwandfrei sauber sein, bevor sie miteinander in
Kontakt kommen.
• Keine Gegenstände auf die Kochfelder fallen lassen!
• Nur Töpfe mit magnetischem Boden benutzen.
Andere Materialien sind nicht erlaubt.
• Die Größe der Töpfe muss dem benutzten Kochbereich angemessen sein.
• Immer einen Topf bzw. eine Pfanne pro Kochbereich benutzen, auch in der Funktion
BRIDGE.
• Kein heißes Geschirr auf die Sensortasten und die Kontrollleuchten stellen, da die
darunter befindliche Elektronik dadurch beschädigt werden kann.
Die Betätigungstasten und Kontrollleuchten müssen immer sauber sein.
• Keine Metallgegenstände direkt unterhalb der Kochebene aufbewahren.
• Möglichst immer Deckel benutzen, um eine Dispersion der Hitze zu verhindern.
•Mit wenig Wasser kochen.
•Nach Koch- oder Bratbeginn der Speisen die Wärmeleistung der Kochebene auf eine
niedrigere Stufe stellen.
Angaben und Hinweise zur Sicherheit
Hinweis für Personen mit Herzschrittmacher:
Beachten, dass während des Betriebs in der Nähe des Geräts ein elektromagnetisches
Feld erzeugt wird. Es ist sehr unwahrscheinlich, dass der betrieb des Herzschrittmachers
dadurch beeinusst wird.
Wenden Sie sich in Zweifelsfällen an den Hersteller des Herzschrittmachers oder an
Ihren Arzt.
Das elektromagnetische Feld des Kochfelds kann die Funktionsweise von magnetisier-
baren Gegenständen beeinträchtigen. Kreditkarten, Rettungsvorrichtungen, Taschen-
rechner usw. müssen aus der unmittelbaren Nähe des eingeschalteten Kochfeld fern-
gehalten werden.
Falls das Gerät länger benutzt wird, können Metallgegenstände, die in einer Schublade
unter dem Gerät aufbewahrt werden, heiß werden. Keine Metallgegenstände in einer
Schublade direkt unter dem Kochfeld aufbewahren.
Das Gerät weist Kühlgebläse auf. Falls sich unter dem Einbaugerät eine Schublade be-
ndet, muss eine Abtrennung zwischen der Schublade und der Unterseite des Geräts
montiert werden; außerdem muss die erforderliche Belüftung des Kochfeld beachtet
werden und es muss sichergestellt werden, dass die Gebläse nicht verdeckt werden.
Nie gleichzeitig zwei Töpfe oder Pfannen auf einem einzigen Kochfeld, einem rechtecki-
gen Kochfeld oder einem PowerFlex-Kochfeld benutzen.
This manual suits for next models
2
Table of contents
Languages:
Other FALMEC Hob manuals

FALMEC
FALMEC Sintesi Series User manual

FALMEC
FALMEC Quantum User manual

FALMEC
FALMEC Quantum Easy User manual

FALMEC
FALMEC DANILO-PROLITE INSERT 38" 2M User manual

FALMEC
FALMEC Modula M2 User manual

FALMEC
FALMEC Domino 38 User manual

FALMEC
FALMEC Modula M1 User manual

FALMEC
FALMEC 105095101 Instruction Manual

FALMEC
FALMEC Quantum Pro User manual

FALMEC
FALMEC Quantum User manual