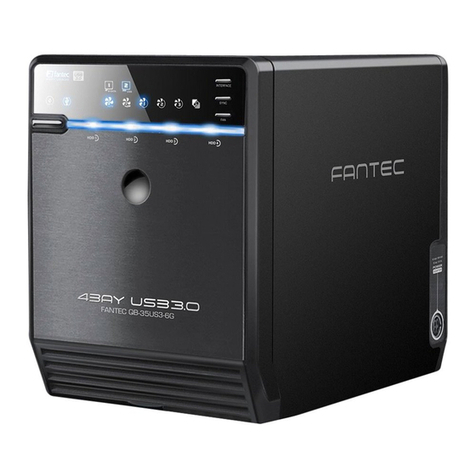
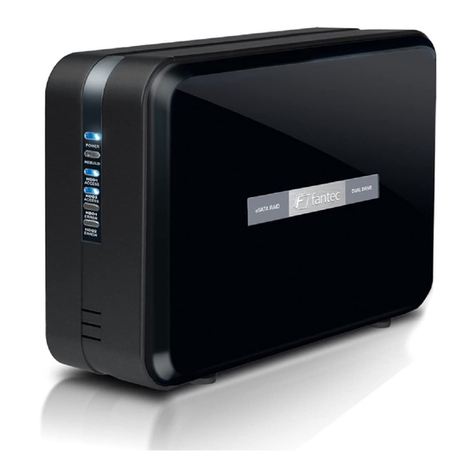
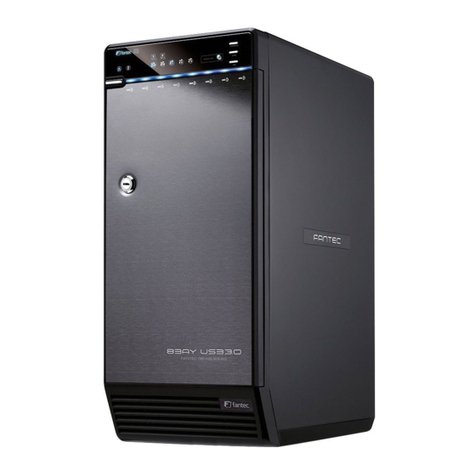
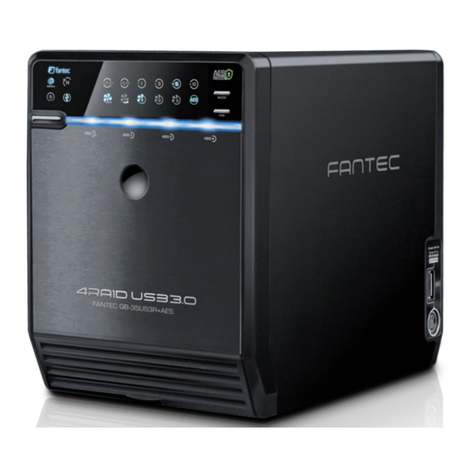
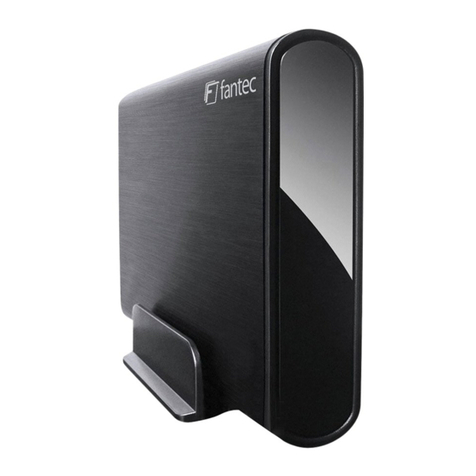
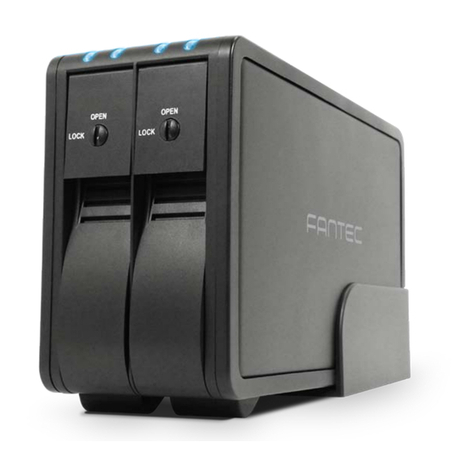
Fantec QB-35U31R User manual

Model QB-35U31R
4-Bay HDD-Enclosure with RAID-Functionality
Manual English

Inhalt
3 Contact
4 Introduction
4 Technical Data
4 Delivery
4 Features
4 Connections
5 System Requirements
5 Working Environment
5 Security Instructions
6 Overview
6 Front View
7 Controls
8 Rear View
8 Side View
9 Assembly
9 Hard Drive Installation
11 Opening the Front Panel
11 Changing the Fan
12 Setup
12 RAID-Modes
12 Single Mode
12 RAID 0 Spanning
13 RAID 0 Striping
13 RAID 1 Mirroring
14 Operation Manual
14 First Use
14 Setting the RAID-Mode
15 Particularities in Single Mode
15 After Installation of a Set
15 Usage of Hardware-RAID-Managers
15 Usage of Hard Drives
16 RAID 0
16 RAID 1
16 Hints for the Installation of Hard Drives with Data

EN 3
18 DataLossduetoMechanicalInuences,Software-InuencesorFaulty
Operation
18 Reading of Hard Drive Information
18 Secure Removing of the Hard Drive
20 Initialising, Partitioning and Formatting
20 Windows
21 Mac OS
Contact
Contact our technical support at:
service@fantec.de
+49 (0)40 730 92 83 56
We are online at:
www.fantec.de
Declaration of Conformity:
http://www.fantec.de/unternehmen/ce
Adress for RMA Sending from Germany
For RMA-Service outside of Germany please contact your dealer!
fantec GmbH
Abteilung RMA/Service
Billwerder Billdeich 605 B
21033Hamburg–Germany

EN 4
Introduction
SaveyourDatawiththefantec QB-35U31R with room for up to four SATA hard
drivesinoneenclosure.WithdiverseRAID-Levels(Single,0,1)theQB-35U31R
offersdifferentsettingsfordatasecurityorincreasedperformance.Allhard
drivescanalsobedisplayed,controlled,changedandreplacedindividually
aswellasexpandedindependentlyofproducerorcapacity.WiththeUSB3.1
interfaceyoucantransferyourdatalightning-fastwithupto10Gbit/sandthe
UASP-transport-protocol allows even more increased performance. The built-in
temperature-sensorcontrolsthefanautomaticallyin3stepsforoptimalventila-
tionofyourharddrivesandtheintegratedUSB-Hubpreventsthelossofinterfaces
onyoursystem.
Technical Data
Delivery
• 1× USB 3.1 Cable
• 4× Hard drive Handles
• 1×ExternalPowerSupply
• 1× Screwdriver
• Manual
Features
• Suitablefor4×8,89cm(3,5“)SATAI/II/IIIHDDs
• RAIDmodesSingle,0Spanning,0Striping,1Mirroring
• USB 3.1 Gen. 2 Interface
• USB-Hub(1×USB3.0TypA,1×USB3.1TypC)
• Data transfers up to 10Gbit/s
• Internal 80mm fan
• Automaticfancontrolbyintegratedteperature-sensor
• SynchroniseddeactivationwhenPCisshutdown
• LEDdisplay(frontside)
• SetupforRAIDMode,fancontrol
Connections
• 4×SATA(internal)
• 1×USB3.1Gen.2TypeCDevice(backside)
• 1×USB3.1Gen.2TypeCHub(side)
• 1×USB3.0TypeAHub(side)

EN 5
• 1×Powerconnection(side)
System Requirements
• Microsoft Windows 7 / 10
• Mac OS X 10.13 or higher
Working Environment
• Temperature: 0 ~ 40 °C
• Humidity: 5%~90%RH
Security Instructions
• Protect the product against moisture and direct sunlight
• Do not place this device near water.
• Cleanonlywithadrycloth.
• Donotblockanyventilationopenings.
• Install in accordance with the manufacturer’s instructions.
• Donotplacenearanyheatsourcessuchasradiators,heatregisters,stoves,or
thedevices(includingampliers)thatproduceheat.
• Protectthepowercordfrombeingwalkedonorpinchedparticularlyatplugs,
conveniencereceptacles,andthepointwheretheyexitfromthedevices.
• Onlyuseattachments/accessoriesspeciedbythemanufacturer.
• Unplug this during lightning storms or when unused for long periods of time.
• CarefullyreadandfollowtheQuickInstallGuideandUserManual.
• Donotdroporshakethedevice.
• Do not move the device when it is powered on.
• Do not overload wall outlets.
• Referallservicingtoqualiedservicepersonnel.
Servicing is required when the devices has been damaged in any way, such as:
• power-supplycordorplugisdamaged;
• liquidhasbeenspilledorobjectshavefallenintothedevices,
• thedeviceshasbeenexposedtorainormoisture,
• doesnotoperatenormally,orhasbeendropped.

10
7
9
8
6
5
4
3
2
1
11 11 11 11
12
12
12
12
13
EN 6
Overview
Front View

EN 7
Controls
1. Main Switch on press switch
off hold switch ca. 3 sec.
2. RAID-mode-change: hold ca.3 sec.
3. RAID-mode-change: hold ca.3 sec.
4. Smart Fan automatic fan control on / off
5. Status LED blue Device is switched on
orange Deviceisinstandby
off Device is switched off
6. USB Port active/accessUSB3.1Typ-Cportdevice
active RAID-Mode Set 1 orange
SINGLE simulates single hard drives
RAID 0 SPN Spanning(BIG)
RAID 0 STR Striping
RAID 1 Mirroring
active RAID-Mode Set 2 green
SINGLE simulates single hard drives
RAID 0 SPN Spanning(BIG)
RAID 0 STR Striping
RAID 1 Mirroring
7. HDD Error LED² signals hard drive errors / rebuilding a RAID
8. Status Smart Fan on faniscontrolledautomaticallyby
temperature
off fan is running with minimal
number of revolutions
9. HDD Status blue active
Access
purple pulsating active rebuild of a RAID1
10. HDD Error red active rebuild of a RAID1
malfunction or incompatible to
RAID
11. Disk Holder
This device consists of two independent RAIDs.
²HDDErrorisnotdisplayedinSingleMode.

1
3
2
EN 8
Rear View
Side View
1. Fan
2. RAID-Mode-Conrmation
3. USB3.1Typ-Cport
1. USBHubTyp-Aport
2. USBHubTyp-Cport
3. Current input
4. Power plug
HDD Handle Front Cover Metal Cladding
2
3
1
1
4

EN 9
Assembly
Hard Drive Installation
1. Please attach the included handles to the hard drives with screws.
2. Pushthecircularindentation,toopentheenclosure.
3. Pushbothhandles,toremovethemetalcladding.

EN 10
4. Pleaseremovethetransportsafetyboard.
5. Pushtheharddrivesintotheenclosureandcheckiftheyareinstalledinthe
correct order from top to bottom.
Toremovetheharddrives,pushtheattachedhandleslightlydownwardsand
then pull the hard drive out.
6. Putthemetalcladdingwhichwasremovedinstep3backinandbecareful
thatitlocksinaswell.Afterthatthefrontpanelcanbeclosedagain.
7. Connect the device with the power adapter and switch it on.
Attention: When the USB-cable is removed the enclosure switches to stand-
by-modeautomatically.

EN 11
Opening the Front Panel
Ifyouforgottoputthemetalcladdingbackinplacebeforeclosingthefrontpanel,
simplypush–asshownintheimage–thelowerlever.Thismakesthefrontpanel
openslowly.Pleasedonottrytoopenthefrontpanelwithasharpobject.
Changing the Fan
Positive
red Cable
Negative
black Cable
Ifthefanbecomesnoisyshutdowntheenclosureandopenthepanelingonthe
backside.Nowyoucanremovethefanandcleanitcarefully.Shouldthenoisenot
stopdespitethecleaning,youcanreplacethefanwithanidenticalone(80×80×
20mm).Incaseofcompletefailureofthefanpleasecontactourservice.

EN 12
Setup
RAID-Modes
The QB-35U31R offers the following RAID-modes: Single,RAID 0 Spanning(Big),
RAID 0 Striping and RAID 1. These modes can be created in two independent sets
of two hard drives. The QB-35U31R has no standard mode.
ToinstallaRAIDyouneedharddriveswhichdonotcontainimportantdata.Usu-
allynoalreadysaveddatacanbetransferredintoaRAID-system.
Only in Single Mode you can use hard drives which already contain data. Please
read Hints for the Installation of Hard Drives with Data (P.17).
Single Mode
InSingleModeor“Non-RAID”Modethehard drives of a set are displayed as inde-
pendent drivesatthecomputer.ThisfunctioncanbeusedifRAIDisnotneccessary,
ifonlyoneharddriveisinstalledortwoharddrivesofdifferentbrandsorcapaci-
ties are installed.
Please note:InWindowsthecommand“safelyremovehardware”cannotbeused
onasingledrive-letterbutonlyonacompleteset.
= 4TB
RAID 0 Spanning
Spanning connects several physical drives to one large virtual driveandthereby
bypassesthephysicallimitationsofindividuallyconnectedharddrives.Thedatais
written continuallyfromHDD1toHDD2(seeimage).Whenonedrivefailsorgets
damagedalldatawillbelostbecanonlybereconstructedwithprofessionalhelp.

EN 13
= 4TB
RAID 0 Striping
Striping connects several drives to one large virtual drive as a logical unit. The
data is written parallelontoallharddrives,whichresultsinanincreaseddata-
transfer-rate. When one drive fails or gets damaged all data will be lost and can
onlybereconstructedwithprofessionalhelp.Theusablememorycorrespondsto
thememoryofthesmallestdrivetimestwo.Forthismodewerecommendtouse
twoidenticalharddrives(samecapacity,brandandmodel-number).
= 4TB
RAID 1 Mirroring
Mirroring is the automatic copying of data onto several hard drives. This ensures
highreliabilityofthedatanetworkintheeventofaharddrivefailure.Incaseof
failureofonediskaccessisstillpossibleandafterexchangeofthefaileddrive
thedatawillberestored.Theusablememorycorrespondstothememoryofthe
smallest drive.
Forthismodewerecommendtousetwoidenticalharddrives(samecapacity,
brandandmodel-number).

RAID-Mode-
Confirmation-Key
EN 14
= 2TB
Operation Manual
First Use
Attention:Afterseveralsecondstheenclosureshutsdownautomatically,ifhard
drives are installed without choosing a RAID-mode.
BothredLEDs(Nr.12onP.6)permanentlybeingonsignalsanerroneousRAID.
Thismeansthecontrollerisnotndingtheharddrivesinthestateneccessaryfor
the chosen RAID-mode.
The QB-35U31R is set to Single mode on delivery!Inthisstateyoucaninstallthe
harddriveswhichwillnotbeusedasaRAIDandsaveyourdataafterinitialising
thedrives.IfyouwanttouseaRAID,setupthedeviceaccordingly.Aftersettingup
thechosenRAIDtheLEDs(Nr.12)willturnoffifeverythingisworking.
Save your data before changing the RAID-mode of the device to avoid negative
consequences of maloperations or other faults.
Setting the RAID-Mode
1. Removethecaponthebacksideandrememberthepositionofthe
2. Installtheharddrivesintotheenclosure,
connect it to a computer (The enclosure
switchestostandby-modewhenitisnot
connected)andswitchonthedevice.
3. Hold the button SET1 (for the top two hard
drives)orSET2 (for the bottom two hard
drives)untiltheLEDfortheRAID-option
startstoblink.
4. Repeat the process until the chosen RAID-
mode is set and the corresponding LED
ashes.
5. Press the at

EN 15
thebacksideofthedeviceuntilitshutsdown.Thisstephastobedonequickly
astheblinkingLEDchangestosolidlightafterafewsecondswhichindicates
thatthedevicecannotbeadjustedanymore.
6. Switchthedevicebackonwiththemain switch onthefrontpanel.Checkifthe
adjustmentofthesetyoujustmadehasbeenacceptedbythedevice.Ifnecces-
saryrepeattheprocess.Ifnosecondsetshallbeinstalled,putthecapofthe
backon.
7. You can now prepare the next RAID-set. Both sets can be adjusted inde-
pendentlyofeachother.Notethatbyswitchingthedeviceonoroffthe
operation of the other drive will be interrupted.
8. Cover the with its cap and switch the device off
and on again with the main switch atthefrontandcheckthesettings.
9. AssoonasyournewRAIDdriveisreadyyouhavtoinitialiseitinyouroperat-
ingsystem.PleasereadthechapterInitialisation, Partitioning and Formatting
(P.20).
Particularities in Single Mode
In Single Mode it is not neccessary to initialise the hard drives in any case. This
dependsonwhethertheyhavealreadybeeninitialisedandifthisinitialisationcan
beprocessedbytheQB-35U31R.Inmostcasestheoperatingsystemwillpresent
anoteaboutanewpartition.InWindowsthisismostlyanewdriveletter.Ifnot,
please see chapter Initialisation, Partitioning and Formatting (P.20).
After Installation of a Set
of the device after being shut down with the RAID-Mode-Con-
the Enclosure is
testing the hard drives and prepares them for RAID-operation: it overwrites parti-
tion-tablesifneccessary.Ifthisprocesstakesmorethanafewsecondsthedevice
is not able to create a RAID. This means the hard drives differ too much regarding
characteristics and therefore do not work synchronously. Such hard drives can not
be used in that pairing for this particular RAID. For this reason we recommend to
the same hard drives as described under Usage of Hard Drives (P.16).
Usage of Hardware-RAID-Managers
Attention:DonotuseanysoftwaretocontroltheHardware-RAID-Controllerofthe
QB-35U31R.No“tool”isneeded.Pleaseonlyusethecontrolsmeantforthat.
Usage of Hard Drives
ForyourRAIDtoworkreliably,werecommendtheuse of identical hard drives: of
the same size,thesamemanufacturer and of the same production date.

EN 16
RAID 0
• WhenaharddrivefailsinaRAID0,theRAIDfailscompletely.
• A RAID 0 Spanningoffersthepossibilitytouseharddriveswithdifferentcharac-
teristics.Thisisonlyagoodsolutionifthesaveddataisactuallyredundant.As
anarchiveof“oldharddrives”itisnotagoodsolution.Olddiskswilleventually
failandyourarchivewillbelost.
RAID 1
• ARAID1continuestoworkevenifoneharddrivefails.Thefaileddiskshouldbe
replacedassoonaspossibleasanotherdiskfailurewouldmeanacompleteloss
of all data. We recommend to perform a data backup before installing the new
hard drive. The exchange of a hard drive and the following rebuild of the data
usebothdrivesheavily–thereisariskfortheotherharddrivetofailtoo.
• The installation of a new hard drive triggers the rebuild of the data. You can
simplyputinthenewharddriveswhiletheotherarebusybutthesmooth
operationofaRAID1canbeinterruptedbythat.Therebuildingprocesstakes
several hours – it is dependent on size and processing speed of the hard drives.
It which means it cannot be seen on
theharddrives.Althoughthedrivecanbeusedduringtherebuildthiswilldelay
the process.
• The rebuild willnotstartwhendriveisactivelyaccessedorthedatacableisnot
connected.Ifyounoticethis,justturnoffthedevice,connectittoaPCandturn
it on again.
• A started and active rebuild will be carried out even with disconnected USB
cable.
• A disk failureissignalledbytheashingoftheredLED(Nr.12)onthefailed
disk.
• A rebuildofthemirrorissignalledbythelightoftheredLED(Nr.12)onthe
faileddisk.AtthesametimebothLEDs(Nr.11)arechangingcolourbetween
blueanpurpleandbothharddrivesareworkingpermanently.
• Hard drives age and will eventually fail.Theycanalsofail spontaneously due
to other defects.Whentheyare“identical”theywillreachtheirlifetime limit
around the same time.
Accordingtothiswerecommendfollowingstrategyforexchangingharddrives:
Hasoneharddrivefailedspontaneously,exchangethisoneharddrive.Hasthe
hard drive reached its lifetime limit (which differs from hard drive model to
modelanddependsontheintensityofusage),betterexchangebothharddrives
–aftercreatingabackup.ThisallowsforaRAID1systemwhichworksreliably
for a long time.
Hints for the Installation of Hard Drives with Data
Important: If you plan to remove hard drives from one system to install them into

EN 17
another system, save all data onto a seperate drive.
• HarddriveswhichcontaindataandandwerenotusedinanotherRAIDsys-
temorinanotherharddriveenclosure,canbeusedinSingleModeinmost
cases.Ifthatdoesnotworkfeelfreetocontactourservice.Inmanycasesthis
issueariseswhentheharddriveswereusedinasystemwithacontrollerthat
operatesinadifferentwaythanthecontrolleroftheQB-35U31R:Inthese
exceptional cases the data can not be used in the QB-35U31R.
• Please note: Do no format hard drives which contain important data and which
donothaveabackup–even if your operating system suggests it!
• Please note that hard drives which contain important data but can not be used
intheQB-35U31R(andthereforehavetobegivenup)havetobeformattedto
beincorporatedintoyourlesystem.Windowsonlyassignsdriveletterswhenit
ndsafunctioningpartition.You can only choose this way if you have a backup
which can be copied after formatting.
For further questions feel free to contact our service.
We recommend the following secure way for installing hard drives containing data:
1. Follow the instructions above (Setting the RAID-Mode; from 3.) and choose
SINGLEMODEbut.
2. Switchthedevicebackonandcheckthesettings.
3. .
4. Switch the device off with the main switch and install the hard drives now.
Technical Background
The Enclosure can be set up in a RAID mode even with no hard drives installed –
alhough it has to be connected to a PC. The important thing is that the device does
notrecognizeharddrivesaftertherstreboot(aftershuttingitdownwiththe
).Otherwisethepartitiontableswouldbereorgan-
isedandthedatacouldnotbereachedanymore.
This way does only make sense if:
• Youwanttousetheenclosureinsingle-modeandbesurethatyouwillnot
makeamistakeduringchangingthemodebyaccidentallychoosingthewrong
mode
• Youwanttoreinstallharddriveswhichhavebeenworkinginthesameenclo-
sure in an intact RAID and had been removed to change the position of the set
for example. This procedure is dangerous for important data!Saveyourdata
beforehandinanycaseandchoosethiswayonlytotrytosavetimewhencopy-
ingyourbackup.Wepointoutthismethodbecauseitgenerallyworksbutadvise
againstusingitbecausetheharddrivesmaynotbetakenbackintothecompos-
iteiftheharddrivesarenotputintotheslotcorrectlyorthecontrollercannot

EN 18
connecttheharddrivesforanyotherreason.
TheuseofaRAID-system–evenofaRAID1–doesnotmakeathought-through
databackupunneccassary.Important data should always be saved onto a seperate
drive and be stored away. Thenevenan“stampede”cangothroughyourworking
spaceandyoucanenjoythesight.Software-virusesareinterestingbythemselves
–unlessitjustencryptedyourRAID1andyourbackupwasalsoconnectedtoyour
computerandisnowalsoencrypted.Anice-smellingcupofcoffeecandestroya
system–withtwosystemsthisismuchlesslikely.Withtheseimageswewantto
illustratetheterm“DataLossduetoMechanicalInuences,Software-Inuencesor
FaultyOperation“andmakeclearthemeaningofagoodbackup.
Reading of Hard Drive Information
Tobeabletojudgethequalityofharddrives,usuallyso-calledSMART-techniques
are used. With RAID-systems the reading of SMART-information of the individual
hard drives is not readily possible. For the QB-35U31R the SMART-information of
therstharddriveofbothsetscanberead.
Secure Removing of the Hard Drive
The QB-35U31R is a USB hard drive enclosure and fromt the vantage point of
manyoperatingsystemsaremovabledisk.Pleaseexecute“SafeHardwareRemoval”
or“unmount”beforeturningofftheenclosureorpullingofthedatacable.Nor-
mallythis“unmounting”isdoneautomaticallybyshuttingdownyourPC,Notebook,
NAS,Router,MediaplayerorMac-Device.In a Standby-Mode, Energy-Saving-Mode,
“Quickstart-Standby” etc. a removable disk might not be “safely removed” and
disconnectingthedatacableleadstodataloss–evenifyouthinkyoursystemis
“off”.WerecommendtouncoupleUSBdrivesfromtheactivelesystemwiththe
neccessarycare.ThismeansbeforeyoushutdownyourPC–ifyouwanttodiscon-
nect the cable.

EN 19

EN 20
Initialising, Partitioning and Formatting
Windows
1. Right-Clickon“This PC” icon and select the “Manage” column.
2. Select “Disk Management”andyouwillseeyourdriveshow“Not initialised”
and “Unallocated”.
3. Right-ClickontheredSymbolandselect“Initialise Disk”.
4. Select “GPT”mode.ThenpressOKbuttonnishtheinitialisingprocedure.
Table of contents
Other Fantec Enclosure manuals

Fantec
Fantec QB-35US3R User manual
Fantec
Fantec MB-X10U31 User manual

Fantec
Fantec MD-25US User manual

Fantec
Fantec DB-AluAir U2e User manual

Fantec
Fantec DB-ALU2e User manual

Fantec
Fantec ALU-25C31 User manual

Fantec
Fantec DB-ALU3e User manual

Fantec
Fantec QB-35US3R+AES User manual

Fantec
Fantec QB-X8US3-6G User manual

Fantec
Fantec ALU-25U31C User manual

Fantec
Fantec DB-ALU2 User manual

Fantec
Fantec QB-X8US3R User manual

Fantec
Fantec MR-25D User manual
Fantec
Fantec SQ-35RU3e User manual

Fantec
Fantec QB-35US3R User manual

Fantec
Fantec DB-ALU3e User manual
Fantec
Fantec QB-35US3R User manual

Fantec
Fantec ER-35U3-6G User manual

Fantec
Fantec DB-R35DUE User manual
Fantec
Fantec MB-X5U31H User manual