manuals.online logo
Brands
  1. Home
  2. •
  3. Brands
  4. •
  5. Far Tools
  6. •
  7. Power Screwdriver
  8. •
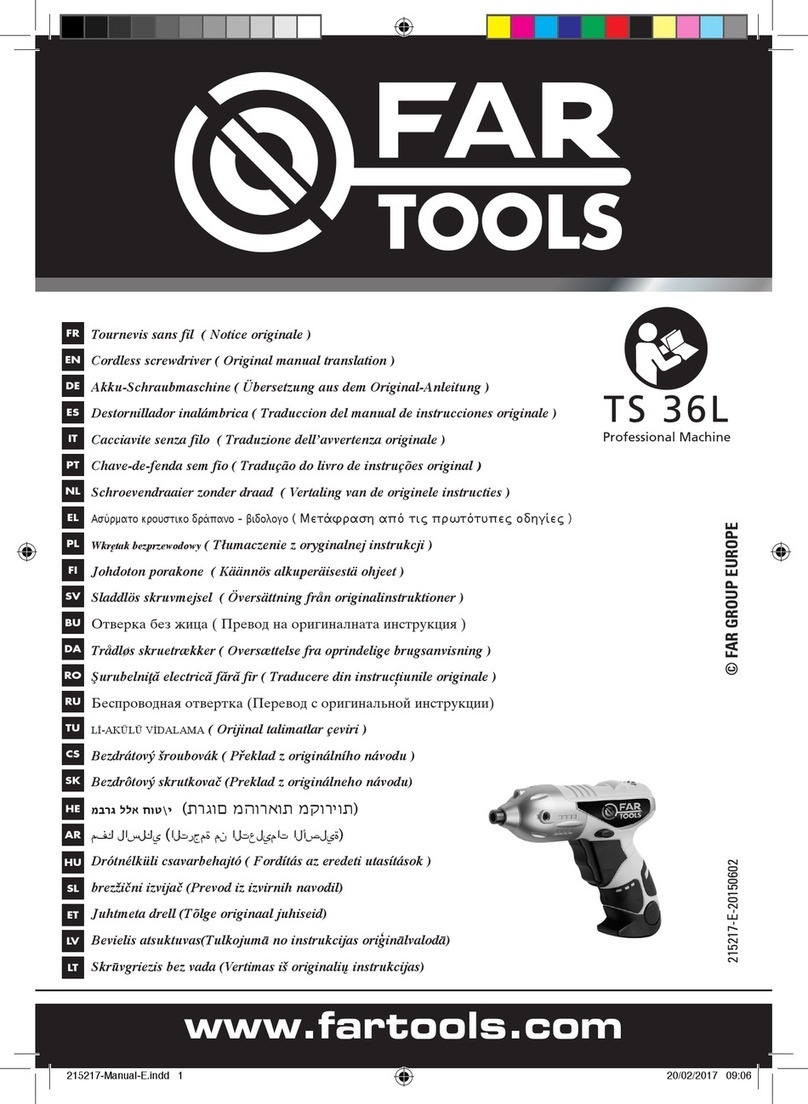
  9. Far Tools LM 144C Use and care manual

Far Tools LM 144C Use and care manual

215519-4-20161110 ©FAR GROUP EUROPE
Professional Machine
LM 144C
www.fartools.com
FR
EN
DE
ES
IT
PT
NL
EL
PL
FI
SV
BU
DA
RO
RU
TU
CS
SK
HE
AR
HU
SL
ET
LV
LT
Perceuse visseuse dévisseuse sans fil (Notice originale)
Cordless drill (Original manual translation)
Schnurlose Bohrmaschine (Übersetzung aus dem Original-Anleitung)
Taladradora inalámbrica (Traduccion del manual de instrucciones originale)
Trapanzo senza fili (Traduzione dell’avvertenza originale)
Furadora sem fio (Tradução do livro de instruções original)
Draadloze boormachine (Vertaling van de originele instructies)
Ασύρµατo κρoυστικo δράπανo - βιδoλoγo (Μετάφραση από τις πρωτότυπες οδηγίες)
Wiertarka przenosna (Tłumaczenie z oryginalnej instrukcji)
Johdoton porakone (Käännös alkuperäisestä ohjeet)
Sladdlös borrmaskin (Översättning från originalinstruktioner)
Ударно-пробивна машина (Превод на оригиналната инструкция)
Trådløs boremaskine/skruetrækker (Oversættelse fra oprindelige brugsanvisning)
Maşină electrică fără fir de găurit şi înşurubat /deşurubat (Traducere din instrucțiunile originale)
Беспроводной гайковерт (Перевод с оригинальной инструкции)
Vidalı vidasız kablosuz matkap (Orijinal talimatlar çeviri)
Vrtačka uzavíračka otevíračka bezdrátová (Překlad z originálního návodu)
Bezdrôtová skrutkovacia-odskrutkovacia vŕtačka (Preklad z originálneho návodu)
יטוחלא גרוב חותיפו הגרבהל חדקמ (תרגום מהוראות מקוריות)
كلس نودب ةبلوللّا لحو ةبلولو بقث ةلآ (الترجمة من التعليمات الأصلية)
Önmetsző csavarbehajtó fúrógép (Fordítás az eredeti utasítások)
Akumulatorski vrtalnik vijačnik (Prevod iz izvirnih navodil)
Juhtmeta drell (Tõlge originaal juhiseid)
Bevielės prisukamos ir atsukamos gręžimo staklės (Tulkojumā no instrukcijas oriģinālvalodā)
Urbis saskrūvēšanai un atskrūvēšanai bez vada (Vertimas iš originalių instrukcijas)
215519-4-Manual-F.indd 1 30/03/2018 09:19
Cet outil sert à visser et dévisser librement, sans être relié à une prise de
courant, mais sert également à percer dans le bois, le plastique et le métal, avec des forets
adaptés.
• Pour visser ou dévisser, il faut insérer un embout de vissage adapté à la forme de la vis dans le mandrin.
• Les vitesses mécaniques, si votre machine en est équipée, ont le rôle d’une boite de vitesse:
Vitesse lente = couple maxi ( force ) - utilisation en fonction vissage
Vitesse élevée = couple réduit - utilisation en fonction perçage
• Plus on appuie sur l’interrupteur variateur et plus la vitesse de rotation du mandrin augmente.
• Le réglage de couple, si votre machine en est équipée, permet apres sélection de celui ci, de faire débrayer le moteur ( arrêt
de la fonction vissage ) pour une force de serrage correspondante.
Ceci permet de visser toujours à une même profondeur et évite de détériorer le support. Très utile pour le vissage de plaques
de placoplâtre ou l’assemblage de stratifié par exemple.
• Adapter la vitesse de rotation du mandrin au diamètre du foret:
- Petit diamètre = grande vitesse
- Gros diamètre = petite vitesse
La fonction percussion, si votre machine en est équipée, permet de percer dans les matériaux (pierre, béton, brique ...).
La machine doit être munie d’un foret à béton avec extrémité en carbure.
• Il existe différents types de forets:
- Foret à bois ( pour percer dans le bois)
- Foret à métaux ( pour percer dans le métal et le plastique)
- Foret à béton ( pour percer dans la maçonnerie)
• Il existe différents types de chargeur:
- rapide = maxi 1 heure
- lent = entre 3 et 5 heures
Pour une optimisation du temps de travail, 2 batteries sont recommandées.
• Certaines visseuses sont équipées de batteries rotatives ( exemple : 180 ° ), afin d’optimiser l’équi-
librage et d’accéder plus facilement à la zone de travail.
• Le niveau, si votre machine en est équipée, permet de travailler perpendiculairement sur une
surface verticale.
• L’affichage digital, si votre machine en est équipée, permet de lire les réglages pré selectionnnés
manuellement ( par exemple, la vitesse de rotation )
• La fonction éclairage, si votre machine en est équipée, permet un confort visuel en milieu obscur.
• Le laser, si votre machine en est équipée, permet de projeter un faisceau matérialisant le passage
de l’outil.
• La fonction test de la charge de la batterie vous permet de savoir le niveau d’énergie restant dans
la batterie.
FICHE CONSEIL
PERCEUSE SANS FIL
FR
xdf
215519-4-Manual-F.indd 2 30/03/2018 09:19
Deze tool wordt gebruikt om vast en draai vrij, zonder te zijn aangesloten op een stroombron
stroom, maar ook dient om het boren in hout, kunststof en metaal, met geschikte bossen.
• Om schroef-of los te draaien, plaats een hulpmiddel beetje aangepast aan de vorm van de doorn in de schroef.
• Mechanische versnellingen, als uw machine is uitgerust, hebben de rol van een versnellingsbak:
Langzame snelheid = maximumkoppel (kracht) - gebruik schroef functie
= Hoge snelheid laag koppel - gebruik boorfunctie
• Meer indrukken van de schakelaar drive en de rotatiesnelheid van de doorn toeneemt.
• Het koppel instelling als uw machine is uitgerust, maakt selectie mogelijk na deze, om de motor (Zaak schroeven functie)
los om een kracht overeenkomstige aanscherping.
Dit kan altijd schroef dezelfde diepte en voorkomt schade aan de vervoerder. Zeer nuttig voor schroeven gipsplaat of assem-
blage van laminaat, bijvoorbeeld.
• Pas de snelheid van de rotatie van de doorn boordiameter:
- Kleine diameter hoge snelheid =
- Grote diameter = lage snelheid
Percussie functie, indien het apparaat is uitgerust, maakt het boren in materialen (steen, beton, baksteen, ...).
De machine moet uitgerust zijn met een steenboor met carbide tip.
• Er zijn verschillende soorten oefeningen:
- Houtboren (voor het boren in hout)
- Metaal boor (voor het boren in metaal en kunststof)
- Betonboren (voor het boren in metselwerk)
• Er zijn verschillende soorten van de lader:
- Rapid = max 1 uur
- Slow = tussen 3 en 5 uur
Voor optimalisatie van de arbeidstijd, worden 2 batterijen aanbevolen.
• Sommige schroevendraaiers zijn voorzien van roterende batterijen (bijvoorbeeld 180 °) om de
balans en gemakkelijker toegang tot de werkplek te optimaliseren.
• Het niveau, indien het apparaat is uitgerust, kan verticaal werken op een verticaal oppervlak.
• De digitale display, als uw machine is uitgerust, kan handmatig worden pre selectionnnés instel-
lingen lezen (bijvoorbeeld snelheid)
• De verlichting functie, indien het apparaat is uitgerust, maakt visueel comfort in een donkere
omgeving.
• De laser, als uw machine is uitgerust, staat het projecteren van een bundel materialiseren de
passage van de tool.
• De test batterij kunt u het niveau van de macht van de batterij te leren kennen.
TIP BLAD
SNOERLOZE BOOR
NL
215519-4-Manual-F.indd 3 30/03/2018 09:19
This tool enables you to screw and unscrew without needing to be anywhere near a mains
source, and to drill into wood plastic and metal, using the suitable drill bits.
• To screw or unscrew, you simply insert a screwdriver bit that fits the shape of the screw into the chuck.
• The mechanical speeds, if your machine has them, function like a gear box:
Slow speed (to be used for the screwdriver function) = maximum torque (force).
High speed (to be used for drilling) = reduced torque.
• The harder you press the trigger button, the faster the chuck rotates.
• The torque adjustment, if your machine is fitted with this, means that you can set the required torque, by disengaging the
motor (stopping the screwdriver function).
This means that you can screw to a uniform depth, without damaging the material you are screwing into. Very useful for
screwing into plasterboard or laminates, for example.
• Adapt the rotation speed of the chuck to the diameter of the drill:
- Small diameter = high speed
- Large diameter = low speed.
The impact function, if your machine has it, means that you can drill into building materials, for example: stone, concrete,
brick... The machine must be fitted with a masonry drill. (carbide tip)
• There are a number of different drill types:
- Wood drill (for drilling into wood)
- Metal drill (for drilling into metal and plastic)
- Masonry drill (for drilling into concrete and brick)
• There are various types of battery charger:
- rapid = max. 1 hour
- slow = between 3 and 5 hours
To optimise your working time, it is recommended that you use 2 batteries.
• Certain electric screwdrivers have rotary batteries (for example: 180°), in order to improve the
balance of the tool and make it easier to reach certain positions.
• The level gauge, if your machine is fitted with one, makes it possible to ensure that you are working
perpendicular to a vertical surface.
• The digital display, if your machine has one, shows the preselected settings (for example, rotation
speed)
• The lighting function, if your machine has one, makes it more comfortable to work with in dark
environments.
• The laser, if your machine has one, produces a beam of light which shows you where the tool will
go.
• The battery charge test function tells you how much energy is left in the battery.
ADVICE SHEET
CORDLESS DRILL
EN
215519-4-Manual-F.indd 4 30/03/2018 09:19
Esta herramienta sirve para atornillar y destornillar libremente, sin estar conectado a ninguna
toma de corriente, pero también, con brocas adaptadas, sirve para taladrar en la madera, el
plástico y el metal.
• Para atornillar o destornillar hay que insertar en el mandril una boquilla de atornillado adaptada
a la forma del tornillo.
• Las velocidades mecánicas, si su máquina está equipada con esta función, desempeñan la función de una caja de cambios:
Velocidad lenta (utilizar según el atornillado) = par máximo (fuerza)
Velocidad elevada (utilizar según el taladrado) = par reducido
• Cuanto más se pulsa el interruptor variador, más aumenta la velocidad de rotación del mandril.
• El ajuste de par, si su máquina está equipada con esta función, permite, después de haberlo seleccionado, desembragar el motor
(parada de la función atornillado) para obtener una fuerza de atornillado adecuada. Esto permite atornillar siempre hasta una
misma profundidad evitando así el deterioro del soporte. Muy útil por ejemplo para el atornillado de placas de yeso o el ensamblaje
de laminado.
• Adaptar la velocidad de rotación del mandril al diámetro de la broca:
- Diámetro pequeño = velocidad elevada
- Gran diámetro = pequeña velocidad.
La función percusión, si su máquina está equipada con esta función, permite por ejemplo taladrar los siguientes materiales:
piedra, hormigón, ladrillo ... La máquina tiene que estar equipada con una broca para el hormigón. (punta de carburo)
• Existen diferentes tipos de brocas:
- Brocas para la madera (para taladrar en la madera)
- Brocas para el metal (para taladrar en el metal y el plástico)
- Brocas para hormigón (para taladrar en la mampostería)
• Existen diferentes tipos de cargadores:
- rápido = como máximo 1 hora
- lento = entre 3 y 5 horas
Para una optimación del tiempo de trabajo, se recomienda el uso de 2 baterías.
• Determinados atornilladores están equipados con baterías rotativas (por ejemplo: 180 °), con el fin
de optimar el equilibrado y de acceder más fácilmente a la zona de trabajo.
• El nivel, si su máquina está equipada con esta función, permite trabajar perpendicularmente en una
superficie vertical.
• La visualización digital, si su máquina está equipada con esta función, permite leer los ajustes pre-
seleccionados manualmente (por ejemplo, la velocidad de rotación)
• La función iluminación, si su máquina está equipada con esta función, ofrece un confort visual en los
lugares oscuros.
• El láser, si su máquina está equipada con esta función, permite proyectar un haz que materializa el
paso de la herramienta.
• La función prueba de la carga de la batería le permite conocer el nivel de energía de la batería.
FICHA DE CONSEJOS
TALADRO ATORNILLADOR
ES
215519-4-Manual-F.indd 5 30/03/2018 09:19
Questo utensile serve ad avvitare e svitare liberamente, senza essere legati ad una presa di
corrente, ma serve anche a forare il legno, la plastica e il metallo, con delle punte specifiche.
• Per avvitare o svitare, occorre inserire una punta a cacciavite adattata alla forma della vite nel mandrino.
• Le velocità meccaniche, se la vostra macchina ne ha, hanno il ruolo di cambio:
Velocità lenta (utilizzare in funzione avvitamento) = coppia massima (forza)
Velocità elevata (utilizzare in funzione foratura) = coppia ridotta.
• Più si preme sull’interruttore variatore e più la velocità di rotazione del mandrino aumenta.
• La regolazione della coppia, se la vostra macchina ne ha una, permette, dopo averla selezionata, di disinnestare il motore
(arresto della funzione avvitamento) per una forza di serraggio corrispondente. Ciò permette di avvitare sempre alla stessa
profondità ed evita di danneggiare il supporto. Molto utile per avvitare le lastre di cartongesso o per esempio assemblare gli
stratificati.
• Adattare la velocità di rotazione del mandrino al diametro della punta:
- Piccolo diametro = grande velocità
- Grande diametro = piccola velocità.
La funzione percussione, se la vostra macchina ne è munita, permette di forare i materiali, per esempio: pietra, cemento,
mattoni .... La macchina deve essere munita di una punta per cemento. (estremità in carburo)
• Esistono diversi tipi di punte:
- Punta per legno (per forare il legno)
- Punta per metalli (per forare il metallo e la plastica)
- Punta per cemento (per forare nella muratura)
• Esistono diversi tipi di caricatore:
- rapido = massimo 1 ora
- lento = tra 3 e 5 ore
Per un’ottimizzazione del tempo di lavoro, si consigliano 2 batterie.
• Alcune avvitatrici sono munte di batterie rotative (esempio: 180 °), per ottimizzare l’equilibratura
e accedere più facilmente alla zona di lavoro.
• La livella, se la vostra macchina ne ha una, permette di lavorare perpendicolarmente su una
superficie verticale.
• La visualizzazione digitale, se la vostra macchina ne ha una, permette di leggere le regolazioni
preselezionate manualmente (per esempio, la velocità di rotazione)
• La funzione illuminazione, se la vostra macchina ne ha una, permette un comfort visivo nell’os-
curità.
• Il laser, se la vostra macchina ne ha uno, permette di proiettare un fascio che materializza il pas-
saggio dell’utensile.
• La funzione test di carico della batteria permette di conoscere il livello d’energia che rimane nella
batteria.
SCHEDA CONSIGLIO
TRAPANO SENZA FILO
IT
215519-4-Manual-F.indd 6 30/03/2018 09:19
Esta ferramenta permite tanto aparafusar e desaparafusar livremente, sem ligação a uma toma-
da eléctrica, como também abrir orifícios em madeira, plástico e metal, com brocas adaptadas.
• Para aparafusar ou desaparafusar, inserir uma ponta de aperto adaptada à forma do parafuso no mandril.
• As velocidades mecânicas, se a sua máquina possuir esta função, actuam como uma caixa de velocidades:
Baixa velocidade (utilizar para o aparafusamento) = binário máximo (força)
Alta velocidade (utilizar para a perfuração) = binário reduzido.
• Quanto mais se pressiona o interruptor variador, maior é a velocidade de rotação do mandril.
• O ajuste do binário, se a sua máquina oferecer esta função, permite, após a sua selecção, desembraiar o motor (interrupção da
função de aparafusamento) para uma força de aperto correspondente. Isso permite aparafusar sempre com a mesma profundidade
e evita a deterioração do suporte. É um recurso muito útil para o aparafusamento de placas de placogesso ou a montagem de
estratificados, por exemplo.
• Adaptar a velocidade de rotação do mandril ao diâmetro da broca:
- Pequeno diâmetro = alta velocidade
- Grande diâmetro = baixa velocidade.
A função de percussão, se a sua máquina oferecer este recurso, permite abrir orifícios em materiais. Ex.: pedra, betão, tijolo,
etc. A máquina deve ser equipada com uma broca para betão (ponta de aço carbono)
• Existem diferentes tipos de brocas disponíveis:
- Broca para madeira (para abrir furos em madeira)
- Broca para metais (para perfurar metal e plástico)
- Broca para betão (para abrir furos em alvenaria)
• Existem diferentes tipos de carregador disponíveis:
- rápido = máx. de 1 hora
- lento = entre 3 e 5 horas
Para a optimização do tempo de trabalho, é recomendável possuir 2 baterias.
•Algumas aparafusadoras vêem equipadas com baterias rotativas (ex.: 180°), a fim de optimizar a
equilibragem e facilitar o acesso à zona de trabalho.
• O nível, se a sua máquina oferecer este recurso, permite operar perpendicularmente numa super-
fície vertical.
• O visor digital, se a sua máquina possuir, permite ler os ajustes pré-seleccionados manualmente (por
exemplo, a velocidade de rotação).
• A função de iluminação, se a sua máquina oferecer, permite um maior conforto visual em ambientes
escuros.
• El láser, si su máquina está equipada con esta función, permite proyectar un haz que materializa el
paso de la herramienta.
• La función prueba de la carga de la batería le permite conocer el nivel de energía de la batería.
FICHA CONSELHO
BERBEQUIM APARA SEM FIO
PT
215519-4-Manual-F.indd 7 30/03/2018 09:19
FIG. C
FIG. A
05
07
06
02
01
FIG. A
Contenu du carton
Inhoud van de doos
Conteúdo da caixa
Contenido de la caja
Contenuto della confezione
Contents of the box
03
215519-4-Manual-F.indd 8 30/03/2018 09:19
FIG. D
Vert / Green / Grün / Verde / Verde / Verde
Rouge / Red / Rot / Rojo / Vermelho / Rosso
01
02
01
02
1 h
215519-4-Manual-F.indd 9 30/03/2018 09:19
01
05
FIG. E
2
1
02
03
02
01
05 0->1500 min-1
0->400 min-1
1
2
0-400.min-1
0-1500.min-1
Variateur éléctronique
Elektronische regelaar
electrónica del inversor
eletrônica inversor
Variador electrónico
Electronic variable speed
215519-4-Manual-F.indd 10 30/03/2018 09:19
06
04
05
14
215519-4-Manual-F.indd 11 30/03/2018 09:19
01 Inter variateur de vitesse
02 Inverseur de sens
03 Batterie
04 -
05 Sélecteur de vitesse mécanique
06 Sélecteur de couple
07 Mandrin
08 -
09 -
10 -
11 -
12 -
13 -
01 Speed variator switch
02 Reversing device
03 Battery
04 -
05 Mechanical speed selector
06 Torque selector
07 Chuck
08 -
09 -
10 -
11 -
12 -
13 -
01 Charger la batterie
02 Montage et démontage de la batterie
01 Charging the battery
02 Mounting and removing the battery
01 -
02 -
01 -
02 -
L’utilisation d’accessoires adaptés et en bon état est
garant d’un fonctionnement optimal.
The use of suitable accessories in good condition will
ensure the machine operates optimally.
01 Batterie et chargeur 01 Battery and charger
01 Mise en marche, réglage de la vitesse
02 Utilisation des vitesses mécaniques
03 Vissage/dévissage
04 Réglage du couple
05 Fonction perçage
06 -
07 Contrôle de la charge de la batterie
08 -
09 -
10 -
11 -
12 -
13 -
14 Utilisation de la lumière
01 Start-up of the machine, adjusting the speed
02 Using the mechanical gears
03 Screwdriver
04 Adjustment of the torque
05 Drilling function
06 -
07 Checking battery charge
08 -
09 -
10 -
11 -
12 -
13 -
14 Use of the light
FR EN
Description et repérage des organes de la machine Description and location of machine parts
Contenu du carton Contents of box
Assemblage de la machine Assembling the machine
Fonctionnalité de la machine Functions of the machine
Réglages de la machine Settings of the machine
Entretien, recommandations et conseils Cleaning and maintenance and advice
FIG. A & B FIG. A & B
FIG. C FIG. C
FIG. D FIG. D
FIG. E FIG. E
FIG. F FIG. F
FIG. G FIG. G
Remplacement des consommables Replacing consumables
215519-4-Manual-F.indd 12 30/03/2018 09:19
01 Schalter/Drehzahlregler
02 Drehrichtungsschalter
03 Batterie
04 -
05 Mechanischer Drehzahlwählknopf
06 Drehmoment-Wahlschalter
07 Spannfutter
08 -
09 -
10 -
11 -
12 -
13 -
01 Interruptor variador de velocidad
02 Inversor de sentido
03 Batería
04 -
05 Selector mecánico de velocidad
06 Selector de par
07 Mandril
08 -
09 -
10 -
11 -
12 -
13 -
01 Batterie laden
02 Batterie ein- und ausbauen
01 Cambiar la batería
02 Montaje y desmontaje de la batería
01 -
02 -
01 -
02 -
Die Benutzung angemessener und einwandfreier
Zubehörteile ist Voraussetzung für ein einwandfreies
Ergebnis.
La utilización de accesorios adecuados y en buen
estado garantiza un funcionamiento óptimo
01 Batterie und Ladegerät 01 Batería y cargador
01 Einschalten, Drehzahl einstellen
02 Verwendung der mechanischen Drehzahlen
03 Ein-/Ausschrauben
04 Drehmoment einstellen
05 Bohrfunktion
06 -
07 Batterieladung prüfen
08 -
09 -
10 -
11 -
12 -
13 -
14 Benutzung der Beleuchtung
01 Puesta en macha, ajuste de la velocidad
02 Utilización de las velocidades mecánicas
03 Atornillado/desatornillado
04 Ajuste del par
05 Función taladrado
06 -
07 Control de la carga de la batería
08 -
09 -
10 -
11 -
12 -
13 -
14 Utilización de la luz
DE ES
Beschreibung und Kennzeichnung der Maschinenteile Descripción y localización de los elementos de la máquina
Inhalt der Verpackung Contenido del cartón
Zusammenbau der Maschine Ensamblaje de la máquina
Funktionen der Maschine Funcionalidad de la máquina
Einstellungen der Maschine Ajustes de la máquina
Batterie und Ladegerät Mantenimiento, recomendaciones y consejos
Auswechseln der Verschleißteile Cambio de los consumibles
FIG. A & B FIG. A & B
FIG. C FIG. C
FIG. D FIG. D
FIG. E FIG. E
FIG. F FIG. F
FIG. G FIG. G
215519-4-Manual-F.indd 13 30/03/2018 09:19
01 Interruttore variatore di velocità
02 Invertitore di direzione
03 Batteria
04 -
05 Selezionatore di velocità meccanico
06 Selezionatore di coppia
07 Mandrino
08 -
09 -
10 -
11 -
12 -
13 -
01 Interruptor variador de velocidade
02 Inversor de sentido
03 Bateria
04 -
05 Selector de velocidade mecânica
06 Selector de binário
07 Mandril
08 -
09 -
10 -
11 -
12 -
13 -
01 Caricabatteria
02 Montaggio e smontaggio della batteria
01 Carregar a bateria
02 Montagem e desmontagem da bateria
01 -
02 -
01 -
02 -
L’utilizzazione di accessori adatti e il buono stato
garantiscono un funzionamento ottimale.
A utilização de acessórios adaptados e em boas
condições é a garantia de um funcionamento ideal
01 Batteria e caricatore 01 Bateria e carregador
01 Avvio, regolazione della velocità
02 Utilizzazione delle velocità meccaniche
03 Avvitamento/svitamento
04 Regolazione della coppia
05 Funzione trapanatura
06 -
07 Controllo del carico della batteria
08 -
09 -
10 -
11 -
12 -
13 -
14 Utilizzazione della luce
01 Accionamento, ajuste da velocidade
02 Utilização das velocidades mecânicas
03 Aparafusamento/desaparafusamento
04 Ajuste do binário
05 Função de perfuração
06 -
07 Controlo de carga da bateria
08 -
09 -
10 -
11 -
12 -
13 -
14 Utilização da iluminação
IT PT
Descrizione e localizzazione degli organi della macchina Descrição e identificação dos órgãos da máquina
Contenuto della scatola Conteúdo da caixa
Assemblaggio della macchina Montagem da máquina
Funzionalità della macchina Funcionalidade da máquina
Regolazioni della macchina Ajustes da máquina
Manutenzione, raccomandazioni e consigli Manutenção preventiva, recomendações e conselhos
Sostituzione dei pezzi di ricambio Substituição de consumíveis
FIG. A & B FIG. A & B
FIG. C FIG. C
FIG. D FIG. D
FIG. E FIG. E
FIG. F FIG. F
FIG. G FIG. G
215519-4-Manual-F.indd 14 30/03/2018 09:20
01 Schakelaar toerenregelaar
02 Omkeerschakelaar
03 Batterij
04 -
05 Mechanische snelheidsschakelaar
06 Koppelschakelaar
07 Spaninrichting
08 -
09 -
10 -
11 -
12 -
13 -
01 Διακόπτης ρύθμισης ταχύτητας
02 Διακόπτης αντιστροφής κατεύθυνσης
03 Μπαταρία
04 -
05 Επιλογέας μηχανικής ταχύτητας
06 Επιλογέας ζευγαριού
07 Τσοκ
08 -
09
10
11
12
13
01 De batterij opladen
02 Montage en demontage van de batterij
01 Φόρτιση της μπαταρίας
02 Εξαγωγή και επανατοποθέτηση της μπαταρίας
01 -
02 -
01
02
Het gebruik van aangepaste accessoires in goede
staat waarborgt een optimale werking
01 Batterij en lader 01 Battery and charger
01 Aanzetten, afstellen van de versnelling
02 Gebruik van de mechanische versnellingen
03 Vastschroeven/Losschroeven
04 Afstelling van het koppel
05 Boorfunctie
06 -
07 Controle van de lading van de batterij
08 -
09 -
10 -
11 -
12 -
13 -
14 Gebruik van het licht
01 Θέση σε λειτουργία, ρύθμιση ταχύτητας
02 Χρήση των μηχανικών ταχυτήτων
03 Βίδωμα/ξεβίδωμα
04 Ρύθμιση του ζεύγους
05 Διάτρηση
06 -
07 Έλεγχος φόρτισης της μπαταρίας
08
09
10
11
12
13
14
NL EL
Beschrijving en plaatsbepalingen
van de onderdelen van de machine περιγραφή και εντοπισμός
των οργάνων της μηχανής
Inhoud van het karton Περιεχόμενο χάρτινου κουτιού
Assemblage van de machine συναρμολόγηση της μηχανής
Functionaliteit van de machine λειτουργικότητα της μηχανής
Afstellingen van de machine
Onderhoud, aanbevelingen en raadgevingen
FIG. A & B FIG. A & B
FIG. C FIG. C
FIG. D FIG. D
FIG. E FIG. E
FIG. F FIG. F
FIG. G FIG. G
Vervanging van de accessoires
215519-4-Manual-F.indd 15 30/03/2018 09:20
01 Wyłącznik - regulator prędkości
02 Przełącznik kierunku
03 Akumulator
04 -
05 Przełącznik biegu
06 Regulator momentu
07 Głowica
08 -
09 -
10 -
11 -
12 -
13 -
01 Katkaisija nopeudenmuuntaja
02 Suunnanvaihtaja
03 Akku
04 -
05 Mekaaninen nopeudenvalitsin
06 Momentin valitsin
07 Istukka
08 -
09 -
10 -
11 -
12 -
13 -
01 Ładowarka akumulatora
02 Montaż i demontaż akumulatora
01 Akun laturi
02 Akun asennus ja ottaminen pois
01 -
02 -
01 -
02 -
Stosowanie dostosowanych akcesoriów w dobrym
stanie stanowi gwarancję optymalnego działania Sopivien ja hyväkuntoisten lisälaitteiden käyttö takaa
laitteen parhaan toiminnan.
01 Akumulator i ładowarka 01 Akku ja laturi
01 Uruchomienie, regulacja prędkości
02 Używanie biegów
03 Przykręcanie / odkręcanie
04 Regulacja momentu
05 Funkcja wiertarki
06 -
07 Kontrola naładowania akumulatora
08 -
09 -
10 -
11 -
12 -
13 -
14 Używanie oświetlenia
01 Käynnistys ja nopeudensäätö
02 Mekaanisten vaihteiden käyttö
03 Istukan toiminta
04 Momentin säätö
05 Porauskäyttö
06 -
07 Akun latauksen näyttö
08 -
09 -
10 -
11 -
12 -
13 -
14 Valon käyttö
PL FI
Opis i oznaczenie elementów urzadzenia Laitteen osien kuvaus ja sijainti
Zawartosc opakowania Laatikon sisältö
Montaz maszyny Laitteen asennus
Funkcje maszyny Laitteen käyttö
Regulacja maszyny Koneen säädöt
Konserwacja, zalecenia i rady Hoito, suosituksen ja ohjeet
FIG. A & B FIG. A & B
FIG. C FIG. C
FIG. D FIG. D
FIG. E FIG. E
FIG. F FIG. F
FIG. G FIG. G
Wymiana elementów zuzywajacych sie Kuluvien osien vaihto
215519-4-Manual-F.indd 16 30/03/2018 09:20
01 Brytare/ steglös varvtalsreglering
02 Riktningsomkopplare
03 Batteri
04 -
05 Manuell växelväljare
06 Momentväljare
07 Chuck
08 -
09 -
10 -
11 -
12 -
13 -
01 Прекъсвач, вариатор на скоростта
02 Инвертор на посоката
03 Батерия
04 -
05 Селектор на механичната скорост
06 Селектор на напречника
07 Бургия
08 -
09 -
10 -
11 -
12 -
13 -
01 Ladda batteriet
02 Montering och demontering av batteriet
01 Зареждане на батерията
02 Монтаж и демонтаж на батерията
01 -
02 -
01 -
02 -
Om man använder anpassade tillbehör av god
kvalitet garanteras optimal funktion
Използването на подходящите аксесоари
и в добро състояние гарантира оптимално
функциониране
01 Batteri och laddare 01 Батерия и зарядно устройство
01 Start, inställning av hastigheten
02 Användning av manuella växlar
03 Skruvning/lossande av skruvar
04 Inställning av moment
05 Borrfunktion
06 -
07 Kontroll av batteriladdningen
08 -
09 -
10 -
11 -
12 -
13 -
14 Användning av ljus
01 Стартиране, настройка на скоростта
02 Използване на механичните скорости
03 Завинтване/развинтване
04 Настройка на напречника
05 Функция пробиване на дупки
06 -
07 Контрол на зареждането на батерия
08 -
09 -
10 -
11 -
12 -
13 -
14 Използване на светлината
SV BU
Beskrivning och märkning av maskinens delar описание и местоположение на частите на машината
Innehåll i kartongen съдържание на кутията
Montering av maskinen сглобяване на машината
Maskinens funktion функциониране на машината
Maskinens inställningar Реглаж на машината
Rengöring och underhåll почистване и поддръжка
FIG. A & B FIG. A & B
FIG. C FIG. C
FIG. D FIG. D
FIG. E FIG. E
FIG. F FIG. F
FIG. G FIG. G
Byte av förbrukningsmedel подмяна на консумативите
215519-4-Manual-F.indd 17 30/03/2018 09:20
01 Kontakt hastighedsvælger
02 Omskifter
03 Batteri
04 -
05 Mekanisk hastighedsvælger
06 Momentvælger
07 Dorn
08 -
09 -
10 -
11 -
12 -
13 -
01 Întrerupător variator de viteză
02 Inversor de sens
03 Baterie
04 -
05 Selector de viteză mecanică
06 Selector de cuplu
07 Mandrină
08 -
09 -
10 -
11 -
12 -
13 -
01 Opladning af batteri
02 Montering og afmontering af batteri
01 Încărcarea bateriei
02 Montarea şi demontarea bateriei
01 -
02 -
01 -
02 -
Brug af velegnede tilbehørsdele i god stand sikrer en
optimal virkemåde. Utilizarea de accesorii adaptate şi în bună stare
reprezintă o garanţie pentru funcţionarea optimă
01 Batteri og oplader 01 Baterie şi încărcător
01 Opstart, indstilling af hastighed
02 Brug af mekaniske hastigheder
03 Skruning/afskruning
04 Indstilling af moment
05 Borefunktion
06 -
07 Kontrol af batteriets opladning
08 -
09 -
10 -
11 -
12 -
13 -
14 Brug af lys
01 Punerea în funcţiune, reglarea vitezei
02 Utilizarea vitezelor mecanice
03 Înşurubare/deşurubare
04 Reglarea cuplului
05 Funcţie de peforare
06 -
07 Controlul nivelului de încărcare al bateriei
08 -
09 -
10 -
11 -
12 -
13 -
14 Utilizarea luminii
DA RO
Beskrivelse og nummerering af maskinens organer Descrierea si identificarea organelor de masina
Papkassens indhold Continutul cartonului
Samling af maskinen Asamblarea masinii
Maskinens virkemåde Functionarea masinii
Maskinens indstillinger Reglajele masinii
Vedligeholdelse, anbefalinger og gode råd Curatare si întretinere
FIG. A & B FIG. A & B
FIG. C FIG. C
FIG. D FIG. D
FIG. E FIG. E
FIG. F FIG. F
FIG. G FIG. G
Udskiftning af forbrugsartikler Inlocuirea consumabilelor
215519-4-Manual-F.indd 18 30/03/2018 09:20
01 Переключатель с вариатором скорости
02 Переключатель направления
03 Батарея
04 -
05 Механический переключатель скорости
06 Переключатель момента
07 Патрон
08 -
09 -
10 -
11 -
12 -
13 -
01 Hız değiştirici anahtar
02 Yön değiştirici
03 Batarya
04 -
05 Mekanik hız selektörü
06 Tork selektörü
07 Mandren
08 -
09 -
10 -
11 -
12 -
13 -
01 Зарядка батареи
02 Монтаж и демонтаж батареи
01 Bataryayı şarj edin
02 Bataryayı takıp çıkarmak
01 -
02 -
01 -
02 -
Использование соответствующих и находящихся
в хорошем состоянии аксессуаров является
гарантом оптимального функционирования
Uygun ve iyi durumdaki aksesuarların kullanımı en iyi
işleyişin güvencesidir.
01 Батарея и загрузочное устройство 01 Batarya ve şarj cihazı
01 Запуск, регулировка скорости
02 Использование механических скоростей
03 Привинчивание-отвинчивание
04 Регулировка момента
05 Функция сверления
06 -
07 Контроль зарядки батареи
08 -
09 -
10 -
11 -
12 -
13 -
14 Использование света
01 Çalıştırma, hız ayarı
02 Mekanik hızların kullanılması
03 Vidalama/vida sökme
04 Tork ayarı
05 Delme işlevi
06 -
07 Bataryanın şarj durumunun kontrol edilmesi
08 -
09 -
10 -
11 -
12 -
13 -
14 Işığın kullanılması
RU TU
описание и маркировка элементов машины Makinenin organlarının tasviri ve bulunması
содержимое коробки Kartonun içerigi
сборка машины Makinenin montajı
функциональность машины Makinenin kullanıslılıgı
Регулировка машины Makinenin ayarları
Техобслуживание, рекомендации и советы Temizlik ve bakım
FIG. A & B FIG. A & B
FIG. C FIG. C
FIG. D FIG. D
FIG. E FIG. E
FIG. F FIG. F
FIG. G FIG. G
замена расходных материалов Tüketim malzemelerinin degistirilmesi
215519-4-Manual-F.indd 19 30/03/2018 09:20
01 Spínač rychlosti
02 Přepínač směru
03 Baterie
04 -
05 Selektor mechanické rychlosti
06 Selektor řezu
07 Razník
08 -
09 -

10 -
11 -
12 -
13 -
01 Spínač rýchlosti
02 Prepínač smeru
03 Batérie
04 -
05 Selektor mechanickej rýchlosti
06 Selektor rezu
07 Razidlo
08 -
09 -
10 -
11 -
12 -
13 -
01 Nabíjení baterie
02 Montáž a demontáž baterie
01 Nabíjanie batérie
02 Montáž a demontáž batérie
01 -
02 -
01 -
02 -
Použití adaptovaného příslušenství v dobrém stavu je
zárukou optimálního fungování Použitie adaptovaného príslušenstva v dobrom stave je
zárukou optimálneho fungovania.
01 Baterie a nabíječka 01 Batéria a nabíjačka
01 Spuštění, nastavení rychlosti
02 Použití mechanických rychlostí
03 Navrtávání/odvrtávání
04 Nastavení řezu
05 Funkce provrtání
06 -
07 Kontrola nabití baterie
08 -
09 -
10 -
11 -
12 -
13 -
14 Použití světla
01 Spustenie, nastavenie rýchlosti
02 Použitie mechanických rýchlostí
03 Navrtávanie/odvrtávanie
04 Nastavenie rezu
05 Funkcia prevŕtania
06 -
07 Kontrola nabitia batérie
08 -
09 -
10 -
11 -
12 -
13 -
14 Použitie svetla
CS SK
Popis a oznacení soucástí stroje Popis a oznacenie súcastí stroja
Obsah krabice Obsah krabice
Montáž stroje Montáž stroja
Chod stroje Chod stroja
Serízení stroje Nastavenie stroja
Cištení a údržba Cistenie a údržba
FIG. A & B FIG. A & B
FIG. C FIG. C
FIG. D FIG. D
FIG. E FIG. E
FIG. F FIG. F
FIG. G FIG. G
Výmena komponentu Výmena komponentov
215519-4-Manual-F.indd 20 30/03/2018 09:20

Other Far Tools Power Screwdriver manuals

Far Tools CD 720 User manual

Far Tools

Far Tools CD 720 User manual

Far Tools LI 55NB Use and care manual

Far Tools

Far Tools LI 55NB Use and care manual

Far Tools KB 180P Use and care manual

Far Tools

Far Tools KB 180P Use and care manual

Far Tools TC 40S Use and care manual

Far Tools

Far Tools TC 40S Use and care manual

Far Tools LI 144B Use and care manual

Far Tools

Far Tools LI 144B Use and care manual

Far Tools one CD140C Operation instructions

Far Tools

Far Tools one CD140C Operation instructions

Far Tools LI 12C Use and care manual

Far Tools

Far Tools LI 12C Use and care manual

Far Tools TS 36LB Use and care manual

Far Tools

Far Tools TS 36LB Use and care manual

Far Tools TS 36L Operation instructions

Far Tools

Far Tools TS 36L Operation instructions

Far Tools KB 180 User manual

Far Tools

Far Tools KB 180 User manual

Far Tools CDL 18E Use and care manual

Far Tools

Far Tools CDL 18E Use and care manual

Far Tools one LI 144 Use and care manual

Far Tools

Far Tools one LI 144 Use and care manual

Far Tools CDL 18F Use and care manual

Far Tools

Far Tools CDL 18F Use and care manual

Far Tools X-FIT XF-Impact2 Use and care manual

Far Tools

Far Tools X-FIT XF-Impact2 Use and care manual

Far Tools One LI 180P Use and care manual

Far Tools

Far Tools One LI 180P Use and care manual

Far Tools LI 36 Use and care manual

Far Tools

Far Tools LI 36 Use and care manual

Far Tools LI 180B Use and care manual

Far Tools

Far Tools LI 180B Use and care manual

Far Tools one LI 180 Use and care manual

Far Tools

Far Tools one LI 180 Use and care manual

Far Tools CDL 14C Use and care manual

Far Tools

Far Tools CDL 14C Use and care manual

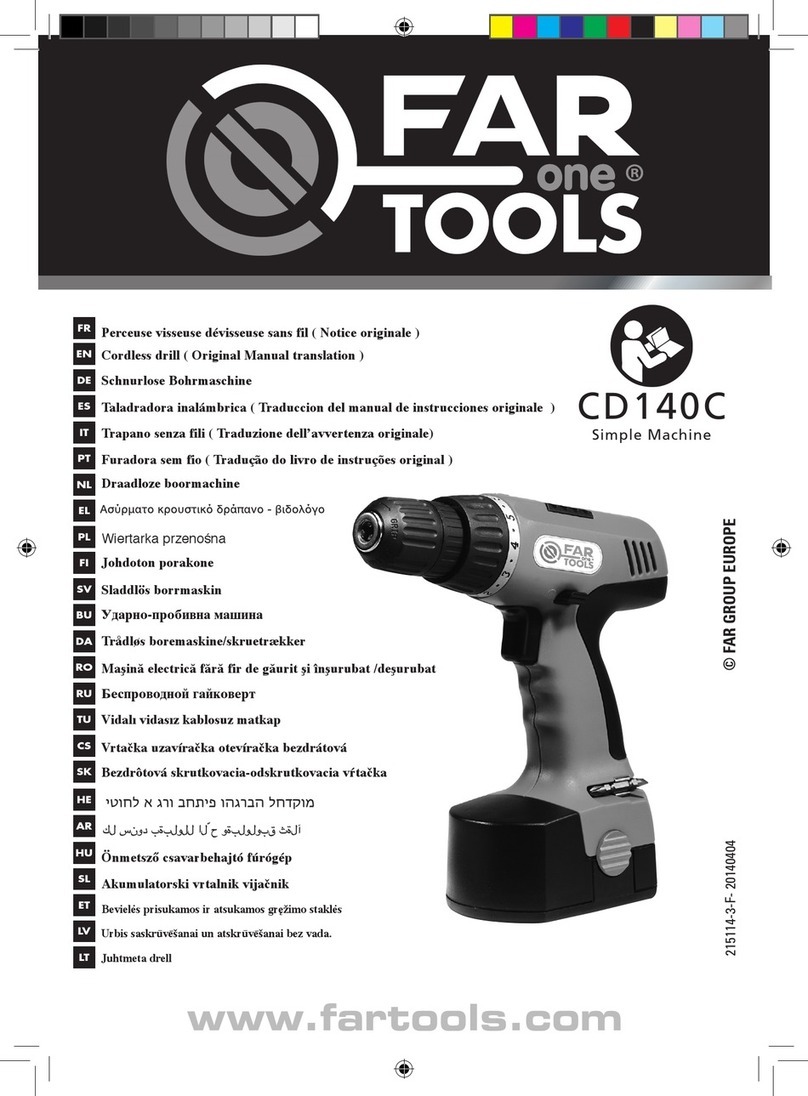
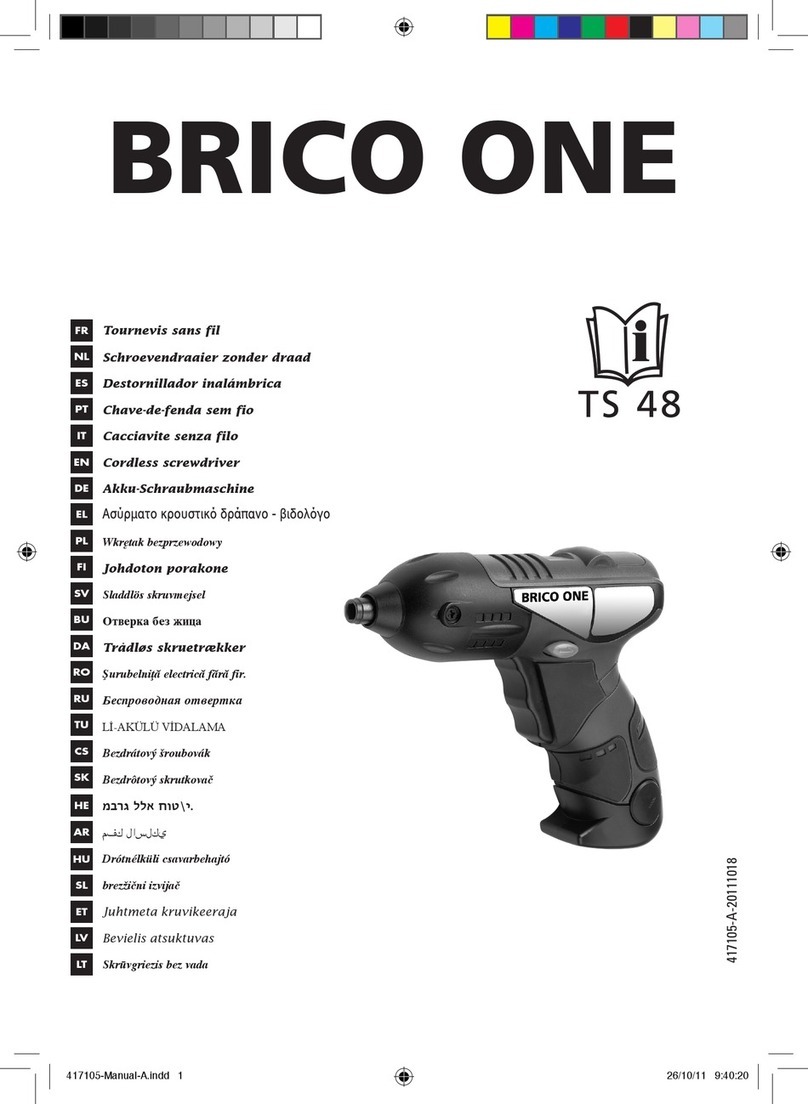
Far Tools BRICO ONE TS 48 User manual

Far Tools

Far Tools BRICO ONE TS 48 User manual

Far Tools TS 36LB Use and care manual

Far Tools

Far Tools TS 36LB Use and care manual

Far Tools LI 12B Use and care manual

Far Tools

Far Tools LI 12B Use and care manual

Far Tools ONE LI 108 User manual

Far Tools

Far Tools ONE LI 108 User manual

Far Tools BRICO ONE Operation instructions

Far Tools

Far Tools BRICO ONE Operation instructions

Popular Power Screwdriver manuals by other brands

Festool C 12 Li instruction manual

Festool

Festool C 12 Li instruction manual

Bosch IXO Original instructions

Bosch

Bosch IXO Original instructions

Atlas Copco ETD M 200 ABL Product instructions

Atlas Copco

Atlas Copco ETD M 200 ABL Product instructions

Black & Decker DP240 Original instructions

Black & Decker

Black & Decker DP240 Original instructions

Applifast Fein ASCM12 Series manual

Applifast

Applifast Fein ASCM12 Series manual

Bahco Torque Screwdrivers BE-6990-AH specification

Bahco

Bahco Torque Screwdrivers BE-6990-AH specification

RIDGID R6791 Operator's manual

RIDGID

RIDGID R6791 Operator's manual

Bosch IXO Professional Original instructions

Bosch

Bosch IXO Professional Original instructions

Makita DFL300F instruction manual

Makita

Makita DFL300F instruction manual

Bahco BCL31SD1 Original instructions

Bahco

Bahco BCL31SD1 Original instructions

Ryobi HP40L Operator's manual

Ryobi

Ryobi HP40L Operator's manual

Makita 6807 instruction manual

Makita

Makita 6807 instruction manual

Blaupunkt CD7010 Original instruction manual

Blaupunkt

Blaupunkt CD7010 Original instruction manual

Bauer 1894F-B Owner's manual & safety instructions

Bauer

Bauer 1894F-B Owner's manual & safety instructions

Parkside PASS 3.6 A1 Operation and safety notes

Parkside

Parkside PASS 3.6 A1 Operation and safety notes

Skil 2436 instructions

Skil

Skil 2436 instructions

Felisatti DCF10/10.8R operating instructions

Felisatti

Felisatti DCF10/10.8R operating instructions

Milwaukee M18 BLPD2-502X Original instructions

Milwaukee

Milwaukee M18 BLPD2-502X Original instructions

manuals.online logo
manuals.online logoBrands
  • About & Mission
  • Contact us
  • Privacy Policy
  • Terms and Conditions

Copyright 2025 Manuals.Online. All Rights Reserved.