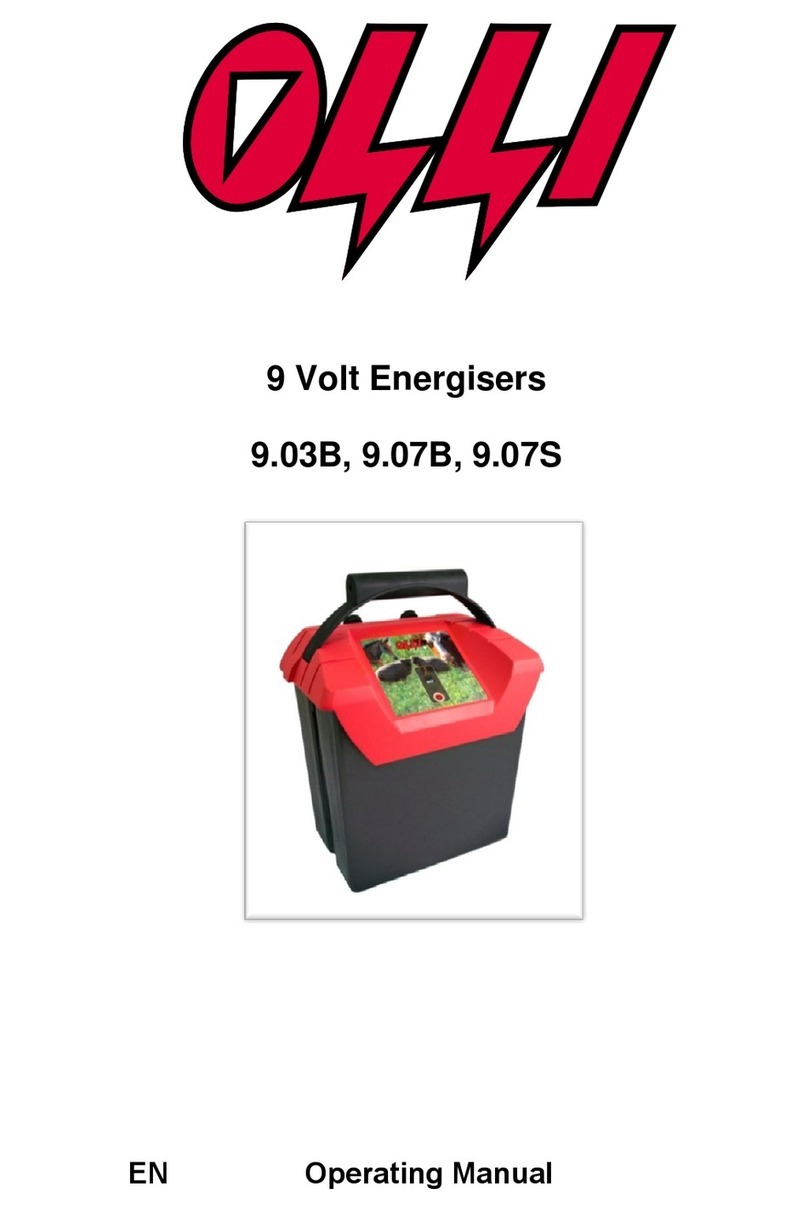
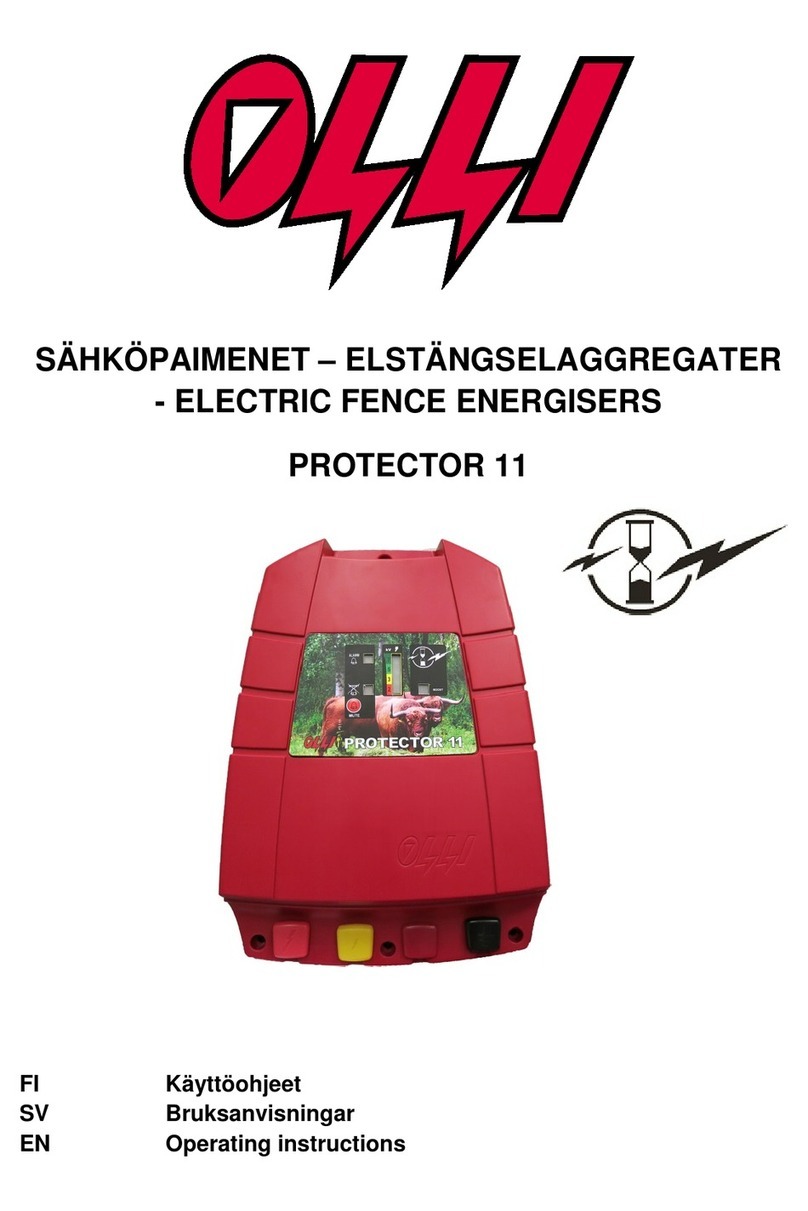
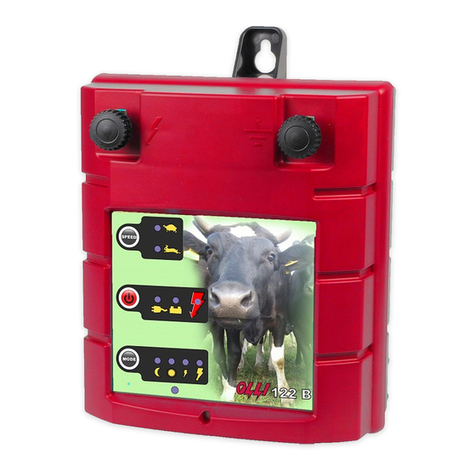
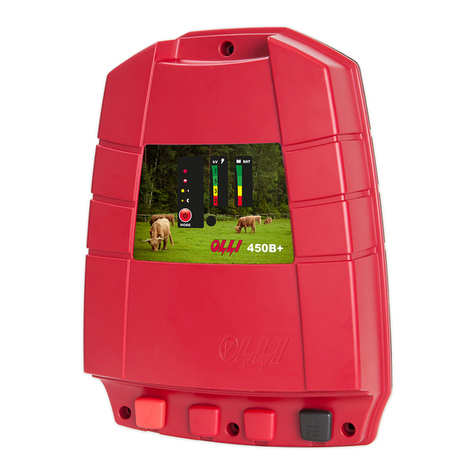
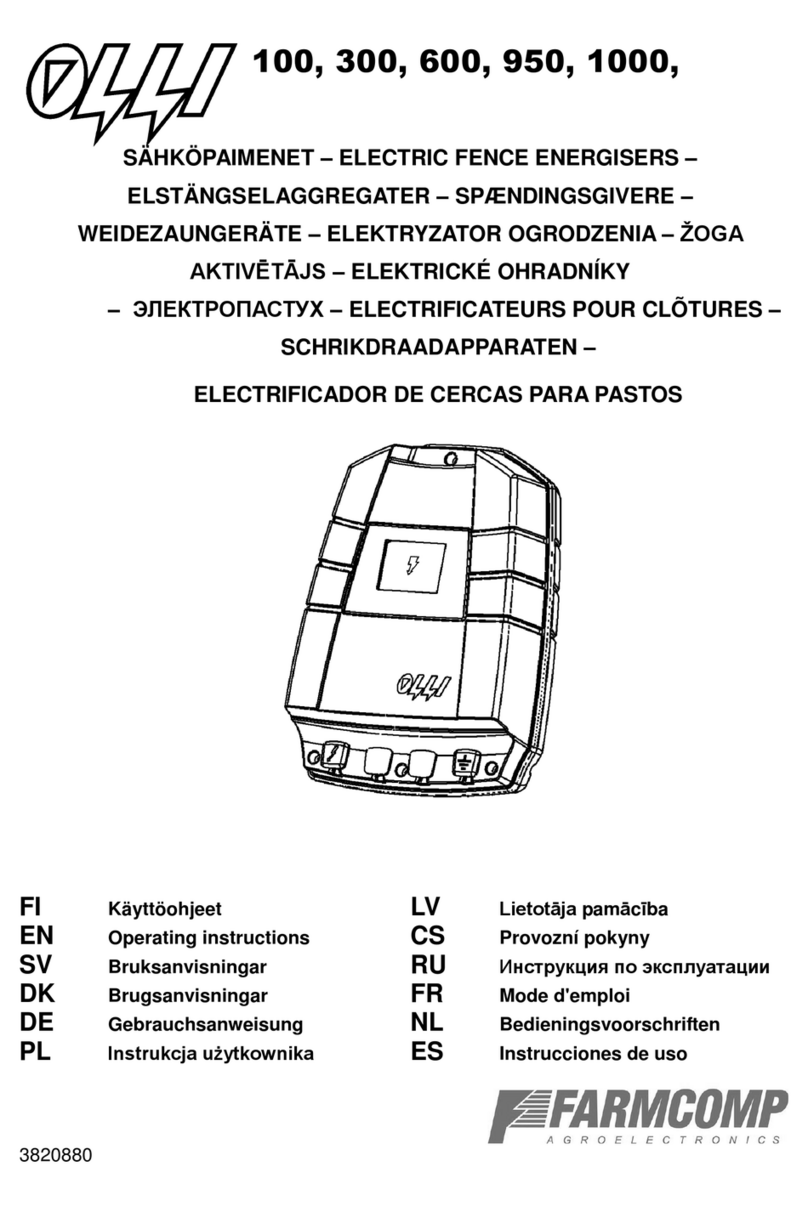
Farmcomp OLLI 180B User manual

180B 250B+
EN User's Guide
PL Instrukcja obsługi
DE Gebrauchsanweisung
CS Uživatelská příručka
ELECTRIC ENERGIZERS - ELEKTRYZATOR
OGRODZENIA –WEIDEZAUNGERÄTE –ELEKTRICKÉ
OHRADNÍKY


Contents:
OLLI 250B+ AND 180B USERS' GUIDE ................................................................4
INSTRUKCJA OBSŁUGI OLLI 180B ORAZ 250B+..............................................15
GEBRAUCHSANWEISUNG FÜR DIE OLLI 250B+ UND 180B...........................29
UŽIVATELSKÁ PŘÍRUČKA PRO OLLI 250B+ A 180B .........................................43

EN
4
OLLI 250B+ AND 180B USERS' GUIDE
Thank you for choosing the Olli fence energiser! Read these instructions carefully
before installing the device. For more information about electric fences, please
visit our internet pages at http://www.olli.fi
1. Contents of the delivery
- Olli fence energiser
- Connection cable to the fence
- Warning sign
- Users guide
Additionally you will need:
- Earth stakes with connection leads
- The fence itself with the required accessories
- Olli Digi Tester of Olli Super Tester to test the function of the fence
In case you have to install the fencer apart from the fence you need
- Special Olli high voltage cable to secure the connection between
energiser and the fence
2. Safety
IMPORTANT: Read the safety instructions!
The safe usage of an electric fence requires that the safety instructions are
always followed. The safety instructions are defined by the safety standards and
they are found in the chapter 9 of this guide. Please read them carefully!
IMPORTANT: The animals have to be taught to respect the fence.
The animal remembers the shock and learns to respect the fence. Especially
when an animal is taken into an electric fence for the first time, it has to be taught
to respect the fence by ensuring that it will touch the fence in a controlled situation
to connect the shock to the fence.
All Olli fence energisers fulfil the safety regulations that are defined for fence
energisers. However, an electric fence is never totally harmless. An animal that is
trapped in electric fence wires can be in danger of life and therefore the electric
fences must be supervised regularly.
The electric shock given by the fence can be dangerous for small children or
persons suffering from heart problems if they get trapped in electric fence wires.
Never work on the fence when the energiser is in on.

EN
5
3. Technical properties of the energisers OLLI 250B+, 180B
3.1. OLLI 180B indicator lights
The energiser has two indicator LED lights: The red pulse indicator and the
yellow low battery indicator that is located below the fence LED. The red light
blinks in the rhythm of the fence pulse. The yellow LED indicates the battery
status as follows:
Battery LED display
Battery
charge
Indication/Action
No light
50—100 %
Battery OK
Blinking with the
fence LED
Under 50 %
It would be a good idea to charge the
battery
Blinking with double
speed
Under 25 %
Charge the battery now
Continuous fast
blinking
Empty
The deep discharge protection is active.
Charge battery immediately to avoid
damage.
IMPORTANT: If the red pulse LED lights for a longer time before starting
pulsing, the energiser may have an operation problem. Disconnect the
battery, wait for a moment and start the energiser again. If the situation
repeats, deliver the energiser to service.
3.1.2. Using the OLLI 180 B with Olli solar panel
IMPORTANT: The full installation instruction is included the Olli solar panel
kit.
The 20 W Olli solar panel kit has a lead kit with battery clamps. Connect the
battery clamps of the energiser and the solar panel both to the poles of the
battery, the red marked connectors to the plus pole and the black marked
connectors to the minus pole.
The charging current flows now directly from the solar panel to the battery.
Disconnect the solar panel from the battery if the energiser is not being used for a
period of a week or more. If you discover that the battery has over heated due to
over charging, disconnect the solar panel from the battery and let the energiser
discharge the battery for a while before re-connecting the solar panel.
IMPORTANT: If you want to check the battery status in solar panel use, you
need to disconnect the solar panel or do the check when the panel is not

EN
6
charging. When the battery is being charged, the battery voltage can not be
used to indicate the charging state of the battery.
3.1.3. Connecting OLLI 180B to the fence
Push down the red button of the fence connector and push the stripped fence
connection lead end into the connector from below. Ensure the connection by
pulling the wire lightly. Install the earthing wire to the black earth connector in the
same way. The red fence connector is marked with a lightning symbol and the
black earth connector is marked with an earth symbol .
IMPORTANT: The fence voltage can be up to 10 000 Volt. Therefore all
connectors from the energiser to the fence must be mounted on fence
insulators or the connector cable shall be a special high voltage cable that
is designed for electric fence use, like Olli the high voltage cable. Normal
230 V installation cables shall not be used for fence installations.
3.2 OLLI 250B+
In the front panel you can find the indicator of the operation mode (1), power and
mode selection button (MODE, 2), light sensor (3), LED bar indicator for the
battery voltage (4) and a LED bar indicator for the fence voltage (5). The fence
voltage is shown in Kilovolts (1 kV = 1000V).
3.2.1. The operation modes of OLLI 250B+
The red LED indicator blinks at the symbol of the selected power mode. Change
mode by pushing shortly the MODE button. One push will move the selection to
the next one on the list. The modes are:

EN
7
Full power
Energy saving low power mode
Automatic day mode: Full power in day light and low power at night.
Automatic night mode: Full power at night and low power in day light.
No
light
Stand by mode: fence not electrified
A longer push of the MODE button switched the energiser to the stand by mode.
When you switch on the energiser with a sort push of the MODE button, it will
return to the mode that was active when the energizer was put to stand by. IF you
disconnect the battery, the energizer will operate in the mode that was active
before disconnecting the battery. The light sensor for the automatic modes is
located under the fence voltage LED bar. Dot not cover the sensor! In all modes
the energiser automatically adjusts the output according to the fence voltage.
Therefore the longest battery life will be reached with a short fence that has no or
little ground leaks.If the uppermost MODE LED lights for a longer time before
starting pulsing, the energiser may have an operation problem. Disconnect the
battery, wait for a moment and start the energiser again. If the situation repeats,
deliver the energiser to service.
3.2.2. Voltage display of OLLI 250B+
The energiser measures the fence voltage and blinks shortly the LED light that
indicates the fence voltage. (Approx. 7 kV green, 5 kV green, 3 kV yellow and 2
kV red, 1 kV = 1000 Volt). If none of the LEDs is blinking, the fence voltage may
be too low. Try selecting full power mode, and if that does not help, check and
repair the fence.
3.2.3. OLLI 250B+ battery display
Function
Battery
status
Message
Green (upper)
75—100 %
Battery OK
Green (lower)
50—75 %
Battery OK
Yellow
25—50 %
It would be a good idea to charge the
battery
Red
Under 25 %
Charge the battery now
Red blinking
Empty
The deep discharge protection is
active. Charge battery immediately to
avoid damage.

EN
8
When the battery is low, the MODE light is not on all time but is instead it is
blinking shortly in the rhythm of the fence pulse to save power.
3.2.4. Using the OLLI 250 B+ with Olli solar panel
IMPORTANT: The full installation instruction is included the Olli solar panel
kit.
Connect the power connector of the solar panel to the white connector of the
battery lead set of the energiser. Protect the connection from water. We
recommend to use a battery box. Connect the red battery clamp to the plus (+)
pole of the battery and the black battery clamp to the minus (-) pole of the battery.
The charge voltage from the solar panel goes to the battery via the energiser. The
energiser will regulate the charging and protect the battery from over charging.
Battery charging and over charge protection operate also when the energiser is in
stand by.
IMPORTANT: If you want to check the battery status in solar panel use, you
need to disconnect the solar panel or do the check when the panel is not
charging. When the battery is being charged, the battery voltage can not be
used to indicate the charging state of the battery.
3.2.5. Connecting OLLI 250B+ to the fence
Push down the red button of the fence connector and push the stripped fence
connection lead end into the connector from below. Ensure the connection by
pulling the wire lightly. Install the earthing wire to the black earth connector in the
same way. The red fence connector is marked with a lightning symbol and the
black earth connector is marked with an earth symbol .
IMPORTANT: The fence voltage can be up to 10 000 Volt. Therefore all
connectors from the energiser to the fence must be mounted on fence
insulators or the connector cable shall be a special high voltage cable that
is designed for electric fence use, like Olli the high voltage cable. Normal
230 V installation cables shall not be used for fence installations.
4. OLLI 180B ja 250B+ deep discharge protection
The energisers have a built in deep discharge protection. When the battery
voltage goes under 11,8 V, the deep discharge protection slows down the internal
destruction of the battery by lowering the power consumption of the energiser.
The energiser does not switch off completely, but gives low energy pulses with
longer intervals. The battery LED blinks rapidly when the deep discharge

EN
9
protector is activated.
Sometimes you may want to use a used vehicle battery that is not anymore
usable as starter battery. The deep discharge protection may prevent using of
such a battery as the voltage level may be lower than the trigger limit of the deep
discharge protector. The deep discharge protector can be switched off to exploit
such batteries to the end.
Switch off the deep discharge protector as follows:
Power on the energiser to full power
Disconnect the Black battery cable connector from the earth pole of the
battery
Repeat following sequence three times:
1. Wait for 10 seconds
2. Re-connect the battery. The energiser will re-start
3. Disconnect the battery again after the fence LED has blinked
three times. Return to the beginning.
Now the deep discharge protection has been switched off. This indicated
by the energiser by blinking the fence LED three times rapidly before
starting blinking normally. The low battery warning operates normally, but
the pulse voltage and pulse interval will not change at low voltage.
Under battery voltage of approx. 8,5V the energiser switches off in all situations.
The deep discharge protection can be switched on with the same sequence than
the switching off, as explained above.
5. Earthing
A proper earthing is necessary for the operation of the electric fence. The
energiser is normally connected to earth with earth stakes that are connected to
the earthing pole of the energiser . We recommend 1-2 earth stakes for Olli
180B and 250B+. You may need to use more earth stakes in very dry conditions
and with long fences.
Hit the stakes in ground in a humid location and place them about one metre from
each other.
For best results use heat zinced Olli earth stakes that are delivered with a
connecting lead.
IMPORTANT: Inadequate earthing is the most common reason for low effect
of a fence and for disturbances in television or radio devices.

EN
10
6. Disturbances in electrical devices
The radio frequency of the pulse of a fence energiser is so low that a correctly
installed electric fence does not cause any visible or audible disturbances in radio
devices. The main reason for disturbances (typically a snapping noise in
loudspeakers) is an inadequate or incorrectly implemented earthing of the fence.
Check and fix the earthing of the fence according to the chapter 4 in this guide.
The other typical reason for disturbances is sparking. Aspark spreads a wire
spectrum electromagnetic radiation that can be heard as snapping in
loudspeakers of as horizontal disturbance stripes in TV picture.
Visible sparks on fence wires are signs of poor connections. They cause
disturbances and add resistance to the fence thus reducing its effect. Always use
proper connectors when connecting the energiser to the fence or connecting
wires to each other.
7. Lightning protection
Olli energisers are internally protected against high voltage pulses and Olli
warranty covers also lightning damage. However, it is not possible to completely
protect an energiser from damage caused by lightings. If your fence is long and in
an open location, it is advisable to protect the energiser with a separate Olli
lightning diverter. if you don't use a fence, it is advisable to disconnect the
energiser to prevent eventual lightning damages.
8. About lead batteries
The most common and cheapest 12 V battery type are the vehicle starter
batteries. An other commonly available type are the Marine/Motor home batteries,
often called ”leisure batteries”. We recommend to use the leisure batteries with
fence energisers. They tolerate discharging with a low current over a longer
period of time and they can be discharged quite deep with no internal damage. A
leisure battery will always last longer in energiser use and it may give up to two
times better capacity with one charge compared to a starter batter with the same
nominal capacity.
Vehicle starter batteries have an internal structure that gives a maximum current
output, and they are designed to be kept well charged. Therefore they are not well
suited as energisers power source. However, they can be used with energisers
but then you should take in account the following: A starter battery should be
charged well before it is empty and regularly at least once a month. The use of an
intelligent electronic battery charger will also extend the battery life. If a starter
battery is discharged with a small current over a long period, it starts to get
damaged internally (sulphating process). A starter battery can also easily be

EN
11
damaged by deep discharge.
Repeated deep discharges will result in capacity loss and ultimately in premature
failure. The deep discharge protection of the new Olli energisers prevents a
complete discharge of the battery, but the battery will last a lot longer, if it is
charged regularly and well before the deep discharge protector cuts off the power.
These issues do concern also to some extent the leisure batteries.
To maximize the battery life even leisure batteries should be charged already
when they are about half empty. A solar cell will keep the 12 V battery properly
charged, and especially with Olli 250B Plus you can well use a normal starter
battery to store electricity. Please note that the battery should be initially fully
charged. Remember to charge the battery regularly also when it is stored to
prevent sulphating that is caused by self discharge. An empty battery may freeze
and get damaged. Therefore do not store batteries in spaces that may freeze in
the winter. Also excessive heat may damage a battery.
IMPORTANT: The battery produces explosive gases during charging.
Always take care of a proper ventilation and do not handle fire near the
battery. A large lead battery can produce a high peak current that may be
dangerous. Never short cut the poles of the battery! The battery contains
acid. Discard a leaking battery with care. Recycle used batteries properly.
Estimated battery life in weeks
55 Ah 12 V lead
battery*
140 Ah 12 V led
battery*
OLLI 180B
2,5
6,5
OLLI 250B+ low power
3-4
7-10,5
OLLI 250B+ full power
1,5-2
3,5-5,5
The capacity of an old lead battery is always lower than the nominal capacity. The
battery life values are estimates that are intended to assist in choosing the best
energiser and battery. The indicated values are no guarantee for a certain battery
life time. The real battery life depends on manner of use and other conditions.
9. Safety instructions
Electric fences shall be installed, operated and maintained in a manner that
minimizes danger to persons, animals or their surroundings. These instructions
add to any official local regulations but are not meant to overrule them.
Any electric fence installed along a public road or pathway must be identified with

EN
12
warning signs at regular intervals. The warning sign should have a yellow
background and be at least 100 mm x 200 mm large, and have the words
“Caution Electric fence” or a symbol to represent a hand and shock.
The inscription shall be indelible, 25 mm tall minimum and inscribed
on both sides of the warning sign.
Electric fences must not be supplied from two separate
energisers or from independent fence circuits of the same energiser.
Avoid contacting electric fence wires especially with the head, neck or
torso. Do not climb over, through or under an electric fence. Use a gate or
a specially designed crossing point.
Constructions that could lead to entanglement should be avoided.
For any two separate electric animal fences, each supplied from a
separate energiser independently timed, the distance between the wires
of the two electric animal fences shall be at least 2.5 m. If this gap is to be
closed, this shall be affected by means of electrically nonconductive
material or an isolated metal barrier.
Barbed wire or razor wire MUST NOT be electrified by an energiser.
A distance of at least 10 m shall be maintained between the energiser
earth electrode and any other earthing system connected parts such as
the power supply system protective earth or the telecommunication
system earth.
Connecting leads that are run inside buildings shall be effectively
insulated from the earthed structural parts of the building. This may be
achieved by using insulated high voltage cable.
Connecting leads that are run underground shall be run in conduit of
insulating material or else insulated high voltage cable shall be used.
Care must be taken to avoid damage to the connecting leads due to the
effects of animal hooves or tractor wheels sinking into the ground
Connecting leads shall not be installed in the same conduit as the mains
supply wiring, communication cables or data cables.
Connecting leads and electric fence wires shall not cross above overhead
power or communication lines.
If an electric fence has to be installed under or near overhead power
lines, do not install fence wires higher than 3 m from the ground. This
height limit is applied up to a walking distance of 2 meters when looking
straight up at the power line if power line voltage is up to 1000 V or less,
or up to 15 m for power lines with higher voltage. Additionally, the fence
or any part of it should be no closer to overhead wires than the values
shown below:

EN
13
Power Line Voltage Up to 1,000 Volts Clearance 3 m
Power Line Voltage 1,000 to 33,000 Volts Clearance 4 m
Power Line Voltage Over 33,000 Volts Clearance 8 m
Electric fences intended for deterring birds, household pet containment or
training animals such as cows need only be supplied from low output
energisers to obtain satisfactory and safe performance.
In electric fences intended for deterring birds from roosting on buildings,
no electric fence wire shall be connected to the energiser earth electrode.
A warning sign shall be fitted to every point where persons may gain
ready access to the conductors.
Where an electric fence crosses a public pathway, a non-electrified gate
shall be incorporated in the electric animal fence at that point or a
crossing by means of stiles shall be provided. At any such crossing, the
adjacent electrified wires shall carry warning signs.
Ensure that all mains-operated, ancillary equipment connected to the
electric animal fence circuit provide a degree of isolation between the
fence circuit and the supply mains equivalent to that provided by the
energiser (clauses 14, 16 and 29 of the standard IEC 60335-2-76 and
their local modifications from e.g. EN 60335-2-76 define the minimum
required isolation). Do not connect a mains supplied device to an electric
fence unless its operating manual specifically allows this connection to be
made. Protection from the weather shall be provided for the ancillary
equipment unless this equipment is certified by the manufacturer as being
suitable for use outdoors, and is of a type with a minimum degree of
protection IPX4.
The above isolation requirement also applies to battery chargers. Unless
user’s manual of the energiser or the battery charger otherwise specifies,
the energiser must be disconnected from the fence whenever the charger
is connected.
10. Warranty
This product carries a three (3) year manufacturer warranty for materials and
workmanship. The warranty also covers possible overload situations caused by
thunder. The warranty is valid for three (3) years from the date of purchase on the
receipt. To claim the warranty, the customer should return the defect product to
the Manufacturer, reseller or the nearest Olli Service Partner at customer's own
expense. The warranty claim must be accompanied by the description of the fault,
copy of the sales receipt and customer's contact information. The manufacturer /
Olli Service Partner will repair or replace the defect product and return it as soon

EN
14
as possible.
The warranty does not cover any damages that are caused by incorrect or
careless use of the product, installation that does not correspond the provided
instructions and other damages which may arise due to causes beyond the
control of the manufacture. Farmcomp does not accept any responsibility for any
direct, indirect or consequential damages that are caused by the use of the
product or the fact that the product could not be used. The liability of Farmcomp is
limited to the price of the product in maximum.
IMPORTANT: Do not open the device! Do not try to repair the device
yourself! The above mentioned actions are strictly forbidden!
Only the manufacturer and authorized service partners have the right to
repair the device.
The manufacture does not accept any responsibility or liability for the
outcome of not following the rules.

PL
15
INSTRUKCJA OBSŁUGI OLLI 180B ORAZ 250B+
Dziękujemy za wybranie elektryzatora ogrodzeń OLLI. Przed zamontowaniem
urządzenia prosimy o staranne przeczytanie instrukcji. Aby uzyskać więcej
informacji na temat ogrodzeń elektrycznych, prosimy o wejście na nasze strony
internetowe: http://www.olli.fi.
1. Zawartość dostawy
- Elektryzator ogrodzenia OLLI
- Kabel łączący z ogrodzeniem
- Znak ostrzegawczy
- Instrukcja obsługi
Dodatkowo będziesz potrzebować:
- Prętów uziemiających i przeznaczonych dla nich kabli łączących
- Samego ogrodzenia z niezbędnymi dodatkami
- Testera OLLI Digi lub testera OLLI Super do testowania funkcjonowania
ogrodzenia
- wkrętak PZ2
W razie konieczności zamontowania elektryzatora z dala od ogrodzenia,
potrzebujesz:
-Kabla wysokiego napięcia OLLI do połączenia elektryzatora z
ogrodzeniem
2. Bezpieczeństwo
WAŻNE: Nigdy nie wykonuj czynności na ogrodzeniu, gdy elektryzator jest
podłączony do napięcia zasilającego.
Dla ogrodzeń elektrycznych obowiązują specjalne przepisy bezpieczeństwa.
Należy ich przestrzegać w sposób bezwzględny. Przepisy te podano na końcu
niniejszej instrukcji. Przeczytaj je uważnie!
Bezpieczne używanie elektrycznego pasterza wymaga stosowania się do
standardów bezpieczeństwa. W punkcie 9 instrukcji przedstawione są przepisy
bezpieczeństwa używania pasterza elektrycznego. Prosimy się z nimi zapoznać i
stosować się do nich!!
WAŻNE: Zwierzęta muszą się nauczyć szanować ogrodzenie.
Ogrodzenia elektryczne pełnią swoją rolę dzięki zdolności zwierzęcia do
zapamiętywania. Zwierzę zapamiętuje doznany szok i nabiera szacunku do
ogrodzenia. W szczególności przy pierwszym kontakcie z ogrodzeniem

PL
16
elektrycznym zwierzę musi nabrać do niego szacunku, gdy się przekona jak
ogrodzenie elektryczne działa i jaki to ma wpływ na odczucia zwierzęcia.
Wszystkie elektryzatory ogrodzeń OLLI spełniają wymogi bezpieczeństwa
ustalone dla elektryzatorów ogrodzeń. Niemniej jednak, ogrodzenie elektryczne
nigdy nie jest całkowicie nieszkodliwe. Życie zwierzęcia uwięzionego w
przewodach ogrodzenia elektrycznego może być w niebezpieczeństwie.
3. Techniczna specyfika elektrycznego pasterza OLLI 250B+ oraz 180B
3.1. Światła sygnałowe OLLI 180B
W pasterzu znajdują się dwa światła sygnałowe: czerwone światło impulsowe i
znajdujące się pod nim żółte światło akumulatora . Światło impulsowe świeci
się chwilowo w momencie przesyłania impulsu przez ogrodzenie. Światło
akumulatora (żółte) informuje o stanie naładowania akumulatora w następujący
sposób:
Światło akumulatora
Stan
naładowani
a
Wymagane działanie
Brak światła
50—100 %
Akumulator w porządku
Pulsuje w tempie
światła impulsowego
Poniżej 50
%
Dobrze byłoby naładować akumulator.
Pulsuje dwa razy
szybciej niż światło
impulsowe.
Poniżej 25
%
Akumulator należy naładować jak
najszybciej.
Ciągłe, szybkie
pulsowanie.
Pusty
Akumulator może ulec uszkodzeniu
dlatego trzeba go natychmiast
naładować! Moc ogrodzenia jest
obniżona jeśli działa osłona przed
całkowitym rozładowywaniem.
WAŻNE:Jeśli w momencie włączenia pasterza światło impulsowe świeci się
długo zanim zacznie pulsować, wystąpiło zakłócenie w czynności pasterza.
Odłącz akumulator, zaczekaj chwilęi włącz pasterza jeszcze raz. Urządzenie
należy dostarczyć do serwisu jeśli zakłócenie nie zniknie.
3.1.2. Używanie OLLI 180B z bateriami słonecznymi
WAŻNE:Dokładna instrukcja podłączenia znajduje się przy instrukcji
obsługi baterii słonecznych OLLI 20 W.

PL
17
Podłącz zaciski pasterza i baterii słonecznej do akumulatora (czerwony zacisk
pasterza do dodatniego bieguna akumulatora, a czarny zacisk do ujemnego
bieguna akumulatora).
Akumulator ładuje się bezpośrednio z baterii słonecznej. Odłącz baterie od
pasterza, jeśli pasterz nie jest używany dłużej niż tydzień. Jeśli akumulator
przegrzeje się w wyniku przeładowania, odłącz natychmiast baterie. Pasterz
rozładuje akumulator, który będzie można znów podłączyć do baterii.
WAŻNE: Gdy akumulator jest w stanie ładowania, światło akumulatora
wskazuje na większy stan naładowania akumulatora, niż jest w
rzeczywistości. Dlatego światło akumulatora przy zastosowaniu baterii
słonecznych działa najlepiej podczas szarówki, lub gdy bateria słoneczna
jest odłączona.
3.1.3. Podłączanie OLLI 180 B do ogrodzenia
Podłącz odkryty koniec przewodu do czerwonego złącza przy ogrodzeniu
zaznaczonego symbolem piorunu : Naciśnij kurek złącza i włóż koniec
przewodu do otworu kurka. Puść kurek i upewnij się, że przewód jest dobrze
przyczepiony lekko go pociągając. Podłącz przewód uziemienia, oznaczony
znakiem , w taki sam sposób.
Pasterza elektrycznego należy połączyć z ogrodzeniem kablem ziemnym OLLI,
jeśli ogrodzenie znajduje się daleko i przewodu nie można przeciągnąć do
ogrodzenia w powietrzu wzdłuż słupków ogrodzenia do pasterza elektrycznego.
Gruba izolacja kabla OLLI wytrzymuje wysokie napięcie pasterza. Kabel OLLI
można również przeciągnąć przez ścianę i podłączyć w środku budynku. Można
go również zakopać gdy zachodzi taka potrzeba, np. gdy miedzy pasterzem a
ogrodzeniem przebiega droga.
WAŻNE: Napięcie w przewodzie pasterza elektrycznego może przekraczać
10 000 voltów. Dlatego przewód łączący pasterza elektrycznego z
ogrodzeniem musi być w powietrzu porządnie izolowany, albo musi to być
przewód przeznaczony do wysokich napięć, jak kabel ziemny OLLI.
Podłączając pasterza elektrycznego nie wolno używać zwykłego przewodu
elektrycznego, lub przewodu przeznaczonego do niskich napięć.
3.2. Działanie OLLI 250B+
Na przednim panelu pasterza znajduje się słupek do ustawiania stanu działania
pasterza (1), przycisk do włączania i wybierania funkcji operowania pasterza
(MODE 2), czujnik świetlny (3), świetlny słupek pokazujący poziom napięcia w
akumulatorze (4), oraz świetlny słupek pokazujący poziom napięcia w ogrodzeniu
(5).

PL
18
3.2.1. Stany działania OLLI 250B+
Przy wybranym stanie działania pasterza (MODE) świeci się czerwone światełko,
które gaśnie chwilowo w momencie przesyłania impulsu. Stan działania
zmieniamy krótko naciskając przycisk MODE. Światełko przesunie się na
wysokość następnego stanu działania.
W OLLI 250+B można wybrać następujące stany działania:
Pełna moc
Zmniejszona moc
Automatyczny stan dzienny: pełna moc w ciągu dnia, podczas
szarówki zmniejszona moc (np. przy zwierzętach wypasanych w ciągu
dnia)
Automatyczny stan nocny: zmniejszona moc w ciągu dnia, pełna moc
podczas szarówki (np. w celu ochrony zwierząt przed drapieżnikami)
Brak
światł
a
Stan gotowości: brak napięcia w ogrodzeniu
Długo naciskając przycisk można postawić pasterza w stan gotowości. Krótkie
przyciśniecie przycisku przywraca automatycznie poprzedni stan działania (ten,
który poprzedzał stan gotowości). Po podłączeniu pasterza do akumulatora,

PL
19
działa on nadal automatycznie w tym samym stanie, w którym był przed
odłączeniem od akumulatora.
Nie wolno przykrywać czujnika świetlnego, który znajduje się pod słupkiem
napięcia pasterza!
Pasterz zawsze dostosowuje moc do stanu ogrodzenia. Dlatego tez akumulator
działa dużej przy ogrodzeniu krótkim i w dobrym stanie.
Jeśli w momencie włączenia pasterza najwyżej położone światło MODE świeci się
długo zanim zacznie pulsować, wystąpiło zakłócenie w czynności pasterza.
Odłącz akumulator, zaczekaj chwilę i włącz pasterza jeszcze raz. Urządzenie
należy dostarczyć do serwisu jeśli zakłócenie nie zniknie.
3.2.2. Słupek poziomu napięcia w ogrodzeniu OLLI 250B+
Pasterz mierzy napięcie w ogrodzeniu i na wysokości napięcia zapala się
odpowiednie światełko (ok. 7 kV zielone, 5 kV zielone, 3 kV żółte, lub 2 kV
czerwone). Jeśli żadne ze świateł się nie pali, napięcie ogrodzenia jest
najprawdopodobniej zbyt niskie, co wymaga zmiany na pełną moc, lub naprawy
ogrodzenia.
3.2.3. Słupek poziomu napięcia w akumulatorze OLLI 250B+
Światło akumulatora
Stan
naładowani
a
Wymagane działanie
zielone (wyższe)
75—100 %
Akumulator w porządku
zielone (niższe)
50—75 %
Akumulator w porządku
żółte
25—50 %
Dobrze byłoby naładować
akumulator.
czerwone
Alle 25 %
Akumulator należy naładować jak
najszybciej.
czerwone pulsujące
pusty
Akumulator może ulec uszkodzeniu
dlatego trzeba go natychmiast
naładować! Moc ogrodzenia jest
obniżona jeśli działa osłona przed
całkowitym rozładowywaniem.
Światełko MODE działające pod niskim napięciem nie pali się przez cały czas,
tylko pulsuje w tempie impulsów elektrycznych, oszczędzając zużycie energii.

PL
20
3.2.4. Używanie OLLI 250B+ z bateriami słonecznymi
WAŻNE: Dokładna instrukcja podłączenia znajduje się przy instrukcji
obsługi baterii słonecznych OLLI 20 W.
Podłącz przewód baterii słonecznych do kabla akumulatora. Chroń połączenie
przed wilgocią (polecamy stosowanie pudelka na akumulator). Podłącz czerwony
zacisk pasterza do dodatniego bieguna akumulatora, a czarny zacisk do
ujemnego bieguna akumulatora. Włącz pasterza.
Akumulator ładuje się przez pasterza, który chroni akumulator przed
przeładowaniem. Akumulator jest ładowany i ochroniony przed przeładowaniem
się również wtedy gdy pasterz jest w stanie gotowości.
WAŻNE: Gdy akumulator jest w stanie ładowania, światło akumulatora
wskazuje na większy stan naładowania akumulatora, niż jest w
rzeczywistości. Dlatego światło akumulatora przy zastosowaniu baterii
słonecznych działa najlepiej podczas szarówki lub gdy bateria słoneczna
jest odłączona.
3.2.5. Podłączanie OLLI 250B+ do ogrodzenia
Podłącz odkryty koniec przewodu do czerwonego złącza przy ogrodzeniu
zaznaczonego symbolem piorunu : Naciśnij kurek złącza i włóż koniec
przewodu do otworu kurka. Puść kurek i upewnij się, że przewód jest dobrze
przyczepiony lekko go pociągając. Podłącz przewód uziemienia, oznaczony
znakiem , w taki sam sposób.
Pasterza elektrycznego z ogrodzeniem należy połączyć kablem ziemnym OLLI,
jesli ogrodzenie znajduje się daleko i przewodu nie można przeciągnąć do
ogrodzenia w powietrzu wzdłuż słupków ogrodzenia do pasterza elektrycznego.
Gruba izolacja kabla OLLI wytrzymuje wysokie napięcie pasterza. Kable OLLI
można również przeciągnąć przez ścianę i podłączyć w środku budynku. Można
go również zakopać gdy zachodzi taka potrzeba, np. gdy miedzy pasterzem a
ogrodzeniem przebiega droga..
WAŻNE: Napięcie w przewodzie pasterza elektrycznego może przekraczać
10 000 voltów. Dlatego przewód łączący pasterza elektrycznego z
ogrodzeniem musi być w powietrzu porządnie izolowany, albo musi to być
przewód przeznaczony do wysokich napiec, jak kabel ziemny OLLI.
Podłączając pasterza elektrycznego nie wolno używać zwykłego przewodu
elektrycznego, lub przewodu przeznaczonego do niskich napięć.
This manual suits for next models
1
Table of contents
Languages:
Other Farmcomp Power Supply manuals
Popular Power Supply manuals by other brands

Vertiv
Vertiv NetSure 8200 Series user manual

CAMBRIONIX
CAMBRIONIX ModIT-MAX user manual

LC-POWER
LC-POWER PLATINUM Series manual

APE
APE 100 Operation and maintenance manual

Fracarro
Fracarro PSU3001 operating instructions

Stanford Research Systems
Stanford Research Systems PS355 Operation and service manual