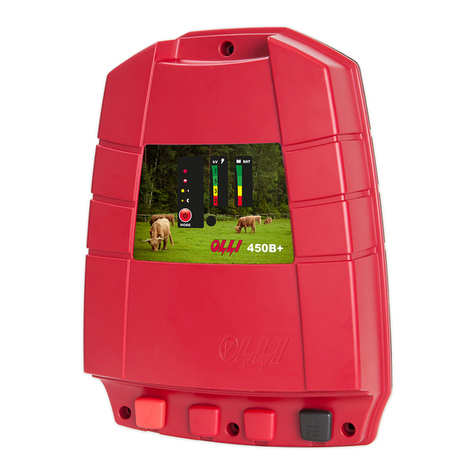
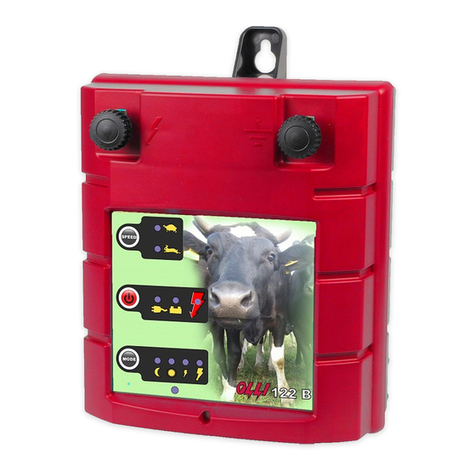
Farmcomp OLLI 9.03B User manual

9 Volt Energisers
9.03B, 9.07B, 9.07S
EN Operating Manual

EN
Thank you for choosing the Olli energiser. Please read these instructions
carefully before using the device.
We advise using a Olli Tester to help diagnose any problems you may have
with your fence.
Safety
All Olli energisers fulfill the safety regulations that are defined for
fence energisers. Please refer to the end of this user guide to see
the full list of safety instructions.
Do not touch the fence wires or the terminals on the energiser when it is
switched on. The electric shock given by the fence can be dangerous for small
children or persons suffering from heart problems if they get trapped in
electric fence wires. Use a designated crossing point or gate.
The fence should carry warning signs at regular intervals.
Place the energiser upright where the animals cannot knock it
over. Never use low voltage cables for any connections.
Contents of the Box
9.03B
9.07B
9.07S
-Olli fence energiser
√
√
√
- Connection cable to the fence
√
√
√
- Earth Stake/Stand
√
√
√
- Users guide
√
√
√
- 12 Volt Connector Cable
-
√
√
- Rechargeable Battery
-
*
√
- Rechargeable Battery Connector Cable
-
*
√
- Mains Adaptor
-
*
√
- Solar Panel with fitting kit
-
*
√
* = Available as option

EN
How an Electric Fence works
The animal makes the connection between the power and the earth and gets
the shock !
Assembling the Energiser
First Assemble the stand / Earth
Stake as seen in the picture →
←Assemble Earth Screw Assembly as shown

EN
Fit Stand / Earth Stake to the
energiser →
Connect the other end of the Earth Cable to the Earth
Stand →
Fitting the 9 Volt battery
1. Open the box by pressing in the handle clips.
2. Lift off the top and place battery in box.
←
Earth
→
Power
RED LEAD = POWER/FENCE
BLACK LEAD = EARTH
→
Power
MAKE SURE THE CONNECTIONS ARE TIGHT

EN
3. On the underside of the top -
Connect the RED cable to the +
Connect the BLACK cable to the -
4. Replace the
handle, make
sure it clicks
to lock !
Connect to the Fence
using the RED fence
connector cable
supplied
MAKE SURE THE CONNECTIONS ARE TIGHT

EN
Functions of the 9.03B
To Switch On Press until the unit “Beeps” twice to confirm it
is on.
To change from High/Low Power to Low/High Power Press
To Switch Off Press and Keep Pressed for 3 seconds it beeps
twice on shutdown.
Flashing x 1 = Under 7.75 Volts in the battery –Go and Buy a new
battery
Flashing x 2 = Under 6.20 Volts in the battery –Change the Battery
Flashing x 3 = Under 4.80 Volts in the battery –Empty –Now operating
Slow pulse and Low power
Pulse light stops flashing when battery level in energiser is not high
enough to produce pulses.
Beeper will sound twice during the pulse if there is a
problem.
High Power - 0.3J
Low Power - 0.15J
Pulse Light
Battery Indicator
On/Off - High/Low Power
Battery Warning Light –9 Volt

EN
Functions of the 9.07B & 9.07S
9.07B –12 Volt Function
Pulse Light
Battery Indicator
Solar panel or Mains
Adapter connected
On/Off
Fast Pulse every 1.55 seconds
Slow Pulse every 2.55 seconds
Choose by Pressing
High Power - 0.7 J
LowPower - 0.3 J
Day Mode - High During the day –Low at night
Night Mode - High at night –Low during the day
The 12 Volt Cable set comes with the
energiser and needs to be fitted to the
big connector on the underside of the
top.
In the picture you can see the mains
adaptor/Solar Panel is connected to the
smaller connector.

EN
Flashing x 1 = under 12.15 Volts in the battery –remember it will need
charging soon!
Flashing x 2 = Under 11.95 Volts in the battery –Charge the Battery
Flashing x 3 = Under 11.74 Volts in the battery –Empty –Now
operating Slow pulse and Low power
Pulse light stops flashing when battery level in energiser is not
high enough to produce pulses.
Pulse light flashes twice when the fence voltage is below 2000
Volts.
Beeper will sound twice during the pulse if there is a
problem.
9.07S –Solar Panel Assembly
Battery Warning Light –12 Volt
Fit Brackets as shown.
Make sure the washer
is on the inside, and
the Bolt goes from the
inside out, from the
handle to the bracket

EN
The Olli Solar 9.07 comes complete with a mains adapter for charging the
12 volt re-chargeable battery. This is sometimes needed in the winter
months when the ambient light is not enough to keep the battery charged
solely with the solar panel.
The energiser needs to be
switched on before charging
starts. Once charging has started
energiser can be switched off. To
charge a flat battery it will take
24 hours. The mains adapter will
run the energiser if there is no
battery.
The solar/adapter light will be on
when charging.
Mains adapter
Make sure the lock
washer is fitted then
add the Wing Nut
When finished it should
look like this →
Connect to the smaller connector on the
underside of the energiser top.

EN
1. Short the fence
using 2 metal
bars
2. Using your fence
tester push the
probe into the
ground
3 Touch the Earth Stake with the tester.
a. If it reads over 400 volts it’s not working properly
b. Add additional earth stakes at least 1m apart
c. Connect the earth stakes with under gate cable
Earthing
Poor earthing is the most likely cause of poor performance of the energiser;
please follow these simple rules;
1. Wet/Clay ground makes good earthing –Dry/sandy soil is a poor
earth
2. Use good quality earth stakes that are galvanized –A piece of iron
will not work for very long
3. DO NOT connect the earth to a building/water pipes etc.
To get good earthing it may be necessary to have
more than 1 earth stake. Extra earth stakes should be
1m from each other and connected together with high
quality double insulated high voltage cable.
How to Test the Earthing

EN
Maintenance
Test the fence
Put the testers earth in the ground
Touch the fence with the testers pin
Check connections
Minimum Voltage should be 4,000 volts
The Power in the electric fence is
dependent on the connections
making good contact.
Also any vegetation touching the
fence will take away the power.
It is necessary to check the fence
regularly to ensure no branches,
bushes etc. are touching the fence

EN
Lightning protection
All Olli energisers are protected against over voltage and the warranty covers
also lightning damage. However, it is not possible to build the fence energiser
to withstand all possible situations. Therefore it is wise to use an Olli lighting
diverter whenever the fence is situated in very open ground or if lightning
occurs frequently in the region. It is also advisable to disconnect both the
fence and mains power from the energizer if you leave your electric fence
unused for a long period of time.
Warranty
This product carries a three (3) year
manufacturer’s warranty for materials
and workmanship from the date it was
retailed, the warranty includes
overloads caused by lightning. To claim
the warranty, the customer should
return the defect product to the
Manufacturer, reseller or the nearest Olli
Service Partner at customer's own expense. The warranty claim must be
accompanied by the description of the fault, copy of the sales receipt and
customer's contact information. The Manufacturer / Olli Service Partner will
repair or replace the defect product and return it as soon as possible.
The warranty does not cover any damages that are caused by incorrect or
careless use of the product, installation that does not correspond to the
provided instructions and other damages which may arise due to causes
beyond the control of the Manufacturer. Olli does not accept any
responsibility for any direct, indirect or consequential damages that are
caused by the use of the product or the fact that the product could not be
used. The liability of Olli is limited to the price of the product in maximum.

EN
Instructions for installation and connection of electric fences
Electric fences shall be installed, operated and maintained in a manner that
minimizes danger to persons, animals or their surroundings and as far as is
reasonably possible out of the reach of children and not subject to mechanical
damage. Any electric fence installed along a public road or pathway must be
identified with warning signs at regular intervals. The warning sign should have a
yellow background and be at least 100mm x 200mm and 25mm high, and have the
words “Caution Electric fence” or have a symbol to represent a hand and shock in
Black. The inscription shall be indelible, inscribed on both sides of the warning sign
Electric fences must not be supplied from two separate energizers or from independent
fence circuits of the same energizer.
Avoid contacting electric fence wires especially with the head, neck or torso.
Do not climb over, through or under an electric fence. Use a gate or a
specially designed crossing point.
For any two separate electric animal fences, each supplied from a separate
energizer independently timed, the distance between the wires of the two
electric animal fences shall be at least 2.5 m. If this gap is to be closed, this
shall be affected by means of electrically nonconductive material or an
isolated metal barrier.
Barbed wire or razor wire MUST NOT be electrified by an energizer.
A distance of at least 10 m shall be maintained between the energizer earth
electrode and any other earthing system connected parts such as the power
supply system protective earth or the telecommunication system earth.
Connecting leads that are run inside buildings shall be effectively insulated
from the earthed structural parts of the building. This may be achieved by
using insulated high voltage cable.
Connecting leads that are run underground shall be run in conduit of
insulating material or else insulated high voltage cable shall be used. Care
must be taken to avoid damage to the connecting leads due to the effects of
animal hooves or tractor wheels sinking into the ground.
Connecting leads shall not be installed in the same conduit as the mains
supply wiring, communication cables or data cables.
Connecting leads and electric fence wires shall not cross above overhead
power or communication lines.

EN
If an electric fence has to be installed under or near overhead power lines it
should NOT cross above it or run in parallel to it for any big distance. Electric
fencing should done at right angles to the power lines, the distance from the
ground to the top of the fence should not exceed 2 meters, and the fence or
any part of it should be no closer to the overhead wires than those values
shown below;
Power Line Voltage Up to 1,000Volts Clearance 3m
Power Line Voltage 1,000 to 33,000 Volts Clearance 4m
Power Line Voltage Over 33,000 Volts Clearance 8m
Electric fences intended for deterring birds, household pet containment or
training animals such as cows need only be supplied from low output
energizers to obtain satisfactory and safe performance.
In electric fences intended for deterring birds from roosting on buildings, no
electric fence wire shall be connected to the energizer earth electrode. A
warning sign shall be fitted to every point where persons may gain ready
access to the conductors.
Where an electric fence crosses a public pathway, a non-electrified gate
shall be incorporated in the electric animal fence at that point or a crossing
by means of stiles shall be provided. At any such crossing, the adjacent
electrified wires shall carry warning signs.
Ensure that all mains-operated, ancillary equipment connected to the
electric animal fence circuit provides a degree of isolation between the
fence circuit and the supply mains equivalent to that provided by the
energizer.
Protection from the weather shall be provided for the ancillary equipment
unless this equipment is certified by the manufacturer as being suitable for
use outdoors, and is of a type with a minimum degree of protection IPX4.

EN
Declaration of Conformity
according to ISO/IEC Guide 22 and EN 45014
Farmcomp Oy
Jusslansuora 8
04360 TUUSULA, FINLAND
declares, that the product described in this instruction manual conforms to
the EMC directive 2014/30/EU by following the harmonised standards:
EEN 60335-2-76:2005+A1:2006+A11:2008+A12:2010 and complies with
the electrical safety standard: EN 55014-1:2017, EN 55014-2:2015
Tuusula, Finland
March 30, 2012
Signed Declarations of Conformity documents are filed at Farmcomp Oy,
Tuusula.
Olli Specifications 9.03B 9.07B 9.07S
Maximum pulse voltage 9100V 9800V 9800V
Pulse voltage @ 500ohm load 2800V 3200V 3200V
Charged energy 0.43J 0.86J 0.86J
Maximum pulse energy 0.34J 0.71J 0.71J
Current consumption with 9V battery (low/high) 21mA /
44mA 40mA /
85mA 40mA /
85mA
Clean ideal fence length (According to CEE norm) 23km 35km 35km
Light vegetation 3km 7km 7km
Moderate vegetation 1km 2km 2km

FARMCOMP OY
Jusslansuora 8 FI-04360 TUUSULA, FINLAND
Tel. +358 9 7744 970
Copyright © Farmcomp Oy 2012, All Rights Reserved
3820780
This manual suits for next models
2
Table of contents
Other Farmcomp Power Supply manuals
Popular Power Supply manuals by other brands

Nordson
Nordson MPS610V product manual

Osram
Osram OPTOTRONIC OT Wi 15/220-240/1A0 NFC CA LP manual

Deli-Farm
Deli-Farm Farmline Protect 5 instruction manual

CAMBRIONIX
CAMBRIONIX TS3-16 user manual

Elgar
Elgar Sorensen DCS Series instruction manual

Micro Technic
Micro Technic Micronix PV-5127 Installation and user manual