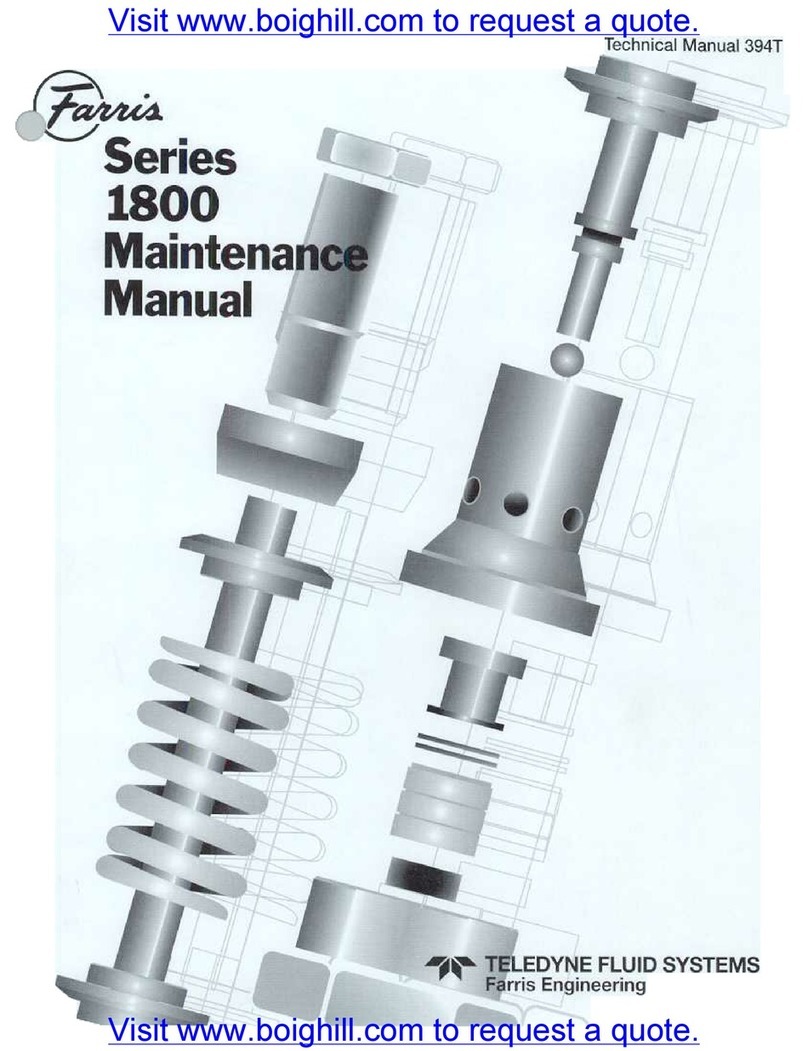
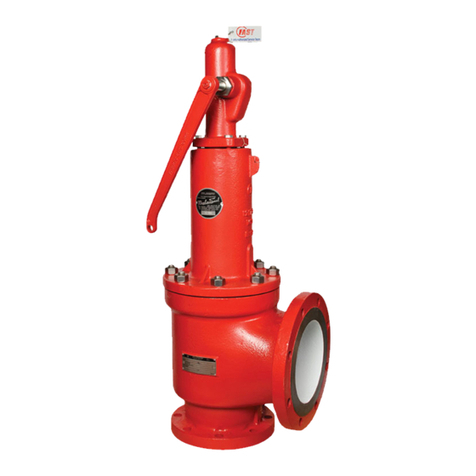
Farris Engineering 1890 Series User manual

Technical Manual 296T
Series
1890 & 2850
Maintenance
Manual
Farris Engineering
Division of Curtiss-Wright Flow Control Corporation
Visit www.boighill.com to request a quote.

Table of Contents
(Manual Revision 1, August 1998)
1. Introduction . . . . . . . . . . . . . . . . . . . . . . . . . . . . .Page 1
2. Disassembly
Series 2850 and 2852 . . . . . . . . . . . . . . . . . . . . .Page 2
Series 1890 and 1892 . . . . . . . . . . . . . . . . . . . . .Page 3
3. Lifting Lever Assemblies
Open Lifting Lever . . . . . . . . . . . . . . . . . . . . . . . .Page 4
Packed Lifting Lever . . . . . . . . . . . . . . . . . . . . . .Page 4
4. Lapping Procedure . . . . . . . . . . . . . . . . . . . . . . .Page 5
5. Assembly
Series 2850 and 2852 . . . . . . . . . . . . . . . . . . . . .Page 6
Series 1890 and 1892 . . . . . . . . . . . . . . . . . . . . .Page 6
6. Testing and Setting . . . . . . . . . . . . . . . . . . . . . . .Page 7
Appendix A: Critical Seat Dimensions . . . . . . . . . .Page 8
© 1998 Teledyne Fluid Systems
10195 BRECKSVILLE ROAD
BRECKSVILLE, OHIO 44141 US A
PHONE: (440) 838-7690
FAX: (440) 838-7699
www.cwfc.com
1. Introduction
This manual contains sufficient information
to allow trained maintenance personnel to
properly repair types 1890, 1892, 2850,
and 2852 pressure relief valves.
All of the assembly and disassembly
instructions refer to types with plain
screwed caps. When repairing types with
either open or packed lifting levers, refer
to Section 3 which describes the removal
of the appropriate lever assembly.
If a valve repair requires replacement
parts, only factory-supplied components
shall be used. Use of parts from other
than the original manufacturer will lead
to potentially dangerous operating condi-
tions. If faced with repairs exceeding the
scope of this manual, contact the Farris
Factory.
1
Farris Engineering
Division of Curtiss-Wright Flow Control Corporation
Visit www.boighill.com to request a quote.

2. Disassembly
When a valve is first received in the shop, it should
be given a visual inspection to note its condition
when removed from service. The valve should
then be carefully dismantled. Proper facilities and
tools should be available. At each stage in the dis-
mantling process, visually inspect all parts of the
valve for evidence of wear and corrosion. If parts
are worn, replace them.
Series 2850 and 2852 (Fig. 2.1)
1. Mount valve vertically in a vise utilizing the flats
in the body.
2. Remove wire seal. Unscrew cap by turning
counterclockwise. Remove cap gasket. (For
open lever and packed lever cap construction,
refer to the section on Lifting Lever
Assemblies.)
3. Measure the distance from the top of the spring
adjusting screw to the top of the bonnet. Use
this measurement when reassembling the valve
to approximately duplicate the original set
pressure.
4. Loosen the jam nut.
5. Relieve the spring compression by turning the
spring adjusting screw counterclockwise.
6. Remove blowdown ring lock screw and gasket.
7. Thread a pipe into the outlet and turn the bon-
net counterclockwise. Lift the bonnet off to
expose internal subassembly.
8. Remove the upper spring button, spring and
lower spring button from the stem.
9. Remove the stem shoulder. Stem shoulder ring
may be a one-piece clip or split rings. Be care-
ful during disassembly; split rings may fall free.
Current valves do not use a stem shoulder and
split ring. The stem shoulder is an integral part
of the stem.
10. Lift the stem with the disc attached. If desired,
remove the grooved pin and lift the stem from
the disc.
11. Unscrew the blowdown ring from the body.
12. Clean all parts and threaded surfaces thor-
oughly. Replace all gaskets. Lap the body
seat and disc surfaces. (See the section on
Lapping for details.)
Bill of Materials
2
Farris Engineering
Division of Curtiss-Wright Flow Control Corporation
Item Part Name Material
2850 & 2852 2850/S4 & 2852/S4
SA-479 Type 316 SA-479 Type 316
1 Body St. St. or SA-351 St. St. or SA-351
Gr. CF8M St. St. Gr. CF8M St. St.
SA-216 Gr. WCB SA-351 Gr. CF8M
2 Bonnet Carbon Steel St. St.
3 Disc 316 St. St. 316 St. St.
4 Blowdown Ring 316 St. St. 316 St. St.
5 Cap Carbon Steel 316 St. St.
6 Stem 316 St. St.
7 Spring Adj. Screw 316 St. St.
8 Jam Nut 316 St. St.
9 Upper Spring Button 316 St. St.
10 Lower Spring Button 316 St. St.
11 Cap Gasket 316 St. St.
12 Stem Shoulder 316 St. St.
13 Blowdown Ring 316 St. St.
Lockscrew
14 Grooved Pin 316 St. St.
15 Stem Shoulder Ring St. St. 316 St. St.
16 Wire Seal St. St. Wire/Lead Seal
17 Nameplate (not shown) Stainless Steel
18 Spring See Spring Table
19 Blowdown Ring 316 St. St.
L/S Gasket
Valve No. Spring Material
2850 316 Stainless Steel
2852 Chrome Alloy, Rust Proofed
2850/S4 316 Stainless Steel
2852/S4 Chrome Alloy, Nickel Plated
SpringTable
Visit www.boighill.com to request a quote.

1. Mount valve vertically in a vise utilizing the flats
in the body.
2. Remove wire seal. Unscrew cap by turning
counterclockwise. Remove cap gasket. (For
open lever and packed lever cap construction,
refer to the section on Lifting Lever
Assemblies.)
3. Measure the distance from the top of the spring
adjusting screw to the top of the bonnet. Use
this measurement when reassembling the valve
to approximately duplicate the original set pres-
sure.
4. Loosen the jam nut.
5. Relieve the spring compression by turning the
spring adjusting screw counterclockwise.
6. Thread a pipe into the outlet and turn the bon-
net counterclockwise. Lift the bonnet off to
expose internal subassembly.
7. Lift the stem with spring and buttons attached.
Remove upper spring button, spring and lower
spring button.
8. Remove the lift stop ring from the guide.
9. By inverting the assembly, remove the disc from
the guide.
10. Unscrew the guide from the valve body Re-.
move body gasket.
11. Clean all parts and threaded surfaces tho-
roughly. Replace all gaskets. Lap the body
seat and disc surfaces. (See the section on
Lapping for details.)
Fig 2.2
1890 &1892
Series
Series 1890 and 1892 (Fig. 2.2)
3
Farris Engineering
Division of Curtiss-Wright Flow Control Corporation
Bill of Materials
Item Part Name Material
1890 & 1892 1890/S4 & 1892/S4
SA-479 Type 316 SA-479 Type 316
1 Body St. St. St. St.
SA-216 Gr. SA-351 Gr.
2 Bonnet WCB Carbon Steel CF8M St. St.
3 Disc 316 St. St. 316 St. St.
4 Guide St. St. 316 St. St.
5 Cap, Plain Screwed Carbon Steel 316 St. St.
6 Stem St. St. 316 St. St.
7 Spring Adj. Screw St. St. 316 St. St.
8 Sprin Button St. St. 316 St. St.
9 Jam Nut St. St. 316 St. St.
10 Stem Shoulder St. St. 316 St. St.
11 Body Gasket Flexible Graphite 316 St. St.
12 Cap Gasket Flexible Graphite 316 St. St.
13 Lift Stop Ring St. St. St. St.
14 Retaining Ring - St. St. St. St.
Stem Shoulder
15 Wire Seal St. St. Wire/Lead Seal
16 Nameplate (not shown) Stainless Steel
17 Spring See Spring Table
Lap Joint Stub End SA-403 Gr. SA-403-Gr.
(Inlet) WP 316 St. St. WP 316 St. St.
N Lap Joint Stub End SA-234 SA-403-Gr.
O(Outlet) Carbon Steel WP 316 St. St.
TLap Joint Flange SA-181 or SA-105 SA-182-Gr.
E (Inlet) Carbon Steel F316 St. St.
Lap Joint Flange SA-181 or SA-105 SA-182-Gr.
(Outlet) Carbon Steel F316 St. St.
Valve No. Spring Material
1890 316 Stainless Steel
1892 Chrome Alloy, Rust Proofed
1890/S4 316 Stainless Steel
1892/S4 Chrome Alloy, Nickel Plated
SpringTable
Note: Items not shown are applicable to the F 1890 Series (Flanged)
Visit www.boighill.com to request a quote.

3. Lifting Lever Assemblies
A. OPEN LIFTING LEVER (Fig. 3.1)
1. Remove wire seal and cotter pin. Slide out button head
rivet to release lever from cap.
2. Remove set screw from base of cap and lift cap off
bonnet.
3. Remove stem jam nut and stem test washer from the
stem.
4. Clean all parts and reassemble in reverse order. Adjust
stem test washer so there is 1/8” clearance between
test lever fulcrum and stem test washer.
B. PACKED LIFTING LEVER
There are several designs of packed cap constructions.
Refer to the appropriate section below for your particu-
lar cap construction.
(a) Fig. 3.2
1. Remove groove pin from lever and slide lever off the
cam
shaft.
2. Remove gland from gland nut. Unscrew gland nut from
bonnet and remove packing ring and cam. If any signs
of leakage exist, replace packing ring.
3. Break wire seal and unscrew cap from bonnet. Holding
the stem with pliers, remove stem jam nut and stem test
washer.
4. Reassemble in reverse order making sure the camshaft
lobe is pointing down. The stem test washer should be
adjusted to ensure the cam will make contact with the
stem test washer and lift the stem when the lever is
actuated.
(b) Fig. 3.3
1.
Remove groove pin from lever and slide lever off the
cam shaft.
2. Complete disassembly is only required if the packing
ring is to be replaced or internal inspection is required.
To remove assembly, rotate the lever down and
unscrew the cap.
3. To complete disassembly, remove the gland, packing
ring and retaining ring.
4.
Pull the cam shaft from the cap. The cam can then be
removed through the bottom of the cap.
5. Remove the stem jam nut and stem test washer.
6.
Reassemble in reverse order, making sure the cam
rests beneath the stem test washer.
(c) Fig. 3.4
1.
Remove lever jam nut and washer. Slide lever off the
cam shaft.
2. Follow steps 2 to 6 in section (b).
4
Farris Engineering
Division of Curtiss-Wright Flow Control Corporation
Visit www.boighill.com to request a quote.

5
5. (1890 and 1892 only) Measure and record the body seat
height. Remove the same thickness of material from the
bottom face of the guide as that has been lapped off
from the body seat.
6. Carefully clean compound from all parts. Failure to do so
may foul the seat and disc surfaces. When reinstalling
the parts in the valve and/or in assembling the disc in the
guide, be careful not to scratch or score either surface.
7. Check Appendix A for critical seat dimensions. Replace
any parts that have dimensions smaller than the mini-
mum required.
4. Lapping Procedure
(For metal seats only; does not apply to O-ring seat seal
valve)
1. The finish on the body seat and disc are critical to seat
tightness. After the parts have been cleaned, both parts
should be lapped to remove all blemishes and score
marks. This can be done on an automatic lapping
machine or by hand using a cast iron lapping block or
Pyrex lapping glass which is known to have a perfectly
flat surface.
PYREX LAPPING PLATES
PART NO. MAT. CODE SIZE THICKNESS
7688 164 1-1/2″l/4″
7689 164 2-1/4″3/8″
2. Use Farris 1200 lapping compound. When lapping the
disc, operate with a light figure eight motion over entire
block surface. In this way complete contact will be
made. With this motion the complete surface of the
part will be evenly lapped and you will avoid wearing a
groove in the block.
3. Lap the disc until all blemishes and score marks have
been removed. As the figure eight motion is executed,
frequently lift the disc away from the block to get a
fresh bite on the compound. Most importantly, do not
contaminate compounds with dirt. Store lapping blocks
and lapping glass in a clean, dust-free area.
4. Follow the same procedure for lapping the body seat.
When lapping bodies, the body can be placed on a
table and a lapping block placed on the body. Be sure
that the lapping block does not tip over the side of the
body (which would cause rounding of the edges). Use a
light, rapid figure eight stroke, lifting the block from the
body occasionally.
Farris Engineering
Division of Curtiss-Wright Flow Control Corporation
Visit www.boighill.com to request a quote.

5. Assembly
Series 2850 and 2852
1. Refer to Figure 2.1 for construction details.
2. Visually inspect all parts to be assembled. Replace gas-
kets, O-rings, and any parts that are worn. Lubricate all
threaded and mating surfaces with Bostik Never Seez
(or equivalent).
3. Examine seat of body and disc for any marks that may
cause leakage. Refer to the section on Lapping if relap-
ping is necessary.
4. (O-ring Seat Only) Refer to Fig. 5.1. Position the disc on
a flat surface with the O-ring groove facing up. Insert
O-ring into the disc groove. Insert the O-ring retainer
on the disc, ensuring the O-ring is centered. Lock the
O-ring and retainer to the disk with the hex nut.
5. Screw blowdown ring onto the body.
6. Place stem into the disc. Drive grooved pin through the
disc into the stem if grooved pin has been disassem-
bled.
7. Place disc stem assembly over the body, making sure
that the disc and body seats are aligned.
8. Place stem shoulder over stem shoulder ring.
9. Install lower spring button, spring and upper spring but-
ton on stem.
10. Place bonnet over the assembled parts and screw
down onto the body.
11. Thread the jam nut onto the spring adjusting screw.
12. Thread spring adjusting screw into bonnet to the posi-
tion recorded during disassembly.
13. With a screwdriver, turn blowdown ring up until it
touches the disc. Then back off the number of notch-
es indicated below.
14. Screw blowdown ring lock screw into bonnet. Adjust
blowdown ring lock screw to engage blowdown ring
notches without jamming the ring in its tightened posi-
tion.
15. The valve is now ready to be removed for testing.
6
Series 1890 and 1892
1. Refer to Figure 2.2 for construction details.
2. Visually inspect all parts to be assembled. Replace all
gaskets. Lubricate all threaded and mating surfaces
with Bostik Never Seez (or equivalent).
3. Examine seat of body and disc for any marks or surface
imperfections that may reduce seat tightness. If relap-
ping is necessary, refer to the section on Lapping.
4a.(Metal Seat Only) Loosely assemble body and guide.
Insert disc in guide and verify that guide turndown from
disc contact is 1/16 to 1/4 turn. For set pressure under
100 psig, 1/8 turndown maximum is required. Remove
disc.
4b.(O-Ring Seat Only) It is recommended that
O-ring/disc
subassembly be replaced rather than attempt removal
of retaining ring. Do not use a metal seat guide in
O-ring seat seal valves.
5. Tighten guide to body with 1/4” dia. bar inserted
through
guide exit holes with approximate torque of 20 ft. Ibs.
6. Insert disc and install lift stop. Verify that available disc
lift is greater than .085”.
7. Place stem shoulder over retaining ring. Install spring
and spring buttons on stem and insert entire assembly
into bonnet/spring adjusting screw subassembly. The
lower subassembly with body gasket can then be
assembled and tightened to approximately 40 ft. Ibs.
torque.
8. Hand tighten adjusting screw until slight spring com-
pression occurs.
Farris Engineering
Division of Curtiss-Wright Flow Control Corporation
INLET SIZE # NOTCHES
3/4″6
1, 1 1/2″22
2, 3″33
Visit www.boighill.com to request a quote.

WATER - Before starting the seat tightness test, the outlet
body bowl shall be filled with water, and the valve shall be
allowed to stabilize with no visible flow from the valve out-
let. The valve shall be observed for 1 minute at the test
pressure. There shall be no visible leakage at the valve
outlet.
Soft SeatedValves:
Soft seated valves shall be tested at 95% of set pressure
when set above 100 psig; they shall be tested at 5 psig
below set pressure when the set pressure is less than or
equal to 100 psig.
AIR - There shall be no leakage (zero bubbles) using the
test method outlined above.
STEAM and WATER - There shall be no visible leakage at
the valve outlet.
2. If any valve fails to meet leakage requirements, it shall
be reworked.
3. Assemble appropriate cap construction after leak tight-
ness has been verified. If valve type is open lever, no
back pressure test is required. Plain cap and packed
lever valves must be back pressure tested as outlined
in the next section.
BACK PRESSURETEST
1. This test applies to all valves designed for discharge to
a closed system (plain or packed lever cap construc-
tion) with inlet sizes larger than 1 nps.
2. The secondary pressure zone of the valve shall be test-
ed with air or other suitable gas at a pressure of at least
30 psi. The valve should be pressurized at the outlet
with shop air or other means. A soap solution or other
suitable solution shall be applied to all connections
which are potential leakage paths (i.e., body/bonnet
connection, cap/bonnet connection, packed lever
assembly/cap connection). No leakage is acceptable.
3. If leakage is detected at any location, the valve shall be
reworked.
6. Setting & Testing
TESTING AND SETTING PROCEDURE
1. Mount the valve on the test stand. Use air as the test
medium for air, gas and vapor or flashing service appli-
cations. Set valves for saturated steam service on satu-
rated steam. Valves for steam service set with air
should include temperature compensation. The name-
plate provides “Cold Differential Test Pressure.” Set
valves for liquid service on water.
2. Hold the stem tightly and tighten (turn clockwise) the
spring adjusting screw to increase the spring force.
Make sure the stem does not rotate while loading the
spring.
3. Slowly raise the test drum pressure and observe the
opening point. The set pressure on air or steam is the
“pop point” while on water it is the first continuous flow.
4. If necessary reduce the test drum pressure and adjust
the spring adjusting screw. Repeat this until the valve
opens at the required pressure, designated as “Cold
Differential Test Pressure.” At the desired setting, torque
the jam nut to 25 ft. lbs. and assemble cap and gasket
for tightness testing. Check set point once more after
locking jam nut.
Never adjust the spring setting when the pressure
under the valve is near its popping point, as the body
seat and disc seat might score and/or gall. Always
lower the pressure in the valve at least 25 percent
below popping pressure before making adjustments.
This will put a loading on the seat surfaces, and pre-
vent rotation and damage.
SEAT TIGHTNESSTESTING
WARNING: The valve must be checked for seat leak-
age after the set pressure has been checked. Excessive
leakage could lead to fouled or inoperable valves, serious
product loss and could be hazardous to personnel and
equipment.
1. The valve can be tested for tightness on the test stand
by increasing vessel pressure to the required test pres-
sure and observing the valve outlet for evidence of
leakage. The following is an overview of the test proce-
dures used.
Metal SeatedValves:
Metal seated valves shall be tested at 90% of set pressure
when the set pressure is greater than 50 psig; they shall
be tested at 5 psig below set pressure when the set pres-
sure is less than or equal to 50 psig.
AIR - A 5/16 O.D. x 0.035 wall thickness copper tube or
equivalent immersed no more than 1/2 deep in water shall
be connected to the valve outlet. See Figure 6.1. Seal all
other potential leakage paths with suitable fixtures (i.e.,
cap, plugs) so that seat leakage can be detected at the
outlet. Before starting the bubble count, test pressure shall
be applied for a minimum of 1 minute. The valve shall then
be observed for leakage for at least 1 minute. The leakage
rate shall not exceed 40 bubbles per minute.
STEAM - Test pressure shall be applied for 3 minutes
before the seat tightness test. The valve shall be observed
for leakage for at least 1 minute. There shall be no visible
or audible leakage at the valve outlet.
7
▲
!
Visit www.boighill.com to request a quote.

Appendix A: Critical Seat Dimensions
8
Unless otherwise specified, all dimensions are ± .005. All dimensions are in inches.
Tolerance 1+.000 2+.003 3+.005 4 ±.010 5 +.000 6+.010
-.005 -.000 -.000 -.010 -.000
SERIES 1890–GUIDE
SERIES 1890–DISC
SERIES 2850R–O-RING BODY
Farris Engineering
Division of Curtiss-Wright Flow Control Corporation
SERIES SIZE A A1 B C C1 D E F G H J K L
2850 3/4 X 1 .7501.7852.8103.1254.1254.0151.284 .700 .894 .459 – – –
& 1 X 1 1/2 1.00011.03721.0603.1254.1254.0151.331 .950 1.125 .611 – – –
2850R 1 1/2 X 2 1.50051.53921.5606.1254.3754.0151.456 1.44021.630 .677 – – –
1890 & 1/2 X 1 .5001– .5603.0624– .0151.076 .450 – .390 .590 .748 .685
1890R 3/4 X 1 .5001– .5603.0624– .0151.076 .450 – .390 .590 .748 .685
Visit www.boighill.com to request a quote.

10195 Brecksville Road, Brecksville, OH 44141 USA Telephone: (440) 838-7690 Fax (440) 838-7699 www.cwfc.com
Plant Plants in Canada
Farris Engineering, Brecksville, Ohio USA Farris Engineering, Brantford, Ontario
While this information is presented in good faith and believed to be accurate, Farris Engineering does not guarantee satisfactory results from reliance upon such
information. Nothing contained herein is to be construed as a warranty or guarantee, expressed or implied, regarding the performance, merchantability, fitness or any
other matter with respect to the products, nor as a recommendation to use any product or process in conflict with any patent. Farris Engineering reserves the right,
without notice, to alter or improve the designs or specifications of the products described herein.
Printed in USA 9/98 5M R1
Farris Engineering
Division of Curtiss-Wright Flow Control Corporation
Visit www.boighill.com to request a quote.
This manual suits for next models
11
Table of contents
Other Farris Engineering Control Unit manuals