ETAS ES650.1 User manual

ETAS ES650.1
A/D and Thermo Module
User Guide

Copyright
The data in this document may not be altered or amended without special noti-
fication from ETAS GmbH. ETAS GmbH undertakes no further obligation in
relation to this document. The software described in it can only be used if the
customer is in possession of a general license agreement or single license.
Using and copying is only allowed in concurrence with the specifications stipu-
lated in the contract.
Under no circumstances may any part of this document be copied, reproduced,
transmitted, stored in a retrieval system or translated into another language
without the express written permission of ETAS GmbH.
© Copyright 2021 ETAS GmbH, Stuttgart
The names and designations used in this document are trademarks or brands
belonging to the respective owners.
ES650.1 - User Guide R10 EN - 05.2021

ETAS Contents
Contents
ES650.1 - User Guide 3
1 About this Document . . . . . . . . . . . . . . . . . . . . . . . . . . . . . . . . . . . . . . . . . . . . . . . . . . . 5
1.1 Classification of Safety Messages . . . . . . . . . . . . . . . . . . . . . . . . . . . . . . . . . . . . . . . . . . 5
1.2 Presentation of Instructions . . . . . . . . . . . . . . . . . . . . . . . . . . . . . . . . . . . . . . . . . . . . . . . 5
1.3 Typographical Conventions . . . . . . . . . . . . . . . . . . . . . . . . . . . . . . . . . . . . . . . . . . . . . . . . 6
1.4 Presentation of Supporting Information . . . . . . . . . . . . . . . . . . . . . . . . . . . . . . . . . . . . . 6
1.5 Scope of supply . . . . . . . . . . . . . . . . . . . . . . . . . . . . . . . . . . . . . . . . . . . . . . . . . . . . . . . . . . 6
1.6 Additional information . . . . . . . . . . . . . . . . . . . . . . . . . . . . . . . . . . . . . . . . . . . . . . . . . . . . 6
2 Basic safety notices. . . . . . . . . . . . . . . . . . . . . . . . . . . . . . . . . . . . . . . . . . . . . . . . . . . . 7
2.1 General safety information . . . . . . . . . . . . . . . . . . . . . . . . . . . . . . . . . . . . . . . . . . . . . . . . 7
2.2 Requirements for users and duties for operators . . . . . . . . . . . . . . . . . . . . . . . . . . . . . 7
2.3 Intended use . . . . . . . . . . . . . . . . . . . . . . . . . . . . . . . . . . . . . . . . . . . . . . . . . . . . . . . . . . . . . 7
3 Hardware Description . . . . . . . . . . . . . . . . . . . . . . . . . . . . . . . . . . . . . . . . . . . . . . . . 12
3.1 ES600 Measurement Modules . . . . . . . . . . . . . . . . . . . . . . . . . . . . . . . . . . . . . . . . . . . . 12
3.2 ES650.1 A/D and Thermo Module . . . . . . . . . . . . . . . . . . . . . . . . . . . . . . . . . . . . . . . . . 13
3.2.1 Overview . . . . . . . . . . . . . . . . . . . . . . . . . . . . . . . . . . . . . . . . . . . . . . . . . . . . . . 13
3.2.2 Features. . . . . . . . . . . . . . . . . . . . . . . . . . . . . . . . . . . . . . . . . . . . . . . . . . . . . . . 14
3.3 Package Contents . . . . . . . . . . . . . . . . . . . . . . . . . . . . . . . . . . . . . . . . . . . . . . . . . . . . . . . 15
3.4 Housing . . . . . . . . . . . . . . . . . . . . . . . . . . . . . . . . . . . . . . . . . . . . . . . . . . . . . . . . . . . . . . . . 15
3.5 Ports and Indicators . . . . . . . . . . . . . . . . . . . . . . . . . . . . . . . . . . . . . . . . . . . . . . . . . . . . . 16
3.5.1 Front Side . . . . . . . . . . . . . . . . . . . . . . . . . . . . . . . . . . . . . . . . . . . . . . . . . . . . . 16
3.5.2 Indicators. . . . . . . . . . . . . . . . . . . . . . . . . . . . . . . . . . . . . . . . . . . . . . . . . . . . . . 17
3.5.3 Rear Side . . . . . . . . . . . . . . . . . . . . . . . . . . . . . . . . . . . . . . . . . . . . . . . . . . . . . . 18
3.6 Maximum Input and Common-Mode Voltages . . . . . . . . . . . . . . . . . . . . . . . . . . . . . . 19
3.7 Measurement Accuracy . . . . . . . . . . . . . . . . . . . . . . . . . . . . . . . . . . . . . . . . . . . . . . . . . . 20
4 Getting Started . . . . . . . . . . . . . . . . . . . . . . . . . . . . . . . . . . . . . . . . . . . . . . . . . . . . . . 22
4.1 Installation and blocking. . . . . . . . . . . . . . . . . . . . . . . . . . . . . . . . . . . . . . . . . . . . . . . . . . 22
4.1.1 General installation recommendations . . . . . . . . . . . . . . . . . . . . . . . . . . . . 22
4.1.2 Fastening the module onto a carrier system . . . . . . . . . . . . . . . . . . . . . . . 22
4.1.3 Connecting several modules mechanically. . . . . . . . . . . . . . . . . . . . . . . . . 23
4.2 Cabling. . . . . . . . . . . . . . . . . . . . . . . . . . . . . . . . . . . . . . . . . . . . . . . . . . . . . . . . . . . . . . . . . 24
4.3 Configuration . . . . . . . . . . . . . . . . . . . . . . . . . . . . . . . . . . . . . . . . . . . . . . . . . . . . . . . . . . . 26
4.4 Calibration. . . . . . . . . . . . . . . . . . . . . . . . . . . . . . . . . . . . . . . . . . . . . . . . . . . . . . . . . . . . . . 26
5 Technical Data . . . . . . . . . . . . . . . . . . . . . . . . . . . . . . . . . . . . . . . . . . . . . . . . . . . . . . 27
5.1 General Data . . . . . . . . . . . . . . . . . . . . . . . . . . . . . . . . . . . . . . . . . . . . . . . . . . . . . . . . . . . . 27
5.1.1 Product labeling . . . . . . . . . . . . . . . . . . . . . . . . . . . . . . . . . . . . . . . . . . . . . . . . 27
5.1.2 Fulfilled Standards and Norms . . . . . . . . . . . . . . . . . . . . . . . . . . . . . . . . . . . 28
5.1.3 Environmental Conditions . . . . . . . . . . . . . . . . . . . . . . . . . . . . . . . . . . . . . . 28
5.1.4 Maintenance the Product . . . . . . . . . . . . . . . . . . . . . . . . . . . . . . . . . . . . . . . . 28
5.1.5 Cleaning the product . . . . . . . . . . . . . . . . . . . . . . . . . . . . . . . . . . . . . . . . . . . . 28
5.1.6 Mechanical Data. . . . . . . . . . . . . . . . . . . . . . . . . . . . . . . . . . . . . . . . . . . . . . . . 28
Contents

ETAS Contents
ES650.1 - User Guide 4
5.2 RoHS Conformity. . . . . . . . . . . . . . . . . . . . . . . . . . . . . . . . . . . . . . . . . . . . . . . . . . . . . . . . 29
5.3 CE conformity. . . . . . . . . . . . . . . . . . . . . . . . . . . . . . . . . . . . . . . . . . . . . . . . . . . . . . . . . . . 29
5.4 UKCA conformity . . . . . . . . . . . . . . . . . . . . . . . . . . . . . . . . . . . . . . . . . . . . . . . . . . . . . . . . 29
5.5 KCC conformity . . . . . . . . . . . . . . . . . . . . . . . . . . . . . . . . . . . . . . . . . . . . . . . . . . . . . . . . . 29
5.6 Taking the Product Back and Recycling . . . . . . . . . . . . . . . . . . . . . . . . . . . . . . . . . . . . 29
5.7 Use of Open Source software . . . . . . . . . . . . . . . . . . . . . . . . . . . . . . . . . . . . . . . . . . . . . 30
5.8 System Requirements. . . . . . . . . . . . . . . . . . . . . . . . . . . . . . . . . . . . . . . . . . . . . . . . . . . . 30
5.8.1 Hardware . . . . . . . . . . . . . . . . . . . . . . . . . . . . . . . . . . . . . . . . . . . . . . . . . . . . . . 30
5.8.2 Software. . . . . . . . . . . . . . . . . . . . . . . . . . . . . . . . . . . . . . . . . . . . . . . . . . . . . . . 31
5.9 Electrical Data . . . . . . . . . . . . . . . . . . . . . . . . . . . . . . . . . . . . . . . . . . . . . . . . . . . . . . . . . . 32
5.9.1 Power Supply . . . . . . . . . . . . . . . . . . . . . . . . . . . . . . . . . . . . . . . . . . . . . . . . . . 32
5.9.2 Host Interface . . . . . . . . . . . . . . . . . . . . . . . . . . . . . . . . . . . . . . . . . . . . . . . . . . 32
5.9.3 Analog Voltage Inputs . . . . . . . . . . . . . . . . . . . . . . . . . . . . . . . . . . . . . . . . . . 32
5.9.4 Thermocouple Inputs . . . . . . . . . . . . . . . . . . . . . . . . . . . . . . . . . . . . . . . . . . . 33
5.10 Pin Assignment . . . . . . . . . . . . . . . . . . . . . . . . . . . . . . . . . . . . . . . . . . . . . . . . . . . . . . . . . 34
5.10.1 Analog Inputs . . . . . . . . . . . . . . . . . . . . . . . . . . . . . . . . . . . . . . . . . . . . . . . . . 34
5.10.2 Thermocouple Inputs . . . . . . . . . . . . . . . . . . . . . . . . . . . . . . . . . . . . . . . . . . 34
5.10.3 Ethernet Interface, Power Supply . . . . . . . . . . . . . . . . . . . . . . . . . . . . . . . . 35
5.10.4 External Display . . . . . . . . . . . . . . . . . . . . . . . . . . . . . . . . . . . . . . . . . . . . . . . 35
6 Cables and Accessories . . . . . . . . . . . . . . . . . . . . . . . . . . . . . . . . . . . . . . . . . . . . . . 36
6.1 Measuring Cable . . . . . . . . . . . . . . . . . . . . . . . . . . . . . . . . . . . . . . . . . . . . . . . . . . . . . . . . 36
6.1.1 Measuring Cable with Banana Plugs . . . . . . . . . . . . . . . . . . . . . . . . . . . . . . 36
6.1.2 Measuring Cable with BNC Plugs . . . . . . . . . . . . . . . . . . . . . . . . . . . . . . . . . 36
6.2 Adapter Cable with BNC Plugs . . . . . . . . . . . . . . . . . . . . . . . . . . . . . . . . . . . . . . . . . . . . 36
6.3 Ethernet Cable/Power Supply Cable . . . . . . . . . . . . . . . . . . . . . . . . . . . . . . . . . . . . . . . 37
6.3.1 Y-Cable (ES650.1 in Stand-alone Mode) . . . . . . . . . . . . . . . . . . . . . . . . . . . 37
6.3.2 Connecting Cables to the ES600.1 . . . . . . . . . . . . . . . . . . . . . . . . . . . . . . . . 38
7 Ordering Information . . . . . . . . . . . . . . . . . . . . . . . . . . . . . . . . . . . . . . . . . . . . . . . . . 40
7.1 ES650.1 . . . . . . . . . . . . . . . . . . . . . . . . . . . . . . . . . . . . . . . . . . . . . . . . . . . . . . . . . . . . . . . . 40
7.2 Accessories . . . . . . . . . . . . . . . . . . . . . . . . . . . . . . . . . . . . . . . . . . . . . . . . . . . . . . . . . . . . 40
7.2.1 Calibration . . . . . . . . . . . . . . . . . . . . . . . . . . . . . . . . . . . . . . . . . . . . . . . . . . . . . 41
8 Configuration . . . . . . . . . . . . . . . . . . . . . . . . . . . . . . . . . . . . . . . . . . . . . . . . . . . . . . . 43
9 Contact Information. . . . . . . . . . . . . . . . . . . . . . . . . . . . . . . . . . . . . . . . . . . . . . . . . . 44
Figures . . . . . . . . . . . . . . . . . . . . . . . . . . . . . . . . . . . . . . . . . . . . . . . . . . . . . . . . . . . . 45
Index . . . . . . . . . . . . . . . . . . . . . . . . . . . . . . . . . . . . . . . . . . . . . . . . . . . . . . . . . . . . . . 46

ETAS About this Document
ES650.1 - User Guide 5
1 About this Document
1.1 Classification of Safety Messages
The safety messages used here warn of dangers that can lead to personal
injury or damage to property:
1.2 Presentation of Instructions
The target to be achieved is defined in the heading. The necessary steps for his
are in a step-by-step guide:
Target definition
1. Step 1
2. Step 2
3. Step 3
> Result
DANGER
indicates a hazardous situation with a high risk of death or serious injury if
not avoided
WARNING
indicates a hazardous situation of medium risk which could result in death or
serious injury if not avoided.
CAUTION
indicates a hazardous situation of low risk which may result in minor or
moder-ate injury if not avoided.
NOTICE
indicates a situation which may result in damage to property if not avoided.

ETAS About this Document
ES650.1 - User Guide 6
1.3 Typographical Conventions
Hardware
1.4 Presentation of Supporting Information
1.5 Scope of supply
Prior to the initial commissioning of the module, please check whether the
module was delivered with all required components and cables (see chapter 7
on page 40).
Additional cables and adapters can be obtained separately from ETAS. A list of
available accessories and their order designation is located in chapter “Acces-
sories” on page 40 of this manual or in the ETAS product catalog.
1.6 Additional information
The configuration instructions for the module under INCA can be found in the
corresponding software documentation.
Bold Menu commands, buttons, labels of the product
Italic Emphasis on content and newly introduced terms
NOTE
Contains additional supporting information.

ETAS Basic safety notices
ES650.1 - User Guide 7
2 Basic safety notices
This chapter contains information about the following topics:
• General safety information . . . . . . . . . . . . . . . . . . . . . . . . . . . . . . . . . . . . . . 7
• Requirements for users and duties for operators. . . . . . . . . . . . . . . . . . . 7
• Intended use. . . . . . . . . . . . . . . . . . . . . . . . . . . . . . . . . . . . . . . . . . . . . . . . . . . 7
2.1 General safety information
Please observe the Product Safety Notices ("ETAS Safety Notice") and the fol-
lowing safety notices to avoid health issues or damage to the device.
ETAS GmbH does not assume any liability for damages resulting from
improper handling, unintended use or non-observance of the safety precau-
tions.
2.2 Requirements for users and duties for operators
The product may be assembled, operated and maintained only if you have the
necessary qualification and experience for this product. Improper use or use by
a user without sufficient qualification can lead to damages or injuries to one's
health or damages to property.
The assembler of the system is responsible for the safety of any system incor-
perating the equipment.
General safety at work
The existing regulations for safety at work and accident prevention must be
followed. All applicable regulations and statutes regarding operation must be
strictly followed when using this product.
2.3 Intended use
Application area of the product
This product was developed and approved for applications in the automotive
sector. The module is suitable for use in interiors, in the passenger cell or in the
trunk of vehicles. The module is not suitable for installation in the engine com-
partment and similar environments. For use in other application areas, please
contact your ETAS contact partner.
Requirements for the technical state of the product
The product is designed in accordance with state-of-the-art technology and
recognized safety rules. The product may be operated only in a technically flaw-
less condition and according to the intended purpose and with regard to safety
NOTE
Carefully read the documentation (Product Safety Advice and this User's
Guide) that belongs to the product prior to the startup.

ETAS Basic safety notices
ES650.1 - User Guide 8
and dangers as stated in the respective product documentation. If the product
is not used according to its intended purpose, the protection of the product
may be impaired.
Requirements for operation
• Use the product only according to the specifications in the correspond-
ing User's Guide. With any deviating operation, the product safety is no
longer ensured.
• Observe the requirements on the ambient conditions.
• Do not use the product in a wet or damp environment.
• Do not use the product in potentially explosive atmospheres.
Electrical safety and power supply
• Observe the regulations applicable at the operating location concerning
electrical safety as well as the laws and regulations concerning work
safety!
• Connect only current circuits with safety extra-low voltage in accordance
with EN 61140 (degree of protection III) to the connections of the mod-
ule.
• Ensure that the connection and setting values are being followed (see
the information in the chapter "Technical data").
• Do not apply any voltages to the connections of the module that do not
correspond to the specifications of the respective connection.
Power supply
• The power supply for the product must be safely disconnected from the
supply voltage. For example, use a car battery or a suitable lab power
supply.
• Use only lab power supplies with double protection to the supply net-
work (with double insulation/reinforced insulation (DI/ RI)).
• The lab power supply must be approved for an operating altitude of
5000 m and for an ambient temperature of up to 70 °C.
• In regular operation of the modules as well as very long standby opera-
tion, a discharge of the vehicle battery is possible.
DANGER
The measuring terminals of the module may not be used for measurement of
mains voltage!
DANGER
Thermocouples should not be placed on energized parts!

ETAS Basic safety notices
ES650.1 - User Guide 9
Connection to the power supply
• The power cable must not be connected directly to the vehicle battery or
lab power supply, but via a fuse of up to 20 A.
• Ensure that the connections of the lab power supply, the power supply at
the module and the vehicle battery are easily accessible!
• Route the power cord in such a way that it is protected against abrasion,
damages, deformation and kinking. Do not place any objects on the
power cord!
De-energizing the module
The module does not have an operating voltage switch. The module can be de-
energized as follows:
• Disconnecting the cables from the measurement inputs
and
• Disconnecting the module from the power supply
– Disconnecting the module from the lab power supply
Separating device is the lab plug of the power cord or the plug of the
power cord at the connection of the module
or
– Disconnecting the module from the vehicle battery
Separating device is the lab plug of the power cord or the plug of the
power cord at the connection of the module
or
– Disconnecting the vehicle battery.
Approved cables
• Use exclusively ETAS cables at the connections of the module!
• Adhere to the maximum permissible cable lengths!
• Do not use any damaged cables! Cables may be repaired only by ETAS!
• Never apply force to insert a plug into a socket. Ensure that there is no
contamination in and on the connection, that the plug fits the socket, and
that you correctly aligned the plugs with the connection.
Requirements for the location
• Position the module or the module stack on a smooth, level and solid
underground.
• The module or the module stack must always be securely fastened.
DANGER
Dangerous electrical voltage!
Connect the power cable only with a suitable vehicle battery or with a suitable
lab power supply! The connection to power outlets is not allowed!
To prevent an inadvertent insertion in power outlets, ETAS recommends to
equip the power cables with safety banana plugs in areas with power outlets.

ETAS Basic safety notices
ES650.1 - User Guide 10
Fixing the modules on a carrier system
• When selecting the carrier system, observe the static and dynamic
forces that could be created by the module or the module stack on the
carrier system.
Requirements on the ventilation
• Keep the module away from heat sources and protect it against direct
exposure to the sun.
• The free space above and behind the module must be selected so that
sufficient air circulation is ensured.
Assembling (interconnecting) the modules
• Prior to assembling (interconnecting) or separating a module stack, the
modules must be disconnected from the supply voltage or they have to
be in the standby operating mode.
Transport
• Stack and connect the modules only at the location of the startup!
• Do not transport the modules at the cable of the module or any other
cables.
Maintenance
The product is maintenance-free.
Repair
If an ETAS hardware product should require a repair, return the product to
ETAS.
Cleaning the module housing
• Use a dry or lightly moistened, soft, lint-free cloth for cleaning the module
housing.
• Do not user any sprays, solvents or abrasive cleaners which could dam-
age the housing.
• Ensure that no moisture enters the housing. Never spray cleaning agents
directly onto the module.
Ambient conditions
The housing and the connectors of the module as well as the plug connectors
of the cables meet the degree of protection IP20.
Opening the module
CAUTION
Damage to the module and loss of properties based on IP20!
Do not open or change the module housing!
Work on the module housing may only be performed by ETAS.

ETAS Basic safety notices
ES650.1 - User Guide 11
Potential equalization
Cabling
For detailed information about cabling, see the User's Guide of the module.
CAUTION
Potential equalization in the vehicle is possible via the shield of the
connecting cables of the modules!
Install the modules only at locations with the same electrical potential or iso-
late the modules from the installation location.

ETAS Hardware Description
ES650.1 - User Guide 12
3 Hardware Description
This chapter contains information on the following topics:
• ES600 Measurement Modules . . . . . . . . . . . . . . . . . . . . . . . . . . . . . . . . . . 12
• ES650.1 A/D and Thermo Module . . . . . . . . . . . . . . . . . . . . . . . . . . . . . . . 13
• Package Contents. . . . . . . . . . . . . . . . . . . . . . . . . . . . . . . . . . . . . . . . . . . . . 15
• Housing. . . . . . . . . . . . . . . . . . . . . . . . . . . . . . . . . . . . . . . . . . . . . . . . . . . . . . 15
• Ports and Indicators . . . . . . . . . . . . . . . . . . . . . . . . . . . . . . . . . . . . . . . . . . . 16
• Maximum Input and Common-Mode Voltages. . . . . . . . . . . . . . . . . . . . 19
• Measurement Accuracy. . . . . . . . . . . . . . . . . . . . . . . . . . . . . . . . . . . . . . . . 20
3.1 ES600 Measurement Modules
The ES6xx series comprises a range of advanced and powerful measurement
and interface modules. All modules are designed for use under harsh environ-
mental conditions and are therefore ideally suited for automotive use. This
applies both to the housings of the ES6xx series and all cable connections. The
ability of these modules to operate under a wide range of ambient tempera-
tures and power supply voltages further contributes to their suitability for auto-
motive applications.
The compact and rugged housings of the ES6xx series allow easy mounting
even under difficult installation conditions. By installing the modules close to
the signal source, it is possible to avoid long signal lines that would corrupt
measurement signals. The housings of the ES6xx series stack easily to build
larger blocks of units.
The measurement modules provide a high sampling rate with high resolution
and accuracy. The accuracy is guaranteed across A/D and Thermo Modulethe
entire extensive ambient temperature range.
The interface modules provide the connection to the popular bus systems used
in motor vehicles and to various emulator probes (ETK).
Each module is equipped with a powerful Ethernet interface that ensures high-
speed data exchange with the host PC.
A synchronization and power management module makes it possible to con-
nect several measurement and interface modules to one Ethernet interface on
the host PC. This synchronization and power management module also
ensures simultaneous sampling of all measurement channels—even in large
module networks. The periodic synchronization signal is superimposed onto
the Ethernet signals without affecting data transfer. This excludes the possibil-
ity of a phase shift between the individual signals, even when measurements
are taken from different modules.
All modules of the ES6xx series have an automatic power saving feature. For
this purpose, the modules are equipped with a link signal detector that is con-
trolled directly by the Ethernet interface. As soon as a device connected to the
ES650.1 starts to send link signals via the Ethernet interface, the module is

ETAS Hardware Description
ES650.1 - User Guide 13
“awakened” from its power-saving standby mode and is ready for operation.
When it no longer receives any more link signals, the ES650.1 switches back
into standby mode automatically after a delay.
The modules are configured using the INCA’s graphical user interface (GUI).
INCA also provides you the functionality for data acquisition and data evalua-
tion.
3.2 ES650.1 A/D and Thermo Module
3.2.1 Overview
The ES650.1 is designed to measure analog input voltages and temperatures.
It provides you with eight channels for input voltages and eight channels for
temperature measurement using thermocouples.
Fig. 3-1ES650.1 A/D and Thermo Module
NOTE
The ES650.1 only switches from the power-saving standby mode to opera-
tion mode when it receives link pulses via the Ethernet interface. To ensure
that a connected PC sends link pulses, its Ethernet adapter must be properly
configured. A data transfer via the Ethernet interface automatically switches
the ES650.1 into operation mode.
TH1
ON TX ER
ES650.1
AD1
TH2
AD2
TH3
AD3
TH4
AD4
TH5
AD5
TH6
AD6
TH7
AD7
TH8
thermocouple
CBAV 180
0257833

ETAS Hardware Description
ES650.1 - User Guide 14
The channels for analog input voltages have two input voltage ranges. The res-
olution is 16 bits, the inaccuracy is 2 mV in the 10 V range or 12 mV in the 60 V
range, depending on the input voltage.
The thermocouple channels have a resolution of 21 bits. You can use B-, E-, J-,
K-, N-, R-, S- and T-type thermocouples. The maximum measuring range is
-210 °C to +1,820 °C. Each thermocouple channel is fitted with a cold junction
compensation directly in the connector. This ensures accuracy even when the
housing is not heated uniformly. The thermocouples are galvanically isolated
from each other and from case ground.
Fig. 3-2ES650.1 A/D and Thermo Module back panel
3.2.2 Features
Overview of the major features of the ES650.1:
• Eight galvanically isolated measurement channels for analog voltages
• Two measuring ranges of ±10 V DC and ±60 V DC
• Eight galvanically isolated measurement channels for thermocouples
• Measuring range from -210 °C to +1,820 °C (depending on type of ther-
mocouple)
• Measurement channels galvanically isolated from each other and from
the supply voltage
• Settable acquisition rate per channel
6-32V/HOST EXT. DISPLAY
CBEP 120
Operating Temperature
-
40…+ 70°C
Typical power consumption 3.5 W
Standby power consumption 50mW
Ethernet 10 Base-T
See manual for maximum voltages and impedance
1
±10V ±60V
2
3
A+
-
VCC
K

ETAS Hardware Description
ES650.1 - User Guide 15
• Parameterized software filters for signal smoothing with adaptive cutoff
frequency
• High resolution
• Data transfer via Ethernet
• Synchronous data acquisition
• Automatic power saving feature (standby mode)
• Rugged, functional metal housing
• Member of the ETAS Tool Suite – supported by INCA
For complete technical data of the ES650.1, refer to Chapter “Technical Data”
on page 27.
3.3 Package Contents
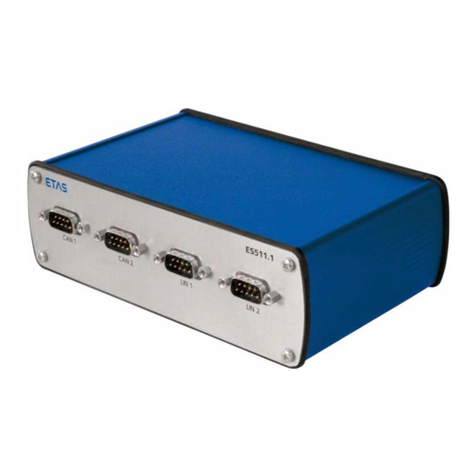
The ES650.1 is available as two different packages.
• Package variant „ES650.1“ includes the following parts:
– the ES650.1 A/D and Thermo Module
– a combined Ethernet cable and power supply cord CBEP110-2, 2 m
– four T-brackets to daisy-chain the housings
• Package variant „ES650.1-SCB“ includes the following parts:
– the ES650.1 A/D and Thermo Module
– four T-brackets to daisy-chain the housings
Additional connection cables for connection to the sensors and extension
cables can be ordered separately from ETAS. A list of available accessories and
ordering information can be found in Chapter “Ordering Information” on
page 40 of this manual or in the ETAS product catalog.
Before using your ES650.1, check that the unit has been delivered with all
required parts and cables.
3.4 Housing
The ES650.1 uses a housing with connections on the front and the rear side of
the device. The robust metal housing of the ES650.1 is equipped with non-slip
plastic feet.
The module is designed for the accommodation in the vehicle or lab. In order to
stabilize it, it can easily be screwed onto a support system. The housings of this
device family can also be connected with each other – quickly and easily (see
chapter 4.1 on page 22.

ETAS Hardware Description
ES650.1 - User Guide 16
3.5 Ports and Indicators
The ES650.1 has three indicators (LEDs), sixteen ports for sensors and trans-
ducers, one combined Ethernet/power supply port, and one port for an external
display.
3.5.1 Front Side
Fig. 3-3ES650.1 Front panel
Ports
The eight ports TH1 to TH8 for the thermocouples are located in the top termi-
nal row on the front panel. The eight ports AD1 to AD8 for the analog input
voltages are located in the bottom terminal row on the front panel.
DANGER
The measuring terminals of the module may not be used for measurement of
mains voltage!
DANGER
Thermocouples should not be placed on energized parts!

ETAS Hardware Description
ES650.1 - User Guide 17
3.5.2 Indicators
The three indicators (LEDs) are located in the top left corner on the front panel.
They indicate the following operational states of the ES650.1:
When enabling the device identification in INCA, the ER LED lights up for 5 s
with intermittent brightness. This allows you to identify the device selected in
INCA within a device block.
Serial number
The serial number is located on the front side of the module. This number is
important for the unique addressing of the module in the application software.
Indicator Indication Operational State
ON green The unit is powered on.
green, blinking The unit is in standby mode.
green, pulse,
intermittent
brightness
The unit is synchronizing with the
ES600.
TX yellow Host connection exists.
yellow, blinking Data are being transferred.
ER red
(duration > 5 s)
An error has occurred. Measurement
accuracy may be out of specification.
Please send the unit to ETAS for service.
red, bright blink-
ing
A serious error has occurred. Measure-
ments are no longer possible. Please
send the unit to ETAS for repair.
red, pulse, inter-
mittent bright-
ness
Device identification activated from
INCA.
t
t
t
t

ETAS Hardware Description
ES650.1 - User Guide 18
3.5.3 Rear Side
The ports for Ethernet, power supply and the external display are located on the
back panel.
Fig. 3-4ES650.1 Back panel
Ports
The port for an external display is located on the back panel. The current firm-
ware version does not yet support this external display; however, the port has
been built in to provide for future use.

ETAS Hardware Description
ES650.1 - User Guide 19
3.6 Maximum Input and Common-Mode Voltages
The maximum input voltage between two inputs and the maximum voltage
between an input and case ground is 60 V DC / 30 V AC.
For an explanation of the maximum input and common-mode voltages, see the
illustration and example below.
Fig. 3-5Maximum input and common-mode voltages
All capacitors between the inputs (Uin+ and Uin-) and case ground have the
same capacity. The maximum voltage between any input and case ground is
60 V DC / 30 V AC.
Example
For the given input voltages Uinx, Uiny, Uinz and the common-mode voltage
UCMxy, the maximum allowed common-mode voltage UCMyz is to be calculated.
Uinx = 10 V
Uiny = 5 V
Uinz = 10 V
UCMxy = 15 V
max(Uinx + Uiny + Uinz + UCMxy + UCMyz) = 2 Uc = 60 V
10 V + 5 V + 10 V + 15 V + max(UCMyz) = 60 V
max(UCMyz) = 60 V - 40 V = 20 V
+
-
+
-
+
-
channel x
channel y
channel z
galvanically isolated
case potential
C
C
C
C
C
C
U
in+
U
in+
U
in+
U
in-
U
in-
U
in-
U
inx
U
iny
U
inz
r
`jñó
r
`jóò
r
Å
r
Å

ETAS Hardware Description
ES650.1 - User Guide 20
3.7 Measurement Accuracy
While measuring temperatures with thermocouples the total measurement
inaccuracy is determined by different parts. These parts are:
• Basic accuracy Tg
• Temperature drift of thermocouple inputs Td
• Inaccuracy depending on the internal resistance of the thermocouple Ti
• Inaccuracy of cold junction compensation Tcjc
• Temperature drift of cold junction compensation Tdcjc
The maximum total inaccuracy is the sum of all parts.
T = Tg + Td + Ti + Tcjc + Tdcjc
The amount of the parts depends on the type of thermocouple. The figures are
listed in table “Thermocouple Inputs” on page 33.
Two examples show you how to calculate the maximum total inaccuracy.
Example 1
A thermocouple of type K with an internal resistance Ri of less than 50 is
used to measure a temperature Tm of 200 °C (473.15 K; 392 °F) at an ambient
temperature Ta of 25 °C (77 °F).
Tg = ( | Tm - T0 | * 0.025 %) + 0.25 K
Tg = ( | 473.15 K - 298.15 K | * 0.025 %) + 0.25 K
Tg = 0.29 K
Td = 0.005 K/K * | Ta - T0 |
Td = 0.005 K/K * | 25 °C - 25 °C |
Td = 0.00 K
Ti = 0 because the internal resistance is less than 50
Tcjc = 1 K
Tdcjc = 0.008 K/K * | Ta - T0 |
Tdcjc = 0.008 K/K * | 25 °C - 25 °C |
Tdcjc = 0.00 K
The maximum total inaccuracy is:
T = Tg + Td + Ti + Tcjc + Tdcjc
T = 0.29 K + 0.00 K + 0.00 K + 1 K + 0.00 K
T = 1.29 K
In this example the maximum total inaccuracy is determined by the inaccuracy
of the cold junction compensation.
Table of contents
Other ETAS Control Unit manuals
Popular Control Unit manuals by other brands

vacuubrand
vacuubrand VAC 24seven Instructions for use

Texas Instruments
Texas Instruments TMS320C6A816 Series Technical reference manual

Actisense
Actisense PRO-BUF-1 NMEA 0183 quick start guide

Miele
Miele DSM 408 Operating and installation instructions

Lawler
Lawler 570 installation manual

Wilo
Wilo Wilo-Control EC-L Installation and operating instructions

Toro
Toro 112-4881 installation instructions

Mitsubishi
Mitsubishi MELSEC QD75P user manual

GHL
GHL PLM-ADIN manual

Mitsubishi
Mitsubishi NZ2GF2B-60DA4 user manual

KUGELHAHN MÜLLER
KUGELHAHN MÜLLER KM-O Series Operating and maintenance instructions

Emerson
Emerson Neotecha Sapro Operating and safety instructions