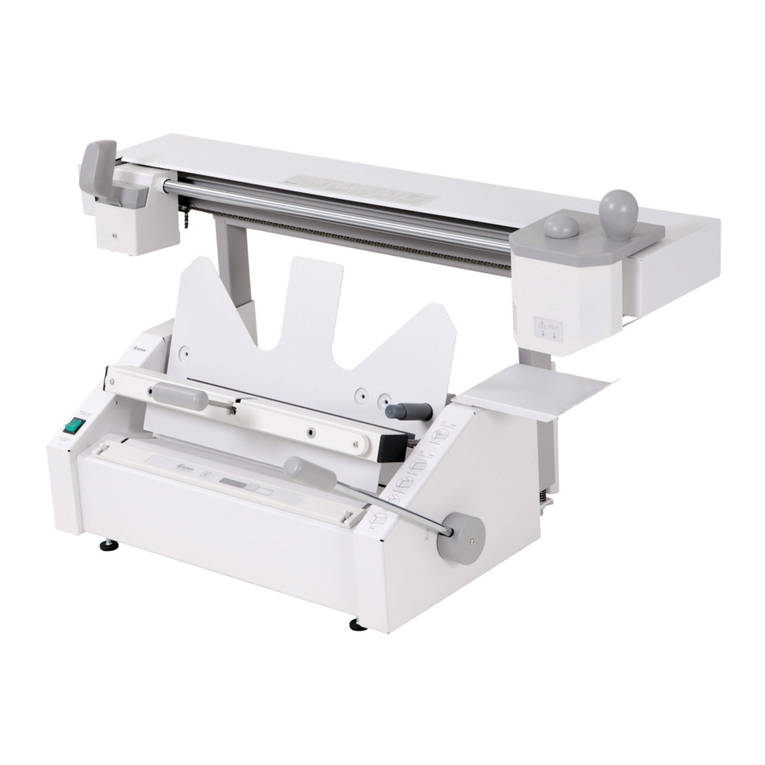
Fastbind Pureva XT User manual

1. INTRODUCTION...............................................................3
2. MAIN PARTS AND CONTROLS.......................................4
3. HOW TO USE: MAIN STEPS.............................................5
4. HOW TO USE: STEP BY STEP............................................6
Step 1: Mounting the book block.....................................6
Step 2: Trimming.............................................................14
Step 3: Mounting the cover............................................15
5. COPYRIGHT, TRADEMARKS AND WARRANTY.............18
Table of conTenTs


FASTBIND PUREVA XT USER MANUAL | v 1.0 | © Maping Co 2014
3
DRAFT
1. INTRODUCTION
1. InTroducTIon
FASTBIND PUREVA XT is a professional perfect binder with a
small footprint that uses a pioneering system allowing for both PUR
or EVA glues to be used (patents pending). Take advantage of this
new technology to produce the strongest bound highest quality books
faster and easier than ever before!
Main features:
• Interchangeable and reusable PUR and EVA glue cartridges
• Hard Cover, Soft Cover, Tape and padding bind books produced
with one machine
• With EVA glue, no cleaning necessary
• Using PUR glue, the strongest binding can be achieved, and its
simple and quick to clean the glue cartridge which can be reused
or replaced.
• Precise electronic temperature control
Overview
Specications
Europe U.S.A.
Machine cycles/hour Up to 450 Up to 450
Capacity books/minute* 1 - 3 1 - 3
Min/max binding thickness 0.1–45 mm 0.004–1.7˝
Max. binding length Up to 455 mm Upto17.9˝
Min/Max. binding height 140 mm / 320 mm 5.5/12.6˝
Max cover thickness** Up to 400 g/m2Up to 225 index
Voltage (V) / Frequency (Hz) 220–240 / 50-60 110–120 /50-60
Max. current 1,5 A 3 A
Machine dimensions (W x L x H) 107 x 60 x 64 cm 42.2x23.6x25.2˝
Weight 90 kg 198.4 lbs
Standard tools
Hard & Soft cover tool set Hard & Soft cover tool set
Approvals CE
* output rate depends on operator, selected cover and glue type
** depending on material properties.
Product information as of July 2014 and is subject to change without prior notice.

1
14
15
1716
13
18
19
21
20
22
6
5
7
4
8
2
3
10 12 11
9
23
23
3
x2
x2
FASTBIND PUREVA XT USER MANUAL | v 1.0 | © Maping Co 2014
4
DRAFT
2. PacKaGe conTenTs
2. PACKAGE CONTENTS
1. PUREVA XT perfect binder
2. storage locker
3. 2 storage locker ring magnets
4. 2 glue cartridge grippers
5. 2 glue cartridge caps
6. cap hook (tool for glue cartridge cap)
7. EVA glue cartridge
8. PUR glue cartridge
9. soft cover nipping tool front
10. soft cover nipping tool back
11. hard cover nipping tool front
12. hard cover nipping tool back
13. thermal casing
14. front heat shield
15. storage tray
16. drop cards
17. llingfunnels
18. fume extraction adapter 50 mm
19. fume extraction adapter 100 mm
20. 4 fastenin screws for fume extraction adapter
+ 4 washers
21. Hex key 4 mm
22. Hex key 2,5 mm (for nipping bar adjustment)
23. Power cord
Figure 2-1 Package Contents

FASTBIND PUREVA XT USER MANUAL | v 1.0 | © Maping Co 2014
5
DRAFT
5
8
12
13
12
7
6
4a
1b
1c/ 1d
1e/ 1f
3a
1a
2
3
1
3b
3c
3e
3d
4b
4
9b
9a
10
11
9
8b
14
1 Positioning deck
1a Positioning deck
1b Nipping cams
1c/1d
Nipping tool back (soft cover/ hard cover)
1e/ 1f
Nipping tool front (soft cover/ hard cover)
2 Turn table handle
3 Press clamp turn table
3a Clamp handle
3b Support rod
3c Paper guide for soft and hard covers
3d Turn table front plate
3e Fastening holes for paper guide
4 Temperature control panel
4a Indicator lights
4b Temperature selection button
5 Front heat shield
3. maIn ParTs and conTrols
6 Storage tray
7 Cap hook
8 Thermal casing
8b handling lid
9 Fume extraction hood
9a Light switch
9b Bypass valve
10 Applicator handle
11 Roughening handle
12 Glue cartridge gripper
13 Storage locker
Figure3-1Mainpartsandcontrolsidentied
3. MAIN PARTS AND CONTROLS

FASTBIND PUREVA XT USER MANUAL | v 1.0 | © Maping Co 2014
6
DRAFT
3. macHIne InsTallaTIon
3. MACHINE INSTALLATION
Opening the package
handling the Machine
• Remove the ”brackets” on the bottom of the shipping container
withaatheadscrewdriver.
• Remove the top parts (cover and mantle).
• Take out the inner carton box.
• Remove all packaging material around the machine
installing the stOrage lOcker
• Lift the machine from the pallet and place it on a solid work
surface. The recommended table height is 90 cm (36 inches) and
the minimum loading capacity is 200 kg (440 lbs.).
o WARNING!
▪The machine weights 90 kg (198 lbs.).
▪Please follow proper lifting guidelines
▪It is strongly suggested that three people are available to
lift and move the machine safely. Safe lifting positions are
highlighted on the picture in green on both sides of the
machine.
o WARNING!
▪Do not lift from the areas marked in red highlight in the
picture.
▪Lifting from the wrong locations can result in personal
injury and damage to the machine
▪Use caution when lifting the machine
• The machine is delivered with a separate storage locker.
• The storage locker is packages separately and its purpose is for
storing the glue cartridge gripper tool.
• Remove the packaging material around the locker.
• Attach two ring magnets (included in the delivery) to the right side
of the storage locker around the top screw heads, position marked
highlighted in green in the image.
o WARNING!
▪The storage locker is connected with the ring magnets,
and will not stay in position if the magnets are not installed
correctly installed.
▪Ensure that the magnets are properly attached before
locker installation.
• Install the storage locker on the left side of the machine so that
the ring magnets are against the machine’s left side panel and the
rear edge is against the left end panel.
• The storage locker has two compartments and it is intended only
for storing glue head grippers.
o WARNING!
▪Thestoragelockerisnotpermanentlyxedtothe
machine.
▪Remove the locker before moving the machine.

FASTBIND PUREVA XT USER MANUAL | v 1.0 | © Maping Co 2014
7
DRAFT
installing stOrage tray • ThemachineisdeliveredwithaseparateTeoncoatedplatform.
• The storage tray is placed on top of the machine, on the upper
right corner.
• The storage tray is intended for storing hot parts when the glue
tankisre-lled.
• The platform has enough space for the thermal casing, the glue
tank cap and the cap hook.
eva -glue
4. Glue, Glue carTrIdGe
pur -glue
• Recommended glue: Fastbind hot melt type 5.1, for normal
binding operations
• Generic glue for normal papers
• The EVA glue can be left in the cartridge at all times (no need for
draining or cleaning).
• Select the EVA -temperature setting on the control panel.
• PURglueisusedforpaperthatisdifculttobindwithEVAglue
• Sold in granules (Contact Fastbind for more information)
• Fume extraction recommended, unit should not be operated
without positive ventilation.
• Once cleaned of PUR glue, the glue cartridge can be used
multiple times.
• If the glue head is not cleaned immediately after use, the PUR glue
solidiesandthecartridgehastobereplaced.Thecartridgesare
inexpensive and can easily be replaced, contact Fastbind for more
information.
• Select the PUR -temperature setting on the control panel.
glue cartridge • One PUR and one Eva glue cartridge are included in the delivery.
• Both cartridge types are also available as accessories. They are
delivered without the tank cap (the main tank cap is included with
the machine and should be retained when replacing the cartridge.
If a cap is needed, it can be ordered separately.
cleaning the pur glue cartridge • APURgluecartridgehastobedrainedandushedtwicewithEVA
after use. Leave a small amount of EVA glue in the tank to protect
the glue cartridge during the storage.
• Drain the glue cartridge by applying glue using a chip board (gray
board) or other thick paper substrate.
3. MACHINE INSTALLATION & 4. GLUE AND GLUE CARTRIDGE

FASTBIND PUREVA XT USER MANUAL | v 1.0 | © Maping Co 2014
8
DRAFT
selecting the teMperature
5. conTrol Panel and TemPeraTure conTrol
standby/ autO-Off
• The control panel indicates the selected temperature (PUR or EVA).
• SelectPURwhentheglueheadislledwithPUR-glueandEVA
whentheglueheadislledEVA–glue.
• When the indicator light is blinking, the glue head has not yet
reached the selected temperature.
• The machine is equipped with timer and auto-off feature.
• The timer starts when the machine is switched on.
• Pressing the temperature selection button resets the timer to zero.
• Auto-off turns the heaters off after 10 hours.
• When the auto-off has turned the heaters off, the red standby –
light is lit.
• When the temperature selection button is pressed, the machine
starts heating again.
5. CONTROL PANEL AND TEMPERATURE CONTROL

FASTBIND PUREVA XT USER MANUAL | v 1.0 | © Maping Co 2014
9
DRAFT
extractOr hOOd and readiness
fOr fuMe extractiOn
6. fume eXTracTor
cOnnectiOn tO the extratOr hOOd
• The machine is equipped with a fume extraction hood which
directs the fumes away from the operator towards the fume
extraction port.
• Either a connection to your existing external/outside ventilation
or a fume extraction unit is recommended for all PUR glue
operations. No fume extraction device is included in the delivery.
• The extractor hood has a work light which can be turned on/off
from the switch located on the upper edge of the hood.
• The hood is equipped with fume exit connector port, and
the machine is equipped with 50mm (2”) and 100 mm (4”)
connectors.
o WARNING!
▪Hot PUR glue emits fume containing isocyanate. Glue
fumes can be harmful. Read the material safety data
sheet for the PUR –glue before using the glue. Do not use
PURgluewithoutsufcientfumeextractionandproper
ventilation. Follow all local and federal guidelines for
proper ventilation.
o RECOMMENDATION!
▪Itisrecommendedtoconnectasufcientlypowerfulfume
extraction device to the extractor hood to collect fume
emissions. Always follow local rules and regulations.
bypass valve On the fuMe extractOrs
• The extractor hood has a bypass vent on right side.
• Open the vent by bending and pulling the blue handle. The vent
is locked to the open position with magnets marked with green
highlight in the image.
• Make sure that the bypass vent is closed when applying glue on
the book spine.
• The bypass vent is opened to improve fume extraction from the
glue cartridge when adding PUR glue or checking glue level. For
details, please, please see
Glue Cartridge Handling
-section
6. FUME EXTRACTOR

FASTBIND PUREVA XT USER MANUAL | v 1.0 | © Maping Co 2014
10
DRAFT
7.1 installing a new glue
cartridge tO the gripper
7. HandlInG Glue carTrIdGe
• Remove the packaging on the glue cartridge and the gripper.
• The gripper has a locking latch which is opened by pressing the
blue trigger on top.
• Press to open the locking latch. Position the gripper by guiding the
screws marked in green highlight in the image, by guiding slots
marked with red highlight in the image.
• Secure the glue head by releasing the latch
• Make sure that locking lid marked with green highlight in the
image is securely attached to the glue cartridge
o WARNING!
▪When the glue head is heating up in the heating dock, all
related parts and surfaces become very hot. This includes
the glue cartridge, the heating dock, the glue tank cap
and any drops of glue dripping from the glue cartridge.
The parts can remain hot for a long time after the heating
or the machine is switched off even when the glue
cartridge is removed from the machine.
▪DO NOT TOUCH ANY HOT SURFACE AT ANY TIME OR
YOU RISK INJURY
▪While the machine is turned on, assume all parts in the
glue cartridge area to be HOT!
▪Use the gripper when handling the hot glue head & use
the cap hook only when taking off or putting on the glue
tank cap
7. HANDLING GLUE CARTRIDGE
7.2 stOring the gripper and glue
catridge head in the stOrage lOcker
• Store the glue cartridge only in the gripper storage area.
o WARNING!
▪Always assume the glue cartridge and the tank cap can be
hot!
▪DO NOT TOUCH ANY HOT SURFACE AT ANY TIME OR
YOU RISK INJURY
▪Never touch the cartridge with your hands if the machine
has been turned on, always use the gripper
o WARNING!
▪When moving the glue cartridge, do not tilt or turn it over.
The cap can come off and hot glue may spill from the tank.
▪DO NOT TOUCH ANY HOT SURFACE AT ANY TIME OR
YOU RISK INJURY
▪Always keep the gripper in upright position.
▪Store the gripper in the locker. The locker must be properly
installed (see the locker installation instructions)
lIsÄÄ KuVaT:
1. KaKsI KorKKIa
2. KorKIn aVausTyöKalu

FASTBIND PUREVA XT USER MANUAL | v 1.0 | © Maping Co 2014
11
DRAFT
7.4 handling the glue tank cap • The machine is delivered with two glue cartridge caps and a
cap hook for handling them. The cartridge cap is placed on the
glue cartridge to close the tank and keep the glue fumes inside
the tank. Use one cap for the glue cartridge with PUR glue and
another for EVA glue.
• Keep the cap on the glue cartridge while storing it in the gripper to
prevent the cap from getting lost and keeping any hot glue fumes
inside the glue cartridge.
• Open the cap only for adding glue or checking the glue level.
Otherwise, keep the cap on to prevent glue fumes from escaping.
o WARNING!
▪The tank cap is hot! DO NOT TOUCH ANY HOT
SURFACE AT ANY TIME OR YOU RISK INJURY
▪Always use the cap hook to handle the cap.
o WARNING!
▪Hot PUR glue emits fumes which can be harmful if
inhaled. Before removing the cap, ensure that
- the externally connected fume extractor is on and
operating
- and the glue cartridge is securely connected in the
heating dock, positioned under the bypass vent, which
must be in the open position.
7.3 installing the glue cartridge
tO the heating dOck
• Always Turn the table down before installing or removing the glue
cartridge
• Install the glue cartridge to the heating dock jaw by sliding it in
aprox 3/4 of the way in.
• The correct position to attach it is shown in the image with green
highlight.
• Before pushing the glue cartridge all the way in, check that the slot
onthetorquewheeltstothecorrespondingwedgeoftheheating
dock.
• The torque wheel can be rotated to the correct position by moving
the heating dock left or right using the applicator handle.
• Push the glue cartridge all the way in to the locked position.
7. GLUE CARTRIDGE HANDLING
• To remove the gripper press the blue trigger with your thumb.
• Pull towards you about 2 cm in order to release the lock.
• Remove the gripper from the machine and store it into the gripper
locker
• Check that safety latch is down, (marked with green highlight)
• Check that the machine is set for the correct glue type temperature
(PUR or EVA)
• Place the thermal protection (covers) back in the correct place.

FASTBIND PUREVA XT USER MANUAL | v 1.0 | © Maping Co 2014
12
DRAFT
7.5 chanching the glue catridge
7. Glue carTrIdGe HandlInG
• Table needs to be in down position
• Remove thermal casing and heat shield
o WARNING!
▪When glue cartridge is heating up , all related parts
and surfaces become hot. This includes glue cartridge,
heating dock, glue tank cap and possible glue drops from
glue cartridge. They can be hot for a long time even if
the machine is switched off - or glue cartridge has been
removed
▪DO NOT TOUCH ANY HOT SURFACE AT ANY TIME OR
YOU RISK INJURY
▪Do not touch
▪Use the gripper when handling the hot glue cartridge and
cap hook only for glue tank cap.
• Place the gripper on glue cartridge by pressing blue locking lid
and push the gripper to its place using the guiding screws marked
in green highlight in the image.
• Release the blue locking lid trigger once the cartridge is placed
correctly
• Securely hold the gripper with both hands with the blue handle.
• Pull the gripper towards you gently until safety latch (highlighted in
red) touches the safety stop
• Press the safety latch down, pull the gripper out and store it in the
storage are on the left side of the machine
o WARNING!
▪If glue cartridge is tilted, the cap can come off and hot
glue can spill out
▪DO NOT TOUCH ANY HOT SURFACE AT ANY TIME OR
YOU RISK INJURY
▪Keep the gripper always in upright position.
▪Store the gripper in the locker, making sure it is properly
installed (see locker installation instructions).
7. GLUE CARTRIDGE HANDLING
lIsÄÄ KuVaT:
1. KaKsI KorKKIa
2. KorKIn aVausTyöKalu
• Install new cartridge as in section 7.3

FASTBIND PUREVA XT USER MANUAL | v 1.0 | © Maping Co 2014
13
DRAFT
adding glue
8. addInG Glue and usInG THe byPass ValVe
• !! IMPORTANT!! Ensure that the fume extraction device is
connected and switched on
• Lift the thermal case cover and place it in the designated area.
o WARNING!
▪DO NOT TOUCH ANY HOT SURFACE AT ANY TIME OR
YOU RISK INJURY
▪Use only the glue cap handle to move the glue cap.
• Move the heating dock sideways under the fume extractor bypass
vent using the applicator handle , and open the vent
• Remove the cap from the cartridge with the cartridge cap hook
and place the cap on storage tray.
o WARNING!
▪The glue cartridge cap is hot! DO NOT TOUCH ANY
HOT SURFACE AT ANY TIME OR YOU RISK INJURY
o WARNING!
▪Hot PUR glue emits fumes which can be harmful if
inhaled. Before removing the cap, ensure that
- the externally connected fume extractor is on and
operating
- and the glue cartridge is securely connected in the
heating dock, positioned under the bypass vent, which
must be in the open position.
• Installthellingfunnelontopofthegluecartridge.
o WARNING!
▪The glue cartridge is hot! DO NOT TOUCH ANY HOT
SURFACE AT ANY TIME OR YOU RISK INJURY
• Addmoreglue,maximumllinglevel2/3ofthecartridgeheight,
see the picture.
o WARNING! DO NOT OVERFILL
▪Risk of injury !
▪Risk of machine failure!
• Removethellingtunnel
• Replace the cap on the glue cartridge, using the cap tool.
• Move the heating dock back to home position
• Replace thermal casing covers
• Close the vent
• Wait a minimum 10 minutes before resuming normal operations
8. ADDING GLUE AND USING BYPASS VALVE

FASTBIND PUREVA XT USER MANUAL | v 1.0 | © Maping Co 2014
14
DRAFT
9. THermal ProTecTIons
THERMAL CASING
• The machine is delivered with a separate
thermal casing cover for the glue cartridge.
• Only touch or move the thermal casing covers
by the handles. All other surfaces are very hot.
• The casing cover is designed to protect the user
from the hot surfaces inside the glue cartridge/
heating dock
• The thermal casing must be removed to open
the glue tank cap or when installing or removing
the glue cartridge
HEAT SHIELD
• The machine is delivered with a separate front
heat shield.
• The purpose of the front heat shield is to protect
the user from hot parts and hot glue drops.
• The front heat shield should always be installed
with the following exceptions:
o When the heat shield needs to be removed
temporarily to install or remove the glue
cartridge or to remove or add drop trays
9. THERMAL PROTECTIONS
Figure 9-1 Thermal casing and heat shield

FASTBIND PUREVA XT USER MANUAL | v 1.0 | © Maping Co 2014
15
DRAFT
10. funcTIons

FASTBIND PUREVA XT USER MANUAL | v 1.0 | © Maping Co 2014
16
DRAFT
TURN TABLE HANDLE
• When in the neutral position, the nipping
plate is open and the turn table is in the down
position.
• By turning the handle up, the turn table rotates
to up or ”gluing” position.
• By turning the handle down, the nip plate moves
to press the book spine.
o Warning!
▪Always use the handle to rotate the turn
table or it may, suddenly drop back
to the down position. Risk of personal
injury and machine failure.
10. funcTIon descrIPTIon
10. FUNCTION DESCRIPTION
NIPPING TOOLS
• The machine is delivered with two pairs of
nipping tools for spine pressing. A pair includes
a moving tool (in front) and a back support.
• Soft cover tools are marked with letter S and
hard cover tools with letter H.
• Install the back support to the rear part of the
positioning deck against the back limiter. The
back support is held tight with magnets.
• The moving tool is placed to the front of the
positioning deck on top of the nipping cams.
CLAMP
• The clamp handle is spring loaded. Pull the
clamp up and release the handle to lock it to
the UP -position.
• The clamp stays in the up position when the
locking pin rests in the slot on the support rod.
• Press the handle down against the U-shaped
groove to move the clamp. Slide the clamp so
that it touches the book block.
• Turn the handle all the way up to lock the
clamp.
• When putting a book cover in the binder, lift
the table slightly up with the cclamp handle and
slide the cover in from above.
• When closing the clamp, press the support rod
down to hold the table in position when locking.
Figure 10-x X
Figure 10-x X
Figure 10-x X

FASTBIND PUREVA XT USER MANUAL | v 1.0 | © Maping Co 2014
17
DRAFT
HARD COVER PAPER GUIDE
• It can be used with both soft and hard covers
• When binding a soft cover book, align the cover
horizontally against the paper guide.
• When binding a hard cover book, pull the
spring loaded outer rim up and align the hard
cover against the inner rim. Release the outer
rim to lock the hard cover down.
Figure 10-x X
ROUGHENING
• For roughening the roughener back and forth
over the book spine when the table is in the
glueing position.
• The book spine must be roughened before
glueing.
• Compress the spine back to shape after
roughening to form a square shaped book
spine.
o CAUTION!
▪Do not use roughening after glue has
been applied to the book spine as glue
destroys the roughening parts!
APPLYING GLUE
• Glue is applied by moving heated hot glue
cartridge back and forth over the book spine
using applicator handle. The glue roller located
on bottom of the glue cartridge spreads the glue
on the book spine.
• Repeat to apply more glue to the spine. Avoid
applying too much glue.
o WARNING!
▪The applied glue is hot! DO NOT
TOUCH ANY HOT SURFACE AT ANY
TIME OR YOU RISK INJURY
▪Do not touch the glue!
• Side gluing for soft cover books
o Pull 3 to 4 times from the cover after
gluing to put more glue between the cover
andtherstpage.
• Side gluing for hard cover books
▪Aftergluing,ipthespinestickonthe
glued book spine to get a professional
nish.
Figure 10-x X
Figure 10-x X

FASTBIND PUREVA XT USER MANUAL | v 1.0 | © Maping Co 2014
18
DRAFT
BEFORE DRAINING
• Place a gray board (chip board)on the
positioning deck, the rear edge against the back
support.
• Put a stack of papers (approximately 4 cm/ 1.5”
thick) on the position deck in portrait position
(the short edge against the deck). Close the
clamp and turn the table to gluing position.
• The glue has to be melted before the glue
cartridge can be drained. Use the PUR
temperature setting for PUR -glue and the EVA
setting for EVA -glue.
11. draInInG THe Glue carTrIdGe
11. DRAINING THE GLUE CARTRIDGE
Figure 10-x X
DRAINING THE PUR GLUE CARTRIDGE
• Cover the book block spine with gray board
so that the long edge of the board is towards
you (the long edge is parallel with the glue
applicator rail).
• Move the heating dock sideways close to the
book block by using the applicator handle.
Move the gray board against the back wall
of the glue cartridge docking station. Apply a
sufcientamountofglueonthegrayboardby
moving the unit back and forth from applicator
handle.
• Stop the heating dock in the middle of the paper
block. Remove the gray board by pulling it
towards yourself, throw out the greyboard. Move
the heating dock right over the edge of the
paper block.
• Repeat the steps until the glue roller stops
applying glue on the gray board and it is empty,
add a small amount of EVA glue and repeat
twice.
• Leave a small amount of EVA glue in the
cartridge.

FASTBIND PUREVA XT USER MANUAL | v 1.0 | © Maping Co 2014
19
DRAFT
HoW To use VIdeos
maInTenance
declaraTIon of conformITy
Address:
Telephone:
Fax:
E-mail:
Internet:
Nordea Bank Finland Plc,
ID No.:
DECLARATION OF CONFORMITY
We, Maping Company, hereby declare that following product:
Machine name:
Model number:
Type:
Fastbind ELITE XT
17
Hot melt book binding machine
is in conformity with essential requirements of the following standard:
98/37/EEC (MC).
Manufacturer:
Maping Co
Atomitie 5 F, FIN-00370 Helsinki, Finland
Tel. +358 9 562 6022 Fax: +358 9 562 6215
Helsinki, 2006-01-05
_______________________
Lauri Huotari, Managing Director
Espoo, 25.6.2014
DECLARATION OF CONFORMITY
We, Maping Company, hereby declare that following product:
Machine name:
Model Number:
Type:
Pureva XT
7502
Hot melt book binding machine
The product fullls the essential safety requirements for CE conformity
marking according to the Low Voltage Directive (2006/95/EC) and EMC
Directive 2004/108/EC.
Manufacturer: Maping Co
Kuusiniemi 10, FIN-02710 Espoo, FINLAND
Tel. +358 9 562 6022 Fax: +358 9 562 6215
Applied standards: EN 60950 - 1:2001 (safety)
EN 61000 - 6-3:2001 (EMC emission)
EN 61000 - 6-1:2001 (EMC immunity)
o TÄNNE TARVITTAISIIN
UUSIN VERSIO
60950 ja EMC
DIREKTIIVEISTÄ

FASTBIND PUREVA XT USER MANUAL | v 1.0 | © Maping Co 2014
20
DRAFT
5. coPyrIGHT, TrademarKs and WarranTy
5. COPYRIGHT, TRADEMARKS AND WARRANTY
cOpyright infOrMatiOn © 2014 Copyright Maping Co. Reproduction, adaptation or translation
without prior written permission is prohibited, except as allowed under
the copyright laws. The information contained herein is subject to
change without notice.
tradeMarks and patents
One year liMited warranty
cOntact infOrMatiOn
X, Y, Z are trademarks of Maping Co. Fastbind Pureva XT is invention
of the Maping Co (patent pending).
Maping Co warrants this product against defects in material or
workmanship as follows:
For the period of twelve months from the date of purchase, repair
or replace free of charge, for the original purchaser, any part or parts
found by inspection to be defective by our factory authorized service
outlet or by the manufacturer at Helsinki, Finland. All transportation
charges on parts submitted for repair or replacement under this
warranty shall be paid for by the purchaser.
All service under this warranty will be furnished and performed by
factory authorized service stations or by the manufacturer. Warranty
service does not extend the warranty period.
This warranty is limited to the value of the product and it does not
cover damage caused by:
• Transportation
• Normalwearandtear
• Neglectedorimpropermaintenance
• Misuse
The warranty will be voided if machine’s type plate has been wholly or
partially removed or erased.
Maping Co is not responsible for any damages, including but
not limited to direct, indirect or consequential damages, loss of
material, prot or interruption of business. Maping Co may at any
time discharge its warranty by refunding the purchase price and taking
back the product.
Maping Co
Kuusiniemi 10, FIN-02710 Espoo, FINLAND
Tel. +358 9 562 6022, Fax +358 9 562 6215
Email: support@maping.com
www.fastbind.com
This manual suits for next models
1
Table of contents
Other Fastbind Binding Machine manuals
