manuals.online logo
Brands
  1. Home
  2. •
  3. Brands
  4. •
  5. Opus
  6. •
  7. Binding Machine
  8. •
  9. Opus Atlas 300 mono User manual

Opus Atlas 300 mono User manual

Other manuals for Atlas 300 mono

3

Other Opus Binding Machine manuals

Opus MultiPress 52 User manual

Opus

Opus MultiPress 52 User manual

Opus El Jumbo B User manual

Opus

Opus El Jumbo B User manual

Opus Atlas 150 User manual

Opus

Opus Atlas 150 User manual

Opus Atlas 300 mono User manual

Opus

Opus Atlas 300 mono User manual

Opus MultiCREASE 30 User manual

Opus

Opus MultiCREASE 30 User manual

Opus MBE-300 User manual

Opus

Opus MBE-300 User manual

Opus Hercules Plus User manual

Opus

Opus Hercules Plus User manual

Opus MB 300 User manual

Opus

Opus MB 300 User manual

Opus profiBINDER&CLOSER User manual

Opus

Opus profiBINDER&CLOSER User manual

Opus Wire Bono User manual

Opus

Opus Wire Bono User manual

Opus Wire Bono User manual

Opus

Opus Wire Bono User manual

Opus Atlas 300 mono User manual

Opus

Opus Atlas 300 mono User manual

Opus Atlas 190 User manual

Opus

Opus Atlas 190 User manual

Opus Atlas 300 mono User manual

Opus

Opus Atlas 300 mono User manual

Opus MBE-300 User manual

Opus

Opus MBE-300 User manual

Opus multiCREASE 52 User manual

Opus

Opus multiCREASE 52 User manual

Opus MB 300 User manual

Opus

Opus MB 300 User manual

Opus Easy 120 User manual

Opus

Opus Easy 120 User manual

Opus Bono Plus User manual

Opus

Opus Bono Plus User manual

Opus OFFICERINO User manual

Opus

Opus OFFICERINO User manual

Opus profiBINDER&CLOSER User manual

Opus

Opus profiBINDER&CLOSER User manual

Opus COIL BONO User manual

Opus

Opus COIL BONO User manual

Opus TB 250 User manual

Opus

Opus TB 250 User manual

Opus Atlas 190 User manual

Opus

Opus Atlas 190 User manual

Popular Binding Machine manuals by other brands

Tamerica OPTICOMBO-341 quick start guide

Tamerica

Tamerica OPTICOMBO-341 quick start guide

GBC CombBind A20 instruction manual

GBC

GBC CombBind A20 instruction manual

GBC CombBind C800pro instruction manual

GBC

GBC CombBind C800pro instruction manual

JBI Alpha-Doc MKIII instruction manual

JBI

JBI Alpha-Doc MKIII instruction manual

GBC DocuBind P100 operating instructions

GBC

GBC DocuBind P100 operating instructions

Rexel CB345E Service and parts manual

Rexel

Rexel CB345E Service and parts manual

Morgana DigiBook 450 Technical manual

Morgana

Morgana DigiBook 450 Technical manual

GBC C210 instruction manual

GBC

GBC C210 instruction manual

Fellowes Orion-E 500 manual

Fellowes

Fellowes Orion-E 500 manual

Fellowes Pulsar E 300 instructions

Fellowes

Fellowes Pulsar E 300 instructions

GBC Modular MP2500iX operating instructions

GBC

GBC Modular MP2500iX operating instructions

Qupa M600 Manual instruction

Qupa

Qupa M600 Manual instruction

Rollabind PBS 2000 operating instructions

Rollabind

Rollabind PBS 2000 operating instructions

GBC SureBind 500 instruction manual

GBC

GBC SureBind 500 instruction manual

ibico ibiMaster 250 instruction manual

ibico

ibico ibiMaster 250 instruction manual

Peach Starbinder Pro PB200-30 operating instructions

Peach

Peach Starbinder Pro PB200-30 operating instructions

Fellowes Starlet 90 instruction manual

Fellowes

Fellowes Starlet 90 instruction manual

Peach PB200-70 operating instructions

Peach

Peach PB200-70 operating instructions

manuals.online logo
manuals.online logoBrands
  • About & Mission
  • Contact us
  • Privacy Policy
  • Terms and Conditions

Copyright 2025 Manuals.Online. All Rights Reserved.

OPUS Atlas 300 mono
User guide
GB
 GB
1
Contents:
1METALBIND SYSTEM
2DESCRIPTION
3IMPORTANT HEALTH & SAFEGUARDS
4PREPARATION TO WORK
IMAGE PRESS DEVICE
8IMAGE PRESS DEVICE
 HEALTH & SAFTY INSTRUCTIONS
9PREPARATION TO WORK
10 PREPARING TYPEFACE FONTS
 PREPARING THE MATRIX
5BINDING METALBIND
6DEBINDING METALBIND
7CBIND SYSTEM
12 HOT PRINT STAMPING ON COVERS
13 HOT PRINT STAMPING ON
O.CHANNELS FOR BINDING
14 HOT PRINT STAMPING ON CD/DVD
CD COVERS
15 TECHNICAL DATA
DECLARATION OF CONFORMITY
16
13
10
7
MINI
1
2
4
3
5
6
Metalbind
1
METALBIND SYSTEM
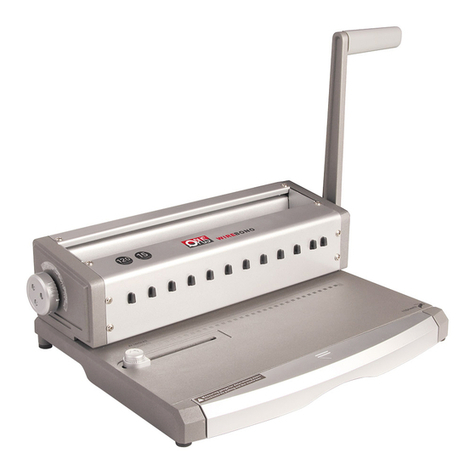
Atlas 300 mono binding equipement was designed to bind documents with
channels and covers from the Metalbind system (available from OPUS).
After assembling the Image Press device it is possible also to hot print stamp
on covers.
This is the strongest binding method
because covers and pages are clamped and healed together from the outside by a channel
1 - The back wall of the channel is bent in to clamp the covers together.
2 - Special coverings for hot print stamping
3 - Shaped front edge to keep a perfected flat face to the front of the presentations
4 - The internal pages are protected against damage by the covers from the channel
5 - The front face of the channel is never misshaped always flat
6 - The special protrusions (on selected channels) at each end help to centre covers and papers of the
presentation document and stop them moving sideways in the channel
5BINDING METALBIND
6DEBINDING METALBIND
7CBIND SYSTEM
12 HOT PRINT STAMPING ON COVERS
13 HOT PRINT STAMPING ON
O.CHANNELS FOR BINDING
14 HOT PRINT STAMPING ON CD/DVD
CD COVERS
15 TECHNICAL DATA
DECLARATION OF CONFORMITY
DESCRIPTION2
1 - Handle
2 - Adjusting lever
3 - Binding slot
4 - Hooks
5 - De-binding wedge (MB),
de-Binding Adapter for
channels 1.5 and 3mm only
6 - Channel width selecting tool
7 - Magnetic guide bar
8 - Guide & bind bar (thin)
9 - Guide & bind bar (thick)
10 - Side stop
11 - Adjustable side stop
12 - Extended back support
3
Atlas 300 mono •User’s guide GB
2DESCRIPTION - Atlas 300 mono
1 - handle
2 - adjusting lever
3 - binding slot
4 - hooks
5 - de-binding wedge (MB),
de-Binding Adapter for channels
1.5 and 3mm only
6 - channel width selecting tool
7 - magnetic guiding bar
8 - guide & bind bar (thin)
9 - guide & bind bar (thick)
10 - side stop
11 - adjustable side stop
12 - extended back support
1
2
6
7
9
8
510
3
8/9 7
3
411

12
11
3
Atlas 300 mono •User’s guide GB
2DESCRIPTION - Atlas 300 mono
1 - handle
2 - adjusting lever
3 - binding slot
4 - hooks
5 - de-binding wedge (MB),
de-Binding Adapter for channels
1.5 and 3mm only
6 - channel width selecting tool
7 - magnetic guiding bar
8 - guide & bind bar (thin)
9 - guide & bind bar (thick)
10 - side stop
11 - adjustable side stop
12 - extended back support
1
2
6
7
9
8
5
10
3
8/9 7
3
411

12
11
2
 GB
3
IMPORTANT HEALTH & SAFEGUARDS
3
• Before operating the equipment read the Health & Safety precautions, manufacturers recommendations
and the operation/user manual
• The operation/user manual should be easily available at any time for the operator
• The equipment must be kept away and out of reach of children
• Equipment must be protected against dust and damp and should be positioned on a strong and sturdy
flat surface
• While binding, do not put ngers into the binding slot
• Be careful when moving the equipment it is very heavy
• Pay attention the de-binding wedge, it has sharp edges
• The equipment must not be used for any other purposes other than those indicated in the operating/user
manual
• It is necessary to check and supervise if the equipment is being used and operated correctly, before
reporting any malfunctions or problems to the service department or dealer
• Equipment must not be located outside or operated in temperatures under 8°C/46.4°F and must be
operated in accordance with the general Health & Safety rules failure to do so could cancel the guarantee
• Repairs must be carried out by authorized stu, during the guarantee period, failure to do so could
cancel the guarantee
• Always leave the arm (1) in the open position.
PREPARATION TO WORK
4
Unpack the equipment and install the extended back support (12) on the housing with the thumb screws,
in the pre drilled holes provided. Screw the handle (1) to the side of the equipment using the Allen key
and socket head bolt provided. In the side of the equipment are slots which hold, 1.o guide bar (7) with
a magnet for all channels. 2. o binding bar (8 (thin) with a ruler for channels 16 to 32) (9 (thick) with a
ruler for channels 5 to 16 and 1.5 to 3) which help you to insert the documents and covers easily into the
channels, called the Cover Guide System, plus the de-binding wedge. When binding the channels 1.5 and
3 you must change the guide bar (7 ) position from on top of the binding jaw to in front of the binding
jaw, with the writing towards the channel see the diagram below 13B. Always store the binding bars and
de-binding wedge in the slots provide at the back of the equipment.
BINDING METALBIND
5
Important! If you are going to use Atlas 300 mono to bind and hot stamp on the same cover,
remember to hot stamp an inscription first and then bind the document. Therefore, in such
case, before binding refer to the user`s guide of Image Press device (on the following pages
of this manual) to make the hot stamping.
1. Use the channel width selecting tool (6) to choose the proper channel size. The channel sizes and
corresponding number of pages you can bind with them are shown in the table.
Channel size H/p/H H/p/T S/p/S O/p/O
1.5 - - 1-15 1-15
3 - - 15-30 15-30
5 10-31 10-33 10-34 10-38
7 32-60 34-63 35-63 39-67
10 61-89 64-92 64-92 68-97
13 90-118 93-121 93-121 98-126
16 119-148 122-150 122-150 127-155
20 149-186 151-189 151-189 156-194
24 187-225 190-228 190-228 195-233
28 226-264 229-266 229-267 234-271
32 265-303 267-305 268-308 272-310
H/p/H – hard cover/pile of pages/ hard cover S/p/S – soft cover/pile of pages/soft cover
H/p/T – hard cover/pile of pages/transparent cover O/p/O – pile of pages bound only with a channel
4
IMPORTANT SAFEGUARDS
•Before operating the equipment read the Health & Safety precautions, manufacturers recommenda-
tions and the operation/user manual
•The operation/user manual should be easily available at any time for the operator
•The equipment must be kept away and out of reach of children
•Equipment must be protected against dust and damp and should be positioned on a strong and sturdy
flat surface
•While binding, do not put fingers into the binding slot
•Be careful when moving the equipment it is very heavy
•Pay attention the de-binding wedge has sharp edges
•The machine must not be used for any other purposes other than those indicated in the operat-
ing/user manual
•It is necessary to check and supervise if the equipment is being used and operated correctly, before
reporting any malfunctions or problems to the service department or dealer
•Equipment must not be located outside or operated in temperatures under 8˚C/46.4˚F and must be ope-
rated in accordance with the general Health & Safety rules failure to do so could cancel the guarantee
•Repairs must be carried out by authorized staff, during the guarantee period, failure to do so could
cancel the guarantee
PREPARATION TO WORK
Unpack the machine and install the extended back support (15) on the housing (the adequate holes are
drilled in the housing and screwed bolts). Screw the handle (1) to the machine using the allen key at-
tached. In the shelves at the bottom of the machine there are two guide&bind bars and de-binding wedge.
Three bars are included to the machine: magnetic guiding bar (7) - with magnet, allows to insert the
documentation into the channel easily, guide&bind bar (8) thin - with a ruler, to be used with 20-32
size channels, helps to insert the document into the channel, guide&bind bar (9) thick - with a ruler,
to be used with 1.5
size of the binding slot. The shape of bars is specially designed to make inserting the documentation in
the channel as easy as possible.
Put the magnetic guiding bar (7) on the movable binding jaw and insert the guide&bind bar (8/9) by
the back wall of the binding slot (3). The cut side of each bar should be directed to the inside of the
binding slot (3). The machine is ready to work.
BINDING METALBIND
Important! If you are going to use Atlas 300 mono to bind and hot stamp on the same cover, re-
member to hot stamp an inscription first and then bind the document. Therefore, in such case, be-
fore binding refer to the user`s guide of Image Press device (on the following pages of this manual)
to make the hot stamping.
1. Use the channel width selecting tool (6) to choose the proper channel size. The channel sizes and corre-
sponding number of pages you can bind with them are shown in the table.
H/p/H – hard cover/pile of pages/ hard cover S/p/S – soft cover/pile of pages/soft cover
H/p/T – hard cover/pile of pages/transparent cover O/p/O – pile of pages bound only with a channel
Channel size H/p/H H/p/T S/p/S O/p/O
5
1.5 - -
- -
1-15 1-15
15-30 15-30
3
10-31 10-33 10-34 10-38
7 32-60 34-63 35-63 39 - 67
10 61-89 64-92 64 - 92 68 - 97
13 90-118 93-121 93 - 121 98 - 126
16 119-148 122 - 150 122 -150 127 - 155
20 149 – 186 151 – 189 151 – 189 156 – 194
24 187 – 225 190 – 228 190 – 228 195 – 233
28 226 – 264 229 – 266 229 – 267 234 – 271
32 265 – 303 267 – 305 268 – 308 272 – 310
4
5
3
7 - Magnetic guide bar
8 - Guide & bind guide (thin)
9 - Guide & bind bar (thick)
13 - 13 A - channel 5-32, 13 B - channel 1,5; 3 mm
14 - Binding jaw
2. Make sure the binding bars are correctly inserted into the binding slot (3)
Important!
• for 1.5-16 mm channels - insert a thick guide&bind bar (9) at the back of the binding slot
• for 20-32 mm channels - insert a thin guide&bind bar (8) at the back of the binding slot
3. Set the extended back support so that the cover is parallel to the de-binding plate.
4. Lift the handle (1) to the vertical position.
5. Move the clamping lever (2) maximum left.
6. Insert the channel in-between the bars (7 and 8 or 9). The correct position of the bars are shown in the
diagrams above. If using A4 format, move the channel maximum to the right side stop (10).
When a channel is smaller than A4, put the channel in the centre of the binding slot, t the adjustable
side guide (11) and lock in place to stop the channel moving when doing more than one channel.
There is a ruler on the binding bar which can help determine the centre position, half of channel length.
7. Move the clamp lever (2) to the right until you feel the resistance.
8. Square the documents, put it between the covers; check if the pages are centered in relation
to the edges of covers.
9. Put the documents an covers into the channel.
• If they are extrusions at each end of the channel, ensure the documents between them in the channel.
Note! Make sure the back cover is facing you.
10. Push the handle (1) down, holding the clamp lever (2) at the same time and then lift the handle (1) up.
11. Move the clamp lever (2) to the left to take out the bound documents.
5
Atlas 300 mono •User’s guide GB
thinner, it is necessary to use the
filling strips (e.g. O.Filling Sticky
available from OPUS) to make it
thick enough.
2. Make sure the binding bars are correctly inserted into the binding slot (3)
Important!
•for 1.5-16 mm channels - insert a thick guide&bind bar (9) by the back wall of the binding slot
•for 20-32 mm channels - insert a thin guide&bind bar (8) by the back wall of the binding slot
3. Set the extended back support so that the cover is parallel to the de-binding plate.
4. Lift the handle (1) maximally up.
5. Move the adjusting lever (2) maximally to the left.
6. Insert the channel in-between the bars (7 and 8/9). Correct positioning of the bars
are shown in the diagrams above. If using A4 format, move the channel maximally
to the right, close to the side stop (10). In case of a channel smaller than A4,
apply a limiter. The position of adjustable side stop (11) can be determined by means
of a scale on insert (position = half of channel length).
7. Move the adjusting lever (2) to the right until you feel the resistance.
8. Even a pile of paper, put it between the covers; check if the pages are centered in rela-
tion to the edges of covers.
9. Put the documentation into the channel.
•If they are extrousious at each end of the channel ensure the pages and channels are
between them.
Note! Make sure the back cover is placed in front of you.
10. Push the handle (1) down, holding the lever (2) at the same time and then lift
the handle (1) up.
11. Move the adjusting lever (2) to the left to take out the bound documentation.
back cover
Important!
In some cases (e.g. too big channel size
comparing with the number of pages) it
may happen that the documentation is
not bound properly. In such case, after
lifting the handle (1), move the lever (2)
to the right until you feel the resistance
and then repeat step 10 and 11.
BINDING
7 - magnetic guiding bar
8 - guide & bind bar (thin)
9 - guide & bind bar (thick)
13 - 13A - channel 5-32
13B - channel 1,5; 3 mm
14 - binding jaw
1
2
13A 13B
Important!
In some cases you may have to use a bigger channel
than necessary, compared to the number of pages,
if this happens, you will find that the documents
and cover are not bound properly. In such a case,
either use a O-filling strip or repeat the binding
process, remember to move the clamp lever (2)
until you feel a resistance, then repeat step
10 and 11.
5
Atlas 300 mono •User’s guide GB
thinner, it is necessary to use the
filling strips (e.g. O.Filling Sticky
available from OPUS) to make it
thick enough.
2. Make sure the binding bars are correctly inserted into the binding slot (3)
Important!
•for 1.5-16 mm channels - insert a thick guide&bind bar (9) by the back wall of the binding slot
•for 20-32 mm channels - insert a thin guide&bind bar (8) by the back wall of the binding slot
3. Set the extended back support so that the cover is parallel to the de-binding plate.
4. Lift the handle (1) maximally up.
5. Move the adjusting lever (2) maximally to the left.
6. Insert the channel in-between the bars (7 and 8/9). Correct positioning of the bars
are shown in the diagrams above. If using A4 format, move the channel maximally
to the right, close to the side stop (10). In case of a channel smaller than A4,
apply a limiter. The position of adjustable side stop (11) can be determined by means
of a scale on insert (position = half of channel length).
7. Move the adjusting lever (2) to the right until you feel the resistance.
8. Even a pile of paper, put it between the covers; check if the pages are centered in rela-
tion to the edges of covers.
9. Put the documentation into the channel.
•If they are extrousious at each end of the channel ensure the pages and channels are
between them.
Note! Make sure the back cover is placed in front of you.
10. Push the handle (1) down, holding the lever (2) at the same time and then lift
the handle (1) up.
11. Move the adjusting lever (2) to the left to take out the bound documentation.
back cover
Important!
In some cases (e.g. too big channel size
comparing with the number of pages) it
may happen that the documentation is
not bound properly. In such case, after
lifting the handle (1), move the lever (2)
to the right until you feel the resistance
and then repeat step 10 and 11.
BINDING
7 - magnetic guiding bar
8 - guide & bind bar (thin)
9 - guide & bind bar (thick)
13 - 13A - channel 5-32
13B - channel 1,5; 3 mm
14 - binding jaw
1
2
13A 13B
Important!
If documentation is thinner, it is
necessary to use the filling strips
(e.g. O.Filling Sticky available from
OPUS) to make it thick enough.
 GB
6
DE-BINDING METALBIND
1. Put the document on the machine (back cover up).
2. Push the extended back support maximally to the back. And disassemble moving limiter for
guide & bind bar.
3. Lift the handle (1) maximally up.
4. Open the document a few pages away from the back cover.
5. Fit the right edge of the de-binding wedge (5) in the right hook (4).
6
7. For de-binding channels 1,5 mm and 3 mm, use the de-binding adapter (5).
Place the de-binding adapter (5) on the channels, small slot is for 1,5 mm, bigger for 3 mm.
. Move the left end of the de-binding wedge (5) over the left hook (4) and fit it there.
8. Move the adjusting handle (2) to the right.
9. Press the handle (1) firmly down holding
the lever (2) at the same time.
Raise the handle (1) up, move the adjust-
ing lever (2) to the right and press the han-
dle (1) down again. Repeat for several
times.
10.
Lift the handle (1) up, loosen the adjusting
lever (2) and remove the document to-
gether with the wedge (5), then take the
wedge (5) out of the document carefully.
11.
12. Make the planned changes to the docu-
ment. The cover and channel may be re-
used (a maximum of three times).
6
DE-BINDING
C-BIND SYSTEM
Accessories enabling binding and de-binding of covers of the C-BIND system.
•2 binding inserts /A1 and B1/ in O.CB Inserts for Atlas 300/MB 300/MBE 300
(not included as standard) - (dig 1)
•de-binding wedge (dig 2) with AA jig (dig 3) in O.CB Debinding tool for Atlas 300/MB 300/MBE 300
(not included as standard)
7
A1
B1
Dig 1
back
cover
Dig 3
Dig 2
4
4
5
DE-BINDING METALBIND
6
1. Put the document on the machine (back cover up).
2. Push the extended back support to the maximum back position, remove the adjustable
side guide.
3. Lift the handle (1) delete the word to the maximum open position.
4. Open the document a few pages away from the back cover.
5. Fit the right edge of the debinding wedge (5) in the right hook (4).
6. Move the left end of the debinding wedge (5) over the left hook (4) and t it there.
7. For de-binding channels 1,5 mm and 3 mm, use the debinding adapter (5).
Place the de-binding adapter (5) on the channels, small slot is for 1,5 mm, bigger for 3 mm.
6
DE-BINDING METALBIND
1. Put the document on the machine (back cover up).
2. Push the extended back support maximally to the back. And disassemble moving limiter for
guide & bind bar.
3. Lift the handle (1) maximally up.
4. Open the document a few pages away from the back cover.
5. Fit the right edge of the de-binding wedge (5) in the right hook (4).
6
7. For de-binding channels 1,5 mm and 3 mm, use the de-binding adapter (5).
Place the de-binding adapter (5) on the channels, small slot is for 1,5 mm, bigger for 3 mm.
. Move the left end of the de-binding wedge (5) over the left hook (4) and fit it there.
8. Move the adjusting handle (2) to the right.
9. Press the handle (1) firmly down holding
the lever (2) at the same time.
Raise the handle (1) up, move the adjust-
ing lever (2) to the right and press the han-
dle (1) down again. Repeat for several
times.
10.
Lift the handle (1) up, loosen the adjusting
lever (2) and remove the document to-
gether with the wedge (5), then take the
wedge (5) out of the document carefully.
11.
12. Make the planned changes to the docu-
ment. The cover and channel may be re-
used (a maximum of three times).
6
DE-BINDING
C-BIND SYSTEM
Accessories enabling binding and de-binding of covers of the C-BIND system.
•2 binding inserts /A1 and B1/ in O.CB Inserts for Atlas 300/MB 300/MBE 300
(not included as standard) - (dig 1)
•de-binding wedge (dig 2) with AA jig (dig 3) in O.CB Debinding tool for Atlas 300/MB 300/MBE 300
(not included as standard)
7
A1
B1
Dig 1
back
cover
Dig 3
Dig 2
4
4
5
8. Move the clamp lever (2) to the right.
9. Press the handle (1) rmly down holding the
lever (2) at the same time.
10. Raise the handle (1) up, move the clamp
lever (2) to the right and press the handle
(1) down again. Repeat remove word
severaltimes.
11. Lift the handle (1) up, loosen the clamp
lever (2) and remove the document together
with the wedge (5), then take the wedge (5)
out of the document carefully.
12. Make the planned changes to the document.
The cover and channel may be reused
(a maximum of three times).
C-BIND SYSTEM
7
Accessories enabling binding and de-binding of covers of the CBIND system.
• 2 binding inserts /A1 and B1/ in O.CB Inserts for Atlas 300/MB 300/MBE 300 (not included
as standard) (dig 1)
• De-binding wedge (dig 2) with AA jig (dig 3) in O.CB De-binding tool for
Atlas 300/MB 300/MBE 300 (not included as standard)
6
DE-BINDING METALBIND
1. Put the document on the machine (back cover up).
2. Push the extended back support maximally to the back. And disassemble moving limiter for
guide & bind bar.
3. Lift the handle (1) maximally up.
4. Open the document a few pages away from the back cover.
5. Fit the right edge of the de-binding wedge (5) in the right hook (4).
6
7. For de-binding channels 1,5 mm and 3 mm, use the de-binding adapter (5).
Place the de-binding adapter (5) on the channels, small slot is for 1,5 mm, bigger for 3 mm.
. Move the left end of the de-binding wedge (5) over the left hook (4) and fit it there.
8. Move the adjusting handle (2) to the right.
9. Press the handle (1) firmly down holding
the lever (2) at the same time.
Raise the handle (1) up, move the adjust-
ing lever (2) to the right and press the han-
dle (1) down again. Repeat for several
times.
10.
Lift the handle (1) up, loosen the adjusting
lever (2) and remove the document to-
gether with the wedge (5), then take the
wedge (5) out of the document carefully.
11.
12. Make the planned changes to the docu-
ment. The cover and channel may be re-
used (a maximum of three times).
6
DE-BINDING
C-BIND SYSTEM
Accessories enabling binding and de-binding of covers of the C-BIND system.
•2 binding inserts /A1 and B1/ in O.CB Inserts for Atlas 300/MB 300/MBE 300
(not included as standard) - (dig 1)
•de-binding wedge (dig 2) with AA jig (dig 3) in O.CB Debinding tool for Atlas 300/MB 300/MBE 300
(not included as standard)
7
A1
B1
Dig 1
back
cover
Dig 3
Dig 2
4
4
5
26
Uwaga!
•okładka musi być założona „do góry nogami“ (grzbiet okładki będzie zawsze znajdować
się po prawej stronie)
•tylna strona przystawki posiada gumową część w kształcie koła, która powinna zostać
nałożona na plastikowa część okładki (miejsce na włożenie płyty)
2. Do szczeliny bindującej urządzenia Atlas 300 mono włóż przystawkę wraz z nałożoną na
nią okładką CDcover. W zależności od rodzaju okładki CDcover przesuń przystawkę:
•maksymalnie w prawo - jeśli używasz
okładek CDcover z marginesem (jednobar-
wny pasek przy grzbiecie okładki)
•maksymalnie w lewo - jeżeli używasz
okładek CDcover bez marginesu (okładka
jest pokryta jednolitą okleiną)
3. Postępuj analogicznie jak w przypadku stan-
dardowego złocenia na okładkach (patrz
rozdział 12. WYKONYWANIE ZŁOCEŃ NA OKŁAD-
KACH)
Uwaga!
Po wykonaniu złocenia i zdjęciu folii zale-
camy przetrzeć wyzłocony napis miękką sz-
matką, aby usunąć resztki folii.
Uwaga!
Przystawka Image Press zawiera element grzewczy, dlatego w przypadku zdjęcia przys-
tawki z zaczepów zalecamy umieszczenie jej na podstawce w celu schłodzenia.
DANE TECHNICZNE - Atlas 300 mono
•maksymalna ilość oprawianych kartek ............................300 kartek*
•waga netto ....................................................................16,3 kg
•waga brutto ....................................................................19,5 kg
•wymiary (W x S x G) ..........................................260 x 435 x 315 mm
Przystawka Image Press
•waga netto ......................................................................2,0 kg
•waga brutto ......................................................................2,2 kg
•zasilanie ................................................................230 V / 50 Hz
•średni pobór mocy ............................................................ 100 W
•maksymalny pobór mocy ....................................................600 W
•wymiary (W x S x G) ............................................88 x 335 x 125 mm
* próby wykonano na papierze o gramaturze 80 g/m²
01.12.14
15
folia
7
IMAGE PRESS DEVICE - SAFETY INSTRUCTIONS
Image Press device is available in OPUS oer.
•Before putting the machine into operation please read the safety precautions, manufac-
turer recommendations and the operation manual
•The operation manual should be easily available at any time for the operator
•The machine must not be placed near the heating units or ventilation units
•The machine should not be used in vicinity of inflammable liquids or gases
•The machine may be supplied only through the original cord. A mains socket must be
provided with ecient earthing. The supply voltage must be consistent with the para-
meters specified on the technical plate positioned on the machine housing. Disobeying
the above rule may result in electric shock or fire
•The supplying cable should be protected against any damage, must not be used to pull
the machine or to remove the plug from a socket
•Making any changes in the electric circuit or the supplying cable may result in electric
shock
•During a long standstill or before replacing the machine, the plug should be removed
from a mains socket
•Before replacing the machine it is necessary to check if the heater cooled down in order
to avoid destroying the surface on which the machine will be placed as well as avoid the burn
8
Atlas 300 mono •User’s guide GB
2. The bound documentation must have thickness of at least 1,8 mm (without cover). If the
documentation is thinner, it is obligatory to use filling strips (e.g. O•Filling Sticky avail-
able at OPUS), to increase the thickness of bound documents. When using channels up to
16 mm size and C sizes in C-BIND covers, put before binding both binding inserts A1 and
B1 to the binding slot and when using covers with size over 16 mm and C sizes in C-BIND
covers, put only one B1 insert into the binding slot.
3. When debinding C-BIND covers use debinding wedge included in O.CB Debinding Tool for
Atlas 300/MB 300/MBE 300.
IMPORTANT! When using AA covers put AA jig on spine of the cover.
4. Binding and de-binding of covers of the C-BIND system is performed analogous to binding
with Metalbind system, but: measure the thickness of sheet pile to be bound means of the
cover selection tool and select appropriate cover.
cover number of
dimension bound sheets
AA soft cover 15-40
hard cover 20-40
A 41-95
B 96-125
C 126-150
D 151-190
E 191-230
F 231-265
G 266-300
1. Choose the proper size of a
cover by using the table (on
the left) or the channel
width selecting tool (6).
1. Choose the proper size
of a cover by using the
table (on the left) or
the channel width
selecting tool (6).
2. The documents to be bound must have a minimum thickness of 1,8 mm without
the covers. If the documents are thinner, you must put a O-lling strips which you can
buy from OPUS, to increase the thickness of the documents to be bound. For A,B,C sizes
in C-bind covers. Before binding you must t both binding bars A1 & B1 in the binding
slot. When binding all other sizes of C-Bind covers, t only B1 insert into the binding slot.
3. When de-binding C-bind covers use the de-binding wedge which is available from OPUS.
pl, for the Atlas range 190 , 300/mb or 300/mbE 300.
INPORTANT:
When using AA covers put the AA remove word de-binding jig on spine of the cover first.
4. Binding and de-binding covers from the C-bind system is done in a similar way to the
Metalbind system. In the C-Bind system you measure only the documents, not the docu-
ments and covers. Use the cover selecting tool or the chart in this manual/user guide.
IMAGE PRESS DEVICE  SAFETY INSTRUCTIONS
Image Press device is available in OPUS oer.
8
• Before putting the machine into operation please read the Health & Safety precautions,
manufacturer recommendations and the operation manual
• The operation manual should be easily available at any time for the operator
• The equipment must not be placed near heating or ventilation units.
• The equipment should not be used in vicinity of inammable liquids or gases
• The equipment may be supplied electricity only through the original cord. A mains socket
must be provided with ecient earthing. The supply voltage must be consistent with the
parameters specied on the technical plate positioned on the equipment housing.
Disobeying the above rule may result in electric shock or re
• The power supply cable should be protected against any damage, and must not be used
to pull or remove the plug from the socket.
 GB
26
Uwaga!
•okładka musi być założona „do góry nogami“ (grzbiet okładki będzie zawsze znajdować
się po prawej stronie)
•tylna strona przystawki posiada gumową część w kształcie koła, która powinna zostać
nałożona na plastikowa część okładki (miejsce na włożenie płyty)
2. Do szczeliny bindującej urządzenia Atlas 300 mono włóż przystawkę wraz z nałożoną na
nią okładką CDcover. W zależności od rodzaju okładki CDcover przesuń przystawkę:
•maksymalnie w prawo - jeśli używasz
okładek CDcover z marginesem (jednobar-
wny pasek przy grzbiecie okładki)
•maksymalnie w lewo - jeżeli używasz
okładek CDcover bez marginesu (okładka
jest pokryta jednolitą okleiną)
3. Postępuj analogicznie jak w przypadku stan-
dardowego złocenia na okładkach (patrz
rozdział 12. WYKONYWANIE ZŁOCEŃ NA OKŁAD-
KACH)
Uwaga!
Po wykonaniu złocenia i zdjęciu folii zale-
camy przetrzeć wyzłocony napis miękką sz-
matką, aby usunąć resztki folii.
Uwaga!
Przystawka Image Press zawiera element grzewczy, dlatego w przypadku zdjęcia przys-
tawki z zaczepów zalecamy umieszczenie jej na podstawce w celu schłodzenia.
DANE TECHNICZNE - Atlas 300 mono
•maksymalna ilość oprawianych kartek ............................300 kartek*
•waga netto ....................................................................16,3 kg
•waga brutto ....................................................................19,5 kg
•wymiary (W x S x G) ..........................................260 x 435 x 315 mm
Przystawka Image Press
•waga netto ......................................................................2,0 kg
•waga brutto ......................................................................2,2 kg
•zasilanie ................................................................230 V / 50 Hz
•średni pobór mocy ............................................................ 100 W
•maksymalny pobór mocy ....................................................600 W
•wymiary (W x S x G) ............................................88 x 335 x 125 mm
* próby wykonano na papierze o gramaturze 80 g/m²
01.12.14
15
folia
7
IMAGE PRESS DEVICE - SAFETY INSTRUCTIONS
Image Press device is available in OPUS oer.
•Before putting the machine into operation please read the safety precautions, manufac-
turer recommendations and the operation manual
•The operation manual should be easily available at any time for the operator
•The machine must not be placed near the heating units or ventilation units
•The machine should not be used in vicinity of inflammable liquids or gases
•The machine may be supplied only through the original cord. A mains socket must be
provided with ecient earthing. The supply voltage must be consistent with the para-
meters specified on the technical plate positioned on the machine housing. Disobeying
the above rule may result in electric shock or fire
•The supplying cable should be protected against any damage, must not be used to pull
the machine or to remove the plug from a socket
•Making any changes in the electric circuit or the supplying cable may result in electric
shock
•During a long standstill or before replacing the machine, the plug should be removed
from a mains socket
•Before replacing the machine it is necessary to check if the heater cooled down in order
to avoid destroying the surface on which the machine will be placed as well as avoid the burn
8
Atlas 300 mono •User’s guide GB
2. The bound documentation must have thickness of at least 1,8 mm (without cover). If the
documentation is thinner, it is obligatory to use filling strips (e.g. O•Filling Sticky avail-
able at OPUS), to increase the thickness of bound documents. When using channels up to
16 mm size and C sizes in C-BIND covers, put before binding both binding inserts A1 and
B1 to the binding slot and when using covers with size over 16 mm and C sizes in C-BIND
covers, put only one B1 insert into the binding slot.
3. When debinding C-BIND covers use debinding wedge included in O.CB Debinding Tool for
Atlas 300/MB 300/MBE 300.
IMPORTANT! When using AA covers put AA jig on spine of the cover.
4. Binding and de-binding of covers of the C-BIND system is performed analogous to binding
with Metalbind system, but: measure the thickness of sheet pile to be bound means of the
cover selection tool and select appropriate cover.
cover number of
dimension bound sheets
AA soft cover 15-40
hard cover 20-40
A 41-95
B 96-125
C 126-150
D 151-190
E 191-230
F 231-265
G 266-300
1. Choose the proper size of a
cover by using the table (on
the left) or the channel
width selecting tool (6).
• Making any changes in the electrical circuit or the power supply cable may result in re
or an electric shock.
• During a long standstill or before moving the equipment, the plug should be removed
from a mains socket
• Before removing the image press equipment from the Atlas, you must check if the heater
has cooled down enough, to avoid burning yourself and to place it on the work surface.
• After work turn o the device using a main switch
• The equipment is turned o completely after removing the plug from a socket
• The equipment should be kept out of reach and away from children.
• Danger! the equipment containsa high temperature heated area – pay special attention!
• The equipment must not be used for any other purposes than those indicated in the
operating manual
• It is necessary to check and supervise if the equipment operates correctly in case of any
malfunctions, contacting the servicing point is required
• The equipment must not be located outside, should be operated in room temperature higher
than +8˚C
• Before removing any cover from the equipment, the plug from a socket should be removed
necessarily
• Using inappropriate lubricants can cause a re hazard
• The equipment should be operated according to general Health & Safety rules
• Any repairs can be conducted only by authorized sta
The image Press device was designed to make hot print stamping on Metalbind
covers and channels. The use of typeface makes it possible to compose any
inscription (various kinds of typeface, also in various languages and sizes,
are available) it is also possible to prepare a special matrix (e.g. logo).
PREPARATION TO WORK
9
1. Remove the guide & binding bar (8 thin) or (9 thick)
from the binding slot.
2. Set the extended back support to the maximum back
position, remove the adjustable side guide (11)
3. Put the handle in the vertical position (1), move the
clamp lever (2) to the maximum left.
4. Assemble the image press device on the hooks (4)
(see the picture on the left).
5. Insert the plug into a mains socket.
6. Turn on the Switch at the front on the left which will
light up, and the heat up process starts.
7. Set the temperature to 100 °C or as required.
Wait until the small red led lights up, “READY” that means the required temperature has been
achieved and you are ready to start work.
IMPORTANT!
The best results for hot print stamping are archived, when using the OPUS supplies
of hot print stamping foil and covers. To obtained the best results set the heater
temperature to 100 c. However, if the results are not satisfactory, a change of the
setting may be necessary, in such case turn the temperature regulator right or left.
8
•After work turn o the device using a main switch
•The machine is turned o completely after removing the plug from a socket
•The machine should be kept away from children reach
•Danger! The machine contains heating area – pay special attention!
•The machine must not be used for any other purposes than those indicated in the oper-
ating manual
•It is necessary to check and supervise if the machine operates correctly. In case of any
malfunctions, contacting the servicing point is required
•The machine must not be located outside, should be operated in room temperature higher
than +8˚C
•Before removing any cover from the machine, the plug from a socket should be removed
necessarily
•Using inappropriate lubricants causes the fire hazard
•The machine should be operated according to general safety rules
•Any repairs can be conducted only by authorized sta
The Image Press device was designed to make hot stampings on Metalbind covers.
The use of fonts makes it possible to compose any inscription (various kinds of
fonts, also in various languages and sizes, are available) It is also possible to
prepare a special matrix (e.g. logo).
PREPARATION TO WORK
1. Remove the thin guide&bind bar (8) or the thick guide & bind
bar (9) from the binding slot.
2. Push the extended back support maximally to the back and dis-
assemble moving adjustable side stop (11).
3. Lift up the handle (1), move the adjusting lever (2) maximally to
the left.
4. Assemble the Image Press device on the hooks (4) (see the pic-
ture on the left).
5. Insert the plug into a mains socket.
6. Turn on the switch (it is placed at the front of the housing, in the left corner). The switch
starts to light.
7. Set the temperature regulator on 100˚C.
Wait until the led “READY” lights. That means that the required temperature is achieved and
the machine is ready to work.
Important!
The best results for hot stamping when using Opus supplies (hot stamping foil and covers) are
obtained with the set heater temperature of 100oC. However, if the stamping results are
not satisfactory, a change in the settings may be necessary. In such case turn the tem-
perature regulator right (to increase the temperature) or left (in order to decrease the
temperature).
9
25
WYKONYWANIE ZŁOCEŃ NA KANAŁACH
O•CHANNEL
Za pomocą urządzenia Image Press możliwe jest również wykonanie złoceń / tłoczeń na
kanałach O.CHANNEL produkowanych przez firmę OPUS. Niezbędna jest do tego przystawka
O.Goldchannel Base IP, która dostępna jest jako wyposażenie dodatkowe.
1. Na przystawkę O.Goldchannel Base IP (a) nałóż nakładkę (b) w rozmiarze pasującym do zło-
conego kanału (rozmiary są naniesione na górze nakładki (b). Zauważ, że nakładka (b)
posiada od spodu otwory, które pozwalają na osadzenie nakładki (b) na kołki znajdujące
się w przystawce (a).
2. Na nakładkę (b) nałóż kanał.
3. Przystawkę (a) wraz z nakładką (b) i kanałem załóż na podporę debindującą (d) urządzenia
Atlas 300 mono.
4. Wykonaj złocenie / tłoczenie analogicznie jak w rozdziale dwunastym (WYKONYWANIE ZŁO-
CEŃ NA OKŁADKACH).
Uwaga!
Za pomocą śrub (c) możliwa jest płynna reg-
ulacja pionowej pozycji napisu:
•przekręcając śruby (c) zgodnie z ruchem
wskazówek zegara oś napisu przesunie się
bliżej dolnej krawędzi kanału
•przekręcając śruby (c) przeciwnie do ruchu
wskazówek zegara oś napisu przesunie się
bliżej górnej krawędzi kanału
Śruby służą również do wyrównywania osi
napisu względem osi kanału.
Uwaga!
Istnieje możliwość złocenia na krańcach
kanału. Przesuń kanał O.Channel na nak-
ładce (b) w lewo bądź w prawo uprzednio odkręcając ogranicznik boczny (10) za pomoca
klucza imbusowego.
Uwaga!
Do tłoczeń na kanałach należy używać czcionek 5,5 mm lub
9 mm. Odpowiednio należy też korzystać z ramek 1L5,5, 3L5,5
(napis powinien znajdować się w środkowej linii) i 1L9.
WYKONYWANIE ZŁOCEŃ NA OKŁADKACH NA PŁYTY
CDCOVERS
Przystawka CD Cover Base IP (dostępna jako wyposażenie do
datkowe) umożliwia wykonanie złoceń na okładkach CDcover
(dostępne w ofercie firmy OPUS)
1. Nałóż na przystawkę okładkę CDcover, którą zamierzasz złocić.
Możliwe są dwa ułożenia przystawki w zależności od tego, w
której części okładki chcesz wyzłocić napis.
•jeśli napis ma pojawić się w centralnej części okładki CDcover,
węższy brzeg przystawki (rysunek A) musi być skierowany w dół
•jeśli napis ma pojawić się w górnej części okładki CDcover, szer-
szy brzeg przystawki (rysunek B) musi być skierowany w dół
13
14
ab
A
B
cd
Atlas 300 mono •Instrukcja obsługi PL
PREPARING THE TYPEFACE FONTS
10
1. Put the frame on the frame Holder;
compose a required text by putting
the typeface fonts into the frame.
NOTE! The typeface fonts should be put
in and taken out by means of special
tweezers. The ends of the tweezers
should be inserted into the holes in
the typeface fonts.
The holes enable to distinguish between the top and the bottom of typeface fonts. The bottom
hole of typeface fonts is larger or located closer to the edge (3.2 mm and 4 mm high fonts,
because of their small measurements, have only marker at the bottom).
24
WYKONYWANIE ZŁOCEŃ NA OKŁADKACH
1. Do szczeliny bindującej włóż złoconą okładkę. Upewnij się, że została ona włożona do góry
nogami.
2. Pomiędzy okładkę a ramkę włóż arkusz folii.
Uwaga! Przytrzymaj folię dołączonym do urządzenia magnesem, aby zapobiec jej prze-
suwaniu.
3. Przytrzymując okładkę, przesuń uchwyt regulujący rozwarcie szczęk (2) maksymalnie w
prawo.
4. Przytrzymując okładkę pchnij ramię urządzenia (1) w dół.
5. Podnieś ramię (1), a uchwyt regulujący rozwarcie szczęk (2) przesuń w lewo.
6. Okładkę wyjmij ze szczeliny bindującej, usuń folię.
Uwaga! Gdy tłoczenie jest nierównomierne, można wykonać korektę ustawienia grzałki.
Potrzebny nam będzie klucz imbusowy 2 mm. Regulacji możemy dokonać w pionie lub w
poziomie.
A. Pozioma regulacja odchylenia grzałki
Jeśli docisk jest większy z prawej strony, należy śrubkę obracać w lewo (patrz rysunek A).
Jeśli natomiast docisk jest większy z lewej strony, obracamy śrubkę w prawo.
B. Pionowa regulacja odchylenia grzałki
Jeśli docisk jest większy w górnej części, należy śrubkę obracać w prawo (patrz rysunek B).
Jeśli natomiast docisk jest większy w dolnej części, obracamy śrubkę w lewo.
12
9
PREPARING THE FONTS
1. Put the frame on the Frame Holder;
compose a required text by putting
suitable fonts into the frame.
Note! The fonts should be put in and
taken out by means of special tweezers.
The ends of the tweezers should be in-
serted into the holes in the fonts.
The holes enable to distinguish between the top and the bottom of a font. The bottom hole
of a font is larger or located closer to the edge (3.2 mm and 4 mm high fonts, because of their
small measurements, have only marker at the bottom).
Important! If the frame/ typeface fonts
were previously used or located in the de-
vice, wait for 5-10 min until they cool
down. DANGER OF BURN!
2. Lock the text in the frame by means of the
stops.
3. Put the frame (with the typeface fonts in)
on the heater of the Image Press.
Important! Do not touch the heater when
putting the frame - DANGER OF BURN!
4. Wait for 1-2 minutes until the typeface
fonts are hot.
PREPARING THE MATRIX
You can order a special, customized matrix (O.Matrix) from OPUS, made according to your own
design. You can also use your own matrix, however, in this case you need to use also a spe-
cial glue (O•Matrix GLUE) and a plate (O.Matrix Base GP).
Important! The available stamping area of the matrix is max. 13 cm2.
A. O.Matrix (customized matrixes ordered in OPUS)
1. Put the O.Matrix into a special frame (O.FRAME MATRIX GP - depending on matrix size).
2. Insert the frame onto the heater and wait until the matrix is hot.
B. Customer’s matrix
1. Glue the matrix to O.Matrix Base GP plate using O•Matrix GLUE.
2. Put bounded set into a special frame (O.FRAME MATRIX GP).
3. Insert the frame onto the heater and wait until the matrix is hot.
Note! Before gluing the matrix, make sure that the inscription / logo on the matrix is
parallel to the bottom edge of the plate (O.Matrix Base GP).
Note! Detailed instructions for gluing the matrix are with O•Matrix Base GP plate.
10
11
frame
with fonts
temperature
regulator
Atlas 300 mono •User’s guide GB
folia
przednia
okładka
magnes
1
2rys. B
rys. A
IMPORTANT! If the frame / typeface fonts
were previously used or located in the device,
wait for 5-10 min until they cool down.
Danger of Burn!
2. Lock the text in the frame by means of the
stops.
3. Put the frame (with the typeface fonts in)
on the heater of the image press.
IMPORTANT! Do not touch the heater when
putting the frame - Danger of Burn!
4. Wait for 1-2 minutes until the typeface
fonts are hot.
PREPARING THE MATRIX
11
You can order a special, customized matrix (O.Matrix) from Opus, made according to your own
design. You can also use your own matrix, however, in this case you need to use also a special
glue (O•Matrix glue) and a plate (O.Matrix base GP).
IMPORTANT! the available stamping area of the matrix is max. 13 cm2.
A. O.MATRIX (customized matrixes ordered in OPUS)
1. Put the O.Matrix into a special frame (O.Frame matrix GP - depending on matrix size).
2. Insert the frame onto the heater and wait until the matrix is hot.
B. CUSTOMER’S MATRIX
1. Glue the matrix to O.Matrix base GP plate using O•Matrix glue.
2. Put bounded set into a special frame (O.Frame Matrix GP).
3. Insert the frame onto the heater and wait until the matrix is hot.
NOTE! Before gluing the matrix, make sure that the inscription / logo on the matrix is
parallel to the bottom edge of the plate (O.Matrix Base GP).
NOTE! 
 GB
NOTE! Before sticking the matrix, make sure that the
inscription / logo on the matrix is parallel to the bottom edge
of the plate (O.Matrix Base GP)
3. Put the base with a matrix on it into O.Frame Matrix GP.
NOTE! In case of customized matrixes only O.Frame Matrix GP
can be used.
4. Put the frame on the heaters face of the Image Press
NOTE! The heating time of a matrix depends on its size and can vary from few to tens
of minutes. Therefore it is necessary to conduct a test to check if the matrix is hot enough.
10
Note! Before sticking the matrix, make sure that the inscrip-
tion/logo on the matrix is parallel to the bottom edge of the
plate (O.Matrix Base GP)
3. Put the base with a matrix on it into O.Frame Matrix GP.
Note! In case of customized matrixes only O.Frame Matrix GP
can be used.
4. Put the frame on the back wall of the Image Press
Note! The heating time of a matrix depends on its size and can
vary from few to tens of minutes. Therefore it is necessary to
conduct a test to check if the matrix is hot enough.
HOT STAMPING ON COVERS
1. Put the front cover into the binding slot.
Make sure it is placed upside down.
2. Put the piece of hot stamping foil between
the cover and the frame.
Note! Use the magnet to fix the foil to the
Image Press and avoid slipping down of the
foil.
3. Move the adjusting lever (2) to the right
(until you feel the resistance) holding the cover at the same time.
4. Press the handle (1) down holding the cover at the same time.
5. Lift the handle (1), move the lever (2) to the left.
6. Take the cover out of the binding slot, take off the foil.
Note! If hot stamping is uneven you can adjust the heater ver-
tical or horizontal. To do this, use Allen key - size 2.
a) Horizontal heater inclination adjustment - if the pressure is big-
ger on the right side, the screw need to be rotated to the left
(see the picture). However, If the pressure is bigger on the left
side, the screw need to be rotated to the right
b) Vertical heater inclination adjustment - if the pressure is big-
ger in the upper side, the screw need to be rotated in to the
right side (see the picture). However, if the pressure is bigger
on the bottom side, the screw need to be rotated to the left
12
foil
magnet
front
cover
23
PRZYGOTOWANIE CZCIONEK
1. Połóż ramkę na przystawce, do ramki
włóż czcionki w taki sposób, aby
skomponować odpowiedni tekst.
Uwaga! Do wyjmowania i wkładania
czcionek służą dołączone szczypce.
Końcówki szczypiec dołączonych do
zestawu wkładaj w otwory w czcionkach.
Otwory pozwalają też odróżnić górę od dołu czcionki. Otwór na dole czcionki jest większy lub
przesunięty bliżej krawędzi. Czcionki o rozmiarach 3,2 i 4 mm ze względu na małe wymiary,
mają tylko znacznik określający dolną stronę czcionki.
Uwaga! Jeśli ramka i/lub czcionki były
wcześniej używane lub znajdowały się
w przystawce, odczekaj 5-10 min, aż
wystygną. NIEBEZPIECZEŃSTWO POPARZENIA!
2. Przy użyciu ograniczników unieruchom
tekst w ramce.
3. Na grzałkę nasuń ramkę z czcionkami tak,
aby zza przystawki wystawały jedynie
rączki ramki.
Uwaga! Przy wkładaniu ramki nie dotykaj
grzałki, wkładaj ramkę trzymając ją za
uchwyty – NIEBEZPIECZEŃSTWO POPARZENIA!
4. Odczekaj 1 – 2 min, aż czcionki się nagrzeją.
PRZYGOTOWANIE MATRYC
Matrycę (O•Matrix) przystosowaną do wykonywania złoceń / tłoczeń w urządzeniu Image
Press możesz zamówić w firmie Opus. Możesz również użyć własnej matrycy, jeśli nie
przekracza ona wymiarów 35 x 180 mm. Aby zamontować własną matrycę należy użyć kleju
O•Matrix GLUE i przykleić ją do płytki O•Matrix Base GP. Tak przygotowany zestaw wkładamy
do ramki O•Frame Matrix GP i matryca jest gotowa do użycia.
Uwaga! Maksymalna powierzchnia aktywna matrycy to 13 cm².
A. Matryce O.Matrix (wykonane w Opus na życzenie klienta)
1. Włóż matrycę do specjalnej ramki O•Frame Matrix GP w zależności od rozmiaru matrycy.
2. Nałóż ramkę na grzałkę i poczekaj, aż matryca się nagrzeje.
B. Matryce własne klienta
1. Przyklej matrycę do płytki O•Matrix Base GP używając kleju O•Matrix GLUE.
2. Włóż matrycę wraz przyklejoną płytką do specjalnej ramki O•Frame Matrix GP.
3. Nałóż ramkę na grzałkę i poczekaj, aż matryca się nagrzeje.
Uwaga! Dokładna instrukcja krok po kroku dostępna jest wraz z płytkami O•Matrix Base GP.
10
11
ramka
z czcionkami
regulator
temperatury
Atlas 300 mono •Instrukcja obsługi PL
1
2
HOT PRINT STAMPING ON COVERS
12
1. Put the front cover into the binding slot.
Make sure it is placed upside down.
2. Put the piece of hot stamping foil between
the cover and the frame.
NOTE! Use the magnet to fix the foil to the
Image Press and remove word this avoids
the foil slipping down.
3. Move the clamping lever (2) to the right
- until you feel the resistance - holding the
cover at the same time.
4. Press the handle (1) down holding the
cover at the same time.
5. Lift the handle (1), move the lever (2) to the left.
6. Take the cover out of the binding slot, remove the foil gently.
NOTE! If the hot print stamping is not level you can adjust the
heater vertical or horizontal. To do this, use Allen key - size 2.
a) Horizontal heater inclination adjustment - if the pressure
is bigger on the right side, the screw need to be rotated to the
left (see the picture). However, If the pressure is bigger on the
left side, the screw need to be rotated to the right
b) Vertical heater inclination adjustment - if the pressure is bigger
in the upper side, the screw need to be rotated in to the
right side (see the picture). However, if the pressure is bigger
on the bottom side, the screw need to be rotated to the left
10
Note! Before sticking the matrix, make sure that the inscrip-
tion/logo on the matrix is parallel to the bottom edge of the
plate (O.Matrix Base GP)
3. Put the base with a matrix on it into O.Frame Matrix GP.
Note! In case of customized matrixes only O.Frame Matrix GP
can be used.
4. Put the frame on the back wall of the Image Press
Note! The heating time of a matrix depends on its size and can
vary from few to tens of minutes. Therefore it is necessary to
conduct a test to check if the matrix is hot enough.
HOT STAMPING ON COVERS
1. Put the front cover into the binding slot.
Make sure it is placed upside down.
2. Put the piece of hot stamping foil between
the cover and the frame.
Note! Use the magnet to fix the foil to the
Image Press and avoid slipping down of the
foil.
3. Move the adjusting lever (2) to the right
(until you feel the resistance) holding the cover at the same time.
4. Press the handle (1) down holding the cover at the same time.
5. Lift the handle (1), move the lever (2) to the left.
6. Take the cover out of the binding slot, take off the foil.
Note! If hot stamping is uneven you can adjust the heater ver-
tical or horizontal. To do this, use Allen key - size 2.
a) Horizontal heater inclination adjustment - if the pressure is big-
ger on the right side, the screw need to be rotated to the left
(see the picture). However, If the pressure is bigger on the left
side, the screw need to be rotated to the right
b) Vertical heater inclination adjustment - if the pressure is big-
ger in the upper side, the screw need to be rotated in to the
right side (see the picture). However, if the pressure is bigger
on the bottom side, the screw need to be rotated to the left
12
foil
magnet
front
cover
23
PRZYGOTOWANIE CZCIONEK
1. Połóż ramkę na przystawce, do ramki
włóż czcionki w taki sposób, aby
skomponować odpowiedni tekst.
Uwaga! Do wyjmowania i wkładania
czcionek służą dołączone szczypce.
Końcówki szczypiec dołączonych do
zestawu wkładaj w otwory w czcionkach.
Otwory pozwalają też odróżnić górę od dołu czcionki. Otwór na dole czcionki jest większy lub
przesunięty bliżej krawędzi. Czcionki o rozmiarach 3,2 i 4 mm ze względu na małe wymiary,
mają tylko znacznik określający dolną stronę czcionki.
Uwaga! Jeśli ramka i/lub czcionki były
wcześniej używane lub znajdowały się
w przystawce, odczekaj 5-10 min, aż
wystygną. NIEBEZPIECZEŃSTWO POPARZENIA!
2. Przy użyciu ograniczników unieruchom
tekst w ramce.
3. Na grzałkę nasuń ramkę z czcionkami tak,
aby zza przystawki wystawały jedynie
rączki ramki.
Uwaga! Przy wkładaniu ramki nie dotykaj
grzałki, wkładaj ramkę trzymając ją za
uchwyty – NIEBEZPIECZEŃSTWO POPARZENIA!
4. Odczekaj 1 – 2 min, aż czcionki się nagrzeją.
PRZYGOTOWANIE MATRYC
Matrycę (O•Matrix) przystosowaną do wykonywania złoceń / tłoczeń w urządzeniu Image
Press możesz zamówić w firmie Opus. Możesz również użyć własnej matrycy, jeśli nie
przekracza ona wymiarów 35 x 180 mm. Aby zamontować własną matrycę należy użyć kleju
O•Matrix GLUE i przykleić ją do płytki O•Matrix Base GP. Tak przygotowany zestaw wkładamy
do ramki O•Frame Matrix GP i matryca jest gotowa do użycia.
Uwaga! Maksymalna powierzchnia aktywna matrycy to 13 cm².
A. Matryce O.Matrix (wykonane w Opus na życzenie klienta)
1. Włóż matrycę do specjalnej ramki O•Frame Matrix GP w zależności od rozmiaru matrycy.
2. Nałóż ramkę na grzałkę i poczekaj, aż matryca się nagrzeje.
B. Matryce własne klienta
1. Przyklej matrycę do płytki O•Matrix Base GP używając kleju O•Matrix GLUE.
2. Włóż matrycę wraz przyklejoną płytką do specjalnej ramki O•Frame Matrix GP.
3. Nałóż ramkę na grzałkę i poczekaj, aż matryca się nagrzeje.
Uwaga! Dokładna instrukcja krok po kroku dostępna jest wraz z płytkami O•Matrix Base GP.
10
11
ramka
z czcionkami
regulator
temperatury
Atlas 300 mono •Instrukcja obsługi PL
1
2
10
Note! Before sticking the matrix, make sure that the inscrip-
tion/logo on the matrix is parallel to the bottom edge of the
plate (O.Matrix Base GP)
3. Put the base with a matrix on it into O.Frame Matrix GP.
Note! In case of customized matrixes only O.Frame Matrix GP
can be used.
4. Put the frame on the back wall of the Image Press
Note! The heating time of a matrix depends on its size and can
vary from few to tens of minutes. Therefore it is necessary to
conduct a test to check if the matrix is hot enough.
HOT STAMPING ON COVERS
1. Put the front cover into the binding slot.
Make sure it is placed upside down.
2. Put the piece of hot stamping foil between
the cover and the frame.
Note! Use the magnet to fix the foil to the
Image Press and avoid slipping down of the
foil.
3. Move the adjusting lever (2) to the right
(until you feel the resistance) holding the cover at the same time.
4. Press the handle (1) down holding the cover at the same time.
5. Lift the handle (1), move the lever (2) to the left.
6. Take the cover out of the binding slot, take off the foil.
Note! If hot stamping is uneven you can adjust the heater ver-
tical or horizontal. To do this, use Allen key - size 2.
a) Horizontal heater inclination adjustment - if the pressure is big-
ger on the right side, the screw need to be rotated to the left
(see the picture). However, If the pressure is bigger on the left
side, the screw need to be rotated to the right
b) Vertical heater inclination adjustment - if the pressure is big-
ger in the upper side, the screw need to be rotated in to the
right side (see the picture). However, if the pressure is bigger
on the bottom side, the screw need to be rotated to the left
12
foil
magnet
front
cover
23
PRZYGOTOWANIE CZCIONEK
1. Połóż ramkę na przystawce, do ramki
włóż czcionki w taki sposób, aby
skomponować odpowiedni tekst.
Uwaga! Do wyjmowania i wkładania
czcionek służą dołączone szczypce.
Końcówki szczypiec dołączonych do
zestawu wkładaj w otwory w czcionkach.
Otwory pozwalają też odróżnić górę od dołu czcionki. Otwór na dole czcionki jest większy lub
przesunięty bliżej krawędzi. Czcionki o rozmiarach 3,2 i 4 mm ze względu na małe wymiary,
mają tylko znacznik określający dolną stronę czcionki.
Uwaga! Jeśli ramka i/lub czcionki były
wcześniej używane lub znajdowały się
w przystawce, odczekaj 5-10 min, aż
wystygną. NIEBEZPIECZEŃSTWO POPARZENIA!
2. Przy użyciu ograniczników unieruchom
tekst w ramce.
3. Na grzałkę nasuń ramkę z czcionkami tak,
aby zza przystawki wystawały jedynie
rączki ramki.
Uwaga! Przy wkładaniu ramki nie dotykaj
grzałki, wkładaj ramkę trzymając ją za
uchwyty – NIEBEZPIECZEŃSTWO POPARZENIA!
4. Odczekaj 1 – 2 min, aż czcionki się nagrzeją.
PRZYGOTOWANIE MATRYC
Matrycę (O•Matrix) przystosowaną do wykonywania złoceń / tłoczeń w urządzeniu Image
Press możesz zamówić w firmie Opus. Możesz również użyć własnej matrycy, jeśli nie
przekracza ona wymiarów 35 x 180 mm. Aby zamontować własną matrycę należy użyć kleju
O•Matrix GLUE i przykleić ją do płytki O•Matrix Base GP. Tak przygotowany zestaw wkładamy
do ramki O•Frame Matrix GP i matryca jest gotowa do użycia.
Uwaga! Maksymalna powierzchnia aktywna matrycy to 13 cm².
A. Matryce O.Matrix (wykonane w Opus na życzenie klienta)
1. Włóż matrycę do specjalnej ramki O•Frame Matrix GP w zależności od rozmiaru matrycy.
2. Nałóż ramkę na grzałkę i poczekaj, aż matryca się nagrzeje.
B. Matryce własne klienta
1. Przyklej matrycę do płytki O•Matrix Base GP używając kleju O•Matrix GLUE.
2. Włóż matrycę wraz przyklejoną płytką do specjalnej ramki O•Frame Matrix GP.
3. Nałóż ramkę na grzałkę i poczekaj, aż matryca się nagrzeje.
Uwaga! Dokładna instrukcja krok po kroku dostępna jest wraz z płytkami O•Matrix Base GP.
10
11
ramka
z czcionkami
regulator
temperatury
Atlas 300 mono •Instrukcja obsługi PL
1
2