Feelworld LIVEPRO L1 User manual
LIVEPRO L1
Multi - format Video Mixer
USER MANUAL

1
Thank you for your purchasing our product!
In order to let you quickly grasp how to use this signal switcher, the
following is the detailed product instruction.You can read it and how to
use it before using the switcher. Please read all the information we
provide carefully, and brake you to use our products correctly.
Safety Instruction
1. The product can only use the specified power cable and interface.
And should be make sure the power cable is in good condition. To
change the specified power cable and interface, you need to find a
qualified technician.
2. Keep away from flammable and explosive materials, do not operate
this product in an explosive environment.
3.There is no customer self-operation service for this product, and
dangerous voltage may be exposed when the cover is removed. To
prevent personal accidents, please do not untie the upper cover by
yourself.
4. Please do not use chemical solutions to clean this product.
Please wipe the switcher with a clean soft cloth to maintain the
brightness of the surface.
5. No adjustable components are in the switcher. Please do not take
apart or repair the unit by yourself, to avoid the damage of the
product.

2
Features
USB capture video complying with UVC for live streaming
4 CH HDMI inputs
2” TFT display on board to live preview 4 inputs
Auto cut and manual switch (T-Bar)
14 transition effects on T-Bar
Support PIP
Audio offers embedded or external source to select
Support switch between 6-picture PVW and PGM to HDMI out
Licensed features including DSK, PTZ control etc.
Control by PC or Smart phone (via APP)
Compact design
Package Content
Name
Unites
Quantity
Switcher
pcs
1
12V/1.5A Adapter
pcs
1
User Manual
pcs
1

3
CONTENTS
1. Production Instruction.......................................................5
1.1 Product Overview..............................................................5
1.2 System Connection...........................................................5
1.3 Front Panel.......................................................................6
1.4 Interface Panel..................................................................7
2. Product Using....................................................................7
2.1 MENU...............................................................................7
2.2 Main Menu.......................................................................7
2.2.1 INPUT.............................................................................8
2.2.2 HDMI..............................................................................8
2.2.3 USB3.0...........................................................................8
2.2.4 AUDIO............................................................................9
2.2.5 IP SETTING...................................................................9
2.2.6 LANGUAGE...................................................................9
2.2.7 RESET...........................................................................10
2.2.8 INFO..............................................................................10
2.3. BUTTON SW...................................................................10
2.3.1 MIX................................................................................10
2.3.2 MODE............................................................................11
2.3.3 PIP..................................................................................12
2.3.4 FX...................................................................................12

4
3. Switch Input Source........................................................12
4. Software Operation.........................................................12
5.OBS Streaming.................................................................18
6.Streaming Setting.............................................................21
7. Upgrade...........................................................................22
8. Specification...................................................................27

5
1.Product Instruction
1.1 Product Overview
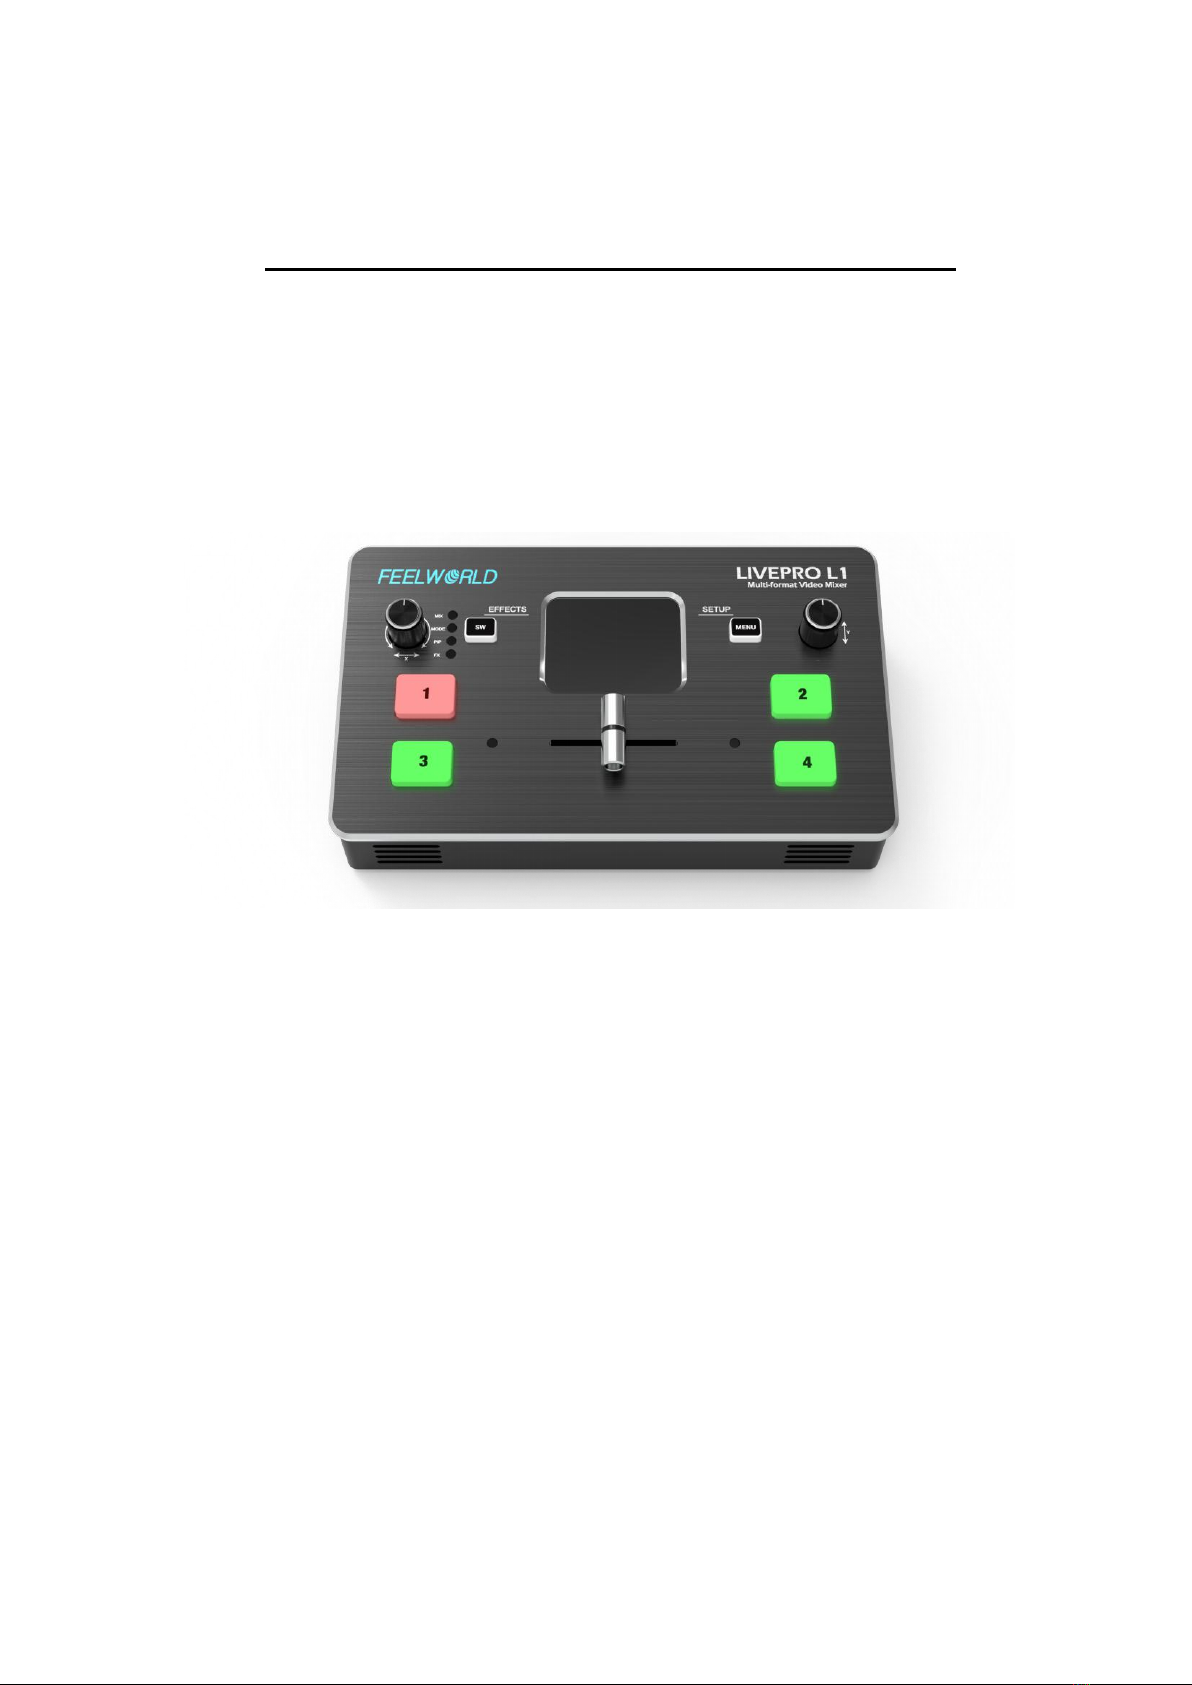
LIVEPRO L1 is a mini signal switcher and mixer which is able to
stream any one from the 4 HDMI inputs to any live broadcasting
platform via the third party live streaming software such as OBS. It
adopt compact design, equipped with a 2 inches TFT screen to
preview the 4 inputs in real time. 14 transition effects on board to
collaborate with T-Bar to do transition switching.
Along with feature of seamless switch, there are other outstanding
features such as audio embedding, deblocking, and automatically
identify color depth of RGB 4:4:4, YUV 4:4:4 ,YUV4:22, YUV4:2:0.
Licensed features including DSK, LOGO, PTZ camera control will be
available at additional cost. It is also easy to operate either on board
or on dedicated app on PC.
1.2 System Connection
LIVEPRO L1 System Connection Diagram
6
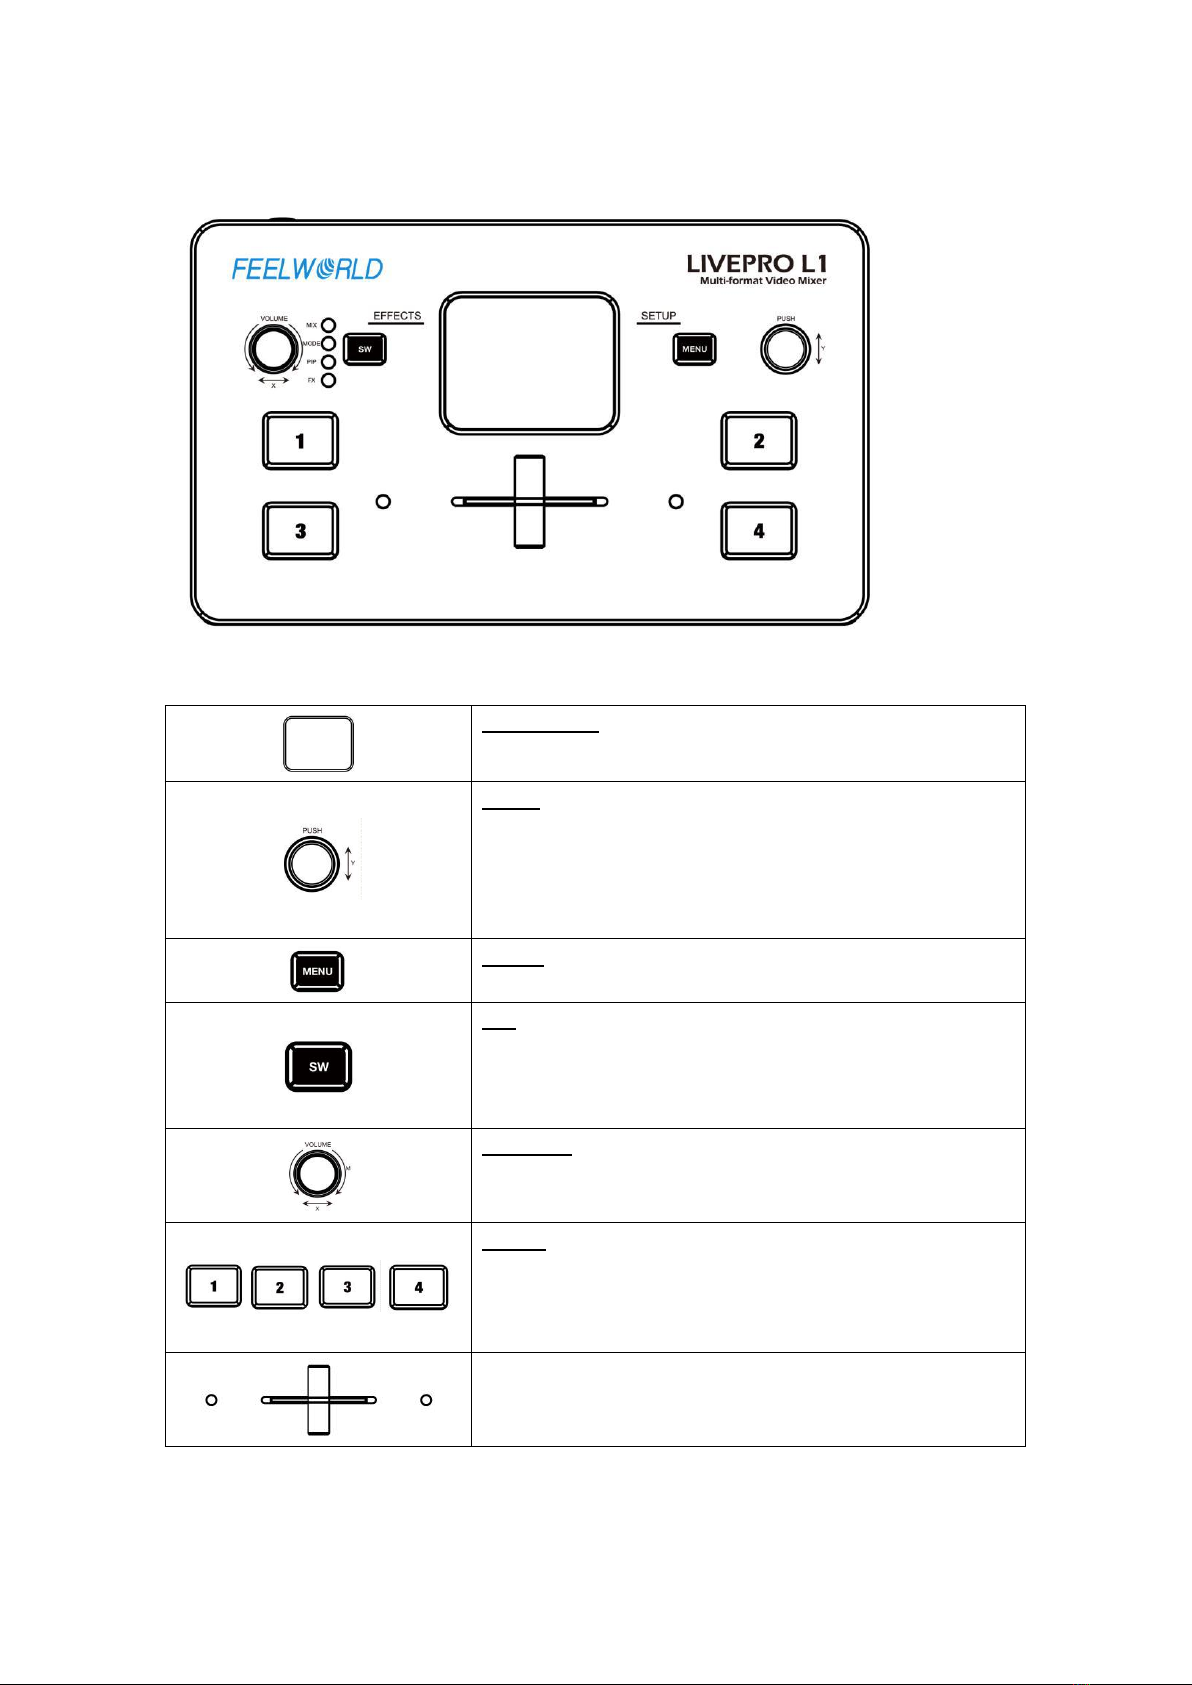
1.3 Front Panel
TFT display
To display 4 inputs and menu
PUSH
Knob, turn to select menu item, push to confirm
Work as a quick button to switch HDMI output between
6-picture PVW and PGM when TFT is under the state of
previewing 4 inputs
MENU
Menu and Back Button
SW
Function select button, to select transition effects (MIX),
Mode switching (Fast or T-Bar), PIP and FX (reserved
licensed feature for future)
VOLUME
Turn to adjust volume of PGM
1,2,3,4
4 inputs, red is on air (PGM), static green is signal
standing by to switch, flash green is the ready to be
switched
T- Bar
Manual switch, push to left end or right end to switch
signal to PGM.

7
1.4 Interface Panel
HDMI OUTPUT
1 HDMI Output port, connect to display to show Preview
(6 pictures) or PGM.
HDMI INPUT
4 HDMI inputs, connect to input source from HD camera or PC
DC 12V
1 DC Jack for power input, connect to 12V/1.5A power adapter
LAN
Communication port to link dedicated software for control
USB
USB3.0 output, capture signal via third party streaming
software and push to live broadcasting websites.
AUDIO IN / OUT
AUDIO In, analog audio input port, connect to microphone
AUDIO Out, analog audio output port, connect to loudspeaker.
2. Product Using
2.1 MENU
When LIVEPRO L1 is power on, the native TFT display show starting up page.
2.2 Main Menu
8
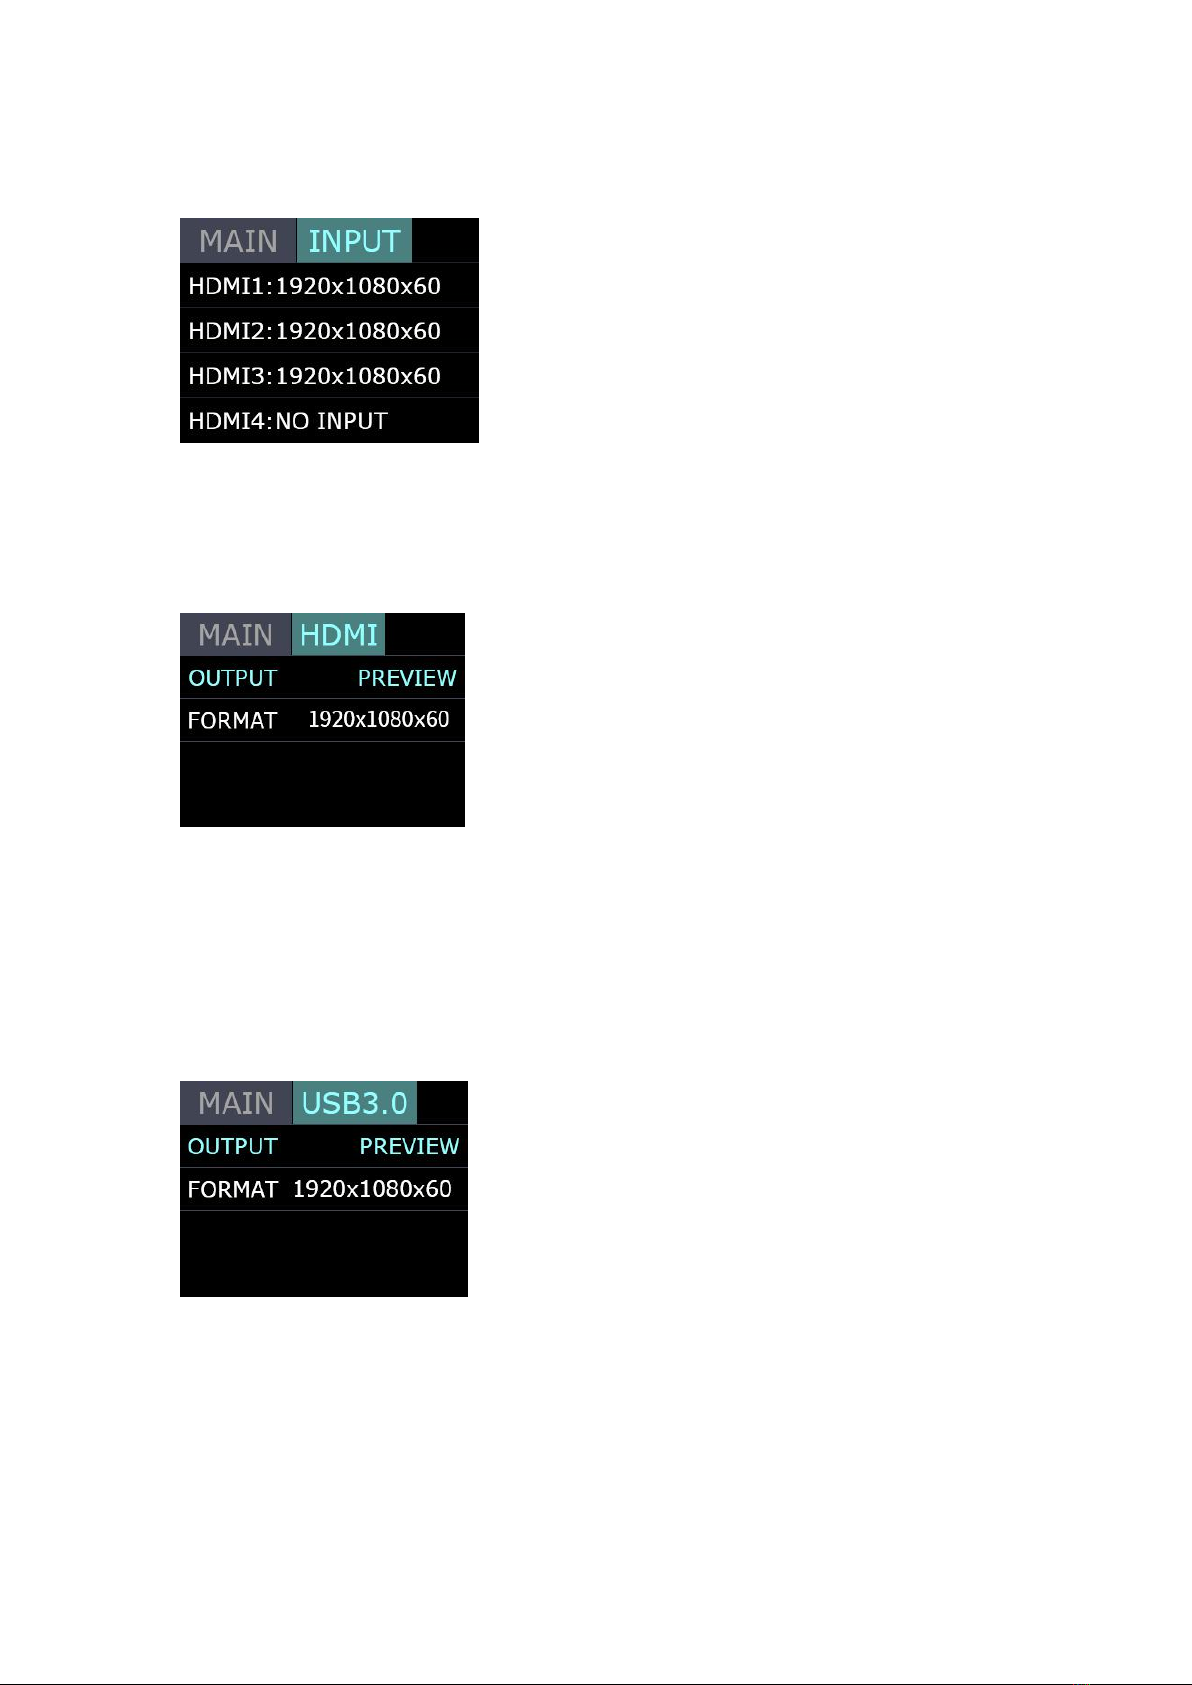
2.2.1 INPUT
Push MENU and select the first menu item <Input>
Push knob to enter <Input> menu
2.2.2 HDMI
Push MENU and select the second menu item <HDMI>
Push knob to enter <HDMI> menu
HDMI means HDMI output, select Preview output and PGM output for HDMI.
Output:Preview or PGM
Format:1920x1080x60
2.2.3 USB3.0
Push MENU and select the third menu item<USB3.0>
USB3.0 means USB3.0 output, push knob to enter <USB3.0>menu, select
Preview output and PGM output for HDMI.
Output:Choose PGM or Preview
Format:1920x1080x60
9
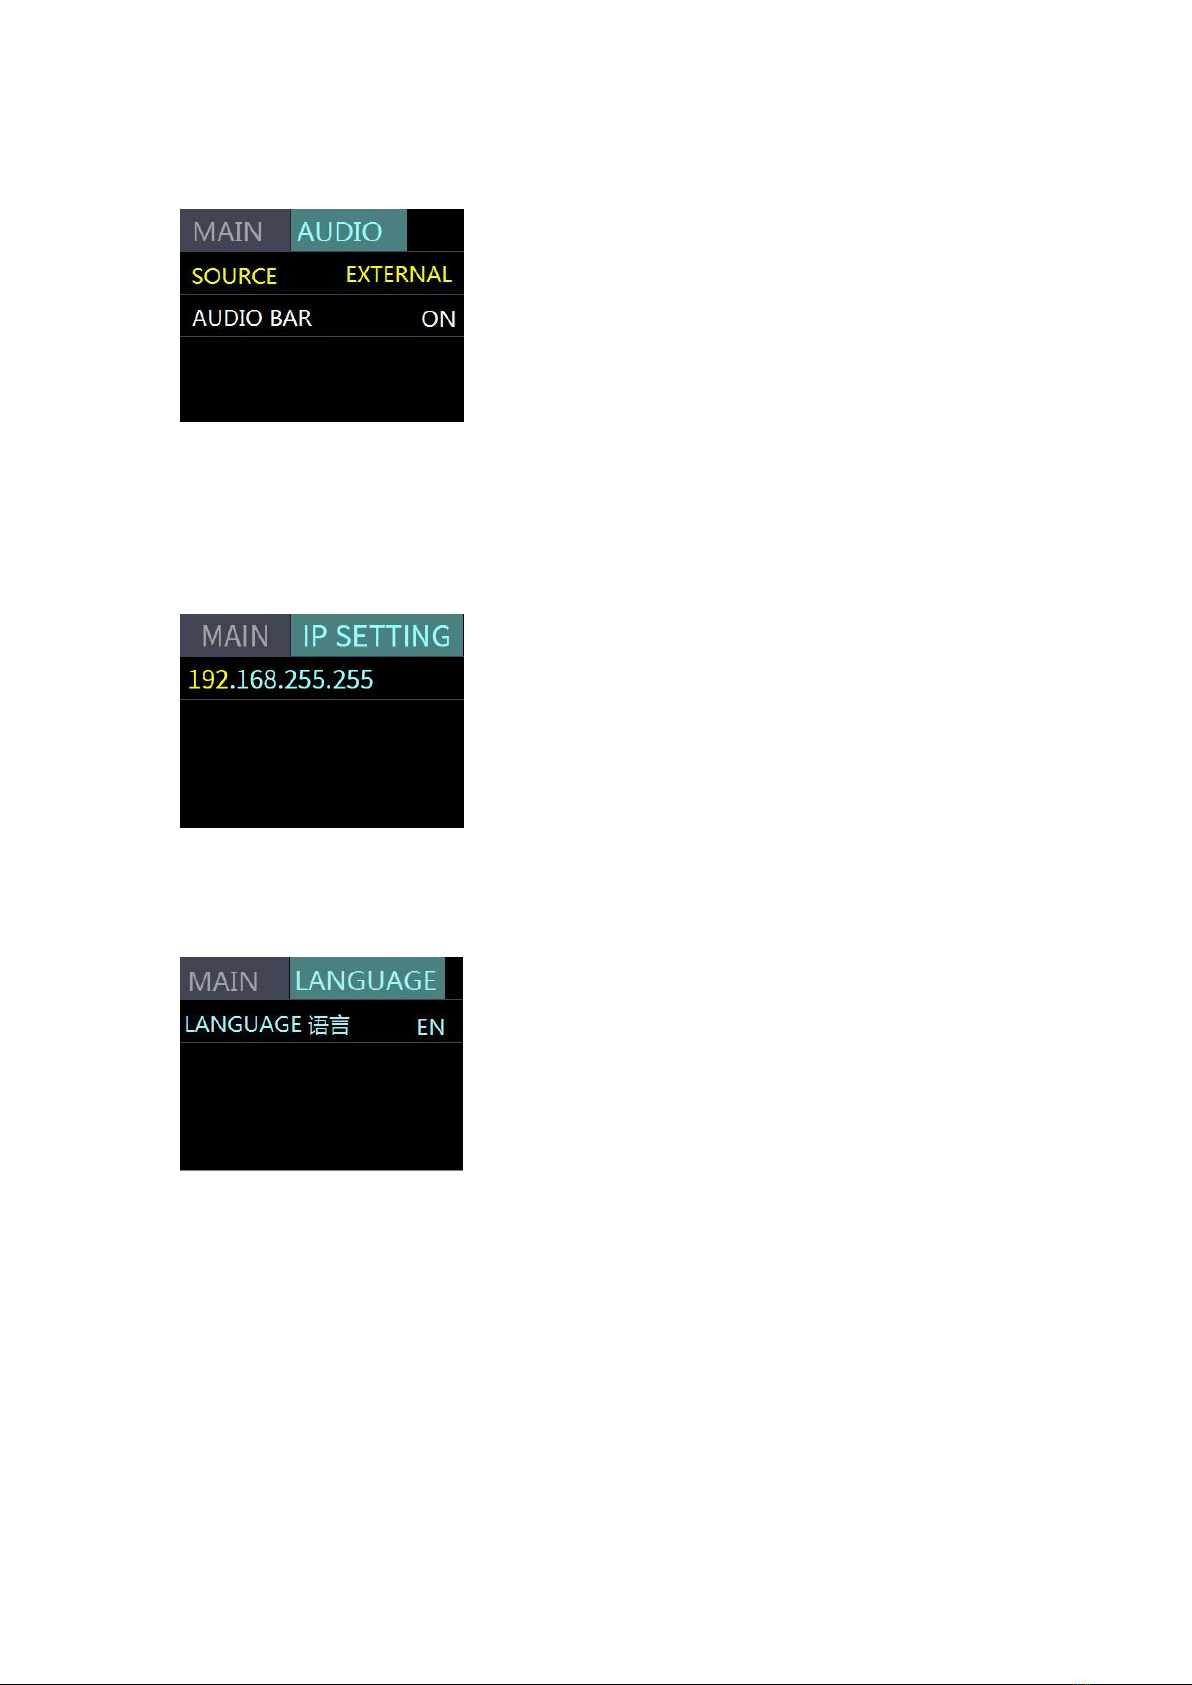
2.2.4 AUDIO
Choose <AUDIO>
SOURCE:EMBEDED or EXTREANAL
AUDIO BAR:ON/OFF
2.2.5 IP SETTING
Manually set IP address
2.2.6 LANGUAGE
LANGUGE, select Chinese or English
10
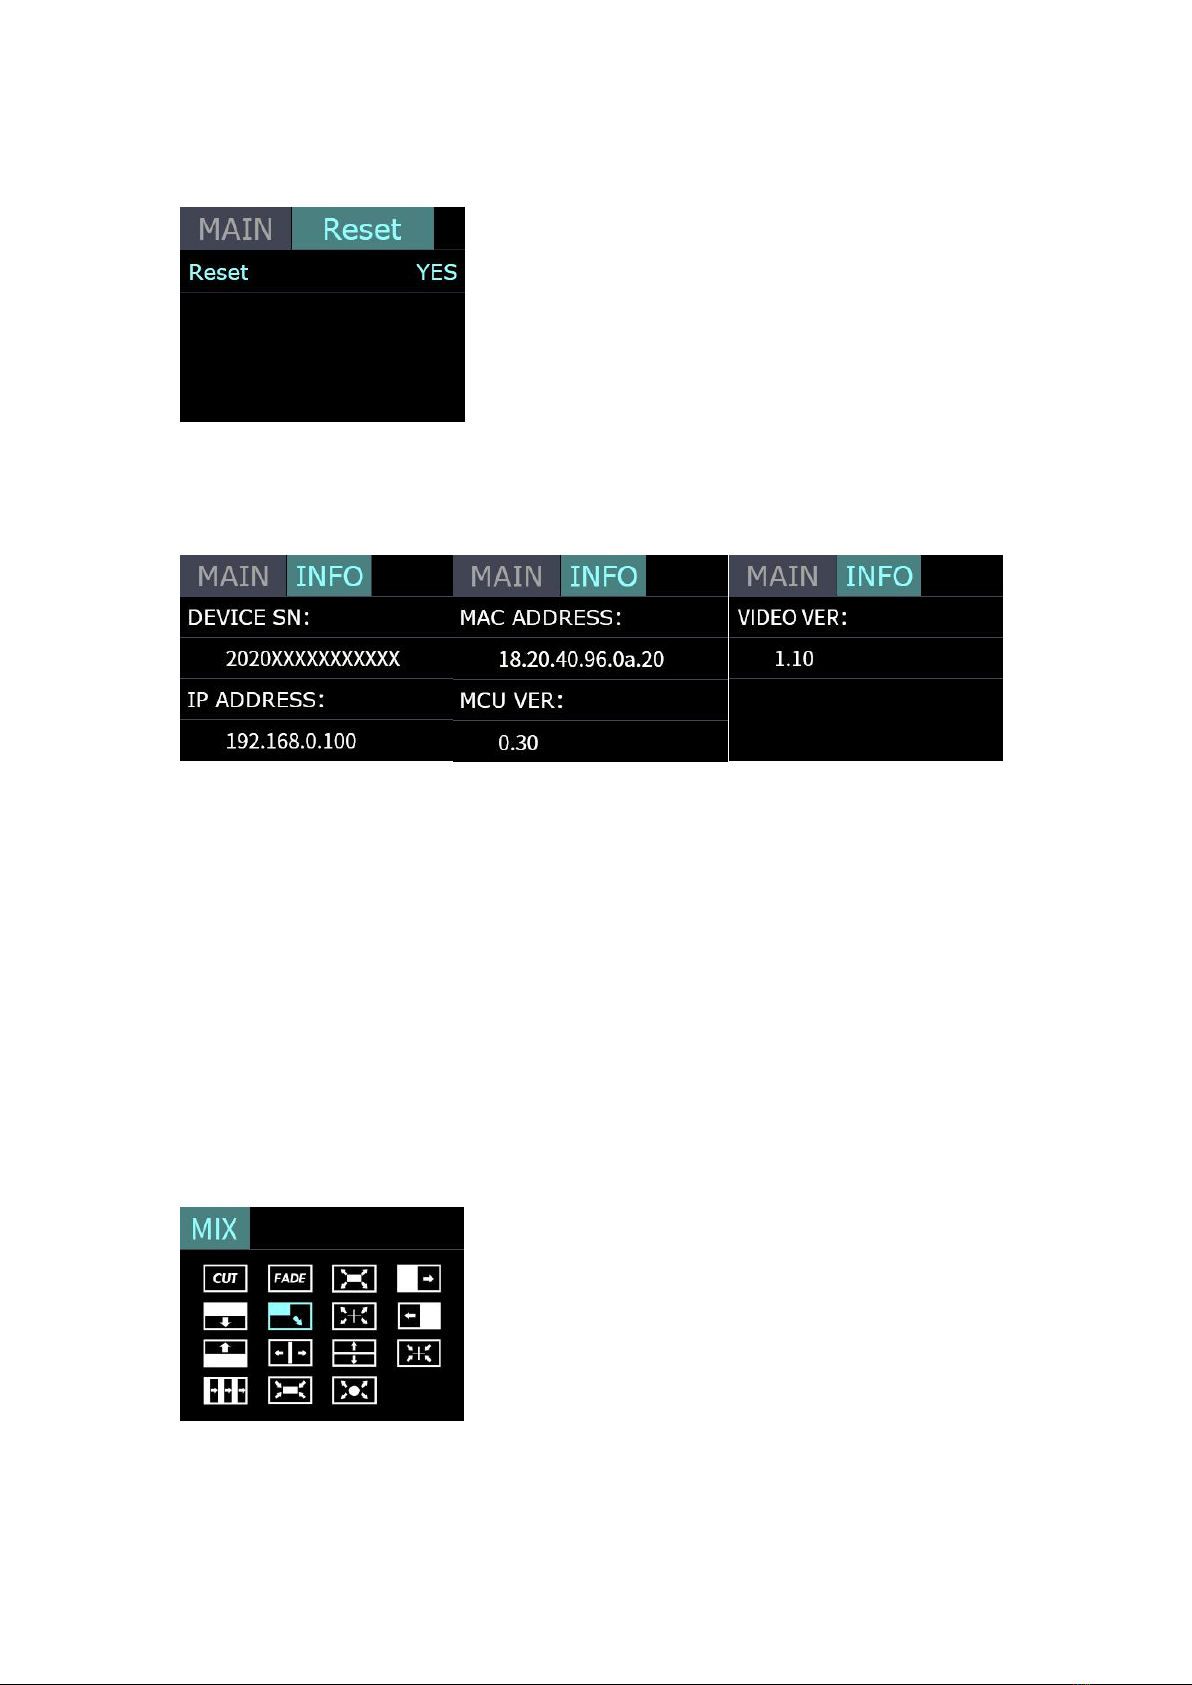
2.2.7 RESET
Reset: Yes or No
2.2.8 INFO
INFO:show the SN, IP, MAC,MCU version and VIDEO version.
2.3 BUTTON SW
Push button SW, the TFT will show the transition effect menu <MIX>. The <MIX>
LED indication beside will light up. Keep pushing, it will skip to the next menu
<MODE>, again to <PIP > and again back to <MIX>. Unless the device got
license, it will skip to <FX> (Additional features).The LED indicators beside light
up meaning the corresponding feature menu is open. Use knob to select and
confirm the desired items after it enters the menu.
2.3.1 MIX
Push button SW to open up the transition effect menu. Use knob to select the
desired transition effect icon and push the knob to confirm.

11
Cut Directly
Fade In/Out
Iris Box
Wipe to Right
Wipe to Bottom
Wipe to Bottom Right
Iris Cross
Wipe to Left
Wipe to Top
Center Split Horizontal
Center Split Vertical
Cross Inwards
Blinds Vertical
Box Inwards
Iris Round
2.3.2 MODE
Keep pushing the button SW to open up MODE menu.
MODE:FAST or T-Bar
TIME:0.5-5.0S
Choose FAST, the switching will be without transition effect but in set time.
Choose T-Bar, the switching will be with selected transition effect by pushing T-Bar.

12
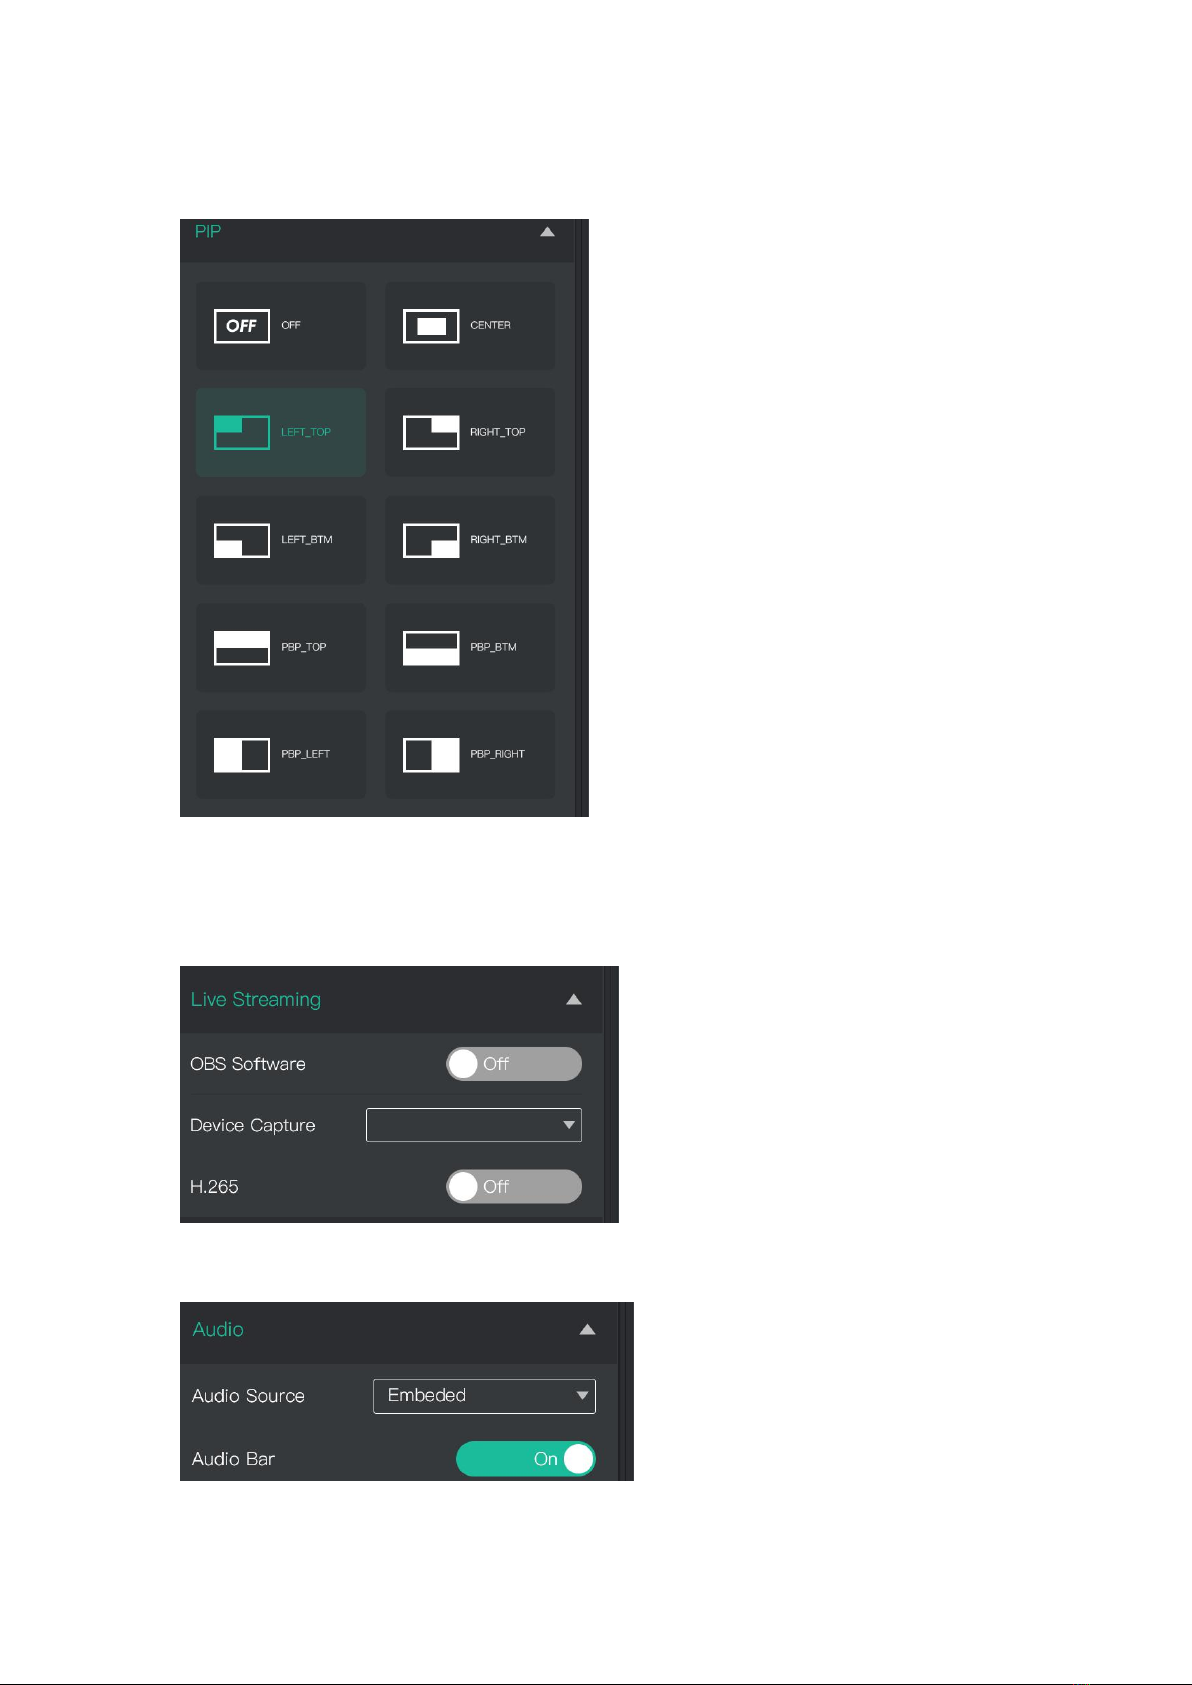
2.3.3 PIP (Picture in Picture)
Push SW button 3 times to open PIP menu. PIP menu offers 9 layouts for main
picture and sub picture.
PIP operation
1. Decide which source to be the main picture, select and switch it to PGM when
PIP is OFF
2. Select the PIP layout mode in PIP menu
3. Select the input source and switch it to sub-picture on PGM
4. After switching, the selected green button turns to red.
After PIP mode is selected, the main picture can not be changed unless
go back to choose PIP OFF and restart the above steps.
2.3.4 FX
FX is advanced features asking for license, reserved for future development.
3.Switch Input Source
After selecting transition effect and switch mode
1.Under Fast+Time mode, pushing green button will switch the input source in
the selected time with set transition effect. After switching , green turns to red.
2.Under T-Bar mode, pushing green button, it will flash and push T-Bar to the
end (left or right), the source will be switched with selected transition effect. After
switching , green turns to red.
Note: When T-Bar is not in the end position, no source can be selected.
4.Software Operation
After software is installed, click the icon and login the software. Click Search
to search LIVEPRO L1 device.

13
After searching, all available mini devices in the subnet can be found, up to 128
devices can found if there are.
Select the desired device by SN and IP and enter the management interface. The
software interface is a simulation of operation panel on real L1 device.
INPUT INFO

14
HDMI Output USB3.0 Output
<MIX>
Choose switch time and transition effect.
15
<PIP>
Choose layout mode for PIP
Streaming
Capture Device:choose FEELWORLD USB3.0 Capture
OBS:Slide On
AUDIO
16
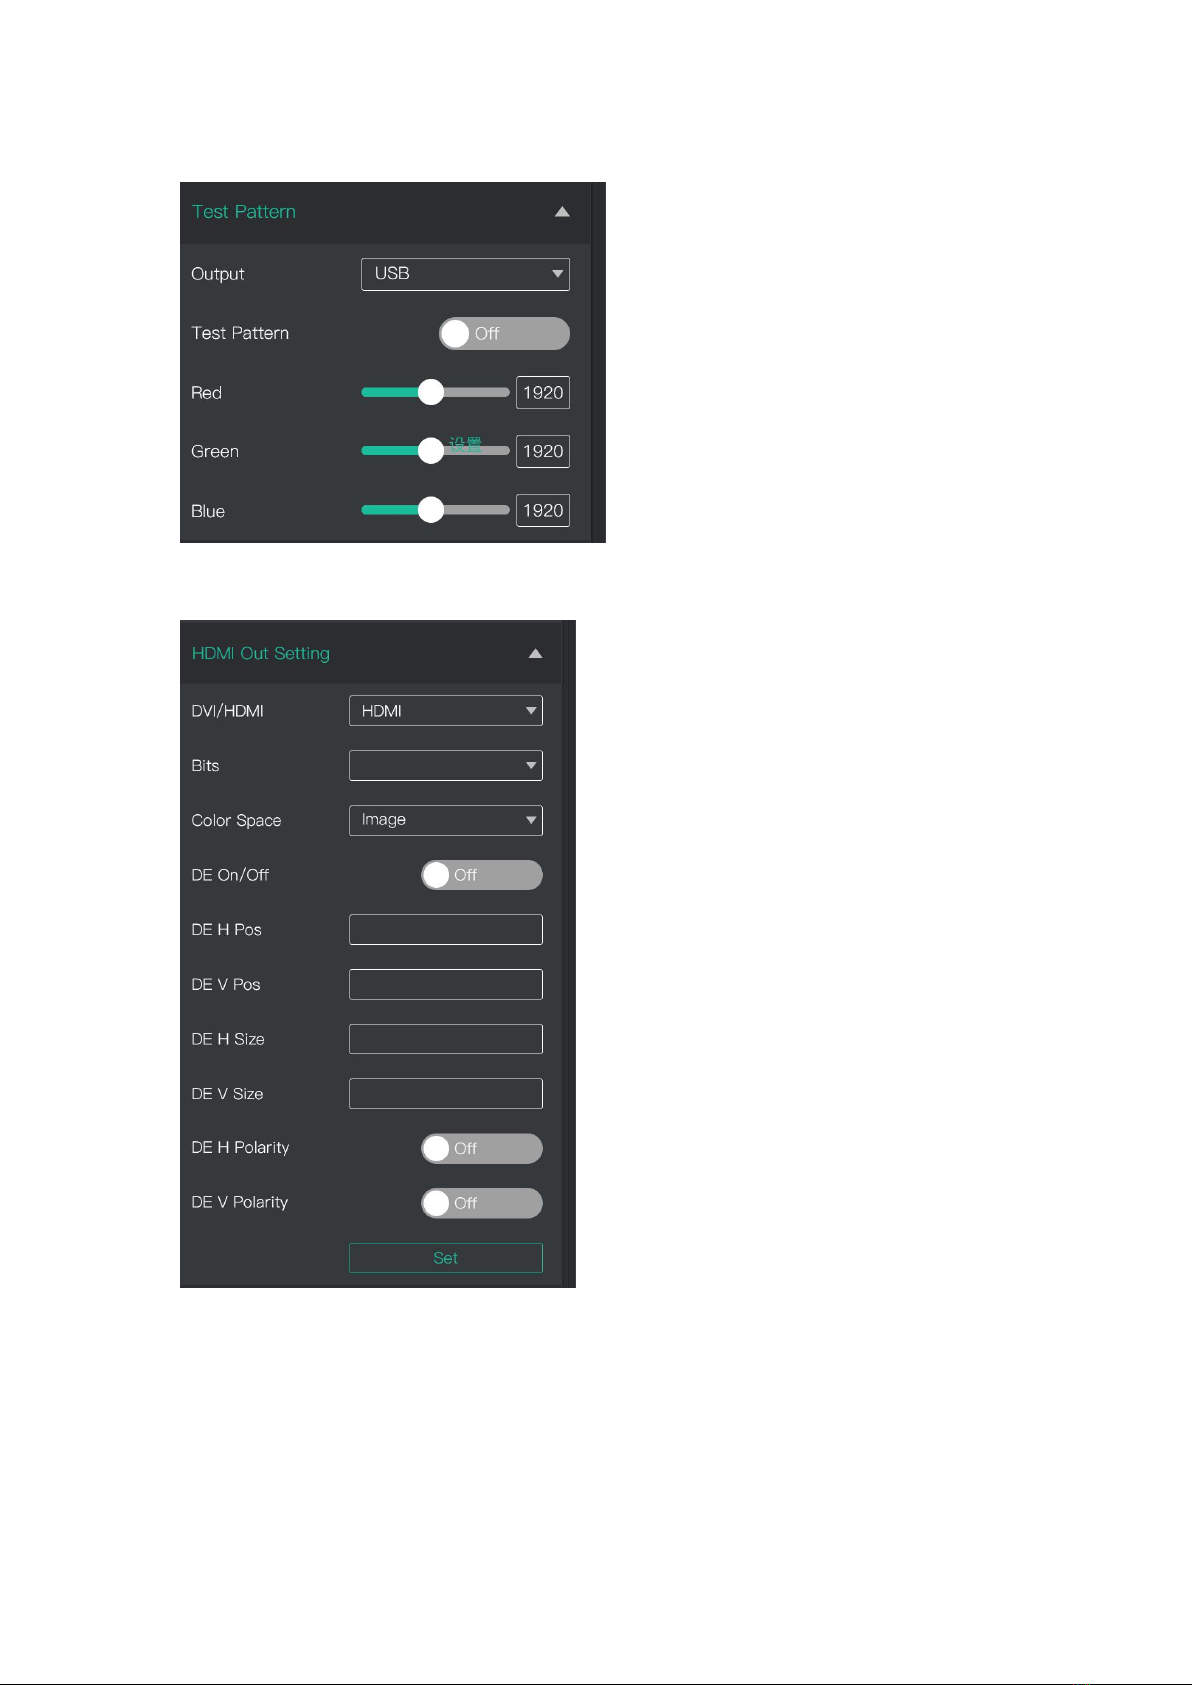
TEST PATTERN
HDMI Output Setting
17
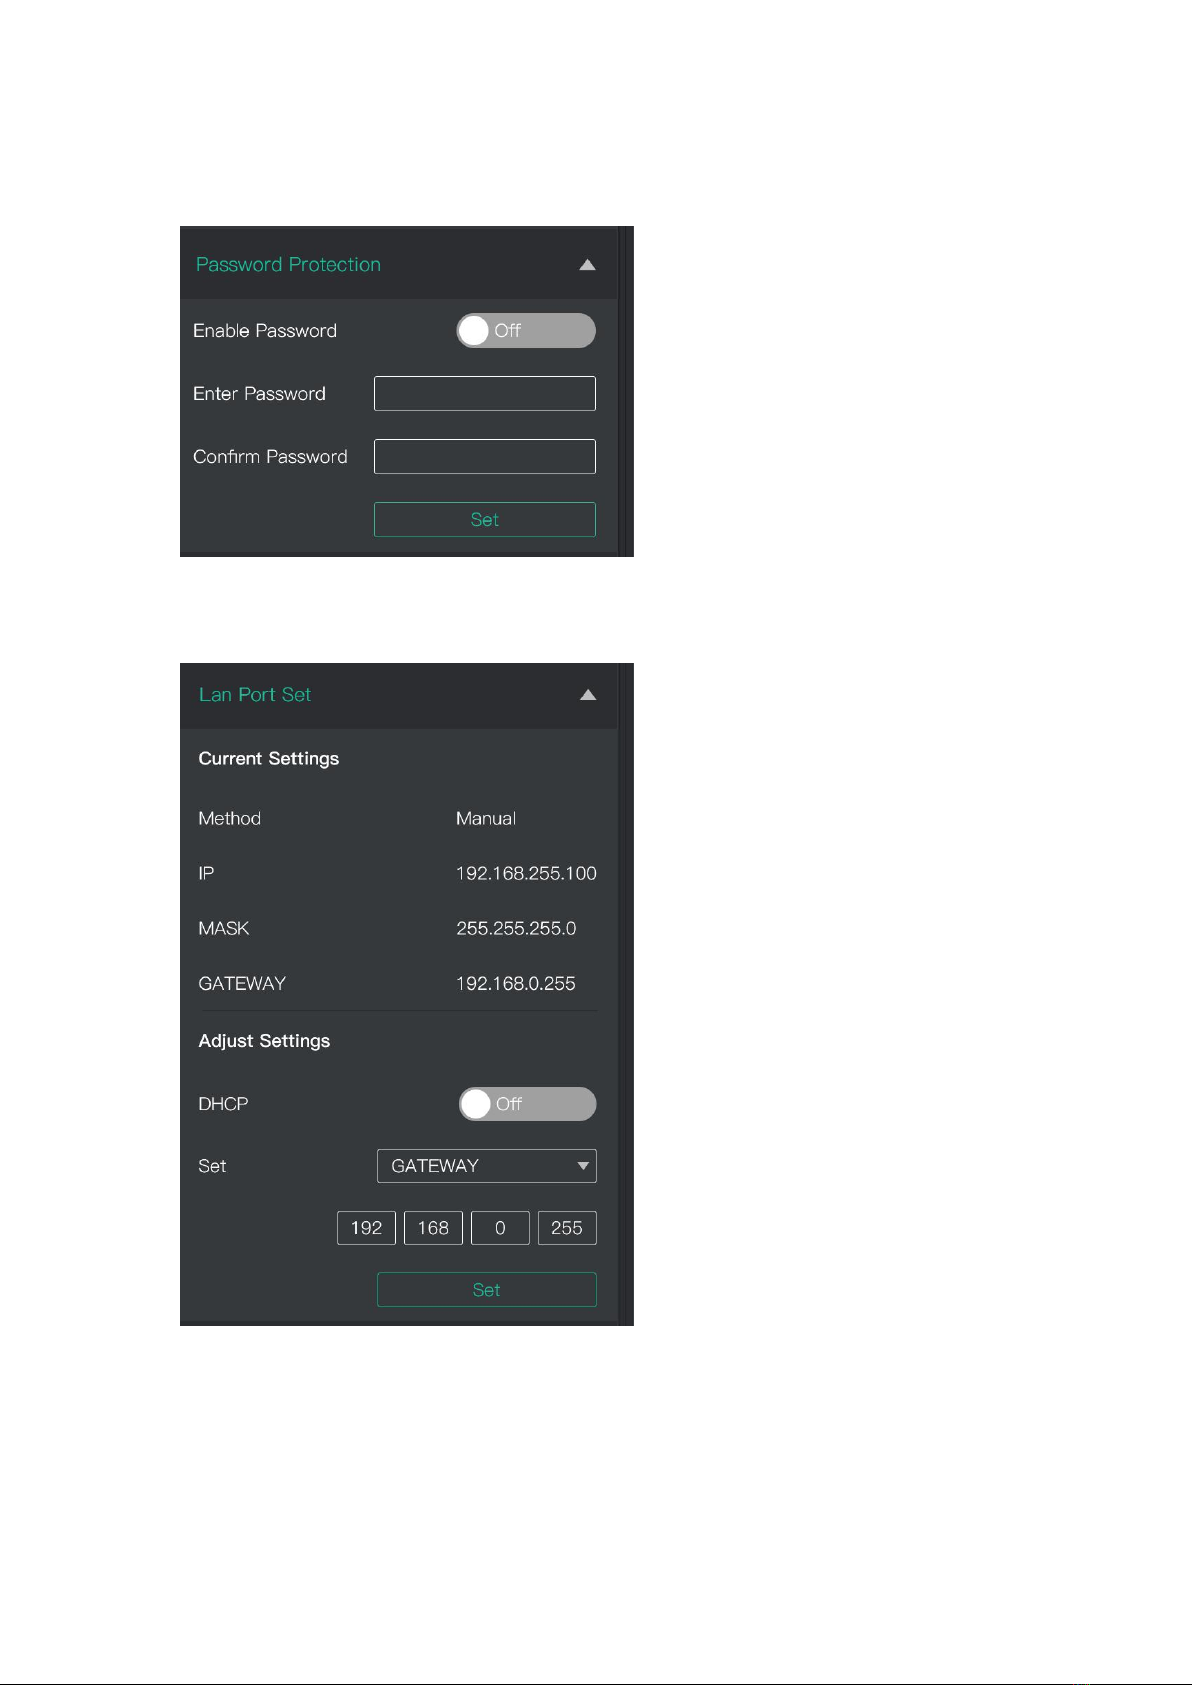
Password Protection
Set password for the device. After password is set, password will be required
when enter the software operation interface.
IP Setting
Manually set Gateway, MASK and IP for the device.
18
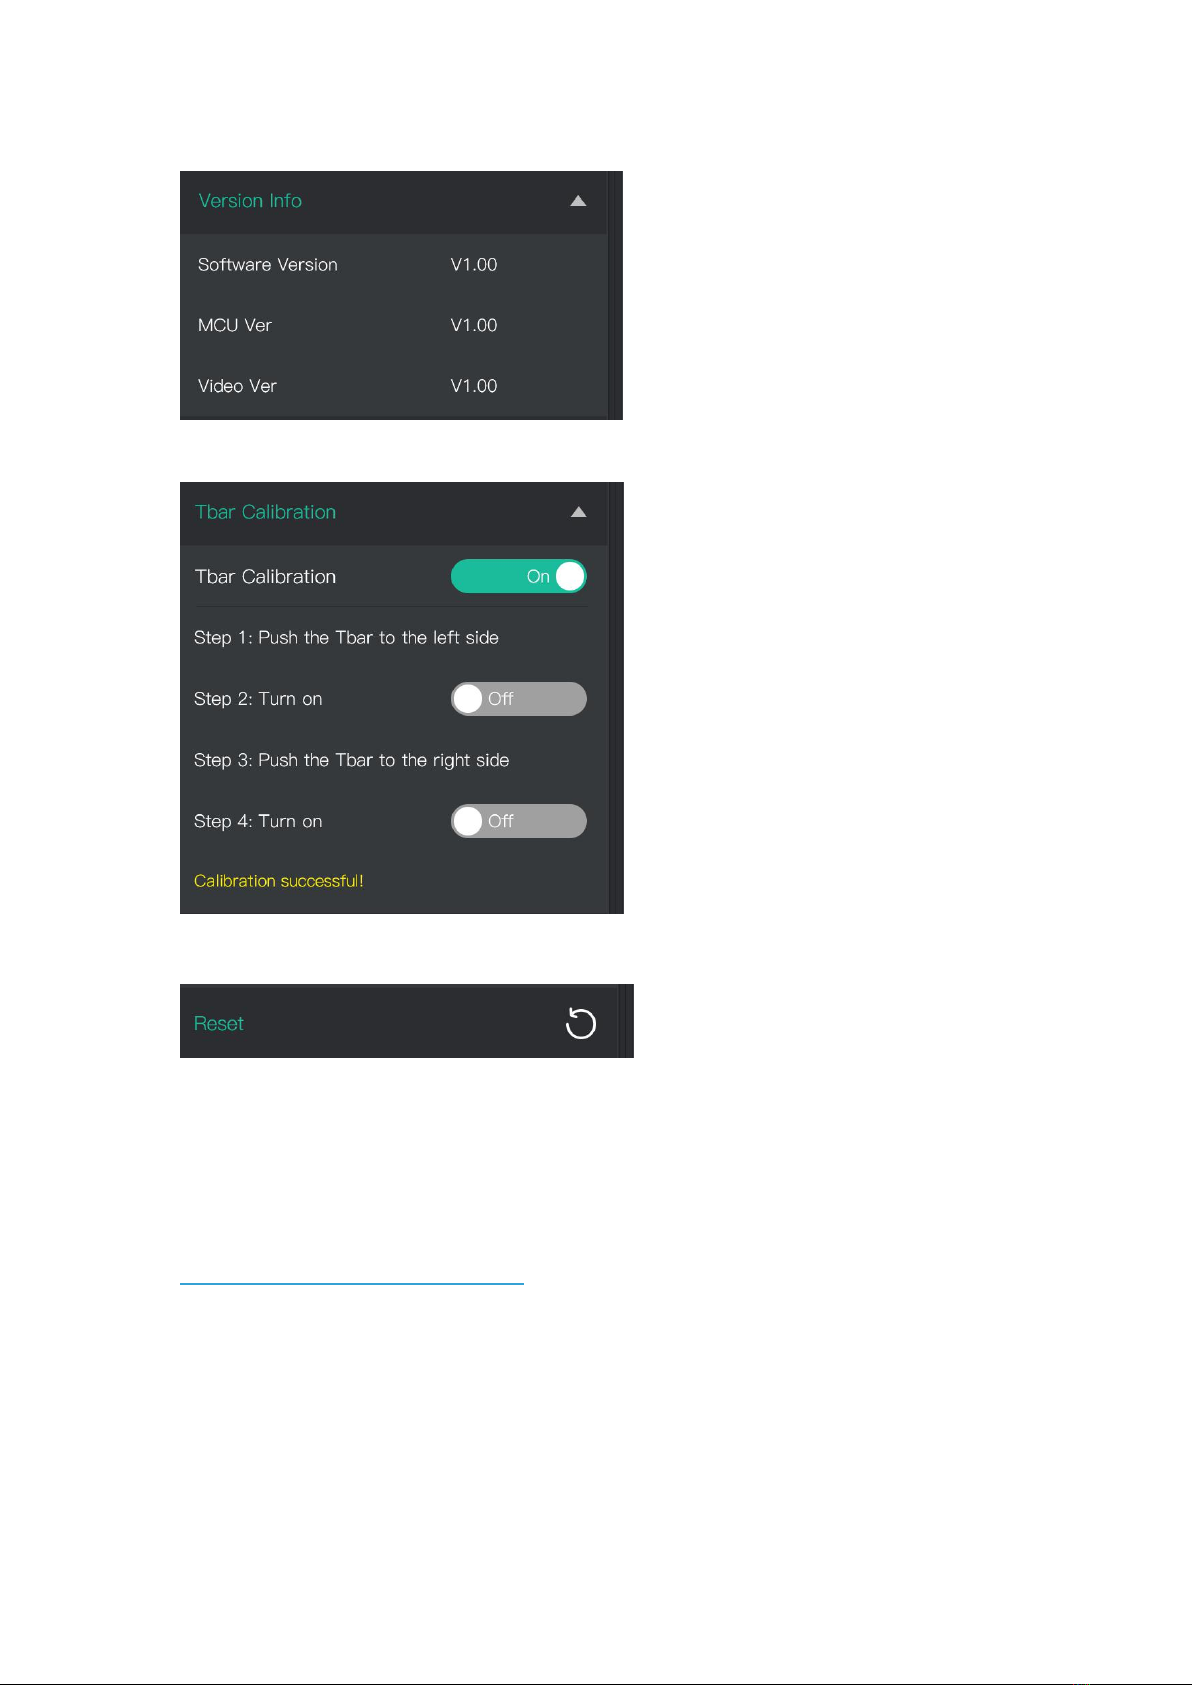
VERSION
T-Bar Calibration
Factory Reset
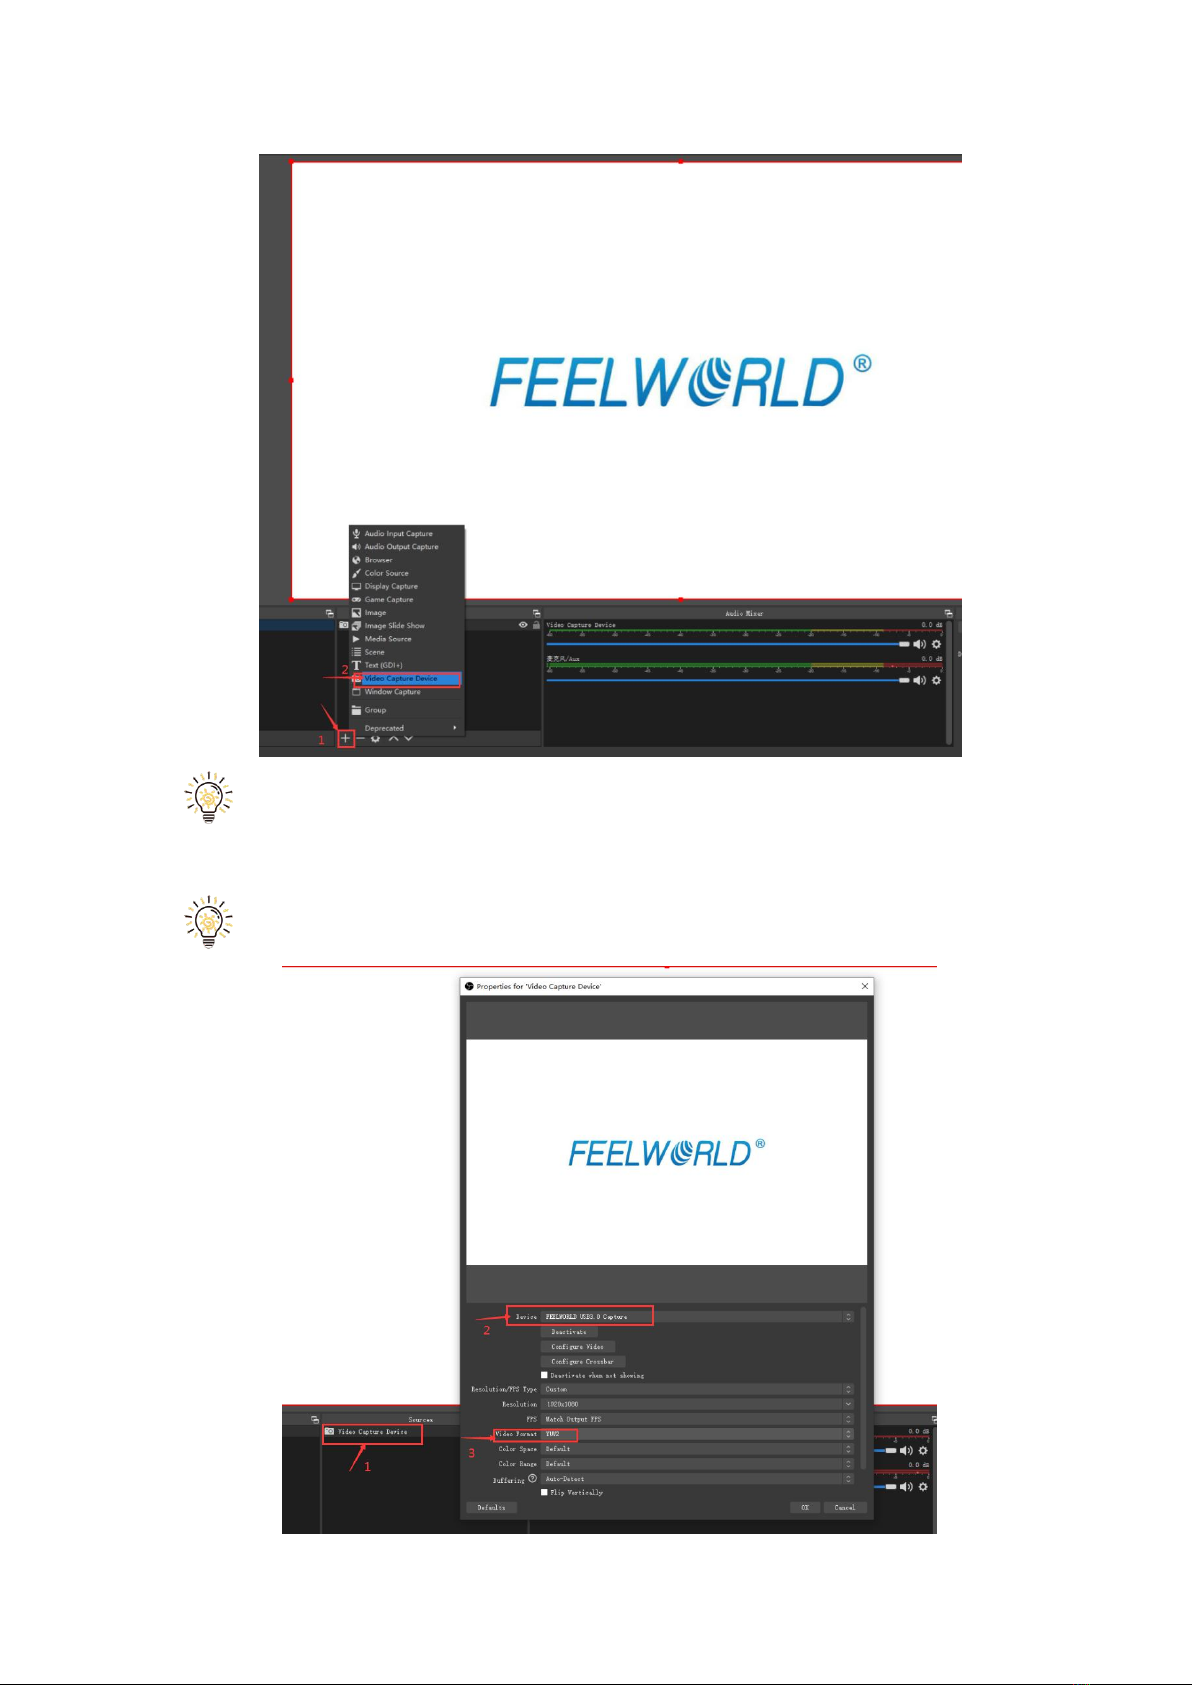
5.OBS Streaming
LIVEPRO L1 is compatible with many third party steaming softwares, we
recommend OBS, which is available to download on
https://obsproject.com/download. Download the software and update to the latest
version.
1.Click”+”icon
2.choose video capture device
3.Click video capture device to open up setting page
4.Choose : FEELWORLD USB 3.0 Capture
5.Choose Video Format YUY2
19
If there is no video format YUY 2 after setting above, check the USB 3.0port
connection. Make sure it is linked to USB 3.0port on PC by USB 3.0 cable. (USB
3.0 cable or port is standard in blue while USB 2.0 is in black)
If the captured video is showing mosaic, change the video format to YUY2.
Other manuals for LIVEPRO L1
2
Table of contents
Other Feelworld Mixer manuals


