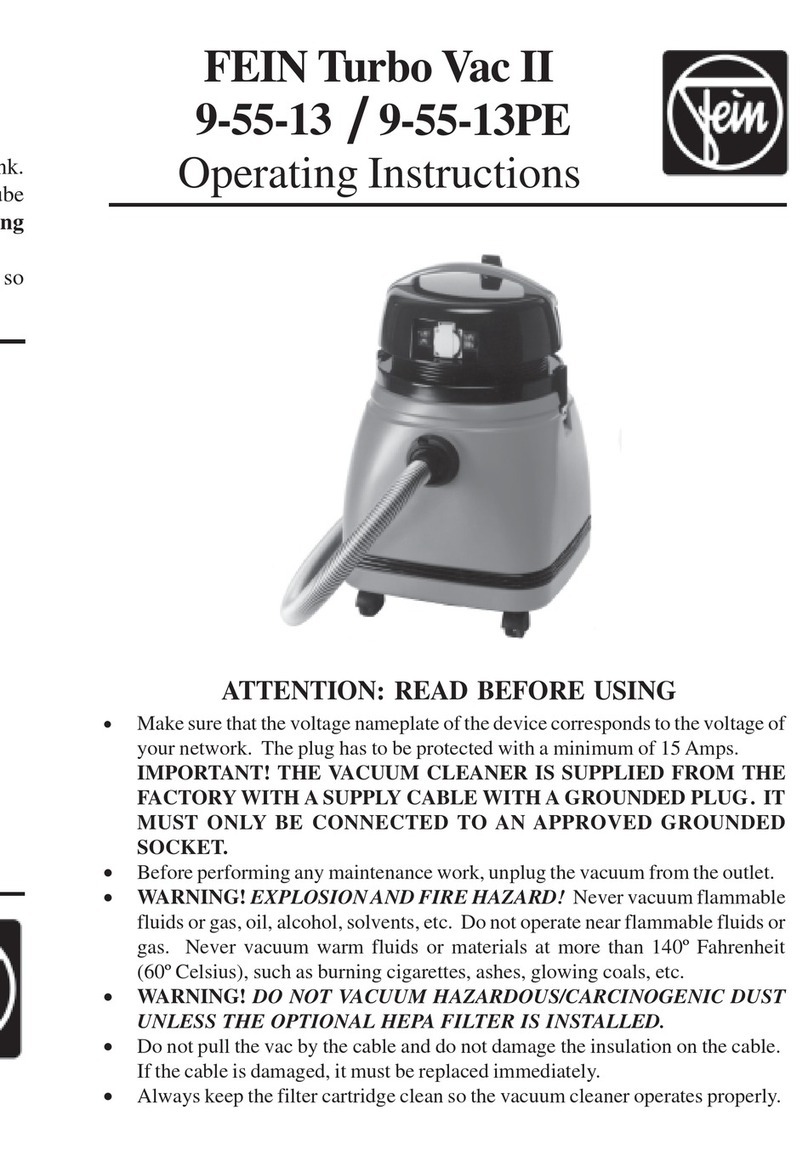
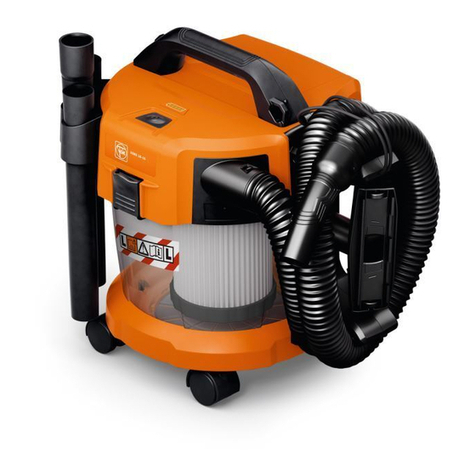
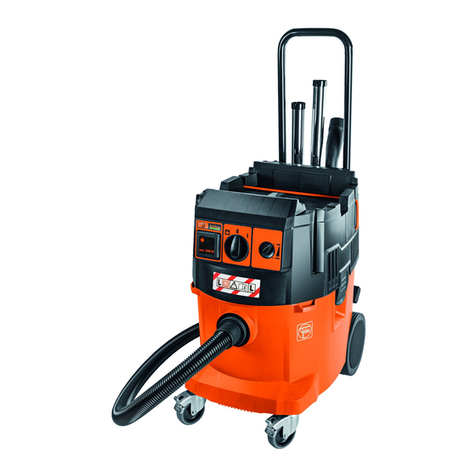
Fein Dustex II 9 20 20 User manual

Dustex II
9 20 20
3 41 01 045 06 9
Printed in Germany 09.04
3 41 01 045 06 9 - Buch Seite 1 Mittwoch, 15. September 2004 11:54 11

2
Deutsch
English
Français
Italiano
Nederlands
Español
Português
EÏÏËÓÈο
Dansk
Norsk
S enska
Suomi
Magyar
âesky
Slovensky
Polski
На русском
языке
5
10
15
21
27
33
39
45
51
56
61
66
71
77
82
88
100
102
94
3 41 01 045 06 9 - Buch Seite 2 Mittwoch, 15. September 2004 11:54 11

3
6 7
3
5
12
4
3 41 01 045 06 9 - Buch Seite 3 Mittwoch, 15. September 2004 11:54 11

4
e
d
b
a
c
i
f
g
h3
h2
h1
h
8
3 41 01 045 06 9 - Buch Seite 4 Mittwoch, 15. September 2004 11:54 11

Dustex II
5
DE
Bedienungsanleitung Staubsauger.
Auf einen Blick.
1 Schalter
Ein- und Ausscha ten.
2 Betriebsartenschalter mit Gerätesteck-
dose
Umscha ten auf Einscha tautomatik
und Ansch uss für E ektrowerkzeug.
3 Filterpatrone
Zum Einsetzen das Saugerobertei
abnehmen.
4 Schlauchaufnahmestutzen
Zum Entfernen des Saugsch auches
den Entriege ungsknopf drücken.
5 Papierstaubsack
Nur zum Trockensaugen verwenden.
6 Räder
Zur Montage in den Behä terboden
einsetzen.
7 Verschluss für Behälter
Zum Öffnen des Staubsaugers.
8 Mitgeliefertes Zubehör
Saugsch auch, Ø 36 mm (a),
Universa -Ansch ussstück für E ektro-
werkzeuge, passend für FEIN
MF 12-180 und Fremdfabrikate (b),
Direktansch ussstück, PVC, Ø 36 mm,
passend für a e FEIN E ektrowerk-
zeuge außer MF 12-180 (c),
Direktansch ussstück, PVC, Ø 36/
32 mm, passend für MF 12-180 (d),
Fugendüse (e),
Handgriff mit Saugkraftverste ung (f),
Po sterdüse (g),
Kombidüse (h) mit Einsatz für Tep-
pich (h1), Böden (h2) und F üssigkei-
ten (h3),
2 Saugrohre (i).
Zu Ihrer Sicherheit.
Vor Gebrauch dieses Gerätes esen
und danach hande n:
diese Bedienungsan eitung,
die bei iegenden Sicherheitshinweise
(Schriftennummer 3 41 30 054 06 1),
die einsch ägigen nationa en Arbeits-
schutzbestimmungen.
Diese Bedienungsan eitung und die bei ie-
genden Sicherheitshinweise sind zum spä-
teren Gebrauch aufzubewahren und bei
einer Weitergabe oder Veräußerung dem
Gerät beizu egen.
Bestimmungsgemäße Verwendung.
Dieses Gerät ist bestimmt:
für den gewerb ichen Einsatz in Industrie
und Handwerk sowie für den Gebrauch
im Hausha t,
zum Aufsaugen und Absaugen von tro-
ckenen, nicht gesundheitsgefährdenden
Stäuben und nicht brennbaren F üssigkei-
ten,
zum Einsatz mit Zubehör, die in dieser
Bedienungsan eitung angegeben sind oder
die von FEIN empfoh en werden.
Sicherheitshinweise.
Verletzungsgefahr
Das Gerät darf nur an vorschriftsmäßigen
Schutzkontaktsteckdosen betrieben wer-
den, das Auftrennen der Schutzkontakt-
verbindungen ist unzu ässig.
Nur unbeschädigte Ansch uss eitung und
ggf. Schutzkontaktver ängerungs eitung
verwenden und rege mäßig auf Beschädi-
gungen überprüfen.
!
3 41 01 045 06 9 - Buch Seite 5 Mittwoch, 15. September 2004 11:54 11

6
Dustex II
DE
Den Netzstecker nie am Kabe aus der
Steckdose ziehen, nur am Stecker ziehen.
Bei Nichtgebrauch, in Arbeitspausen oder
a en Arbeiten am Gerät den Netzstecker
aus der Steckdose ziehen.
Die Ansch uss eitung nicht beschädigen,
z. B. durch Überfahren, Zerren, Quet-
schen.
Gesundheitsgefahr: Den Staubsauger
nicht zum Saugen gesundheitsgefähr icher
Stoffe benutzen, z. B. Asbest.
Gefahr von Brand oder Exp osion: Den
Staubsauger nicht zum Saugen heißer,
brennbarer oder exp osiver Stoffe, z. B.
Benzin, Ö , Lösemitte , A koho , verwen-
den. Den Staubsauger nicht in exp osions-
gefährdeten Räumen gebrauchen.
Vor dem Verwenden der Gerätesteck-
dose den Staubsauger abscha ten. Nur
Stecker ausgescha teter E ektrowerk-
zeuge in die Gerätesteckdose einstecken.
Die Bedienungsan eitung und Sicherheits-
hinweise des verwendeten E ektrowerk-
zeuges beachten.
Vor dem Aufsaugen von F üssigkeiten
muss der Papierstaubsack sowie die Fi ter-
patrone herausgenommen und die Funkti-
onsfähigkeit des Schwimmers überprüft
werden. Bei Schaumentwick ung die
Arbeit sofort beenden und den Behä ter
ent eeren.
Das Saugerobertei nicht mit Wasser
abspritzen – Kurzsch ussgefahr. Den Sau-
ger vor Niedersch ag schützen.
Keine Schi der und Zeichen auf das Gerät
nieten oder schrauben. Die Schutziso ie-
rung kann dadurch unwirksam werden.
Empfoh en werden K ebeschi der.
Nur unbeschädigte Stecker und Kabe
verwenden.
Sachbeschädigung
Netzspannung und Spannungsangabe am
Gerät müssen übereinstimmen.
Montage.
Verletzungsgefahr
durch unbeabsichtigtes Einschalten.
Vor Montagearbeiten Stecker ziehen.
Einige Zubehörtei e werden im Behä ter
iegend ge iefert und müssen vor der ers-
ten Inbetriebnahme entnommen werden.
Fahrwerk montieren (6).
■Die Räder zur Montage in den Behä -
terboden einsetzen.
Papierstaubsack einsetzen (5).
Der Papierstaubsack darf nur zum Tro-
ckensaugen verwendet werden.
Bei Verwendung des Papierstaubsacks
b eibt die Fi terpatrone änger sauber, das
steigert die Saug eistung. Der aufgesaugte
Staub kann besser entsorgt werden.
■Die Versch üsse (7) auf beiden Seiten
öffnen und das Saugerobertei abneh-
men.
■Den neuen Papierstaubsack (5) am
Pappf ansch greifen und zuerst unten,
dann oben über die Rastnocke schie-
ben.
■Darauf achten, dass der Pappf ansch
und der Papierstaubsack vo ständig an
der Innenwand des Behä ters an iegt.
■Das Saugerobertei aufsetzen und die
Versch üsse (7) sch ießen.
Das Entfernen des Papierstaubsacks
erfo gt in umgekehrter Reihenfo ge.
Um Verschmutzungen beim Wechse n
des vo en Papierstaubsacks zu vermeiden,
diesen mit dem Versch ussdecke sch ie-
ßen.
!
!
3 41 01 045 06 9 - Buch Seite 6 Mittwoch, 15. September 2004 11:54 11

Dustex II
7
DE
Filterpatrone wechseln (3).
Die Fi terpatrone darf nur zum Trocken-
saugen verwendet werden.
Die Fi terpatrone stets trocken und sauber
ha ten. Zum Reinigen die Fi terpatrone
rege mäßig ausk opfen.
So te die Saug eistung nicht mehr ausrei-
chen, die Fi terpatrone auswechse n.
■Die Versch üsse (7) auf beiden Seiten
öffnen und das Saugerobertei abneh-
men.
■Die Rände mutter am Boden der Fi ter-
patrone entgegen dem Uhrzeigersinn
drehen und die Fi terpatrone abneh-
men.
■Neue Fi terpatrone mittig aufsetzen
und die Rände mutter im Uhrzeiger-
sinn bis zum Ansch ag drehen.
■Das Saugerobertei aufsetzen und die
Versch üsse (7) sch ießen.
Saugschlauch montieren (4).
■Den Saugsch auch bis zum Ansch ag in
den Sch auchaufnahmestutzen einfüh-
ren bis dieser fest sitzt.
■Zum Entfernen des Saugsch auches den
Entriege ungsknopf drücken und den
Saugsch auch herausziehen.
Die Zubehörtei e werden mit eichtem
Druck montiert. Zur Demontage die Tei e
etwas gegeneinander drehen und g eich-
zeitig ziehen.
Bedienen.
Ein- und Ausschalten (1).
■Zuerst Kabe und Stecker auf Beschädi-
gungen prüfen.
Zum Betrieb des Staubsaugers ohne ange-
sch ossenes E ektrowerkzeug den
Betriebsartenscha ter (2) auf (M) ste en.
Einscha ten:
■Den Scha ter (1) auf (I) ste en.
Ausscha ten:
■Den Scha ter (1) auf (0) ste en.
Elektrowerkzeug anschließen.
Vor dem Verwenden der Gerätesteck-
dose den Staubsauger abscha ten. Nur
Stecker ausgescha teter E ektrowerk-
zeuge in die Gerätesteckdose einstecken.
Der Staubsauger wird über das an die
Gerätesteckdose angesch ossene E ektro-
werkzeug automatisch ein- und ausge-
scha tet.
■Den Netzstecker des E ektrowerkzeu-
ges in die Gerätesteckdose einstecken.
■Den Scha ter (1) auf (I) ste en.
■Den Betriebsartenscha ter (2) auf (A)
ste en.
■Das E ektrowerkzeug einscha ten – der
Staubsauger startet automatisch.
■Nach dem Ausscha ten des E ektro-
werkzeuges äuft der Staubsauger noch
etwa 5 Sekunden nach und scha tet sich
dann automatisch ab.
Saugen on Flüssigkeiten.
Vor dem Aufsaugen von F üssigkeiten
muss der Papierstaubsack sowie die Fi ter-
patrone herausgenommen und die Funkti-
onsfähigkeit des Schwimmers überprüft
werden.
■Den Behä ter ent eeren und säubern,
um Verschutzungen zu vermindern.
Beim Erreichen der maxima en Fü höhe
des Behä ters wird der Luftstrom durch
den im Saugerobertei integrierten
Schwimmer unterbrochen. Der Staubsau-
ger saugt dann nicht mehr auf.
Den Staubsauger sofort ausscha ten, den
Netzstecker aus der Steckdose ziehen
und den Behä ter ent eeren.
Bei Schaumentwick ung die Arbeit sofort
beenden und den Behä ter ent eeren.
3 41 01 045 06 9 - Buch Seite 7 Mittwoch, 15. September 2004 11:54 11
8
Dustex II
DE
Trockene Stoffe saugen.
Zum Trockensaugen die Fi terpatrone in
den Staubsauger einsetzen.
Zusätz ich so te beim Trockensaugen der
Papierstaubsack verwendet werden.
Reinigen und Pflegen.
Verletzungsgefahr
durch unbeabsichtigtes Einschalten.
Vor Pflegearbeiten Stecker ziehen.
Nach jedem Gebrauch den Behä ter ent-
eeren (F üssigkeiten, Grobschmutz,
Staub).
Nach dem Aufsaugen von F üssigkeiten
den Behä ter ent eeren. Danach den
Staubsauger mit den angesch ossenen
Zubehörtei en (Saugsch auch, Saugrohr,
Düsen, usw.) noch einige Minuten aufen
assen, um diese zu trocknen.
Warten und Reparieren.
Verletzungsgefahr
Warten, prüfen und reparieren dürfen nur
Elektrofachkräfte nach den im eweiligen
Land gültigen Vorschriften.
Zum Warten und Reparieren.
Wir empfeh en unsere Kundendienstab-
tei ung (Zentra reparatur), FEIN-Vertrags-
werkstätten und -Vertretungen. Adressen
am Ende dieser Bedienungsan eitung und
in den bei iegenden Sicherheitshinweisen.
Diese Bedienungsan eitung der Reparatur-
werkstatt mitgeben. Ersatztei übersicht
am Ende dieser Bedienungsan eitung.
Nur Origina -FEIN-Ersatztei e verwen-
den.
Störungssuche.
Bei ungenügender Saug eistung ist zu überprüfen:
!
!
Störungsbeschreibung Ursache Störungsbeseitigung
Staubsauger ässt sich nicht
einscha ten. Sicherung der Ansch uss-
steckdose hat ausge öst. Stromzufuhr gewähr eisten.
Staubsauger im Automatik-
betrieb. Betriebsartenscha ter (2)
auf (M) ste en.
Saug eistung vermindert. Staubsauger nicht richtig
montiert. Saugerobertei aufsetzen
und Versch üsse vo ständig
sch ießen.
Saugsystem verstopft. Saugsch auch und Saugrohre
reinigen.
Papierstaubsack vo . Papierstaubsack wechse n.
Fi terpatrone verschmutzt. Fi terpatrone reinigen oder
erneuern.
Keine Saug eistung beim
Nasssaugen. Behä ter vo – Schwimmer
versch ießt die Saugöffnung. Behä ter ent eeren.
3 41 01 045 06 9 - Buch Seite 8 Mittwoch, 15. September 2004 11:54 11
Dustex II
9
DE
Ersatzteile.
Ersatztei übersicht am Ende dieser
Bedienungsan eitung. Tei e-Nr. (1),
Beste nummer (2) sowie Anzah der
Ersatztei e (3) er eichtern das Beste en.
Zubehör.
Bi d iche Darste ung und Beste nummern
am Ende dieser An eitung.
Er äuterungen zum Zubehör:
A Papierstaubsack, Packung mit 5 Stück.
B Fi terpatrone.
Garantie.
Jedes FEIN-Erzeugnis wird sorgfä tig
geprüft und unter iegt den strengen Maß-
stäben der FEIN-Qua itätssicherung.
Über die gesetz ichen Gewähr eistungs-
pf ichten hinaus eisten wir Garantie ent-
sprechend der FEIN Herste er-
Garantieerk ärung. Detai s darüber erfah-
ren Sie bei Ihrem Fachhänd er, der FEIN-
Vertretung im Land oder beim FEIN-Kun-
dendienst.
Schäden, die durch unsachgemäße
Behand ung, Über astung oder gebrauchs-
bedingten Versch eiß entstanden sind,
sind genere ausgesch ossen.
Umweltschutz.
Verpackungen, ausgediente Geräte und
Zubehör einer umwe tgerechten Wieder-
verwertung zuführen.
Weitere Informationen erha ten Sie bei
Ihrem Fachhänd er.
Technische Daten.
CE-Konformität.
Wir erk ären in a einiger Verantwortung,
dass dieses Produkt mit den fo genden
Normen oder normativen Dokumenten
übereinstimmt: EN 60 335 gemäß den
Bestimmungen der Richt inien 98/37/EG
und 89/336/EWG.
C. & E. FEIN GmbH,
Postfach 10 14 44 • 70013 Stuttgart
Bei Veränderung des Gerätes ver iert
diese Erk ärung ihre Gü tigkeit und die
Garantie er ischt.
Beste nummer 9 20 20
Bauart Dustex II
Nennaufnahme 1 300 W
min./max. Ansch usswert
der Gerätesteckdose 40/2 000 W
Stromart 1 ~
Gewicht 7,0 kg
Schutzk asse / I
Behä tervo umen 24
max. Unterdruck 230 mbar
Luftmenge 3 300 /min
Staubk asse L
Hammersdorf
Qua ity Manager
Dr. Schreiber
Manager of
R&D department
3 41 01 045 06 9 - Buch Seite 9 Mittwoch, 15. September 2004 11:54 11

10
Dustex II
EN
Operating instructions for acuum cleaner.
O er iew.
1 Switch
For switching ON/OFF.
2 Mode selector switch with power tool
socket
For se ecting automatic switch-on and
connection for power too .
3 Filter cartridge
For inserting remove the top of the
vacuum c eaner.
4 Hose connection piece
To remove vacuum hose, press the
re ease knob.
5 Paper dust bag
On y use for dry vacuuming.
6 Castors
For assemb ing, insert in the underside
of the container.
7 Latch for container
For opening the vacuum c eaner.
8 Supplied accessories
Vacuum hose, Ø 36 mm (a),
Universa connection piece for power
too s, to fit FEIN MF 12-180 and other
makes (b),
Direct connection piece, PVC,
Ø 36 mm, to fit a FEIN power too s
except FEIN MF 12-180 (c),
Direct connection piece, PVC,
Ø 36/32 mm, to fit MF 12-180 (d),
Groove nozz e (e),
Grip section with vacuum power
adjustment (f),
Upho stery nozz e (g),
Mu ti-purpose ho der (h) with insert
for carpets (h1), f oors (h2) and f u-
ids (h3),
2 vacuum tubes (i).
For your safety.
Before using this vacuum c eaner
p ease read first and act accord-
ing y:
these operating instructions,
the enc osed safety instructions
(document number 3 41 30 054 06 1),
the re evant nationa industria safety
regu ations.
These operating instructions and the
enc osed safety instructions shou d be
kept for ater use and enc osed with the
vacuum c eaner when passing it on or
se ing it.
Intended use.
This vacuum c eaner is intended for:
commercia use in industry and trade, as
we as for use in the home,
for vacuuming dry dust that is not hazard-
ous to hea th, and non-inf ammab e f uids,
for app ications using the accessories given
in these operating instructions or those
recommended by FEIN.
Safety instructions.
Risk of injury
The vacuum c eaner may on y be operated
using the correct earthing contact sockets;
separating the earthing contact connec-
tions is forbidden.
On y use undamaged connecting cab es
and, if necessary, shock-proof extension
cab e and at regu ar interva s check that
they are not damaged.
!
3 41 01 045 06 9 - Buch Seite 10 Mittwoch, 15. September 2004 11:54 11
Dustex II
11
EN
Never pu the mains p ug out of the
socket by pu ing at the cab e; on y pu
out ho ding the p ug.
Remove the mains p ug from the socket
when not in use, during work breaks, or
during any work to be done on the
machine itse f.
Do not damage the connection cab e, e. g.
by driving over it, pu ing or squeezing it.
Danger to hea th: The vacuum c eaner
must not be used for vacuuming sub-
stances that are hazardous to hea th, e. g.
asbestos.
Danger of fire or exp osion: The vacuum
c eaner must not be used for vacuuming
substances that are hot, inf ammab e or
exp osive, e. g. petro , oi , so vents, a co-
ho . The vacuum c eaner must not be used
in rooms where there is risk of exp osion.
Before using the socket for the power
too s, switch off the vacuum c eaner first.
On y insert the power too p ug in the
power too socket when the power too is
switched-off.
P ease observe the operating instructions
and safety instructions for the respective
power too used.
Before vacuuming f uids, the paper dust
bag and fi ter cartridge must be taken out
and the f oat checked for proper function-
ing. If foam deve ops, stop work immedi-
ate y and empty the container.
Do not a ow any water to sp ash on the
vacuum top – danger of a short circuit.
Protect the vacuum c eaner from the rain.
Do not rivet or screw any name-p ates or
signs onto the vacuum c eaner. The pro-
tective insu ation can thereby be rendered
ineffective. Adhesive abe s are recom-
mended.
On y use an undamaged p ug and cab e.
Damage to property/material
Mains vo tage must correspond with
the vo tage specifications on the vacuum
c eaner.
Assembly.
Risk of injury
by switching ON unintentionally.
Before assembling pull out the mains plug.
Some of the accessories are supp ied ying
in the container and have to be taken out
before using for the first time.
Assembling the cart (6).
■Assemb e by inserting the castors in the
underside of the container.
Insert the paper dust bag (5).
The paper dust bag may on y be used for
dry vacuuming.
Using the paper dust bag keeps the fi ter
cartridge c ean over a onger period, and
increases the vacuuming performance.
The vacuumed dust can be disposed of
more easi y.
■Open the atches (7) on both sides and
remove the top of the vacuum c eaner.
■Ho d the new paper dust bag (5) by the
cardboard f ap and push it downwards
first and then upwards over the ocking
notch.
■Make sure that the cardboard f ap and
the paper dust bag are ying comp ete y
f ush against the inside wa of the con-
tainer.
■P ace the top of the vacuum c eaner on
again and c ose the atches (7).
Removing the paper dust bag is done in
the reverse sequence.
To avoid creating any dirt when changing
the fu paper dust bag, c ose it by shutting
the id.
!
!
3 41 01 045 06 9 - Buch Seite 11 Mittwoch, 15. September 2004 11:54 11
12
Dustex II
EN
Changing the filter cartridge (3).
The fi ter cartridge may on y be used for
dry vacuuming.
A ways keep the fi ter cartridge dry and
c ean. To c ean the fi ter cartridge, knock
it out regu ar y.
Shou d the vacuuming performance no
ong prove sufficient, change the fi ter car-
tridge.
■Open the atches (7) on both sides and
remove the top of the vacuum c eaner.
■Turn the knur ed nuts on the base of
the fi ter cartridge anti-c ockwise and
remove the fi ter cartridge.
■Rep ace a new fi ter cartridge, centring
it correct y, and tighten the knur ed
nuts by turning them c ockwise.
■P ace the top of the vacuum c eaner on
again and c ose the atches (7).
Assembling the acuum hose (4).
■Insert the vacuum hose fu y in the hose
connection piece unti it sits firm y.
■To remove the vacuum hose, press the
re ease knob and pu the vacuum hose
out.
The accessories are assemb ed by pressing
them in gent y. To detach the parts,
untwist them s ight y, pu ing them apart at
the same time.
Handling.
Switching ON/OFF (1).
■First check that the cab e and p ug are
not damaged.
For operating the vacuum c eaner without
a connected power too , set the mode
se ector switch (2) to (M).
Switching the vacuum c eaner ON:
■Turn the switch (1) to (I).
Switching the vacuum c eaner OFF:
■Turn the switch (1) to (0).
Connecting the power tool.
Before using the socket for the power
too s, switch off the vacuum c eaner first.
On y insert the power too p ug in the
power too socket when the power too is
switched-off.
The vacuum c eaner is switched on and off
automatica y by the power too con-
nected to the power too socket.
■Insert the mains p ug of the power too
in the power too socket.
■Turn the switch (1) to (I).
■Turn the mode se ector switch (2)
to (A).
■Switch on the power too – the vac-
uum c eaner starts automatica y.
■After turning the power too off, the
vacuum c eaner continues to run for
about 5 seconds and then switches off
automatica y.
Wet acuuming.
Before vacuuming f uids, the paper dust
bag and fi ter cartridge must be taken out
and the f oat checked for proper function-
ing.
■Empty the container and c ean it to
reduce dirt accumu ation.
When the maximum fi ing eve of the
container has been reached, the air f ow is
interrupted by the f oat integrated in the
top of the vacuum c eaner. The vacuum
c eaner suction then stops.
Immediate y switch the vacuum c eaner
off, pu the p ug out of the socket and
empty the container.
If foam deve ops, stop work immediate y
and empty the container.
3 41 01 045 06 9 - Buch Seite 12 Mittwoch, 15. September 2004 11:54 11
Dustex II
13
EN
Vacuuming dry material.
For dry vacuuming, insert the fi ter car-
tridge in the vacuum c eaner.
The paper dust bag shou d a so be used
for dry vacuuming.
Cleaning and care.
Risk of injury
by switching the tool ON unintentionally.
Before cleaning, pull out the mains plug.
Empty the container after each app ication
(f uids, dirt, dust).
Empty the container after vacuuming f u-
ids. Afterwards, a ow the vacuum c eaner
with the connected accessories (vacuum
hose, vacuum tube, nozz es, etc.) to con-
tinue running for a few minutes to dry
them.
Maintenance and repairs.
Risk of injury
Service, testing and repairs may only be car-
ried out by electrical engineers in conformity
with the regulations valid in the respective
country.
Maintenance and repairs.
We recommend our customer service
department (repair centre), FEIN author-
ised service centres and agencies.
Addresses can be found at the end of
these operating instructions and in the
enc osed safety instructions.
P ease hand these operating instructions
to the repair centre. An overview of spare
parts can be found at the end of these
operating instructions.
On y use origina FEIN spare parts.
Troubleshooting.
In the case of inadequate vacuuming performance, check the fo owing:
!
!
Fault description Cause Correcting the fault
Vacuum c eaner cannot be
switched on. The connection socket fuse
has actuated. Check that there is a
current supp y.
Vacuum c eaner is in
automatic mode. Turn the mode se ector
switch (2) to (M).
Vacuuming performance is
reduced. Vacuum c eaner is not
correct y assemb ed. P ace the top of the
vacuum c eaner on and
c ose the atches correct y.
Vacuum hose system is
c ogged. C ean vacuum hose and
vacuum tubes.
Paper dust bag is fu . Insert a new paper dust bag.
Fi ter cartridge is c ogged. C ean or renew fi ter
cartridge.
No vacuuming performance
for wet vacuuming. Container is fu – f oat has
c osed the vacuuming opening. Empty container.
3 41 01 045 06 9 - Buch Seite 13 Mittwoch, 15. September 2004 11:54 11

14
Dustex II
EN
Spare parts.
The overview of spare parts is at the end
of these operating instructions. Quoting
the parts no. (1), reference no. (2) as we
as the number of spare parts (3) faci itates
the ordering procedure.
Accessories.
I ustrations and reference numbers can be
found at the end of these instructions.
Description of the accessories:
A Paper dust bag, pack of 5.
B Fi ter cartridge.
Guarantee.
A the FEIN products are tested carefu y
and are subject to the stringent require-
ments of the FEIN qua ity contro .
In addition to the ega warranty we a so
provide the FEIN manufacturer’s guaran-
tee. For further detai s on this, p ease con-
tact your specia ist dea er, your nationa
FEIN representative, or the FEIN cus-
tomer service centre.
Damage due to improper hand ing, over-
oading or norma wear are genera y not
covered by the guarantee.
En ironmental protection.
Packaging, worn out vacuum c eaners and
accessories shou d be sorted for environ-
ment-friend y recyc ing.
Further information is avai ab e from your
dea er.
Specifications.
CE conformity.
We dec are ourse ves so e y responsibi ity
for this product conforming with the
fo owing standards or standardised
documents: EN 60 335 in accordance
with the regu ations in the recommenda-
tions 98/37/EC and 89/336/EEC.
C. & E. FEIN GmbH,
Postfach 10 14 44 • 70013 Stuttgart
Any a terations made to the vacuum
c eaner wi render this dec aration inva id
and the guarantee wi become ineffective.
Reference number 9 20 20
Type Dustex II
Rated input 1 300 W
Min./max. connected oad
of the power too socket 40/2 000 W
Current type 1 ~
Weight 7.0 kg
C ass of protection / I
Container vo ume 24
Max. vacuum 230 mbar
Air f ow 3 300 /min.
Dust c assification L
Hammersdorf
Qua ity Manager
Dr. Schreiber
Manager of
R&D department
3 41 01 045 06 9 - Buch Seite 14 Mittwoch, 15. September 2004 11:54 11
Dustex II
15
FR
Instructions d’utilisation aspirateur.
Vue générale.
1 Interrupteur Marche/Arrêt
Mise en marche et arrêt.
2 Commutateur du mode de fonctionne-
ment a ec prise de courant
Commutation sur mise en marche
automatique et raccordement de
’outi é ectrique.
3 Cartouche filtrante
Pour e montage, démonter a partie
supérieure de ’aspirateur.
4 Tubulure de raccordement du tuyau
d’aspiration
Pour en ever e tuyau d’aspiration,
appuyer sur e bouton de déver-
roui age.
5 Sac à poussières en papier
Seu ement pour ’aspiration de matiè-
res sèches.
6 Roulettes
Pour e monter, es fixer dans e fond
du réservoir.
7 Fermeture du réser oir
Pour ouvrir ’aspirateur.
8 Accessoires fournis
Tuyau d’aspiration, Ø 36 mm (a),
Raccord universe pour outi s é ectri-
ques, approprié pour FEIN MF 12-180
et autres marques (b),
Manchon de raccord direct, PVC,
Ø 36 mm, approprié pour tous es
outi s é ectriques FEIN sauf
MF 12-180 (c),
Manchon de raccord direct, PVC,
Ø 36/32 mm, approprié pour
MF 12-180 (d),
Buse p ate (e),
Poignée avec rég age de a force d’aspi-
ration (f),
Buse d’aspiration de rembourrage (g),
Buse d’aspiration mu ti-fonctions (h)
avec insert pour tapis (h1), so (h2) et
iquides (h3),
2 tubes d’aspiration (i).
Pour otre sécurité.
Avant d’uti iser cet apparei , ire et
respecter scrupu eusement :
a présente notice d’uti isation,
es consei s de sécurité ci-joints
(réf. documents 3 41 30 054 06 1),
es dispositions concernant a prévention
des accidents du travai en vigueur dans e
pays en question.
Bien garder ces instructions d’uti isation
ainsi que es consei s de sécurité ci-joints
en vue d’une uti isation u térieure ; i s doi-
vent être joints à ’apparei en cas de trans-
mission ou de vente à une tierce
personne.
3 41 01 045 06 9 - Buch Seite 15 Mittwoch, 15. September 2004 11:54 11
16
Dustex II
FR
Utilisation conforme à la
destination.
Cet apparei est conçu :
comme outi age professionne à usage
industrie et artisana , ainsi qu’à usage
domestique,
pour ’aspiration de poussières sèches qui
ne sont pas nuisib es à a santé ainsi que
pour ’aspiration de iquides ininf amma-
b es,
pour travai er avec des accessoires indi-
qués dans a présente notice d’uti isation
ou recommandés par FEIN.
Consignes de sécurité.
Risques de blessures
L’apparei ne doit être branché que sur des
prises de courant avec igne de terre con-
forme à a égis ation en vigueur ; a cou-
pure de a igne de terre n’est pas
autorisée.
Uti iser uniquement un câb e d’a imenta-
tion et, e cas échéant, une ra onge avec
igne de terre qui soient en bon état et es
contrô er régu ièrement afin de détecter
des signes d’endommagement.
Ne pas tirer sur e câb e pour retirer a
fiche de a prise de courant, tirer seu e-
ment sur a fiche.
Lorsque ’apparei n’est pas uti isé, ors
d’interruptions de travai ou pour effec-
tuer des travaux sur ’apparei , retirer a
fiche de a prise de courant.
Ne pas écraser e câb e d’a imentation, ni
e coincer ni ’étirer, ce qui risquerait de
’endommager.
Risques sanitaires : Ne pas uti iser ’aspira-
teur pour aspirer des matières nuisib es à
a santé, p. ex. amiante.
Risques d’incendie ou d’exp osion : Ne
pas uti iser ’aspirateur pour aspirer des
matières brû antes, inf ammab es ou
exp osives, p. ex. essence, hui e, so vant,
a coo , etc. Ne pas uti iser ’aspirateur dans
des ocaux où i y a risque d’exp osion.
Avant d’uti iser a prise de courant située
sur ’aspirateur, arrêter ce ui-ci. Ne bran-
cher sur a prise de courant située sur
’aspirateur que des fiches d’outi s é ectri-
ques qui sont arrêtés.
Respecter es instructions d’uti isation
ainsi que es instructions de sécurité de
’outi é ectrique uti isé.
Avant d’aspirer des iquides, en ever e sac
à poussières en papier ainsi que a cartou-
che fi trante et contrô er e bon fonction-
nement du f otteur. En cas de génération
d’écume, cesser immédiatement e travai
et vider e réservoir.
Ne pas projeter d’eau sur a partie supé-
rieure de ’aspirateur – risque de court-
circuit. Ne pas exposer ’aspirateur à a
p uie.
Ne pas riveter ni visser de p aques ou de
repères sur ’apparei . Vous risqueriez
sinon de rendre inopérante a doub e iso-
ation de ’apparei . I est recommandé
d’uti iser des autoco ants.
Uti iser uniquement une fiche et un câb e
en bon état.
Détérioration du matériel
La tension du secteur doit correspondre à
ce e mentionnée sur ’apparei .
!
!
3 41 01 045 06 9 - Buch Seite 16 Mittwoch, 15. September 2004 11:54 11
Dustex II
17
FR
Montage.
Risques de blessures
pouvant survenir en cas de mise en marche
non intentionnée.
Avant tous travaux de montage, débrancher
la fiche de la prise de courant.
Que ques accessoires, ivrés avec ’appa-
rei , se trouvent dans e réservoir de ’aspi-
rateur ; i s doivent être sortis avant de
mettre ’apparei en service.
Montage du châssis (6).
■Monter es rou ettes dans e fond du
réservoir.
Montage du sac à poussières en
papier (5).
Le sac à poussières en papier ne doit être
uti isé que pour ’aspiration de matières
sèches.
Lorsqu’on uti ise un sac à poussières en
papier, a cartouche fi trante restera p us
ongtemps propre, ce qui augmente a
puissance d’aspiration. Les poussières
aspirées peuvent être évacuées p us faci e-
ment.
■Ouvrir es fermetures (7) sur es deux
côtés et en ever a partie supérieure de
’aspirateur.
■Saisir e nouveau sac à poussières en
papier (5) par a bride en carton, e
pousser d’abord vers e bas, puis vers e
haut par-dessus a came.
■Vei er à ce que a bride en carton ainsi
que e sac à poussières en papier co ent
bien à a paroi intérieure du réservoir.
■Monter a partie supérieure de ’aspira-
teur et fermer es fermetures (7).
Le démontage du sac à poussières en
papier s’effectue dans ’ordre inverse.
Afin d’éviter es encrassements ors du
remp acement du sac à poussières remp i,
fermer ce ui-ci avec e couverc e.
Remplacement de la cartouche
filtrante (3).
La cartouche fi trante ne doit être uti isée
que pour ’aspiration de matières sèches.
Toujours tenir a cartouche fi trante pro-
pre et à sec. Pour nettoyer a cartouche fi -
trante, donner des petits coups sur ce e-ci
à interva es régu iers.
Au cas où a puissance d’aspiration ne suf-
firait p us, remp acer a cartouche fi trante.
■Ouvrir es fermetures (7) sur es deux
côtés et en ever a partie supérieure de
’aspirateur.
■Tourner dans e sens inverse des
aigui es d’une montre ’écrou mo eté
se trouvant sur e fond de a cartouche
fi trante et en ever ce e-ci.
■Bien centrer a nouve e cartouche fi -
trante et serrer ’écrou mo eté à fond,
dans e sens des aigui es d’une montre.
■Monter a partie supérieure de ’aspira-
teur et fermer es fermetures (7).
Montage du tuyau d’aspiration (4).
■Introduire à fond e tuyau d’aspiration
dans a tubu ure de raccordement
jusqu’à ce qu’i soit correctement fixé.
■Pour en ever e tuyau d’aspiration,
appuyer sur e bouton de déver-
roui age et retirer e tuyau d’aspiration.
Monter es accessoires en exerçant une
égère pression. Pour démonter es acces-
soires, es tourner égèrement ’un contre
’autre tout en tirant.
!
3 41 01 045 06 9 - Buch Seite 17 Mittwoch, 15. September 2004 11:54 11
18
Dustex II
FR
Utilisation.
Mise en marche et arrêt (1).
■Vérifier d’abord que e câb e d’a imen-
tation et a fiche sont en parfait état.
Pour mettre ’aspirateur en marche sans
qu’i y ait un outi é ectrique raccordé,
mettre e commutateur du mode de fonc-
tionnement (2) en position (M).
Mise en marche :
■Mettre ’interrupteur (1) en posi-
tion (I).
Arrêt :
■Mettre ’interrupteur (1) en posi-
tion (0).
Raccordement de l’outil électrique.
Avant d’uti iser a prise de courant située
sur ’aspirateur, arrêter ce ui-ci. Ne bran-
cher sur a prise de courant située sur
’aspirateur que des fiches d’outi s é ectri-
ques qui sont arrêtés.
L’aspirateur est automatiquement mis en
marche et arrêté par ’outi é ectrique
branché sur a prise de courant située sur
’aspirateur.
■Brancher a fiche de ’outi é ectrique
sur a prise de courant située sur ’aspi-
rateur.
■Mettre ’interrupteur (1) en posi-
tion (I).
■Mettre e commutateur du mode de
fonctionnement (2) en position (A).
■Mettre ’outi é ectrique en marche –
’aspirateur se met automatiquement
en fonctionnement.
■Une fois ’outi é ectrique arrêté, ’aspi-
rateur continue à fonctionner pendant
5 secondes environ, puis i s’arrête
automatiquement.
Aspiration de liquides.
Avant d’aspirer des iquides, en ever e sac
à poussières en papier ainsi que a cartou-
che fi trante et contrô er e bon fonction-
nement du f otteur.
■Vider et nettoyer e réservoir afin
d’éviter des encrassements.
Lorsque e niveau de remp issage maxi-
mum du réservoir est atteint, e f otteur
intégré dans a partie supérieure de ’aspi-
rateur interrompt e mouvement d’air.
L’aspirateur n’aspire p us.
Arrêter immédiatement ’aspirateur, reti-
rer a fiche de a prise de courant et vider
e réservoir.
En cas de génération d’écume, cesser
immédiatement e travai et vider e réser-
voir.
Aspiration de matières sèches.
Monter a cartouche fi trante dans ’aspira-
teur pour aspirer des matières sèches.
En p us, i est recommandé d’uti iser e sac
à poussières en papier ors de ’aspiration
de matières sèches.
Nettoyage et entretien.
Risques de blessures
pouvant survenir en cas de mise en marche
non intentionnée.
Avant tous travaux d’entretien et de nettoya-
ge, débrancher la fiche de la prise de courant.
Vider e réservoir après chaque usage
( iquides, sa etés diverses, poussières).
Vider e réservoir après avoir aspiré des
iquides. Puis aisser marcher ’aspirateur
avec es accessoires raccordés (tuyau
d’aspiration, tube d’aspiration, buses, etc.)
pendant que ques minutes afin de es
sécher.
!
3 41 01 045 06 9 - Buch Seite 18 Mittwoch, 15. September 2004 11:54 11

Dustex II
19
FR
Entretien et réparation.
Risques de blessures
Faire effectuer l’entretien, le contrôle et les
réparations de l’appareil uniquement par un
électricien respectant les prescriptions en vi-
gueur dans le pays en question.
Consignes d’entretien et de
réparation.
Nous vous recommandons de vous adres-
ser à notre service après-vente (centre de
réparation), aux ate iers agréés FEIN ainsi
qu’aux représentants FEIN. Vous trouve-
rez eur adresse à a fin de a présente
notice d’uti isation et dans es consignes
de sécurité ci-jointes.
Remettre a présente notice d’uti isation à
’ate ier chargé des réparations. Vous
trouverez un récapitu atif des pièces de
rechange à a fin de cette notice d’uti isa-
tion.
Uti iser uniquement des pièces de
rechange FEIN d’origine.
Détection des pannes.
Au cas où a capacité d’aspiration serait insuffisante, contrô er si :
!
Description des pannes Cause Réparations des pannes
L’aspirateur ne peut pas
être mis en marche. Le fusib e de a prise de
courant a déc enché. Assurer ’a imentation en
courant é ectrique.
L’aspirateur est en mode
automatique. Mettre e commutateur du
mode de fonctionnement (2)
en position (M).
La puissance d’aspiration
est réduite. L’aspirateur n’est pas
correctement monté. Monter a partie supérieure
de ’aspirateur et fermer
comp ètement es fermetures.
Le système d’aspiration est
obturé. Nettoyer e tuyau et es tubes
d’aspiration.
Le sac à poussières en papier
est p ein. Remp acer e sac à poussières
en papier.
La cartouche fi trante est
encrassée. Nettoyer ou remp acer a
cartouche fi trante.
Aucune puissance
d’aspiration ors de
’aspiration de iquides.
Le récipient est p ein –
e f otteur obture ’orifice
d’aspiration.
Vider e récipient.
3 41 01 045 06 9 - Buch Seite 19 Mittwoch, 15. September 2004 11:54 11
20
Dustex II
FR
Pièces de rechange.
Vous trouverez un récapitu atif des pièces
de rechange à a fin de cette notice d’uti i-
sation. Indiquer e numéro de a pièce (1),
a référence (2) ainsi que e nombre de
pièces (3) faci ite a commande.
Accessoires.
Les i ustrations et es numéros de réfé-
rence figurent à a fin de a présente notice
d’uti isation.
Note exp icative sur es accessoires :
A Sac à poussières en papier, ot de
5 pièces.
B Cartouche fi trante.
Garantie.
Chaque produit FEIN a été soigneusement
contrô é ; i est soumis à des critères
stricts étab is par e département « FEIN-
Assurance de qua ité ».
Outre es ob igations de garantie éga es,
es apparei s FEIN sont garantis conformé-
ment à notre déc aration de garantie de
fabricant. Pour p us de précisions, veui ez
vous adresser à votre revendeur spécia-
isé, à votre représentant FEIN dans votre
pays ou auprès du service après-vente
FEIN.
De manière généra e, es dommages résu -
tant d’une usure nature e, d’une sur-
charge ou d’un maniement non conforme
ne sont pas couverts par a garantie.
Respect de l’en ironnement.
Rapporter es emba ages, es apparei s
hors d’usage et es accessoires à un centre
de recyc age respectant es directives con-
cernant a protection de ’environnement.
Pour p us de précisions, veui ez vous
adresser à votre revendeur spécia isé.
Caractéristiques techniques.
Déclaration de conformité CE.
Nous déc arons sous notre propre res-
ponsabi ité que ce produit est en confor-
mité avec es normes ou documents
normatifs suivants : EN 60 335 conformé-
ment aux rég ementations des directives
98/37/CEE et 89/336/CE.
C. & E. FEIN GmbH,
Postfach 10 14 44 • 70013 Stuttgart
Toute modification apportée à ’apparei
fait perdre toute va idité à a présente
déc aration ainsi que e bénéfice de a
garantie.
Référence 9 20 20
Type Dustex II
Puissance absorbée 1 300 W
Va eur de raccordement
min./max. de a prise de cou-
rant située sur ’aspirateur 40/2 000 W
Type de courant 1 ~
Poids 7,0 kg
C asse de protection / I
Contenance du réservoir 24
Dépression max. 230 mbar
Débit d’air 3 300 /min
C asse de poussières L
Hammersdorf
Qua ity Manager
Dr. Schreiber
Manager of
R&D department
3 41 01 045 06 9 - Buch Seite 20 Mittwoch, 15. September 2004 11:54 11
Table of contents
Languages:
Other Fein Vacuum Cleaner manuals

Fein
Fein Dustex 25L User manual

Fein
Fein Turbo I User manual

Fein
Fein 9-77-25 User manual

Fein
Fein Dustex25 User manual

Fein
Fein 9-11-55 User manual

Fein
Fein Dustex 25L User manual

Fein
Fein Dustex 25L Setup guide

Fein
Fein Dustex 25L 9 20 27 User manual

Fein
Fein Turbo II X User manual

Fein
Fein Dustex 35 LX AC User manual

Fein
Fein Turbo I User manual

Fein
Fein 9 20 19 223 01 4 dustex User manual

Fein
Fein 9-77-25 User manual

Fein
Fein 9-11-55 Assembly instructions

Fein
Fein 9 20 30 User manual

Fein
Fein Dustex 35 LX AC User manual

Fein
Fein ASBS18-10AS User manual

Fein
Fein 9-11-20 User manual

Fein
Fein Dustex 35 LX AC User manual

Fein
Fein 9-55-13 User manual