manuals.online logo
Brands
  1. Home
  2. •
  3. Brands
  4. •
  5. Fenix
  6. •
  7. Heater
  8. •
  9. Fenix LSDTS 8 User manual

Fenix LSDTS 8 User manual

INSTALLATION MANUAL / NÁVOD NA INŠTALÁCIU
N205/R01
(
1.3.07
)
-S
K
LSDTS 8, 12
CABEL HEATING MATS/ PODLAHOVÉ VYKUROVACIE ROHOŽE
GENERAL TERMS AND CONDITIONS/ VŠEOBECNÉ PODMIENKY
 Heating mats may be operated only as a part of
building structures. Fixing the heating cable to the
fiberglass fabric during manufacture by gluing is
regarded to be only a temporary bond. The heating
mat is intended for installation in wet construction
processes (concrete, adhesive and “self- leveling”
sealing materials based on cement). When in use, the
heating mat must be in full contact with these
materials and free from air bubbles.
 The mat may be adjusted only as shown in pictures 1
– 3, and in no case may it be shortened. You may
shorten only the cold connection ends, as required.
The connection joining the cold end and the heating
cable may not be installed in a bend. The heating
cables of the heating mats may neither touch nor
cross one another. The minimum distance between
the cables is 30 mm. If the heating or power supply
cables are damaged, they must be replaced or
repaired by the manufacturer, its service technician or
a similarly qualified person in order to prevent
a dangerous situation from arising. Do not use nails or
screws to install the cables!
 When installing the cables, the diameter of a bend in
the cable must be at least eight times greater than the
cable’s diameter.
 The heating cable must be supplied with electricity by
means of a residual current circuit breaker with rated
actuating current of IΔn≤30mA, except for those mats
with protective braiding that are installed in a dry
environment. We recommend that each heating
unit/circuit be equipped with a separate residual
current device.
 For safety reasons, heating mats may not be installed
in walls.
 The heating mats may be stored at temperatures from
+10°C to +35°C and installed at temperatures from
+5°C to +30°C. When in operation, they may not be
exposed to temperatures exceeding 70°C.
 In case that mats are laid in an area larger than 20m2
or with a diagonal greater than 7m, it is necessary to
account for expansion of the foundation materials.
The heating cable must not cross the expansion
joints. The non- heating connecting cables located at
the expansion joints must be laid loosely in
a protective tube. All installed elements – cold
connection end, thermostat’s probe – where they pass
from the wall to the floor must be placed in installation
tubes and must allow for movement of the floor and
wall relative to one another.
 Vykurovacie rohože môžu byťprevádzkované len
ako súčasťstavebných konštrukcií. Fixácia
vykurovacieho vodiča k sklenej tkanine lepením sa
považuje len za dočasnou fixáciu, vykurovacia rohož
slúži na inštaláciu v mokrých stavebných procesoch
(betón, lepiace a „samonivelačné“ tmely na
cementovej báze) a pri prevádzke musí byťs týmito
hmotami v dokonalom kontakte bez vzduchových
medzier.
 Rohož môže byťupravovaná výhradne podľa
obrázkov 1–3, v žiadnom prípade nesmie byť
krátená. Krátené podľa potreby môžu byťlen studené
pripojovacie konce. Spojka spojujúca studený koniec
a vykurovací okruh nesmie byťinštalovaná v ohybe.
Vykurovacie vodiče vykurovacích rohoží sa nesmú
dotýkať, ani krížiť, vzdialenosťvykurovacích vodičov
od seba je min. 30mm. Ak je vykurovací vodičalebo
napájací prívod poškodený, musí byťnahradený
alebo opravený výrobcom, jeho servisným technikom
alebo podobne kvalifikovanou osobou, aby sa
zabránilo vzniku nebezpečnej situácie. Vodiče
neinštalujte pomocou hrebíkov a vrutov!
 Pri inštalácii musí byťdodržaná požiadavka, že
priemer ohybu vodiča smie byťminimálne
osemnásobok jeho priemeru.
 Vykurovacia rohož musí byťnapájaná cez prúdový
chráničs menovitým vybavovacím prúdom
IΔn≤30mA, okrem rohoží s ochranný opletením, ktoré
sa inštalujú v suchom prostredí. Doporučujeme
každý vykurovací celok / okruh vykurovania vybaviť
samostatným prúdovým chráničom.
 Vykurovaciu rohož z hľadiska bezpečnosti je
zakázané inštalovaťdo stien.
 Vykurovacia rohož môže byťskladovaná pri teplote
+10°C až +35°C a inštalovaná pri teplote +5 až
+30°C a pri prevádzke nesmie byťvystavovaná
teplotám vyšším než 70°C.
 Pri kladení na plochy väčšie než 20m2alebo
s uhlopriečkou väčšou než 7m je nevyhnutné
rešpektovaťdilatáciu podkladových materiálov.
Vykurovacia rohož nesmie prechádzaťcez dilatačné
škáry. Pripojovacie nevykurovacie vodiče musia byť
v mieste dilatačných škár voľne uložené v ochrannej
rúrke. Prechod všetkých inštalácií – studený koniec,
sonda termostatu – zo steny do podlahy musí byť
urobený v inštalačných rúrkach a umožňovať
vzájomný pohyb podlahy a steny.
 The mat must not be placed either under such
furnishings as bathtubs, shower baths, toilets and the
like or under furniture that does not allow air to
circulate. The maximum thermal resistance between
the heating part and the room may be R=0.12 m2K/W.
 The installation must allow for disconnecting the mat
or mats at both poles (which condition may be
provided using the FENIXTherm 100 thermostat).
 The label on the cold end of the heating mat shows
the serial number and production date. The label on
the mat’s packaging shows type, dimensions and area
of the mat, total output, output per 1m2, as well as the
mat’s supply voltage and electrical resistance.
 Before and after laying the mats, it is necessary to
measure the resistance of the heating circuit. The
measured values should be equal. Record the
measured values in the certificate of warranty.
 Before and after laying the cables, it is necessary to
measure the insulation resistance between the
heating conductor and the protective braiding. This
measured value may not be less than 0.5MΩ. Record
the measured values in the certificate of warranty.
 Before opening the package with the heating mat, it is
necessary to check whether the data on the label is in
accordance with your requested product.
 In case of any discrepancies, you should report these
immediately to the manufacturer or supplier and
discontinue the work completely.
 You must draw the scheme of the heating mat layout
in the certificate of warranty, indicating the exact
distance of the connections of the supply cable and
heating part from the walls of the building. Record the
serial number and production number of the heating
mat that are stated on the label on the mat’s cold end,
then insert/stick this label into the connection box.
 The supplier must inform other construction suppliers
about the heating unit installed in the floor and of the
related risks.
 The product must be installed in accordance with the
national regulations for electrical installation.
 Rohož nesmie byťkladená pod zariaďovacie
predmety ako sú vane, sprchové kúty, WC apod.,
ako aj pod nábytok neumožňujúci voľné prúdenie
vzduchu. Maximálny tepelný odpor medzi
vykurovacou jednotkou a miestnosťou môže byť
R=0,12 m2K/W.
 Inštalácia musí umožňovaťodpojenie rohože, či
rohoží v oboch póloch (splňuje termostat FENIX-
Therm 100).
 Na štítku umiestnenom na studenom konci
vykurovacej rohože je uvedené výrobné číslo
a dátum výroby. Na štítku, ktorý je umiestnený na
obale rohože je uvedený typ, rozmery a plocha
rohože, celkový výkon, výkon na 1m2, napájacie
napätie a elektrický odpor rohože.
 Pred pokládkou aj po pokládke je nutné premerať
odpor vykurovacieho okruhu. Namerané hodnoty sa
musia zhodovať. Namerané hodnoty zapíšte do
Záručného listu.
 Pred pokládkou aj po pokládke vykurovacej rohože
musí byťpremeraný izolačný odpor medzi
vykurovacím vodičom a ochranným opletením –
nameraná hodnota nesmie byťnižšia než 0,5MΩ.
Namerané hodnoty zapíšte do Záručného listu.
 Pred rozbalením vykurovacej rohože je nutné
skontrolovaťštítkové údaje, či sa zhodujú
s požadovaným výrobkom.
 Akékoľvek nezhody ihneďoznámte výrobcovi alebo
dodávateľovi a ukončite všetky práce.
 Do záručného listu musí byťzakreslené uloženie
vykurovacej rohože s označením spojok prívodného
vodiča a vykurovacej časti presným okótovaním od
stien objektu. Do záručného listu musí byťopísané
výrobné číslo rohože a dátum výroby zo štítku
umiestneného na studenom konci rohože, tento
štítok následne vložte/vlepte do pripojovacej krabice.
 Dodávateľmusí informovaťostatných dodávateľov
stavby o umiestnení vykurovacej jednotky v podlahe
a o rizikách z toho vyplývajúcich.
 Výrobok musí byťinštalovaný v súlade s národnými
predpismi pre elektrickú inštaláciu.
1. Description and connection 1. Popis a zapojenie
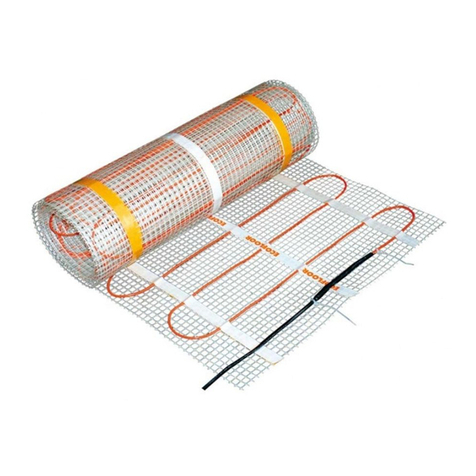
 The heating mat consists of the heating cable
 to a 230 V,

 of an LSDTS mat’s fabric is
 ting
. Using mats for direct floor heating
 Vykurovacia rohož pozostáva z vykurovacieho vodiča
pripevneného k nosnej sklovláknitej tkanine.
attached to a supporting fiberglass fabric.
The heating cables should be connected  Vykurovacie rohože sa pripojujú na sústavu 230V,
50Hz. Krytie IP 67.
50 Hz electrical network. Degree of protection: IP67.
LSDTS mats have protective braiding. The cable’s  Rohože LSDTS sa vyrábajú s vodičom s ochranným
opletením. Ochranné opletenie vodiča (CuSn 1 mm2)
zaisťuje požiadavku noriem na kovovú mrežu alebo
kovový plášťa zaisťuje zvýšenú ochranu v tých
priestoroch, kde sa to vyžaduje (kúpelne, práčovne
apod.). Ochranné opletenie sa pripojuje k PE vodiču
alebo k ochrannému pospojovaniu.
protective braiding (CuSn 1mm2) meets the standards
required of metal grid or metal shield and provides
increased protection in spaces where that is required
(bathroom, laundry, etc.) The protective braiding is to
be connected to the PE conductor or to a protective
grounding connection.
The entire bottom side  Pri rohožiach LSDTS je na celej spodnej strane
tkaniny nanesená samolepiaca vrstva, ktorou sa
rohož lepí k podkladu. Podklad musí byťzbavený
všetkých nečistôt.
covered with a selfadhesive material allowing the mat
to be attached to the foundation. The foundation’s
surface must be free from dirt and foreign matter.
The mats are wound on a paper tube, with the hea  Rohože sú navinuté na papierovej trubici, majú
koncovku vykurovacieho vodiča vyvedenú mimo
nosnej tkaniny. Po rozvinutí rohože je nutné túto
koncovku pripevniťk tkanine pomocou priloženej
sťahovacej pásky (viď. obrázok).
cable end protruding out of the supporting fabric. After
unwinding the mat, affix this end to the fabric using
the enclosed fastening strip (see picture).
22. Použitie na priamovýhrevné podlahové
vykurovanie
a) Dimenzovanie
a) Dimensioning ating is intended to be
 ng is to be used to heat
 and for bathrooms, we
 If the floor he
used to warm the floor surface for short
intervals, we recommend that the
heating mat be installed close to the
floor’s surface.
If the floor heati
 Ak ide o krátkodobú temperáciu
povrchu podlahy, doporučujeme
vykurovaciu rohož inštalovaťblízko
povrchu podlahy.
 Ak ide o vykurovanie miestnosti, tak pre správnu
voľbu vykurovacieho systému musíme poznať
hodnotu tepelných strát objektu. Inštalovaný príkon
by mal zodpovedať1,1 až 1,3 násobku vypočítaných
tepelných strát objektu. Ak nie je možné takto
vypočítaný príkon inštalovaťv celom rozsahu do
podlahovej plochy, musí sa použiťprídavné
vykurovanie (napr. Priamovýhrevné konvektory).
a room, it is
necessary to know the thermal loss value for the
building in order to select the most suitable heating
system. The installed output should correspond to
a multiple of 1.1 to 1.3 times the calculated thermal
loss for the building. If it is impossible to install the
calculated output into the entire floor area, an
additional heating device must be used (for example,
direct heating convectors).
For short- term heating
recommend using the LSDTS 12 heating mats with
output of 160W/m2. For rooms occupied for long time
periods, we recommend using the LSDTS 8 heating
mats with output of 80 and 100W/m2.
 Na krátkodobé vykurovanie a do kúpelní
doporučujeme vykurovacie rohože LSDTS 12
s výkonom 160W/m2. V priestoroch dlhodobo
obývaných doporučujeme rohože LSDTS 8
s výkonom 80 a 100W/m2.
b) Installation – direct heating system
 First read Clause 1 of the General Terms and
Conditions.
 To allow for expansion around the periphery of the
room between the baseboards and the floor tiles, use
an expansion profile or fill the spaces with silicone
sealing cement. The distance between the heating
mat and the wall must not be less than 50 mm.
 An insufficient thermal insulation layer below the
heating system may cause significant thermal loss
(warmth moving downwards). Recommended thermal
insulation is 70–80mm of extruded polystyrene or
similar thermal insulation materials. In case of
reconstruction, where there is not space to install the
thermal insulation to a sufficient depth on the existing
tiles, we recommend installing F- boards in a depth of
6mm or 10mm to accelerate the warming of the
s. This material

c) R


b) Montáž — priamovýhrevný systém
 Najprv si prečítajte bod 1. Všeobecné podmienky.
 Na obvodovú dilatáciu medzi soklom a dlažbou
použite dilatačný profil, alebo škáru vyplňte
silikónovým tmelom. Rohož musí byťnajmenej
50 mm od steny.
 Nepoužitím dostatočnej vrstvy tepelnej izolácie pod
vykurovacím systémom sa vystavujete riziku
značných tepelných strát smerom dole. Doporučená
tepelná izolácia je 70–80 mm extrudovaného
polystyrénu a obdobne tepelne izolujúcich
materiálov. Pri rekonštrukciách, kde nie je priestor na
doterajšiu dlažbu inštalovaťdostatočnú tepelnú
izoláciu, doporučujeme na zrýchlenie nábehu
povrchu teploty a zníženie tepelných strát inštalovať
dosky F—board s hrúbkou 6 a 10 mm. Tento materiál
sa inštaluje do zubovej stierky lepiaceho tmelu
o na ňu, nie je
c) R


surface and to reduce the thermal los
is installed into the adhesive sealing cement that was
shaped by a notched spreader and the heating mat is
placed directly onto its surface. The F- boards do not
need to be penetrated.
Detailed descriptions of use for the individual
materials can be found in the installation manuals for
the recommended materials.
egulation
For regulation, use one of FENIX’s currently available
thermostats.
For floors where exceeding the hygienic limit of 27°C
is not anticipated, or for floors in rooms occupied for
only short intervals (bathroom, lavatory, corridor) with
surface area output of up to 160W/m2, it is optional to
use the thermostat’s limiting floor probe. For all other
applications, the thermostat must be equipped with
a floor probe with the maximum temperature set to
35°C.
a vykurovacia rohož sa kladie priam
potrebné ju vopred penetrovať.
 Detailné použitie jednotlivých hmôt je uvedené
v návodoch priložených k doporučeným hmotám
egulácia
Na reguláciu použite termostat z aktuálnej ponuky
firmy FENIX.
Pri podlahách, kde sa nepredpokladá prekročenie
hygienickej hranice 27°C alebo ide o krátkodobo
obývané miestnosti (kúpelňa, WC, chodba)
s plošným príkonom do 160W/m2nie je podmienkou
limitujúca podlahová sonda termostatu. Pri všetkých
ostatných aplikáciách musí byťtermostat vybavený
podlahovou sondou s max. nastavením 35°C.
Direct heating system – new constructions / Priamovýhrevný systém — novostavby
1) Base / Podklad
2) Thermal insulation 70–80mm / Tepelná izolácia 70—
80 mm
3) Reinforcing steel grid (KARI) / Armovacia oceľová sieť
(KARI)
4) Concrate spread layer 40mm / Betónová vrstva cca
40mm
5) Flexible adhesive sealing cement / Flexibilný lepiaci tmel
6) ECOFLOOR heating mat / Vykurovacia rohož
ECOFLOOR
7) Floor tiles / Dlažba
Original floor tiles or another base / Pôvodná dlažba
alebo iný podklad
sealing cement / Flexibilný lepiaci tmel
F-BOARD (nie je podmienkou)
OR
6) or tiles / Nová dlažba
Direct heating system – reconstruction / Priamovýhrevný systém — rekonštrukcia
1)
2) Flexible adhesive
3) F- BOARD thermal insulation (optional) / Tepelná
izolácia
4) ECOFLOOR heating mat / Vykurovacia rohož
ECOFLO
5) Flexible adhesive sealing cement / Flexibilný lepiaci tmel
New flo
3. Accelerating the warming of heating floors
3. Nábehy vyku
For heating mat laid into self- leveling material
and into adhesive sealing cement
 We recommend putting the mat into operation after 5
days from laying the final layer of the floor (floor
covering).
Note: The values mentioned above are for information
only, it is necessary to follow the instructions provided by
the manufacturer of the respective construction material.
rovacích podláh
Uloženie v samonivelačnej hmote a v lepiacom
tmeli

po
Po .
nu
st
Vykurovaciu podlahu doporučujeme uviesťdo
prevádzky po 5 dňoch od položení finálnej vrstvy
dlahy (krytiny).
zn daje sú doporučené, prednostne je
nmi uvedenými výrobcom príslušnej
: Uvedené ú
tné sa riadiťpoky
a ebnej hmoty.
v
4. Warranty, claims
ECOFLOOR, supplier of the cable circuits, provides
warranty period of 24 months for the product’s
nctionality, beginning from the date of its installation that
confirmed in the certificate of warranty (installation must
e made at latest within 6 months from the date of
urchase), provided that:
a certificate of warranty and proof of purchase are
submitted,
the procedure described in this user guide has been
followed,
data on laying and connecting the cable in the floor
and the resulting measured values of the insulation
resistance of the heating cable are provided, and
the procedure for applying the sealing cement
cer has been followed.
laims may be made in writing at the company that
http://www.fenix.sk
a
fu
is
b
p




specified by its produ
C
performed the installation, or directly to the manufacturer.
Provided that the aforementioned conditions were met
and the warranty period has expired, the conditions under
the claims procedure, clause 5, applies for an additional
period of 8 years.
The claims procedure also is available at the website
4. Záruka, reklamácie
Dodávateľvodičových okruhov ECOFLOOR poskytuje
záruku na ich funkčnosťpo dobu 24 mesiacov odo dňa
inštalácie potvrdenej na záručnom liste (inštalácia musí
byťzrealizovaná maximálne 6 mesiacov od dátumu
predaja) ak je:
 doložený záručný list a doklad o zakúpení,
 dodržaný postup podľa tohto návodu,
 doložené údaje o skladbe vodiča v podlahe, zapojení
a výsledkoch meraní izolačného odporu
vykurovacieho vodiča,
 dodržaný návod výrobcu na aplikáciu tmelov.
Reklamácia sa uplatňuje písomne u firmy, ktorá
realizovala inštaláciu, pripadne priamo u výrobcu. Pri
dodržaní vyššie uvedených podmienok a po uplynutí
záručnej doby platia po dobu ďalších 8 rokov podmienky
podľa reklamačného poriadku, bod č. 5.
Reklamačný poriadok je taktiež na http://www.fenix.sk
FENIX SLOVENSKO s.r.o.
Iliašská cesta 86
974 05 Banská Bystrica
tel.: 048/4143253-4 fax: 048/4141852
e-mail: [email protected]
www.fenix.sk www.fenixgroup.cz

This manual suits for next models

1

Other Fenix Heater manuals

Fenix Atlantic F125-D User manual

Fenix

Fenix Atlantic F125-D User manual

Fenix GR 300 Service manual

Fenix

Fenix GR 300 Service manual

Fenix LDTS 8 User manual

Fenix

Fenix LDTS 8 User manual

Fenix GR 300 Service manual

Fenix

Fenix GR 300 Service manual

Fenix ECOSUN S+ Operation manual

Fenix

Fenix ECOSUN S+ Operation manual

Fenix CH 2000 B TURBO User manual

Fenix

Fenix CH 2000 B TURBO User manual

Fenix Ecosun 700U User manual

Fenix

Fenix Ecosun 700U User manual

Fenix Ecosun 750 IKP User manual

Fenix

Fenix Ecosun 750 IKP User manual

Fenix Ecosun G Series User manual

Fenix

Fenix Ecosun G Series User manual

Fenix GR 300 Service manual

Fenix

Fenix GR 300 Service manual

Fenix Ecosun 300 Basic User manual

Fenix

Fenix Ecosun 300 Basic User manual

Fenix Ecosun GS Series User manual

Fenix

Fenix Ecosun GS Series User manual

Fenix GRT Series User manual

Fenix

Fenix GRT Series User manual

Fenix ECOSTATIC WMX706 User manual

Fenix

Fenix ECOSTATIC WMX706 User manual

Fenix MR Series User manual

Fenix

Fenix MR Series User manual

Fenix ECOSUN S+ 18 Guide

Fenix

Fenix ECOSUN S+ 18 Guide

Fenix Actua User manual

Fenix

Fenix Actua User manual

Fenix Atlantic F129-D User manual

Fenix

Fenix Atlantic F129-D User manual

Fenix Ecosun G 300 User manual

Fenix

Fenix Ecosun G 300 User manual

Fenix HN4500 series User manual

Fenix

Fenix HN4500 series User manual

Fenix ECOFLEX G User manual

Fenix

Fenix ECOFLEX G User manual

Fenix ECOSUN E 700 IKP User manual

Fenix

Fenix ECOSUN E 700 IKP User manual

Fenix 45 Turbo User manual

Fenix

Fenix 45 Turbo User manual

Popular Heater manuals by other brands

KING PGH2440TB Installation and Maintenance

KING

KING PGH2440TB Installation and Maintenance

Storageflex RMC-LC NG manual

Storageflex

Storageflex RMC-LC NG manual

VEAB Heat Tech BX 20E User instructions

VEAB Heat Tech

VEAB Heat Tech BX 20E User instructions

tresnar 7141 instruction manual

tresnar

tresnar 7141 instruction manual

Warmlite WL41001 instruction manual

Warmlite

Warmlite WL41001 instruction manual

Markilux IR 54001 Information

Markilux

Markilux IR 54001 Information

PINK Triple Roll-on Heater Professional Edition quick start guide

PINK

PINK Triple Roll-on Heater Professional Edition quick start guide

Broan 164 instruction manual

Broan

Broan 164 instruction manual

Jefferson Professional Tools & Equipment INFERNO iR75 user manual

Jefferson Professional Tools & Equipment

Jefferson Professional Tools & Equipment INFERNO iR75 user manual

Euromate 107433 Original instructions

Euromate

Euromate 107433 Original instructions

KUKEN RH02 user manual

KUKEN

KUKEN RH02 user manual

Sencor SFH 9013 user manual

Sencor

Sencor SFH 9013 user manual

Powered Aire EVE owner's manual

Powered Aire

Powered Aire EVE owner's manual

VTS  Euroheat CH-2000M TURBO-UK instruction manual

VTS Euroheat

VTS Euroheat CH-2000M TURBO-UK instruction manual

DeLonghi BAMBINO instructions

DeLonghi

DeLonghi BAMBINO instructions

Dimplex PLX050NN instruction manual

Dimplex

Dimplex PLX050NN instruction manual

TREVIDEA G3 FERRARI TEPOR user manual

TREVIDEA

TREVIDEA G3 FERRARI TEPOR user manual

Dometic CH4000 operating manual

Dometic

Dometic CH4000 operating manual

manuals.online logo
manuals.online logoBrands
  • About & Mission
  • Contact us
  • Privacy Policy
  • Terms and Conditions

Copyright 2025 Manuals.Online. All Rights Reserved.