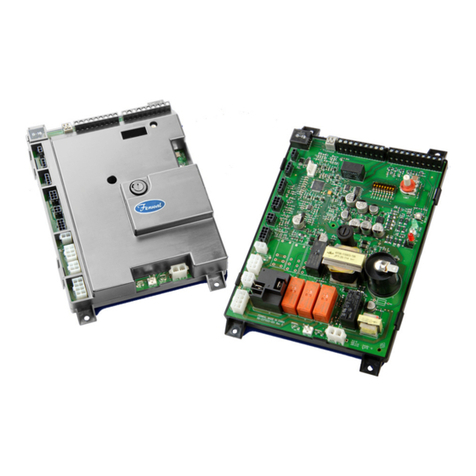
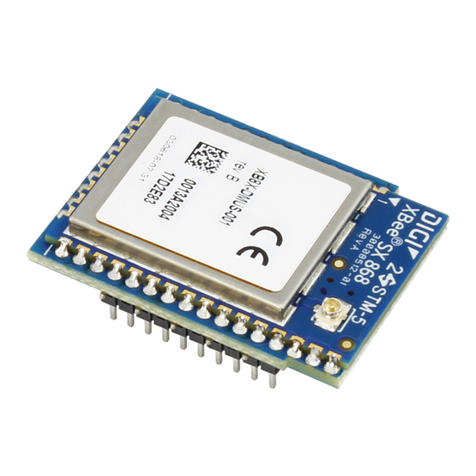
Fenwal Controls 35-71 Series User manual

F-35-71
March 2020
1
FEATURES
• Safe start with DETECT-A-FLAME® flame sensing
technology
• Custom pre-purge and inter-purge timings
• Inducer blower control and airflow switch monitoring
• Single or three trials for ignition
•System diagnostic LED
• Flame current test points
• Local or remote flame sensing
• Automatic reset
• Alarm output (normally closed contact)
• Open board, potted or enclosure
• Polarity insensitive input power
APPLICATIONS
• Commercial cooking
•Agriculture
• Infrared burners
•Construction heaters
• Other gas-fired appliances
DESCRIPTION
The 35-71 is a 120 VAC direct spark ignition (DSI) control
designed for use in all types of gas-fired appliances. The control
uses a microprocessor circuit to provide precise, repeatable
timing and operating sequences. On-board diagnostics with LED
output makes troubleshooting easy and ensures safe and
efficient operation.
Export Information (USA)
Jurisdiction: EAR
ECCN: EAR99
Agency Certifications
SPECIFICATIONS
Recognized under the UL component program, UL
372. Software certified to ANSI/UL 1998. UL File
MH8817
Design Certified to ANSI Z21.20,
CAN/CSA C22.2 No. 199-M89
Input Power 102 to 138 VAC, 50/60 Hz
Input Current 350 mA @120 VAC with gas valve relay
energized (control only)
Gas Valve 1.5A max @ 120 VAC
Inducer Blower 3.0 FLA @ 120 VAC
Operating Temperature -40°F to +160°F
(-40°C to +71°C)
Storage Temperature -40°F to +185°F
(-40°C to +85°C)
Flame Sensitivity 1.0 µA minimum
Flame Failure Response 0.8 seconds maximum
Flame Detector Self-check Rate Once per second minimum
Gas Types Natural, LP, or manufactured
Spark Rate:
Remote
Local
50/60 sparks/sec
25/30 sparks/sec
Size (LxWxH)
with enclosure
5.11 x 3.55 x 2.00 inches
(12.98 x 9.02 x 5.08 cm)
Moisture Resistance Conformal coated to operate non-con-
densing to 95% R.H. Module should not
be exposed to water
Ingress Protection Not rated, protection provided by
appliance in which it is installed
Tries for Ignition One or three try versions available
Trial for Ignition Periods 4, 7, 10, 15 seconds available
Pre-purge and Inter-purge
Timings
0, 5, 15 or 30 seconds available
Post-purge Time 0, 30 or 60 seconds available
SERIES 35-71
120 VAC Microprocessor-Based Direct Spark
Ignition Control with Inducer Blower Relay
R

Effective: March 2020
2F-35-71
SEQUENCE OF OPERATION / FLAME
RECOVERY / SAFETY LOCKOUT
Power Up / Stand By
Upon applying 120VAC power to L1, the control will reset,
perform a self-check routine, flash the diagnostic LED and enter
the thermostat scan state.
Start Up - Heat Mode
When a call for heat is received from the thermostat supplying
120 VAC to TH, the control will check the pressure switch for
normally open contacts. The inducer blower is then energized.
Once the pressure switch contacts close, a pre-purge delay
begins. Following the pre-purge period, the gas valve is
energized and sparking commences for the Trial for Ignition
(TFI) period.
When flame is detected during the TFI, the sparking process is
terminated and the gas valve and inducer blower remain
energized. The thermostat, pressure switch and burner flame
are constantly monitored to ensure proper system operation.
When the thermostat is satisfied and the demand for heat
terminates, the gas valve is immediately de-energized. The
control verifies the loss of flame signal and initiates an optional
post-purge period before de-energizing the inducer blower.
Failure to Light - Lockout
SINGLE TRIAL MODEL
Should the burner fail to light, or a flame is not detected during
the TFI period, the gas valve will de-energize and the control will
go into lockout. The inducer blower will turn off following the
optional post-purge period. The LED will indicate the fault code
for ignition lockout.
MULTI TRIAL MODEL
Should the burner fail to light or the flame is not detected during
the TFI period, the gas valve will de-energize. The control will
then go through an inter-purge delay before an additional
ignition attempt. The control attempts two additional ignition
trials before de-energizing the gas valve and entering lockout.
The inducer blower will turn off following the optional post-
purge period. The LED will indicate the fault code for ignition
lockout.
FLAME FAILURE - RE-IGNITION MODE
If the established flame signal is lost while the burner is
operating, the control will respond within 0.8 seconds by
immediately energizing the spark for the TFI period in an
attempt to relight the flame. If the burner does not light within
the TFI, the gas valve will immediately de-energize and single
try models will enter lockout. On multi-try models, a new TFI
sequence will begin after an inter-purge delay. Multi-try models
perform two additional attempts to light the burner. If the
burner relights, normal operation resumes. If the burner does
not relight, the control will enter lockout and the inducer blower
will turn off following the optional post-purge period.
FLAME FAILURE - RECYCLE MODE
With the “Recycle After Loss of Flame" option, upon loss of
flame, the gas valve is de-energized and the control proceeds to
inter-purge before attempting to relight the flame. Multi-try
models permit three tries for ignition including inter-purges. If
the burner relights, normal operation resumes. If the burner
does not relight, the control will enter lockout and the inducer
blower will turn off following the optional post-purge period.
Lockout Recovery
Recovery from lockout requires a manual reset by either
resetting the thermostat, or removing 120 VAC for a period of 5
seconds. On models with automatic reset, if the thermostat is
still calling for heat after one hour, then the control will
automatically reset and attempt to ignite the burner.
Combustion Airflow Fault
Combustion airflow is continually monitored during an ignition
sequence by the pressure switch (PSW). If during the initial call
for heat, the switch contacts are in the closed position for 30
seconds, without the inducer blower being energized, the LED
will indicate an airflow fault and remain in this mode with the
inducer blower off. If the pressure switch contacts later open
while there is still a call for heat, the control will begin the pre-
purge period followed by a normal ignition sequence.
If the pressure switch remains open for more than 30 seconds
after the inducer blower output (L1 & IND) is energized, the LED
will indicate an airflow fault and the control will remain in this
mode with the inducer blower on, waiting for the pressure
switch to close. When proper airflow is detected at the pressure
switch input (PSW) the control will begin the pre-purge period
followed by a normal ignition sequence.
If the airflow signal is lost while the burner is firing, the control
will immediately de-energize the gas valve and the LED will
indicate an airflow fault. The inducer blower will remain on for
the post-purge period and the control continues to monitor the
PSW input waiting for airflow to return. If proper airflow is
detected during the post-purge period, a normal ignition
sequence will begin with the pre-purge period. Otherwise, the
control will remain in an airflow fault as indicated by the LED
with the inducer blower off.

Effective: March 2020
F-35-71 3
MOUNTING AND WIRING
The Series 35-71 control is not position sensitive and can be
mounted vertically or horizontally. The control may be mounted
on any surface and fastened with #6 sheet metal screws. Secure
the control in an area that will experience a minimum of
vibration and remain below the maximum ambient temperature
of 160°F (71°C).
All connections should be made with UL Approved, 105°C rated,
18 gauge, stranded, .054” thick insulated wire. Refer to the
appropriate wiring diagram when connecting the 35-71 to other
components in the system.
Wiring Diagrams - 35-71
Figure 1. Local Sense
Figure 2. Remote Sense
Figure 3. No Full Time Power
Figure 4. Pin Layout
CAUTION
All wiring must be performed in accordance with
both local and national electrical codes.
CAUTION
Label all wires prior to disconnection when
servicing controls. Wiring errors may cause
improper and dangerous operation. A functional
checkout of a replacement control should always
be performed.
WARNING
This product uses voltages of shock hazard
potential. Wiring and initial operation must be
performed by a qualified service technician.
WARNING
Operation outside specifications could result in
failure of the Fenwal Controls product and other
equipment with potential for injury to people and
property.
Terminal Designations
Terminal Description
Multi-Pin
Connector
P/N: TE 1-644615-1
Quick
Connect
(inch)
NC Alarm 11 1/4”
V1 Valve Power 10 3/16”
PSW Pressure Switch 9 1/4”
L2 120 VAC (Neutral) 8 3/16”
V2 Valve Neutral 7 3/16”
L1 120 VAC Input (Hot) 6 1/4”
IND Inducer Output 4 1/4”
TH Thermostat Input 3 1/4”
B. GND Burner Ground 2 3/16”
S1 Remote Flame
Sensor 11/4”
FC+, FC- Flame Sense
Test Poi nt s
2 Pin Header
(TE P/N: 640383-2,
Molex P/N: 26-60-2020)
MOTOR
ALARM
120V
OR CONTROL
120V THERMOSTAT
L1
DEVICE
B. GND
L2
NC
IND
L1
K3
BURNER GROUND
H.V. OUT
V2
TH
P.SW
K1
V1
MV
BURNER
SPARK
L2
3A
M
MOTOR
ALARM
120V
OR CONTROL
120V THERMOSTAT
L1
DEVICE
L2
NC
IND
L1
K3
V2
TH
P.SW
K1
V1
MV
L2
3A
M
BURNER
B. GND
S1
BURNER GROUND
H.V. OUT SPARK
OR CONTROL
120V THERMOSTAT
L1
DEVICE
IND
L1
TH
P.SW
On controls without full time
power the TH terminal is not
used and L1 becomes the
T'stat or control device input
DS2
V1
NC
TH
V2
L1
L2
PSW
IND
FC+
FC-
S1
B.GND
P1
1234567891011

Effective: March 2020
4F-35-71
TROUBLESHOOTING
Note: During a fault condition, the LED will flash on for
1/4 second and off for 1/4 second as needed to
indicate the fault code. The code will repeat every
3 seconds. Removing power from the control will
clear the fault code.
Internal Control Failure
If the control detects a software or hardware error, all outputs
are turned off and the LED displays a Steady On condition. If this
condition persists after an attempt to restart, then the control
must be replaced.
Flame Fault
If a flame is sensed during a pre-purge or inter-purge, before the
gas valve opens, a flame fault is declared and the inducer blower
remains energized. If the flame signal later disappears, then the
fault will be cleared and the control will start a normal ignition
sequence.
Proper Electrode Location
Proper location of electrode assembly is important for optimum
system performance. The electrode assembly should be located
so that the tips are inside the flame envelope and about 1/2-inch
(1.2 cm) above the base of the flame as shown:
Notes:
• Ceramic insulators must not be in or close to the flame.
• Electrode assemblies must not be adjusted or
disassembled. Electrodes are NOT field adjustable.
• Electrodes should have a gap spacing of 0.125± 0.031
in (3.12± 0.81 mm), unless otherwise specified by the
appliance manufacturer. If spacing is not correct, the
assembly must be replaced.
• Exceeding temperature limits can cause nuisance
lockouts and premature electrode failure.
• Electrodes must be located where they are not exposed
during normal operation.
Flame Current Measurement
Flame current is the current that passes through the flame from
sensor to ground. To measure flame current, connect a True
RMS or analog DC micro-ammeter to the FC+ and FC- terminals.
Readings should be 1.0 µA DC or higher. If the meter reads
negative or below "0" on scale, meter leads are reversed. Re-
connect leads with proper polarity.
Alternately, a Digital Voltmeter may be used to measure DC
voltage between FC+ and FC- terminals. Each micro-amp of
flame current produces 1.0 VDC. For example, 2.6 VDC equates
to 2.6 µA.
A good burner ground that matches the control ground is critical
for reliable flame sensing.
Troubleshooting Guide
Symptom Recommended Actions
1. Control does not start A. Miswired
B. No 120VAC at L1
C. Fuse or circuit breaker fault
D. Faulty control, check LED
for fault codes
2. Thermostat on - no spark A. Miswired
B. Faulty thermostat, no
voltage at terminal L1
C. Faulty control, check LED
for fault codes
3. Blower on - no TFI after
purge delay
A. Miswired
B. Flame fault
C. Airflow fault (check voltage
at PSW)
D. Faulty control (check
voltage between L1 and IND)
4. Valve on - no spark during
TFI
A. Shorted electrode -
establish 1/8-inch gap
B. Check high voltage cable
C. Miswired
5. Spark on - valve off A. Valve coil open
B. Valve wire disconnected
C. Faulty control, check
voltage at gas valve
terminal V1
6. Flame okay during TFI - no
flame sense after TFI
A. Check electrode position
B. Check high voltage wire
C. Poor ground at burner
D. Poor flame, check flame
current
Fault Conditions
LED Indication Fault Mode
Steady On Internal Control Failure
1 Flash Airflow Fault
2 Flashes Flame without call for heat
3 Flashes Ignition Lockout

Effective: March 2020
F-35-71 5
DIMENSIONS
Figure 4. Enclosure
Figure 5. Potted
Figure 6. Integral Standoff
Note: All dimensions are in inches

This literature is provided for informational purposes only.
KIDDE-FENWAL, INC. assumes no responsibility for the prod-
uct’s suitability for a particular application. The product must be
properly applied to work correctly. If you need more informa-
tion on this product, or if you have a particular problem or
question, contact KIDDE-FENWAL, INC., Ashland, MA 01721.
© 2020 Kidde-Fenwal Inc. P/N F-35-71 Rev AF
Fenwal Controls, Kidde-Fenwal Inc.
400 Main Street
Ashland, MA 01721
Tel: 800-FENWAL-1
Fax: 508-881-7619
fenwalcontrols.com
DETECT-A-FLAME is a registered trademark of Kidde-Fenwal, Inc., or its parents, subsidiaries, or affiliates.
PART NUMBER CONFIGURATION
SERIES 35-715 X X X - X X X
Trial for Ignition
1 = 4 Seconds
3 = 7 Seconds
5 = 10 Seconds
7 = 15 Seconds
Inter-Purge
0 = None (Single Try Only)
1 = 15 Seconds
2 = 30 Seconds
Pre-Purge
0 = None
1 = 15 Seconds
2 = 30 Seconds
5 = 5 Seconds
Tries for Ignition, Flame Sense
Method and Reset Method
0 = 1 try, local sense
1 = 1 try, remote sense
2 = 1 try, local sense
3 = 1 try, remote sense
5 = 3 try, local sense
6 = 3 try, remote sense
7 = 3 try, local sense
8 = 3 try, remote sense
Configuration and Wiring options
2 = Potted
3 = Enclosure
4 = Integral Standoffs
5 = Enclosure
6 = Integral Standoffs
7 = Potted
8 = Aftermarket Kit
9 = Special Configuration
An 8 or 9 in this location
(i.e. 35-71 5 901 -113)
indicates a special configuration.
9XX is a sequentially assigned
part number and does not follow
the standard part numbering configuration.
Consult Fenwal Controls for operating
characteristics of this control.
Multi-Pin Connector
Multi-Pin Connector
Multi-Pin Connector
Quick Connect
Quick Connect
Quick Connect
Thermostat / power off reset
Thermostat / power off reset
Automatic reset
Automatic reset
Thermostat / power off reset
Thermostat / power off reset
Automatic reset
Automatic reset
Combustion Blower Control,
Post-purge time and Power Options
0 = 0 second post purge and no full-time power -
1 = 0 second post purge with full-time power
2 = 30 second post purge with full-time power -
3 = 60 second post purge with full-time power
Single 120 VAC input for both blower and thermostat
These options require individual 120 VAC inputs for blower and thermostat
which allows higher current to feed the combustion blower without having to
pass through the thermostat
Table of contents
Other Fenwal Controls Control Unit manuals
Popular Control Unit manuals by other brands
inVENTer
inVENTer sMove Operation instructions
Santec
Santec Designer Series Installation and Rough-In
VersaLogic
VersaLogic STD32 VL-1225 Reference manual
Honeywell
Honeywell NOTIFIER FTM-1 Installation and maintenance instructions
Orbit
Orbit B-hyve quick start guide
Leb Electronics
Leb Electronics CTR61 instruction manual
