Ferguson FRG-R121D User manual
FRG-R121D DAB/FM

Safety Information
Please note: Because DAB digital radio is a developing technology, station availability can
change without notice. As new multiplexes and transmitters are turned on, new stations will
begin transmitting and new postcodes will be able to receive DAB digital radio. Conversely,
some DAB radio stations may disappear without notice.
Covers -Do not remove any fixed covers as this may expose dangerous voltages.
Weather -It is advisable to unplug an external aerial during a thunderstorm.
Ventilation -The ventilation holes on the casing prevent your product from over heating.
Do not block or cover these holes, especially with cloth or paper. It is recommended you
leave a 10cm gap all around the unit.
Damage -Never use the product if i t is damaged in any way. Always place the unit on a flat
level surface avoiding anywhere which may be subject to strong vibration.
Batteries -Batteries are easily swallowed by young children. Do not allow young children
to play with the unit or remote control. Dispose of used batteries in an environmentally
friendlymanner.
Temperature -Avoid extremes of temperature, either hot or cold, place your product well
away from heat sources such as radiators or gas/electric fires.
Moisture -Do not allow your product to be exposed to rain, moisture or dust. If any liquid is
spilt into this product it can cause serious damage. If you spill any liquid switch the unit off
at the mains immediately. Contact your store immediately.
Headphones -Do not use headphonesor earphones while cycling or driving. It is
dangerous and illegal in some areas. Also do not use at high volume. Hearing experts
advise against listening to continuous, loud and extended play. Reduce volume while
walking especially at pedestrian crossings.

1
Table of Contents
Safety Information.........................................................................0
Operating your radio -DAB...........................................................2
Selecting a station -DAB..............................................................3
Secondaryservices -DAB ............................................................4
Display modes -DAB ....................................................................5
Autoselect -DAB...........................................................................6
Manual Tuning -DAB....................................................................7
Signal strength display -DAB........................................................7
Setting DAB Presets.....................................................................8
Selecting a DAB Preset channel ...................................................8
Operating your radio -FM.............................................................9
Manual tuning -FM.....................................................................10
Display modes -FM....................................................................11
FM Stereo/Mono.........................................................................12
Setting FM Presets......................................................................12
Selecting a FM Preset channel ...................................................12
Alarm Settings.............................................................................13
Alarm Sound Off..........................................................................13
Headph one socket ......................................................................14
General .......................................................................................14
Specifications..............................................................................14
Circuit Features...........................................................................14
l
2
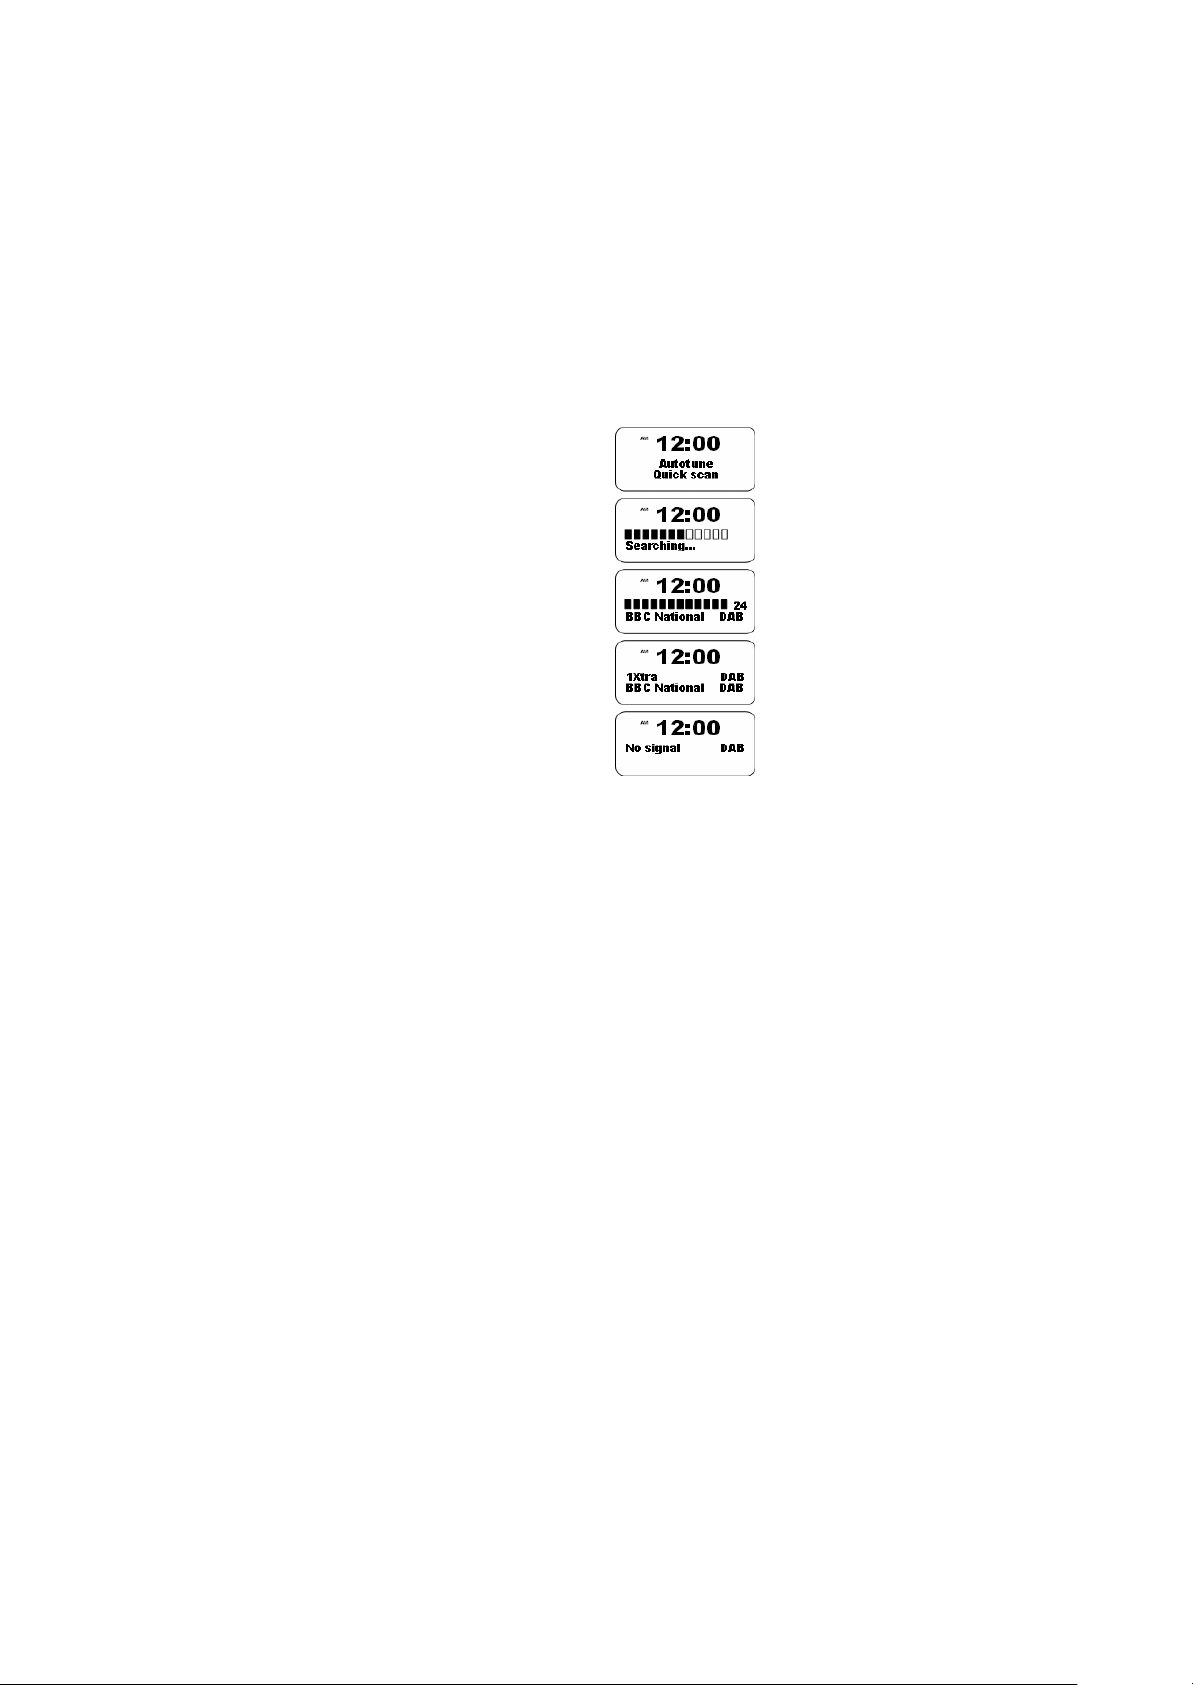
Operating your radio -DAB
1. Carefully extend the telescopic aerial.
2. Press the Standby button to switch on your radio.
3. If this is the first time the radio is used a quick scan of UK Band III DAB
channels will be carried out. The display will show "Autotune Quick scan".
If the radio has been used before the last used station will be selected.
4. During Autotune as each group of stations is detected the bottom line of
the display will show its name and the station count will be updated. The
top line of the display shows a bargraph indicating progress of the
Autotune.
5. When the Autotune is completed the first station (in numeric-alphaorder
0...9...A....Z) will be selected.
6. If the station list is still empty after the Autotune your radio will display "No
Signal".
7. If no signals are found it may be necessary to relocate your radio to a
position giving better reception.

3
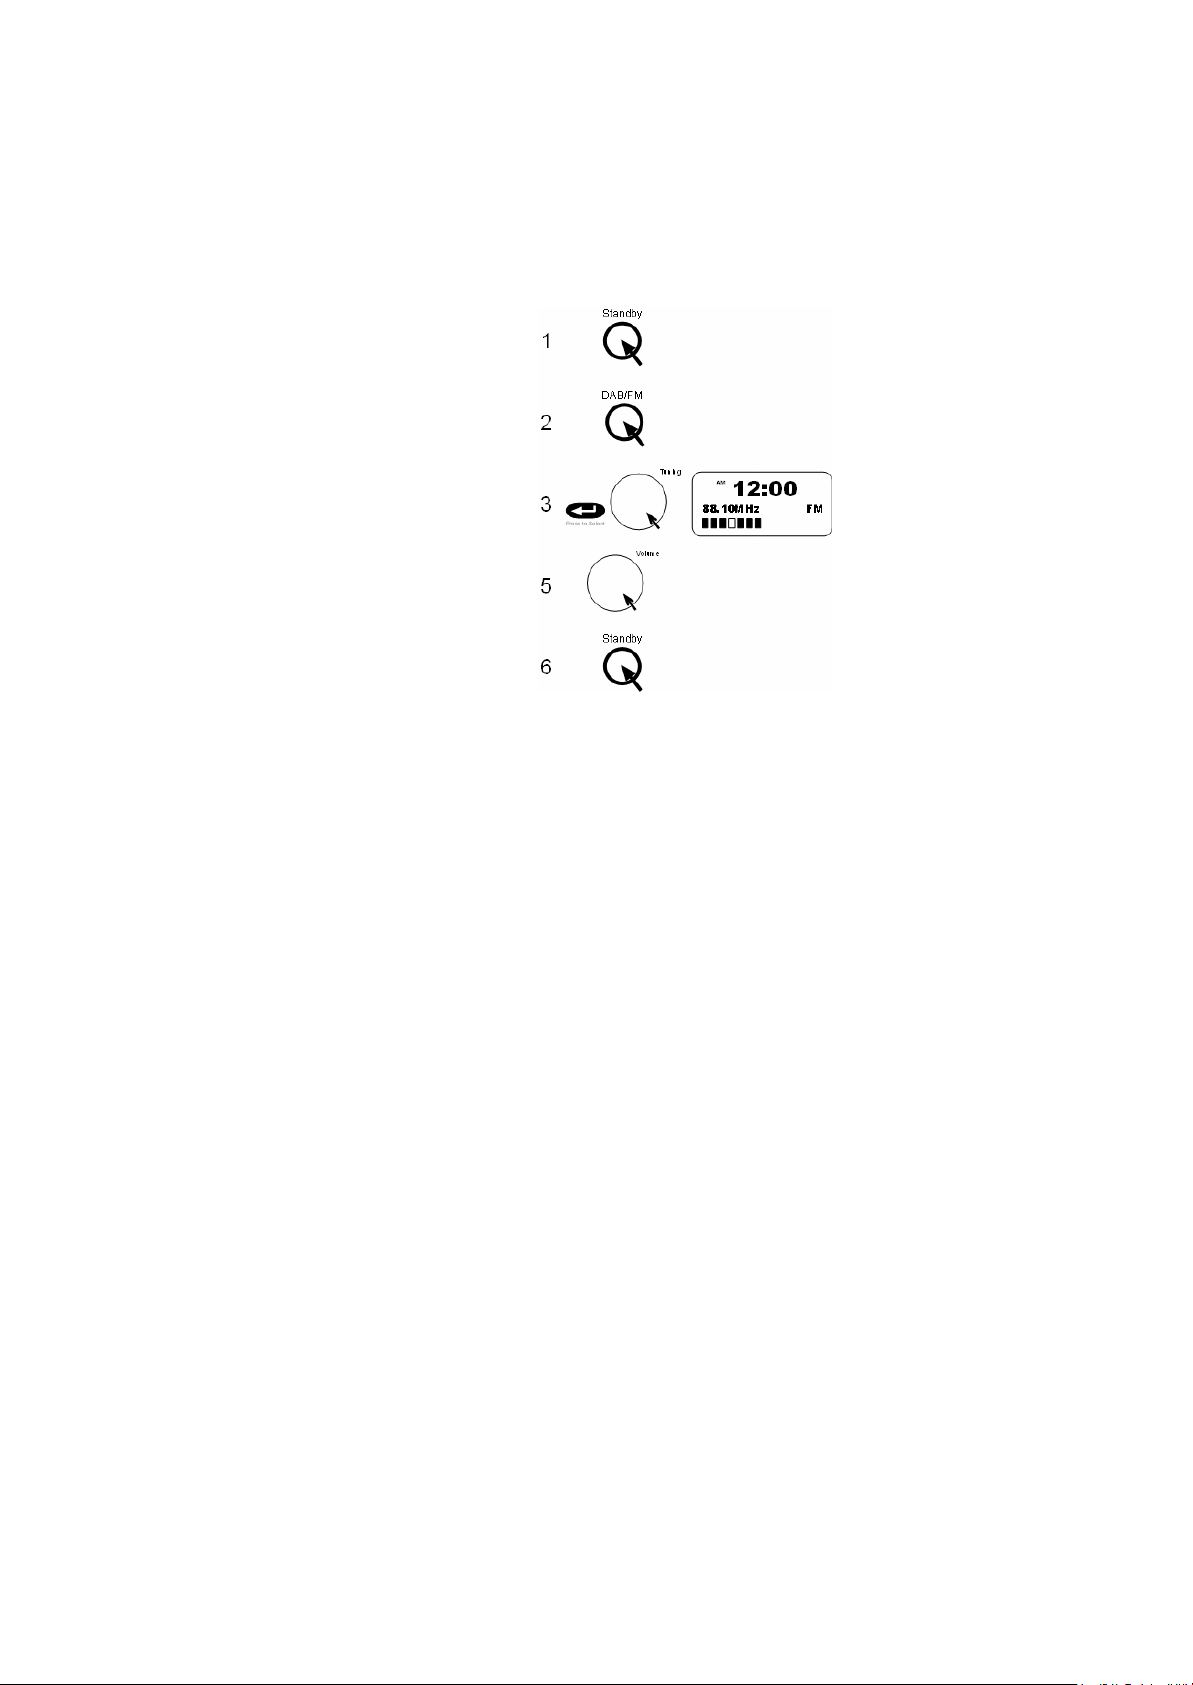
Selecting a station -DAB
1. The top line of the display shows the name of the station currently
selected.
2. Rotate the Tuning control to scroll through the list of available stations.
Stop rotating the Tuning control when you find the station that you wish to
hear.
3. Press and release the Tuning control to select the station. The display
may show "Tuning" while your radio finds the new station.
4. Adjust the Volume control to the required setting.
Note: If after selecting a station the display shows "Not Available" it may
be necessary to relocate your radio to a position giving better reception.
12:00
AM
ClassicDAB
12:00
AM
BBC 7DAB
Tuning...
Press to Select
Tuning
Volume
2
4

4
Secondary services -DAB
1. Certain radio stations have one or more secondary services associated
with them. If a station has a se condary service associated with it the
display will show ">" next to the station name on the station list. The
secondary service will then appear immediately after the primary service
as you rotate the tuning control clockwise.

5
Display modes -DAB
1. Your radio has six display modes: -
2. Press the Info button to cycle through the various modes.
a. Scrolling text-Displays scrolling text messages such as artist/track
name, phone in number, etc.
b. Programmetype-Displays type of station being listened to e.g. Pop,
Classic, News, etc.
c. Multiplex Name-Displays name of multiplex to which current station
belongs.
d. Signal strength-Displays signal strength for station being listened
to.
e. Timeanddate-Displays current time and date.

6
Autoselect -DAB
As an alternative to pressing the tuning control to select a station your radio can
be set to automatically select a station.
1. Rotate the Tuning control a few clicks in either direction, immediately
press and hold in the tuning control until the display shows "Autoselect
ON".
2. Rotate the Tuning control until the station you require is visible on the
display, after a few seconds your radio will automatically select the station
shown on the display.
3. To switch off Autoselect rotate the Tuning control a few clicks in either
direction, immediately press and hold in the Tuning control until the
display shows "Autoselect OFF".

7
Manual Tuning -DAB
Manual tuning allows you to tune directly to the various DAB Band III channels.
UK DAB stations located in the range 11B to 12D.
1. Press and hold in the Tuning control until the display shows "Manual
tune".
2. Rotate the Tuning control to select the required DAB channel.
3. Press and release the Tuning control to select the channel.
4. Rotate the Tuning control to select the stations contained within the
Multiplex (group of stations) for the selected DAB channel.
5. Press and release the Tuning control to return to normal tuning mode.
Signal strength display -DAB
1. Repeatedly press and release the Info button until the lower line of the
display shows signal strength.
2. Position your radio and carefully angle the telescopic aerial for best
reception using the signal strength display as a guide. Move your radio
around and position so as to give maximum number of black rectangles on
signal strength display.
3. The clear unfilled rectangle indicates minimum signal level required for
satisfactory reception.

8
Setting DAB Presets
You can preset up to 8 DAB stations as follows.
1. Turn to the station that you want to set into the preset memory.
2. Press and hold the PRESET button (store into 1-4 or press SHIFT to
storein5-8)
3. “Preset * stored” will appear on the display when the preset has been
saved.
Selecting a DAB Preset channel
You can preset up to 8 DAB stations as follows.
1. Press 1-4 button.
2. Or press SHIFT then press 1-4.

9
Operating your radio -FM
1. Carefully extend the telescopic aerial.
2. Press the Standby button to switch on your radio.
3. Press the Band button to select the FM band.
4. Press and immediately release the Auto Tune button, your radio will scan
in an upwards direction (low frequency to high frequency) and stop
automatically when it finds a station of sufficient strength.
5. After a few seconds the display will update and show station name.
6. To find other stations press and release the AutoTune button as before.
7. To scan the FM band in a downwards direction (high frequency to low
frequency) press and hold down the AutoTune button for 0.5 seconds and
then release.
8. When the waveband end is reached your radio will recommence tuning
from the opposite waveband end.
9. Adjust the Volume control to the required setting.
10.To switch off your radio press the Standby button.
10
Manual tuning -FM
1. Press the Standby button to switch on your radio.
2. Press the Band button to select the FM band. Fully extend the Telescopic
aerial.
3. Rotate the Tuning control to tune to a station. The frequency will change in
steps of 50kHz.
4. When the waveband end is reached the radio will recommence tuning
from the opposite waveband end.
5. Set the Volume control to the required setting.
6. To switch off your radio press the Standby button.

11
Display modes -FM
On FM the bottom line of the display can be set to any of the following modes:-
Press the Info button to cycle through the various modes.
a) Scrolling text-Displays scrolling text messages such as artist/track name,
phone in number etc.
b) Program Type-Displays type of station being listened to e.g. Pop, Classic,
News, etc.
c) Signal strength-Displays signal strength for station being listened to.
d) Time and date-Displays current time and date.
e) Frequency-Displaysfrequency of the station being listened to.
f) Audiomode-Display shows Auto (stereo) or mono.
12
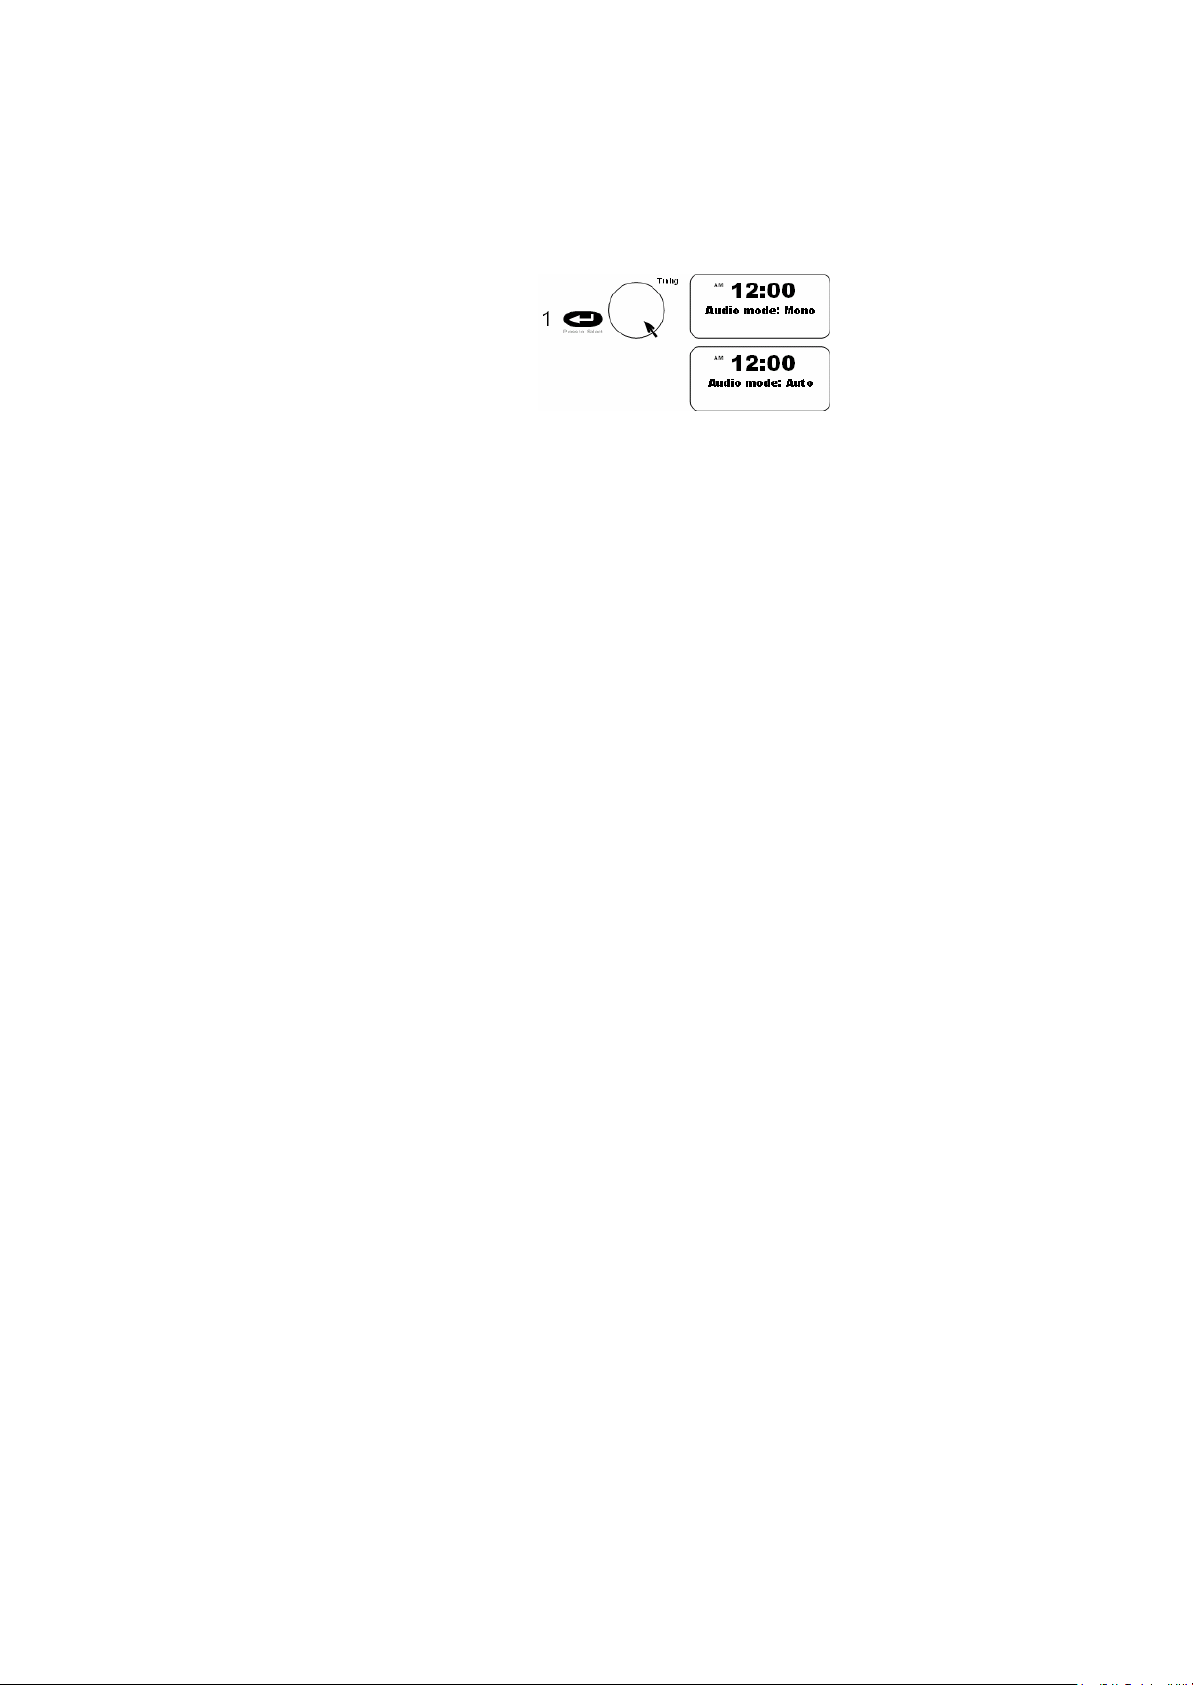
FM Stereo/Mono
1. If a station being received is weak some hiss may be audible. To reduce
the hiss press and hold in the Tuning control until the display shows
"Audio mode: Mono". Your radio will switch to mono mode.
2. To return to stereo mode press and hold in the Tuning control until the
display shows "Audio mode: Auto". Your radio will switch to stereo mode.
3. Note: FM stereo is only available when listening via earphone/headphones
Setting FM Presets
You can preset up to 8 FM stations as follows.
1. Turn to the station that you want to set into the preset memory.
2. Press and hold the PRESET button (store into 1-4 or press SHIFT to store
in5-8)
3. “Preset * stored” will appear on the display when the preset has been
saved.
•
Selecting a FM Preset channel
You can preset up to 8 FM stations as follows.
1. Press 1-4 button.
2. Or press SHIFT then press 1-4.
13
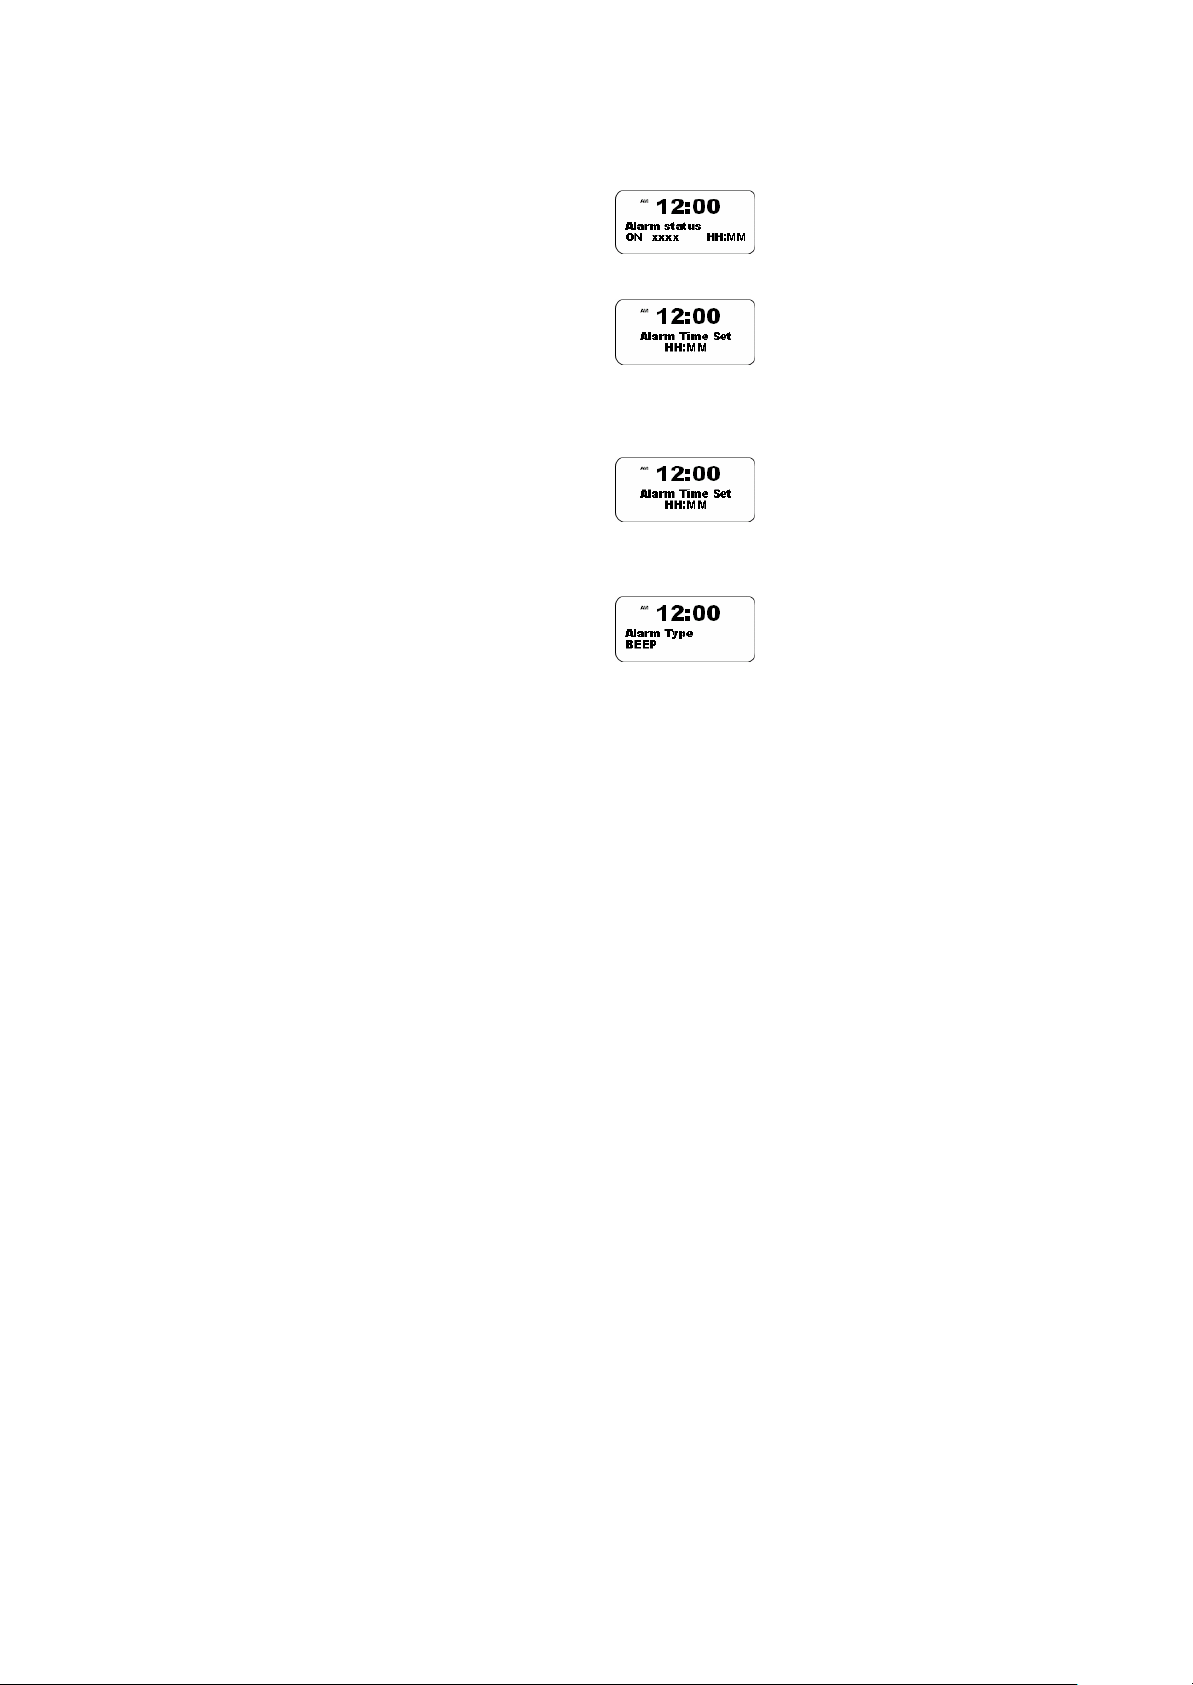
Alarm Settings
1. Press ALARM button and then press ENTER (Press Rotary knob) to
select Alarm On/Off
2. Press and hold ENTER, the radio will display the alarm time minute.
3. Turn the Rotary knob to setup the alarm minute
4. Press Rotary knob again, then it will display the alarm time hour
5. Turn the Rotary knob to setup the alarm hour
6. After setting up the alarm hour, press Rotary knob, the radio will display Alarm
Type.
7. Turn the Rotary knob, and choose BEEP, FM or DAB. Press Rotary knob to
select
8. After finish the Alarm settings, wait for 8 seconds
NOTE: If the volume control is at minimum level, the alarm sound will not be heard
Alarm Sound Off
•When the alarm is activated, whilst the radio is in Standby mode, press the
Rotary (Select) knob/button to disable the alarm sound.

14
Headphone socket
1. A 3.5mm Headphone Socke t located on the rear of your radio is provided
for use with either headphones or an earpiece. Inserting a plug
automatically mutes the internal loudspeaker.
2. Line out socket-Red/White RCA Line out sockets located on the rear of
your radio is provided for connecting the audio signal to an external
amplifier. Inserting a line out audio cable will not mute the internal
loudspeaker. Set the volume control to minimum if desired.
General
•Do not allow this radio to be exposed to water, steam or sand. Do not
leaveyour radio where excessive heat could cause damage such as in a
parked car where the heat from the sun can build up even though the
outside temperature may not seem too high. It is recommended that the
DAB band be used wherever possible as better results in terms of quality
and freedom from interference will usually be obtained than on the FM
band.
Specifications
•Power Requirements
•Mains AC 230 volts, 50Hz only
•Frequency Coverage
•FM87.5-108MHz
•DAB 174.928 -239.200MHz
Circuit Features
•Loudspeaker 4 inch full range
•Output Power 4 Watt
•Headphone socket 3.5mm
•Line out Red/White RCA connectors
•Speaker output 3.5mm

15
This symbol on the product or in the instructions means that your electrical and electronic equipment should
be disposed at the end of its life separately from your household waste. There are separate collection
systems for recycling in the EU.
For more information, please contact the local authority or your retailer where you purchased the product.
Table of contents
Other Ferguson Radio manuals

Ferguson
Ferguson Regent I100 User manual

Ferguson
Ferguson REGENT i350s User manual

Ferguson
Ferguson DAB+150 User manual

Ferguson
Ferguson REGENT i500s User manual

Ferguson
Ferguson DAB+100 User manual

Ferguson
Ferguson REGENT i350s+ User manual

Ferguson
Ferguson i300 User manual

Ferguson
Ferguson Regent i100s User manual


