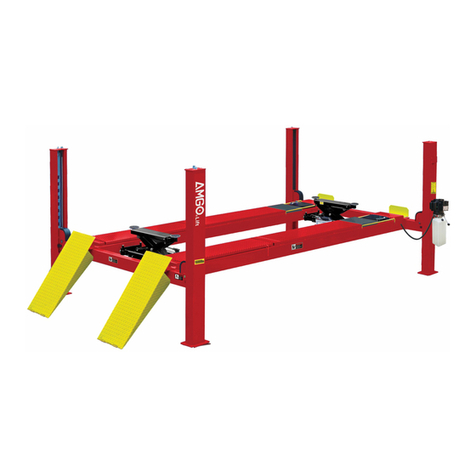
Fermator VCI-VF5A.CD0 Series User manual

ENG
Assembly manual.
Automatic horizontal sliding car door.
Component: VF5 Electronic Module.
AUTOMATIC DOORS FOR LIFTS
MAN-MMCAENGV5TC-10.2017

AUTOMATIC DOORS FOR LIFTS
2VF5
CONNECTIONS
5
6
7
L1’
GND
L2’
26
23 12 V COM
66
67
1
2
3
L2
GND
L1
BAT
ON
29
28
ON 1
OFF2
VF4+ OUTPUT
SALIDA VF4+ SUPPLY
ALIMENTACIÓN
230 V. AC
DO NOT OPEN
THE COVER
NOABRIR LATA PA
ALIMENTADOR DE
EMERGENCIA
EMERGENCY
SUPPLIER
CONTROL VF4+
STANDBY
ESTADO
FLOOR / PISO
LANDING FLOOR
RELLANO PISO
FUSE 20A (yellow / amarillo)
BATTERY
BATERIA
ON OFF
INPUTS
ENTRADAS
12
Opcional
Optional
0?
N
_
15...250 V ~
_
15...250 V ~
Ref. PMT-PM00.C0000
Ref. VCI-VF5A.CD0
VCI-VF5A.CI0
Ref. VCP-VFCP.C00
Ref. VCI-AESB.C00EE
5m :Ref.CFT-FC00.C0000
3m :Ref.CFT-FCDM.C0000
12 V 2 Ah
Ref. WCE-VFCE.C0000
230 V
0V
Abrir / Open
Cerrar / Close
100...230V AC / DC
PM
ASYNC
13
Derecha / Right
QCI.VF5A.CD0EE
ENCODER
+12 V COM
CERRAR LENTO / SLOW CLOSE
REABRIR / RE-OPEN
SEÑAL DE PISO / FLOOR LEVEL
ENTRADAS PRIORITARIAS
PRIORITY INPUTS
FOTOCÉLULA / PHOTOCELL
EMITTER
EMISOR
RECEIVER
RECEPTOR
ABIERTA
OPEN
CERRADA
CLOSED
FOTOCÉLULA
PHOTOCELL
OBSTRUCCIÓN
OBSTRUCTION
ESTADO
STATUS
FUERZA
SAFETY
VELOCIDAD ABRIR
OPEN SPEED
INTELIGENTE / MASTER
ESCLAVO / SLAVE
PUERTA RELLANO
LANDING DOOR
MANUAL
AUTOMÁTICA
AUTOMATIC
1 ENTRADA
1 INPUT
2 ENTRADAS
2 INPUTS
ALIMENT.
SUPPLY
ABRIR
OPEN
0 V
COM
OUT +12 V
CERRAR
CLOSE
ENTRADAS
INPUTS
MOTOR
NO ABRIR LA TAPA
DO NOT OPEN THE COVER
AUTOADJUSTMENT
Push to calibrate
the door
AUTOAJUSTE
Pulsar para ajustar
la puerta
VELO CIDAD
CERRAR
CLOSE SPEED
TEST
Pulsar para
verificar
Push to check the
door
PUERTO SERIE
SERIAL PORT
R
e
f. PMT-PM
0
0
.
C
0
230 V
0V

3
VF5
AUTOMATIC DOORS FOR LIFTS
1
O
N
234
O
F
F
PROGRAMMING
The VF may be programmed using the DIP switches on the front of the unit. If any
change is made to any of the above switch selections, the main supply of the VF 5
unit MUST be switched OFF and ON again to read the new programming.
The switches functions are:
1 1 & 2 Inputs.
ON: 1 Input.
The door control unit will be controlled by a single input. Any voltage between 12 V DC to
60 V DC or door remains opened. When it activates the door close. Open input is not used.
OFF: 2 Inputs.
The door control module will be controlled by two independent inputs. Any voltage bet-
ween 12 V DC to 60 V DC or 100 V AC to 230 V AC applied between terminals 8 & 10 will
cause the doors to close. And between terminals 10 & 12 will cause the doors to open.
In the absence of a signal, the doors will remain static. If both inputs are applied then the
open signal has priority.
2 Automatic/ Semiautomatic.
ON: Automatic.
Operators with skate (automatic landing). In this case a special movement is made for
locking and unlocking the skate.
OFF: Semiautomatic.
Operators without skate (Semiautomatic landing door)
3 Rotation sense.
ON: Lock at the picture:
-Skate xed on the top side of the belt
and the motor on the right side.
-Skate xed on the bottom side of the
belt and the motor on the left side.
OFF:Lock at the picture:
-Skate xed on the bottom side of the
belt and the motor on the right side.
-Skate xed on the top side of the belt
and the motor on the left side.
Com
0 V
12 V
8
9
10
11
12
1 INPUTS
Close
Open
Without Voltage
0 V
OPEN
With Voltage
12 V DC...250 V DC,
100 V AC..230 V AC
CLOSE
Com
0 V
12 V
8
9
10
11
12
2 INPUTS
Close
Open
Voltage
12 V DC...60 V DC,
100 V AC...230 V AC
CLOSE
Voltage
12 V DC...250 V DC,
100 V AC...230 V AC
OPEN

AUTOMATIC DOORS FOR LIFTS
4VF5
4 Master and Slave.
ON: Master.
The door control unit will execute instructions directly. Example: photocell activation will
cause the doors to re-open immediately without control of the door control unit.
OFF: Slave.
There is no automatic reopen movements. The doors will only react to instruction given
by the main lift controller. Example: with the photocell activated the unit will send a signal
to the main lift controller via the PHOTOCELL output (36, 37, 38). Then, the main lift
controller must remove the close signal and put the open signal.
5 / 6 / 7 230 Volts single phase AC.
The circuit has been designed to operate on a
mains supply of 230 V AC (+10%,-15%, 50 or 60
Hz). The unit will consume approx 1 Amp from
the supply.
It is important that the Door Operator Module
has a GOOD EARTH CONNECTION.
The circuit can work with external voltage inputs or internal voltage input
(voltage free contact).
8 Close signal.
This signal is used for ordering to close the door.
9 12 V.
Isolated 12 V output available to control the door via a voltage free contact.
Features are:
a)This supply must only be used for this purpose.
b)This contact must be isolated from any other power supply.
10 Common.
Is the reference used for the opening and closing signal.
11 0 V.
Is the opposite pole to 12 V, in the case of using internal voltage it should be connected
to common input.
N
L
230 V
5
6
7
POWER INPUTS CONNECTIONS
CONTROL INPUTS
POWER INPUTS
12
11
10
9
8
EXTERNAL VOLTAGE INPUTS
Open
Close
Voltage
12 V DC...60 V DC,
100 V AC...230 V AC.
OPEN
Voltage
12 V DC...60 V DC,
100 V AC...230 V AC.
CLOSE
12
11
10
9
8
INTERNAL VOLTAGE INPUTS
Open
Close
OPEN
CLOSE
PROGRAMMING

5
VF5
AUTOMATIC DOORS FOR LIFTS
CONTROL INPUTS
12 Opening Signal.
Is a signal that orders the door to open. The tension to apply could be from 12 V DC to 60
V DC or 120 V AC to 230 V AC, with an external supply between this input and common
(10).
13 Serial Port.
The serial port is used to connect with external devices like the diagnostic console,
inter faces and future expansion devices. Operating speed 1. 200 Baud per second, cur rent
loop. It is used a RJ11 connector (phone jack connector).
17 / 18 / 19 / 20 Photocell.
One of the most relevant characteristics of this control
is the optional incorporation of the Fermator photocell.
It is composed by a emitter and receptor infrared.
21 Re-open.
This signal is used for installing the cabin door switch or an external barrier.
In order to active this signal, connect the re-open input (21) with the +12 V (23). Use
voltage free contacts. The reopening signal has priority over the closing signal.
23 + 12 V Com.
This terminal is used for giving with an isolated contact a reopening order or a slow closing.
Always use voltage free contacts and usually open.
SERIAL PORT CONNECTION
CONNECTION OF THE PHOTOELECTRIC DETECTOR
20
19
18
17
PHOTOCELL
(
+
) White
(
+
) White
(
-
) Black
(
-
) Black
Green
Yellow
Receiver
Emitter
CONNECTION OF THE «OTHER INPUTS»
26
21
25
23
FLOOR LEVEL
RE-OPEN
SLOW CLOSE
+12 V COM
OTHER INPUTS

AUTOMATIC DOORS FOR LIFTS
6VF5
25 Slow closing.
This signal is used for ordering to close the door slowly. The slow signal has priority over
the control signals and the photocell. It ’s created for wor king with detection of re centres.
26 Floor Level.
This input is for connecting the ex ternal emergency supplier that allows the opening manouvre
in the case of power failure by a battery of 12 V, able to give power during 15 seconds for
a passengers rescue.
Output relays have been provided to give continuous information to the main lift controller
concerning the status of the doors. The output contacts of the relays may be used by the
main lift controller to pilot such information as «doors fully opened», «doors fully closed»,
«Photoelectric detection», «obstruction in the doorway» and «door control O.K.».
30/31/32 Opened.
Led indicator and relay activated when the doors
are fully open.
33/34/35 Closed.
Led indicator and relay activated when the doors
are fully closed and locked.
36/37/38 Photocell.
Led indicator and relay activated when the photocell
or the reopening input is operated.
Note: In USA model the photocell led is also the
obstruction led.
39/40/41 Obstruction.
Led indicator and relay activated when an obstacle
is detected that stops the doors from closing. The
signal will reset when the doors reach the opened
or closed position.
Note: In USA model the obstruction relay
functionality is redened, the relay will be activated when the operator has passed a third
part of the clear opening.
Status.
Blinking led indicating proper working conditions
50 Test pushbutton.
Operation of the TEST pushbutton will cause a door open or close cycle.
51 Autoadjustment pushbutton.
The Autoadjustment push-button is used to set up the doors. The doors will do 5 complete
movements to detect the motor and the clear opening. From the information obtained the
microprocessor will calculate the acceleration and deceleration ramps and the braking
torque required to give the optimum control of the doors. Once the autoadjustment has
been completed the parameters are stored in non-volatile EEPROM and will be used to
calculate the optimum performance. The doors will open slowly for the rst operation
after power has been removed from the door control unit. Autoadjustment only needs
to be used when setting the initial parameters or when changes such as connecting or
removing the Fermator photocell are made.
32.
30.
31.
OPENED
35.
33.
34.
CLOSED
PHOTOCELL
OBSTRUCTION
OUTPUT RELAYS AND LED INDICATORS
OTHER INPUTS

7
VF5
AUTOMATIC DOORS FOR LIFTS
Autoadjustment process.
- Switch OFF the VF and place the doors in closed position.
- Disconnect the inputs (8, 9, 10, 11 and 12) and the priority inputs (26, 21, 25 and 23).
- Switch ON the VF and Push auto-adjustment button (51).
Next 2 movements are to detect which kind of motor it is installed.
- 1st Movement: The door will open 200 mm (If the door instead of opening makes small
rebounds, means that it’s trying to close and that the direction is the opposite. The
pin 3 of the DIP switch has to be changed).
- 2nd Movement: The door will close 150 mm.
Nex t 3 movements are to detect the clear opening of the door, the 3rd movement is starting
2 or 3 seconds after nishing the second one.
- 3rd Movement: The door will close completely in slow velocity until the end to detect the
0 position.
- 4th Movement: The door will open slowly counting the pulses from the encoder built into
drive motor until it reach the open mechanical stop. Will detect the nal position.
-5th Movement: The door will close after a short delay. From the information obtained the
microprocessor will calculate the acceleration and deceleration ramps and the braking
torque required to give the optimum control of the doors.
52 Close speed.
The door closing speed can be independently adjusted from 150 mm/s up to 400 mm/s.
53 Open speed.
The door opening speed can be independently adjusted from 200 mm/s up to 700 mm/s.
54 Safety.
This potentiometer is used to set the closing pressure onto an obstacle in the clear opening.
The closing pressure can be set between 60 and 150 Nm.
55 Encoder.
An integral quadrature pulse encoder is connected to this
input. The purpose of the encoder, which is situated inside
the motor, is to inform the control of the exact position and
speed of doors.
Compatibility with Fermator asynchronous motor.
- The VF5 encoder connector is prepared to connect the
high resolution encoder for the synchronous PM motor (5
wires) and the standard encoder from the asynchronous
motor (4 wires).
- The encoder from the asynchronous motor (4 wires) has
to be connected to the 4 pins of the encoder marked like
ASYNC.
56 Motor.
Output to the 3 phase motor varying the voltage and
frequency to control speed and torque.
57 ON / OFF Switch.
Disconnects the unit from the 230 V AC mains supply.
PM
ASYNC
56
55
ENCODER
MOTOR
OUTPUT RELAYS AND LED INDICATORS

AUTOMATIC DOORS FOR LIFTS
8VF5
PROGRAMMING EXAMPLES
•MASTER: 1 INPUT
- Conguration
1. ON: 1 Input.
2. Depends on type of door.
3. Depends on type of door.
4. ON: Master.
- Inputs
1. 8 Close. Closes the doors with voltage between terminals 8 &
10. Open the doors when the voltage between
terminals 8 & 10 is removed.
2. 17...20 Photocell. Doors will reopen if the photocell beam is broken.
3. 21-23 Reopening. Doors will not close if this signal is active.
4. Obstacle. Door will re-open if an obstacle is detected by the
motor ceasing to rotate.
5. 25-23 Slow Closing. Closes regardless of the state of the photocell.
- Priorities
1. 21-23 Reopening.
2. Obstacle.
3. 25-23 Slow Closing
4. 17...20 Photocell.
5. 8 Close.
•SLAVE: 2 INPUTS
- Conguration
1. ON: 2 Inputs.
2. Depends on type of door.
3. Depends on type of door.
4. ON: Slave.
- Inputs
1. 8 Close. Closes the doors with voltage between terminals 8 &10.
2. 12 Open. Open the doors with voltage between terminals 12 &
10.
3. 17...20 Photocell. Does not re-open the doors when activated but provides
signal to main controller via the Photocell
relay.
4. 21-23 Reopening. Doors will not close if this signal is active.
5. Obstacle. Door will not re-open if an obstacle is detected by the
motor ceasing to rotate.
6. 25-23 Slow Closing. Closes regardless of the state of the photocell.
- Priorities
1. 12 Open.
2. 21-23 Reopening
3. 25-23 Slow Closing.
4. 8Close.

9
VF5
AUTOMATIC DOORS FOR LIFTS
LEARNING PHASE OF THE DOOR OPERATOR
1Switch on the VF door controller.
- Button O/I in the side of the box.
2Cables.
- 5 / 6 / 7 Connect the 230 V AC mains supply to the controller
- If they are connected, disconnect the following connections:
8-12: Input signals.
21/23/25/26: Priority inputs.
30-41: Outputs.
3Program in ”2 INPUTS” (switch 1 = OFF) and “MASTER” (switch 4 = ON).
4Program the door type.
Switch 2: Landing door type (semiautomatic = OFF or automatic = ON).
Switch 3: Rotation sense.
5Adjust the 3 potentiometers in maximum (maximum to the right 52, 53, 54)
With these regulations, the door overcomes little mechanic frictions, but if they are very important
is not possible to x it.
If the door does not move with this conguration, then there is a mechanical problem or electric
(motor or controller not supplied).
6Place the door in a middle position in order to see the starting movement.
7Switch on the VF unit (O/I button on the controller).
The door must remain stopped. If the door moves, verify the position of switch 1.
8Press once the «AUTOADJUSTMENT» button to start a learning cycle.
The correct steps that the door has to make are:
- The door should close completely (the «CLOSED» LED lights on).
- Then the door opens completely (during this phase, the OK Status led will blink synchronized with
the encoder pulses to check it visually) and after a open pause of 3s the door closes again (OK LED
blinks normally).
- The door keeps closed with CLOSED LED and relay on. The skate is completely closed and the
«OK» LED blinks normally.
9Door Test.
- Press once the «TEST» button and the door will open, and it will close pressing again the button.

AUTOMATIC DOORS FOR LIFTS
10 VF5
•The control does not answer to the TEST or AUTOADJUSTMENT button.
- Switch off and on the controller and test again. Change the controller If nothing happens.
•The door does not move.
- Verify the motor cable and its connection with the motor connector.
- Verify that a variable voltage is applied to the motor when a movement order is applied. This voltage
is different when the door stops closed or open, because in open position a torque to keep the
position is needed.
The motor voltage has to be checked with the Fermator programming tool.
You should change the motor if no movement is made when the voltage is present.
•The door stops before the end of the learning cycle.
Verify the encoder :
- The door keeps open with no movement → sense of opening reversed, so interchange the 2
middle cables in the connector (55).
- The door closes and opens only 20 cm then stopping → encoder disconnected, encoder not
supplied or damaged, pulley screw wrong tight.
Change the encoder if nothing solves it.
•The door opens instead of close.
- Verify the DIP switch 3 position.
- Reverse 2 phases of the motor connection (56).
•The door makes the learning phase correctly but the skate stays open with the closed relay
active.
- Verify the switch 2 according to the correct open sense of the door. The door should be close in
the motor zone with the skate closed too.
•The door stops in the skate zone.
- Verify by hand the correct and soft movement of the skate (see the assembling manual).
•The door does not close completely.
- Disconnect the whole system and verify that no obstruction happens.
TEST always in this way in order to obtain the correct movement and verify in a well known
schedule.
If the autoadjustment was correctly passed, then the connections with the lift controller. The 3
potentiometers can be regulated too.
A Connect the cables coming from the lift controller.
- Connect the inputs cables (8, 9, 10, 11 and 12) and priority inputs cables
(26, 21, 25 and 23).
- Connect the photocell (17, 18, 19 and 20).
- Connect the relays outputs cables that inform the lift controller (30 to 41).
TROUBLESHOOTING DURING THE AUTOADJUSTMENT
NORMAL REGULATION WITH THE LIFT CONTROLLER

11
VF5
AUTOMATIC DOORS FOR LIFTS
Switch off the VF control before connecting the open and close command cables. Do not
mix the voltages from the lift controller with the internal ones in the VF control (9: 12 V
and 11: 0 V).
B Put the potentiometers to the minimum.
- Close Speed (52).
- Open Speed (53).
- Safety (54).
C Test the door.
- Check from the landing door side.
- Press the «TEST» button and establish the potentiometers (open speed, close speed and the
safety force) in order to get the required adjustment.
Information: The VF parameters could be adjusted with the Fermator programming tool.
Remove the photocell wiring from any place where there are “electric noises” such as motors,
supplies wiring, etc.
AVerify that there is an emitter and a receiver (E mark and R mark on the capsules) connected to the
correct cable (emitter to the yellow cable and receiver to the green one).
BConnect the photocell (on the operator).
Even if you will not install the photocell, make the learning of the photocell to avoid that
the photocell relay is active by no reason. Once the photocell is veried, it is possible to
disconnect it and the VF control will detect that is not connected anymore.
CPut the capsules face to face at a minimum distance of 50 cm, make the autoadjusment process
without hitting the capsules, once done, make a open and a close movement, and then block the
photocell with the hand during the close movement to check that the Photocell relay is active every
time the hand is in the middle of the infrared beam.
NORMAL REGULATION WITH THE LIFT CONTROLLER
TEST OF THE PHOTOCELL
12
11
10
9
8
EXTERNAL VOLTAGE INPUTS
Open
Close
Voltage
12 V DC...60 V DC,
100 V AC... 230 V AC.
OPEN
Voltage
12 V DC...60 V DC,
100 V AC... 230 V AC.
CLOSE
12
11
10
9
8
INTERNAL VOLTAGE INPUTS
Open
Close
OPEN
CLOSE

AUTOMATIC DOORS FOR LIFTS
12 VF5
•The photocell is active intermitently.
- Check the “grounding” connection (6).
- Check the correct plugs connection. (17 to 20).
- Disconnect the photocell, make a complete open and close movement, connect again the
photocell and try again.
- Verify that there is an emitter and a receiver (E mark and R mark on the capsules) connected
to the correct cable (emitter to the yellow cable and receiver to the green one).
- Remove the photocell wiring from any place where there are “electric noises” such as motors,
supplies wiring,...being sure that the cables are not short-circuited.
- If you can use a console, please check the stability of the signal.
- Do not extend the photocell wires.
- Take in mind that in master mode the system recognizes automatically the photocell detector
after making a complete autoadjustment with the beam free controlled by the input signals.
•The door doesn’t answer to the test or auto-adjustment buttons.
- Switch OFF (57) and try again.
- If does not works change the VF control.
•The door only closes 35 cm.
- This is the clear entrance of any controller that has never been adjusted. Therefore an
autoadjustment is required (check the autoadjustment process).
• The door opens but doesn’t close.
- Check if the photocell LED is activated. If so, verify that the photocell is not blocked or the
«OPEN» input is active (8) continuously.
- Check if the close signal (12) arrives to the system using a multimeter or the console.
Change the VF control if the voltage arrives, but the door does not close.
- Check if the re-opening signal (21) is activated.
- Check that there is no stray voltage in the open signal.
• The door re-opens by itself.
- Check the sensibility of the re-opening (54) Safety regulation potentiometer.
- Check that the photocell is not activated.
- Check that there is no mechanical obstruction on the door.
- In case of having the same problem, disconnect the photocell and try again with the TEST
button, and if the door doesn’t open or close totally there must be a mechanical obstruction
on the door.
•The door doesn’t reach the fully open position.
- Verify the mechanical adjustments of the door. The motor has enough torque to open the
doors in normal circumstances until a Clear Opening of 1.400 mm (motor without reduction).
PROBLEMS WITH THE PHOTOCELL
TROUBLESHOOTING

13
VF5
AUTOMATIC DOORS FOR LIFTS
• The door reopens when the skate is closing.
- Check the regulation of the skate, because probably the locking system of the skate is not
well adjusted and the door has a mechanical friction. Verify if the the obstruction LED lights.
•The door hits when it opens.
- Check that the skate unlocking is well xed before the door starts to open.
In case the skate is not fully xed you should check the skate adjustment because it is probably too
hard.
• The door hits when it arrives at the fully open position, the “open” LED is not activated and
the system gets out of order.
- Check the tension of the toothed belt, because probably is not correctly adjusted and it slips
on the pulley of the motor and consequently the encoder is sending a wrong information.
Adjust the belt tension and make the autoadjustment again.
• The system gets power but doesn’t work and the led ON is off.
- Check if both external fuse are burned and change it for another Fermator fuse
(250 V, 4 A ceramic fast speed).
• The motor is moving intermittently.
- Check the wiring connections or if a phase of the motor is failing.
- Verify that the pulley of the encoder is well assembled.
• The “ON” LED is activated and the door doesn’t obey to the signals.
- There has been an obstruction at opening and then the door enters into an “out of order
stage” during 15 seconds.
- In slave mode, there is a continuous obstruction and the lift controller has not changed the
close signal by the open signal in slave mode.
- There has been a short circuit in the output of the motor, and the system will be deactivated
during 3 seconds.
TROUBLESHOOTING

AUTOMATIC DOORS FOR LIFTS
14 VF5
POWER SUPPLY
• AC voltage range 230 V AC +10%, 15%
• Frequency supply 50...60 Hz
• Stand by power 50 mA 4 W
• Nominal power (PM motor) 0,21 A 20 W
• Maximum peak power 1,31 A 170 W
INVERTER
• Carrier frequency 16 KHz
• Frequency range 0,5...100 Hz
• Voltage range 40...200 V AC III
• Maximum output current 4 A
• Positional control Quadrature encoder
MOTOR VF
• Asynchronous triphasic 6 pole
• Voltage supply 230 V
• Power 250 W
• Nominal torque 1,5 N·m
• Nominal speed 900 RPM
• Thermic class F-155°C
MOTOR PM
• Synchronous permanent magnet 10 pole.
• Voltage supply 88 V
• Power 63 W
• Nominal torque 1 N·m
• Nominal speed 600 RPM
• Thermic class F-155°C
INPUTS
• Impedance 20 KΩ.
• Voltage 12 V DC...60 V DC
100 V DC...230 V AC
OUTPUTS
• Contacts Switched
• R. contact 50 mW
• Switch time 5 ms
• Output current Maximum: 150 mA
• Voltage 230 V AC
PERFORMANCE
• Open speed 200...700 mm/s
• Close speed 150...400 mm/s
• Max. acceleration 800...1.500 mm/s 2
• Safety force 60...150 N adjustable
• Maintenance torque (Opened door) 80 N/cm
REFERENCE DATA

15
VF5
AUTOMATIC DOORS FOR LIFTS
DECLARATION OF CONFORMITY
VF 5 Electronic Module
(10/31700972_M1)
Here with declares that the products mentioned below conform with the following E.U.
council directives:
European Directive 2014/30/EU on Eelectromagnetic Compatibility (EMC) in
accordance with the Product family standard for lifts, escalators and moving walks
EN12015: 2014 and EN12016: 2013
Tecnolama, S.A.
Ctra. Constantí, Km 3
43204 REUS (Spain)
Reus, 19-10-2017
David Román
General Manager

ATENTION: Any type of modication not reexed in this manual, before testing it should be notied
to our Technical Department.
TECNOLAMA accepts no responsability in the event of any damage produced in the equipment
described in this manual and associated installation if the instructions given have not been followed.
TECNOLAMA reserves the rights to modify the products specications of this technical brochure
without any previous advise.
Tecnolama, S.A.
●
Ctra. Constantí, Km 3
●
43206 REUS (Spain)
●
Tel.: +34 977 774 065
Fax: +34 977 771 615
●
www.fermator.com
●
e-mail: info.es@fermator.com
This manual suits for next models
2
Table of contents
