Ferno iNSX Integrated Patient Transport & Loading... User manual

Instructions for Use
December 2022
Pub. No. 234-3622-09
iN∫X®
Integrated Patient Transport & Loading System™
Read this Manual and Retain
for Future Reference

© Ferno / 234-3622-09 / December 2022
2
iN∫X®
Ferno Customer Relations
For ordering assistance or general information:
CANADA AND THE U.S.A.
Telephone (Toll-free) 1.877.733.0911
Telephone 1.937.382.1451
Fax (Toll-free) 1.888.388.1349
Fax 1.937.382.1191
Internet www.ferno.com
ALL OTHER LOCATIONS
For assistance or information, please contact your Ferno distributor. If you do not
have a Ferno distributor, please contact Ferno Customer Relations:
Ferno-Washington, Inc., 70 Weil Way
Wilmington, Ohio 45177-9371, U.S.A.
Telephone Country Code +1.937.382.1451
Fax Country Code +1.937.382.6569
Internet www.ferno.com
Disclaimer
This manual contains general instructions for the use, operation and care of this
product. The instructions are not all-inclusive. Safe and proper use of this product
is solely at the discretion of the user. Safety information is included as a service
to the user. All other safety measures taken by the user should be within and
under consideration of applicable regulations and local protocol. Training on
the proper use of this product must be provided before using this product in an
actual situation.
Retain this manual for future reference. Include it with the product in the event
of transfer to new users. Additional free copies are available upon request from
Customer Relations.
Proprietary Notice
The information disclosed in this manual is the property of Ferno-Washington,
Inc., Wilmington, Ohio, USA. Ferno-Washington, Inc. reserves all intellectual
property rights, proprietary design rights, manufacturing rights, reproduction
use rights, and sales use rights thereto, and to any article disclosed therein
except to the extent those rights are expressly granted to others or where not
applicable to vendor proprietary parts.
Limited Warranty Statement
The products sold by Ferno are covered by a limited warranty, which is printed
on all Ferno invoices. The complete terms and conditions of the limited warranty,
and the limitations of liability and disclaimers, are also available upon request by
calling Ferno at 1.800.733.3766 or 1.937.382.1451.
Adverse Event Notice
In the event of an adverse event or serious incident related to the use of this
device, the end user/operator must report the incident to Ferno-Washington,
Inc. at 70 Weil Way, Wilmington, Ohio 45177 USA, 1-877-733-0911, or via email at
tscoordinator@ferno.com. If the incident occurred in the European Union, report
it to Ferno’s Authorized EU Representative and the competent authority of the
Member State in which the end user is established.
Battery Recycling
In the U.S.A., contact TerraCycle Regulated Waste to responsibly recycle and
dispose of the Ferno 36VDC Lithium-iron phosphate battery. Visit https://
tcrwusa.com/.
Outside the U.S.A., contact the government of your country for recycling
information. See“Recycling Notice”on page 39.
USERS’MANUALS
To request additional free users’ manuals,
contact Ferno Customer Relations, your Ferno
distributor, or www.ferno.com.
Unique Device Identication (UDI)
Ferno complies with the United States Food and Drug Administration’s (FDA)
Unique Device Identication (UDI) regulation to identify medical devices.
The UDI label contains information in human- and machine-readable form.
Device information is online at the FDA’s Global Unique Device Identication
Database (GUDID). The public can search and download information at
AccessGUDID at www.fda.gov.
The label is located on the under the battery, on the battery tray.
Ferno-Washington Inc. | Wilmington, Ohio 45177 USA | +1.937.382.1451
Product Name/Model
(01) Global Trade Item Number
(11) Date of Manufacture
(21) Serial Number
Date of Manufacture
SN Serial Number
Manufacturer GS1 Data Matrix
Serial Label

© Ferno / 234-3622-09 / December 2022 3
iN∫X®
Ferno Customer Relations ________________________________ 2
Unique Device Identication (UDI) _________________________ 2
Table of Contents _________________________________________ 3
1 - Safety Information _____________________________________ 4
1.1 Warning__________________________________________ 4
1.2 Notice ___________________________________________ 5
1.3 Bloodborne Disease Notice __________________________ 5
1.4 Symbol Glossary ___________________________________ 5
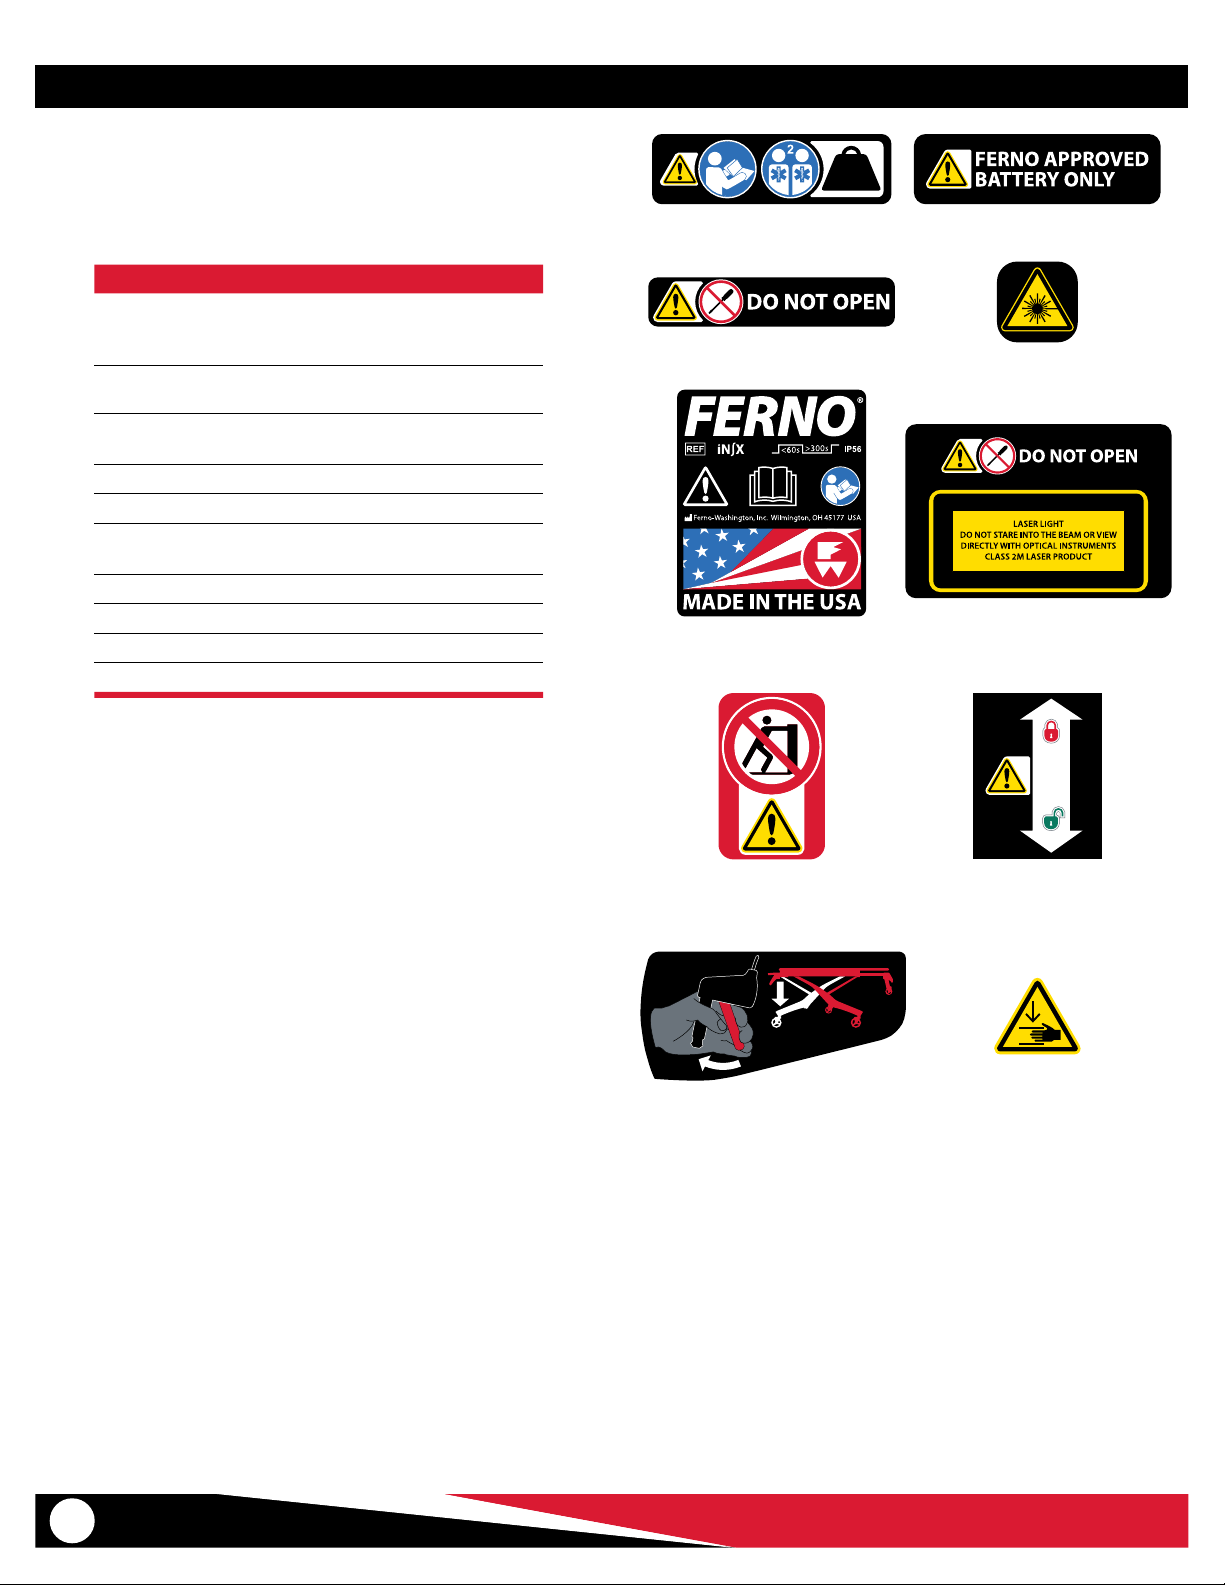
1.5 Safety and Instruction Labels _________________________ 6
1.6 Compliance: USA Standard SAE J3027__________________ 7
1.7 Compliance: Worldwide _____________________________ 7
2 - Operator Focus ________________________________________ 8
2.1 Operator Training __________________________________ 8
2.2 Operator Height and Strength ________________________ 8
2.3 Daily Operator Duties _______________________________ 8
2.4 No-Lift Loading/Unloading __________________________ 9
2.5 Control the Load ___________________________________ 9
2.6 Using Additional Help______________________________ 10
2.7 Terms ___________________________________________ 11
3 - About the Cot_________________________________________ 12
3.1 Description ______________________________________ 12
3.2 General Specications _____________________________ 12
4 - Features _____________________________________________ 14
4.1 Display__________________________________________ 14
4.2 Power Switch_____________________________________ 14
4.3 Lights___________________________________________ 14
4.4 Display Zones ____________________________________ 15
4.5 Audible Alarm ____________________________________ 15
4.6 Battery__________________________________________ 16
4.7 Battery Charger___________________________________ 17
4.8 Integrated Charging System (ICS®) ___________________ 17
4.9 Extend and Retract Buttons _________________________ 18
4.10 Sleep Mode ______________________________________ 18
4.11 Mode-Select Button _______________________________ 18
4.12 Telescoping Handles_______________________________ 19
4.13 Position Indicator Lights____________________________ 19
4.14 Shock Frame _____________________________________ 19
4.15 Backrest_________________________________________ 20
4.16 Safety-Bar Release Levers___________________________ 20
4.17 Wheel Locks _____________________________________ 20
4.18 Telescoping Frame ________________________________ 21
4.19 Mattress_________________________________________ 21
4.20 Fold-Down Sidearm (Option) ________________________ 22
4.21 SX Surface Xtender (Option) ________________________ 22
4.22 Non-Powered Operation (Manual Mode Handles) _______ 22
4.23 Patient Restraint System____________________________ 23
4.24 Accessory Rail ____________________________________ 23
4.25 Oxygen Cylinder Holder ____________________________ 23
5 - Using the Cot _________________________________________ 24
5.1 Before Placing the Cot in Service _____________________ 24
5.2 General Guidelines for Use__________________________ 24
5.3 One Operator, Empty Cot ___________________________ 25
5.4 Powered Extending/Retracting ______________________ 25
5.5 Transferring the Patient ____________________________ 26
5.6 Transferring the Patient: Chair Position ________________ 27
5.7 Rolling the Cot ___________________________________ 28
5.8 Loading the Cot __________________________________ 29
5.9 Unloading the Cot ________________________________ 30
5.10 Direct Power Modes _______________________________ 31
5.11 Non-Powered Operation: Extending and Retracting _____ 32
5.12 Non-Powered Operation: Loading____________________ 33
5.13 Non-Powered Operation: Unloading __________________ 34
6 - Maintenance _________________________________________ 35
6.1 Maintenance Schedule_____________________________ 35
6.2 Service Life ______________________________________ 35
6.3 Disinfecting /Cleaning Restraints_____________________ 35
6.4 Disinfecting/Cleaning Mattress ______________________ 35
6.5 Disinfecting the Cot _______________________________ 36
6.6 Cleaning the Cot __________________________________ 36
6.7 Pressure-Washing _________________________________ 36
6.8 Inspecting the Cot ________________________________ 37
6.9 Lubricating the Cot________________________________ 38
6.10 Storing the Cot ___________________________________ 39
6.11 Storing the Battery ________________________________ 39
6.12 Recycling Notice __________________________________ 39
6.13 Adjusting Backrest Control Handles __________________ 40
6.14 Adjusting Position Indicator Lights ___________________ 40
6.15 Adjusting Manual Mode Handles_____________________ 41
6.16 Adjusting the Oxygen Cylinder Holder ________________ 42
7 - Initial Setup __________________________________________ 44
7.1 Ambulance Information ____________________________ 44
7.2 Accessories ______________________________________ 44
7.3 Charge and Install the Battery _______________________ 44
7.4 Set the Loading Height_____________________________ 44
8 - Troubleshooting ______________________________________ 45
8.1 General Troubleshooting ___________________________ 45
8.2 Status Indicators __________________________________ 45
9 - Parts and Service______________________________________ 46
9.1 U.S.A. and Canada_________________________________ 46
9.2 Worldwide_______________________________________ 46
10 - Accessories__________________________________________ 46
Training Record__________________________________________ 47
Maintenance Record _____________________________________ 47
TABLE OF CONTENTS
Section Page Section Page

© Ferno / 234-3622-09 / December 2022
4
iN∫X®
1.1 Warning
Warning safety alerts indicate a potentially hazardous situation that, if
not avoided, could result in injury or death.
1 SAFETY INFORMATION
WARNING
Untrained helpers can cause injury or be injured. Trained
operators must operate the controls and direct helpers
where to grasp the cot to avoid pinch points.
Improper use of the cot can cause injury. Use the cot only
for the purpose described in this manual.
Improper operation can cause injury. Operate the cot
only as described in this manual.
An unattended patient can be injured. Stay with the
patient at all times.
An unrestrained patient can be injured. Use properly-
installed patient restraints to secure the patient on the
cot.
Rolling the cot above the factory-set maximum transport
height can cause it to tip. Only roll the cot at or below the
factory-set maximum transport height.
Uncontrolled movement can cause injury or damage.
Support and control the cot at all times.
Sheets or other objects can interfere with, or become
entangled in, the actuator or legs, which can cause injury
and/or malfunction, including unexpected retracting
of the cot legs. Tuck sheets between the mattress and
patient surface. Keep other articles above the mattress.
Rolling the cot sideways can cause it to tip and injure the
patient and/or operators. Roll the cot only toward the
control end or loading end.
Pushing the cot by the backrest can cause it to tip and
injure the patient and/or operators. Roll the cot only by
grasping the main frame.
Trained operators must consider the environment and
terrain before rolling. Rolling the cot in a lowered position
will minimize the potential of a cot tip.
Failure to engage the safety hook during loading or
unloading can cause injury. Operators must visually
ensure each safety bar engages the safety hook and the
cot is secure inside the ambulance before extending or
retracting the legs.
A severe angle can injure the patient and/or operators.
Control the cot when using a direct power mode.
Uncontrolled movement can cause injury or damage.
Support the load before using a manual mode handle.
WARNING
A severe angle can injure the patient and/or operators.
Control the cot when operating without power.
Improper maintenance can cause injury and damage.
Maintain the cot and battery only as described in this
manual.
Improper adjustment of the manual mode handle cables
can lead to injury. Adjust cable tension when needed.
The cot can rapidly descend and cause injury if the manual
mode handles are activated while you are adjusting the
cable tension. Use caution when adjusting cable tension.
Attaching improper items to the cot can cause injury. Use
only Ferno-approved items on the cot.
Improper parts and service can cause injury. Use only
Ferno parts and Ferno-approved service on the cot.
Modifying the cot can cause injury and damage. Use the
cot only as designed by Ferno.

© Ferno / 234-3622-09 / December 2022 5
iN∫X®
Symbol Denition
General warning of potential injury
Laser Class 2M Warning: Do Not Stare Into
Light
Pinch point. Keep hands clear
Read the users’manual
Two trained operators required
Lubricate
Do not lubricate
Do Not Open. No user serviceable parts.
Do not push cot by the backrest
Lock
Unlock
700 lb
318 kg
50 st
Load Capacity/Safe Working Load in
pounds, kilograms, stone
OFF
ON
Status Indicator: Low or Medium Priority
Status Indicator: High Priority
1.2 Notice
Notices emphasize important, but not hazard-related information.
Failure to follow Notices could result in product or property damage.
1.3 Bloodborne Disease Notice
To reduce the risk of exposure to blood or other potentially infectious
materials when using the cot, follow the disinfecting and cleaning
instructions in this manual.
Button Denition
Extend Legs
Retract Legs
Scene Lights
Emergency Lights
Chair Position
Battery Check
1.4 Symbol Glossary
The symbols dened here are used on the cot and/or in this’ manual.
Ferno uses symbols recognized by the International Standards
Organization (ISO), American National Standards Institute (ANSI) and
the emergency medical services industry.
NOTICE

© Ferno / 234-3622-09 / December 2022
6
iN∫X®
1.5 Safety and Instruction Labels
Safety and instruction labels place important information from the
users’ manual on the cot. Read and follow label instructions. Replace
worn or damaged labels immediately.
Symbol Denition
A
General injury warning, read the users’
manual, two trained operators required,
load capacity
B Ferno approved battery only
CDo not open: no user-serviceable parts
inside
D Warning: laser emitter
E Regulatory and ratings label
FWarning: do not open controller or stare
into laser light with optical instruments
G Warning: do not push cot by the backrest
H Manual release handle mount
I Manual mode control handle
J Warning: pinch point
AB
DC
FE
JI
HG
700 lb
318 kg
50 st

© Ferno / 234-3622-09 / December 2022 7
iN∫X®
1.7 Compliance: Worldwide
When properly installed and used with appropriate Ferno products,
the iN∫X meets the following standards. Standards and specications
are updated periodically. Current standards are available from these
organizations.
● Alberta: Alberta Health and Wellness Ambulance Vehicle Standard
Code; Section 17.5 Cot Retention System Test
● AMD: Ambulance Manufacturer’s Division (AMD) of the National
Truck Equipment Association Standard 004 Litter Retention System
Static Test.
● AS/NZS 4535:1999: Meets the requirements of Australia/New
Zealand Ambulance Restraint Systems test.
● BCAS: British Columbia Ambulance Service (BCAS) Ambulance
Performance Test Criteria E2 Stretcher Retention
● CAAS: Commission on Accreditation of Ambulance Services Global
Vehicle Standard (GVS)
● CE: Conforms to European standards.
● CSA: Electronic components meet Canadian Standards Association
requirements.
● EN 1789 and EN 1865-3: Vehicle, fastening system, and crash-test
standards.
● IEC 60601-1-2: Electrical and electromagnetic medical equipment.
● IEC 2007/47
● IP56: Ingress Protection rating. Tested in compliance with dust and
water inltration standards.
● KKK-A-1822 (F): Federal Ambulance Specication KKK-A-1822
revision F.
● MDR: Meets the requirements of the European Medical Device
Regulation 2017/745.
● MDD (UK): Meets the requirements of the European Medical Device
Directive 93/42/EEC.
● NFPA: National Fire Protection Association standard NFPA 1917.
● Ontario: Ontario Land Ambulance Standard, Version 5.0, Section
20.1 Main Cot Retention
● SAE J3027:2016: Society of Automotive Engineers Recommended
Practice, Ambulance Litter Integrity, Retention, and Patient
Restraint
1.6 Compliance: USA Standard SAE J3027
The iN∫X® is compatible with SAE J3027 Recommended Practice (USA),
when used with a compliant fastening system (Ferno® iN∫LINE®), and
transport restraint system (Ferno Model 417-3 Restraint System).

© Ferno / 234-3622-09 / December 2022
8
iN∫X®
2.3 Daily Operator Duties
It is good practice for operators to check equipment at the start of each
work shift.To check the cot prior to use, follow the procedures described
in this manual:
● Unload the cot from the ambulance.
● Retract the cot to the oor or ground.
● Extend the cot to the recommended rolling height.
● Rotate the cot in a circle to verify it rolls easily.
● Visually inspect the cot for readiness (page 37).
● Load the cot into ambulance and secure it in the iN∫LINE fastening
system.
● If equipped, verify the cot is being charged by the ICS (page 17,
or see the ICS users’manual).
2 OPERATOR FOCUS
2.1 Operator Training
Operator using the cot:
● must read and understand this manual.
● must have training on proper use of the cot.
● musthaveatraining on emergency-medicalserviceandemergency
patient-handling procedures.
● must have the physical ability to assist the patient.
● must practice with the cot before using it with a patient.
● must keep training records. For a sample, see page 47.
WARNING
Untrained helpers can cause injury or be injured. Trained
operators must operate the controls and direct helpers
where to grasp the cot to avoid pinch points.
2.2 Operator Height and Strength
The cot is designed to minimize the need for lifting. Whenever possible,
use the powered hydraulic system to:
● Extend and retract the legs.
● Load the cot into and unload it from an ambulance.
● Transition between surfaces of varying levels.
● Place the cot at good height to establish a proper, ergonomic
grasping position for the operators.
An excessive load (exceeding the 700 lb/318 kg load capacity) or non-
powered operation may require the operators to lift a portion of the
load. Use additional help as needed (page 10).
NOTICE
If the ambulance is parked on an uneven surface, the
operators (and any helpers) may need to extend the legs
higher than the user-set loading height to allow the cot to roll
into the ambulance.

© Ferno / 234-3622-09 / December 2022 9
iN∫X®
2.5 Control the Load
At all times during rolling, both operators (and any helpers) keep both
hands on the main frame (or guide bar), support and balance the load,
and maintain control of the cot. Use care on rough or uneven terrain.
Roll the cot only at, or below, the maximum transport height. This
height is programmed into the cot. See “Rolling the iN∫X”on page 28.
2.4 No-Lift Loading/Unloading
The iN∫LINE fastening system holds the cot level with the patient oor
as the operators load it into the ambulance (Figure 1), or unload it from
the ambulance (Figure 2). During the loading and unloading process:
● Do not lift the cot. Allow the legs to support the load.
● Both operators work together to guide the cot into the iN∫LINE.
● The Control-end Operator conrms each cot safety bar engages
the iN∫LINE safety hook.
● Conrm the legs have clearance before extending or retracting.
Look for obstructions such as the ambulance bumper.
● Follow the loading and unloading procedures in this manual.
● Use additional help as needed (page 10). 1
2

© Ferno / 234-3622-09 / December 2022
10
iN∫X®
Heavy Patients (95th Percentile Male and Heavier), Ferno Recommends:
Extend/Retract Rolling Loading/Unloading
Key: O = Operator H = Helper
O
OO
O
Extend/Retract Rolling Loading/Unloading
2.6 Using Additional Help
Operating the cot requires a minimum of two trained operators. They
may need additional trained help when working with heavy loads
(patient plus equipment), or when operating the cot manually.
● Two trained operators stand at the loading end and control end of
the cot, maintain control of the cot, operate the controls, and direct
helpers on where to stand and how to grasp the cot.
● Side helpers may need to walk sideways under some circumstances.
Follow local protocols.
● Ferno recommends that helpers work in pairs to help maintain cot
balance.
● For heavy loads (patient weight exceeding 95th percentile male
and heavier), Ferno recommends a minimum of two trained
operators and two helpers.
● Use special techniques when operating the cot without power.
Refer to the non-powered operation instructions in this manual.
● Refer to the chart for suggested placement for operators and
helpers.
LOAD CAPACITY
Inspect the cot if the load capacity has
been exceeded (page 37).
700 lb
318 kg
50 st
WARNING
Untrained helpers can cause injury or be injured. Trained
operators must operate the controls and direct helpers
where to grasp the cot to avoid pinch points.

© Ferno / 234-3622-09 / December 2022 11
iN∫X®
2.7 Terms
● ACTUATOR: The actuator is a hydraulic system that extends and
retracts the cot legs. One actuator is attached to each set of legs.
● AUTO-EQUALIZE: During normal operation, if the legs are not
equally extended, pressing or will extend or retract one set of
legs until both sets of legs are equally extended. Then, both sets of
legs extend or retract simultaneously.
● AUTOMATIC STOPS: The cot stops automatically at the maximum
safe transport height (factory-set) and at the loading height (user-
set). To continue extending or retracting, press or again.
● CONTROL END: The end of the cot with the display, telescoping
handles and shock frame, also known as the foot end.
● DISPLAY: The display provides operators with the status of many
cot systems, including the legs, patient surface, battery charge, and
alternate operating modes. See “Display Zones” on page 15.
● DRIVE LIGHTS: Drive lights are white lights on the actuators that
illuminate the ground around the wheels and increase cot visibility
in low light. See page 14.
● EXTEND (LEGS): Powered cot operation to raise the patient surface
away from the transport wheels. Extend the legs to increase
the height of the patient surface, or to unload the cot from an
ambulance.
● GUIDE BAR: The control-end operator uses the guide bar to roll and
maintain control of the cot. The display is mounted between the
guide bar and the patient surface. A set of /buttons is attached
to the right-hand side.
● iN∫LINE: The iN∫LINE fastening system is a Ferno fastening system
designed to secure the cot in a ground-based ambulance.
● ICS® (Integrated Charging System): The ICS allows the cot to be
charged each time it is secured in the iN∫LINE. (Power to the ICS
from the ambulance inverter or shore power must be ON). The ICS
helps keep the cot battery fully charged.
● LIFT-ASSIST: Under extreme weight conditions (loads), the
operators may need to provide lift-assistance. Use additional help
as needed (page 10).
● LOAD: The overall weight of patient plus equipment placed on, or
attached to, the cot.
● LOADING END: The end of the cot with the backrest, telescoping
frame and one of two safety bars, also known as the head end.
● LOADING HEIGHT: Users can program the cot to stop at the normal
loading height for a designated ambulance (page 44). Extend
the cot to the loading height only to load it into an ambulance or
unload it from an ambulance.
● OPERATORS: Trained operators are referred to as the Control-end
Operator and Loading-end Operator. Trained operators maintain
control of the cot, operate the controls, and direct helpers.
● RETRACT (LEGS): Powered cot operation to lower the patient
surface toward the transport wheels. Retract the legs to reduce the
height of the patient surface, or to load the cot into an ambulance.
● SURROUND LIGHTS: Red and white lights on each side of the
cot that provide steady light to illuminate the cot, or ash in an
attention-grabbing alert pattern to increase safety. See “Lights” on
page 14.
● TELESCOPING HANDLES: Telescoping handles extend or retract
to provide the control-end operator with additional ergonomic
positions to grasp and guide the cot. A set of /buttons is
attached to the right-hand telescoping handle (page 19).
● TRANSPORT HEIGHT: An alarm beeps when the patient surface is
higher than the recommended maximum transport height. Keep
the cot at or below this height when rolling it.
● SHEETS: Sheets or other articles that are placed, or nd their way,
beneath the patient surface can become caught in the power
system. Do not tuck sheets or place other objects where they can
interfere with, or become entangled in, the locking mechanism.

© Ferno / 234-3622-09 / December 2022
12
iN∫X®
3.1 Description
The Ferno® iN∫X® Integrated Patient Transport & Loading System™
(“cot”) is an emergency patient-handling device designed to transport
a patient over various terrain, to be loaded into and unloaded from an
ambulance, and for transport inside a ground-based ambulance.
The cot is designed for use with the for Ferno® iN∫LINE® series fastening
system. The cot is for professional use by a minimum of two trained
operators. It is designed to help reduce the risk of back injury to medical
service personnel by eliminating or minimizing the amount of lifting
required to extend or retract the legs.
During powered operation, no lifting is required to raise or lower the cot,
or to load the cot into an ambulance or unload it from an ambulance.
The cot may be operated manually when desired.
INCLUDED
● Ferno battery charger and adapter cable
● iN∫X battery
● Sealed vinyl mattress polyurethane foam pad interior
● Set of patient restraints
● Users’manual and training DVD
● ICS® charging contacts standard
FEATURES
● 700 lb/318 kg lifting capacity (load capacity)
● Independent-leg, powered transport loading system
● Legs auto-equalize before extending or retracting
● Safety Lighting System
● Variable height adjustment allows level loading into an ambulance
with a oor of up to 35”(889 mm)
● User-set loading height (maximum 35”/892 mm)
● IP 56 (Ingress Protection) rating for dust, water
● 36-Volt DC power system with dual actuators
● Multifunction display
● Position-indicator lights
● Simple / operation
● Directional wheel locks (loading-end) standard
● Sidearm (SX® or fold-down option)
● Telescoping handles (control end)
● Coated handling surfaces keep hands/clothes clean
● 4 swivel transport wheels, 6" (152 mm)
● 2 wheel locks
● Pneumatic backrest
● 3-position telescoping load-end frame
● 2-position shock frame
● Direct power and non-powered backup systems
3 ABOUT THE COT
WARNING
Improper use of the cot can cause injury. Use the cot only
for the purpose described in this manual.
3.2 General Specications
Specications are shown in the tables at right. General specications
are rounded. Metric conversions are calculated before rounding the
Imperial measurement.
Ferno reserves the right to change specications without notice. For
more information, contact Ferno Customer Relations or your Ferno
distributor (page 2).
● Height is the distance from the ground to the patient surface.
● Loading Height is the distance from the ground to the bottom of
the loading wheels.
● Weight includes the battery but is without mattress, patient
restraints and optional features.
● All Ferno mattresses for emergency medical service use are fully-
sealed.

© Ferno / 234-3622-09 / December 2022 13
iN∫X®
Construction
Frame Aluminum
Legs Carbon-Fiber Composite
Bed Surface Aluminum
Wheels Stainless steel, sealed bearings;
Nonconductive wheels
Position Indicator Lights Class 2M Laser
Power System
Operating Temp. -40°F to 131°F (-40°C to 55°C)
Battery Output 36 Volts DC
Charging Time (1 transport,
charge maintained by ICS®)
As little as 15 minutes
Charging Time (depleted) Up to 1 hour, 45 minutes
Charger Input 100 – 240 Volts AC
Charger Output Up to 39.6 Volts DC, 2 Amps
(for cot LiFePO4 battery)
Load Capacity
Imperial/Metric 700 lbs/318 kg
Stone (UK) 50 st
Weight
With SX® Sidearms 214 lbs/97 kg
With Fold-Down Sidearms 203 lbs/92 kg
Dimensions Imperial Metric
A) Wheels 6" x 2" 153 mm x 52 mm
B) Length (Adjustable) 63" – 81" 1594-2045 mm
C) Width (Overall) 24" 597 mm
D) Width (Patient Surface) 16" 406 mm
E) Height (Adjustable) 14" – 49" 356-1245 mm
F) Maximum Transport height (Factory-Preset, measurement is to patient surface) 34" 864 mm
G) Loading Height (Adjustable, measurement is to bottom of loading wheel) 35" Maximum 889 mm Maximum
H) Backrest Adjustment 0°–76°
I) Shock Frame Adjustment 0°–16°
E
F
G
H
I
A
C
B
D
Soft Goods
Mattress 72.5"x16.5"x3"/1842x419x73 mm

© Ferno / 234-3622-09 / December 2022
14
iN∫X®
4 FEATURES
4.1 Display
The display screen inner surface is coated with a layer to protect it
against ultraviolet (UV) light and pressure damage. This clear surface is
normally invisible but may sometimes be seen as lines of clear “dots”
when viewed at an angle. This is normal.
Features include:
● (A) Power switch (right side)
● (B) Manual mode button (left side)
● (C) Scene lights button
● (D) Emergency lights button
● (E) Chair position button
● (F) Battery check button
● (G) Display screen
4.3 Lights
The safety lighting system (Figure 4) features two types of lights that
illuminate the cot and surrounding area to increase operator and
patient safety. Both types are ON or OFF at the same time.
● Drive Lights (H) are axed to each actuator and provide steady
light to illuminate the ground around the cot.
● Surround Lights (I) are white and red bar lights that span the length
of each side of the cot to increase cot visibility. These lights can
ash or provide steady light.
Use one of two buttons to turn the lights ON and OFF. An LED in the
upper-right corner of the button indicates the active light mode. Lights
also turn OFF when the cot enters Sleep Mode. See “Sleep Mode” on
page 18.
For steady“Scene Lighting”press the far-left display button (C, Figure 3).
The drive lights and surround lights illuminate with steady white light.
Press the button again to turn all lights OFF.
For ashing Emergency Lights, press the center-left button on the
display (D, Figure 3).The drive lights remain steady ON, but the surround
lights will illuminate and ash in a sequence of red-red-white. Press the
button again to turn all lights OFF.
4
4.2 Power Switch
The power switch (A, Figure 3) is located on the right side of the display.
Keep the switch in the ON ( ) position for all cot operations.
If the cot will not be used for more than 30 minutes, turn the power
switch OFF ( ) to conserve battery power.
After 10 minutes of non-use, the cot will enter Sleep Mode to conserve
power. See “Sleep Mode”on page 18.
A powered Integrated Charging System (ICS, page 17) will disable the
cot powered mode and charge the battery when the cot is locked in the
fastening system.
3
NOTICE
Turn the power OFF when the cot will not be in use. See
“Storing the Cot” on page 39.
CF
G
I
DE
B A
H

© Ferno / 234-3622-09 / December 2022 15
iN∫X®
4.4 Display Zones
Turning the power switch ON ( ) (A, Figure 3 on page 14) illuminates
the display and prepares the cot for its default, powered operating
mode. The display is o when the power switch is OFF (0)or when the
cot enters Sleep Mode. To awaken from Sleep Mode, press . See “Sleep
Mode”on page 18.
The display shows the following information (Figure 5):
● COT: The cot is displayed in various colors to indicate the current
status of each area. Refer to the table at right.
● TIMER: The countdown timer appears in the lower-left corner of the
display only when the cot is in a direct power mode. See “Direct
Power Modes” on page 31. If the countdown timer is allowed to
expire, the cot returns to its default powered mode.
● STATUS: This bottom center of the display illuminates with notices
and safety information. Based on the condition, a warning triangle,
other symbol, and/or alphanumeric code may be displayed. The
warning triangle is yellow for medium-level notices, and red for
high-priority notices (Figure 5). See “Audible Alarm” below and
“Status Indicators”on page 45.
● BATTERY: The symbol indicates the current battery charge. It is
illuminated whenever the cot power is ON or the cot is connected
to a powered ICS. The color and shape of the battery indicator
shows the approximate charge remaining in the battery. Refer to
the table at right.
Cot Color Indicators
LEG
Green Legs may be extended or retracted
White Legs will not extend or retract
Blue Direct Power: blue legs move when a
button is pressed
PATIENT SURFACE
White Safe transport height
Yellow/Red Above max transport height. Lower
before rolling.
WHEELS
Green/White Cot may be rolled if patient surface is at
a suitable transport height
Red Do not roll the cot
4.5 Audible Alarm
The cot will sound a series of beeps when a status indicator is displayed.
The number of beeps is dependent on the severity of the situation. The
alarm continues to sound until the status returns to normal.
● High-priority: 2+3 beeps, pause, repeat
● Medium-priority: 2 beeps/15 seconds
● Low-priority: 1 beep/minute
Symbol Denition
1 Connected to ICS, charging
2 Connected to ICS, charge full
3 Full charge
4 Moderate charge
5 Low charge
6 Battery Depleted (ash red/outline)
NOTICE
The cot beeps when a status indicator is displayed. The
severity of the status determines the number of beeps.
N04
5
1 2 3 4 5 6

© Ferno / 234-3622-09 / December 2022
16
iN∫X®
4.6 Battery
The iN∫X battery (J, Figure 6) is a rechargeable, 36 Volt DC lithium-iron
phosphate battery (LiFePO4). The battery has a carry handle (K). The
battery installs under the shock frame, behind the display (Figure 7).
For complete use, maintenance, and safety information, refer to Ferno
publication 234-3595.
● Charge the battery by securing the cot in a fastening system with
powered ICS, or remove the battery from the cot and connect it
directly to a Ferno battery charger.
● Charging time is 15 minutes (one transport, maintaining the charge
with ICS) to 1 hour, 45 minutes (depleted battery). If a battery has a
very low charge, extend the charging time.
● Actual charging time varies based on frequency of recharge,
depth of discharge, and battery age. Patient weight and extreme
temperature can also aect the power available from each battery
charge.
● Turn the power OFF if the cot will not be used for more than 30
minutes.
● The battery is water-resistant and is suitable for outdoor use. Do
not submerge the battery in water.
● Before placing the battery in storage, charge it. Store only a fully-
charged battery. See page 39.
● Replace a damaged or cracked battery. Do not open the sealed
battery case. Do not dismantle, open or shred the battery.
● Recycle the battery when it no longer holds a charge (page 39).
REMOVING THE BATTERY
1. Turn the power switch OFF (A, Figure 3, page 14).
2. Raise the shock frame.
3. Place your thumbs under the front corners of the battery cover
and lift to remove.
4. Grasp only the battery-cable plug (L, Figure 7) to disconnect the
cable from the battery. Do not pull on the cable.
5. Use the battery carry handle to lift the battery out of the cradle.
ATTACHING THE BATTERY
6. Conrm the power switch is OFF.
7. Raise the shock frame.
8. Place your thumbs under the front corners of the battery cover
and lift to remove.
9. Angle and slide the battery into the cradle. Press down to lock the
battery in place in the cradle.
10. Connect the battery cable (L, Figure 7) to the battery port.
11. Insert the front tabs of the battery cover into the slots and then
press down the area near the display to snap the cover into place.
12. Lower the shock frame.
7
L
6
K
J
NOTICE
If the battery sustains noticeable or suspected damage or
is hot to the touch, immediately remove it from service and
store outside of a building.

© Ferno / 234-3622-09 / December 2022 17
iN∫X®
4.7 Battery Charger
Use only the provided Ferno battery charger (M, Figure 8) to charge
Ferno batteries, and charge only Ferno batteries with the charger. For
complete use, maintenance, and safety information, refer to Ferno
publication 234-3588.
The charger output cable connects to an ICS. An adapter cable (N,
supplied) allows the charger to connect directly to the cot battery. The
charger has two indicator lights (red and green).
To charge the battery, see “Battery” on page 16 and “Integrated
Charging System”below.
4.8 Integrated Charging System (ICS®)
To charge a battery inside an ambulance, the Ferno ICS and iN∫LINE
fastening system must be used.
When the cot is locked in the fastening system (Figure 9), ICS charges
the cot main battery and disables powered operation. Conrm the ICS
is receiving power from the ambulance ignition, inverter, and/or outlet
switch.
If the battery has a very low charge, the ICS may not be able to charge
the battery. Connect the battery directly to the charger separate from
the ambulance and ICS.
8
9
NOTICE
When inside an ambulance, connect the cot and charger only
to an ICS. Cables can create a trip hazard, and cables can be
damaged when the cot is moved.
M
N
Charger Light Indicators
Red light (3x slow ash) Initial power on.
Battery disconnected/not detected.
No lights (connected to power) Standby/Ready
Red light (solid) Charging
Green light (slow ash) Charging (very low charge)
Green light (solid) Charging complete
Alternating Red/Green (slow) Battery fault
Green light (fast ash) Charger fault (over voltage)
Red and Green lights
slow ash for 30 seconds
Older units:
Slow ash 3x red, 1x green
Short circuit protection activated.
Check the charger output cable,
battery adapter cable, or ICS.
Fast ash: the light ashes 10 times per second.
Slow ash: the light ashes once per second.

© Ferno / 234-3622-09 / December 2022
18
iN∫X®
4.9 Extend and Retract Buttons
Extend and Retract buttons (O, Figure 10) are axed to the control-
end telescoping handle and guide bar. Button function is identical.
To activate the cot after turning the power switch ON, or to wake the cot
from Sleep Mode, press . Note: only activates the cot.
If the patient surface is not level when beginning to extend or retract,
the legs automatically equalize before extending or retracting together.
During the loading (page 29) and unloading process (page 30)
when the cot is supported by the ambulance oor, pressing or will
extend or retract only one set of legs at a time.
AUTOMATIC STOPS
The cot stops automatically at up to four heights: fully-lowered, fully-
raised, recommended transport height (factory-set), and the user-set
loading height. When the cot stops at the transport or user-set loading
height, press or again to continue extending or retracting the legs.
The cot stops at the user-set loading height only when extending.To set
the loading height, see page 44. 10
4.10 Sleep Mode
Sleep Mode conserves battery power. If the cot is not in use for more
than 10 minutes (no buttons pressed), the system enters Sleep Mode. In
Sleep Mode, the display and all lights are OFF.
The indicator light in the battery check button (F, Figure 11) will ash
every 4 seconds when the cot is in Sleep Mode.
Press the battery check button or or button to activate the cot.
11
4.11 Mode-Select Button
Press the mode-select button (B, Figure 12) to cycle between direct
power modes and the set-loading height feature. Direct power modes
are rarely used. See page 31.
Each button press cycles to the next mode, with matching images on
the display. The button-press sequence is:
● Direct power both legs
● Direct power loading-end legs only
● Direct power control-end legs only
● Set loading height. See “Set the Loading Height” on page 44.
● Standard operating mode
12
F
B
O

© Ferno / 234-3622-09 / December 2022 19
iN∫X®
4.13 Position Indicator Lights
Position indicator lights (Q, Figure 14) project a red line on the
ambulance oor as a visual aid for the operators. The lights have no
eect on cot operation.
Position indicator lights activate automatically during the loading and
unloading process and help operators visually locate the proper position
to stop rolling the cot and extend or retract the control-end legs.
The red line shows the approximate position of the intermediate
loading wheels. If the line is visible on the ambulance oor, then the
intermediate loading wheels and the majority of the load (the weight
on the cot) are also inside the ambulance.
4.12 Telescoping Handles
Telescoping handles (P, Figure 13) lock in two positions: fully retracted
and extended (about 9"/225 mm). Use the telescoping handles only
when they are in a locked position. To change the handle position:
1. Press the red button on the end of the handle (Figure 13) and
push or pull the handle to the desired position.
2. Release the button. Push or pull the handle to verify it has locked.
14
4.14 Shock Frame
The shock frame (R, Figure 15) elevates the patient’s feet approximately
16°. Follow your local medical protocols when deciding to use the
shock frame. Use an underhand grip (palms up) to support the shock
frame when raising or lowering it. For proper, ergonomically-correct
operation, always work from the control end of the cot.
To raise the shock frame:
1. Unfasten or loosen the leg restraint.
2. Lift the shock frame with both hands until it locks in the raised
position. The support bars engage automatically.
3. Fasten and adjust the leg restraint.
To lower the shock frame:
1. Unfasten or loosen the leg restraint.
2. Support the weight of the shock frame with both hands and lift
slightly.
3. Using both thumbs, press the shock frame control levers (S, Figure
16) to disengage the support bars, then lower the shock frame.
4. Fasten and adjust the leg restraint.
16
15
13
P
Q
R
S

© Ferno / 234-3622-09 / December 2022
20
iN∫X®
4.15 Backrest
The backrest (T, Figure 17) adjusts between 0° and 76° to elevate the
patient’s torso for patient comfort or medical necessity.
The gas spring is under pressure to ease raising and lowering. With
a heavy patient, support the patient’s weight before adjusting the
backrest. With a light patient, control the upward movement of the
backrest so it does not move too quickly.
To adjust the backrest:
1. Loosen or unbuckle the restraints.
2. Lower the sidearms. See “Fold-Down Sidearm” or “SX Surface
Xtender (Option)”on page 22.
3. Support the weight of the backrest and patient before using a
control handle.
4. Squeeze either red control handle toward the backrest frame to
unlock the backrest (U, Figure 17).
5. Raise or lower the backrest to the desired position, then release
the control handle to lock the backrest.
6. Adjust the sidearms as needed for patient comfort.
7. Adjust and fasten the patient restraints.
17
4.16 Safety-Bar Release Levers
Safety-bar release levers are located on the telescoping frame and
loading-end legs (V, Figure 18). Use the levers to disengage each safety
bar from the safety hook during the unloading process.
Turn the bottom of the lever away from the center of the cot to rotate
the safety bar away from the safety hook.
18
4.17 Wheel Locks
Wheel locks stop wheel rotation when engaged, and help keep the cot
from rolling during patient transfer and certain medical procedures.
Wheel locks are mounted to control-end transport wheels (Figure 19).
Press the red lever (W) down to engage the lock. Press the opposite end
of the lever to unlock.
Wheel locks are not brakes. Do not use wheel locks to slow a cot while
it is being rolled. Remain with the cot and keep control of it at all times.
Do not leave the patient unattended.
NOTICE
Do not lift the cot by the backrest. Lift only by grasping the
main frame.
NOTICE
Wheel locks are not a substitute for operator control. The
operators must remain with the cot and keep control of it at
all times. Do not leave the patient unattended.
T
V
V
19
W
U
Table of contents
Popular Lifting System manuals by other brands

Lift Products
Lift Products Moto-Cart Jr Electric Lift Service manual

SmarterHome
SmarterHome Universal XL installation manual

AAQ
AAQ AutoLift 163027 Installation manual & operation instructions

Nussbaum
Nussbaum ATT HYMAX S 3000 Operating manual, Inspection book

Borum
Borum B900TJL owner's manual

Atlas Equipment
Atlas Equipment BP12000X Installation & operation manual