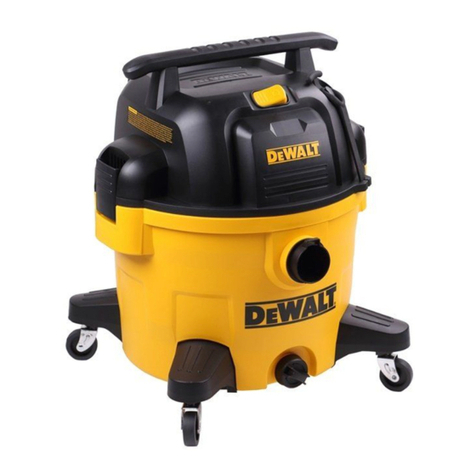
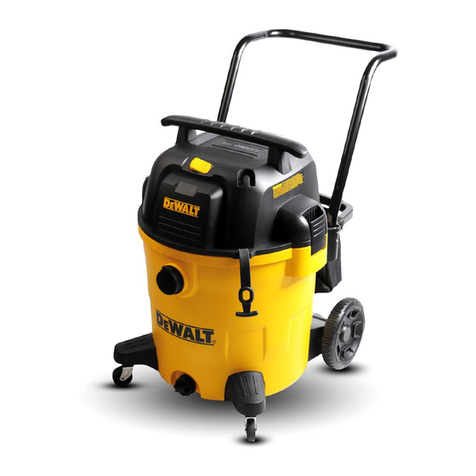
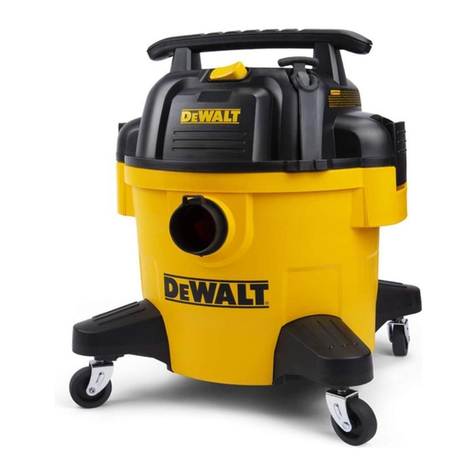
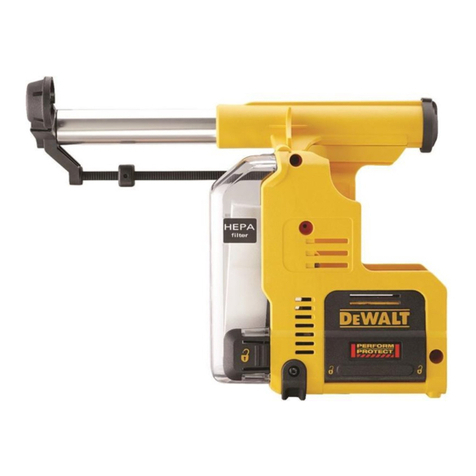
DeWalt D27902 User manual

D27902

Deutsch (übersetzt von den Originalanweisungen) 6
English (original instructions) 13
Français (traduction de la notice d’instructions originale) 20
Italiano (tradotto dalle istruzioni originali) 27
Nederlands (vertaald vanuit de originele instructies) 34
Español (traducido de las instrucciones originales) 41
Português (traduzido das instruções originais) 48
Dansk (oversat fra original brugsvejledning) 55
Norsk (oversatt fra de originale instruksjonene) 61
Svenska (översatt från de ursprungliga instruktionerna) 67
Suomi (käännetty alkuperäisestä käyttöohjeesta) 73
Ελληνικά (μετάφραση από τις πρωτότυπες οδηγίες)80
Türkçe (orijinal talimatlardan çevrilmiştir) 87
2

23
22
17
18
19
20
21
27
26
26
25
24
1
2
314 15
4
5
6
789101112
13
16
28
3

2
2x (Optional)
“Click”
5
(Optional)
6
7
4

A
B
1.
2.
C
45
25
26
32
35
21,5
26,9
31
D
E
F
G
5

Deutsch
– 1
Herzlichen Glückwunsch!
Sie haben ein DEWALT Gerät gewählt.
Jahrelange Erfahrung, sorgfältige Pro-
duktentwicklung und Innovation machen
DEWALT zu einem verlässlichen Partner
für Benutzer professioneller Elektrowerk-
zeuge.
Lesen Sie vor der ersten Benut-
zung Ihres Gerätes diese Origi-
nalbetriebsanleitung, handeln Sie danach
und bewahren Sie diese für späteren Ge-
brauch oder für Nachbesitzer auf.
–Vor erster Inbetriebnahme Sicherheits-
hinweise Nr. 5.956-249 unbedingt lesen!
–Bei Nichtbeachtung der Betriebsanlei-
tung und der Sicherheitshinweise kön-
nen Schäden am Gerät und Gefahren
für den Bediener und andere Personen
entstehen.
–Bei Transportschaden sofort Händler
informieren.
Getrennte Entsorgung. Dieses Pro-
dukt darf nicht über den normalen
Hausmüll entsorgt werden.
Sollte Ihr DEWALT Produkt eines Tages er-
neuert werden müssen, oder falls Sie es
nicht weiter verwenden wollen, so darf es
nicht über den Hausmüll entsorgt werden.
Stellen Sie dieses Produkt zur getrennten
Entsorgung bereit.
Durch die getrennte Entsorgung
gebrauchter Produkte und Verpa-
ckungen können die Materialien re-
cycelt und wiederverwertet werden. Die
Wiederverwertung recycelter Materialien
schont die Umwelt und verringert die Nach-
frage nach Rohstoffen.
–Die regionalen Bestimmungen schrei-
ben unter Umständen die getrennte
Entsorgung elektrischer Produkte aus
dem Haushalt an Sammelstellen oder
seitens des Händlers vor, bei dem Sie
das neue Produkt erworben haben.
–DEWALT nimmt Ihre ausgedienten
DEWALT-Produkte gern zurück und
sorgt für eine umweltfreundliche Ent-
sorgung und Wiederverwertung. Um
diesen Dienst zu nutzen, schicken Sie
bitte Ihr Produkt zu einer Vertragswerk-
statt. Hier wird es dann auf unsere Kos-
ten gesammelt.
–Die Adresse der zuständigen DEWALT
Vertretung steht in diesem Handbuch,
darüber läßt sich die nächstgelegene
Vertragswerkstatt ermitteln. Außerdem
ist eine Liste der Vertragswerkstätten
und aller Kundendienststellen von
DEWALT sowie der zuständigen An-
sprechpartner im Internet zu finden un-
ter: www.2helpU.com
Inhaltsverzeichnis
Umweltschutz. . . . . . . . . . . DE . . .1
Symbole in der Betriebsanlei-
tung . . . . . . . . . . . . . . . . . . DE . . .2
Bestimmungsgemäße Verwen-
dung . . . . . . . . . . . . . . . . . . DE . . .2
Geräteelemente . . . . . . . . . DE . . .2
Inbetriebnahme . . . . . . . . . DE . . .2
Bedienung . . . . . . . . . . . . . DE . . .3
Transport . . . . . . . . . . . . . . DE . . .4
Lagerung . . . . . . . . . . . . . . DE . . .4
Pflege und Wartung . . . . . . DE . . .4
Hilfe bei Störungen. . . . . . . DE . . .4
Garantie . . . . . . . . . . . . . . . DE . . .5
Zubehör und Ersatzteile . . . DE . . .5
EG-Konformitätserklärung . DE . . .6
Technische Daten . . . . . . . DE . . .7
Umweltschutz
6 DE
– 2
Gefahr
Für eine unmittelbar drohende Gefahr, die
zu schweren Körperverletzungen oder zum
Tod führt.
몇Warnung
Für eine möglicherweise gefährliche Situa-
tion, die zu schweren Körperverletzungen
oder zum Tod führen könnte.
Vorsicht
Für eine möglicherweise gefährliche Situa-
tion, die zu leichten Verletzungen oder zu
Sachschäden führen kann.
몇Warnung
Das Gerät ist nicht für die Absaugung ge-
sundheitsschädlicher Stäube geeignet.
–Dieser Sauger ist zur Nass- und Tro-
ckenreinigung von Boden- und Wand-
flächen bestimmt.
–Das Gerät ist für den gewerblichen Be-
reich geeignet, z.B. in Hotels, Schulen,
Krankenhäusern, Fabriken, Läden, Büros,
Vermietergeschäften und Baustellen.
1 Elektroden
2 Saugschlauch
3 Kabelhaken
4 Luftaustritt, Arbeitsluft
5 Verriegelung des Saugkopfs
6 Laufrad
7 Lufteintritt, Motor-Kühlluft
8 Schmutzbehälter
9 Saugkopf
10 Lenkrolle
11 Saugstutzen
12 Bodendüse (nicht im Lieferumfang)
13 Saugrohr (nicht im Lieferumfang)
14 Tragegriff
15 Filterdeckel
16 Krümmer
17 Drehregler für Saugleistung (min-max)
18 Kontrolllampe
19 Steckdose
20 Automatische Filterabreinigung
21 Hauptschalter
22 Flachfaltenfilter
23 Filterabreinigung
24 Halter für Bodendüse
25 Halter für Fugendüse
26 Halter für Saugrohre
27 Netzkabel
28 Typenschild
Vorsicht
Beim Saugen darf niemals der Flachfalten-
filter entfernt werden.
–Beim Aufsaugen von Feinstaub kann
zusätzlich eine Papierfiltertüte oder ein
Membranfilter (Sonderzubehör) ver-
wendet werden.
Abbildung
Saugkopf entriegeln und abnehmen.
Papierfiltertüte oder Membranfilter
(Sonderzubehör) aufstecken.
Saugkopf aufsetzen und verriegeln.
Abbildung
Bürstenstreifen ausbauen.
Gummilippen einbauen.
Hinweis: Die strukturierte Seite der Gum-
milippen muss nach außen zeigen.
–Beim Aufsaugen von Nassschmutz
muss immer die Papierfiltertüte oder
der Membranfilter (Sonderzubehör)
entfernt werden.
–Es empfiehlt sich eine Spezialfiltertüte
(nass) zu verwenden (siehe Filtersyste-
me).
Symbole in der
Betriebsanleitung
Bestimmungsgemäße
Verwendung
Geräteelemente
Inbetriebnahme
Trockensaugen
Einbau Papierfiltertüte
Nasssaugen (Option)
Einbau Gummilippen
Papierfiltertüte entfernen
7DE

– 3
Vorsicht
Beim Saugen darf niemals der Flachfalten-
filter entfernt werden.
–Beim Aufsaugen von Nassschmutz mit
der Polster- oder Fugendüse, bezie-
hungsweise wenn überwiegend Was-
ser aus einem Behälter aufgesaugt
wird, empfiehlt es sich, die Funktion
„Automatische Filterabreinigung“ abzu-
schalten.
–Bei Erreichen des max. Flüssigkeits-
stands schaltet das Gerät automatisch
ab.
–Bei nicht leitenden Flüssigkeiten
(zum Beispiel Bohremulsion, Öle
und Fette) wird das Gerät bei vollem
Behälter nicht abgeschaltet. Der
Füllstand muss ständig überprüft
und der Behälter rechtzeitig entleert
werden.
–Nach Beendigung des Nasssaugens:
Flachfaltenfilter mit der Filterabreini-
gung abreinigen. Elektroden mit einer
Bürste reinigen. Behälter mit einem
feuchten Tuch reinigen und trocknen.
Abbildung
Der Saugschlauch ist mit einem Clip-Sys-
tem ausgestattet. Alle C-35/C-DN-35 Zube-
hörteile können angeschlossen werden.
Netzstecker einstecken.
Gerät am Hauptschalter einschalten.
Saugleistung (min-max) am Drehregler
einstellen.
Nicht möglich mit D27902-LX in 115V-
Ausführung
Gefahr
Verletzungs- und Beschädigungsgefahr!
Die Steckdose ist nur zum direkten An-
schluss von Elektrowerkzeugen an den
Sauger bestimmt. Jeder andere Gebrauch
der Steckdose ist nicht zulässig.
Netzstecker des Elektrowerkzeugs am
Sauger einstecken.
Gerät am Hauptschalter einschalten.
Kontrolllampe leuchtet, Sauger befindet
sich im Standby-Modus.
Hinweis: Der Sauger wird automatisch mit
dem Elektrowerkzeug ein- und ausgeschaltet.
Hinweis: Der Sauger hat eine Anlaufverzö-
gerung bis zu 0,5 Sekunden und eine
Nachlaufzeit von bis zu 15 Sekunden.
Hinweis: Leistungsanschlusswert der Elektro-
werkzeuge, siehe Technische Daten.
Abbildung
Anschlussmuffe an den Anschluss des
Elektrowerkzeugs anpassen.
Abbildung
Krümmer am Saugschlauch entfernen.
Anschlussmuffe an Saugschlauch
montieren.
Abbildung
Anschlussmuffe an Elektrowerkzeug
anschließen.
Das Gerät verfügt über eine neuartige Filter-
abreinigung, besonders wirksam bei feinem
Staub. Dabei wird der Flachfaltenfilter alle 15
Sekunden durch einen Luftstoß automatisch
gereinigt (pulsierendes Geräusch).
Hinweis: Die automatische Filterabreini-
gung ist werkseitig eingeschaltet.
Hinweis: Das Aus-/Einschalten der auto-
matischen Filterabreinigung ist nur bei ein-
geschaltetem Gerät möglich.
–Automatische Filterabreinigung aus-
schalten:
Schalter betätigen. Kontrolllampe im
Schalter erlischt.
Allgemein
Clipverbindung
Bedienung
Gerät einschalten
Saugleistung einstellen
Arbeiten mit Elektrowerkzeugen
Automatische Filterabreinigung
8 DE

– 4
–Automatische Filterabreinigung ein-
schalten:
Schalter wiederholt betätigen. Kontroll-
lampe im Schalter leuchtet grün.
Gerät am Hauptschalter ausschalten.
Netzstecker ziehen.
Behälter entleeren.
Gerät innen und außen durch Absau-
gen und Abwischen mit einem feuchten
Tuch reinigen.
Abbildung
Saugschlauch und Netzkabel entspre-
chend Abbildung aufbewahren.
Gerät in einem trockenen Raum abstel-
len und vor unbefugter Benutzung si-
chern.
Vorsicht
Verletzungs- und Beschädigungsgefahr!
Gewicht des Gerätes beim Transport be-
achten.
Saugrohr mit Bodendüse aus der Halte-
rung nehmen. Gerät zum Tragen am
Tragegriff und am Saugrohr fassen.
Beim Transport in Fahrzeugen Gerät
nach den jeweils gültigen Richtlinien
gegen Rutschen und Kippen sichern.
Vorsicht
Verletzungs- und Beschädigungsgefahr!
Gewicht des Gerätes bei Lagerung beach-
ten.
Dieses Gerät darf nur in Innenräumen gela-
gert werden.
Gefahr
Vor allen Arbeiten am Gerät, Gerät aus-
schalten und Netzstecker ziehen.
Filterabdeckung öffnen.
Flachfaltenfilter wechseln.
Filterabdeckung schließen, muss hör-
bar einrasten.
Saugkopf entriegeln und abnehmen.
Elektroden mit einer Bürste reinigen.
Saugkopf aufsetzen und verriegeln.
Gefahr
Vor allen Arbeiten am Gerät, Gerät aus-
schalten und Netzstecker ziehen.
Kabel, Stecker, Sicherung, Steckdose
und Elektroden überprüfen.
Gerät einschalten.
Behälter entleeren.
Gerät ausschalten und 5 Sekunden
warten, nach 5 Sekunden wieder ein-
schalten.
Elektroden sowie den Zwischenraum der
Elektroden mit einer Bürste reinigen.
Verstopfungen aus Saugdüse, Saug-
rohr, Saugschlauch oder Flachfaltenfil-
ter entfernen.
Papierfiltertüte wechseln.
Filterabdeckung richtig einrasten.
Membranfilter (Sonderzubehör) unter
fließendem Wasser reinigen bzw.
wechseln.
Flachfaltenfilter wechseln.
Korrekte Einbaulage des Flachfaltenfil-
ters überprüfen.
Flachfaltenfilter wechseln.
Gerät ausschalten
Nach jedem Betrieb
Gerät aufbewahren
Transport
Lagerung
Pflege und Wartung
Flachfaltenfilter wechseln
Elektroden reinigen
Hilfe bei Störungen
Saugturbine läuft nicht
Saugturbine schaltet ab
Saugturbine läuft nach
Behälterentleerung nicht wieder an
Saugkraft lässt nach
Staubaustritt beim Saugen
9DE

– 5
Elektroden sowie den Zwischenraum der
Elektroden mit einer Bürste reinigen.
Füllstand bei elektrisch nicht leitender
Flüssigkeit ständig kontrollieren.
Saugschlauch nicht angeschlossen.
Kundendienst benachrichtigen.
Wenn Sie mit Ihrem DEWALT Gerät nicht
restlos zufrieden sind, können Sie es inner-
halb 30 Tagen bei Ihrem Händler zurückge-
ben. Sie bekommen ein Ersatzgerät oder
erhalten der Kaufpreis zurück. Das Gerät
muss mit dem gesamten Lieferumfang zu-
rückgegeben werden. Der Kaufbeleg muss
vorgelegt werden.
Kundendienst- oder Wartungsarbeiten in-
nerhalb der ersten 12 Monate nach dem
Kauf werden durch autorisierte DEWALT
Reparaturwerkstätten kostenlos ausge-
führt. Der Kaufbeleg muss vorgelegt wer-
den. Kosten für Arbeitszeit und Ersatzeile
für das Elektrowerkzeug fallen nicht an. Zu-
behörteile sind von dieser Regelung aus-
geschlossen.
Weist Ihr DEWALT Gerät innerhalb der ers-
ten 12 Monate nach dem Kauf einen Scha-
den aufgrund eines Materialfehlers oder
fehlerhafter Montage auf, garantieren wir
den kostenlosen Austausch aller nach un-
serem Ermessen defekten Teile oder den
Ersatz des Gerätes (nach unserem Ermes-
sen) unter folgenden Voraussetzungen:
–Das Gerät wurde nicht zweckentfrem-
det verwendet.
–Reparaturen wurden nicht durch unbe-
rechtige Personen vorgenommen.
–Der Kaufbeleg wird vorgewiesen. Diese
Garantie ist eine Zusatzleistung zu den
gesetzlichen Garantieansprüchen.
Die Adresse Ihrer nächsten DEWALT Re-
paraturwerkstatt erfahren Sie unter der Te-
lefonnummer auf der Rückseite dieser
Betriebsanleitung. Außerdem finden Sie
eine Liste mit den autorisierten DEWALT
Reparaturwerkstätten im Internet unter
www.2helpU.com
–Es dürfen nur Zubehör und Ersatzteile
verwendet werden, die vom Hersteller
freigegeben sind. Original-Zubehör und
Original-Ersatzteile bieten die Gewähr
dafür, dass das Gerät sicher und stö-
rungsfrei betrieben werden kann.
–Für zusätzliche Informationen zu Er-
satzteilen wenden Sie sich bitte an Ih-
ren DEWALT Händler.
Abschaltautomatik (Nasssaugen)
spricht nicht an
Automatische Filterabreinigung
arbeitet nicht
Automatische Filterabreinigung
lässt sich nicht abschalten
Automatische Filterabreinigung
lässt sich nicht einschalten
Garantie
30 TAGE ZUFRIEDENHEITS
GARANTIE OHNE RISIKO
EIN JAHR KOSTENLOSER
KUNDENDIENST
EIN JAHR VOLLGARANTIE
Zubehör und Ersatzteile
10 DE

– 6
MASCHINENRICHTLINIE
D27902
DEWALT erklärt hiermit, dass diese unter
„Technische Daten“ beschriebenen Pro-
dukte die folgenden Vorschriften erfüllen:
Für weitere Informationen wenden Sie sich
bitte an DEWALT unter der folgenden Ad-
resse oder schauen Sie auf der Rückseite
dieser Betriebsanleitung nach.
Der Unterzeichnete ist verantwortlich für
die Zusammenstellung des technischen
Dossiers und gibt diese Erklärung im Na-
men von DEWALT ab.
DEWALT
Richard-Klinger-Straße 11
D-65510 Idstein
Deutschland
01.01.2010
EG-Konformitätserklärung
Einschlägige EG-Richtlinien
2006/42/EG (+2009/127/EG)
2004/108/EG
Angewandte harmonisierte Normen
EN 55014–1: 2006 + A1: 2009
EN 55014–2: 1997 + A2: 2008
EN 60335–1
EN 60335–2–69
EN 61000–3–2: 2006 + A2: 2009
EN 61000–3–3: 2008
EN 62233: 2008
Angewandte nationale Normen
-
Horst Großmann
Vice President Engineering and Product Development
11DE

– 7
Technische Daten
D27902 LX D27902 QS D27902 GB
Netzspannung V 115 220-240 220-240
Frequenz Hz 50/60 50/60 50/60
Max. Leistung W 1320 1380 --
Nennleistung W 1150 1200 1200
Behälterinhalt l 45 45 45
Füllmenge Flüssigkeit l 30 30 30
Luftmenge (max.) l/s 58 61 61
Unterdruck (max.) kPa
(mbar)
22,1 (221) 23,0 (230) 23,0 (230)
Leistungsanschlusswert der Elektro-
werkzeuge
W -- 100-2200 100-1800
Schutzklasse -- II I I
Saugschlauchanschluss (C-DN/C-ID) mm 35 35 35
Länge x Breite x Höhe mm 520 x 380 x
695
520 x 380 x
695
520 x 380 x
695
Gewicht kg 13,0 13,5 13,5
Umgebungstemperatur (max.) °C +40 +40 +40
Ermittelte Werte gemäß EN 60335-2-69
Schalldruckpegel LpA dB(A) 65 65 65
Unsicherheit KpA dB(A) 1 1 1
Hand-Arm Vibrationswert m/s2<2,5 <2,5 <2,5
Unsicherheit K m/s20,2 0,2 0,2
Netzkabel H07RN-F 2x1,5 mm2
D27902 Teile-Nr. Kabellänge
LX 1003275-00 7,5 m
Netzkabel H07RN-F 3x1,5 mm2
D27902 Teile-Nr. Kabellänge
QS 1003279-00 7,5 m
GB 1003280-00 7,5 m
12 DE

English
– 1
Congratulations!
You have choosen a DEWALT tool. Years
of experience, thorough product develop-
ment and innovation make DEWALT one of
the most reliable partners for professional
power tool users.
Please read and comply with
these original instructions prior to
the initial operation of your appliance and store
them for later use or subsequent owners.
–Before first start-up it is definitely nec-
essary to read the safety indications Nr.
5.956-249!
–The non-compliance of the operating
and safety instructions may lead to
damages of the appliance and to dan-
gers for the operator and other persons.
–In case of transport damage inform ven-
dor immediately
Separate collection. This product
must not be disposed of with nor-
mal household waste.
Should you find one day that your DEWALT
product needs replacement, or if it is of no
further use to you, do not dispose of it with
household waste. Make this product availa-
ble for separate collection.
Separate collection of used prod-
ucts and packaging allows materi-
als to be recycled and used again.
Re-use of recycled materials helps prevent
environmental pollution and reduces the
demand for raw materials.
–Local regulations may provide for sepa-
rate collection of electrical products
from the household, at municipal waste
sites or by the retailer when you pur-
chase a new product.
–DEWALT provides a facility for the col-
lection and recycling of DEWALT prod-
ucts once they have reached the end of
their working life. To take advantage of
this service please return your product
to any authorised repair agent who will
collect them on our behalf.
–You can check the location of your
nearest authorised repair agent by con-
tacting your local DEWALT office at the
address indicated in this manual. Alter-
natively, a list of authorised DEWALT
repair agents and full details of our af-
ter-sales service and contacts are avail-
able on the Internet at:
www.2helpU.com
Contents
Environmental protection . . EN . . .1
Symbols in the operating in-
structions . . . . . . . . . . . . . . EN . . .2
Proper use . . . . . . . . . . . . . EN . . .2
Device elements. . . . . . . . . EN . . .2
Start up. . . . . . . . . . . . . . . . EN . . .2
Operation . . . . . . . . . . . . . . EN . . .3
Transport . . . . . . . . . . . . . . EN . . .4
Storage. . . . . . . . . . . . . . . . EN . . .4
Maintenance and care . . . . EN . . .4
Troubleshooting . . . . . . . . . EN . . .4
Warranty. . . . . . . . . . . . . . . EN . . .5
Accessories and Spare Parts EN . . .5
EC Declaration of Conformity EN . . .6
Technical specifications . . . EN . . .7
Environmental protection
13EN

– 2
Danger
Immediate danger that can cause severe
injury or even death.
몇Warning
Possible hazardous situation that could
lead to severe injury or even death.
Caution
Possible hazardous situation that could
lead to mild injury to persons or damage to
property.
몇Warning
The appliance is not suitable for vacuuming
dust which endangers health.
–The machine is meant for dry and wet
cleaning of floors and walls.
–This appliance is suited for the commer-
cial use, e.g. in hotels, schools, hospi-
tals, factories, shops, offices, rental
companies, and on construction sites.
1 Electrodes
2 Suction hose
3 Cable hook
4 Air outlet, working air
5 Suction head lock
6 Impeller
7 Air inlet, motor cooling air
8 Dirt receptacle
9 Suction head
10 Steering roller
11 Suction support
12 Floor nozzle (not included in the delivery)
13 Suction pipe (not included in the delivery)
14 Carrying handle
15 Filter cover
16 Bender
17 Rotary switch for suction output (min-max)
18 Indicator lamp
19 Socket
20 Automatic filter dedusting
21 Main switch
22 Flat fold filter
23 Filter dedusting
24 Floor nozzle holder
25 Holder for crevice nozzle
26 Holder for suction pipes
27 Power cord
28 Nameplate
Caution
The flat pleated filter must must always be
in place while vacuuming.
–When vacuuming fine dust, you may
also use an additional paper filter bag or
a membrane filter (special accessory).
Illustration
Release and remove the suction head.
Insert the paper filter bag or the mem-
brane filter (special attachment).
Insert and lock the suction head.
Illustration
Remove the brush strips.
Install the rubber lips.
Note: The structured side of the rubber lips
must point outwards.
–If the appliance is used to vacuum wet
dirt the paper filter bag or the mem-
brane filter (special accessory) must al-
ways be removed.
–It is recommended to use a special filter
bag (wet) (see Filter systems).
Symbols in the operating
instructions
Proper use
Device elements
Start up
Dry vacuum cleaning
Inserting the paper filter bag
Wet vacuum cleaning (optional)
Inserting the rubber lips
Remove the paper filter bag
14 EN

– 3
Caution
The flat pleated filter must must always be
in place while vacuuming.
–If wet dirt is vacuumed with the uphol-
stery or crevice nozzle, or if water is
sucked up from a container, it is recom-
mended to deactivate the "automatic fil-
ter cleaning" function.
–If the maximum liquid level is reached
the appliance will turn off automatically.
–In case of non-conductive liquids
(such as emulsion drilling fluids,
oils, and greases) the appliance is
not turned off when the container is
full. The filling level must be continu-
ously monitored and the container
must be emptied in time.
–After the wet vacuuming: Clean the flat
folded filter with the filter cleaning.
Clean the electrodes with a brush.
Clean the container with a damp rag
and dry it.
Illustration
The suction hose is equipped with a clip
system. All C-35/C-DN-35 accessories can
be connected.
Plug in the main plug.
Switch on the appliance at the main
switch.
Set the suction output (min - max) at the
rotary switch.
Not applicable to the D27902-LX, 115V
version
Danger
Risk of injury and damage! The socket out-
let is only for the connection of power tools
to the vacuum cleaner. Any other use of the
socket outlet is not permitted.
Connect the mains plug of the electric
power tool to the vacuum cleaner.
Switch on the appliance at the main
switch.
Indicator lamp is on; vacuum cleaner is in
the standby mode.
Note: The vacuum cleaner is turned on and
off automatically with the electric power tool.
Note: The vacuum cleaner starts automat-
ically within 0.5 seconds and continues to
run for 15 seconds after the power tool has
being switched off.
Note: Please refer to "Technical specifica-
tions" for the power connection specifica-
tions of the power tools.
Illustration
Adjust the stepped power tool adaptor
to fit the connection of the electric pow-
er tool.
Illustration
Remove the elbow from the suction hose.
Attach the stepped power tool adaptor
to the suction hose.
Illustration
Connect the adaptor to the electric pow-
er tool.
The appliance has an innovative filter
cleaning system that is particularly effective
with fine dust. The flat pleated filter is auto-
matically cleaned every 15 seconds
through an air jet (pulsating sound).
Note: Automatic filter dedusting is switched
on at the factory.
Note: The automatic filter dedusting func-
tion can only be switched on/ off when the
appliance is switched on.
–To switch off automatic filter cleaning:
General
Clip connection
Operation
Turning on the Appliance
Adjust the suction output
Working with electrical power tools
Automatic filter cleaning
15EN

– 4
Activate the switch. Indicator lamp in
the switch goes off.
–To switch on automatic filter cleaning:
Press the switch again. Indicator lamp
in the switch glows green.
Switch off the appliance at the main
switch.
Pull out the mains plug.
Empty the container.
Vacuum and wipe the appliance inside
and outside with a damp cloth.
Illustration
Store the suction hose and the mains
cable as shown in the illustration.
Place the appliance in a dry room and
secure it from unauthorized use.
Caution
Risk of injury and damage! Observe the
weight of the appliance when you transport it.
Remove the suction pipe with the floor
nozzle from the holder. Hold the appli-
ance at the handle and at the suction
pipe to transport it.
When transporting in vehicles, secure
the appliance according to the guide-
lines from slipping and tipping over.
Caution
Risk of injury and damage! Note the weight
of the appliance in case of storage.
This appliance must only be stored in inte-
rior rooms.
Danger
First pull out the plug from the mains before
carrying out any tasks on the machine.
Open filter door.
Replace the flat pleated filter.
Close the filter door, it must lock into
place.
Release and remove the suction head.
Clean the electrodes with a brush.
Insert and lock the suction head.
Danger
First pull out the plug from the mains before
carrying out any tasks on the machine.
Check cables, plugs, fuse, socket and
electrodes.
Turn on the appliance.
Empty the container.
Turn off the appliance and wait for 5 sec-
onds, turn it on again after 5 seconds.
Clean the electrodes as well as the
space between the electrodes with a
brush.
Remove blockages in the suction noz-
zle, suction tube, suction hose, or flat
pleated filter.
Exchange the paper filter bag.
Ensure the filter cover properly locks
into place.
Clean or replace the membrane filter
(special accessory) under running water.
Replace the flat pleated filter.
Turn off the appliance
After each operation
Storing the Appliance
Transport
Storage
Maintenance and care
Exchanging the flat pleated filter
Cleaning the electrodes
Troubleshooting
Suction turbine does not run
Suction turbine turns off
Suction turbine does not start again
after the container has been
emptied
Suction capacity decreases
16 EN

– 5
Check for proper installation of the flat
pleated filter.
Replace the flat pleated filter.
Clean the electrodes as well as the
space between the electrodes with a
brush.
Continuously check the filling level in
case of non-conductive liquid.
Suction hose is not connected.
Inform Customer Service
If you are not completely satisfied with the
performance of your DEWALT tool, simply
return it within 30 days, complete as pur-
chased, to the pont of purchase, for a full
refund or exchange. Proof of purchase
must be produced.
If you need maintenance or service for your
DEWALT Tool, in the 12 months following
purchase, it will be undertaken free of
charge at an authorized DEWALT repair
agent. Proof of purchase must be pro-
duced. Includes labour and spare parts for
power tools. Excludes acessories.
If your DEWALT product becomes defec-
tive due to faulty materials or workmanship
within 12 months from the date of pur-
chase, we guarantee to replace all defec-
tive parts free of charge or, at our
descretion, replace the unit free of charge
provided that:
–The product has not be misused.
–Repairs have not been attempted by
unauthorized persons.
–Proof of purchase date is produced.
This guarantee is offered as an extra
benefit and is additional to consumers
statutory rights.
For the location of your nearest authorized
DEWALT repair agent, please use the ap-
propriate telephone number on the back of
this manual. Alternatively, a list of author-
ized DEWALT repair agents and full details
on our after-sales service are available on
the internet at
www.2helpU.com
–Only use accessories and spare parts
which have been approved by the man-
ufacturer. The exclusive use of original
accessories and original spare parts
ensures that the appliance can be oper-
ated safely and trouble free.
–For additional information about spare
parts, please visit your DEWALT vendor.
Dust comes out while vacuuming
Automatic shut-off (wet vacuum
cleaning) does not react
Automatic filter cleaning is not
working
Automatic filter cleaning cannot be
switched off
Automatic filter cleaning cannot be
switched on
Warranty
30 DAY NO RISK SATISFACTION
GUARANTEE
ONE YEAR FREE SERVICE
CONTRACT
ONE YEAR FULL WARRANTY
Accessories and Spare Parts
17EN

– 6
MACHINERY DIRECTIVE
D27902
DEWALT declares that these products de-
scribed under “technical data” are in com-
pliance with:
For more information, please contact
DEWALT at the following address or refer
to the back of the manual.
The undersigned is responsible for compi-
lation of the technical file and makes this
declaration on behalf of DEWALT.
DEWALT
Richard-Klinger-Straße 11
D-65510 Idstein
Germany
01.01.2010
EC Declaration of Conformity
Relevant EU Directives
2006/42/EC (+2009/127/EC)
2004/108/EC
Applied harmonized standards
EN 55014–1: 2006 + A1: 2009
EN 55014–2: 1997 + A2: 2008
EN 60335–1
EN 60335–2–69
EN 61000–3–2: 2006 + A2: 2009
EN 61000–3–3: 2008
EN 62233: 2008
Applied national standards
-
Horst Großmann
Vice President Engineering and Product Development
18 EN

– 7
Technical specifications
D27902 LX D27902 QS D27902 GB
Mains voltage V 115 220-240 220-240
Frequency Hz 50/60 50/60 50/60
Max. performance W 1320 1380 --
Rated power W 1150 1200 1200
Container capacity l 45 45 45
Filling quantity (liquid) l 30 30 30
Air volume (max.) l/s 58 61 61
Negative pressure (max.) kPa
(mbar)
22,1 (221) 23,0 (230) 23,0 (230)
Power connection data of the power
tools
W -- 100-2200 100-1800
Protective class -- II I I
Suction hose connection (C-DN/C-ID) mm 35 35 35
Length x width x height mm 520 x 380 x
695
520 x 380 x
695
520 x 380 x
695
Weight kg 13,0 13,5 13,5
Max. ambient temperature °C +40 +40 +40
Values determined to EN 60335-2-69
Sound pressure level LpA dB(A) 65 65 65
Uncertainty KpA dB(A) 1 1 1
Hand-arm vibration value m/s2<2,5 <2,5 <2,5
Uncertainty K m/s20,2 0,2 0,2
Power cord H07RN-F 2x1,5 mm2
D27902 Part no.: Cable length
LX 1003275-00 7,5 m
Power cord H07RN-F 3x1,5 mm2
D27902 Part no.: Cable length
QS 1003279-00 7,5 m
GB 1003280-00 7,5 m
19EN

Français
– 1
Félicitations !
Vous avez choisi un outil DEWALT. Des an-
nées d'expérience, à travers le développe-
ment produit et l'innocation, font de DEWALT
un des partenaires les plus fiables pour les
utilisateurs d'outils professionnels puissants.
Lire ces notice originale avant la
première utilisation de votre appa-
reil, se comporter selon ce qu'elles requièrent
et les conserver pour une utilisation ultérieure
ou pour le propriétaire futur.
–Avant la première mise en service, vous
devez impérativement avoir lu les
consignes de sécurité N° 5.956-249 !
–En cas de non-respect des instructions
de service et des consignes de sécuri-
té, l'appareil risque de subir des dom-
mages matériel et l'utilisateur ainsi que
toute tierce personne sont exposés à
des dangers potentiels.
–Contactez immédiatement le revendeur
en cas d'avarie de transport.
Collecte séparée. Ce produit ne
doit pas être jeté avec les déchets
domestiques normaux.
Si vous décidez de remplacer ce produit
DEWALT, ou si vous n’en avez plus l’utilité,
ne le jetez pas avec vos déchets domes-
tiques Rendez-le disponible pour une col-
lecte séparée.
La collecte séparée des produits et
emballages usés permet le recy-
clage des articles afin de les utiliser
à nouveau. Le fait d’utiliser à nouveau des
produits recyclés permet d’éviter la pollu-
tion environnementale et de réduire la de-
mande de matières premières.
–Les réglementations locales peuvent
permettre la collecte séparée des pro-
duits électriques du foyer, dans des dé-
chetteries municipales ou auprès du
revendeur vous ayant vendu votre nou-
veau produit.
–DEWALT fournit un dispositif permet-
tant de collecter et de recycler les pro-
duits DEWALT lorsqu’ils ont atteint la fin
de leur cycle de vie. Pour pouvoir profi-
ter de ce service, veuillez retourner
votre produit à un réparateur agréé qui
se chargera de le collecter pour nous.
–Pour connaître l’adresse du réparateur
agréé le plus proche de chez vous,
contactez le bureau DEWALT à
l’adresse indiquée dans ce manuel.
Vous pourrez aussi trouvez un liste des
réparateurs agréés de DEWALT et de
plus amples détails sur notre service
après-vente sur le site Internet à
l’adresse suivante : www.2helpU.com
Table des matières
Protection de l’environnement FR . . .1
Symboles utilisés dans le mode
d'emploi . . . . . . . . . . . . . . . FR . . .2
Utilisation conforme . . . . . . FR . . .2
Éléments de l'appareil . . . . FR . . .2
Mise en service . . . . . . . . . FR . . .2
Utilisation . . . . . . . . . . . . . . FR . . .3
Transport . . . . . . . . . . . . . . FR . . .4
Entreposage. . . . . . . . . . . . FR . . .4
Entretien et maintenance . . FR . . .4
Assistance en cas de panne FR . . .4
Garantie . . . . . . . . . . . . . . . FR . . .5
Accessoires et pièces de re-
change . . . . . . . . . . . . . . . . FR . . .6
Déclaration de conformité CE FR . . .6
Caractéristiques techniques FR . . .7
Protection de
l’environnement
20 FR
Table of contents
Languages:
Other DeWalt Vacuum Cleaner manuals

DeWalt
DeWalt DWV900L User manual

DeWalt
DeWalt D25303DH User manual

DeWalt
DeWalt DCV580HAM User manual

DeWalt
DeWalt D25301D User manual

DeWalt
DeWalt DWV009-BR User manual

DeWalt
DeWalt DWH205DH User manual

DeWalt
DeWalt DC500 User manual

DeWalt
DeWalt DC515 User manual

DeWalt
DeWalt DXV15TPRO User manual

DeWalt
DeWalt DXV45P User manual

DeWalt
DeWalt DXV20P User manual

DeWalt
DeWalt DWH200D User manual

DeWalt
DeWalt DCV501H User manual

DeWalt
DeWalt DCV582 User manual

DeWalt
DeWalt D25300DH User manual

DeWalt
DeWalt DXV06P User manual

DeWalt
DeWalt DWV012-CA User manual

DeWalt
DeWalt DWV905M User manual

DeWalt
DeWalt DCV501 User manual

DeWalt
DeWalt DC500 User manual