Fifine K669 User manual

K669-K669B
MADE IN CHINA
CONTACT US
If there is any problem, please contact us by email or phone. We will reply within
24 hours (Mon. to Fri. ).
E-Mail: info@salcar.de
Tel: 0341 25257850
Company: Salcar GmbH
Address: An der Hebemärchte 6 04316 Leipzig, Germany

WHAT'S IN THE BOX
WARRANTY
1 X USB Microphone with 5.9ft USB Cable
1 X Metal Tripod Stand
1 X User Manual
CONTENTS
USER'S MANUEL ---------------------- 2
BEDIENUNGSANLEITUNG ---------------------- 11
MANUEL FRANÇAIS ---------------------- 20
MANUALE ITALIANO ---------------------- 21
MANUAL ESPAÑOL ---------------------- 22
Easily get a 2-year extended warranty with online registration within 90 days of purchase.
1. Input the link : https://nemicrophone.com
2. Please roll down to the bottom of the page, ll in E-mail address and submit it .
3. Check your inbox or spam to conrm subscription email.
2. The front of the microphone should be facing the sound source. (A VOLUME icon indicate
the front of the microphone). No matter how you adjust the angle or position of the mic,
make sure the front of the mic is pointing at your mouth in order to achieve the best pick up
eect.
INTRODUCTION
1. Keep the volume all the way down when plugging the mic into USB port, and gradually
turn volume up for the perfect eect during the use.
Volume Control
Volume up: Clockwise
(Turn right)
Volume down: Counterclockwise
(Turn left)
Mute: Counterclockwise
(Turn maximum left)
2

STAND INSTALLATION AND ADJUSTMENT
COMPUTER SETUP
SPECIFICATION
1. Plug the free end of the provided USB cable into the USB port on your computer.
indicating the microphone is receiving power. Your computer will automatically recognize
the USB device and install a driver.
2. To select the K669 as your audio input, rst, open your System Preferences.
1. If necessary, adjust the microphone’s angle
with the pivotMount’s thumbscrew.(turn left
for loosen ,turn right for tighten)
2. Pls Swing the microphone counterclock-
wise, Swing the microphone clockwise will
cause the bracket broken.
Apple MAC OS
Power Supply: 5V
Polar Pattern: Unidirectional
Frequency Response: 20Hz-20KHz
Sensitivity: -34dB±30%(at 1kHz)
Load Impedance: 1000Ω
Equivalent Noise Level: 16dB-A
Max.SPL: 130dB(at 1kHz≤1% T.H.D)
S/N Ratio: 78dB
Electrical Current: 3mA
3.Screw the pivot mount to adjust microphone angle 360° horizontally.
3 4
Front Rear

Please wait for a few seconds when rst time operation, since driver of microphone takes
time to automatically install. There may be no pop-up window or message though. (If
plugging receiver in a dierent USB port, driver installs again).
After installation, you can test the mic by speaking to it. If the mic picks up no sound, please
follow procedures below.
1. Right-click the speaker icon at the bottom right of the screen. Click "Sounds".
2.Conrm the loudspeaker is open.
Click the loudspeaker is being used-”Properties”--“levels”, drag progress bar to adjust
volume of output.
4. Click the Input tab and select the “USB PnP Audio Device”as the device for sound input.
NOTICE:
If you want to monitor your voice when using Macbook, you must turn on any recording
software rst(Audacity for example),
make sure to click “Software Play through(on)”, then click the Record button to begin,
otherwise you cannot hear any sound when you speak to the mic.
If the computer is not able to identify this USB device, please restart computer and replug
the mic into other USB port.
3. Next, click Sound to display the Sound preference panel.
Windows
5 6

3.Select the Recording tab, and choose“USB PnP Audio Device”as the default device. When
you speak to mic, bar-type icon will turn green and bounce. If it remains unchanged, please
reset computer and replug in the USB port. If there’s still no “USB PnP Audio Device”,please
contact our customer service.
4. Double click on the “USB PnP Audio Device” icon to open the Microphone Properties
window. Select the Levels tab to adjust microphone level (loudness).
1. If computer prompts that it’s unable to identify USB devices, please restart computer and
replug the microphone into other USB port.
2. If mic recognized but no sound comes out, please check whether System Sound is mute
and whether you have turned volume control on microphone to minimum.
3. if mic recognized but not sound out, and your computer runs windows 10, please go to
settings>privacy>microphone and click the Allow apps to access the microphone to ON
then restart.
1. Make sure you have the correct input/output selected. Notice: logging out of AUDACI-
TY(or other recording software) if you nd USB microphone is unavailable. And then plug in
mic rst ,secondly log in software again.
If you want to monitor your recording, click Microphone “Realtek High Denition Audio”-
“Properties”- ”Listen”- click ”Listen to this device”-”Apply”. No sound can be heard through
earphone/speaker, if you don’t follow this procedure.
NOTE: Click o listen to myself when you are using any recording software or chatting
software(Skype).
7 8
Note:(Applicable for MAC and Windows)
Recording Software Settings

IMPORTANT NOTICE
input:USB PnP Audio Device
output:Pls choose your output device as needed
2. Make sure to click o listen to device in your computer system when you are using any
recording software, or else you would hear duet of yourself just like too much echo.
3. There are several ways to improve the recording by using Audacity. Contact us for other
way if you need.
4. For windows computers, we recommend audacity, and for Apple computers, you can use
Apple's own QuickTime player to test the recording.
Setting your software levels
Correct adjustment of microphone level is important for optimum performance. Ideally, the
microphone level should be as high as possible without overloading the input of your
computer. If you hear distortion, or if your recording program shows levels that are
consistently overloaded (at peak levels), turn the microphone volume (or level) down, either
through your control panel (or system preferences) settings, or through your recording
software. If your recording program shows insucient level, you can increase the
microphone gain either from the control panel (or system references) settings or through
your recording program.
Selecting software
You have many choices in recording software. Audacity, available for free online at http://au-
dacity.sourceforge.net/, is a widely used software program that provides basic recording
software.
Note: The microphone must be plugged in rst and secondly turning on the recording
software.
Positioning your microphone
It is important to position the microphone directly in line (on axis) with the person
speaking/ singing or instrument (or other sound source) to achieve the best frequency
response of the microphone. For use in speaking/singing applications, the ideal placement
for the microphone is directly in front of the person speaking/singing.
Protecting your microphone
Avoid leaving your microphone in the open air or in areas where temperatures exceed 110°
F (43° C) for extended periods. Extremely high humidity should also be avoided.
9
10

WAS IST IN DER VERPACKUNG
GARANTIE
1 X USB-Mikrofon mit 5.9 ft USB-Kabel
1 X Stativ aus Metall
1 X Benutzerhandbuch
Bei Online-Registrierung erhalten Sie innerhalb von 90 Tagen nach dem Kauf eine erweiter-
te Garantie von 2 Jahren.
1. Folgen Sie dem Link: https://nemicrophone.com/
2. Am Ende Der Seite geben Sie Ihre E-Mail-Adresse ein und bestätigen.
3. Überprüfen Sie Ihren Posteingang, um die Abonnement-E-Mail zu bestätigen.
2. Die Vorderseite des Mikrofons sollte zur Schallquelle zeigen (Ein VOLUME-Symbol zeigt
die Vorderseite des Mikrofons an). Unabhängig davon, wie Sie den Winkel oder die Position
des Mikrofons einstellen, vergewissern Sie sich, dass die Vorderseite des Mikrofons zu Ihrem
Mund zeigt, um den besten Aufnahmeeekt zu erzielen.
EINFÜHRUNG
1. Halten Sie die Lautstärke ganz niedrig, wenn Sie das Mikrofon an den USB-Anschluss
anschließen, und erhöhen Sie die Lautstärke schrittweise, um den optimalen Eekt
während des Betriebs zu erzielen.
Lautstärkeregelung
Lauter: im Uhrzeigersinn
(nach rechts) drehen
Leiser: gegen den Uhrzeigersinn
(nach links) drehen
Stumm: gegen den Uhrzeigersinn
(maximal nach links) drehen
11 12
STANDINSTALLATION UND EINSTELLUNG
1. Passen Sie ggf. den Winkel des Mikrofons
mit der Rändelschraube an (zum Lösen nach
links drehen, zum Festziehen nach rechts
drehen).
2. Bitte schwenken Sie das Mikrofon gegen
den Uhrzeigersinn. Wenn Sie das Mikrofon im
Uhrzeigersinn schwenken, wird die
Halterung beschädigt.
Front Rear

13 14
COMPUTER-SETUP
SPEZIFIKATION
1. Stecken Sie das freie Ende des mitgelieferten USB-Kabels in den USB-Anschluss Ihres
Computers. Ihr Computer erkennt das USB-Gerät automatisch und installiert einen Treiber.
2. Um den 669er als Audioeingang auszuwählen, önen Sie zunächst die Systemeinstellun-
gen.
Apple MAC OS
Stromversorgung: 5V
Polarmuster: Unidirektional
Frequenzgang: 20 Hz-20 kHz
Empndlichkeit: -34 dB ± 30% (bei 1 kHz)
Lastimpedanz: 1000Ω
Äquivalenter Geräuschpegel: 16dB-A
max.SPL: 130 dB (bei 1 kHz ≤ 1% T.H.D)
S/N-Verhältnis: 78 dB
Elektrischer Strom: 3mA
3.Schrauben Sie die Schwenkhalterung, um den Mikrofonwinkel um 360 °
orizontal einzustellen.
4. Klicken Sie auf die Registerkarte Input und wählen Sie als Gerät für die Toneingabe„USB
PnP-Audiogerät“.
Achtung:
Wenn Sie Ihre Stimme in Echtzeit über die eingebaute Mikrofonbuchse des Macbooks
überwachen möchten, müssen Sie zuerst die Aufnahmesoftware (z.B. Audacity) einschalten.
Klicken Sie auf "Software Play through (on)" und dann auf die Schaltäche "Record" um zu
beginnen, sonst hören Sie keinen Ton, wenn Sie mit dem Mikrofon sprechen.
Wenn der Computer dieses USB-Gerät nicht identizieren kann, starten Sie den Computer
neu und stecken Sie das Mikrofon an einen anderen USB-Anschluss.
3. Klicken Sie als Nächstes auf Sound, um den Einstellungsbereich Sound anzuzeigen.

15 16
3.Wählen Sie die Registerkarte Aufnahme und wählen Sie als Standardgerät „USB
PnP-Audiogerät“. Wenn Sie mit dem Mikrofon sprechen, wird das Balkensymbol grün und
springt ab. Bleibt es unverändert, setzen Sie den Computer zurück und stecken Sie den
USB-Port erneut ein. Wenn immer noch kein„USB PnP-Audiogerät“ vorhanden ist, wenden
Sie sich bitte an unseren Kundendienst.
Wenn Sie Ihre Aufnahme überwachen möchten, klicken Sie auf Mikrofon "Realtek High
Denition Audio" - "Eigenschaften" - "Hören" - klicken Sie auf "Hören Sie auf dieses Gerät" -
"Übernehmen". Über Kopfhörer/Lautsprecher ist kein Ton zu hören, wenn Sie dieses
Verfahren nicht befolgen.
HINWEIS: Klicken Sie auf"Aus", wenn Sie eine Aufnahme- oder Chat-Software (Skype)
verwenden.
Bitte warten Sie bei Inbetriebnahme einige Sekunden, da der Treiber des Mikrofons Zeit für
die automatische Installation benötigt. Möglicherweise ist jedoch kein Popup-Fenster oder
eine Meldung vorhanden(Wenn Sie den Empfänger an einen anderen USB-Port
anschließen, wird der Treiber erneut installiert).
Nach der Installation können Sie das Mikrofon testen, indem Sie mit ihm sprechen. Wenn
das Mikrofon keinen Ton empfängt, befolgen Sie die nachstehenden Anweisungen.
2.Stellen Sie sicher, dass der Lautsprecher geönet ist.
1. Klicken Sie mit der rechten Maustaste auf das Lautsprechersymbol unten rechts auf dem
Bildschirm. Klicken Sie auf "Sounds".
Klicken Sie auf den Lautsprecher, der gerade verwendet wird - „Eigenschaften“ - „Pegel“.
Ziehen Sie den Fortschrittsbalken, um die Lautstärke der Ausgabe anzupassen.
Windows

17
18
Eingang: USB-PnP-Audiogerät
Ausgabe: Bitte wählen Sie die korrekte Ausgabe.
2. Stellen Sie sicher, dass Sie in Ihrem Computersystem nicht auf Gerät hören klicken, wenn
Sie eine Aufnahmesoftware verwenden. Andernfalls hören Sie ein Duett, wie ein zu starkes
Echo.
3. Es gibt mehrere Möglichkeiten, die Aufnahme mit Audacity zu verbessern. Kontaktieren
Sie uns für Alternativen.
4. Für Windows-Computer empfehlen wir Audacity. Bei Apple-Computern können Sie den
eigenen QuickTime-Player von Apple verwenden, um die Aufnahme zu testen.
4. Doppelklick auf das Symbol „USB PnP-Audiogerät“, um das Fenster mit den Mikrofonei-
genschaften zu önen. Wählen Sie die Registerkarte “Pegel“, um den Mikrofonpegel
(Lautstärke) einzustellen.
1. Wenn der Computer das USB-Gerät nicht identiziert, starten Sie den Computer neu und
stecken Sie das Mikrofon an einen anderen USB-Anschluss.
2. Wenn das Mikrofon erkannt, aber kein Ton ausgegeben wird, prüfen Sie, ob System Sound
stummgeschaltet ist und ob Sie den Lautstärkeregler am Mikrofon auf ein Minimum
eingestellt haben.
3. Wenn das Mikrofon erkannt, aber kein Ton ausgegeben wird und auf Ihrem Computer
Windows 10 ausgeführt wird, gehen Sie zu Einstellungen> Datenschutz> Mikrofon und
klicken Sie auf Apps zulassen, damit das Mikrofon eingeschaltet ist - starten Sie es dann
erneut.
1. Stellen Sie sicher, dass Sie den richtigen Eingang/Ausgang ausgewählt haben. Hinweis:
Wenn Sie feststellen, dass das USB-Mikrofon nicht verfügbar ist, melden Sie sich bei AUDAC-
ITY (oder einer anderen Aufzeichnungssoftware) ab.Danach das Mikrofon einstecken und
die Software erneut starten.
Hinweis: (gültig für MAC und Windows)
Einstellungen der Aufnahmesoftware

MANUEL FRANÇAIS
Introduction
1. Il est conçu pour l'ordinateur de bureau et l'ordinateur portable, ce n'est pas convient pas
aux autres dispositifs dotés d'une entrée USB.
2. Système compatible: Windows 10, Windows 8, Windows 7. Windows Vista, XP Edition de
Maison, XP Professionnel, Mac et Linux.
3. Assurez-vous que ce micro est sélectionné comme une entrée par défaut dans le «Son» de
l'ordinateur, dont le nom est USB PnP Device (Echo).
4. La meilleure distance de prise est à environ 7 pouces de la source sonore principale. Parlez
au noyau du microphone pour un eet plus fort.
Les réglages de Windows
Si aucun son, vous pouvez:
1.D ébranchez l'autre adaptateur audio de USB sur l'ordinateur. 2. Réinitialisez l'ordinateur et
rebranchez le microphone dans un autre port de USB.
3. Cliquez sur 《Son》-《Enregistrement》- l'icône de clic droit de ce micro, cliquez sur
"Activer".
4. Continuez à faire un clic droit sur l'icône - «Propriétés» - «Écouter». Choisissez la case à
cocher《Écoutez ce dispositif》
5.Retour à "Propriétés", cliquez sur "Niveau". Ajustez la barre de progression pour augmenter
le volume d'entrée. Il en va de même pour l'ajustment de la sortie dans "Réécouter".
Si cela ne fonctionne pas encore, contactez-nous pour obtenir de l'aide.
Les réglages de Mac
Cliquez sur 《Préférences de système》--《Son》-《Entrée》, sélectionnez le dispositif
audio de USB.
Note
Pour éliminer le bruit, il vaut mieux:
1.Garder l'environnement d'utilisation silencieux.
2.Placez le microphone qu'il n'est pas trop près d'une source d'alimentation ou d'un hôte de
l'ordinateur de bureau.
3.Ajustez le volume à un niveau modéré.
4.Utilisez un logiciel d'enregistrement, tel que Audacity, pour optimiser le son.
19 20
WICHTIGER HINWEIS
Einstellen der Softwareversionen
Die korrekte Einstellung des Mikrofonpegels ist wichtig für eine optimale Leistung.
Idealerweise sollte der Mikrofonpegel so hoch wie möglich sein, ohne die Eingabe Ihres
Computers zu überlasten. Wenn Sie Verzerrungen hören oder wenn Ihr Aufnahmepro-
gramm Pegel aufweist, die ständig überlastet sind (bei Spitzenpegeln), verringern Sie die
Mikrofonlautstärke (oder den Pegel) entweder über die Einstellungen Ihres Bedienfelds
(oder der Systemeinstellungen) oder über Ihre Aufnahmesoftware.
Wenn Ihr Aufnahmeprogramm einen unzureichenden Pegel anzeigt, können Sie die
Mikrofonverstärkung entweder über die Einstellungen des Bedienfelds (oder der
Systemeinstellungen) oder über Ihr Aufnahmeprogramm erhöhen.
Software auswählen
Mit der Aufnahmesoftware haben Sie viele Einsatz-Möglichkeiten. Audacity ist unter
http://audacity.sourceforge.net/ kostenlos verfügbar und ist ein weit verbreitetes Software-
programm, das eine grundlegende Aufnahmesoftware bereitstellt.
Hinweis: Das Mikrofon muss zuerst angeschlossen sein um anschließend die Aufnahmesoft-
ware zu verwenden.
Positionieren Sie Ihr Mikrofon
Es ist wichtig, das Mikrofon direkt in einer Linie (auf der Achse) mit der sprechenden /
singenden Person oder dem Instrument (oder einer anderen Schallquelle) zu positionieren,
um den besten Frequenzgang des Mikrofons zu erzielen. Die ideale Platzierung für das
Mikrofon für den Einsatz bei Sprech- / Gesangsanwendungen ist direkt vor der Person, die
spricht / singt. Die gleiche Platzierung ist optimal, wenn Sie beispielsweise ein Instrument,
wie eine akustische Gitarre, ein Schlagzeug oder ein Klavier platzieren wollen. Experimentie-
ren Sie mit verschiedenen Platzierungen, um den besten Klang für Ihr spezielles Setup zu
nden.
Schützen Sie Ihr Mikrofon
Lassen Sie das Mikrofon nicht über längere Zeit in der freien Sonne oder in Bereichen liegen,
in denen die Temperaturen 43°C übersteigen. Extrem hohe Luftfeuchtigkeit sollte ebenfalls
vermieden werden.

MANUALE ITALIANO
Introduzione
1.Si è progettato per desktop e laptop, non adatto per gli altri dispositivi che dispongono di
ingresso USB.
2. Sistema Compatible: Windows 10, Windows 8, Windows 7. Windows Vista, XP Home
Edition, XP Professional, Mac e Linux.
3. Assicurare che questo microfono è selezionato come ingresso predenito nel "Sound" del
computer, il cui nome è il dispositivo PnP USB (Echo).
4. La distanza di pick-up migliore è di circa 7 pollici dalla sorgente sonora principale. Si prega
di parlare con il nucleo del microfono per un eetto più forte.
Impostazioni di Windows
Se non c'è suono, ptresti:
1. Disinserire l'altro adattatore audio USB sul computer.
2. Rinstallare il computer e ricollegare il microfono in un'altra porta USB.
3. Fare clic su “Sound”-“Recording” - clic destro l'icona di questo microfono, fare clic su
“Enable”.
4. Continuare a fare clic destro sull'icona - “Properties”-“Listen”. Seleziona la casella "Ascolta
questo dispositivo"
5. Ritornare a“Properties”, fare clic su“Level”. Regolare la barra di avanzamento per attivare il
volume di ingresso. Lo stesso vale per la regolazione dell'uscita in “Playback”. Se non
funziona ancora, contattaci per il supporto.
Impostazioni Mac
Fare clic su“System Preferences”-“Sound”-“Input”, selezionare il dispositivo audio USB
Nota
Per eliminare il rumore, è meglio:
1. Tenere l'ambiente d'uso tranquillo.
2. Posizionare il microfono non troppo vicino a qualsiasi sorgente di alimentazione o host
desktop.
3. Regolare il volume a livello moderato.
4. Usare software di registrazione, come Audacity, per ottimizzare il suono.
21
MANUAL ESPAÑOL
Introducción
1. Está diseñado para computadora de escritorio y portátil, no está apto para dispositivos
que tienen entrada USB.
2. Sistema compatible: Windows 10, Windows 8, Windows 7. Windows Vista, XP Home
Edition, XP Professional, Mac y Linux.
3. Asegúrese de que este micrófono está seleccionado como entrada predeterminada en el
¨Sonido¨ de la computadora, cuyo nombre es USB PnP Device(Echo).
4. La mejor distancia de recogida es 7 pulgadas alrededor de la fuente de sonido principal.
Por favor hable a la base del micrófono para un efecto más fuerte.
Conguración de Windows
Si no hay sonido, puede:
1. Desconeste el otro adaptador USB de audio en la computadora.
2. Reinicie la computadora y vuelva a conectar en otro puerto USB.
3. Haga clic en ¨Sonido¨ - "Grabación" - Haga clic con el botón derecho el icono de este
micrófono, haga clic en "Activar".
4. Continúa hacer clic con el botón derecho en el icono - ¨Propiedad¨ - ¨Escuchar¨. Seleccione
la casilla de vericación ¨Escuchar este dispositivo¨.
5. Vuelva a ¨Propiedad¨, haga clic en ¨Nivel¨. Ajuste la barra de proceso para subir el volumen
de entrada. Lo mismo ocurre para el ajuste de la salida en ¨Reproducción¨. Si todavía no
funciona, por favor póngase en contacto con nosotros para la ayuda.
Conguración de Mac
Haga clic en "Preferencias del Sistema" - "Sonido" - "Entrada", seleccione el dispositivo de
audio USB.
Para eliminar el ruido, es mejor:
1. Mantenga el silencio de ambiente de uso.
2. No coloque el micrófono demasiado cerca de cualquier fuente de alimentación ni la caja
de computadora de escritorio.
3. Ajuste el volumen a un nivel moderado.
4. Use software de grabación, como Audacity para optimizar el sonido.
22
This manual suits for next models
1
Table of contents
Languages:
Other Fifine Microphone manuals
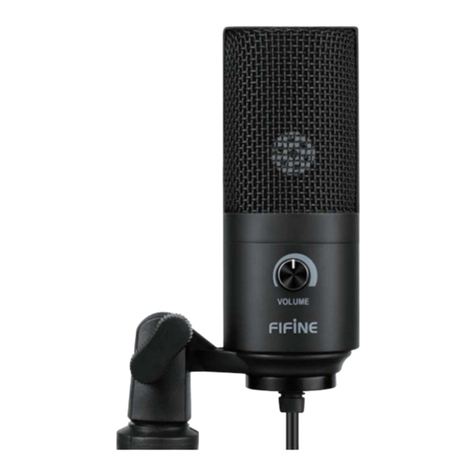
Fifine
Fifine K669B User manual
Fifine
Fifine AMPLIGAME A8 PLUS User manual
Fifine
Fifine K720 User manual
Fifine
Fifine K726 User manual
Fifine
Fifine K658 User manual
Fifine
Fifine K670 User manual
Fifine
Fifine K651 User manual

Fifine
Fifine K669B User manual
Fifine
Fifine K025 User manual
Fifine
Fifine T683 User manual
